(As a bit of a ?warning? about this article, I intend to revisit it for semi-regular editing to include any new advancements I discover in playing Ocarina of Time with mods. I may also update it to provide more in-depth ?how to? instructions for doing this stuff if people are interested. The most recent update was on the 15th of July, 2018)
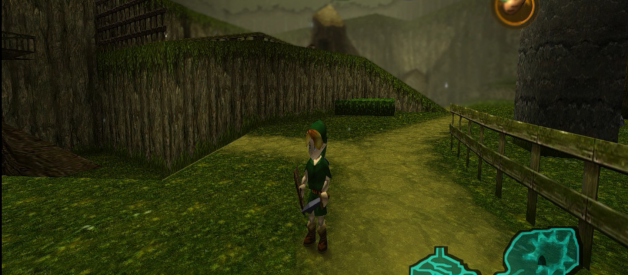
Ocarina of Time running with some extensive modification, notice the framerate counter in the bottom-left showing a fair increase from the game?s normal 20fps. Also notice the free camera controls, high resolution textures and shader effects!
The Legend of Zelda: Ocarina of Time really needs no introduction, but in case you?ve somehow missed this, Ocarina of Time scored perfectly across the charts when it released to the Nintendo 64 in the late 90’s and continues to hold its place as the highest-rated video game of all time at Metacritic. The game was successful enough to drive the releases of the very similar sequel Majora?s Mask, the reworked version of the game, Ocarina of Time Master Quest, and an enhanced port Ocarina of Time 3D.
In my own opinion, Ocarina of Time is a masterpiece. It is unquestionably the game I have sank the most time into. Having played and replayed the game so many times in the last 18 years, the game is so well-embedded into my brain that it comes to me with considerable clarity in my dreams.
As a game I have revisited so incredibly frequently, I?ve explored how I can mix things up a bit (asides from picking up Master Quest). This article will share what I?ve learned about how to play Ocarina of Time ? on your PC with texture packs, shaders, and various hacks.
Project64
Project64 is an emulator for the Nintendo 64, meaning it allows, in this case, a Microsoft Windows-based PC to run software built for the Nintendo 64. Essentially a?virtualized? Nintendo 64, Project 64 allows us to configure the system?s graphics and controls (among other things) to our own liking.
Project64 is the enabling software for all of the following modifications to Ocarina of Time in this article as it actually allows us to play Ocarina of Time on our PCs. Of course, Project64 can play most any Nintendo 64 game, whether its Ocarina of Time, Majora?s Mask or any of the swath of amazing games the system had.
Of course, you can grab and download Project64 here, however you can also pull the source from their Git-Hub repository and build the latest version yourself (if you?re into that kind of thing).
GLideN64
GLideN64 is an open source graphics plug-in available for Project64. GLideN64 is my recommended graphics plug-in as it is highly configurable, works with ReShade (more on that later) and supports custom texture packs!
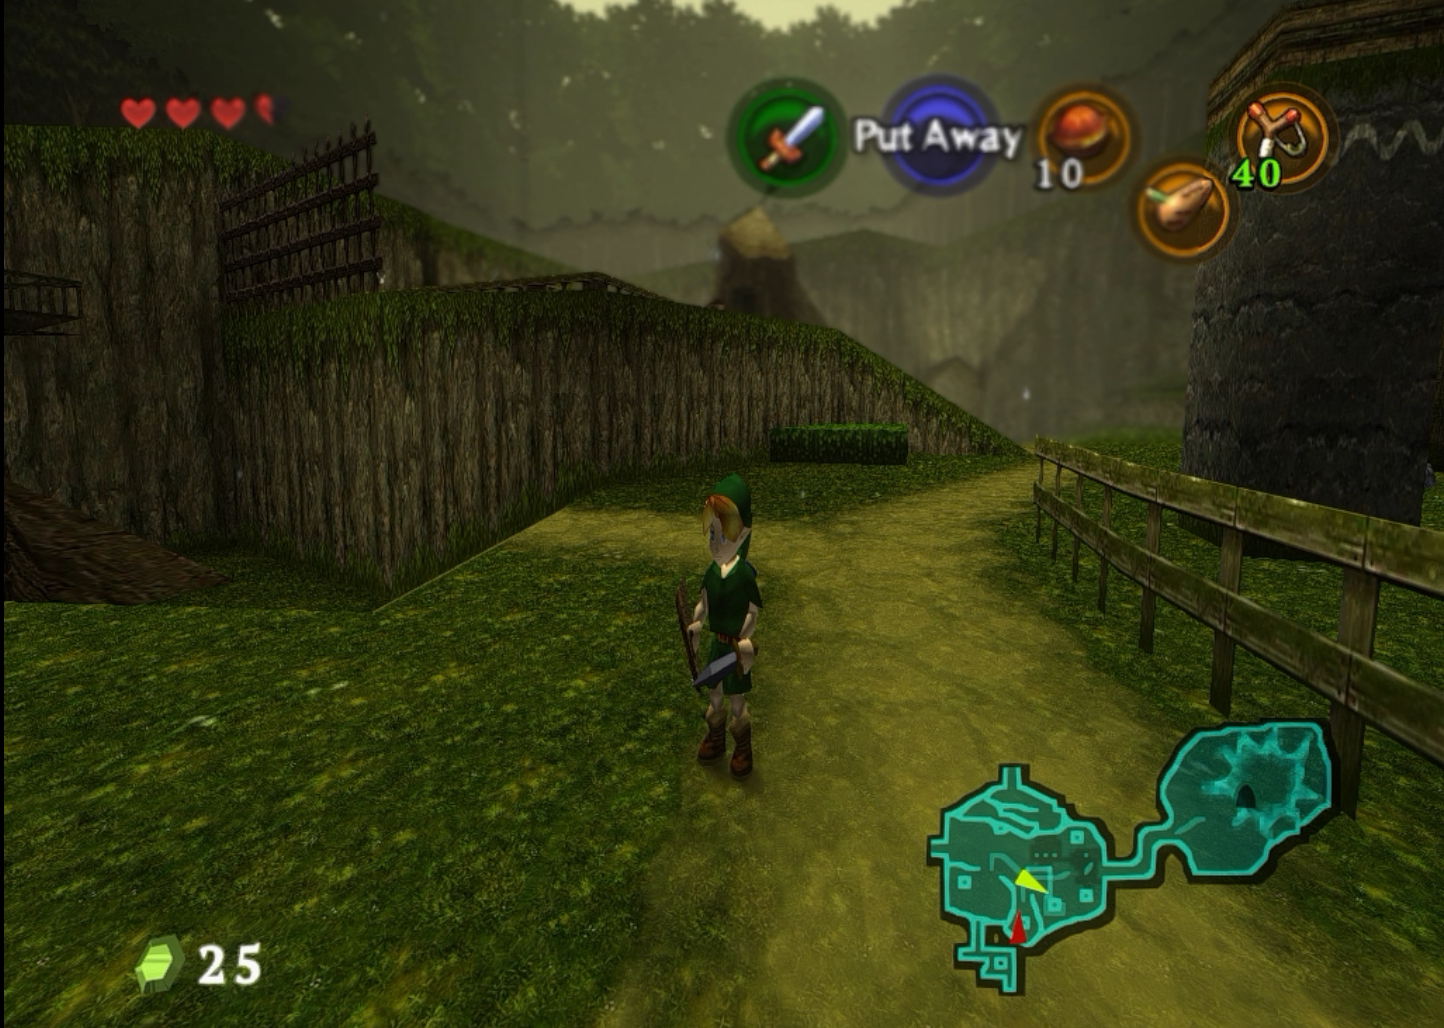 Ocarina of Time, being run in Project64 with high resolution textures, ambient occlusion, depth of field, motion blur, an increased draw distance, ambient lighting, and a boosted framerate.
GLideN64 can be found on Git-Hub here, again giving us the option to either simply download GLideN64 (from here) or building it from source.
From here I?ll discuss graphical enhancements that are available when using GLideN64. Note that for this article I?m going all out with exploring high resolution textures, texture filtering, anti-aliasing anisotropic filtering, many shader effects, and so on so that I can illustrate what all is available. I think it?s important to know that your mileage may vary and you?ll likely prefer to use only one these enhancements, or maybe a combination of a couple of them, everyone?s preferences vary so take away from this what it is that you find the most enticing.
Texture Packs
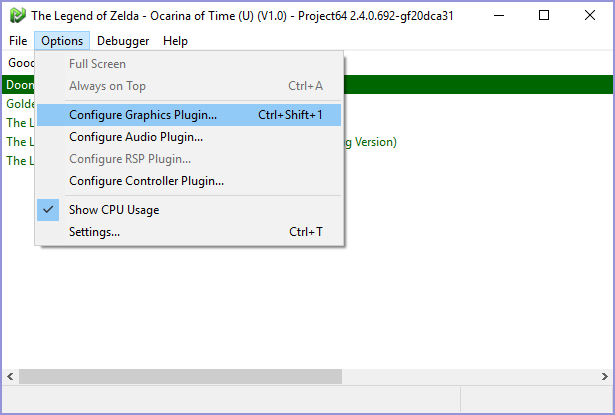
Once you?ve installed Project64 and added GLideN64 to it, you can pretty easily set up custom texture packs. You?ll want to select the option to ?Configure Graphics Plugin? from the ?Options? dropdown:
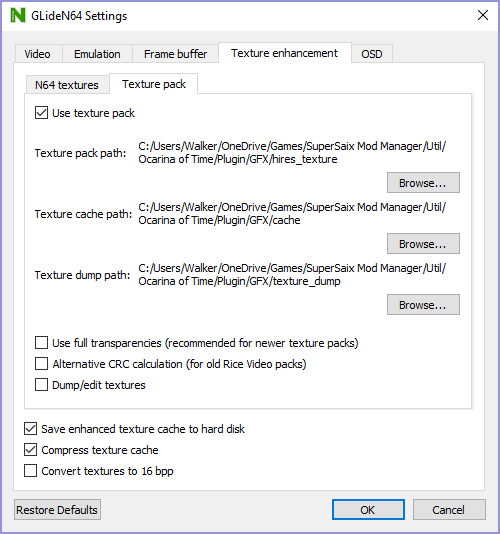
Then double check your ?Texture pack? settings, this will allow you to configure where you?ll need to place the texture pack files.
?So what texture packs are there?? you ask! Well, I?ll just quickly speak to Djipi?s 2016 3DS texture pack (the high-resolution texture pack that I use) as it?s honestly beautiful. You can grab it (or just check it out) here.
There?s also another high-resolution texture pack from Djipi, the ?Cel pack? with Wind Waker-inspired textures that can be found here. It?s also gorgeous, and I especially recommend it if your calling in the Zelda series tends to be Wind Waker.
Graphics Enhancements
But wait there?s more! If you?ve done any exploring around the GLideN64 settings you?ve probably seen these options already, but I?d like to highlight just a few things here:
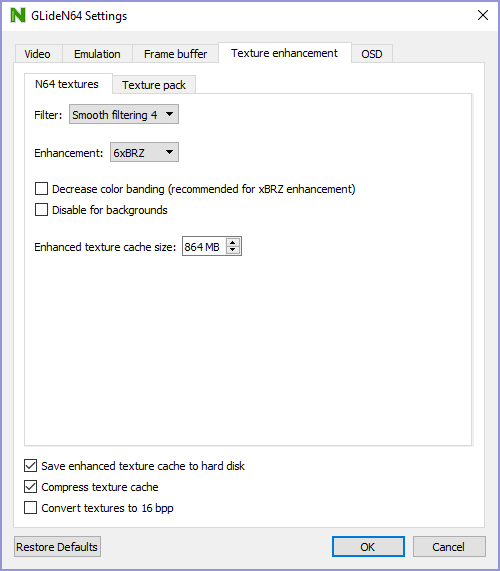
First, are the literal enhancements, your ?N64 textures? settings, which provides a selection of filters and enhancements you can use (in combination with texture packs and shaders, of course).
I tend to lean towards using the ?Smooth filtering? settings for the filter, and for enhancement using the BRZ filters (may as well go with the 6x as well) but it?s definitely worth experimenting with the different options (especially with different texture packs) to see what aesthetic you like best.
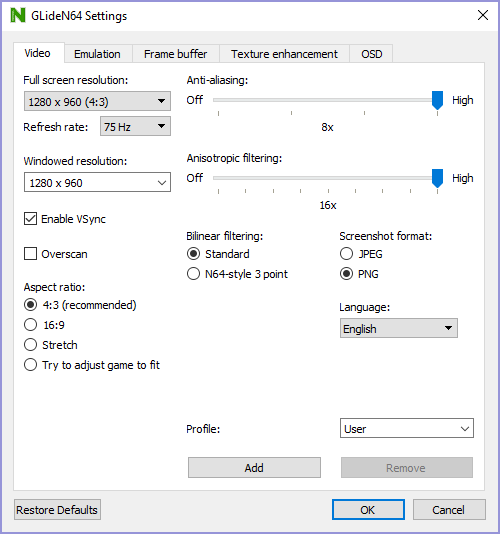
There?s also anti-aliasing and anisotropic filtering settings available under the ?Video? tab. My understanding is that options like this can often interfere with ReShade shaders, but fear not, as far as I can tell, ReShade works just fine alongside GLideN64?s aliasing and filtering settings.
You?ll also find on the ?Video Tab? you can enable alternative aspect ratios (like 16:9 or even use ?Stretch? or ?Try to adjust? to achieve less common ratios like 21:9) although I recommend using aspect ratio-adjusting hacks (like those provided by Temple or in GameShark codes) to work with alternative aspect ratios.
Reshade (Shaders)
Reshade describes itself as ?an advanced, fully generic post-processing injector for games and video software developed by crosire.? And fully generic it truly is, through it?s quick and easy installation process, Reshade can be configured for Project64 when using GLideN64 (or other plugins, if you so choose). Combined with high-resolution texture packs, the effects Reshade?s shaders provide can be quite satisfying.
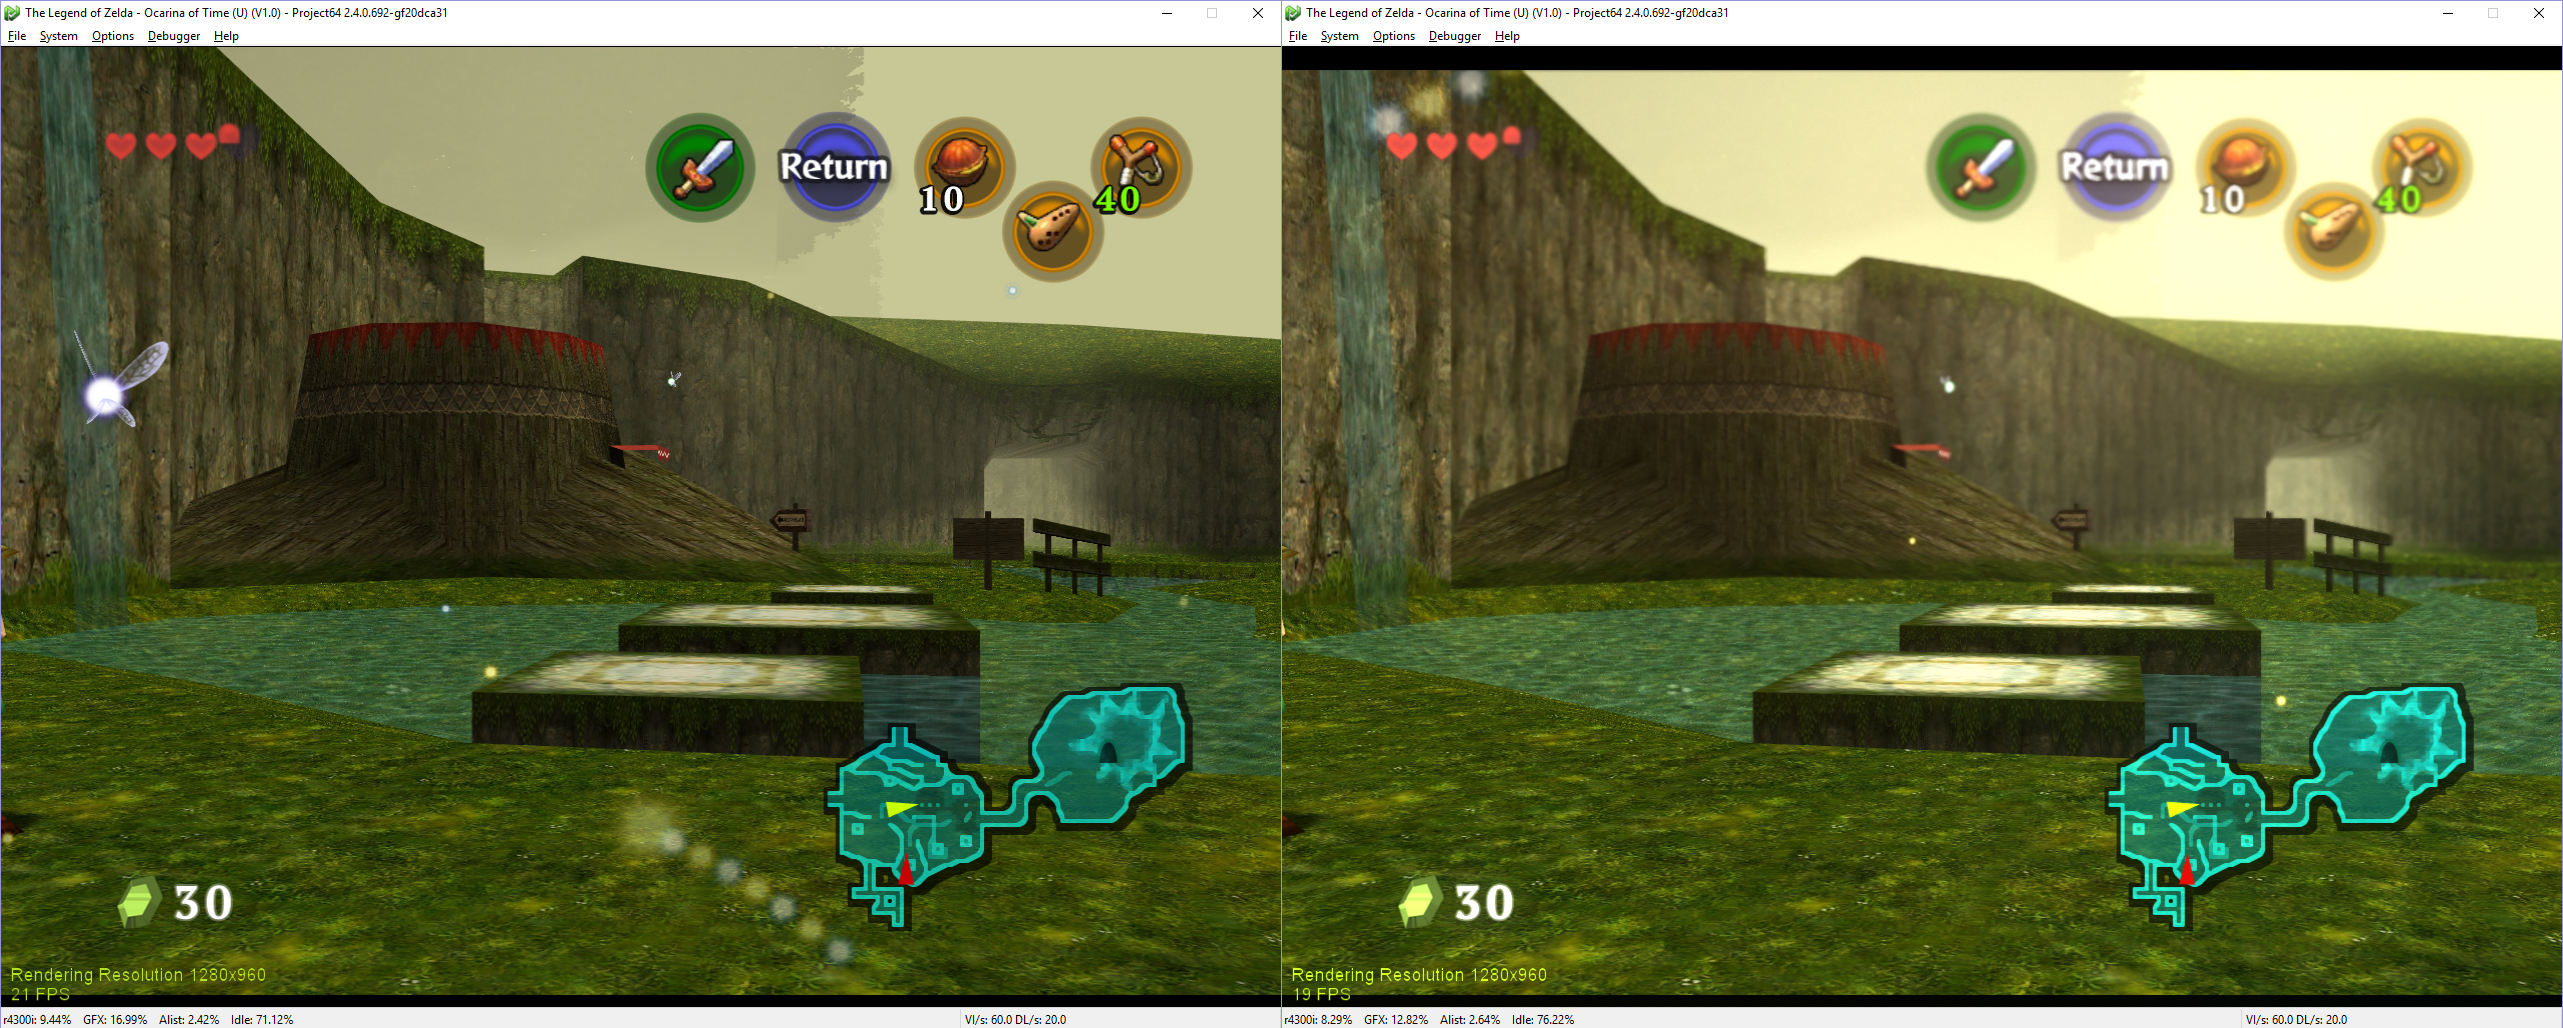 Here is a comparison of no shaders (on the left) to some modestly configured shaders (the right). Notice the difference in ambient lighting, slight shift in color values, and how the depth of field effect applies a blur to the more distant objects.
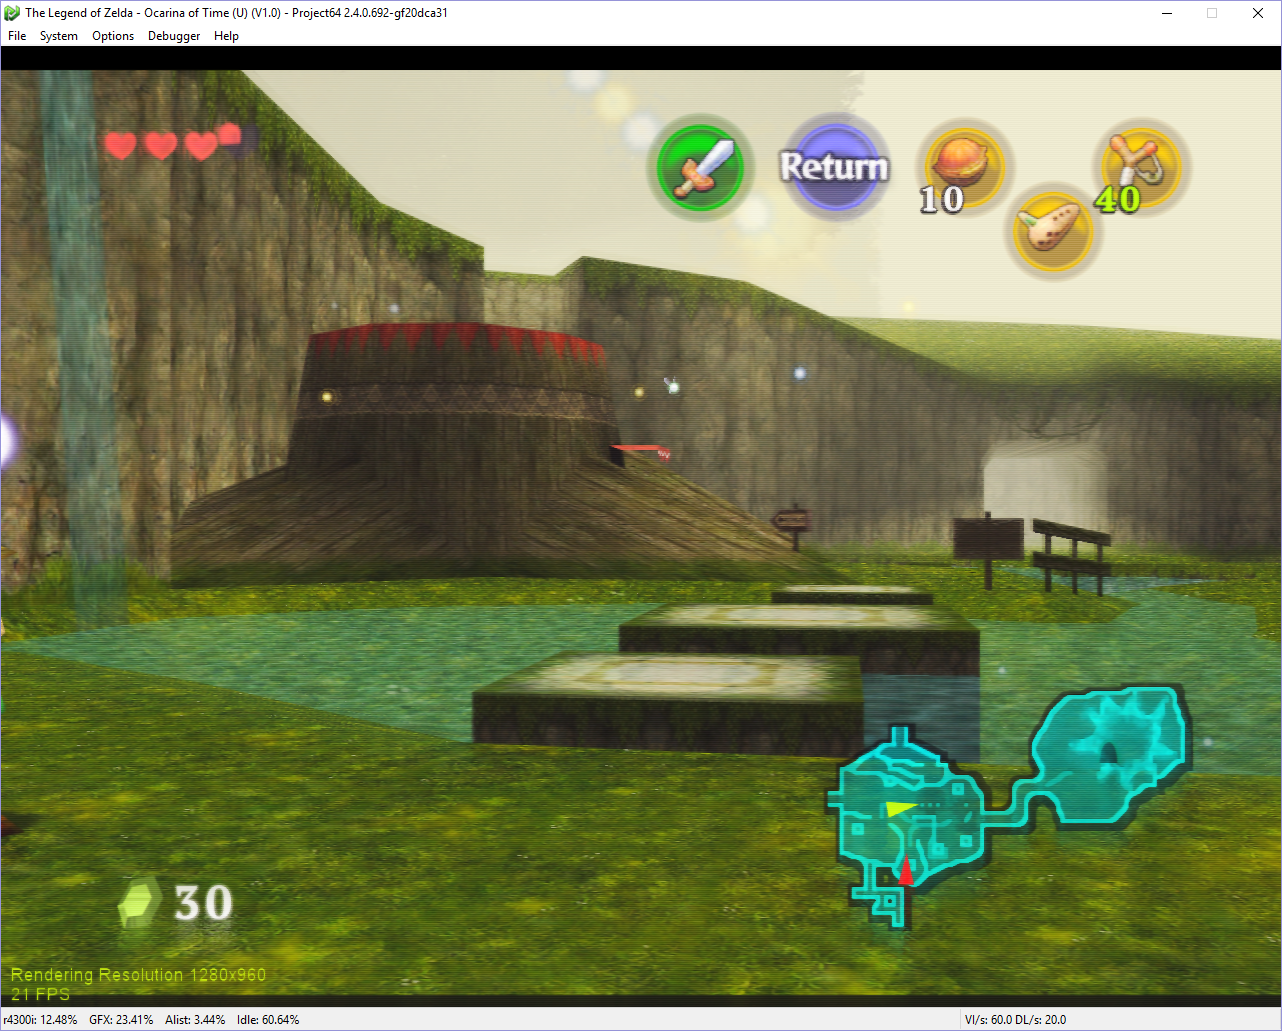
Just for fun, here?s a third configuration with an entirely different set of shaders:
For my own most recent playthrough I?ve used some of the following shaders (mostly of crosire/reshade-shaders, except where noted):
- MXAO
- DepthHaze
- MagicDOF
- MotionBlur
- HDR
- Smart_Sharp (of BlueSkyDefender/Depth3D)
- DiffuseGlow (of Ioxa53?s shaders)
Your mileage may vary, but I?ve found you can certainly layer on the shaders to achieve all sorts of effects, some other shaders I would recommend would be DepthHaze (especially in combination with DOF shaders), SMAA, AdaptiveFog, AmbientLight, and 3DFX.
Of course, I cannot recommend experimenting with the various shaders available in reshade enough, it?s more than worth playing around until you?ve found that comfortable spot of every pixel on screen looking just the way you like it.
To get ReShade up and running with Project64/GLideN64 you?ll have to do some configuration. First, you?ll need to install ReShade for Project64. Grab the installer here, when you run the installer select your Project64.exe file from your installation directory, and then select ?OpenGL? for your rendering API and the installer will take care of the rest.

You?ll then need to configure GLideN64. First, let?s open up the graphics plugin configuration and head to the ?Frame buffer? tab to configure our frame buffer emulation. You?ll want to ensure ?Emulate frame buffer? is checked, as is ?Use emulator help to read/write frame buffers?. I haven?t checked any other boxes, and ReShade works for me, but feel free to experiment with the settings a bit. As well, for the ?Frame buffer swap on? setting you?ll need to select the option ?VI origin change?.
Next, head to the ?Emulation? tab, and ensure your ?Internal Resolution? is set to ?Same as output resolution?. This one I?m not so sure I can explain, I don?t seem to be able to get ReShade?s depth buffer rendering unless I specifically use this setting, although it strikes me that this should be configurable even with ReShade. If anyone finds they?re able to change their internal resolution and still use ReShade, please let me know as I?d be interested to see if it?s simply a setting I?ve gotten wrong.
 ReShade?s loading incator inside of Ocarina of Time.
Once you?ve gotten through the installation and configuration above, you should be able to fire up Project64 with Ocarina of Time just as normal, however you?ll notice that ReShade?s loading indicator will appear along the top of the screen!
You?ll now be able to press Shift + F2 to open the ReShade menu where you can enable, disable, reorder, and configure any shaders you?ve downloaded.
If at this point you haven?t downloaded any shaders, I recommend downloading some from these repositories:
crosire/reshade-shaders (these are essentially the ?default? shaders, it?s a considerable collection).
BlueSkyDefender/Depth3D (some useful shaders for interacting with the game?s depth maps, allows you to play in various formats of 3D).
AWBuchanan7/reshade-shaders-retooled (these are some of the crosire/reshade-shaders, however, they?ve been retooled to use BlueSkyDefender?s depth linearization method which is more configurable. You?ll want to grab this if you?re interested in features like ambient occlusion or depth of field).
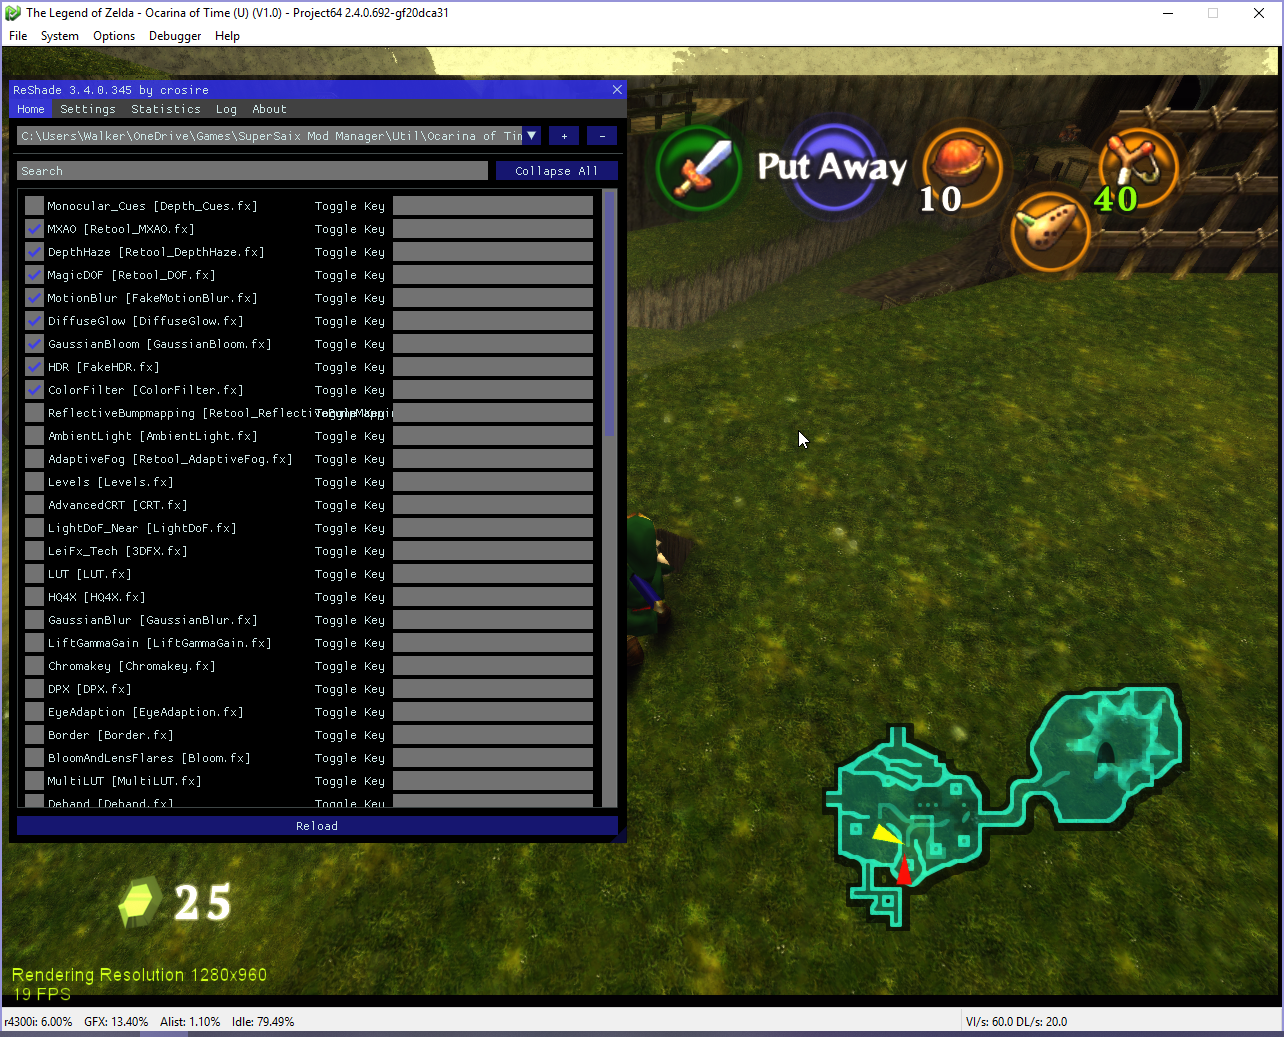 ReShade?s configuration menu overlaid in a running instance of Ocarina of Time in Project64!
You should notice ReShade provides a list of your available shaders under the ?Home? tab. Keep in mind that there is a ?Settings? tab as well. Under the ?Settings? tab you?ll want to double check the Effect Search and Texture Search paths and that they lead to where you?ve stored your downloaded shaders. You?ll also want to make a note of the ?Usage Mode? setting. Switching to Performance Mode grants a considerable performance boost (something you?ll likely find yourself needing if you?re using high res textures, the 30 frames per second hack (described below) and shaders in combination) however keep in mind you can only configure your shader settings in Configuration Mode.
Temple (Scripting)
Temple is a project of my own (of which I am quite proud) so this is my plug for it. Temple provides an interface to the game?s memory space through TypeScript classes which enables the simplified creation of ?mods? for the game in TypeScript.
Temple currently comes bundled with a couple of small mods, that you can use to customize your Ocarina of Time game as you see fit.
CameraController is a Temple mod that enables enhanced camera controls. This is done through mapping player 3?s controller?s joystick to the camera, allowing Project64 users to then configure their controllers or keyboard/mouse combos to utilize both player 1?s controller and player 3?s analog stick however they best see fit. CameraController is in active development and more specific controls, including those for the roll and zoom of the camera are on the way!
DisplayAmplify is a Temple mod that aims to provide a single interface (and configuration file!) to manage a handful of display-related hacks such as increasing the game?s framerate (a default of 20fps) some 50% to 30fps, adjusting the aspect ratio for 16:9 ?Widescreen? or 21:9 ?UltraWide? hacks, and boosting the game?s draw distance, among other functions.
I?ll be the first to admit Temple, CameraController, and DisplayAmplify are all in early alpha stages and have more than a fair share of the bugs that are character to this early alpha stage, but if you have a particular interest in modding it?s a project worth checking out!
And there you have it, everything from free camera controls to ambient occlusion for your very own Ocarina of Time experience! Hopefully at least something in this article was new to you, and you now have an excuse to play Ocarina of Time again.
Love Ocarina of Time? How about the Nintendo 64? The Virtual Boy? Check out this article about my latest hacking project: Nintendo 64 by Virtual Boy.

 Ocarina of Time)
 Ocarina of Time)