
Chapter 5 from the book; Vumbula React ? Co-authored by John Kagga
 Cover Image by Edmond Atto
Recap: – In Chapter One, get introduced to React with ES6. If you are new to React , simply need a refresher, or need a gentle introduction to the ES6 features that are most frequently used throughout this book, review chapter one.- In Chapter Two, get introduced to React components. They are the building blocks of any React Application you will build. Go ahead and review that chapter if you are not yet comfortable with React components and then head back here.- In Chapter Three, get introduced to State in React. Understanding State and how it works will unlock your ability to build powerful components. Go ahead and review that chapter if you are not yet comfortable with React State and then, head back here.- In Chapter Four, get introduced to handling User Input in React. Understanding how to handle user input (primarily via forms) will unlock your ability to build interactive applications. Go ahead and review that chapter if you are not yet comfortable with handling user input and then, head back here.

Routing is the ability to move between different parts of an application when a user enters a URL or clicks an element (link, button, icon, image etc) within the application.
Up until this point, you have dealt with simple projects that do not require transitioning from one view to another, thus, you are yet to interact with Routing in React.
In this chapter, you will get introduced to routing in a React application. To extend your applications by adding routing capabilities, you will use the popular React-Router library. It?s worth noting that this library has three variants:
=> react-router: the core library=> react-router-dom: a variant of the core library meant to be used for web applications=> react-router-native: a variant of the core library used with react native in the development of Android and iOS applications.
Often, there is no need to install the core react-router library by itself, but rather a choice is made between react-router-dom and react-router-native, depending on the situation. Both react-router-dom and react-router-native import all the functionality of the core react-router library.
The scope of this book is in the realm of web applications so we can safely choose react-router-dom. This library is installed in a project by running the command below in the project directory
npm install –save react-router-dom
Routers
The react-router package includes a number of routers that we can take advantage of depending on the platform we are targeting. These include BrowserRouter, HashRouter, and MemoryRouter.
For the browser-based applications we are building, the BrowserRouter and HashRouter are a good fit.
The BrowserRouter is used for applications which have a dynamic server that knows how to handle any type of URL whereas the HashRouter is used for static websites with a server that only responds to requests for files that it knows about.
Going forward, we shall use the BrowserRouter with the assumption that the server running our application is dynamic. Worth noting is that any router expects to receive only one child. Take the example below
ReactDOM.render( <BrowserRouter> <App/> </BrowserRouter>, document.getElementById(?root?));
In this example, the <App/> component is the child to the <BrowserRouter> and should be the only child. Now, the routing can happen anywhere within the <App/> component, however, it is considered good practice to group and place all the routes in the same place. More on this later.
History
Each router creates a history object that it uses to keep track of the current location and re-renders the application whenever this location changes. For this reason, the other React Router components rely on this history object being present; which is why they need to be rendered inside a router.
The BrowserRouter uses the HTML5 history API to keep the user interface in sync with the URL in the browser address bar.
The history object created by the Router contains a number of properties and one of the location property whose value is also an object. The location property is one we shall put a lot of emphasis on in this chapter as the rest are beyond the scope of this book.
When the earlier example is rendered in the browser, you should be able to see the created history object within the React DevTools window as shown below.

The location object within the history object is shaped like so
{ pathname, search, hash, state }
The location object properties are derived from the application URL.
Routes
The <Route/> component is one of the most important building blocks in the React Router package. It renders the appropriate user interface when the current location matches the route?s path. The path is a prop on the <Route/> component that describes the pathname that the route should match as shown in the example that follows
<Route path=?/items?/>
This route is matched when the pathname is /items or, all other paths that start with /items/ for example /items/2. If the intention is to strictly match only /items, the <Route/> component accepts an exact prop. Adding this ensures that only the pathname that exactly matches the current location is rendered. Below is an example that uses the exact prop.
<Route exact path=?/items? />
When a path is matched, a React component should be rendered so that there?s a change in the UI.
It is also worth noting that the Path-to-RegExp package is used by the react-router package to turn a path string into a regular expression and matched against the current location.
The <Route/> component provides three props that can be used to determine which component to render:
=> component=> render=> children
Component Prop
The component prop defines the React element that will be returned by the Route when the path is matched. This React element is created from the provided component using React.createElement. Below is an example using the component prop.
<Route exact path=?/items? component={Items}/>
In this example, the Items component will be returned when the path matches the current location.
Render Prop
The render prop provides the ability for inline rendering and passing extra props to the element. This prop expects a function that returns a React element when the current location matches the route?s path. Below are examples demonstrating the use of the render prop on a Route component.
<Route exact path=?/items? render={() => (<div>List of Items</div>)}/>
In the example above, when the current location matches the path exactly, a React element is created and the string List of Items is rendered in the browser.
const cat = {category: ?food?}<Route exact path=?/items? render={props => <Items {?props} data={cat}/>}/>
In the second example, data represents the extra props that are passed to the Items component. Here, cat is passed in as the extra prop.
Children Prop
The children prop is similar to the render prop since it always expects a function that returns a React element. The major difference is that the element defined by the child prop is returned for all paths irrespective of whether the current location matches the path or not.
<Route children={props => <Items {?props}/>}/>
In this case, Items component is always rendered.
Switch
The react-router library also contains a <Switch/> component that is used to wrap multiple <Route/> components. The Switch component only picks the first matching route among all its children routes.
The next example demonstrates how multiple routes behave in the absence of the Switch component.
<Route path=?/items? render={() => (<div><em>List of items</em></div>)}/><Route path=?/items/2″ render={() => (<div>Item with id of 2</div>)}/>
In the browser, when you navigate to /items/2, the React elements in both Route components will be rendered as shown below
List of itemsItem with id of 2
This could be the intended behaviour, where the first component displays the title and the other routes with the same base path render different UIs.
Let?s modify the example above and include the <Switch/> component and observe the behaviour when we navigate to /items/2.
<Switch> <Route path=?/items? render={() => (<div><em>List of items</em></div>)} /> <Route path=?/items/2″ render={() => (<div>Item with id of 2</div>)} /></Switch>
In the browser, only List of Items will be rendered. This is because the Switch component matches only the first path that matches the current location. In this example, the route /items was matched when /items/2 was entered in the browser?s address bar.
Link
The react-router package also contains a <Link/> component that is used to navigate the different parts of an application by way of hyperlinks. It is similar to HTML?s anchor element but the main difference is that using the Link component does not reload the page but rather, changes the UI. Using an anchor tag would require that the page is reloaded in order to load the new UI. When the Link component is clicked, it also updates the URL.
Let?s explore the use of the Link component further by creating an app that allows us to navigate between categories and items.
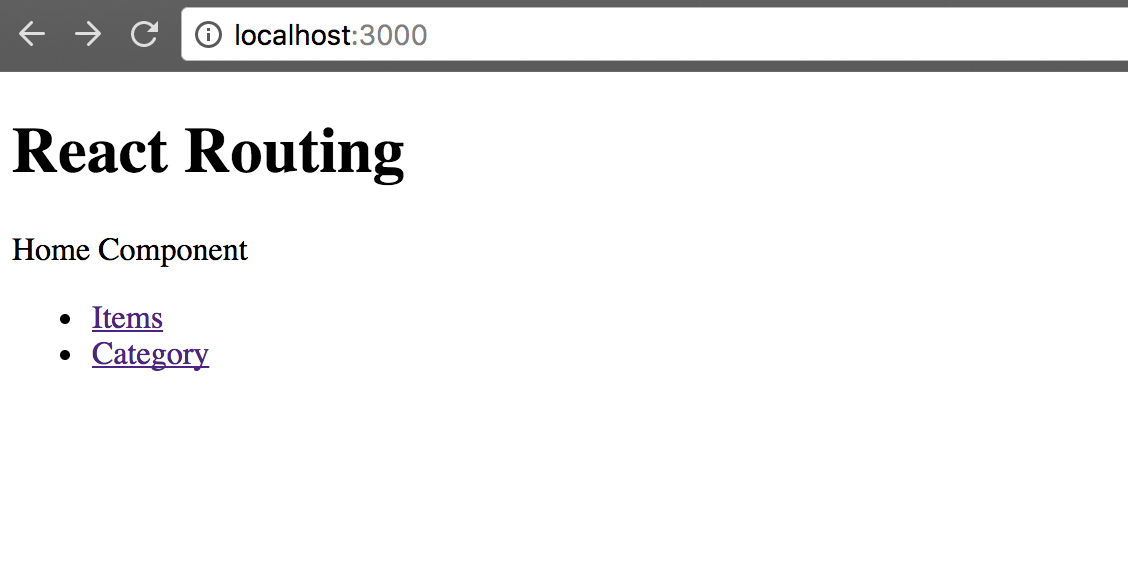
export const Home = () => ( <div> Home Component <ul> <li> <Link to=?/items?>Items</Link> </li> <li> <Link to=?/category?>Category</Link> </li> </ul> </div>);
The Home component contains links to Items and Categories components.
The <Link/> component uses to as a prop to define the location to navigate to. This prop can either be a string or a location object. If it is a string, it is converted to a location object. Note that the pathname must be absolute.
To get the example set up on your machine, clone the project here and run npm install && npm start. The rendered page should look like this
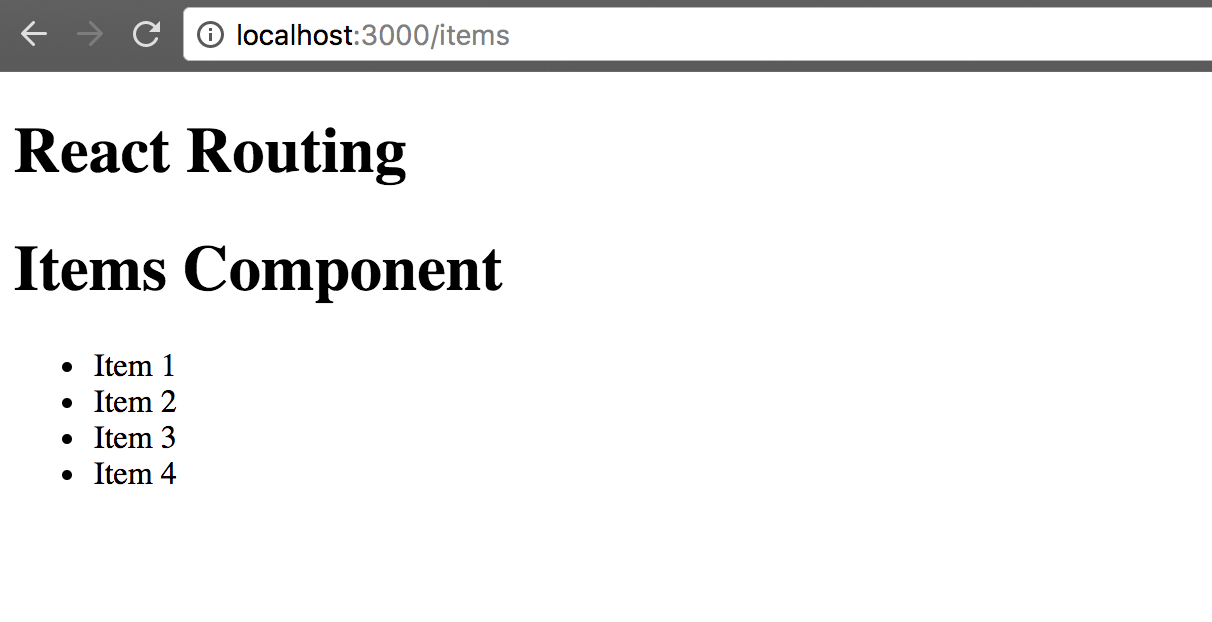
Clicking on the Items link triggers a UI change and updates the URL in the address bar as well.
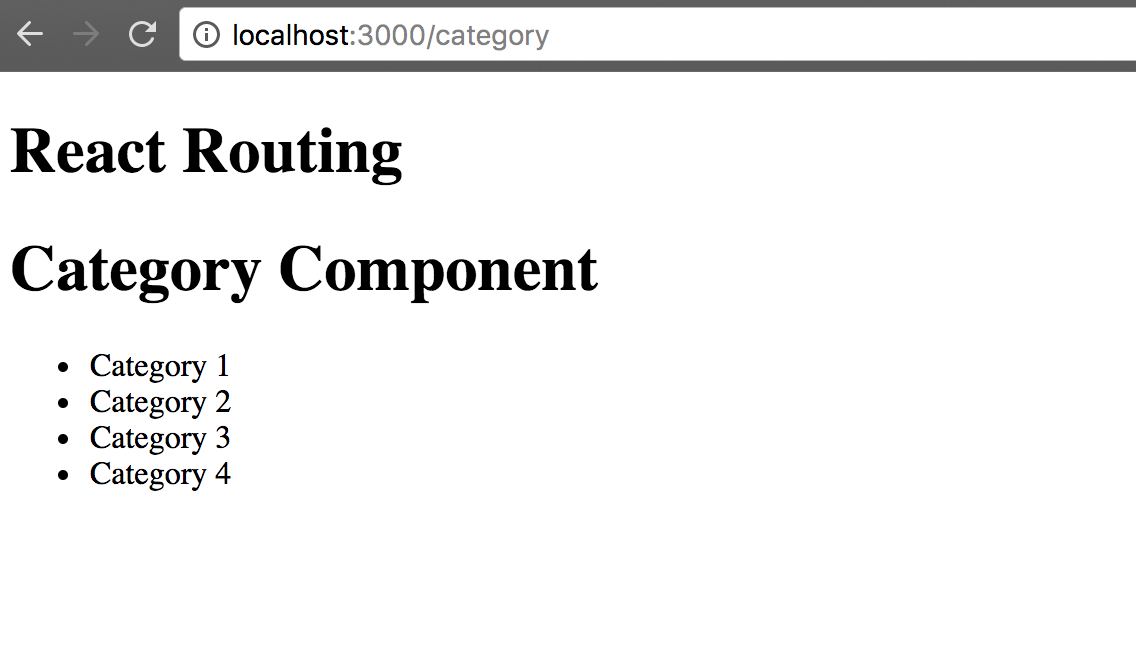
Similarly, clicking on the Category link trigger a UI change and updates the URL in the address bar.
Nested Routing
You now have an understanding of how the <Route/> component and path work. We can now move on to nested routing in a React application.
When the router?s path and location are successfully matched, a match object is created. This object contains information about the URL and the path. This information can be accessed as properties on the match object.
Let?s take a closer look at the properties:
=> url : A string that returns the matched part of the URL=> path : A string that returns the route?s path=> isExact : A boolean that returns true if the match was exact=> params : An object containing key-value pairs that were matched by the Path-To-RegExp package.
You can try this out using Route tester to match routes to URLs.
In order to successfully achieve nested routing, we shall use match.url for nested Links and match.path for nested Routes.
Let?s explore the use of nested routing by working on an example. Clone the project here and run npm install && npm start to get it set up and fired up.
This example contains four components;
=> Header component which contains the Home, Items and Category links=> Home component which contains dummy data=> Items component which contains a list of dummy items=> Category component which demonstrates nested routing and dynamic routing
We shall focus on the Category component since it contains the nested and dynamic routing.
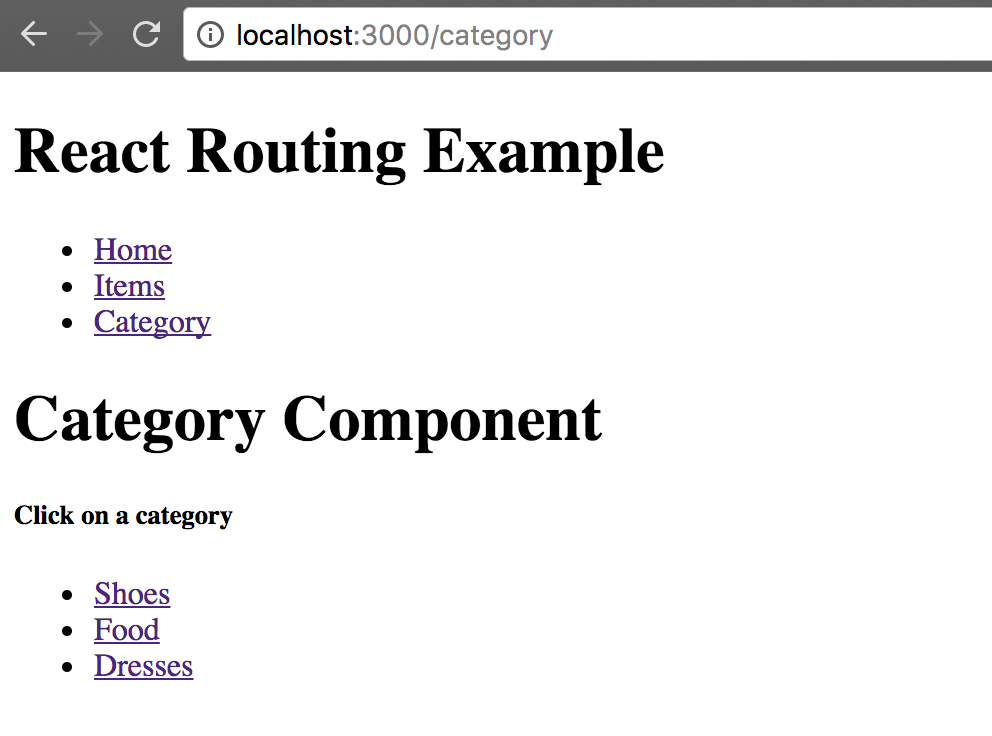
export const Category = ({match}) => ( <div> <h2>Category Component</h2> <h5>Click on a category</h5> <ul> <li> <Link to={`${match.url}/shoes`}>Shoes</Link> </li> <li> <Link to={`${match.url}/food`}>Food</Link> </li> <li> <Link to={`${match.url}/dresses`}>Dresses</Link> </li> </ul>);
Based on the code snippet above, when the Category link is clicked, a route path is matched and a match object is created and sent as a prop to the Category component.
Within the Category component, the match object is destructured in the argument list and links to the three categories are created using match.url.
Template literals are used to construct the value of the prop on the Link component to the different /shoes, /food and /dresses URLs.
Opening the example in the browser and clicking on the category link reveals three different categories. When any one of these categories is clicked, the URL updates, however, there is no change in the UI.
In order to fix this bug and ensure that the UI changes when a category link is clicked, we create a dynamic route within the Category component that uses match.path for its path prop and then dynamically change the UI.
<Route path={`${match.path}/:categoryName`} render={props => (<div> {props.match.params.categoryName} category </div> ) }/>
Looking closely at the value of the path prop in the code snippet above, you can see that we use :categoryName, a variable within the pathname.
:categoryName is the path parameter within the URL and it catches everything that comes after /category.
Passing the value to the path prop in this way saves us from having to hardcode all the different category routes. Also, notice the use of template literals to construct the right path.
A pathname like category/shoes creates a param object like the one below
{ categoryName: ?shoes?}
The render prop in this route example runs an inline render which displays the categoryName param from the match object contained within the props.
That should fix the issue of an unchanging UI and now, clicking on one of the categories should trigger an update of both the URL and the UI like so

Protected Routes
The rationale of having is a protected route is that when a user tries to access part of the application without logging in, they are redirected to the login page to sign into the application.
For this redirect to work as intended, the react-router package provides a <Redirect/> component to serve this purpose. This component has a to prop which is passed to it in form of an object containing the pathname and state as shown below.
<Redirect to={{pathname: ?/login?, state: {from:props.location}}}/>
Here, the Redirect component replaces the current location in the stack with the pathname provided in the object (/login) and then stores the location that the user was attempting to visit, in the state property. The value in state can be accessed from within the Login component using this.props.location.state.
For example, if a user attempts to navigate to /admin, a protected route, without logging in first, they will be redirected to the login page. Following a successful sign in, they will be redirected to /admin, the route they intended to visit in the first place.
Custom Routes
In order to achieve the concept of protected routes, we need to understand first how to create custom routes.
Custom routes are a fancy way of saying nesting a route inside a component. This is typically done when there is a need to decide whether a component should be rendered, or not.
In the case of a protected route, a given route should only be accessed when a user is logged in, otherwise, the user should be directed to the login page.
Let?s explore custom routes more in the next example. Clone the project here and run npm install && npm start to set up.
A private route is also grouped with all other routes as shown below.
The private route has the path, component and isAuthenticated props. Let?s take a closer look at the private (custom) route.
We destructure the props within the argument list and rename component to Component. We use the Route component by passing it the …rest and render props. Within the render prop, we write logic that determines whether to render a component and which one to render if the user is signed in. Otherwise, the user is redirected to the login page.
The Login component contains a dummy authentication method which signs the user in when they click the Login button within its render method. See below the code snippet from the Login component.
The redirectToReferrer state property is set to true when the user is signed in. This triggers a redirect to the route they had intended to visit, or to the ?/? path incase they navigated directly to the login route.
Run npm start if you do not already have the project running and navigate to localhost:3000. You should see this
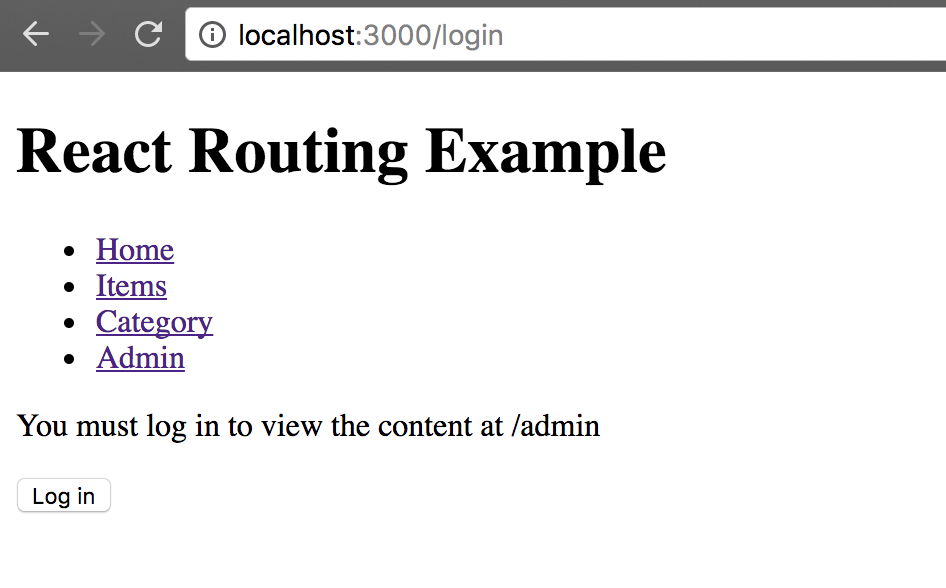
Clicking on the Admin link when not signed in redirects you to the /login page, showing the login button.
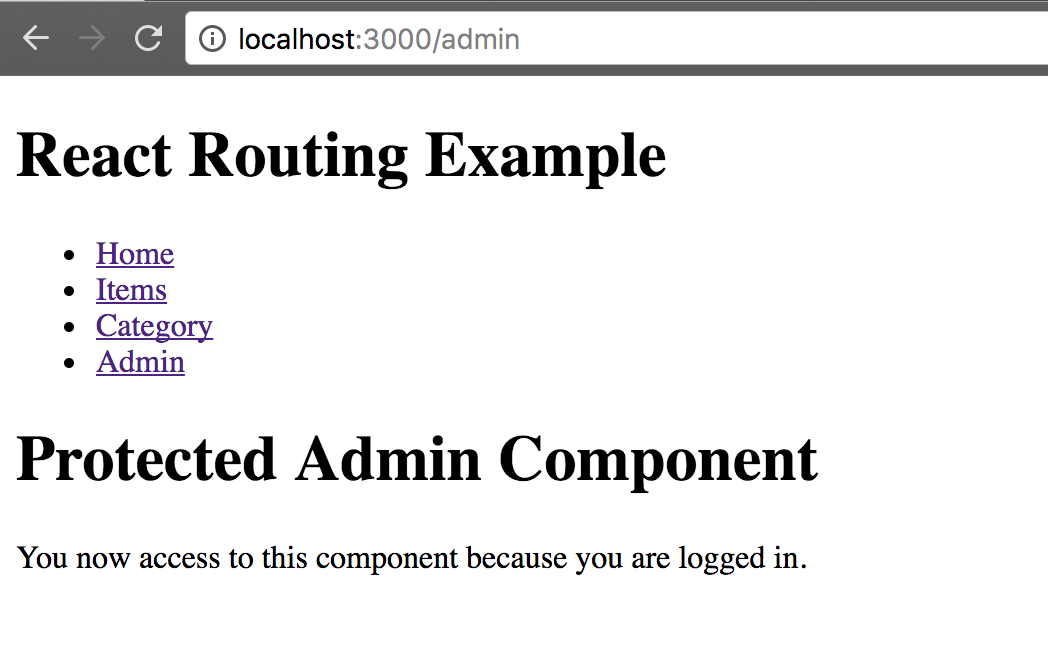
After clicking the login button, you are redirected to the protected admin page as shown below
You?re now fully equipped to build a complete React application. You are well on your way to gaining the ability to write complex React applications. We?re excited to see what you?ll build.
If you need a refresher on any of the material covered in the earlier chapters or haven?t had a chance to check them out, find links to them below:
A Beginner?s Guide to React with ES6
Chapter 1 from the book; Vumbula React ? Co-authored by John Kagga
medium.com
Understanding React Components
Chapter 2 from the book; Vumbula React ? Co-authored by Edmond Atto
medium.com
Understanding the Fundamentals of State in React
Chapter 3 from the book; Vumbula React ? Co-authored by John Kagga
medium.com
Handling User Input in React ? CRUD
Chapter 4 from the book; Vumbula React ? Co-authored by Edmond Atto
medium.com
If you have found this article useful, reach over to the ? button and hit it as many times as you have enjoyed reading this post. Your responses are also highly appreciated. You can also find me on twitter.

