
Continuing from the last post, we?ll look at how to set up a built-in SSH server starting with Windows 10 and Windows Server 1709. This method allows Windows Server to connect remotely using SSH, just like a traditional Linux server. We will also look at how you can use Remote Desktop securely without modifying your firewall settings using SSH port tunneling.
Installing and configuring OpenSSH Server
You can install OpenSSH Server the same way you installed the SSH client in the previous article.
$OpenSSHServer = Get-WindowsCapability -Online | ? Name -like ?OpenSSH.Server*?Add-WindowsCapability -Online -Name $OpenSSHServer.Name
After installing the OpenSSH server program, start and stop the NT service once to create the necessary initial configuration files.
$SSHDaemonSvc = Get-Service -Name ?sshd?Start-Service -Name $SSHDaemonSvc.NameStop-Service -Name $SSHDaemonSvc.Name
Apply asymmetric key authentication
Using public SSH Key authentication methods and disable the password authentication method highly recommended because it prevents attacks through password assignment. To enable this authentication feature, start PowerShell as an administrator and open the file in the path below with notepad. (Or you can use another text editor of your choice.)
notepad.exe $env:PROGRAMDATAsshsshd_config
For the following items, uncomment below lines and apply the value as follows:
- PubkeyAuthentication yes
- PasswordAuthentication no
- PermitEmptyPasswords no
Then choose your preferred method of managing SSH public keys. Starting with Windows Server 2019 (or 1809), there are two ways to describe SSH public keys. One of which is the traditional way of creating an authorized_keys file in the user?s home directory.
Using $HOME.sshauthorized_keys
To use this method, comment out the following block of code at the bottom of the configuration file:
Match Group administrators AuthorizedKeysFile __PROGRAMDATA__/ssh/administrators_authorized_keys
Then go to the user home directory you want to log in to and create a .ssh directory.
mkdir “$HOME.ssh”
Create an authorized_keys file (without the extension) inside the newly created directory and open it with your favorite text editor.
$authorizedKeyFilePath = ?$HOME.sshauthorized_keys?New-Item $authorizedKeyFilePathnotepad.exe $authorizedKeyFilePath
Add the public SSH key value you are using here.
When you save the file, you must change the file permission settings as described in the section Setting File Permissions with Authentication Key Information. If this setting is missing, the SSH connection will fail.
Using administrators_authorized_keys
This property is the default used by OpenSSH included in Windows Server 2019 (1809). Instead of registering a new SSH key for each user, you can manage your files in one place.
If you use this method, all public keys need to store in the $env: PROGRAMDATAsshadministrators_authorized_keys file, except for non-administrative users (that is, users who do not belong to the Administrators group). If you try, this setting will be used instead of your home directory, so if there is no key here, the connection will fail.
The administrators_authorized_keys file does not exist by default and created.
Warning: Run below commands carefully. If you change the other system file or configuration mistakenly, the system can break.
$authorizedKeyFilePath = ?$env:ProgramDatasshadministrators_authorized_keys?New-Item $authorizedKeyFilePathnotepad.exe $authorizedKeyFilePath
Add the public SSH Key you are using here.
When you save the file, you must change the file permission settings as described in the section Setting File Permissions with Authentication Key Information. If this setting is missing, the SSH connection will fail.
Setting File Permissions with Authentication Key Information
A common and very tough problem that you will face about using the OpenSSH server for Windows is this. SSH Key file permission should have correct and limited file permission. Windows version of SSH also follows this rule, but especially in Windows, configuring file permission can be unintuitive.
Depending on the method you chose in the previous step, you must verify the path of the authorized_keys file or administrators_authorized_keys file and change the permissions so that only the system account can access it using the icacls.exe utility and the Get-Acl and Set-Acl commands.
Warning: Run below commands carefully. If you change the system file?s ACL configuration mistakenly, the system can break.
$authorizedKeyFilePath = “…”icacls.exe $authorizedKeyFilePath /remove ?NT AUTHORITYAuthenticated Users?icacls.exe $authorizedKeyFilePath /inheritance:rGet-Acl ?$env:ProgramDatasshssh_host_dsa_key? | Set-Acl $authorizedKeyFilePath
Changing the SSH Default Shell
Basically, for compatibility reasons, the Windows operating system has provided a shell-based interpreter that recognizes DOS commands for a long time. But now, with more and more features than working with DOS commands, PowerShell is becoming a good alternative.
If necessary, you can specify that PowerShell as the default shell for SSH instead of the DOS interpreter. However, the settings here are specific to SSH sessions, not for the Remote Desktop or console session.
Warning: Run below commands carefully. If you change the registry configuration mistakenly, the system can break.
New-ItemProperty -Path “HKLM:SOFTWAREOpenSSH” -Name DefaultShell -Value “$env:WINDIRSystem32WindowsPowerShellv1.0powershell.exe” -PropertyType String -Force
Staring SSH Server
You are now ready to start your SSH server. The SSH server is set to manual run by default so that you can change the startup mode to automatic. Then begins the service.
$SSHDaemonSvc = Get-Service -Name ?sshd?Set-Service -Name $SSHDaemonSvc.Name -StartupType AutomaticStart-Service -Name $SSHDaemonSvc.Name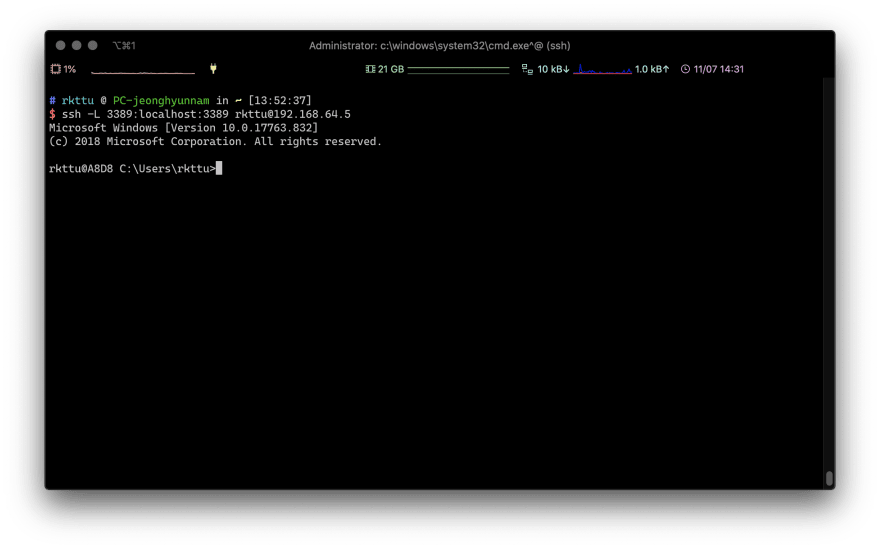
Congratulations! From now, you can connect to Windows with SSH-key authentication.
How to Secure Remote Desktops
Unlike Linux, Windows still runs much of the system on a graphical interface rather than on the command line. So if you try to do something with a terminal like this, you may not have much to do as you might expect.
Remote Desktop, however, is a well-known food for many hackers and script kiddies, as is well known. You may encounter the dilemma of choosing between convenience and security.
Fortunately, SSH provides the concept of tunneling, supporting the ability to relay other network connections securely. Remote desktop connections can also be protected in this way so that you can use them with confidence.
Start by blocking the TCP 3389 and UDP 3389 ports. You can do this because you will use Remote Desktop only with SSH tunneling.
Warning: Run below commands carefully. If you change the firewall configuration mistakenly, the system can become vulnerable.
Set-NetFirewallRule -DisplayName ?Remote Desktop – User Mode (UDP-In)? -Action BlockSet-NetFirewallRule -DisplayName ?Remote Desktop – User Mode (TCP-In)? -Action Block
Next, you must change the registry flag value so that the remote desktop server can accept the connection.
Warning: Run below commands carefully. If you change the registry configuration mistakenly, the system can break.
Set-ItemProperty -Path ?HKLM:SystemCurrentControlSetControlTerminal Server? -Name ?fDenyTSConnections? -Value 0
And the part that I?m going to explain right now is cool. As you saw earlier, you will not be asked for your password when you connect to OpenSSH, so you can set up a randomly generated strong password each time you use it. It is handy to have a simple script in the system directory that can do this.
Choose the type of script you want to create a file called ChangePassword.ps1. We will keep this script in the system directory for your convenience.
Warning: Run below commands carefully. If you change the other system file or configuration mistakenly, the system can break.
$change_pwd_script_path = ?$env:WINDIRChangePassword.ps1?Clear-Content $change_pwd_script_path -ErrorAction SilentlyContinuenotepad.exe $change_pwd_script_path
Set your desired password
Create the contents of the ChangePassword.ps1 file as follows:
$Password = Read-Host -Prompt “Provide your new account password” -AsSecureStringSet-LocalUser -Name “$env:UserName” -Password $PasswordClear-Variable “Password”Write-Host “Detailed settings such as remote desktop settings, WinRM connection settings, and Windows Update can be controlled using the sconfig command.”
This script allows you to enter your password. However, unless you change the policy, you can only use passwords that pass the Windows Server enhanced default password rules. You must specify a password that must meet all of the following conditions.
- English capital letters (A through Z)
- Lowercase English letters (a through z)
- Arabic numerals (0 to 9)
- Special symbols (e.g.!, $, #,%)
Generate a new password every time
Create the contents of the ChangePassword.ps1 file as follows:
Add-Type -AssemblyName System.Web$Password = [System.Web.Security.Membership]::GeneratePassword(30,10)Set-LocalUser -Name “$env:UserName” -Password ($Password | ConvertTo-SecureString -AsPlainText -Force)Write-Host “Your New Password is:`r`n`r`n$Password”Write-Host “Detailed settings such as remote desktop settings, WinRM connection settings, and Windows Update can be controlled using the sconfig command.”Clear-Variable “Password”
This way, you can set a strong password every time. If you forget your password, you can rest assured that you can still use public key authentication as a secondary means of authentication.
Try logging in to Remote Desktop with Tunneling
Now enter the following command to run the above script. After that, just set the password and verify that the remote desktop connection is working.
Warning: Run below commands carefully. If you lost the password you specified, you?d be lost access to your system.
ChangePassword
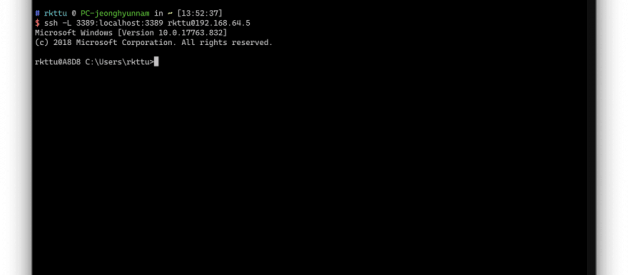
To log in to the remote desktop, run SSH as follows:
ssh -L 3389:localhost:3389 <user_id>@<host_address>
The first 3389 is the port number on the server-side, and the second address is the port number you want to use locally. If you have changed the remote desktop?s port number from the registry to another port number on the server, you can enter the changed port number instead of 3389.

If you try to connect to a remote desktop using only the <host_address> part as before, the firewall will block the connection as previously set up. So no one can access the remote desktop directly unless the user has registered a public key that matches the SSH secret key with that server.
Using secure file sending and receiving
Not surprisingly, it is possible to use SSH based SFTP. This feature designed to securely handle large file transfers in place of the remote desktop?s folder sharing feature.
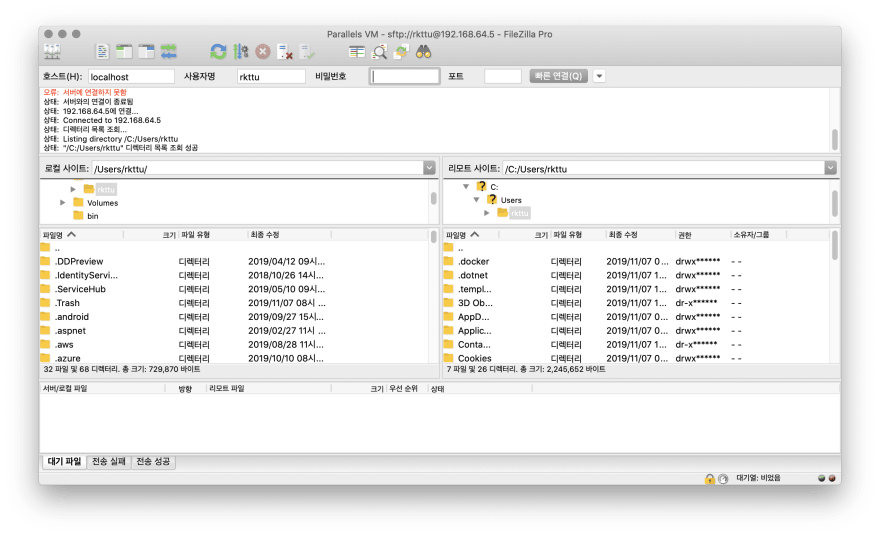
Any client that supports the SFTP feature, such as FileZilla, is compatible and has a management advantage, as there is no need to apply complex firewall open policies like traditional FTP.
Wrap-up
This walkthrough let you through all the new SSH features that added since Windows 10 Version 1709. Both articles are available for Windows 10 and Windows Server 2019, so please take a moment to set them up for even more security.
Credits
The following articles helped me as I wrote this article.
- https://ilovepowershell.com/2018/05/28/awesome-and-simple-way-to-generate-random-passwords-with-powershell/
- https://stackoverflow.com/questions/16212816/setting-up-openssh-for-windows-using-public-key-authentication
![]()

