Although M4A develops smaller size and better quality than MP3, it?s not compatible with tons of portable devices and auditors like PSP, Creative Zen, PS3, Audacity, Wavosaur, and more. It can only be played on iTunes and Apple devices. To make it playable on the old yet acclaimed devices with original quality kept, I recommend you to convert M4A audio to WAV. Here shows you how to convert M4A to WAV on Mac.
Method 1. iTunes
#One. Convert M4A to WAV Mac in Library
- Run the iTunes app.
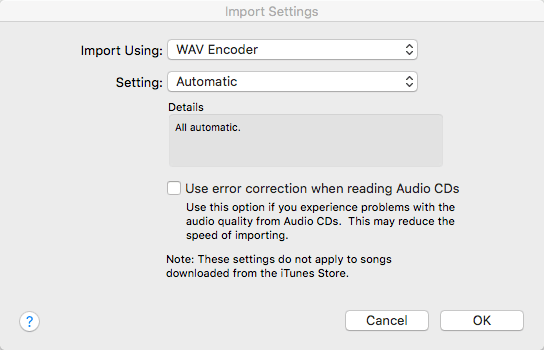
2. Navigate to menu bar, select ?iTunes? > ?Preferences? > ?General? tab > ?Import Settings?.
3. Choose the ?WAV Encoder? format > then ?OK?.
4. Choose one or more M4A tracks from your library.
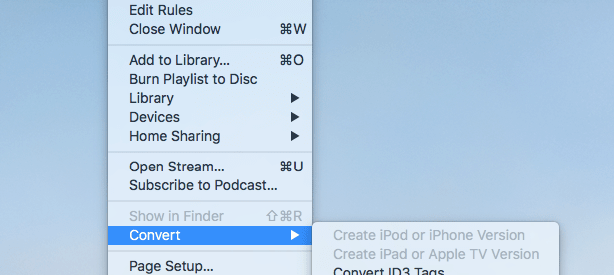
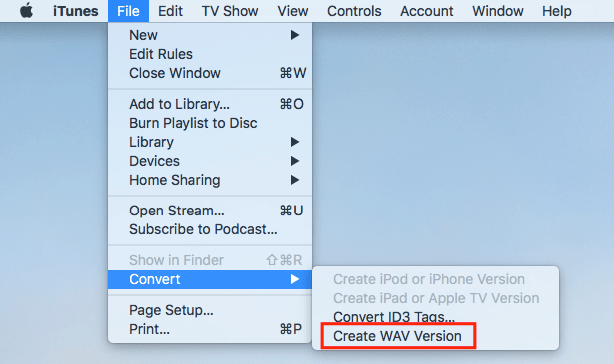
5. Go to the menu bar again and choose ?File? > ?Convert? > ?Create WAV Version?.
#Two. Create WAV from M4A in a Folder or on a Disk
1. Repeat the first three steps above.
2. While holding down the Option key and then select ?File? > ?Convert? > ?Convert to WAV Encoder?.
3. Choose the folder or disk that contains M4A tracks you would like to import. iTunes converts all of the tracks in the folder or on the disk.
Method 2. Cisdem Video Converter
Cisdem Video Converter is a powerful yet easy-to-use tool that takes care of all your file conversion demands. It allows you to convert M4A to WAV, AAC, AC3, MP3, WMA, OGG, AIFF, FLAC and so on. Besides video conversion, it also lets you download, play, edit, rip and upload files.
Benefits of the software:
- Convert audio and video files to 500+ different formats, including device presets
2. Customize audio presets by altering bitrate, sample rate, channel, etc.
3. Batch processing file conversions
4. Integrated with editing tool that trims, crops, rotates, merges, and tweaks volume, saturation, brightness, applies effects
5. Download online videos from 1000+ websites, e.g. YouTube
6. Rip DVD movies to any format
7. Directly share videos to YouTube
Steps to Convert M4A to WAV Mac Using the Cisdem Video Converter:
Step 1. Install the software
Cisdem M4A to WAV converter download >>
Step 2. Upload M4A file
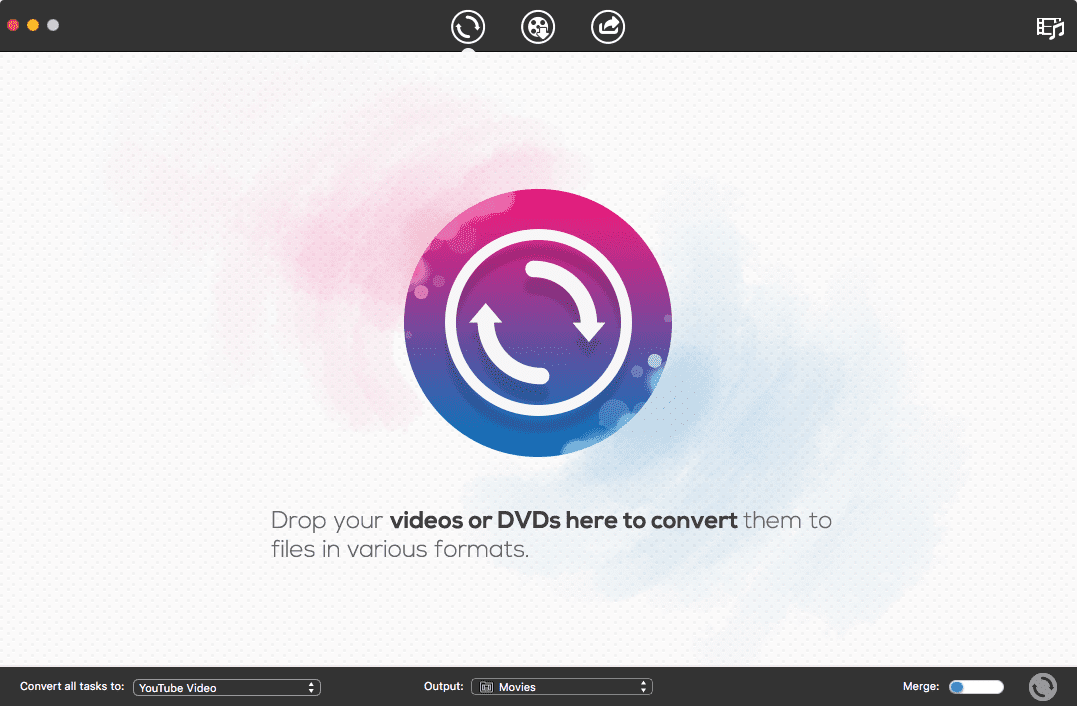
Drag the appropriate M4A audio tracks into the convert tab of the software.
Step 3. Choose WAV as output format
Click the format icon to open the format library, choose General Audio > WAV Audio. To batch define the file format, click on ?Convert all tasks to? in the bottom right and select the format as you like.
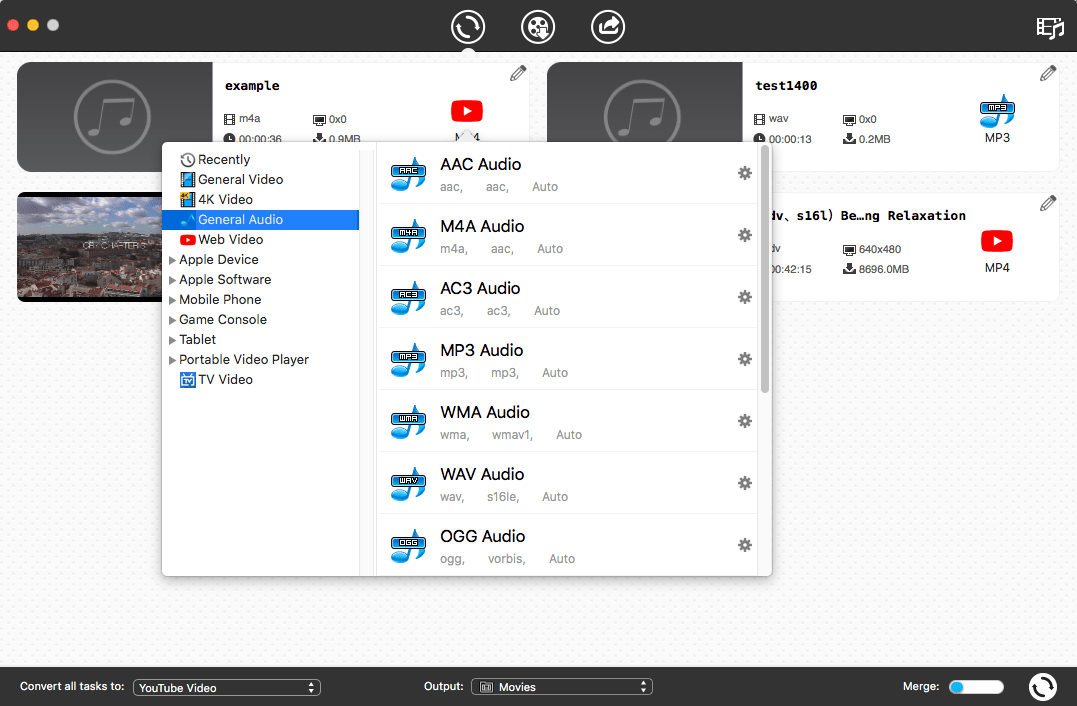
Step 4. Adjust the parameters
If needed, you can click the gear icon to open ?Advanced Settings? windows and change the settings of quality, codec, sample rate, bit rate, and channel.
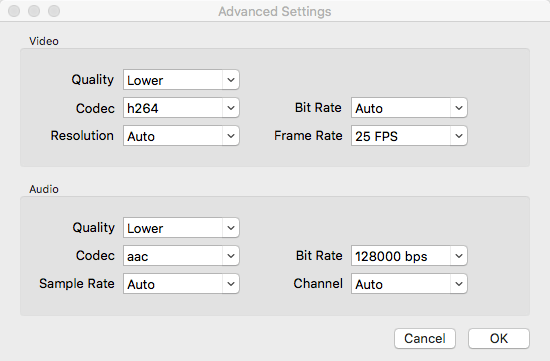
Step 5. Start the conversion.
Select a file location from the ?Output? folder to save your WAV files. Then, click the convert icon and your M4A tracks will be converted to WAV within seconds.
#3. VLC Media Player
VLC is a popular media player that can playback almost every media format and packs a whole bunch of additional useful features. It?s not just a media player, the software supports to perform the conversion between audio and video files as well.
Steps to Convert M4A to WAV VLC:
1. Head over to ?File? > ?Convert/Stream? to open the dialog box.
2. Click ?Open media? button to import M4A files or drag the media into the software.
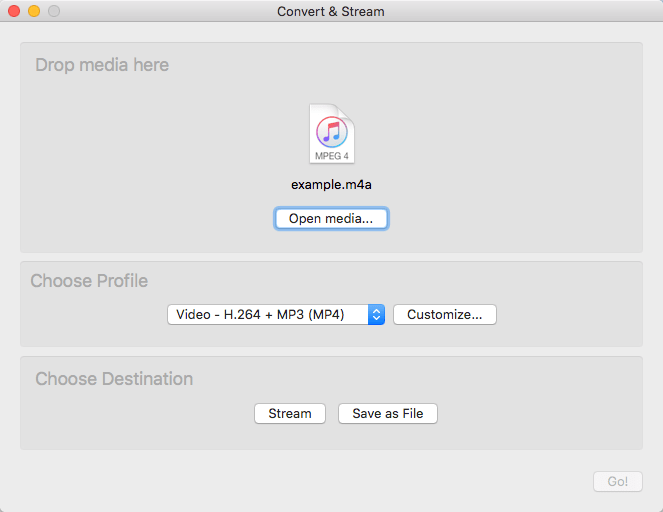
3. In the ?Choose Profile? section, select Customize > WAV, and save the new profile.
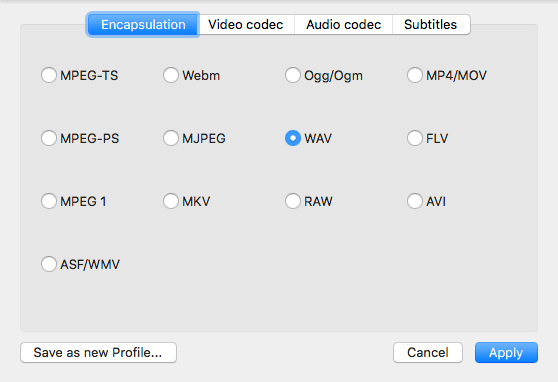
4. Select a destination and start to save M4A as WAV on Mac.
Note: In my tests, the output WAV file could not be opened with either QuickTime Player or iTunes.
#4. Online-audio-converter.com
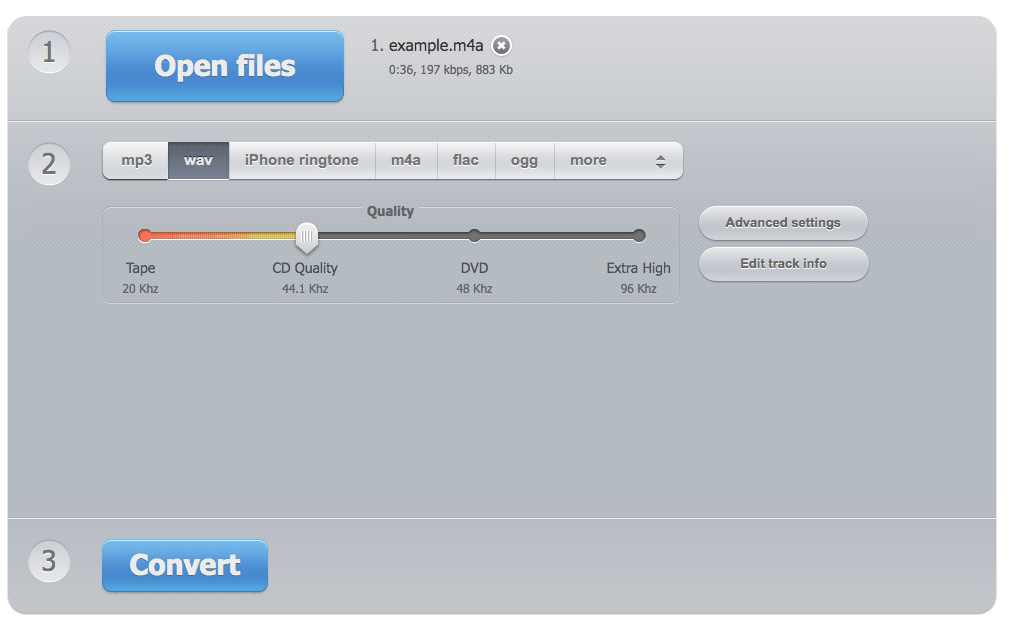
Online-audio-converter.com is a free web app that converts audio files without having to install the software. It supports 7 output formats for M4A conversion, including MP3, WAV, iPhone ringtone, FLAC, OGG, MP2 and AMR. The drawback is that it doesn?t enable you to convert files in batches.
Steps to Convert M4A to WAV Mac Online
1. Click ?Open files? to add the M4A files.
2. Choose WAV as a target format.
3. Adjust the audio quality, settings and basic information (title, artist, album, year and genre).
4. Click the ?Convert? button.
Conclusion
Users who are interested in M4A to WAV conversion on Mac may find assistance from the above. Both of them have pros and cons. The free tools are convenient and save your money while the commercial software incorporates lots of functions into one and works efficiently in converting media files.
