
 http://thefutureofink.com/
Do you want to write an eBook, but feel intimidated by the whole process?
Not too long ago, I felt the exact same way.
For years, I wanted to write and publish a book, but continued to put it off because it just seemed too impossible.
Sure, I could write the damn thing, but I didn?t know the first thing about formatting, publishing, or designing a book cover, and I definitely had no idea how to sell it.
I also had a lot of different book ideas and felt overwhelmed with having to choose just one to develop into an actual book.
So instead of sharing my ideas with the world, I kept them locked inside my head, where no one could see them, paralyzed with the fear that my book would just never happen.
Until November 2016.
The year was coming to a close and my ever-present resolution of ?write a book? was still on my list (as it always is, year-after-year).
I looked over my long list of book ideas, longingly, and wondered if a quick release might be possible.
I paused at ?Book about becoming a freelancer.?
Some background: over the last year or so, I had (somehow) become the go-to source for friends, family members, and strangers for questions about becoming a freelancer.
?If they had questions, maybe other people would, too?? I thought to myself.
So I ran with it.
Because the year was coming to an end (this was about a week before Thanksgiving), I knew I didn?t have much time. If I was going to publish this thing, I was going to have to do it fast (as in, a month or less fast).
So, I ended up writing, formatting, and publishing my eBook in one week.
And today, I?m going to share with you exactly what I did to make that possible, so you too, can get that idea out of your head and into your next book.
*Note: while this schedule worked for me, every writer is different. I would recommend taking this outline and adjusting it to your own needs and style.
Day 1: Create a pre-sale landing page
Before you write your book, you?ll want to make sure people are actually interested in it first.
And the best way to do that? Create a pre-sale landing page with an email capture form.
For my eBook, I used Podia to quickly whip up this pre-sale landing page, which summarized my product (an eBook about going from full-time to freelance) and when it was coming out (December 9th, 2016).
*Note: before the book came out, the page had different copy about the book and when it was coming out ? now that the book is live, I turned the page into a ?free chapter? lead capture page.
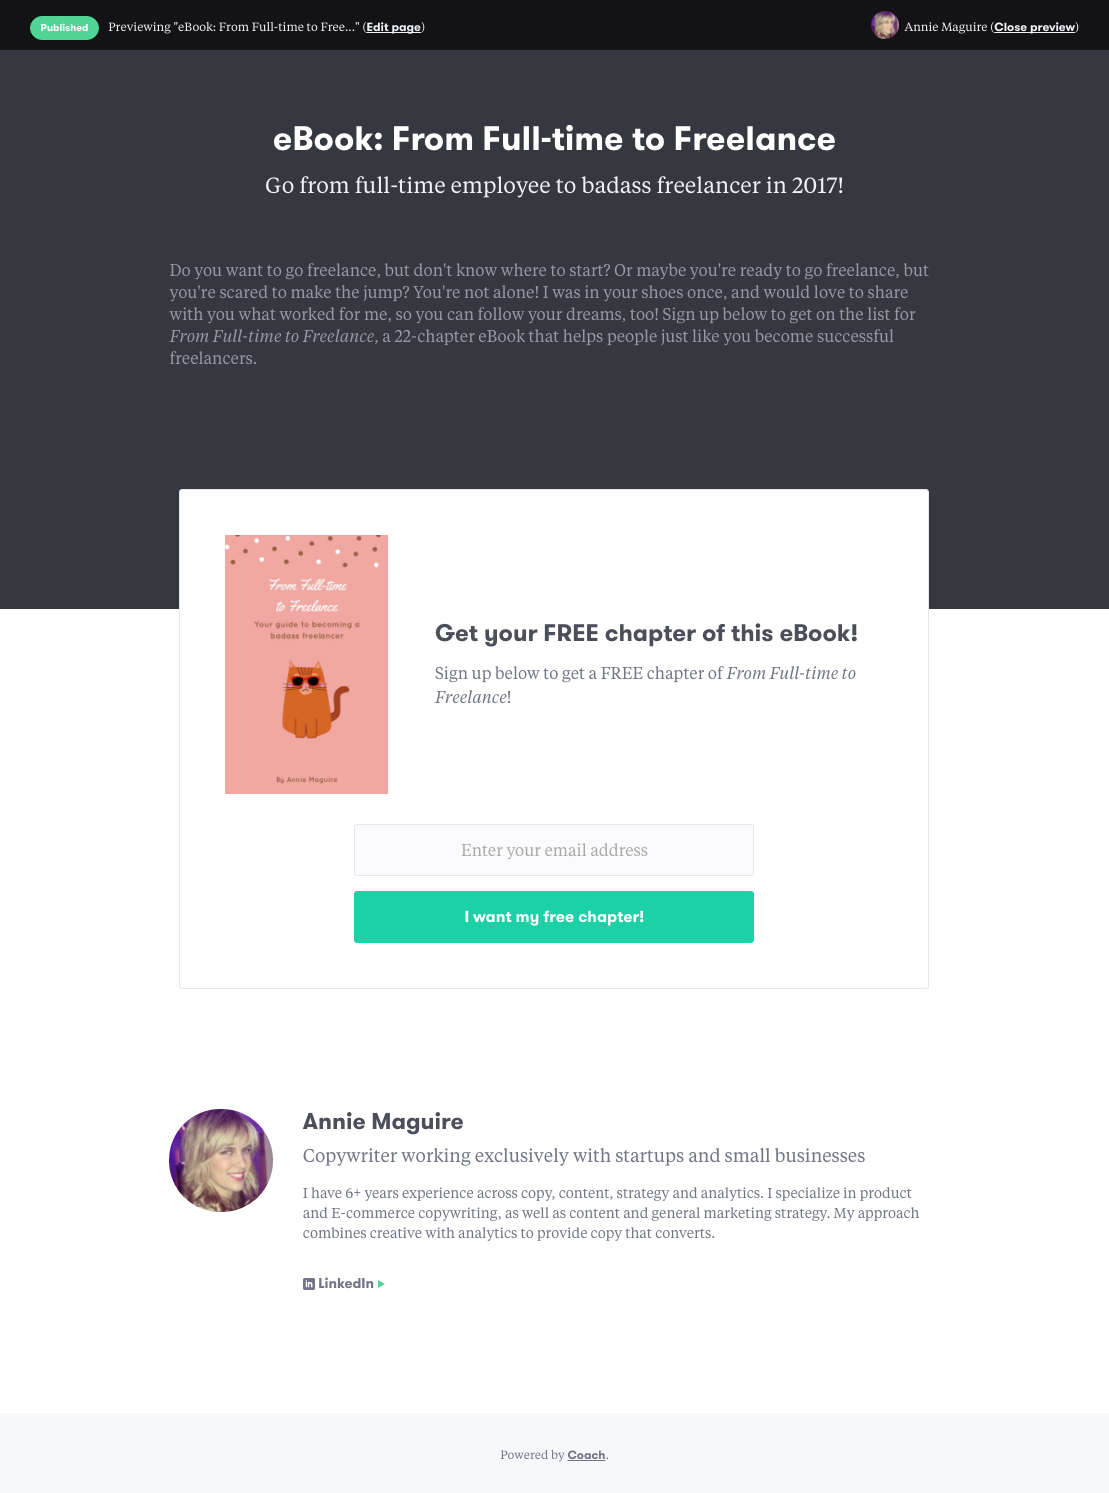 Pre-sale landing page for my eBook (it?s now a ?Free chapter? lead capture page) ? powered by Podia
Through the email capture form, people could easily signup to get notified when the book was available for purchase, which allowed me to build up a strong list of potential customers before I even wrote a single chapter.
A pre-sale landing page allowed me to build up a strong list of potential customers before I even wrote a single chapter.
After promoting the pre-sale landing page a couple of times, I felt like I had a good-sized audience to move forward with the eBook idea.
Day 2: Write your outline
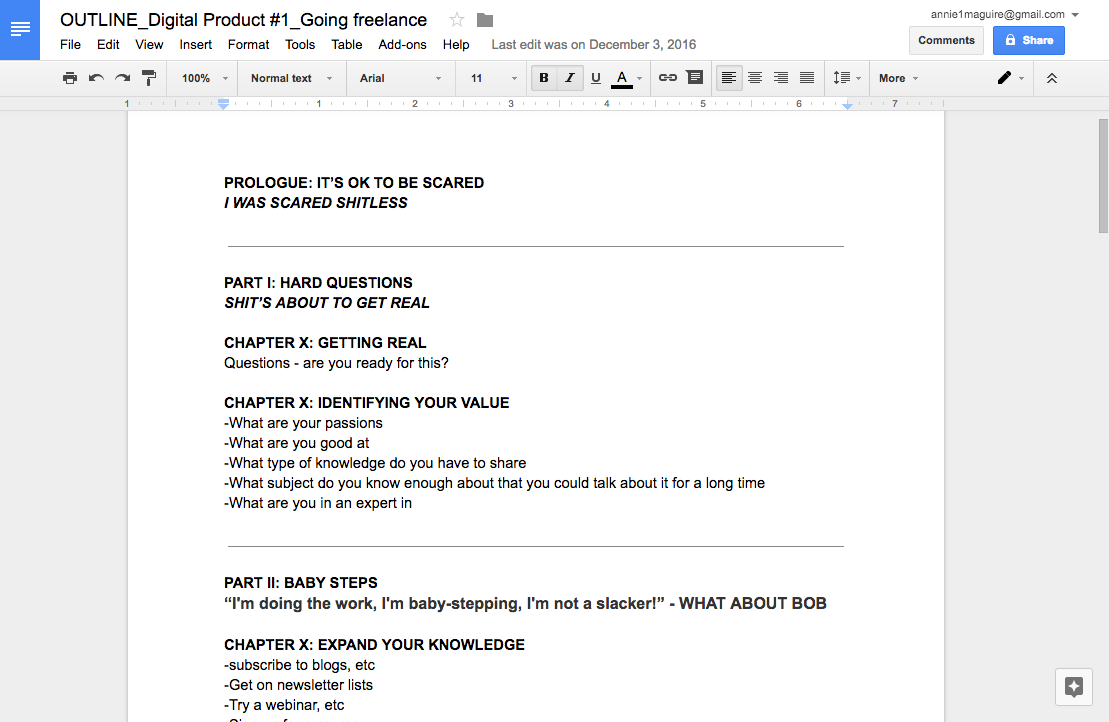
Next, I started a Google Doc where I began outlining my book, chapter-by-chapter.
In the beginning, your outline should feel pretty loose, as you?re only trying to get the ideas out of your head and into some type of executable format.
Focus on throwing out as many ?chapter ideas? as you can, and worry about organizing them into a sensical manner after.
As you jot down more and more chapter ideas, you may notice some themes appearing ? this may be an opportunity to chunk certain topics together into parts or sections.
Here?s what my outline looked like after I began chunking chapters together:
Next, I emailed the people who had signed up from my pre-sale landing page (as well as some people outside the list who I knew were interested in the book) to ask for their feedback and ideas.
Here?s what that email looked like (I sent them from my personal email and customized each one):
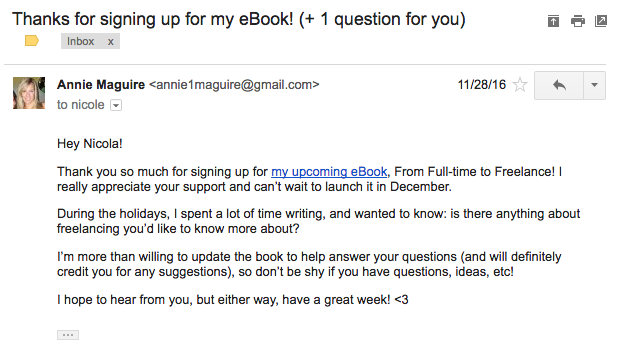
The idea here is two-fold: (1) you want to collect relevant questions from your customer base to make sure you?re including content they?re interested in learning about and (2) you want to make your customers feel like they?re involved and part of the creative process (i.e. ? receiving a shoutout in the book, etc).
Depending on your audience, you may get 1 response or 20 responses ? all that matters is you engage your audience and take their feedback into consideration.
*Note: I ended up calling out people by name in the book, i.e. ?Stephanie had a question about X, bla bla bla?? and also included a ?Special thanks? section at the end of the book to thank anyone who had inspired the book or asked questions.
Day 3?4: Write, write, write
While you?re going to eventually transfer your book into a printable format (I get into that a few steps below), I would recommend writing the first draft(s) in a Google Doc.
Using Google Docs (or some type of backup writing software) is especially important in case you want to look at an older version while you?re writing, or if you accidentally delete a chapter while formatting your book (this happened to me ? ).
Now, depending on how long your book is (and how quickly you write), this 2-day timeframe may vary person-to-person.
This is what worked for me: I selected one weekend (one week out from the promised launch date) and dedicated every moment to writing.
I selected one weekend (one week out from the promised launch date) and dedicated every moment to writing.
Through this method, I completed 22 chapters (114 pages) in essentially 2 days (Saturday and Sunday).
Now, I?m a writer by trade and happen to write very quickly, so I can?t promise that this approach will work for every person and every style of book (it also helped to write about a topic that I?m incredibly passionate about ? this will be true for you, as well).
So, here?s what I would recommend: pick a day (or a specific amount of time, like setting aside a few hours) and try to write one chapter of your book (I would choose the prologue or something on the easier side).
So, here?s what I would recommend: pick a day and try to write one chapter of your book.
As you?re writing, time how long it takes you from start to finish so you can get a good idea how long writing one chapter will take you.
Once you have a good sense of your timing, you can now select an appropriate writing schedule to ensure you finish your book on time (for example, if it takes you one day to write 5 chapters and your book is 15 chapters, you know you need at least 3 days to get it done ? maybe one weekend and an extra day would be ideal for this scenario).
Day 5: Edit
If you?re self-publishing, the hardest part of writing your book will not be writing, but editing it.
If you?re editing the book yourself, the majority of your time is going to be tied up in reading and re-reading the damn thing over and over again to edit out unnecessary content, verboseness, and scanning for grammatical errors.
This takes a lot of mental energy, so if your book is 50?100+ pages, I would recommend editing in chunks or continually editing over several days (for example, start on Day 5 and edit again on Day 6, Day 7, etc).
As you?re editing, you may also find that certain chapters should be dropped, combined together, or you need another chapter altogether.
This will take additional time, and why I suggest you start editing on Day 5, but continue doing so until the moment you export it.
If you have the luxury of hiring an editor (or you have a VERY generous friend), I would absolutely recommend going this route, so you can stay focused on writing (+ the final touches of your book), versus searching for incorrect oxford comma usage.
If you?re looking for a book editor, I can give you a recommendation for someone (just comment below if you?re interested) or you can hire an editor through Reedsy.
Day 6: Create your cover
I don?t know about you, but I?m no designer (though I do have an amateur art blog where I make cards, cartoons, etc).
Therefore, creating the cover for my eBook was one of the most intimidating parts of this whole process.
I didn?t want to put all of this time and effort into writing a book only to be embarrassed by an ugly book cover.
I looked into 99designs, Upwork, downloaded some free templates (not ideal), etc and nothing seemed like what I was looking for.
And then I had a conversation with marketing master/eBook author, Justin Jackson, who recommended I try Canva for my eBook cover.
No joke: my eBook cover took me less than one hour (maybe even 30 minutes) to create.
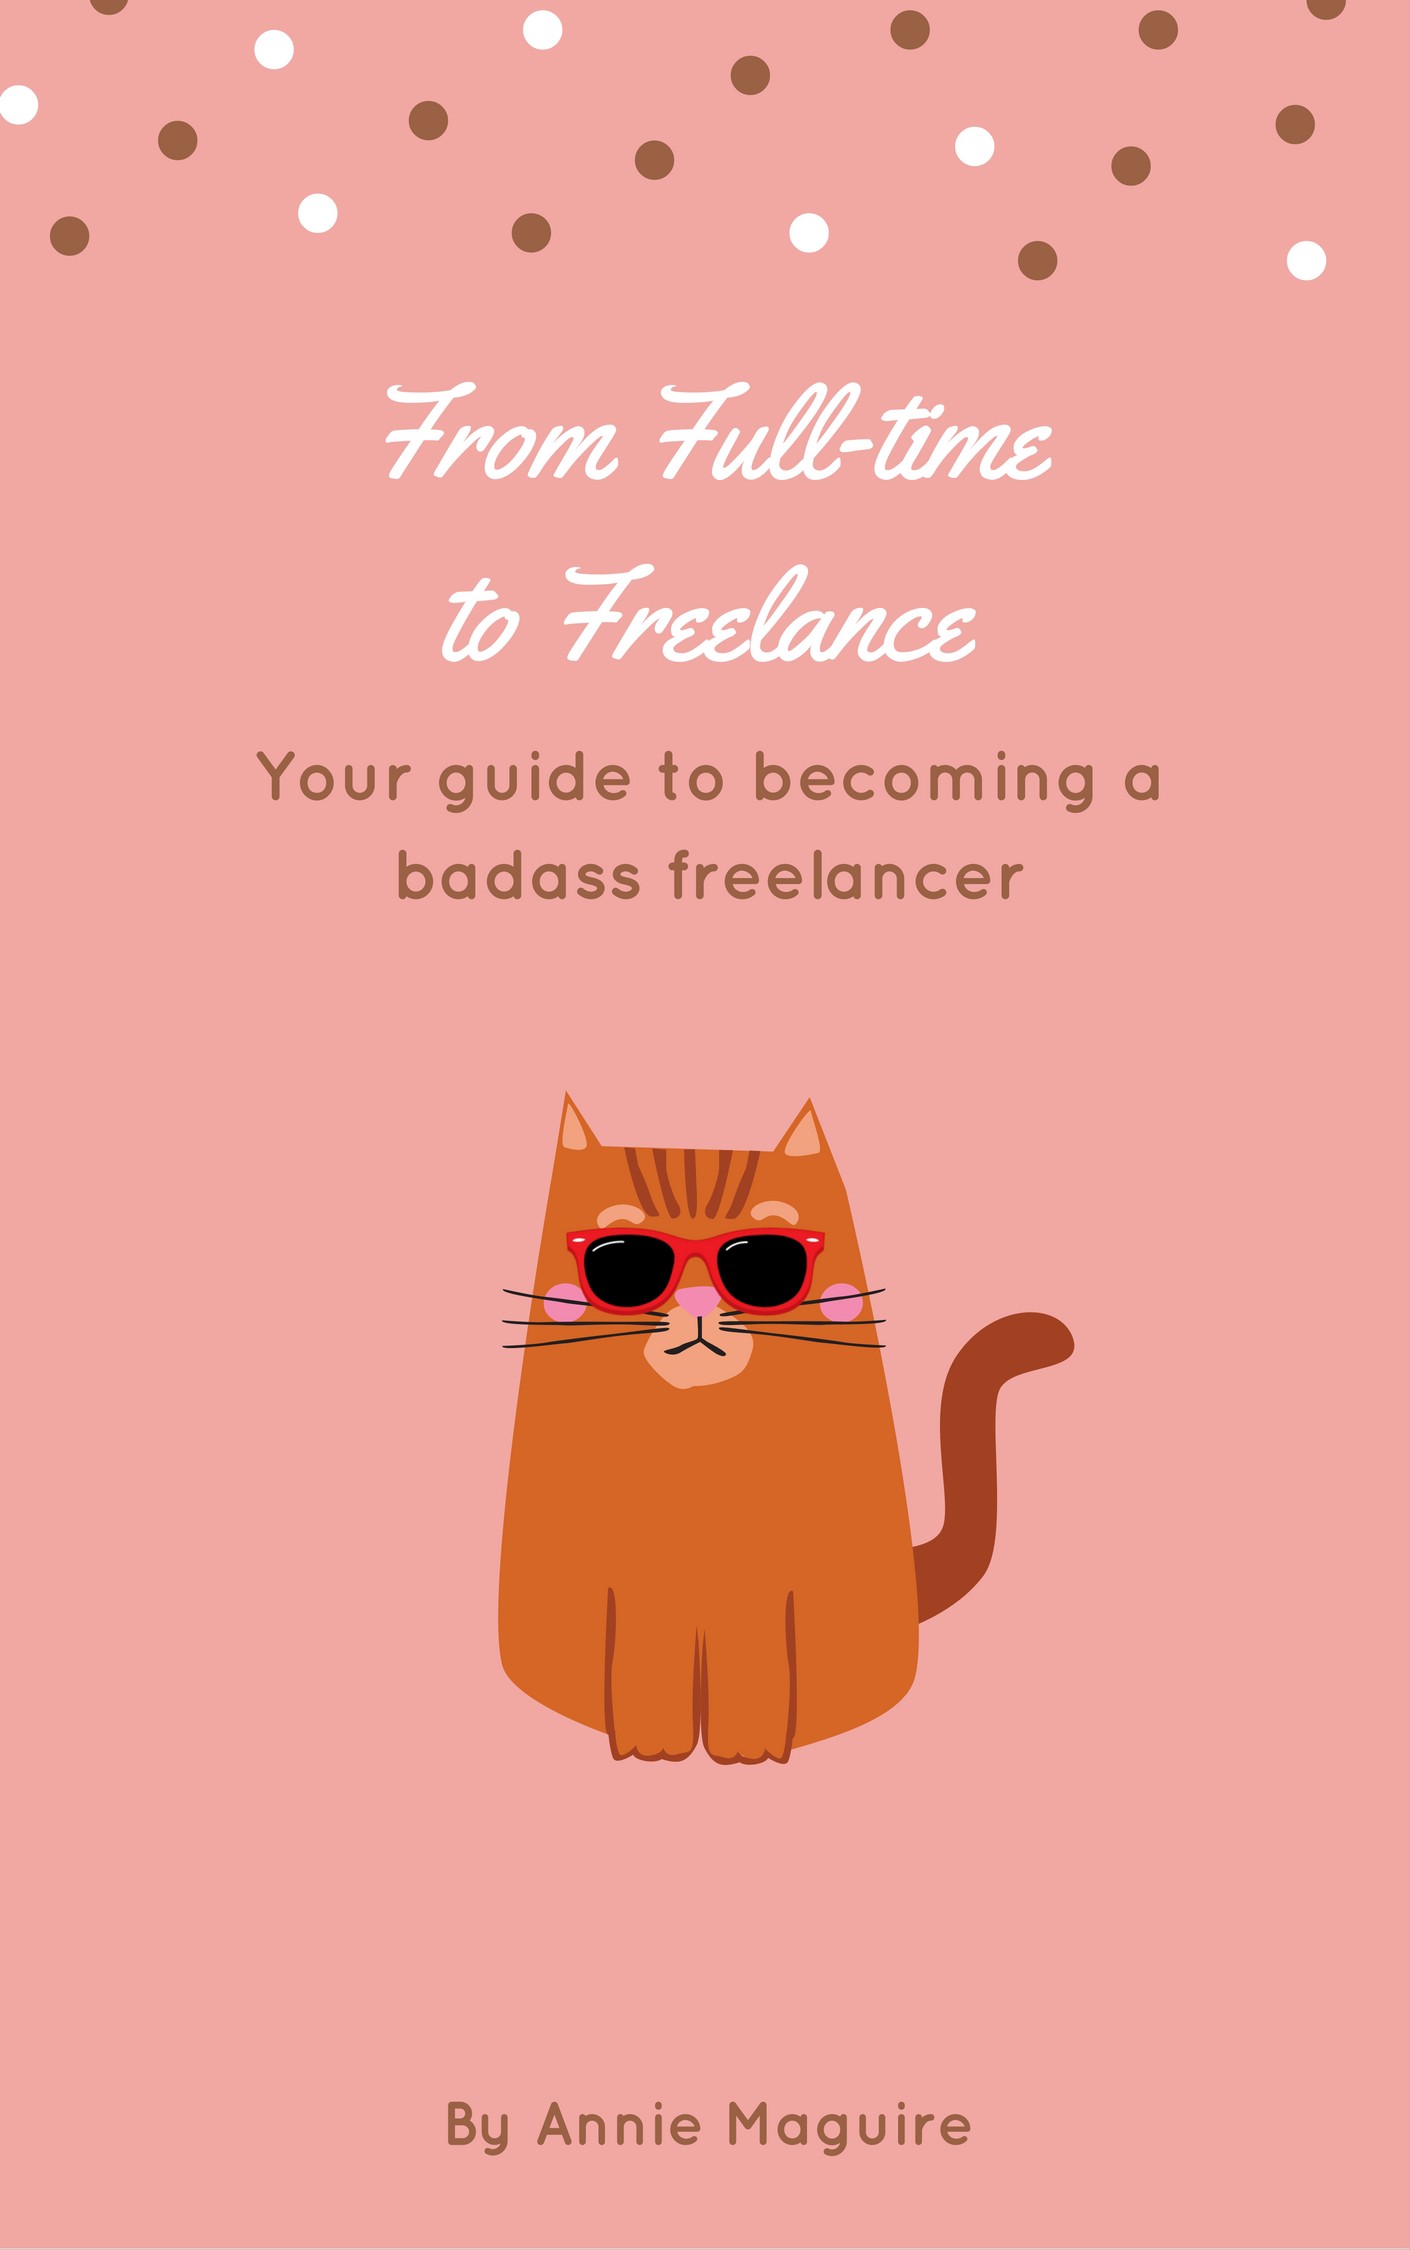 Cover for my eBook (made using Canva)
Now, I?m not saying my eBook cover is a work of art or anything, but considering my limited digital design skills, Canva gave me exactly what I needed to get the job done (and quickly).
To design your own eBook cover, simply go into the ?eBook cover? template section of their graphics library, find a template you like, and customize it with whatever text and images you want.
When you?re finished, just export it, and you?re done.
That?s it. Seriously.
Day 7: Format
If you?ve ever considered writing a book, the question of ?how to format it? has likely popped into your mind (and in my case, gave me a lot of anxiety).
If you?re inexperienced (like I was not too long ago), you either have no idea how to do this, or you?re thinking crazy stuff like manually (and painstakingly) importing your book into a keynote template or something equally as awful.
Do not, I repeat, do NOT do this.
The reason? There?s an insanely easy (and FREE) way to format your entire book (with sections, chapters, page numbers, table of contents, etc) called Reedsy.
*Psst: using Reedsy to format my book was another amazing suggestion from eBook author, Justin Jackson ? thanks Justin! ?
The hardest part of the whole ?formatting? process is pasting in your content from your Google Doc (or wherever you wrote your first draft) into Reedy?s eBook editor.
This is what the Reedsy editor looks like once you?ve put your content in:
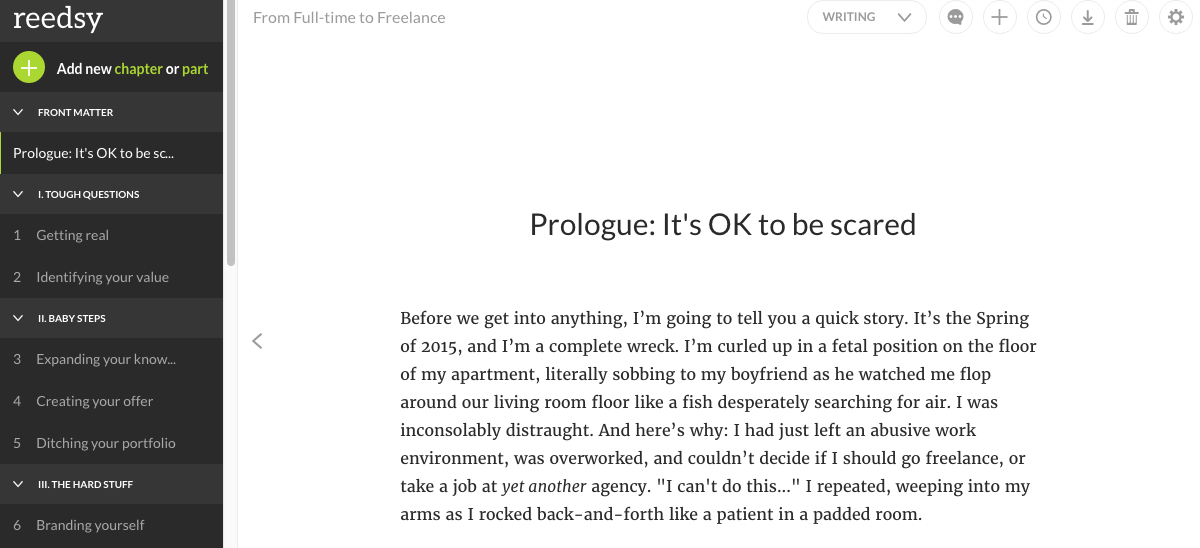 A peek inside my eBook using Reedsy to format it
I can?t emphasize enough how simple this process was.
It did take me some time (at least a day and maybe more depending on how long your book is), but I promise using this FREE service is completely worth it.
When you?re finished with your book, all you have to do is adjust the settings to whatever you want (i.e. ? upload your book cover, the export style, the file type, copyright info, etc) and boom ? you?re a G.D. author.
Final edits + publish
While this may seem like the easiest part, you may end up running into some expected issues.
For example, maybe you export your final version, only to find more typos (no worries, you just have to go back inside, edit, and re-export).
In my case, I did this about 5?10x (or more, I lost count) because I kept finding errors (another reason to just hire an editor, haha).
Another thing: in a few of my chapters, I would mention something like ?we cover this topic in Chapter 17, skip ahead to read that part,? but toward the end of the book, I ended up rearranging a bunch of the chapters and then had to go back through and check for those instances where I referenced a now incorrect future chapter (SO annoying).
These are just two examples of many, many things that can go wrong when you?re about to finalize your eBook.
My point is, just leave some extra time for unexpected issues, so you?re able to launch on time.
My point is, just leave some extra time for unexpected issues, so you?re able to launch on time.
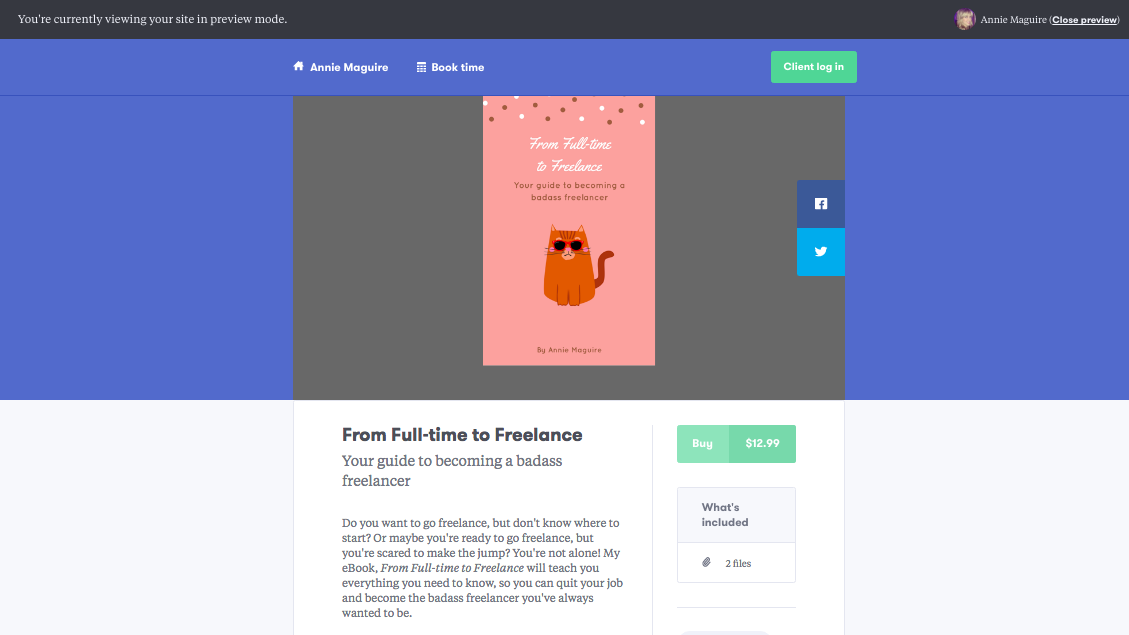
Once I had my FINAL version of my eBook, I published it through Reedsy (in both a PDF and epub file), and uploaded it onto Podia so I could sell it (Podia makes it super easy to sell digital products like eBooks, online courses, etc ? plus, I work for them, so that made it even easier ? ).
Here?s a peek at my final sales page (complete with a photo, price, description, chapter outline, reviews, and FAQ) ? you can see the live version here:
And that?s it ladies and gents!
I wrote, formatted, and published my eBook in just 7 days. And guess what? If I can do it, you can ABSOLUTELY do it, too!
Just follow the schedule I outlined above (and adjust it however you need) and I promise, your eBook WILL get FINISHED!
What?s your eBook about?
I?d love to know what you?re working on! Share your project ideas in the comments below ? I?m happy to answer your questions, give you tips, or share some motivational words.
Annie is a New York-based product copywriter who works exclusively with startups and small businesses. Get the goods in your inbox every Monday.

