Electron, managed by Github, is used in a myriad of projects + companies. Making your web apps available for desktop makes them that much more versatile. So it makes sense to have a fundamental understanding of Electron, and how to integrate it into current projects. This article will walk you through:
- The basics of Electron in a standalone environment.
- How to integrate effectively with React.
- The issues that I overcame with the tutorials/walkthroughs I had found.
What is Electron?
Electron allows you to build cross-platform desktop applications, using a Node.js backend and a Chromium front-end. It might seem like a challenge to turn your React web-app into a full fledged, downloadable desktop app ? but Electron?s objective is to make this process seamless. I was intimidated at first, but the learning curve wasn?t nearly what I thought it would be.
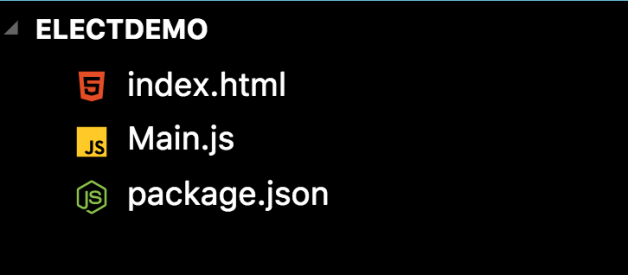
We need three files to start our App:
You can create your package.json file by running this in your terminal:
npm init -y
From there, we create an index.html and a Main.js file. The file naming is arbitrary, but it will better help you separate your Electron JS file from your Index.js file we normally start with in React. Less confusion ? the better.
All of this beginning content can easily be found in Electron?s amazing docs. We?ll start with our npm install:
npm install –save-dev electron
Once we have our package installed, we?ll open up Main.js and add the following code:
const {app, BrowserWindow} = require(‘electron’) function createWindow () { // Create the browser window. win = new BrowserWindow({width: 800, height: 600}) // and load the index.html of the app. win.loadFile(‘index.html’) } app.on(‘ready’, createWindow)
If you work with Node.js, you?ll see a few similarities already. By default, it assigns the new class instance of BrowserWindow to ?win?. The docs emphasize that this is a minimal setup, and that we need to address a lot more situations ? but this will get us started. For instance, we could also include the following:
win.webContents.openDevTools()
Just like that, we have access to DevTools within our Chromium front-end.
Next, we?ll work with our index.html file:
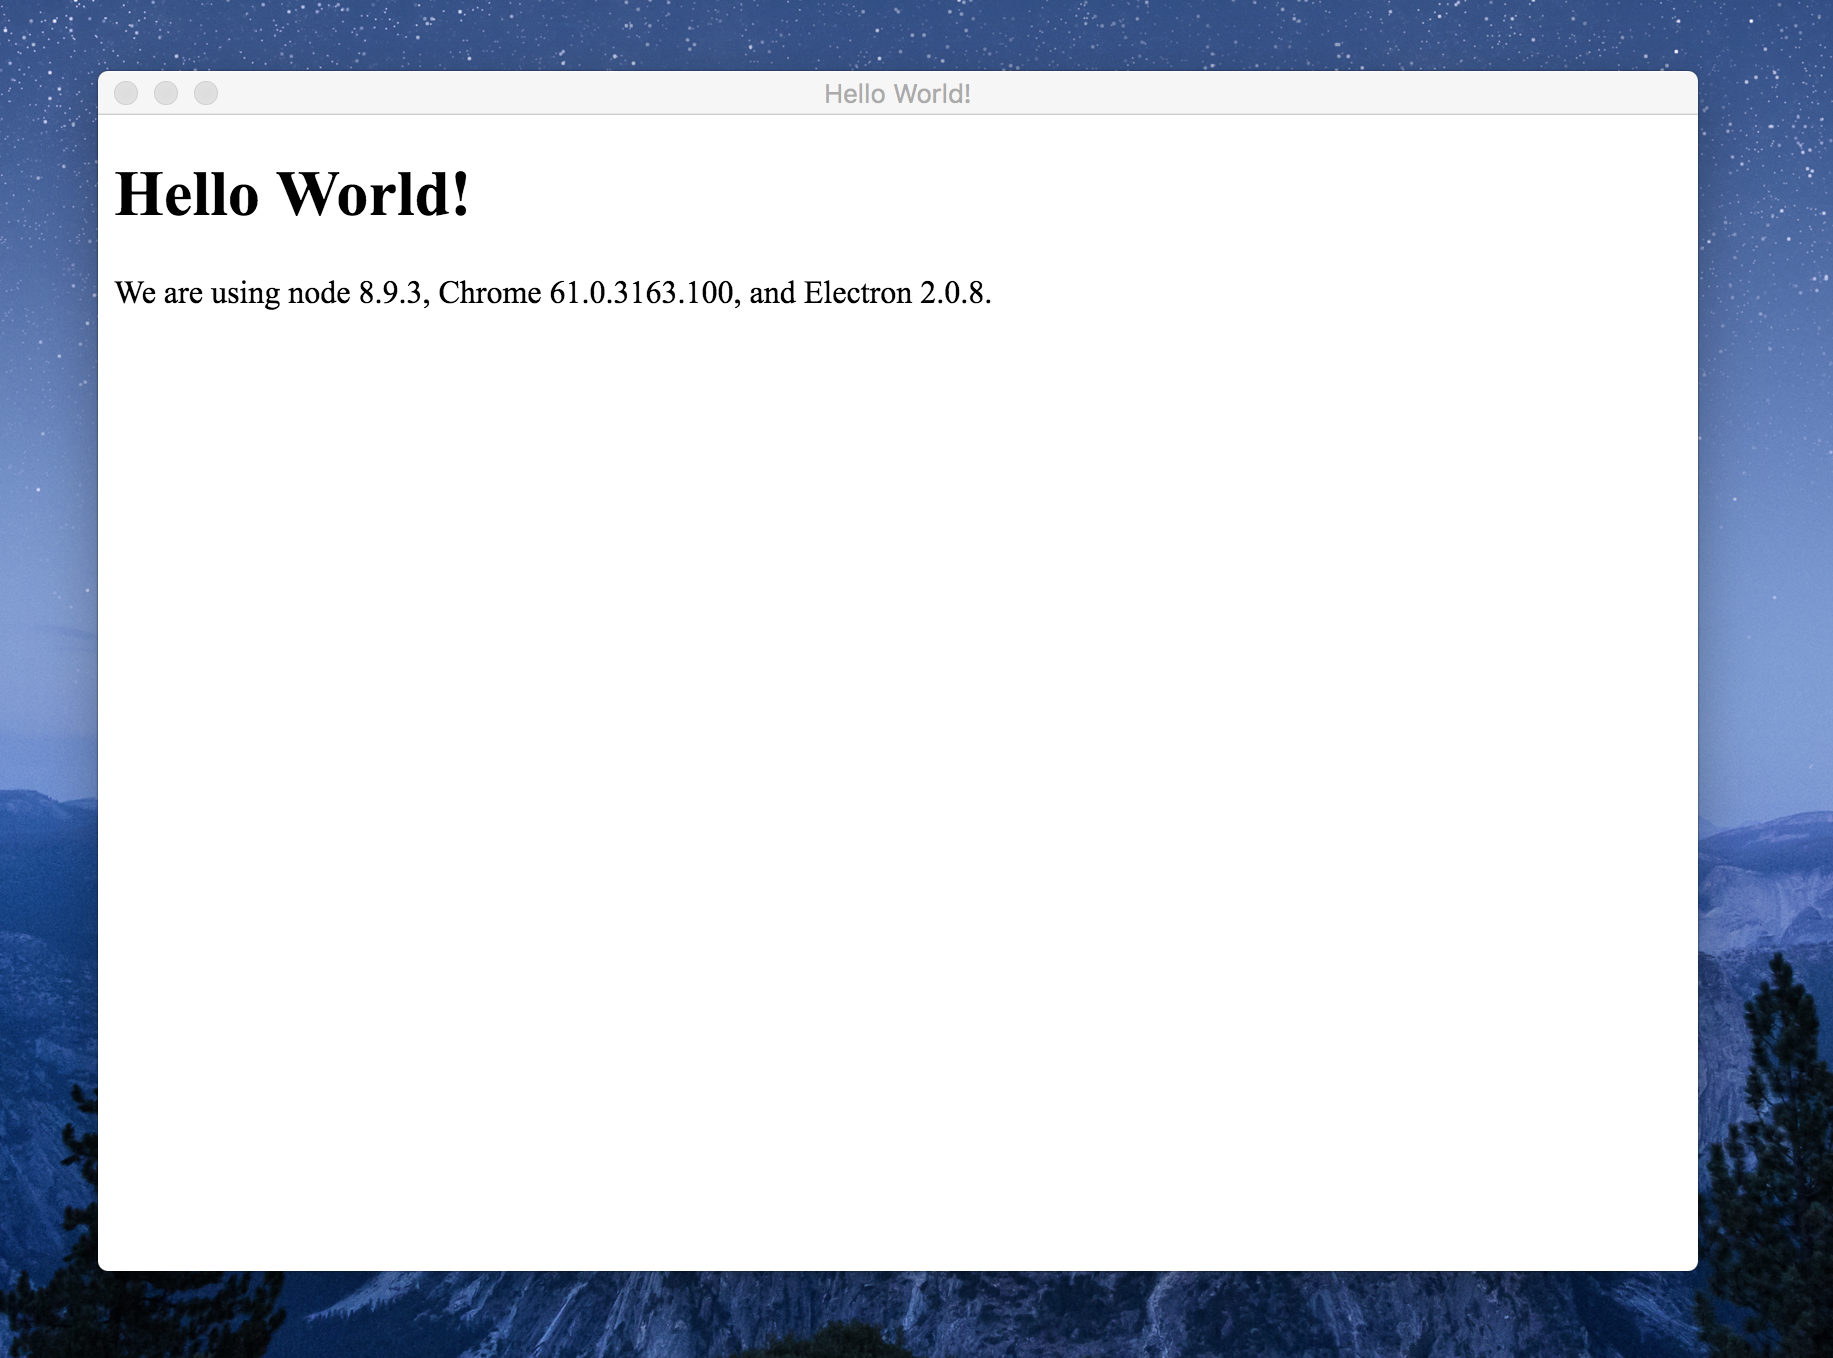
<!DOCTYPE html> <html> <head> <meta charset=”UTF-8″> <title>Hello World!</title> </head> <body> <h2>Hello World!</h2> We are using node <script>document.write(process.versions.node)</script>, Chrome <script>document.write(process.versions.chrome)</script>, and Electron <script>document.write(process.versions.electron)</script>. </body> </html>
The long term goal is to open your React app within this window, but it?s still satisfying to just display a static html file. We?ll also have to adjust our package.json to render electron with our html file:
{“name”: “electdemo”,”version”: “1.0.0”,”description”: “”,”main”: “Main.js”,”scripts”: {“test”: “echo “Error: no test specified” && exit 1″,”start”: “electron .”},”keywords”: ,”author”: “”,”license”: “ISC”,”devDependencies”: {“electron”: “^2.0.8”}}
I just directed our ?main? to the JS file and added a start script to initialize Electron. If you go to your terminal and run
npm start
You should now see your ?Hello World? index file render in a separate window instance. Congrats! You just made your first Electron application.
How to Integrate effectively with React
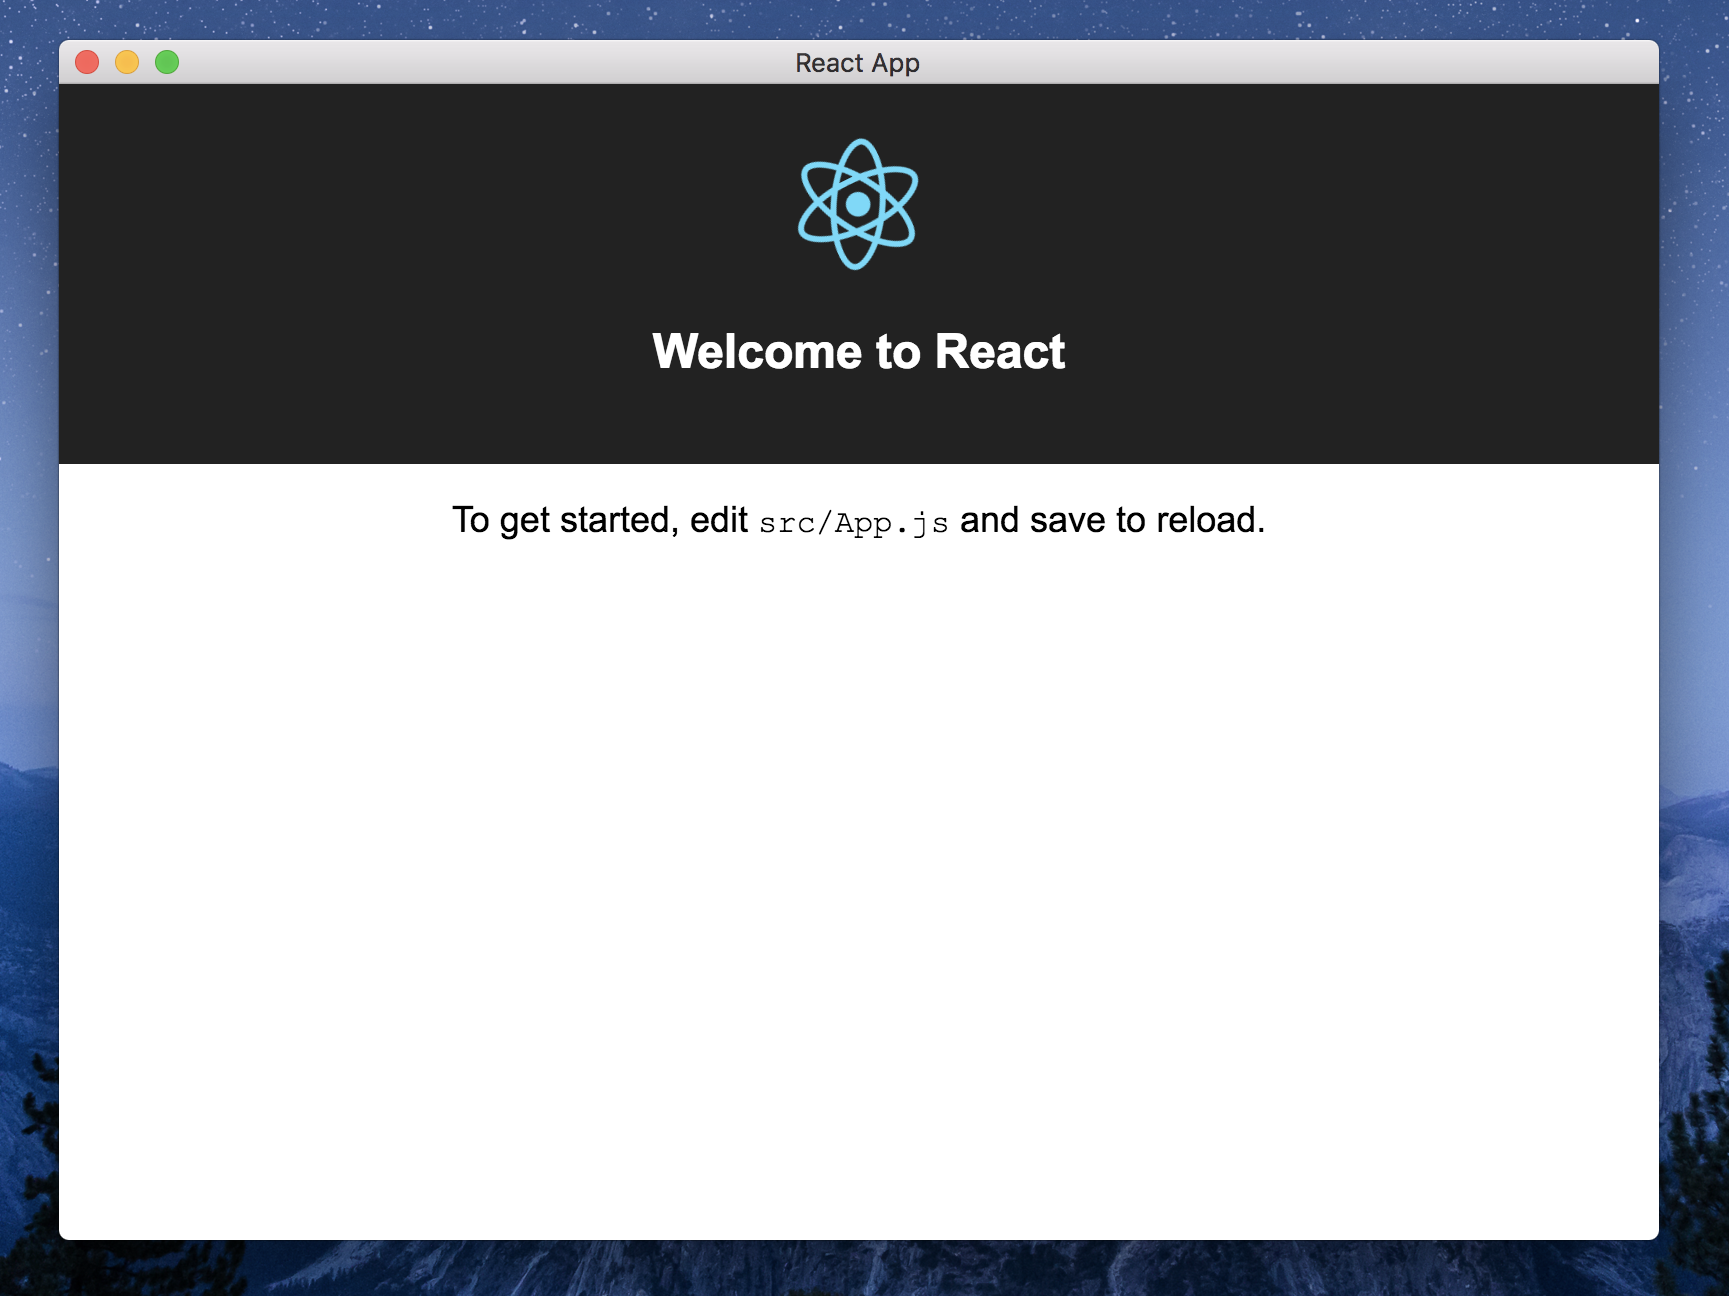
Now that we have seen Electron by itself, let?s throw it into a basic React App. I?m assuming that you already have a firm understanding of React for this tutorial. Go ahead and build a brand new React app running create-react-app in your terminal. Then install Electron in our new app:
npm install –save-dev electron
We?ll have to make a few adjustments to integrate Electron into React. We?ll start by altering our package.json file. We?ll need to include the electron-start script that we had included from our first demo.
{“name”: “electdemo”,”version”: “0.1.0”,”main”: “public/Main.js”,”private”: true,”dependencies”: {“react”: “^16.4.2″,”react-dom”: “^16.4.2″,”react-scripts”: “1.1.5”,”electron”: “^2.0.8″},”scripts”: {“start”: “react-scripts start”,”build”: “react-scripts build”,”test”: “react-scripts test –env=jsdom”,”eject”: “react-scripts eject”,”electron-start”: “electron .”}}
You?ll notice I moved my Main.js into the public folder. That?s just my preference to help organize my files. You can ignore Electron as a dependency in the above code. While you need to have it installed, it will show errors (when you compile later) if you list it as a dependency. You?ll notice the electron-start script is added at the bottom of our Scripts.
Hey, hey, hey?we?re not there yet. Don?t go running npm start in your terminal just yet.
We?ll need to adjust our Main.js file. Because?we no longer want to render an index.html file?that we haven?t created. You can copy and set up your Main.js based on our previous demo. Scroll back up for the code if needed.
Let?s consider what we have going on. In a normal react-app, we run npm run start and that will run on localhost. So similar to our backend server, we?ll need to have that running in the background to load that in Electron. So instead of rendering a static page, we want to render our running instance of our initialized React-App. We?ll do this by removing our win.loadfile() and add:
win.loadURL(‘http://localhost:3000/’)
This tells Electron, ?Hey, go grab my running React App and display that here.? You can do this for any website, even a hosted project you already have. Cool stuff, right?
So we run the following in our terminal with our new setup:
npm run start
& (after your React-App displays in your browser)
npm run electron-start
React will first render in your browser, but then your second command should bring up Electron with your React-App. Mission accomplished.
A brief introduction to exporting our React-App with Electron
This is merely an introduction to exporting our newly created app. There are more in-depth concepts that we need to know to fully integrate React with Electron and get this app ready for production. This is meant to be a bare-bones introduction to a much more complex topic. Hopefully, this will get you excited about the potential of Electron by exporting a functional version of our second demo. Even if all it properly exports is a basic React-App.
Optional: An easy place to start would be setting up our assets folder. To export, we?ll need a .ico (Windows) and .icns (Mac/Linux) file. This is my favorite resource for generating icons. Although you?ll have to find another resource to generate your .icns file for Mac. Some tutorials have you place these in your build, but we?ll have issues if we do that. We?ll update our package.json to reflect where our icons are kept instead. Note: If you really don?t care about icons, you can skip this step. Electron will default their logo in place of custom icons.
Let?s open up our package.json next. Rather than pasting my whole JSON file for you to parse out the differences, I?ll explain what I added one at a time.
“homepage”: “./”
We need to add the homepage to our JSON file, otherwise, even if everything else renders correctly ? Electron has no idea where your CSS/JS files are kept. And it will display a non-desirable white screen. Here?s the challenge though. Putting this in your JSON will create the dreaded red squiggly of doom. You?ll see that the string is not a URI. But three other tutorial repos had JSON files with the same error. Ignore the error, as it will still let you export. You can double-check against my JSON below for context.
Then, we?ll install Electron-Builder. This is where all of the magic happens. Beyond compiling our App, it also has amazing features like Auto-Update to update installed applications for your users. Let?s run this command in our terminal:
npm install electron-builder –save-dev
Potential Error
In addition to installing electron-builder, the latest version might throw the following error: “Error: Unresolved node modules: typescript”
To resolve the error, please run the following command. Installing typescript as a dev dependency should resolve the issue (March 2019).
npm install –save-dev typescript
For compiling, you cannot keep Electron or Electron-Builder in your dependencies. You?ll have them listed in DevDependencies instead, so that way your local app functions normally. You?ll get a long stream of red errors if you leave them in your dependencies. So remove them if you see them listed.
The build portion of our App will look like this:
“build”: {“appId”: “nonExistentID”,”files”: [“build/**/*”,”node_modules/**/*”],”directories”:{“buildResources”: “assets”}
Our AppId is nonexistent, but it will let you export this with a warning. We?re also telling our build the required files, and redirecting it to our assets folder to find those icons (if you elected to include them). If you didn?t use your own icons, including this code won?t produce an error ? although it?s a waste of code if you don?t have any icons in an assets folder. I recommend removing the directories if you don?t have custom icons you want to include.
In our Scripts, we?ll need to add a few more:
“preelectron-pack”: “npm run build”,”electron-pack”: “build -c.extraMetadata.main=build/Main.js”
Preelectron-pack runs a build every time you compile your App for distribution. If you don?t include this preelectron-pack, you will get errors and you won?t be able to export. Including this is probably for the best. We almost always want to include our updated build in something we?re exporting ? or else there wouldn?t be a point to exporting at all. If you prefer yarn, it will work just the same in the above code.
In the electron-pack, you?ll see tutorials out there that will mention -em instead of -c.extraMedatada. You have to use the code above, or else you?ll run into errors. Or at least that?s my understanding of it. These both come from our electron-builder that we installed earlier.
Once we have our JSON set up, we will move over to our Main.js, where we?ll make our final changes. Require path at the top of our Application.
const path = require(‘path’)
And then we?ll be changing our loadURL path:
win.loadURL(`file://${path.join(__dirname, ‘../build/index.html’)}`)
Nothing crazy. We?re just updating the location of where we plan on loading React in distribution.
We?re at the final step on this grand voyage. Actually exporting our App! Simply run the following:
npm run electron-pack
Your terminal will be busy for a few minutes. It will list out multiple warnings, like your AppID isn?t valid, and that we don?t list an author or description. Which for this tutorial isn?t important. Although you?ll want to learn how to set up a proper configuration at some point.
Once complete, your App will have an installer file in the dist folder. Which you can find at the root of your App. Before installing or running your App, make sure that you close out of your React-App if it is still running on localhost. If for some reason you didn?t update your Main.js, or terminate your localhost ? you?d be fooled into thinking it was a success. We want to make sure this App runs on its own and doesn?t point to localhost.
Click install and open your App. You should see something similar to me:
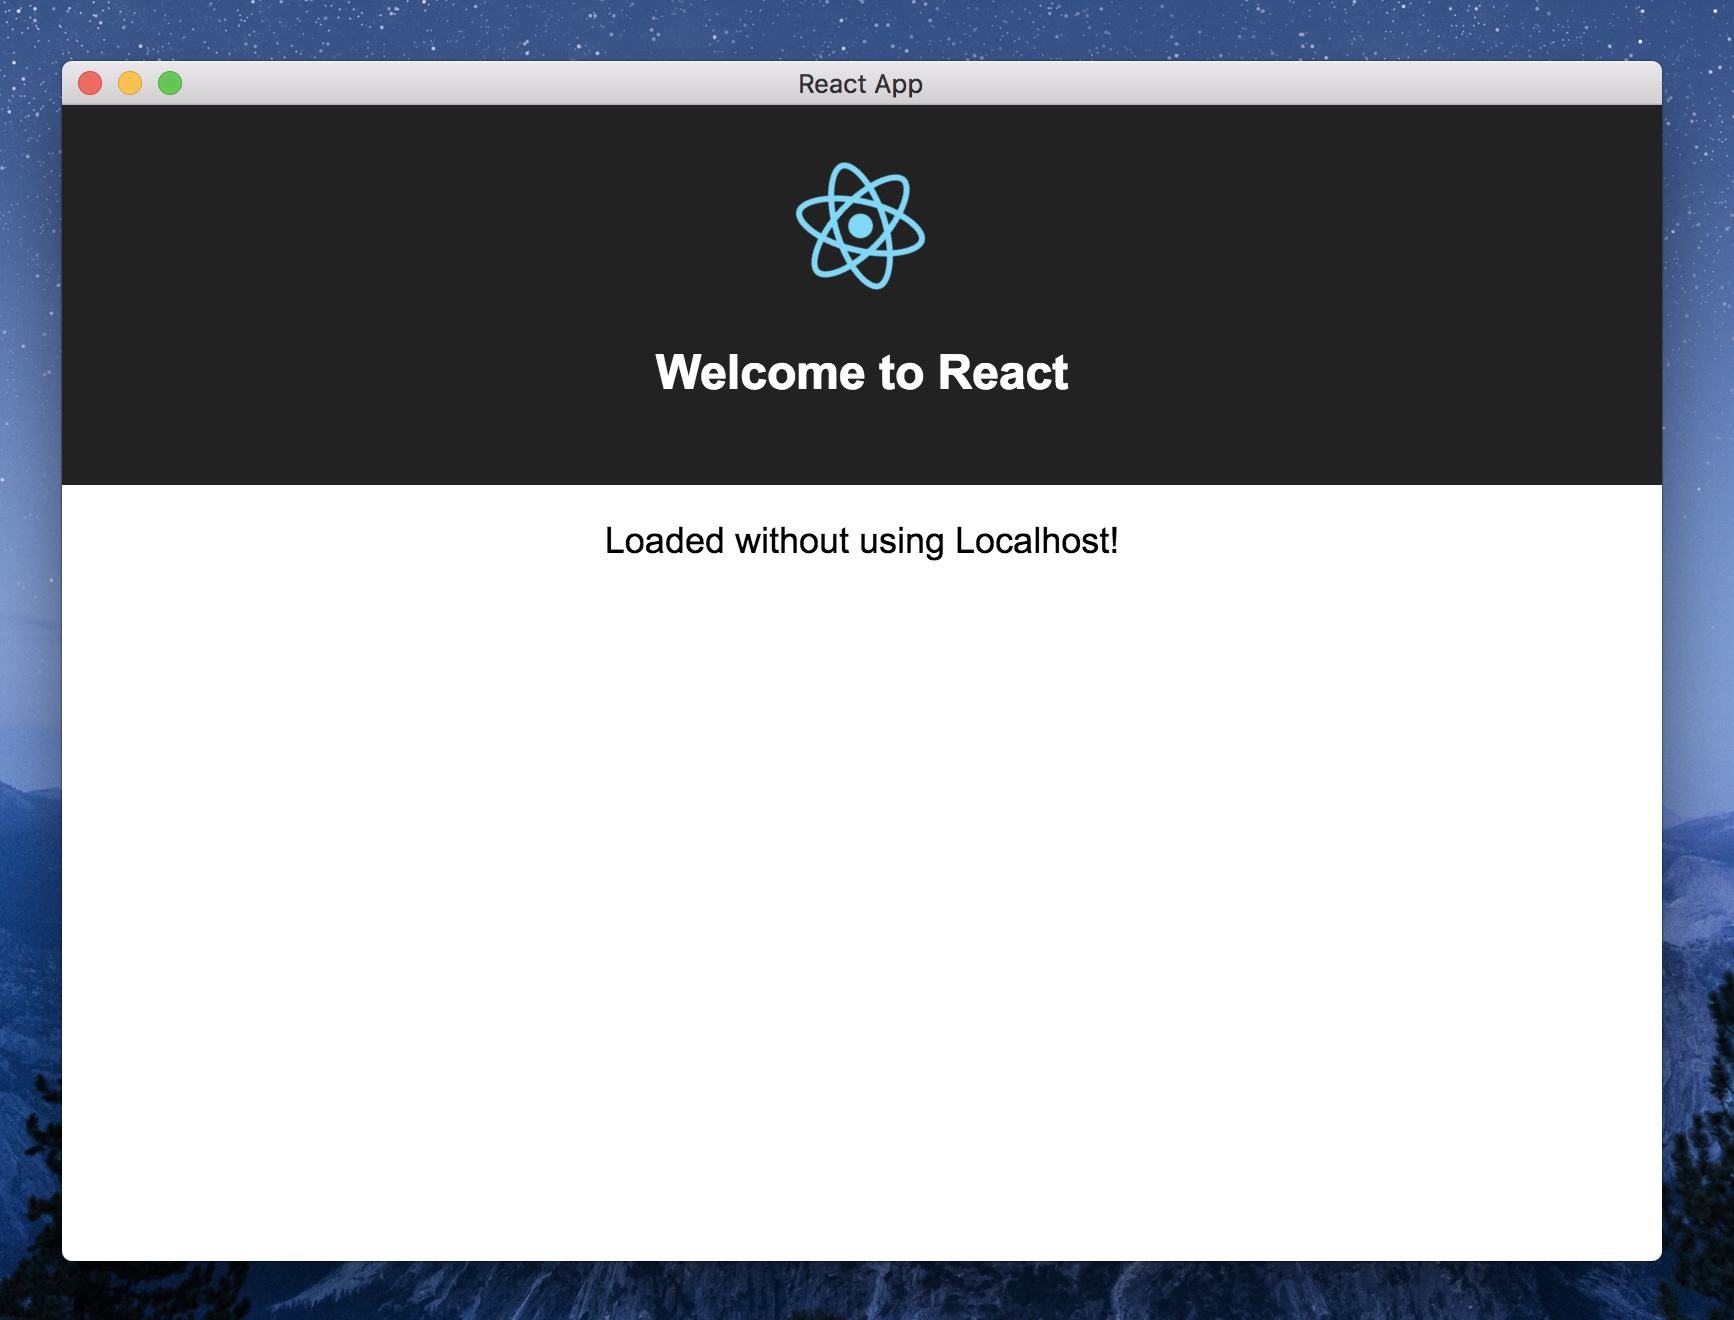 I changed the text to demonstrate that this is different from our previous demo.
This is running without our localhost! We did it! ?
You?ll notice it exported an installer for your given operating system. Mac users only received Mac installers (and the same for Windows, Linux). The process for building for multiple platforms gets more complicated. I?ll show you the quick answer for Mac users who want to create the .exe counterpart.
We?ll update your electron-pack:
“electron-pack”: “build –win –macos -c.extraMetadata.main=build/Main.js”
All I added was ? ? win? and ? ? macos?. Other JSON files will have dist scripts that will look similar. You?ll also find:
“win”: { “target”: “nsis” }
But I?ve found that I don?t have to declare ?win? in order to get a functioning .exe file. I?m sure that moving this towards production, or beyond an intro tutorial, you?ll need to add these to your build. A production-ready JSON file, and more information on code signing can be found on Nick Parson?s article.
My final JSON file for you to compare with:
{“name”: “electdemo”,”version”: “0.1.0”,”main”: “public/Main.js”,”homepage”: “./”,”private”: true,”dependencies”: {“react”: “^16.4.2″,”react-dom”: “^16.4.2″,”react-scripts”: “1.1.5”},”scripts”: {“start”: “react-scripts start”,”build”: “react-scripts build”,”test”: “react-scripts test –env=jsdom”,”eject”: “react-scripts eject”,”electron-start”: “electron .”,”preelectron-pack”: “npm run build”,”electron-pack”: “build –win –macos -c.extraMetadata.main=build/Main.js”},”build”: {“files”: [“build/**/*”,”node_modules/**/*”],”directories”:{“buildResources”: “assets”}}}
So you?ve done it! You?ve converted a React-App into an exported installer for Windows + Mac. Now you?re ready to delve into the Electron + Electron Builder docs to take the next step. ?
Huge thanks to these people who know a lot more about this than I do:
Kitze | Tzahi Vidas
