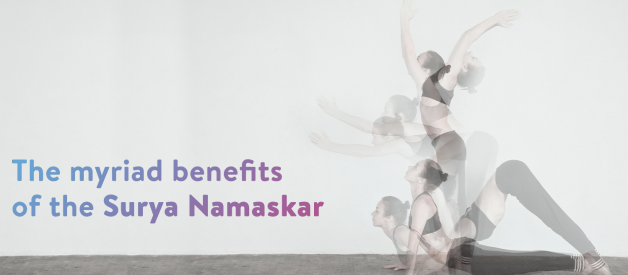
In Hindu mythology, the sun god, Surya, is worshipped as a symbol of health and immortal life. The Rig Veda declares that ?Surya is the Soul, both of the moving and unmoving beings?. Surya Namaskar or Sun Salutation is a sequence of powerful yoga poses that originated as a series of prostrations to the sun. Traditionally, it is performed at dawn, facing the rising sun. Each of the twelve positions has its own mantra and each celebrates an aspect of the sun?s divinity.
There are many variations of Surya Namaskaras each with its own belief and benefits. The Sivananda style of Surya Namaskara is a popular variation that consists of a graceful sequence of twelve positions performed as one continuous exercise.
Each position counteracts the one before, stretching the body in a different way and alternately expanding and contracting the chest to regulate the breathing. Practised daily, it brings great flexibility to the spine and joints and keeps the waist trim. It limbers up the whole body in preparation for the asanas (postures) practice.
On this international yoga day, here is our step-by-step guide to the Sivananda Surya Namaskara and benefits that you get with each pose of the sequence. Please pay attention to the breathing cue mentioned with each and every pose.
One round of Sun Salutation consists of two sequences, the first performed on the right side and the second on the left.
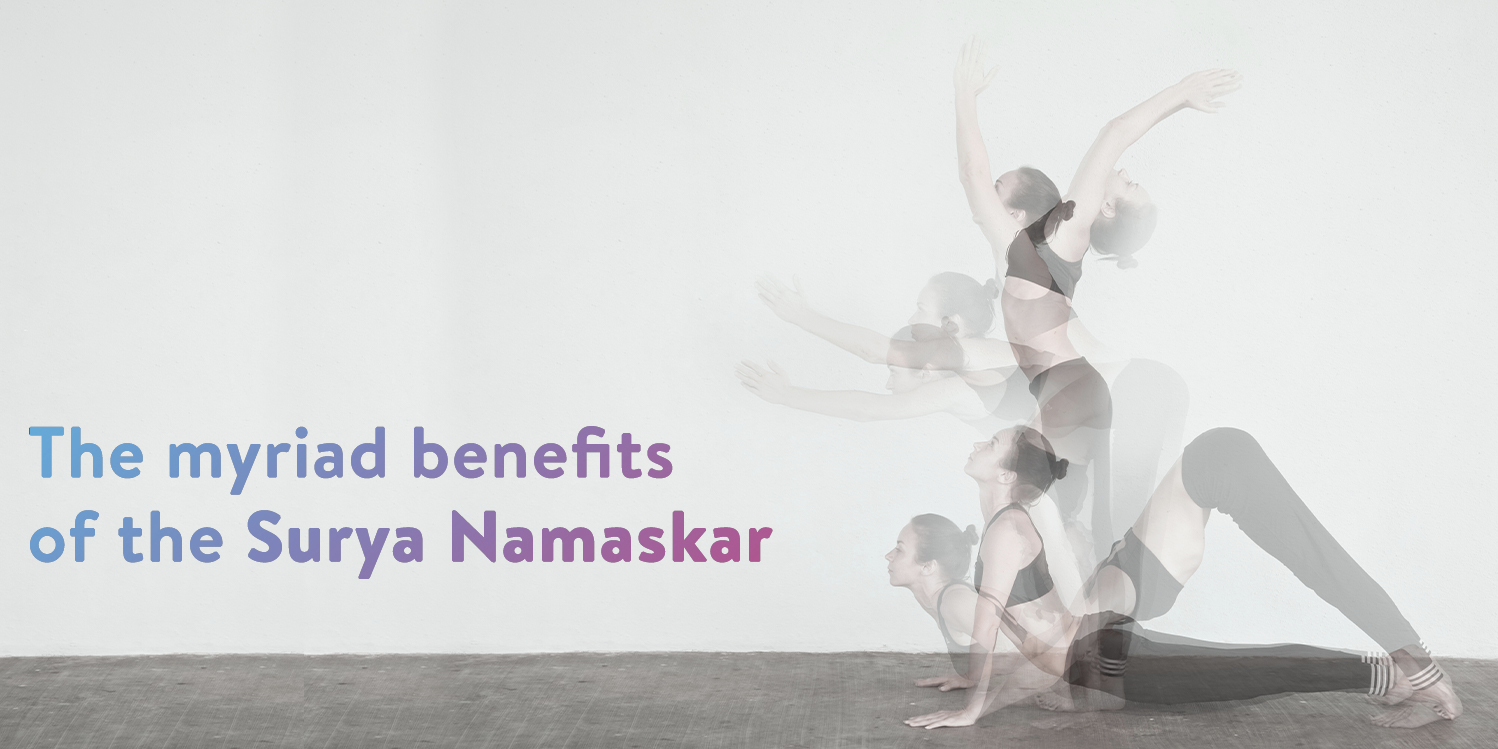
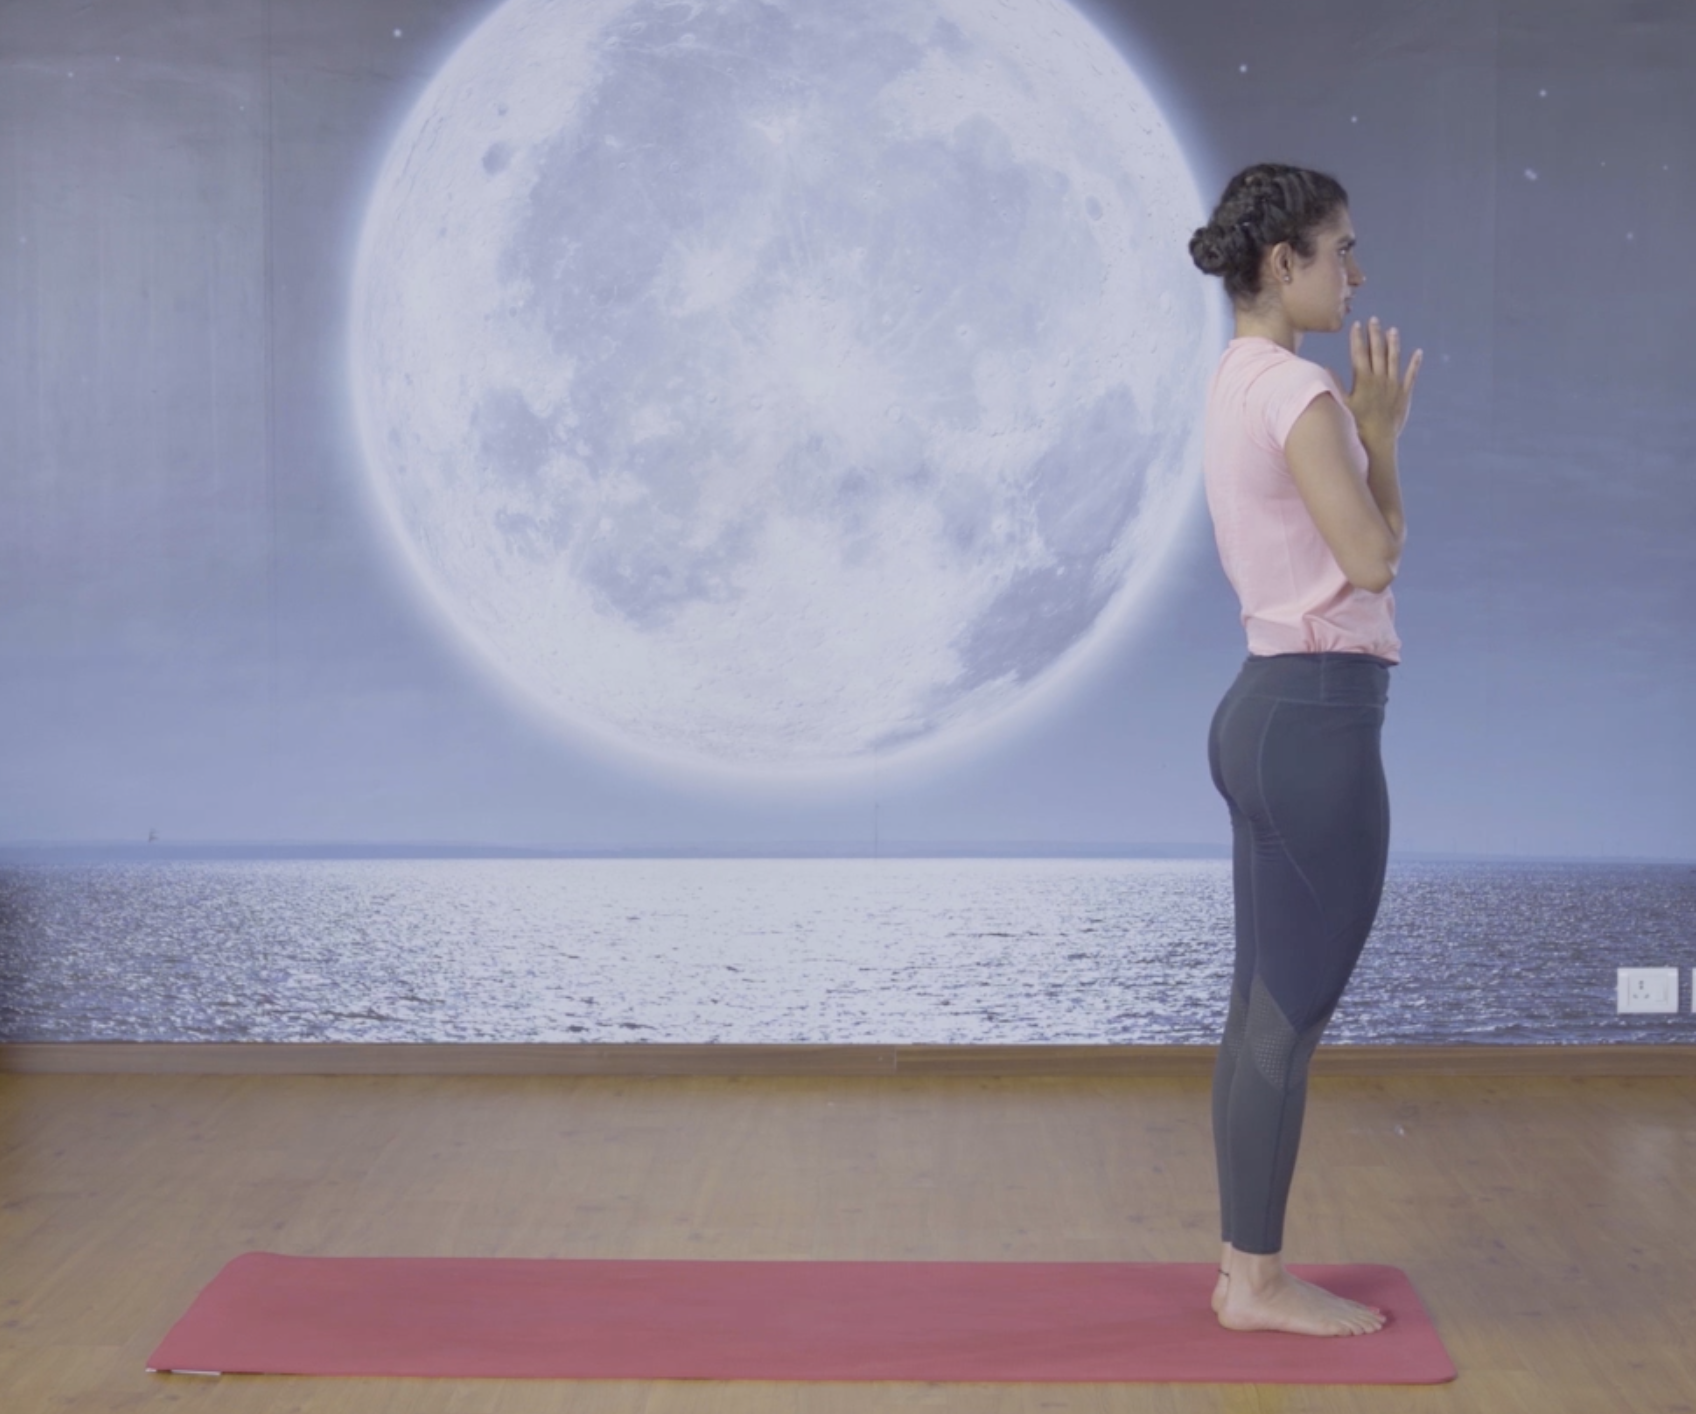
STEP 1: Pranamasa, The Centring Pose/ Prayer Pose
Stand erect with feet together and hands in prayer position in front of your chest. Make sure your weight is evenly distributed
Exhale
Benefit: The centring pose is a focus building and meditative yoga pose of Surya namaskar. It helps to relieve mental stress and anxiety
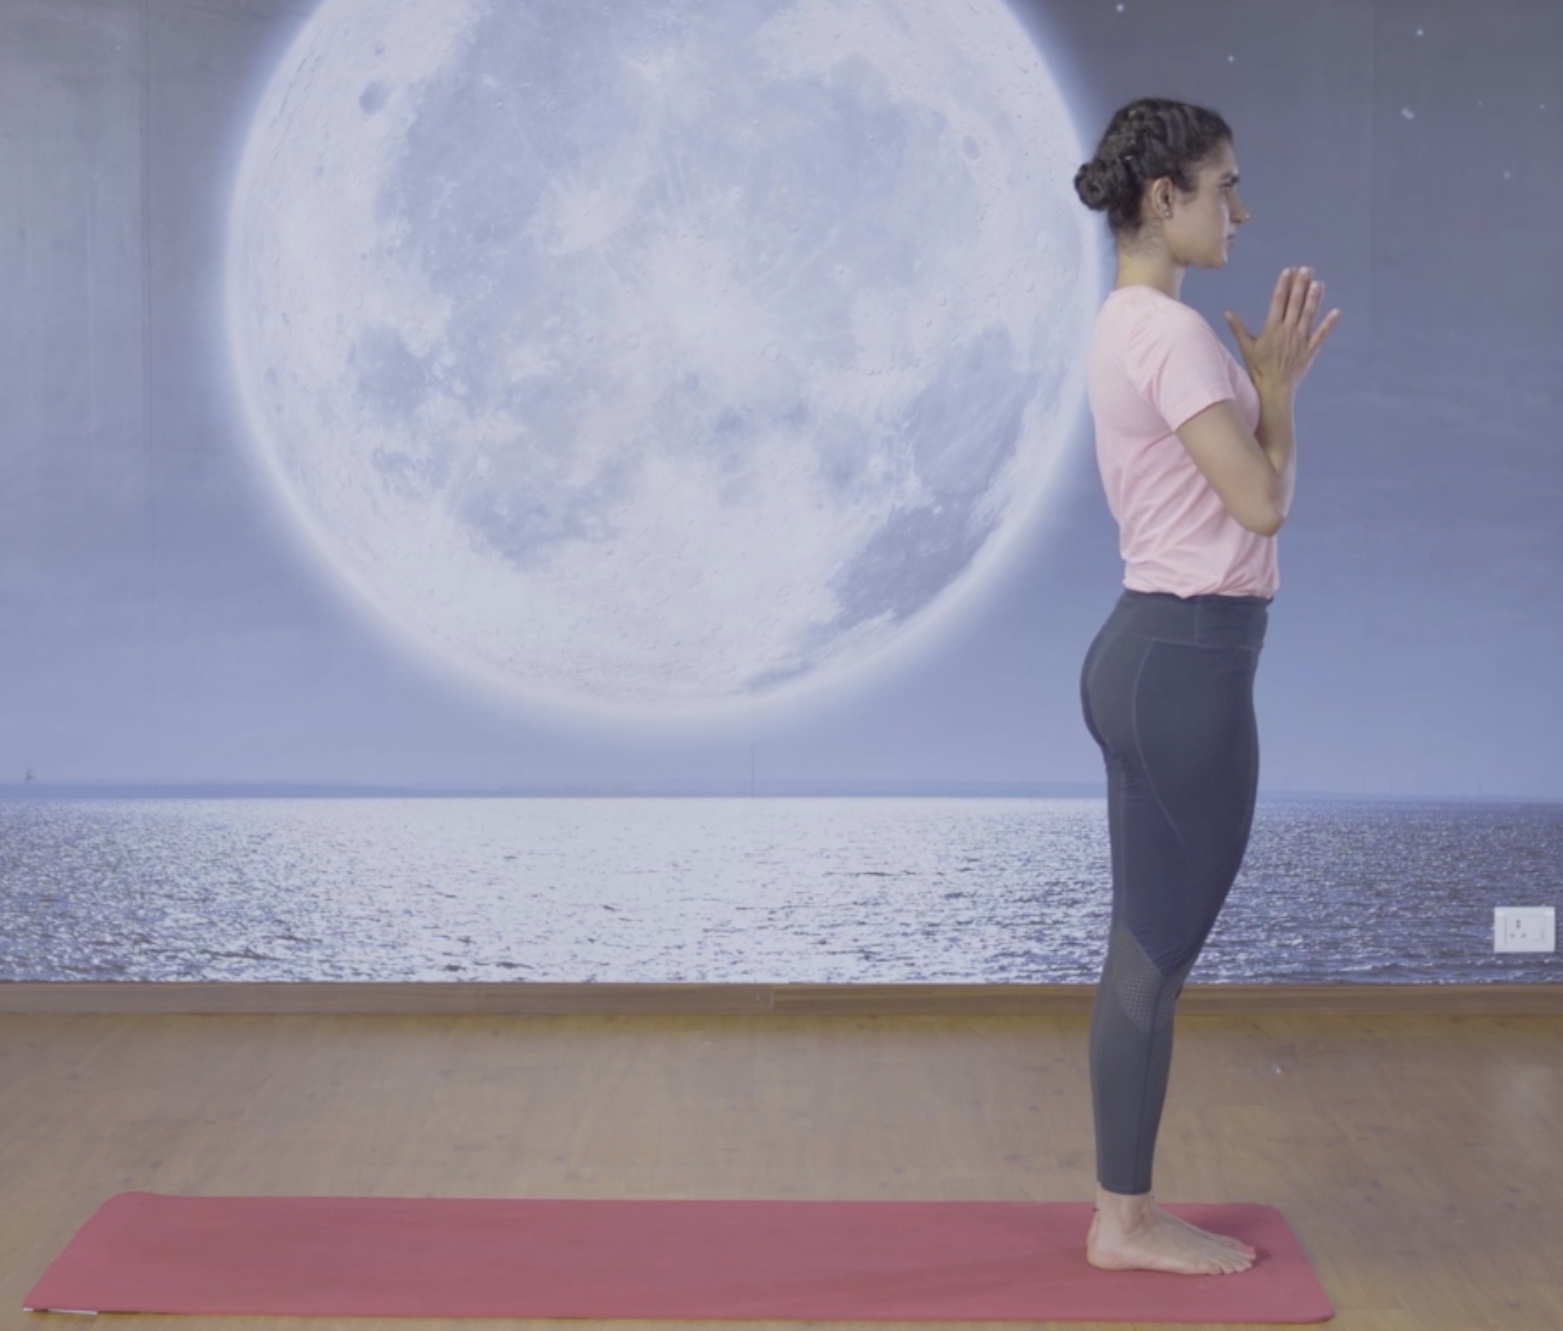
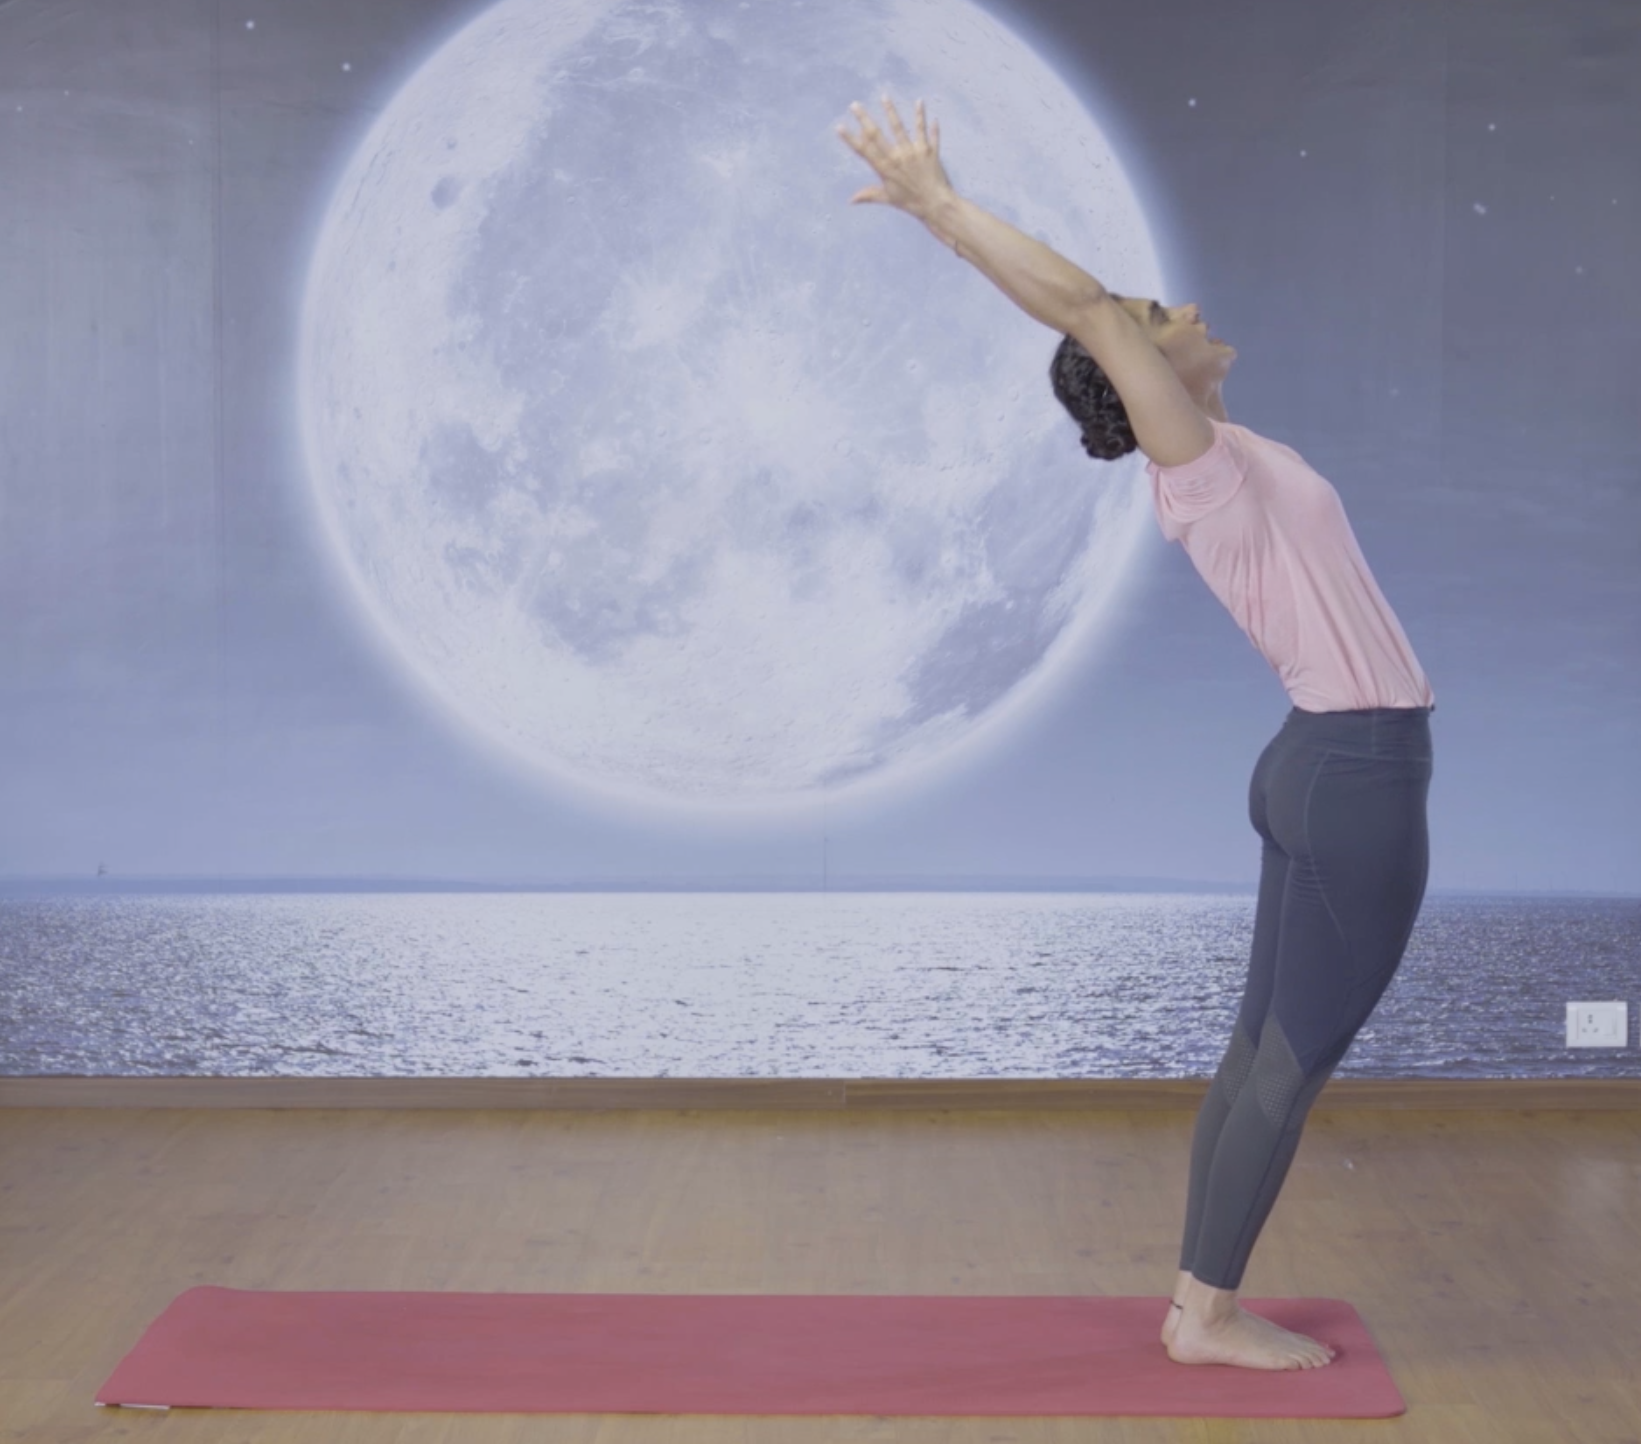
STEP 2: Hasta Utthasana, The Raised Arms Pose
Inhale as you stretch your arms up and arch back from the waist, pushing the hips out, legs straight. Relax your neck
Benefit: This benefits those who suffer from asthma. It helps reducing backache, fatigue and mild anxiety. This pose also improves digestion
STEP 3: Pada Hastasana, Standing Forward Bend Pose
Exhaling, fold forward, and press your palms down, fingertips in line with toes ? bend your knees if necessary
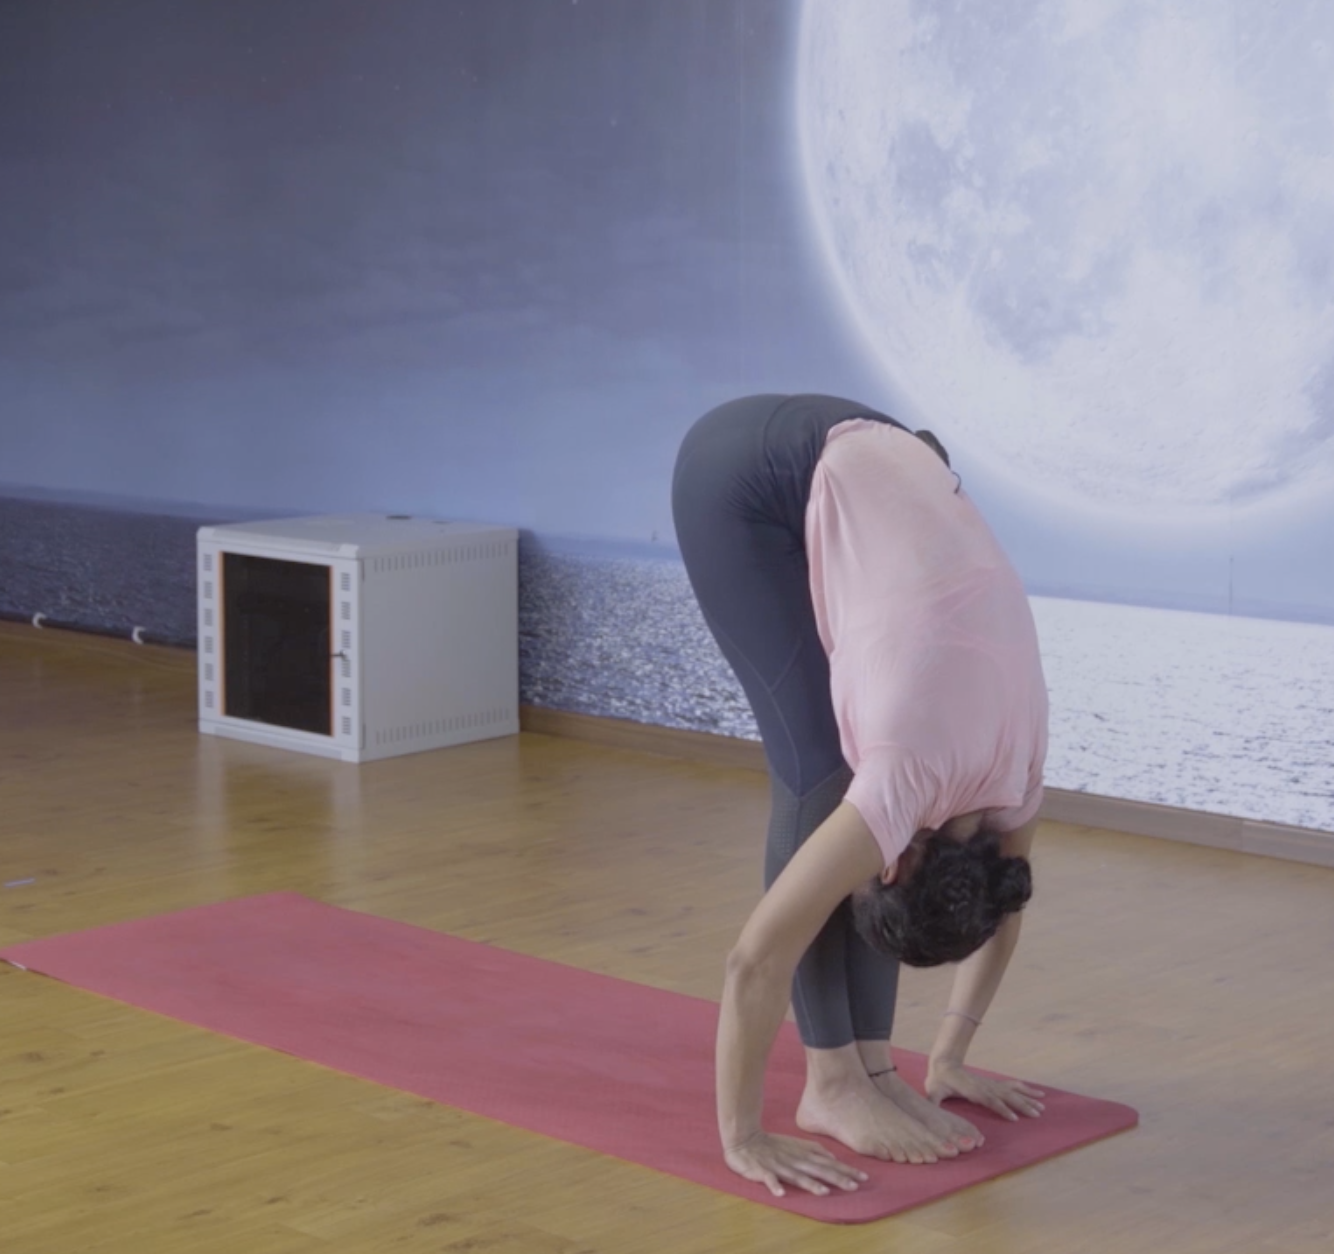
Benefit: This helps relief from conditions such as insomnia and osteoporosis. This step of Surya namaskar relieves anxiety, stress and headache. It strengthens thighs and knees and opens up the hips, hamstrings and calves
Step 4: Ashwa Sanchalanasana, The Lunge Pose
Inhaling, bring the left (or right) leg back and place the knee on the floor. Arch back and look up, lifting your chin
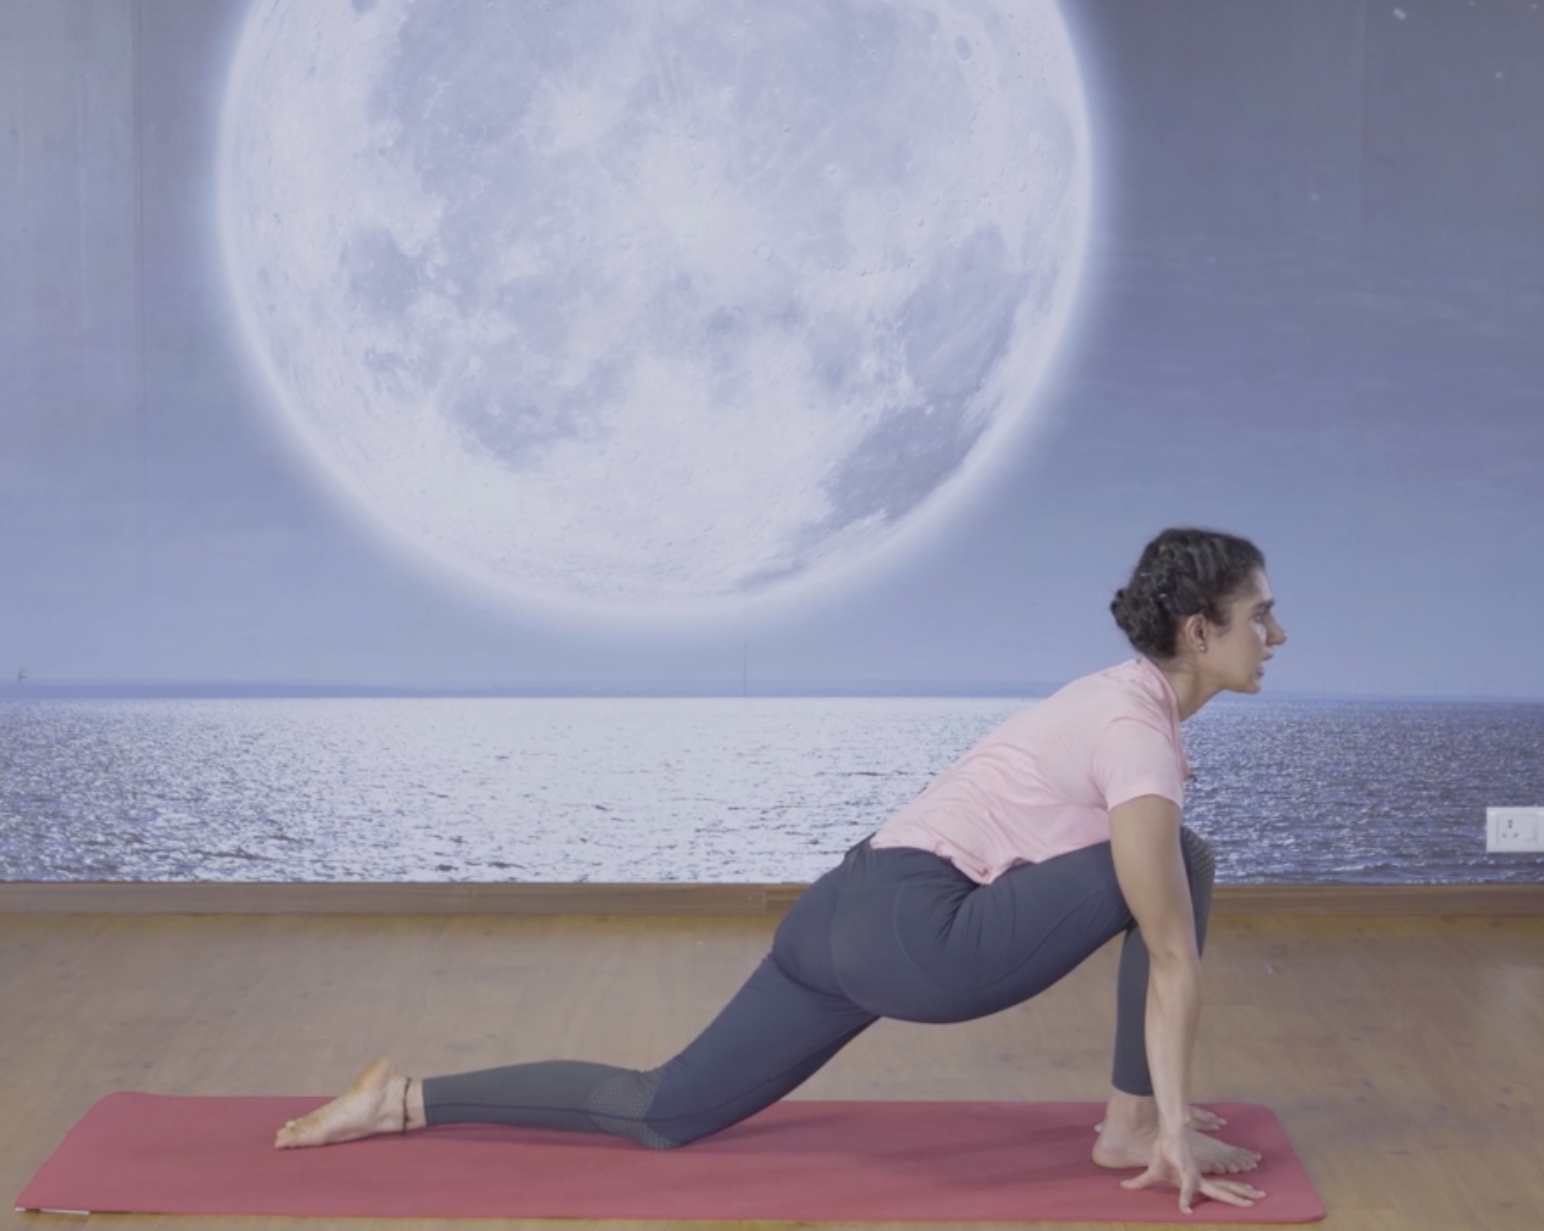
Benefit: This pose is believed to increase one?s will power. It also strengthens the spine and increases lung capacity
Step 5: Dandasana, The Plank Pose
Retaining the breath, bring the other leg back and support your weight on hands and toes
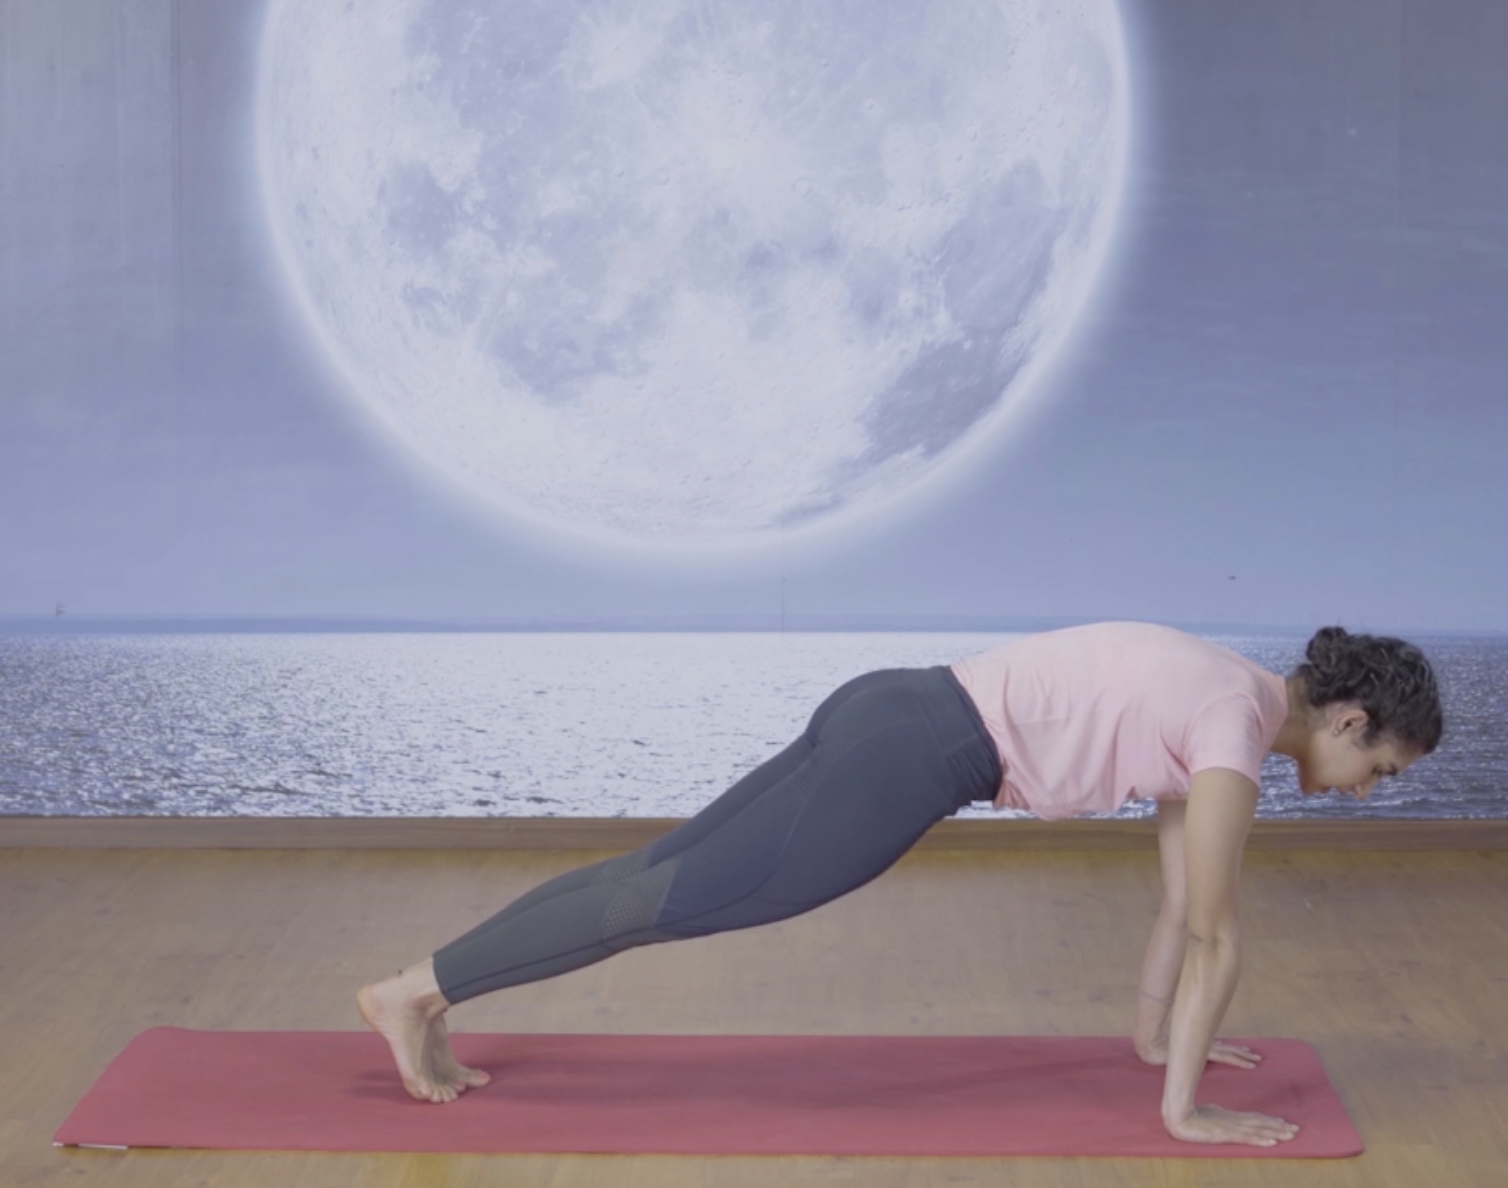
Benefit: This tones the abdomen and makes the arms, shoulders and wrists stronger
Step 6: Ashtanga Namaskara, The Eight Limbed Pose
Exhaling, lower your knees first, then your chest and then your forehead. Keep your hips up and your toes curled under
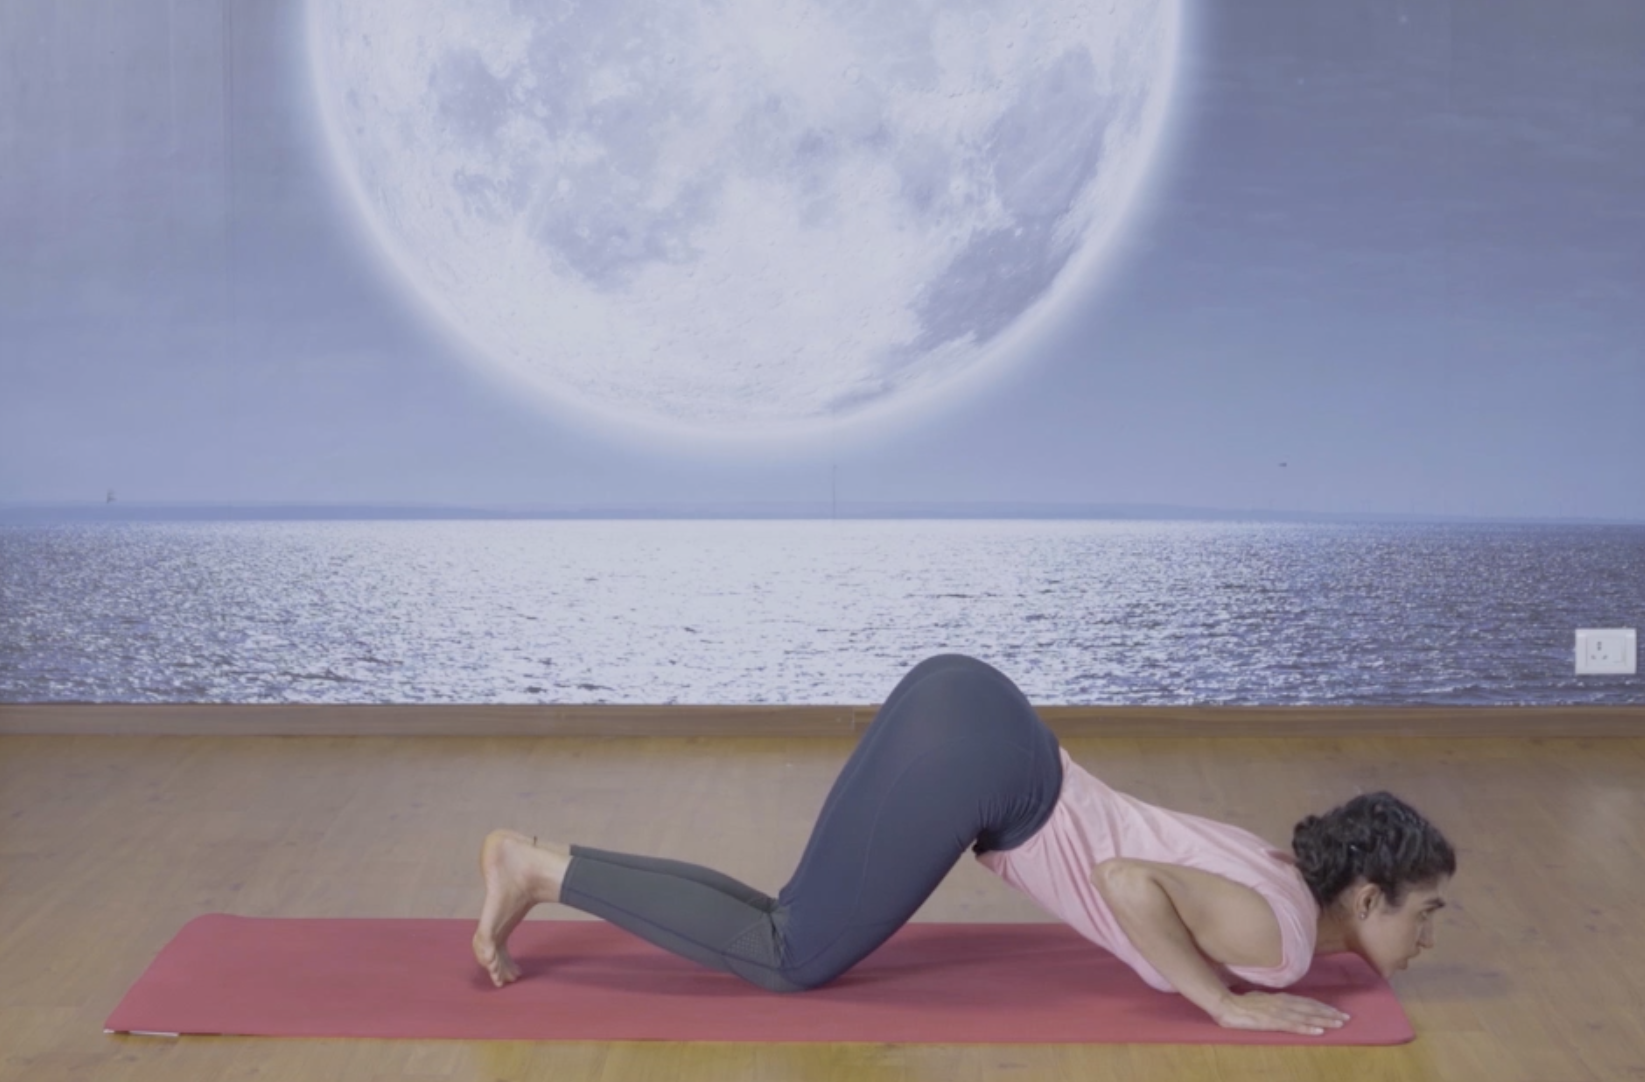
Benefit: This pose tones and strengthens the arms, shoulders and legs. This also releases tension around the neck and the shoulder area. It also improves the spine?s flexibility.
Step 7: Bhujangasana, The Cobra Pose
Inhaling, lower your hips, point your toes and bend the back. Keep the legs together and shoulders down. Look upwards
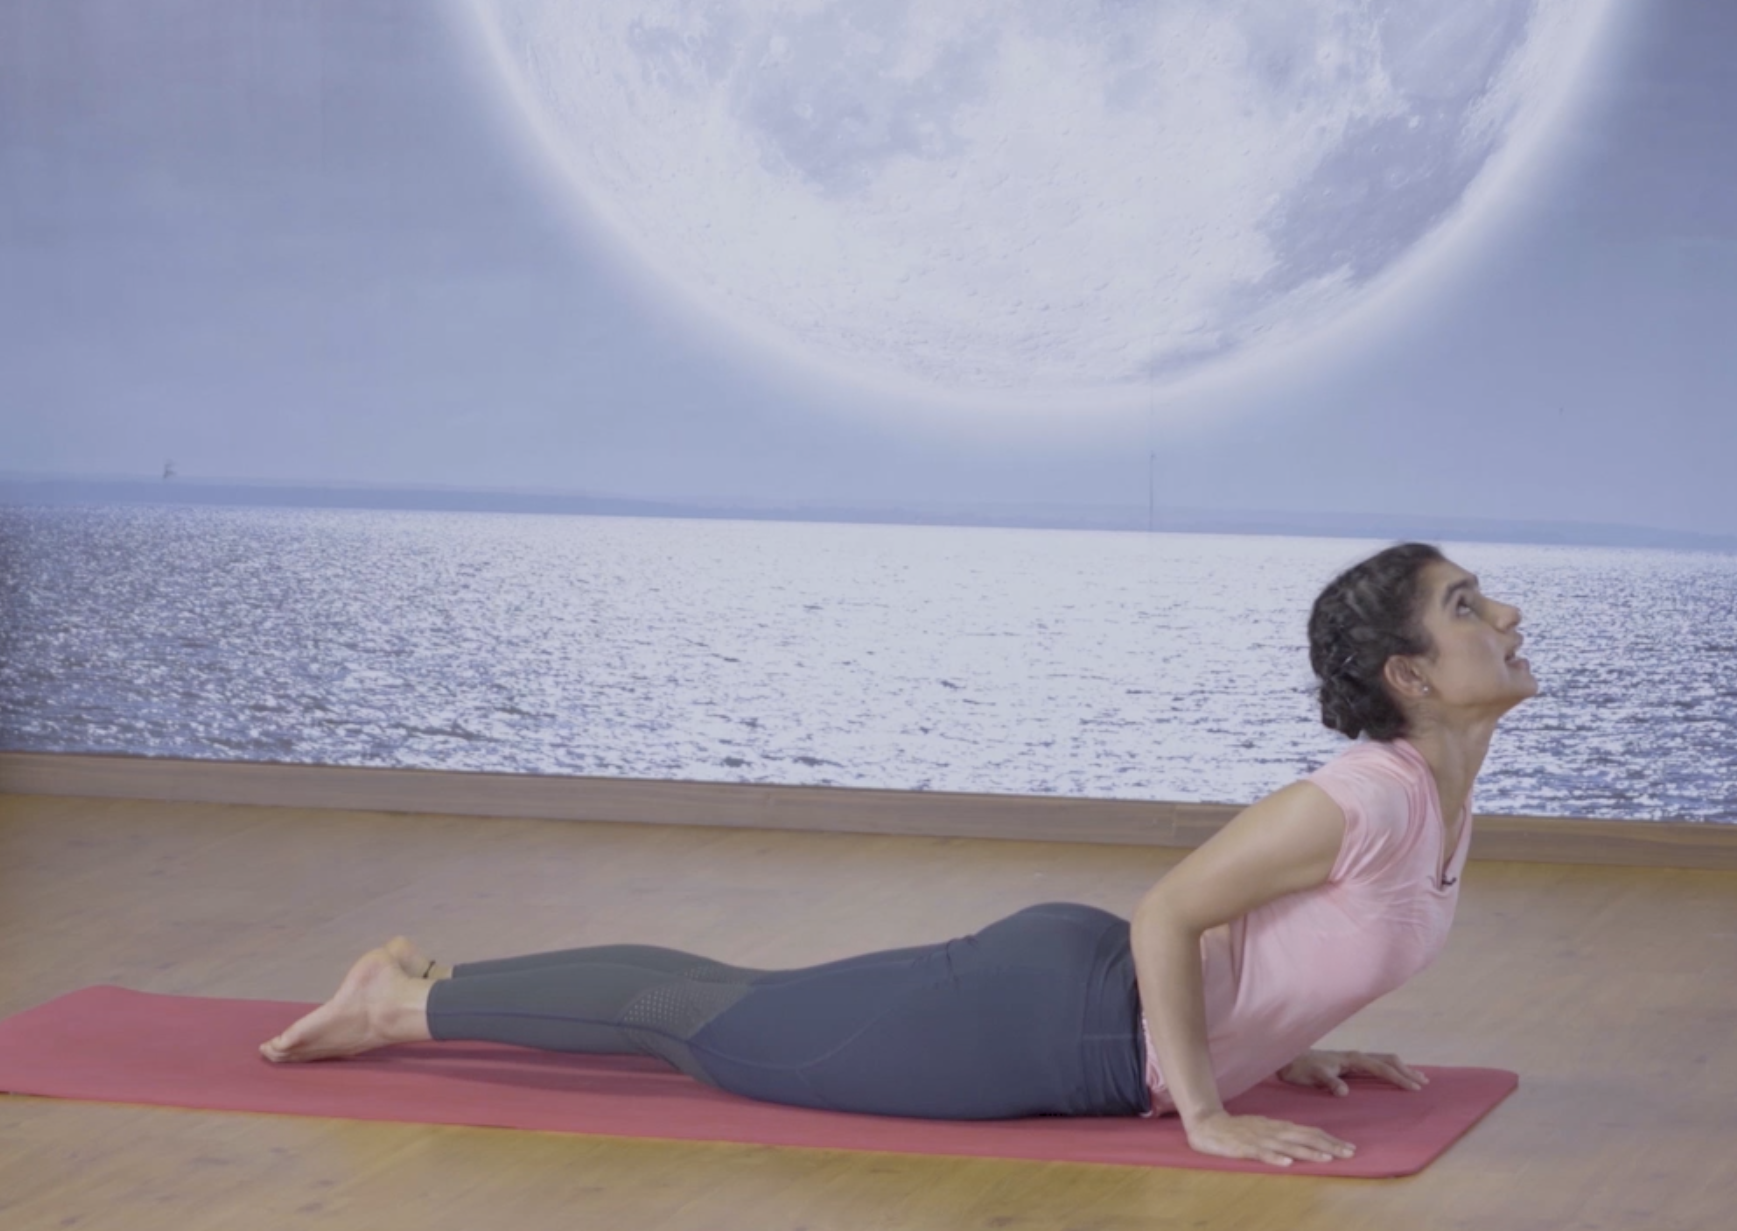
Benefit: It tones abdominal muscles and improves blood circulation. It helps relieve menstrual pains and also reduces backache and sciatica
Step 8: Adhomukha Svanasana, The Downward Facing Dog Pose
Exhaling, curl your toes under, raise your hips and pivot into an inverted ?V? shape. Try to push your heels and head down and keep your shoulders back.
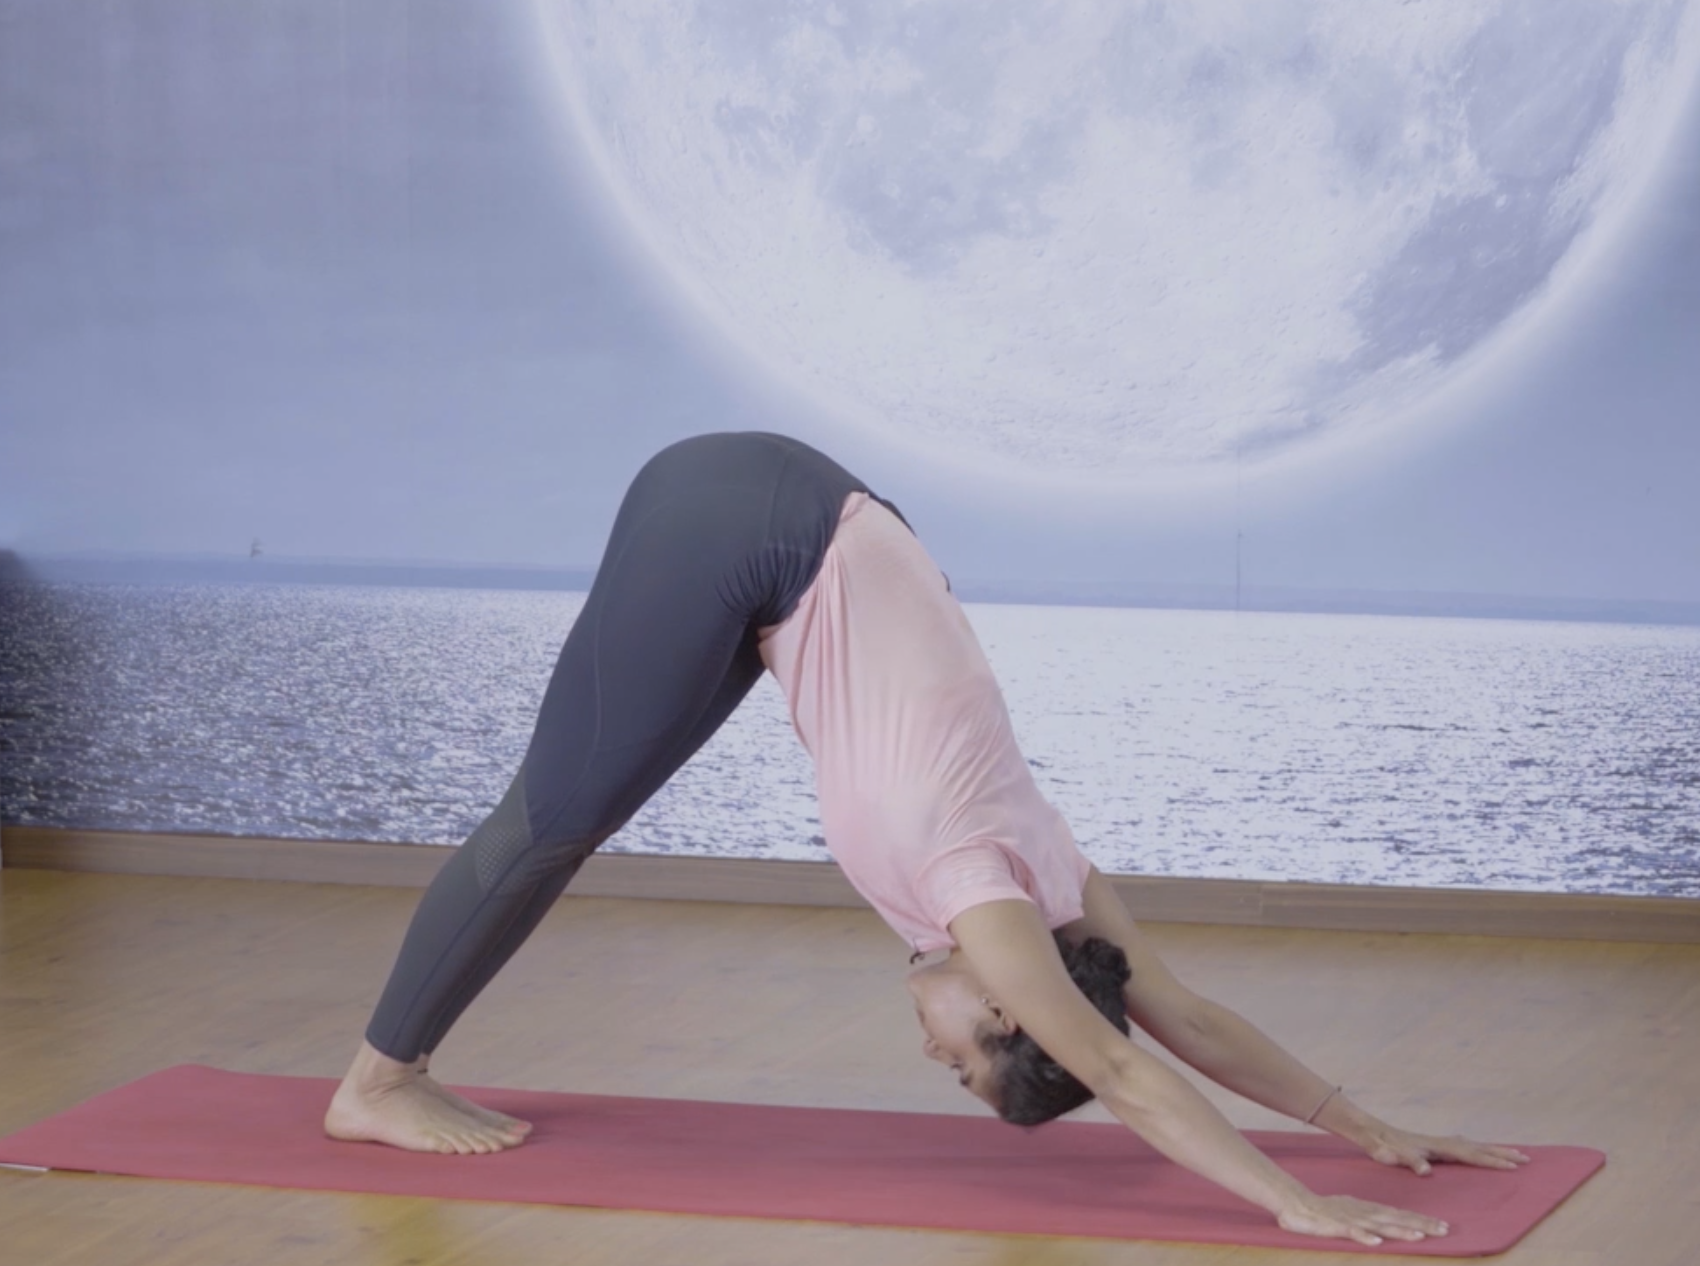
Benefit: This step has incredible health benefits. It improves blood circulation, calms the nerves and relieves stress. For women, It helps relieve symptoms of menopause, back pain and headaches
Step 9:Ashwa Sanchalanasana, The Lunge Pose
Inhaling, step forward and place the left (or right) foot between your hands. Rest the other knee on the floor and look up, as in step 4.
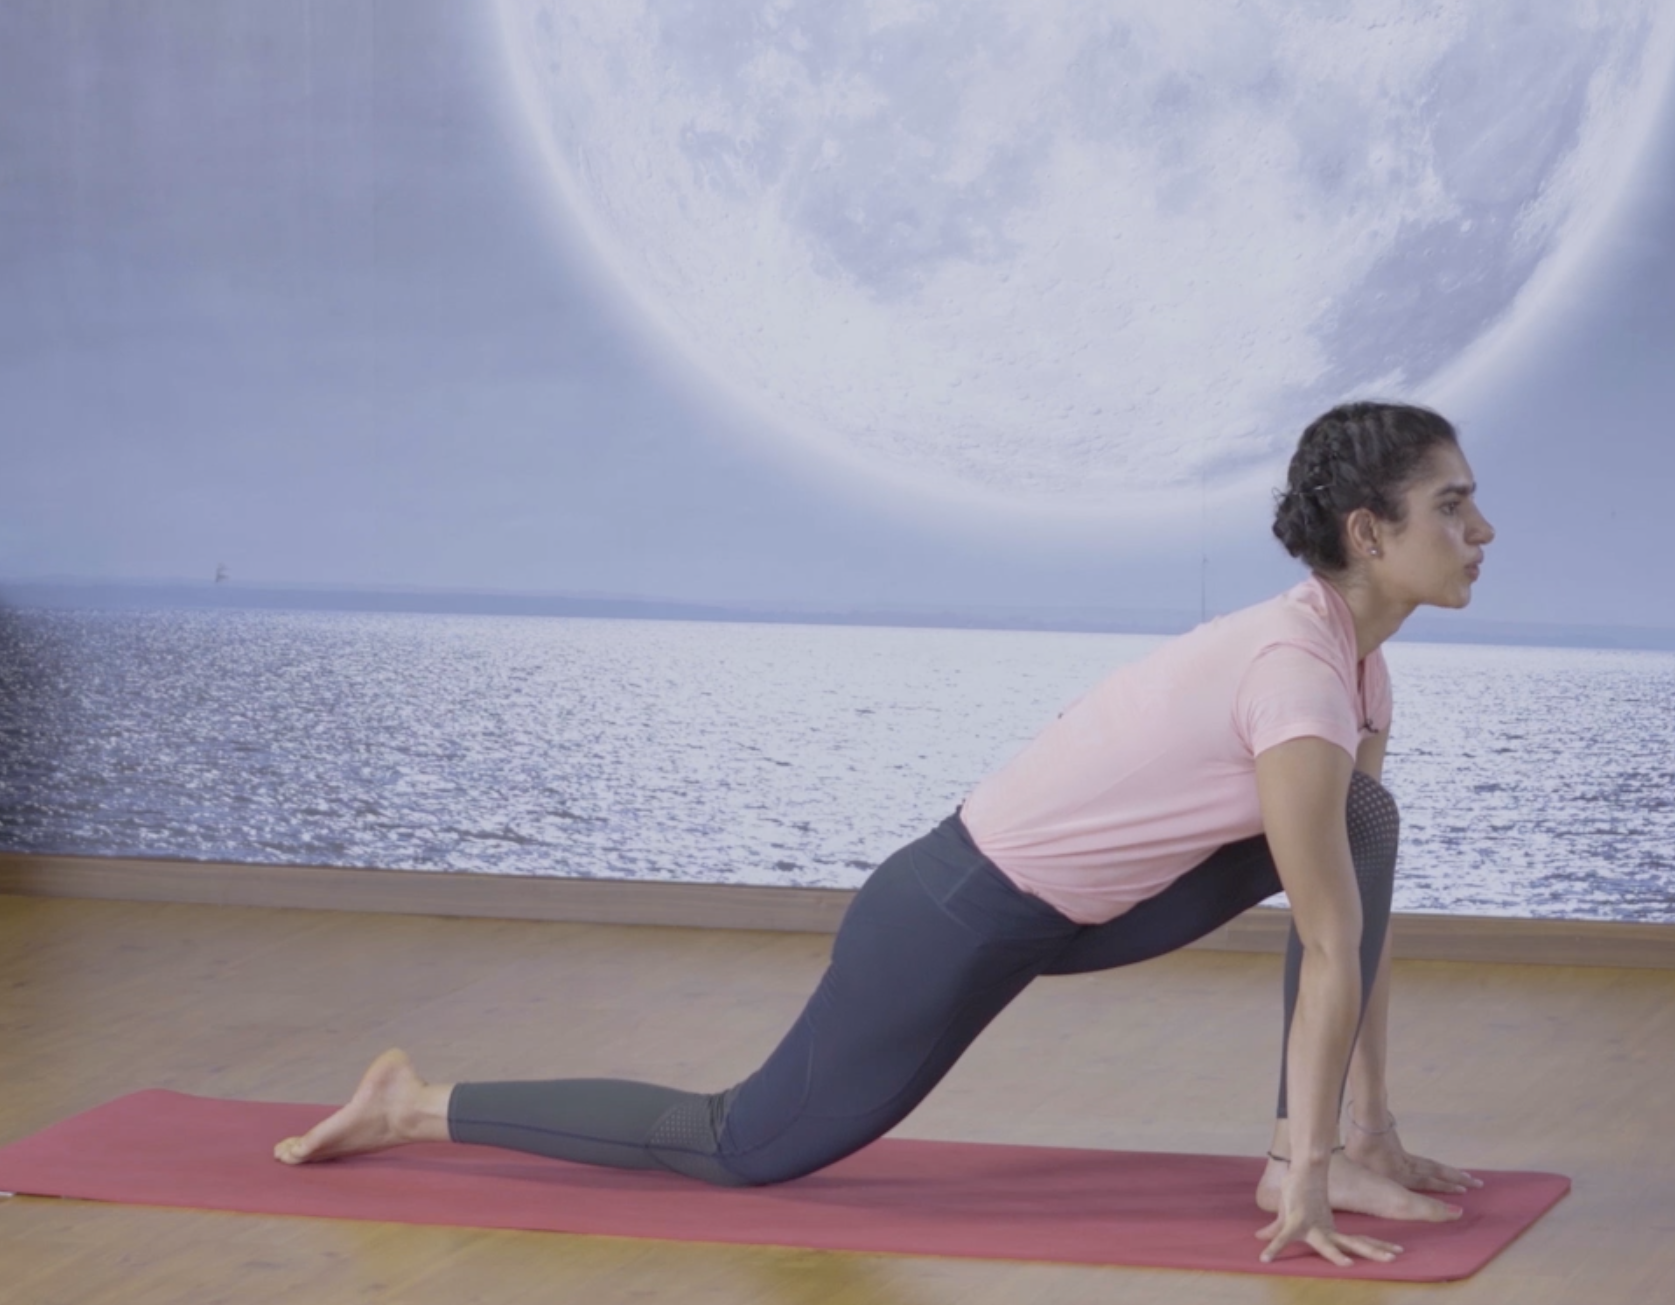
Benefit: Same as step 4
Step 10: Pada Hastasana, Standing Forward Bend Pose
Exhaling, bring the other leg forward and bend down from the waist, keeping your palms as in step 3.
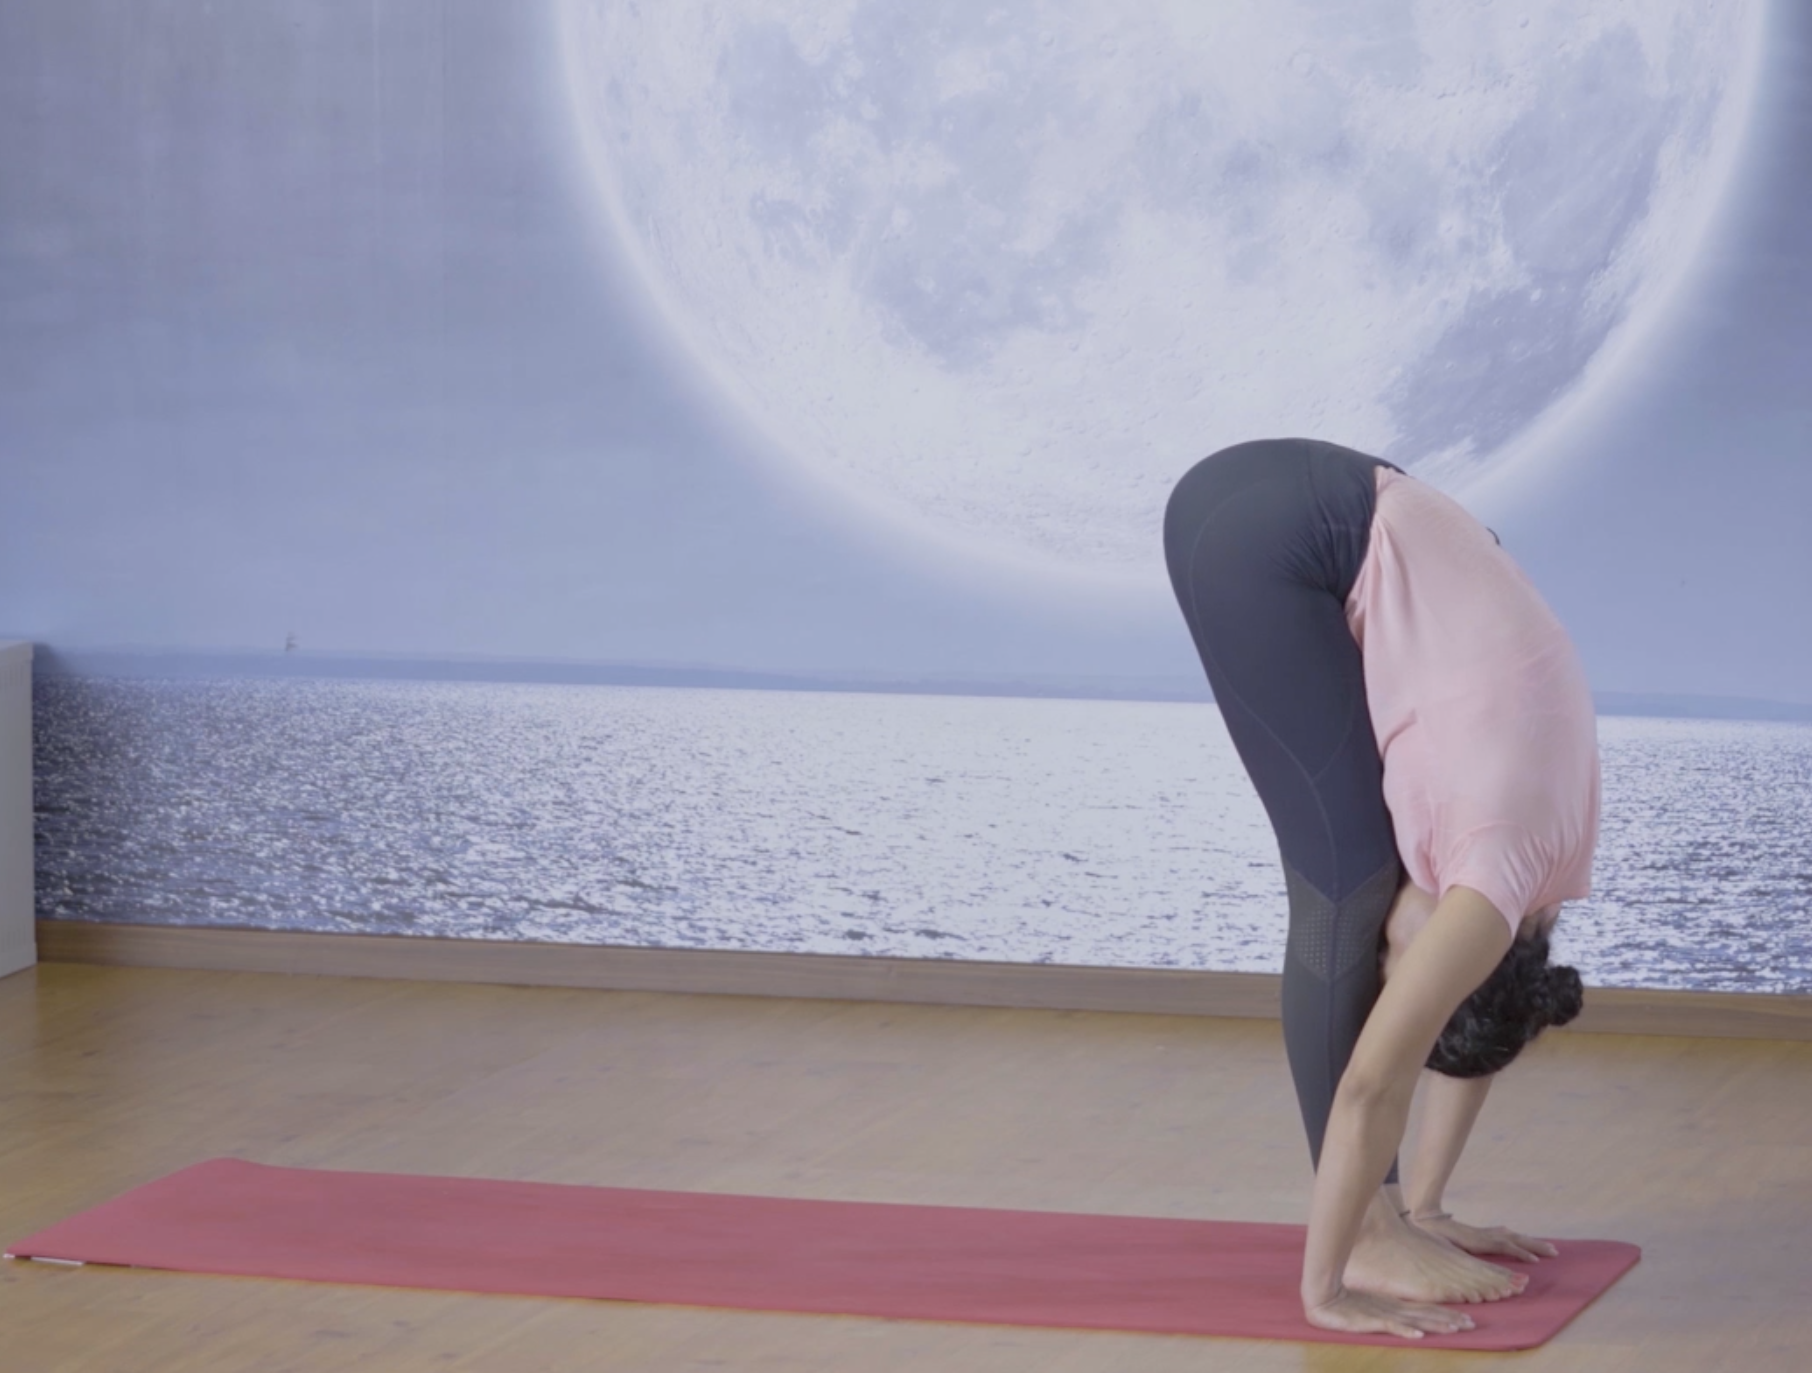
Benefit: Same as step 3
Step 11: Hasta Utthasana, The Raised Arms Pose
Inhaling, stretch your arms forward, then up and back over your head and bend back slowly from the waist, as in step 2
Benefit: Same as step 2
Step 12: Pranamasa, The Centring Pose/ Prayer Pose
Exhaling, gently come back to an upright position and bring your palms together in a namaste position. You can then bring your arms down by your sides
Benefit: Same as step 1
There can be any number of variations to these postures, but the basic structure and sequence is always maintained. In case you are new to this practice, start with four rounds and gradually build up to twelve rounds.
To perfect the Surya Namaskara, please take a look at the list below and avoid these common errors:
Not following the breathing cues: Following the correct breathing sequence is very important and can not be emphasised enough. It allows you to gain the maximum benefit of doing that asana
Skipping one position: Surya Namaskara is a sequence of varied positions and skipping any of the positions would break the cycle of breathing and the movements
Dropping the back low or keeping it too elevated during the Dandasana, the plank position: Make sure that your body forms a straight line
Extending the knee too ahead during Ashwa Sanchalanasana, the thumb rule is that the knee should not cross where your toes are
Not performing light warm-up exercises before Surya Namaskara: This may lead to injuries and hence, it is always recommended that you warm up with some light stretches before the sequence
Escalating the number of sets too quick: It is recommended that you go slow in the beginning and perfect the poses first before increasing the number of sets
