I have recently been asked to work on an iOS project with some friends. However, one of the friends in question do not own a mac, and some method for development on Windows was necessary. He was having some issues finding reliable information online, and to be honest, I had some of the same issues. A large amount of information was outdated or simply plain incorrect.
I figured out how to get it working properly, through a combination of searching and looking up tutorials and I will list the concise method that worked for me right here.
Download:
First of all, you need to download the ISO of Yosemite and VirtualBox.
The Yosemite ISO is here, as well as a mirror:
http://hackintosh.zone/downloads/download/810-nireshs-yosemite-with-amd-intel/https://drive.google.com/file/d/0B4br0Q4rkURlcjNlaGlMQVJteGM/view?usp=sharing
Next, download VirtualBox from Oracle?s website.
https://www.virtualbox.org/wiki/Downloads
Setting it up
Now, install VirtualBox and open up the application. You will see a screen as such.

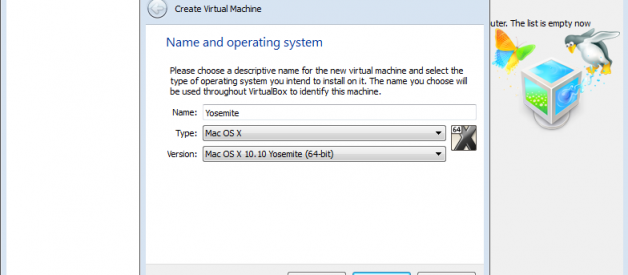
Next, click the ?New? button in the top left, and configure a new virtual machine as a 64-bit Mac OS.
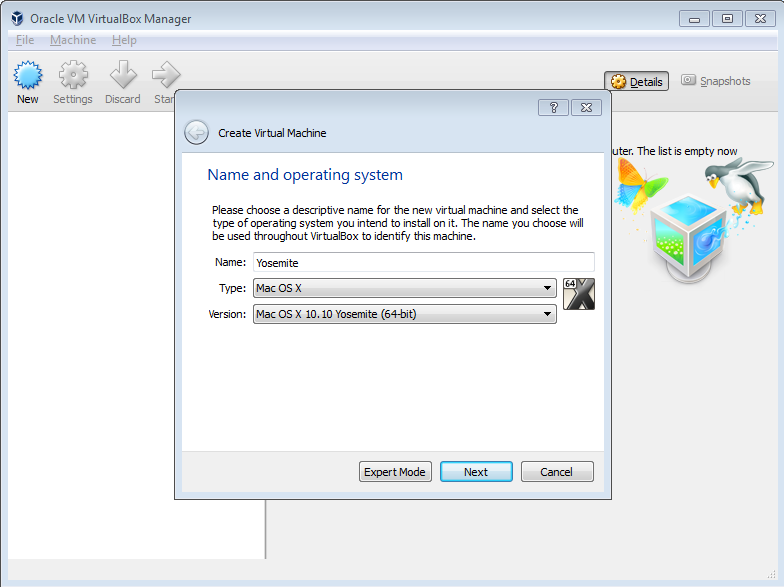
Pick Create VDI and dynamic scaling. For RAM and HD space, I picked 2G and 40G respectively, but it really doesn?t matter too much. Then finish creating the VM.
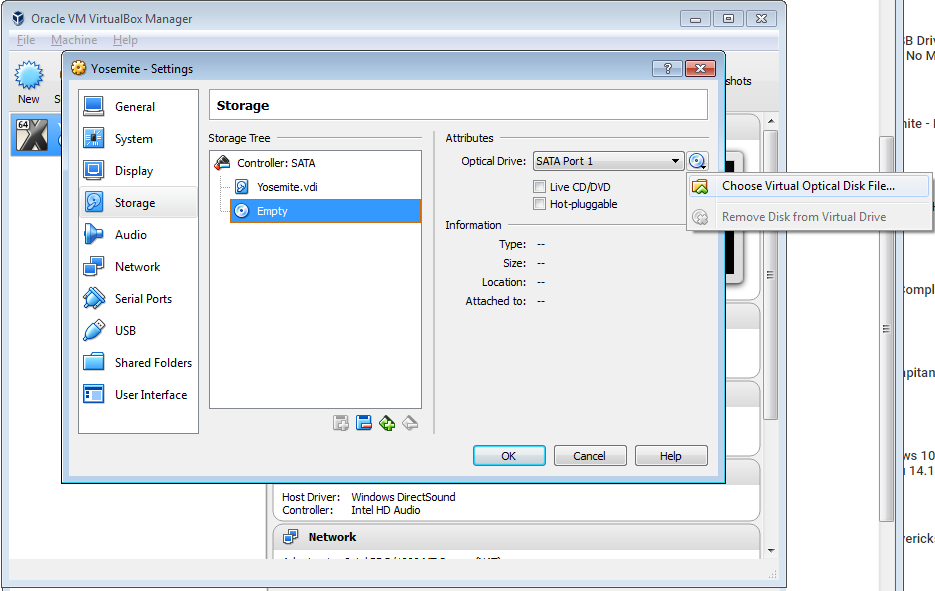
Now, go into the settings for your new machine and select options as follows:
- In ?System?, turn off the checkbox for ?enable EFI?
- In ?Display?, turn up the slider for video memory to max
- In ?Storage?, select and mount your ISO file onto the disc
- In ?USB?, make sure USB is enabled
The next step is to trick VirtualBox so it thinks we have a valid CPU for the Mac OS. Close VirtualBox before proceeding.
First of all, we want to find the correct location of VirtualBox on our computer. By default it is under C:\Program FilesOracleVirtualBox

Open up the command prompt by going to Windows->Run->cmd
Then inside the command prompt, type: ?cd <directory of virtualbox>?. This will allow you to access the VirtualBox configuration files.

Now input the command (replacing <Your VM Name> with the name you selected earlier):
VBoxManage modifyvm <Your VM Name> –cpuidset 00000001 000306a9 00020800 80000201 178bfbff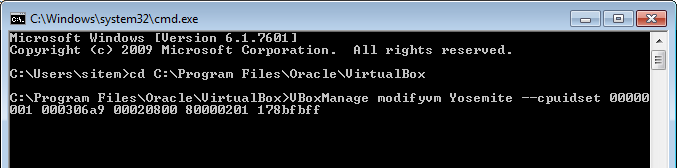
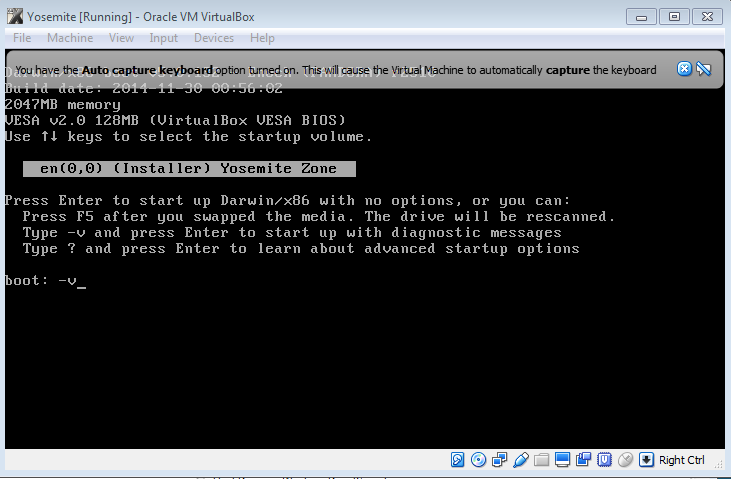
Now, start up VirtualBox and start up the VM you created. Once you reach the set-up screen, enter option -v and wait for it to finish.
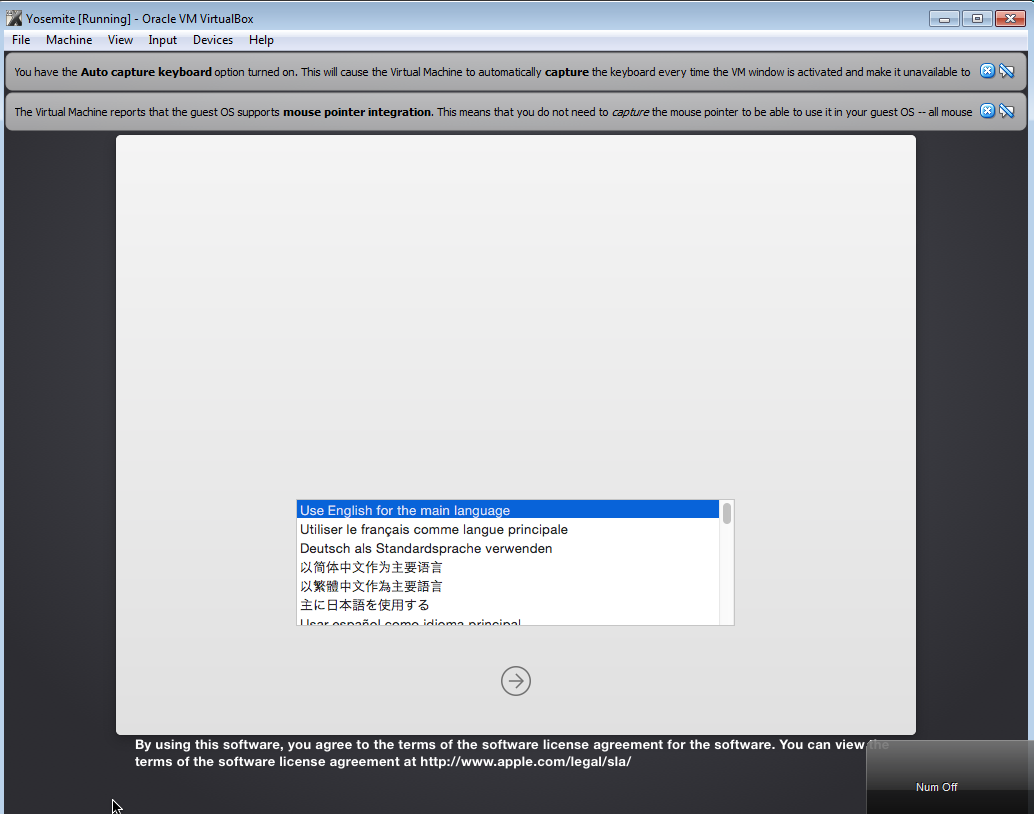
Once it is ready, set up the VM with whatever settings you desire.
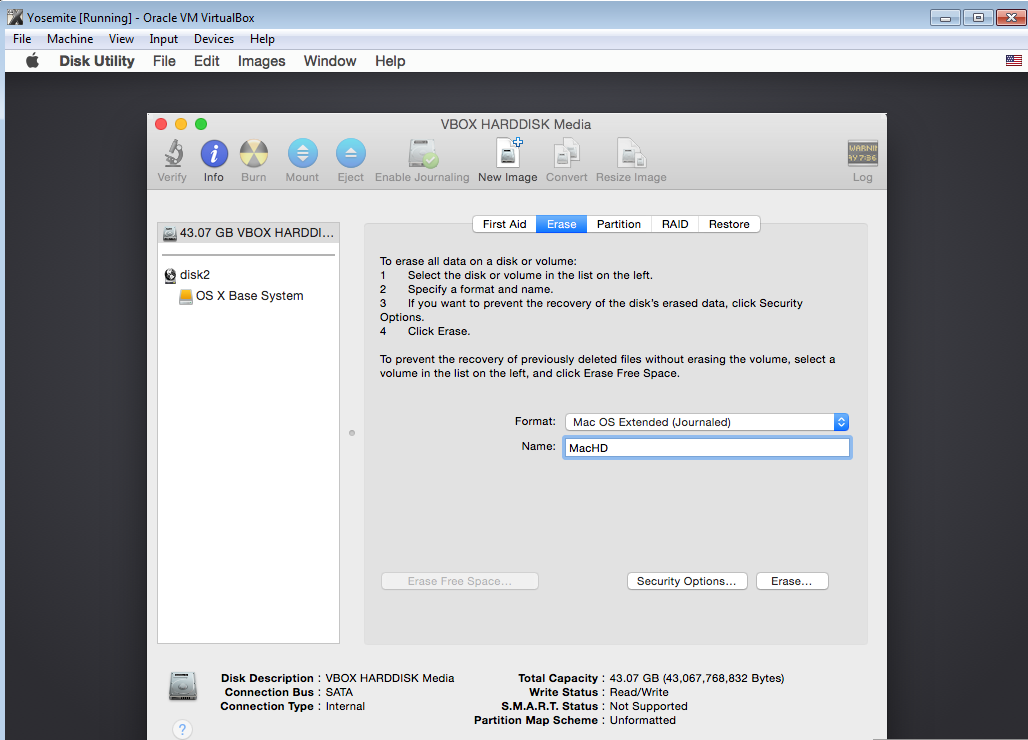
After you set it up, on the disc select page, go to disc utility.
Then select your 40GB partition, select the erase option, create any name you?d like, make sure the format is Mac OS Journaled and proceed with erasing the partition.
Once this step is done, you should be able to close the Disc Utility and begin the Mac OS installation onto your new partition. This will take ~15 minutes.
At about ~2 minutes. The installation will freeze. You can look at the little hard drive on the bottom of VirtualBox to see if the installation has frozen (if it?s not flashing the download is done).
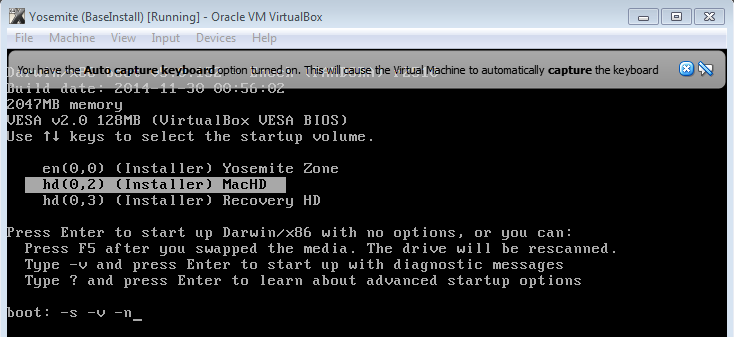
At this point, go to the options and reset the Virtual Machine.
Now, on this boot up, you should have some additional selections. Start your hard drive with options ?-s -v -n?.
Now wait for the installation to continue. They suggest some things we want to do, but there are additional steps we need to do.
Enter these commands:
/sbin/fsck -fy/sbin/mount -uw /cd /.OSInstallSandboxPath/Scripts/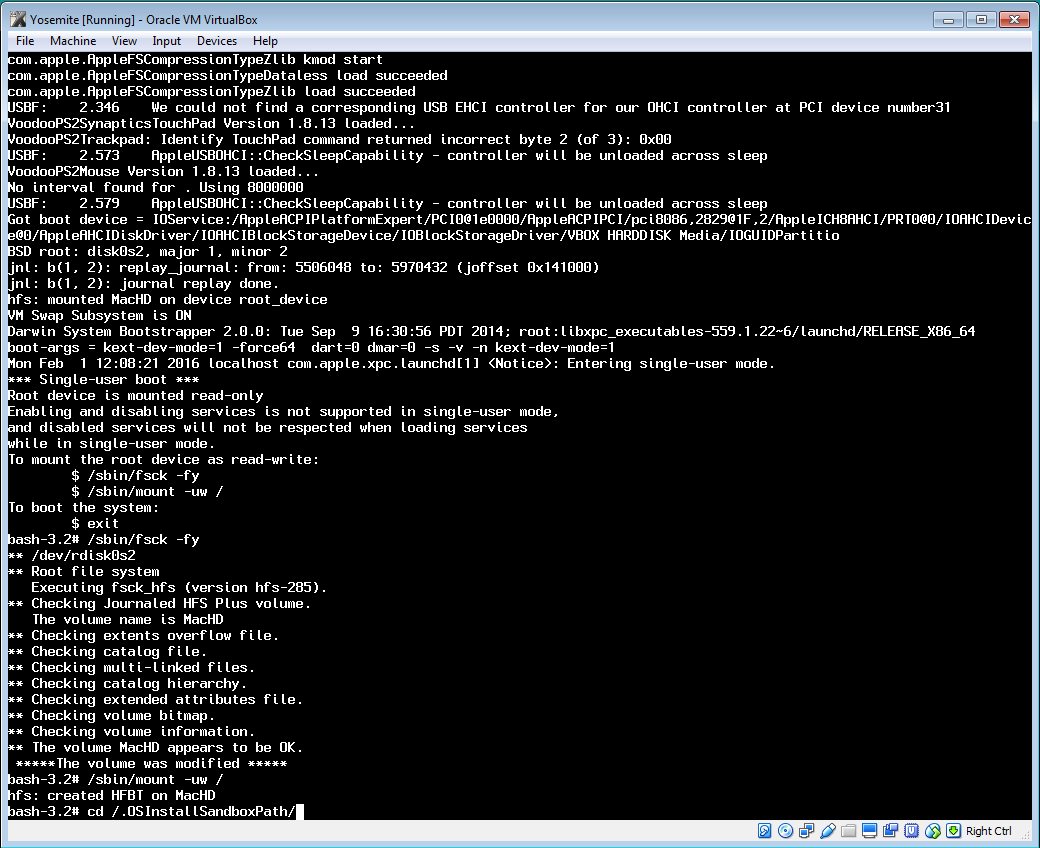
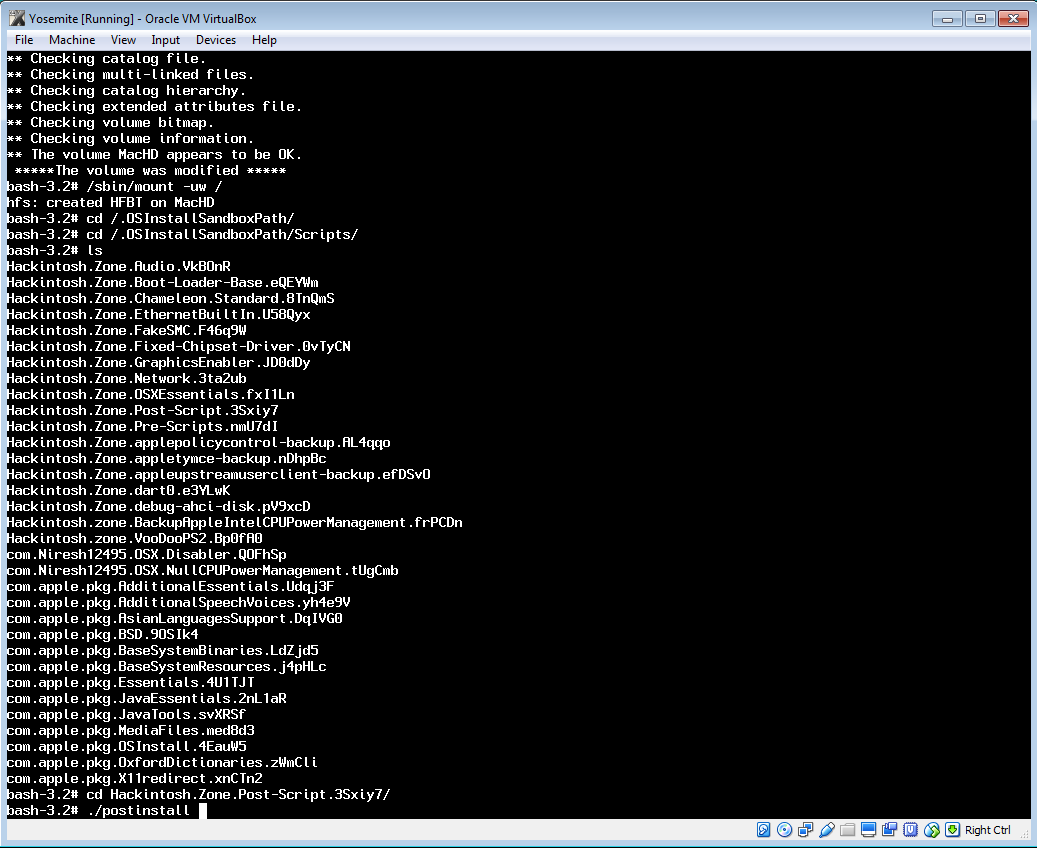
Then, start typing ?Hackintosh.Zone.Post-Script? and press tab to auto-complete. Press enter and then type:
./postinstall
to start up the post installation configuration.
After this finishes executing, enter ?exit?.
Start up your VM again, boot up with ?-x -v? if necessary and now you should see:
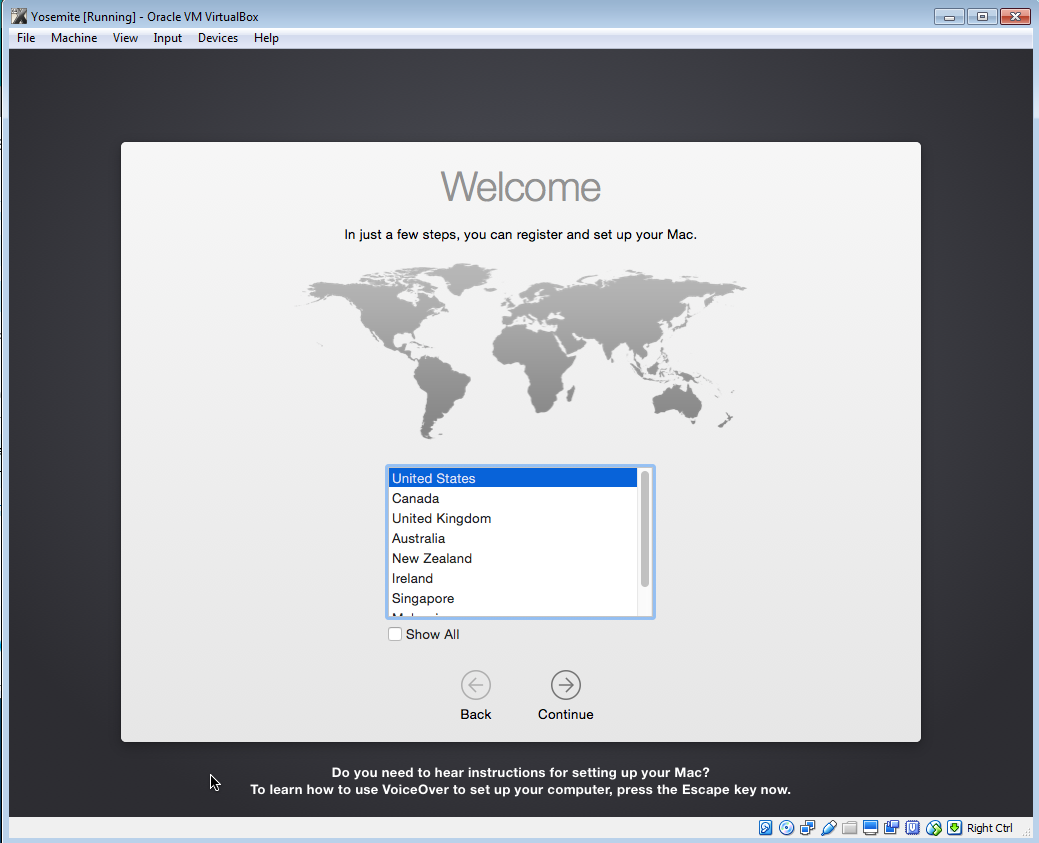
Follow the setup steps and voila, your hackintosh is complete.
Pointer Lag and Resolution
Finally, we have two issues. The first is that there is a lag on the mouse pointer and the second is that the resolution might not match that of your monitor.
Pointer Lag
Simply download the BeamOff application run it. Your performance should improve drastically.A mirror is here:
https://m.sendspace.com/file/sm9sf7
Resolution
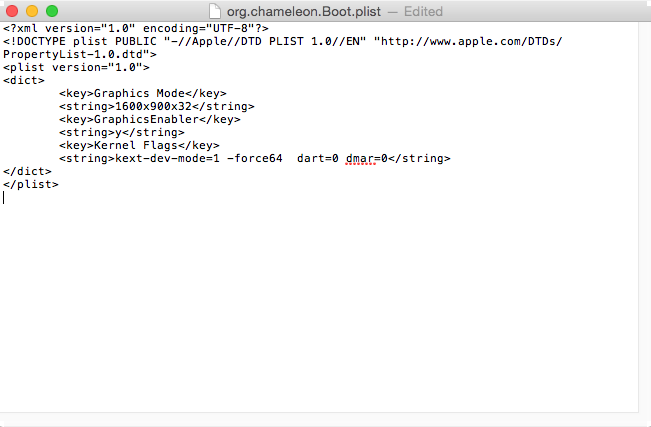
We can fix the resolution by opening the Finder, then going to Computer -> Extras.
Edit the file called org.chameleon.Boot.plist and find the resolution string and replace it with your screens resolution, whether it is 1920×1080 or 1600×900 like my laptop.
Then simply shut down and restart your VM. And when it starts up, press ctrl-F to see it in full screen glory!
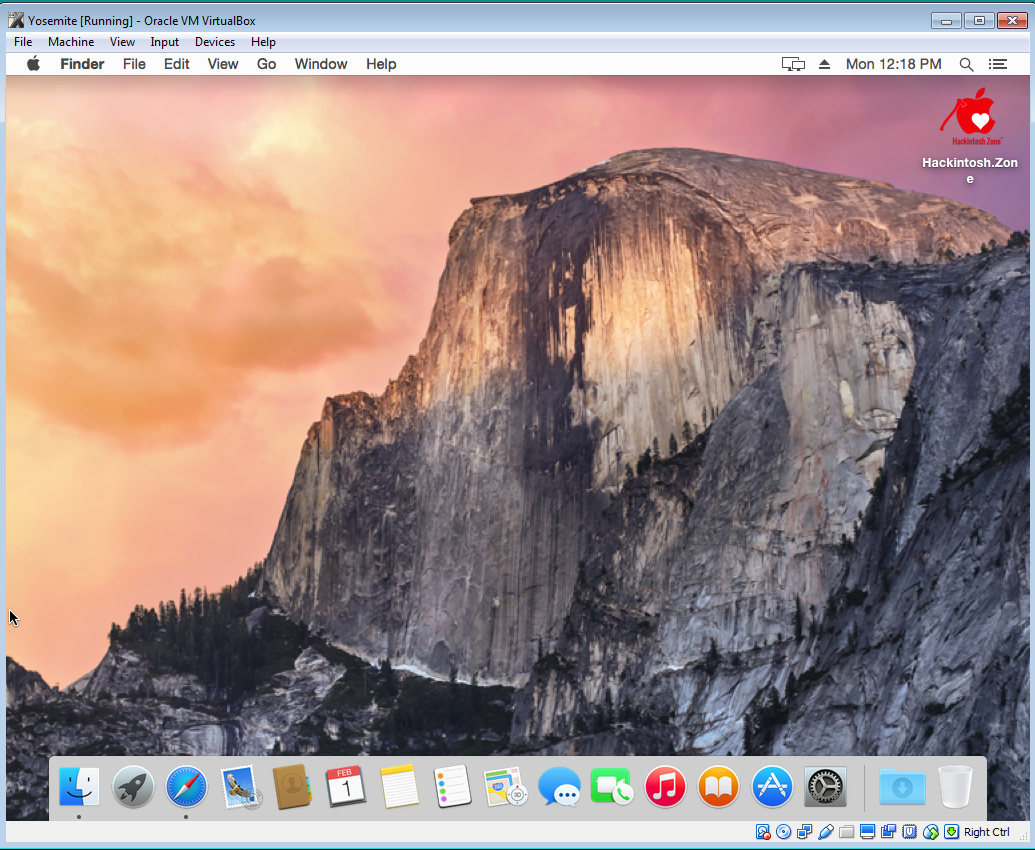
Here is a final screenshot of my VirtualBox Mac running at my screens resolution.
Good luck!

