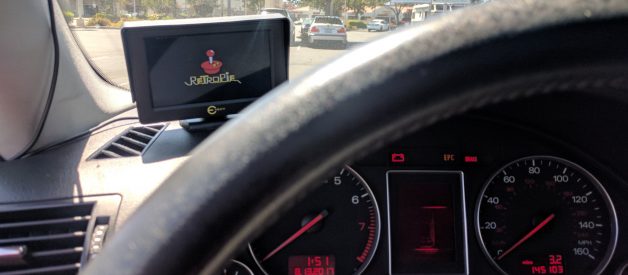
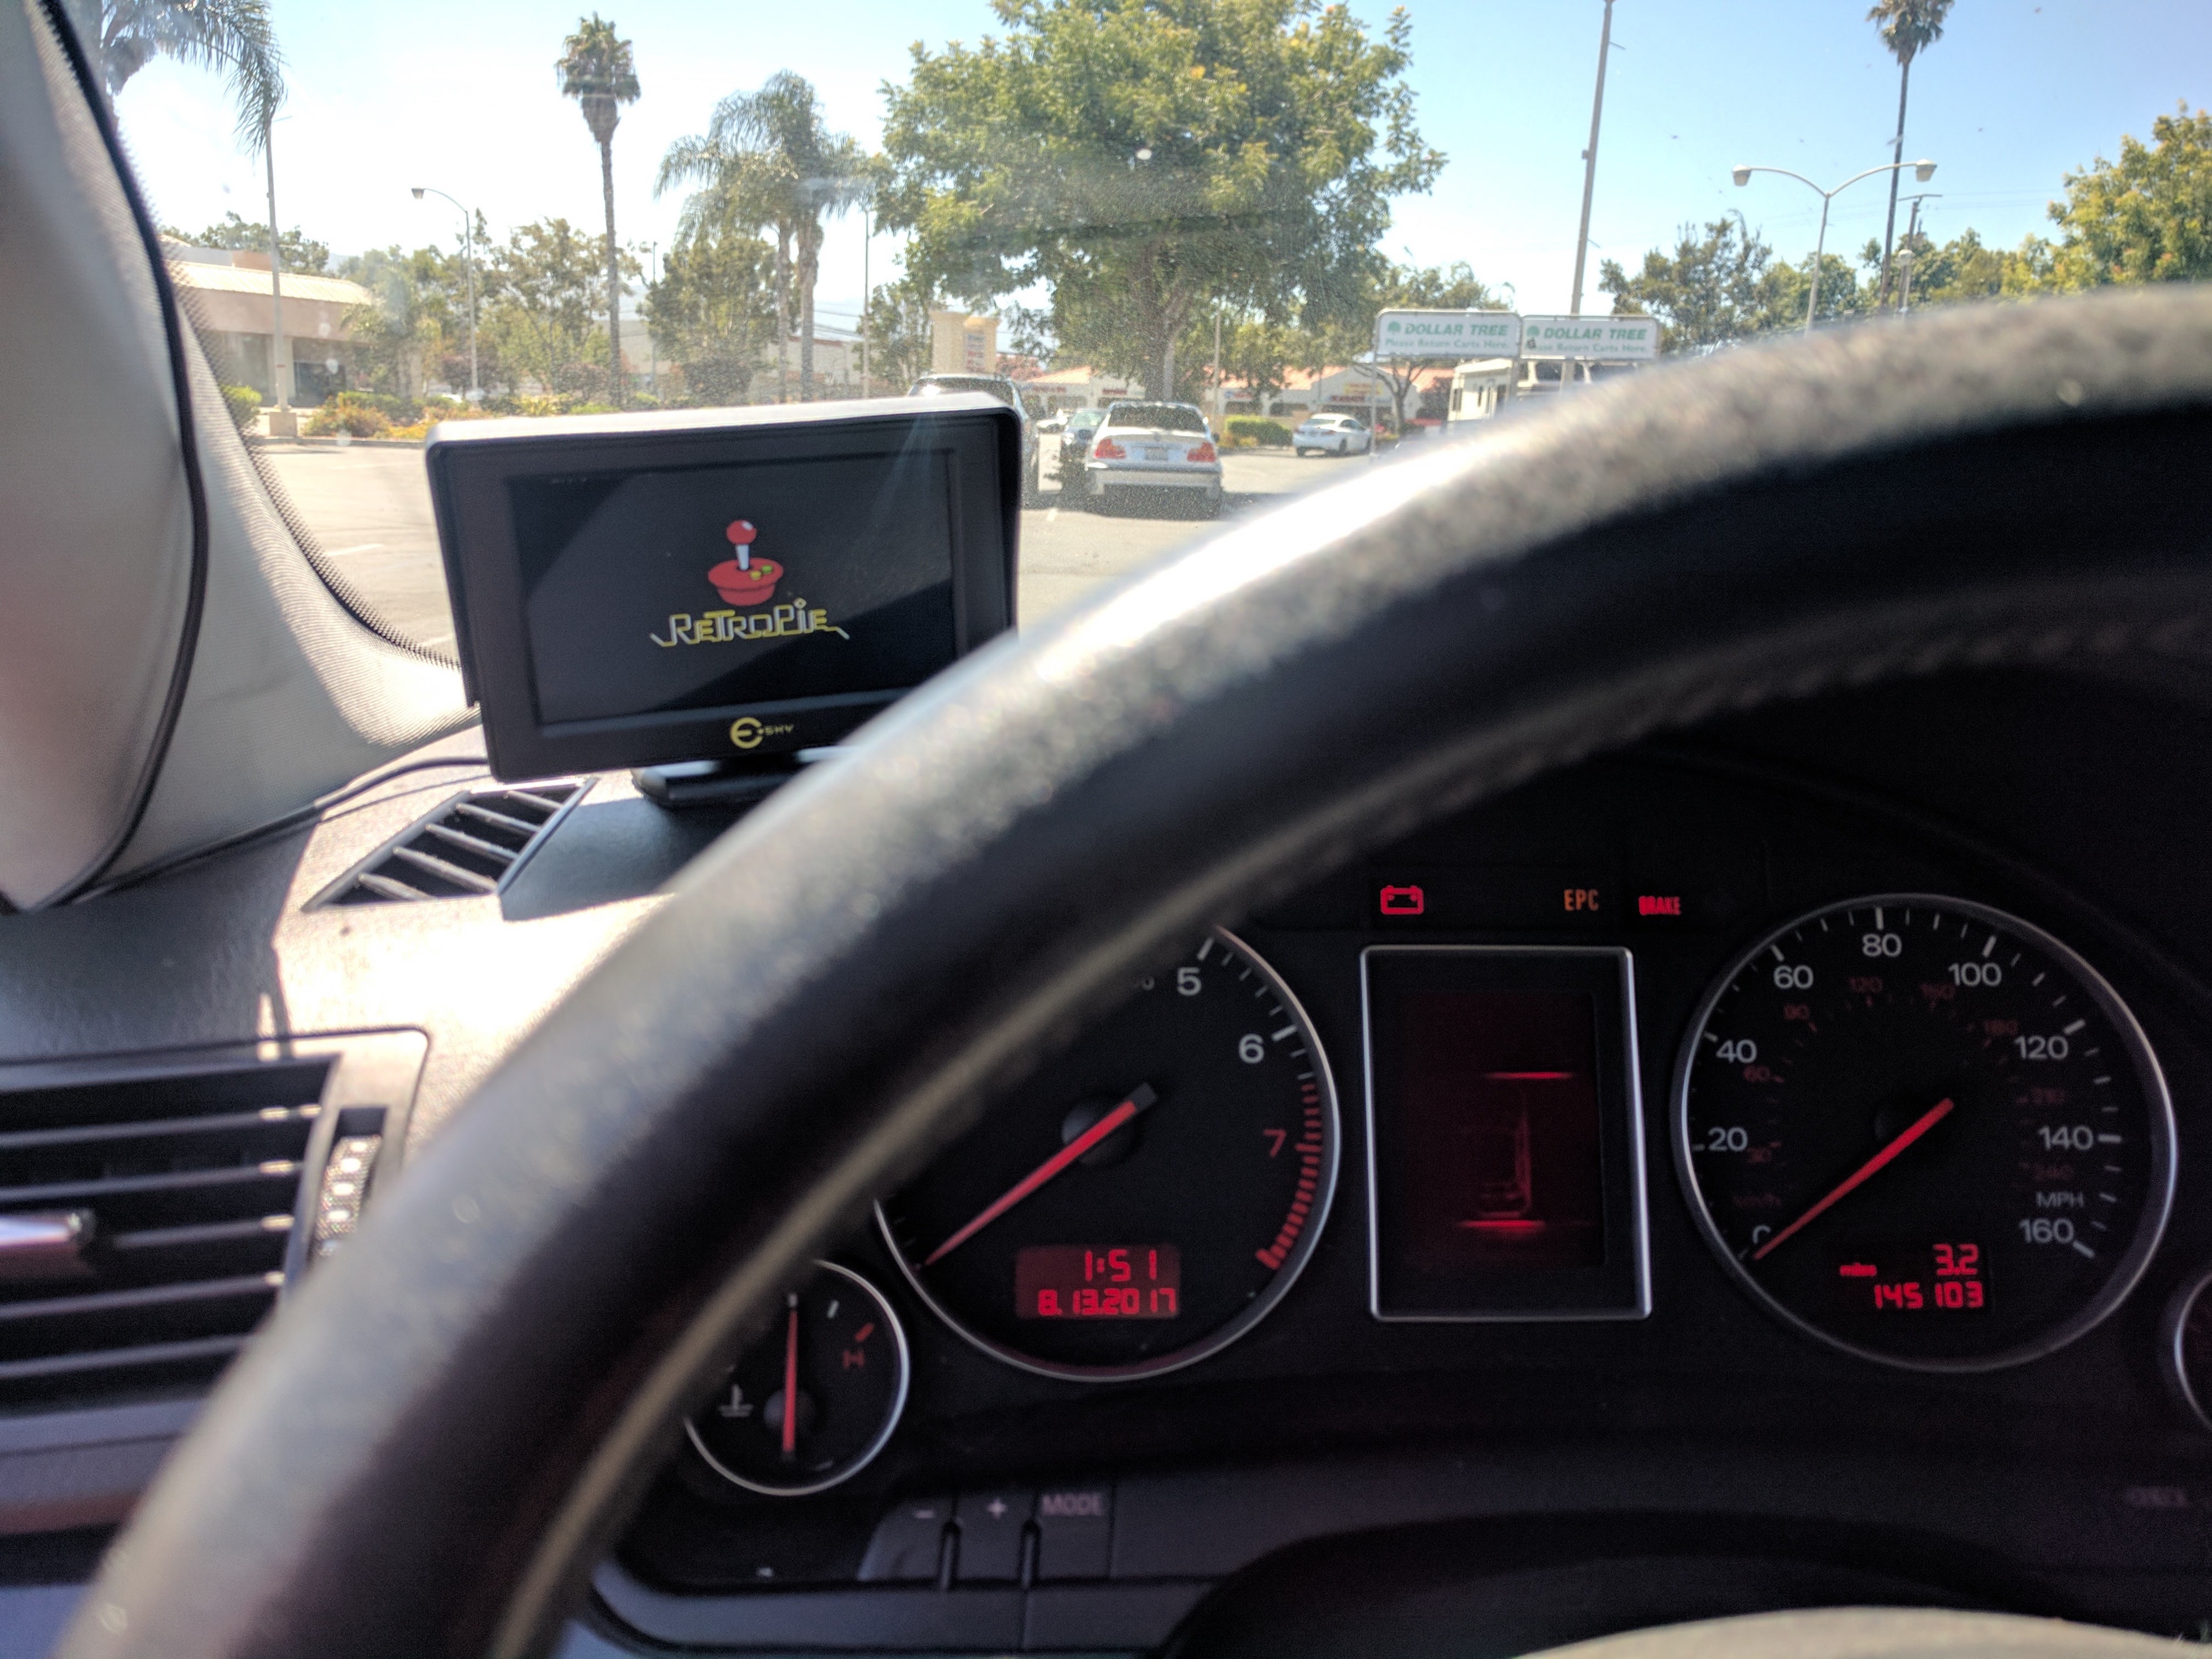
 Retropie running in my 2003 Audi A4
I love Raspberry Pis. My buddy introduced me to them about three years ago, around when the pi 2 came out, and I fell in love. Currently I have about 4 running some type of home network system running a bunch of self hosted apps. I have them tell me ?Hello, Aaron!?, whenever I come home through IFTTT. I have a 2 TB hard drive connected to a pi to run a file server. This same pi also runs motioneye to record motion across my house for security, which is then, stored onto the file server. I have multiple retropie images, which I swap out on a pi, and I also have a pi running my piStreamRadio for Galaxy Noise Radio.
But this isn?t about my pi setup. This is about a car. A car with a raspberry pi in it. The same buddy that introduced me to Raspberry Pis, introduced me into the basics of working on cars. I do my own oil, I switch my own belts, and I tend to my own repairs for smaller things like brakes, fuel injectors, starters, radiators, etc? So combining the two seemed natural. However, trying to come up with ideas for Raspberry Pis in a car is actually quite difficult. Common ideas I found were ODB monitors, and timelapse dash cams mentioned on reddit that didn?t really interest me. Or, expensive carputers running raspberry pis, and usually replaced your entire center console. However, my girlfriend bought me a dash cam and a reverse cam for my birthday. I knew I was going to be wiring stuff in my car, and I knew now was the perfect time for a raspberry pi in my car. Now I have that pi running retropie, will a bluetooth controller in my driver side bin, and also a bluetooth receiver for my phone to play music.
This is going to be more of an explanation of my process, than a guide. If you are planning to use this as a guide, I would suggest using it more as reference, where you skip the parts about how I wired the reverse and dash cam. However, I do mention concepts like Fuse Tapping, and how to set up the monitor, so it will be a good read nonetheless for beginners. Money wise, I spent ~$234 on everything, though just the pi materials (Including the pi itself) can be had for ~$125 . I used the labels REQUIRED FOR PI: and WARNING: for anything required for just the pi setup, or anything you might really want to read before buying. Here?s an Amazon shopping list:
- Esky Backup Camera is the reverse camera I have on my car, and has been working great for about 5 months now.
- Wire Crimps For wiring your reverse camera to your reverse lights. You may also need to buy a Wire Crimping tool if you do not have one.
- REQUIRED FOR PI: Esky 4.3 Inch Car Display will be used as the display for both the raspberry pi, and the reverse cam. It also happens to support switching between the two since one input will act as primary, and the other as secondary.
- REQUIRED FOR PI / WARNING: Fuses for my car. Fuses are different between cars, the set will probably not fit your car. These will more than likely be required, and it?s not bad to have a set. Though, you may want to get something smaller.
- REQUIRED FOR PI / WARNING: Fuse Tap Adapter. Again, Fuses are different between cars, the set will probably not fit your car. These will be used to fuse tap your car, which will provide power to the display, and a bunch of other things.
- Yi Dashcam. Which was and still is considered the best value dashcam on the r/Dashcam sidebar.
- REQUIRED FOR PI: Car Usb Power Socket. This will be used to power the dashcam and pi. and will be fuse tapped to provide power on car ignition.
- REQUIRED FOR PI: Socket Panel Wire. This will be used to connect the socket to the fuse tapper.
- Zip Ties. Yeah, we?re buying a lot of wires. This is getting a bit messy, so we?ll need to clean them all up.
- REQUIRED FOR PI: Raspberry Pi 3. If you?re reading this, I assume you know what this is 🙂 Definitely want to buy a Pi 3 for the onboard Bluetooth if you want to do any bluetooth stuff.
- REQUIRED FOR PI: Class 10 or greater micro SD card for the raspberry pi. I will cover boot times below. Class 10 is a must or else you?ll be sitting at gas stations holding things up.
- REQUIRED FOR PI: USB Audio Adapter For The Pi. Audio out on the headphone jack of the Pi, sounds terrible. This is necessary for playing any type of acceptable audio out of the Pi. Especially for listening to music.
- MAYBE REQUIRED FOR PI / WARNING: AUX Cassette Adapter. Your car may already have an AUX port. If So, just use that, and buy an AUX cable + an extender if needed. But for cars with cassette ports, this is a huge upgrade.
- REQUIRED FOR PI: ZUNE A/V Output Cable. We will be using this to get video out of the pi. I will explain how the Pi headphone jack actually supports video out (surprising right?!?!). These are the most widely used an accepted for video out on the pi headphone jack for the standard RCA composite thing.
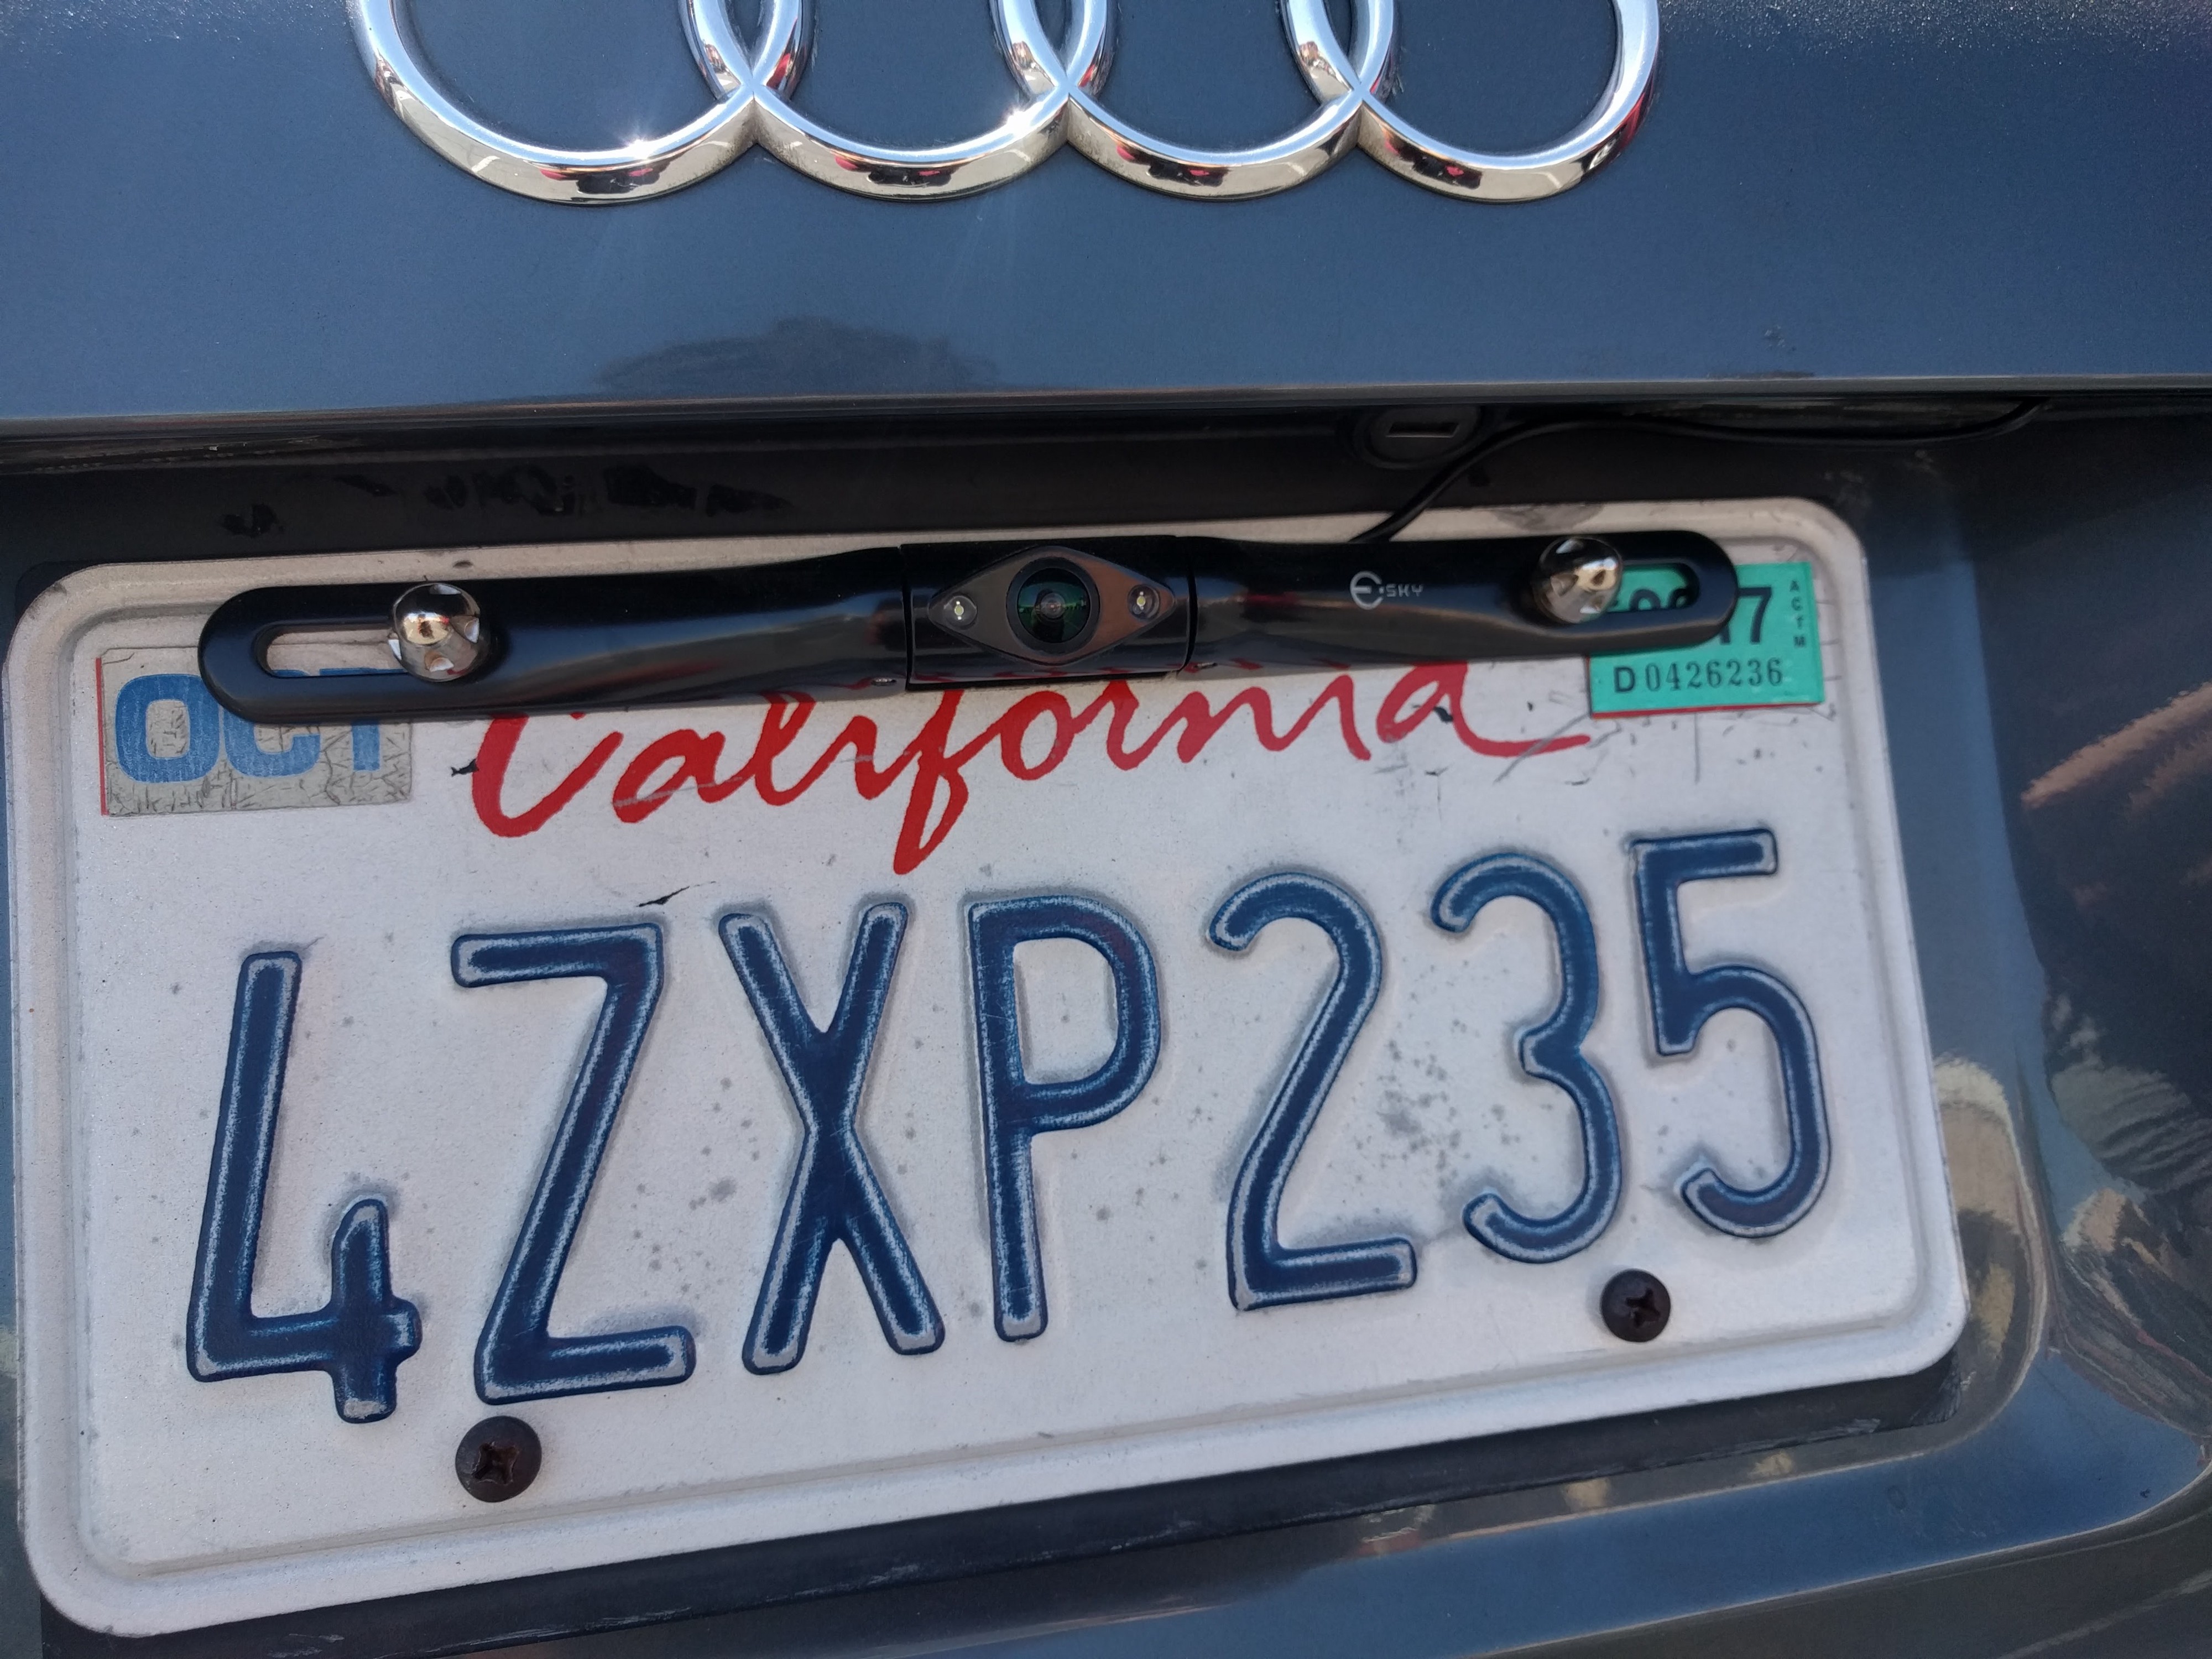 My dashcam attached to my license plate.
This is my reverse cam. They are easy to install for most car DIYers, but it can be confusing. Luckily, there are tons of videos on youtube on the process. I essentially just screwed the camera onto the license plate, crammed the wires around one of the license plate lights. Then, the wires you have are power, and output (the yellow RCA thing). For power, you cut the reverse light, and you then crimp the reverse cam power, with the reverse light power, which will automatically turn the camera on. For the output, you have to feed it through the weather lining of the car all the way to the cabin fuse box, or wherever you place your monitor. But before we do that, we need to set up our fuse taps for our monitor, raspberry pi, and dash cam.
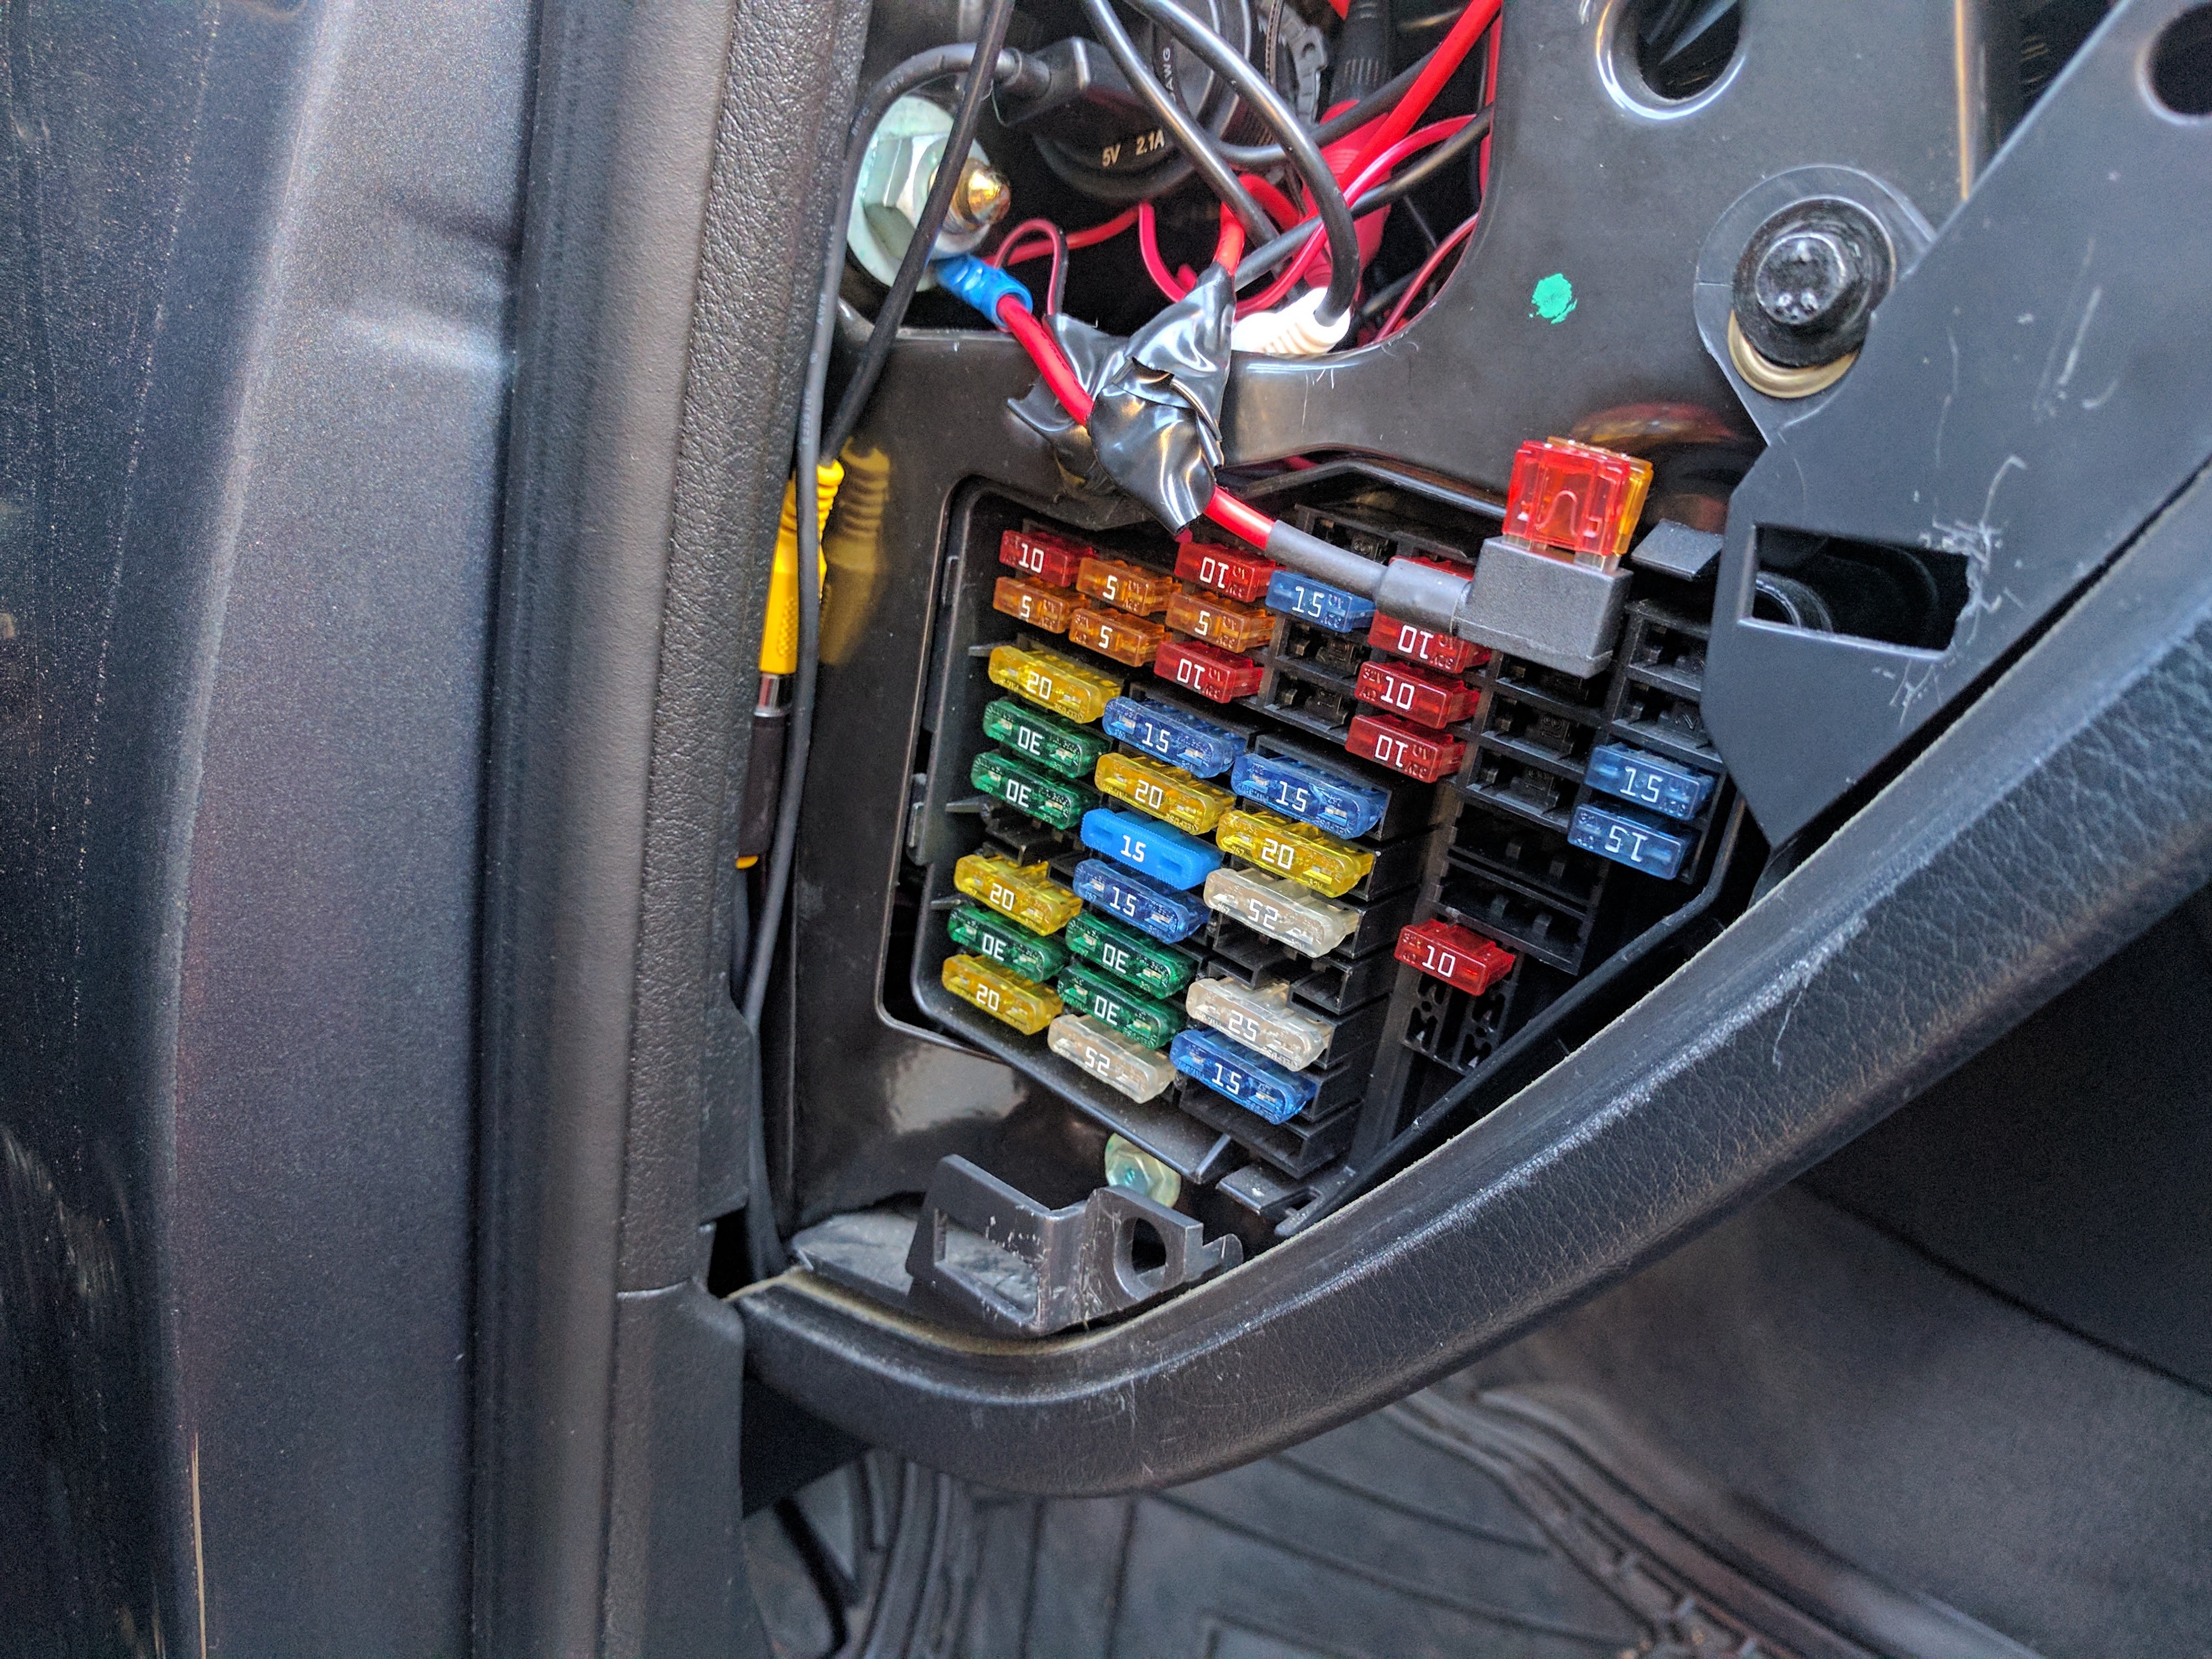 A Fuse Tap on the cabin fuse box to power my rat?s nest
Fuse tapping is awesome, and very safe if done correctly (like if you don?t have a crazy collection of wires like me :p). This is a good video on how fuse tapping works. But as a tl;dr, you find a non-life threatening fuse like the radio that gets power when you put the car in accessory, put a fuse tap with the original fuse and a larger fuse for additional power, and then crimp the lead onto whatever you would like! This is what will be used to power both the socket panel wires, and the monitor itself. Also, both of these will require a good ground. On that glob of (fire resistant!) electrical tape, I have a screw inside a hole to hold together the grounds for the monitor and the usb socket.
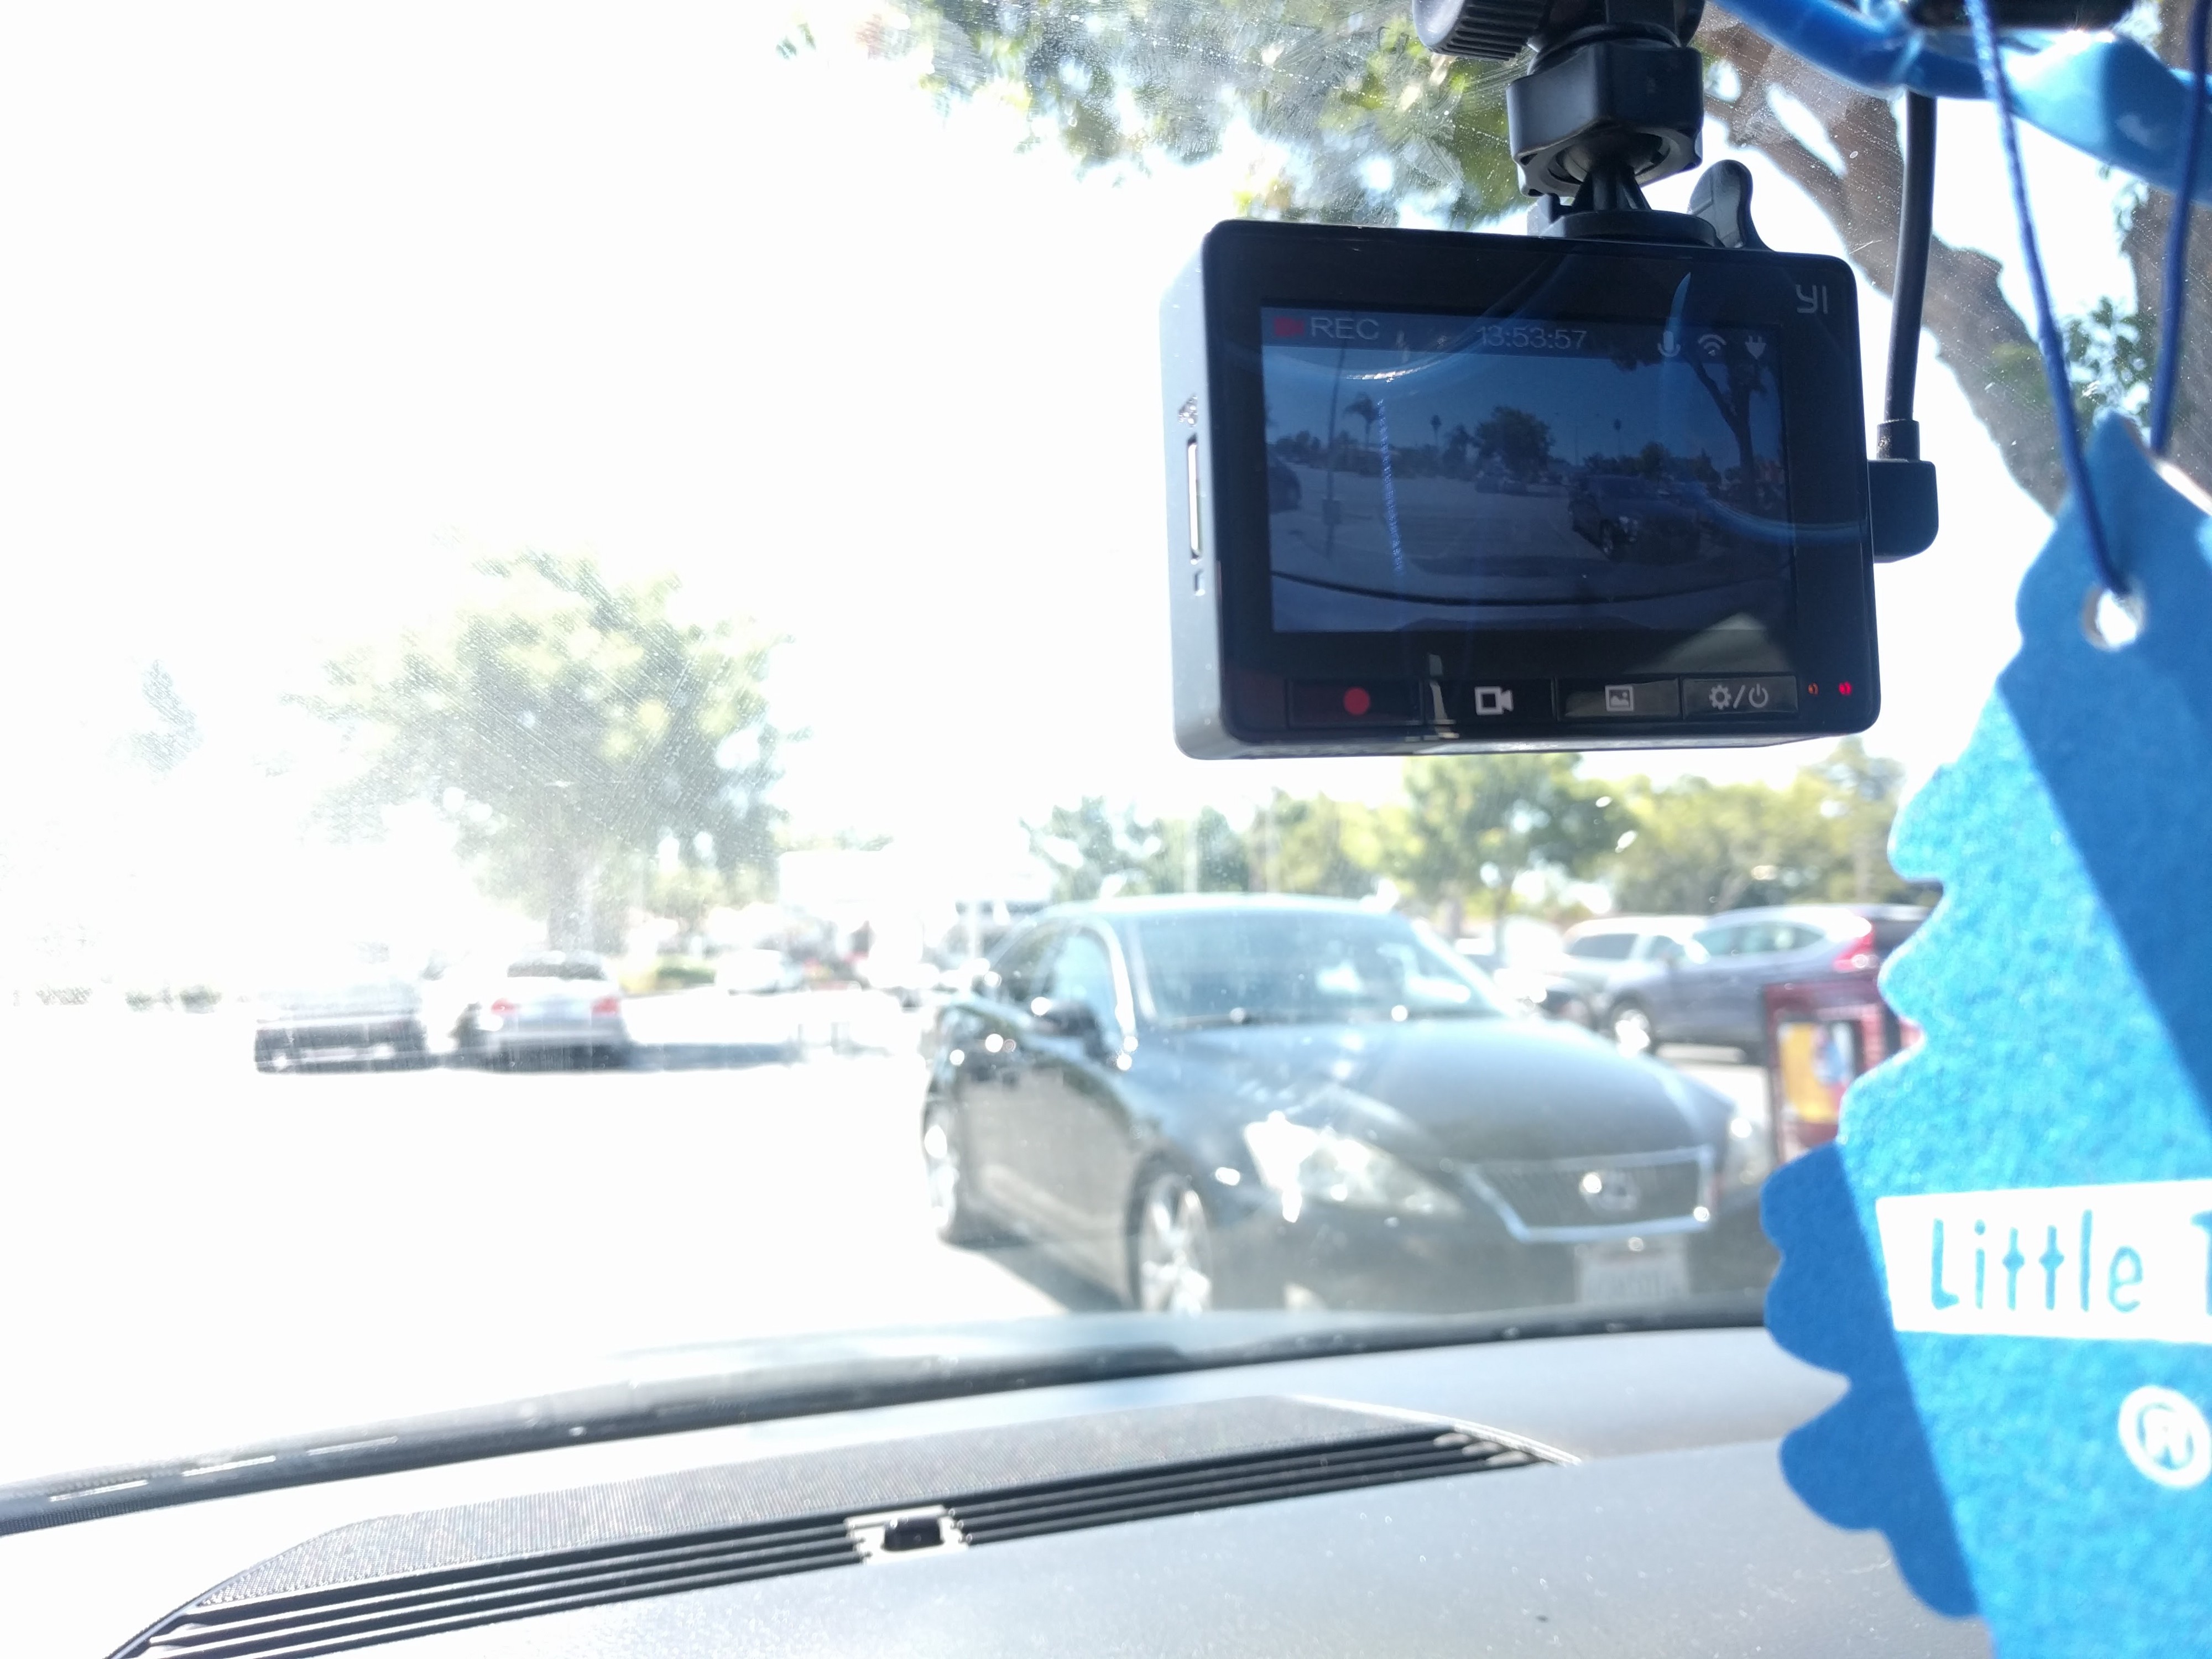
Now that we have power, how do we go about getting a video? So the Esky monitor is cool because it comes with three wires. Power, Secondary input (Yellow), and Primary Input (White). While the monitor has power, it will show the secondary input, as long as there is no primary input. When there is primary input, it will always show over the secondary input, until the primary input no longer has video. So with this, we can plug the raspberry pi into the secondary input, and the reverse cam into the primary input. This will allow us to view the pi, but once we put the car into reverse, the spliced reverse lights will power the reverse camera, which will then send a video signal, and the monitor will switch to the primary reverse camera video. It works great, and is super cool!
After we get the monitor working, let?s go ahead and finish up connecting the socket wires we also added power to, to the actual sockets. This is super easy, and they simply slide onto the ends. Once you see the little voltmeter LED on the front of the USB socket, it?s now working! And before we move onto the Pi, let?s set up that dash cam.
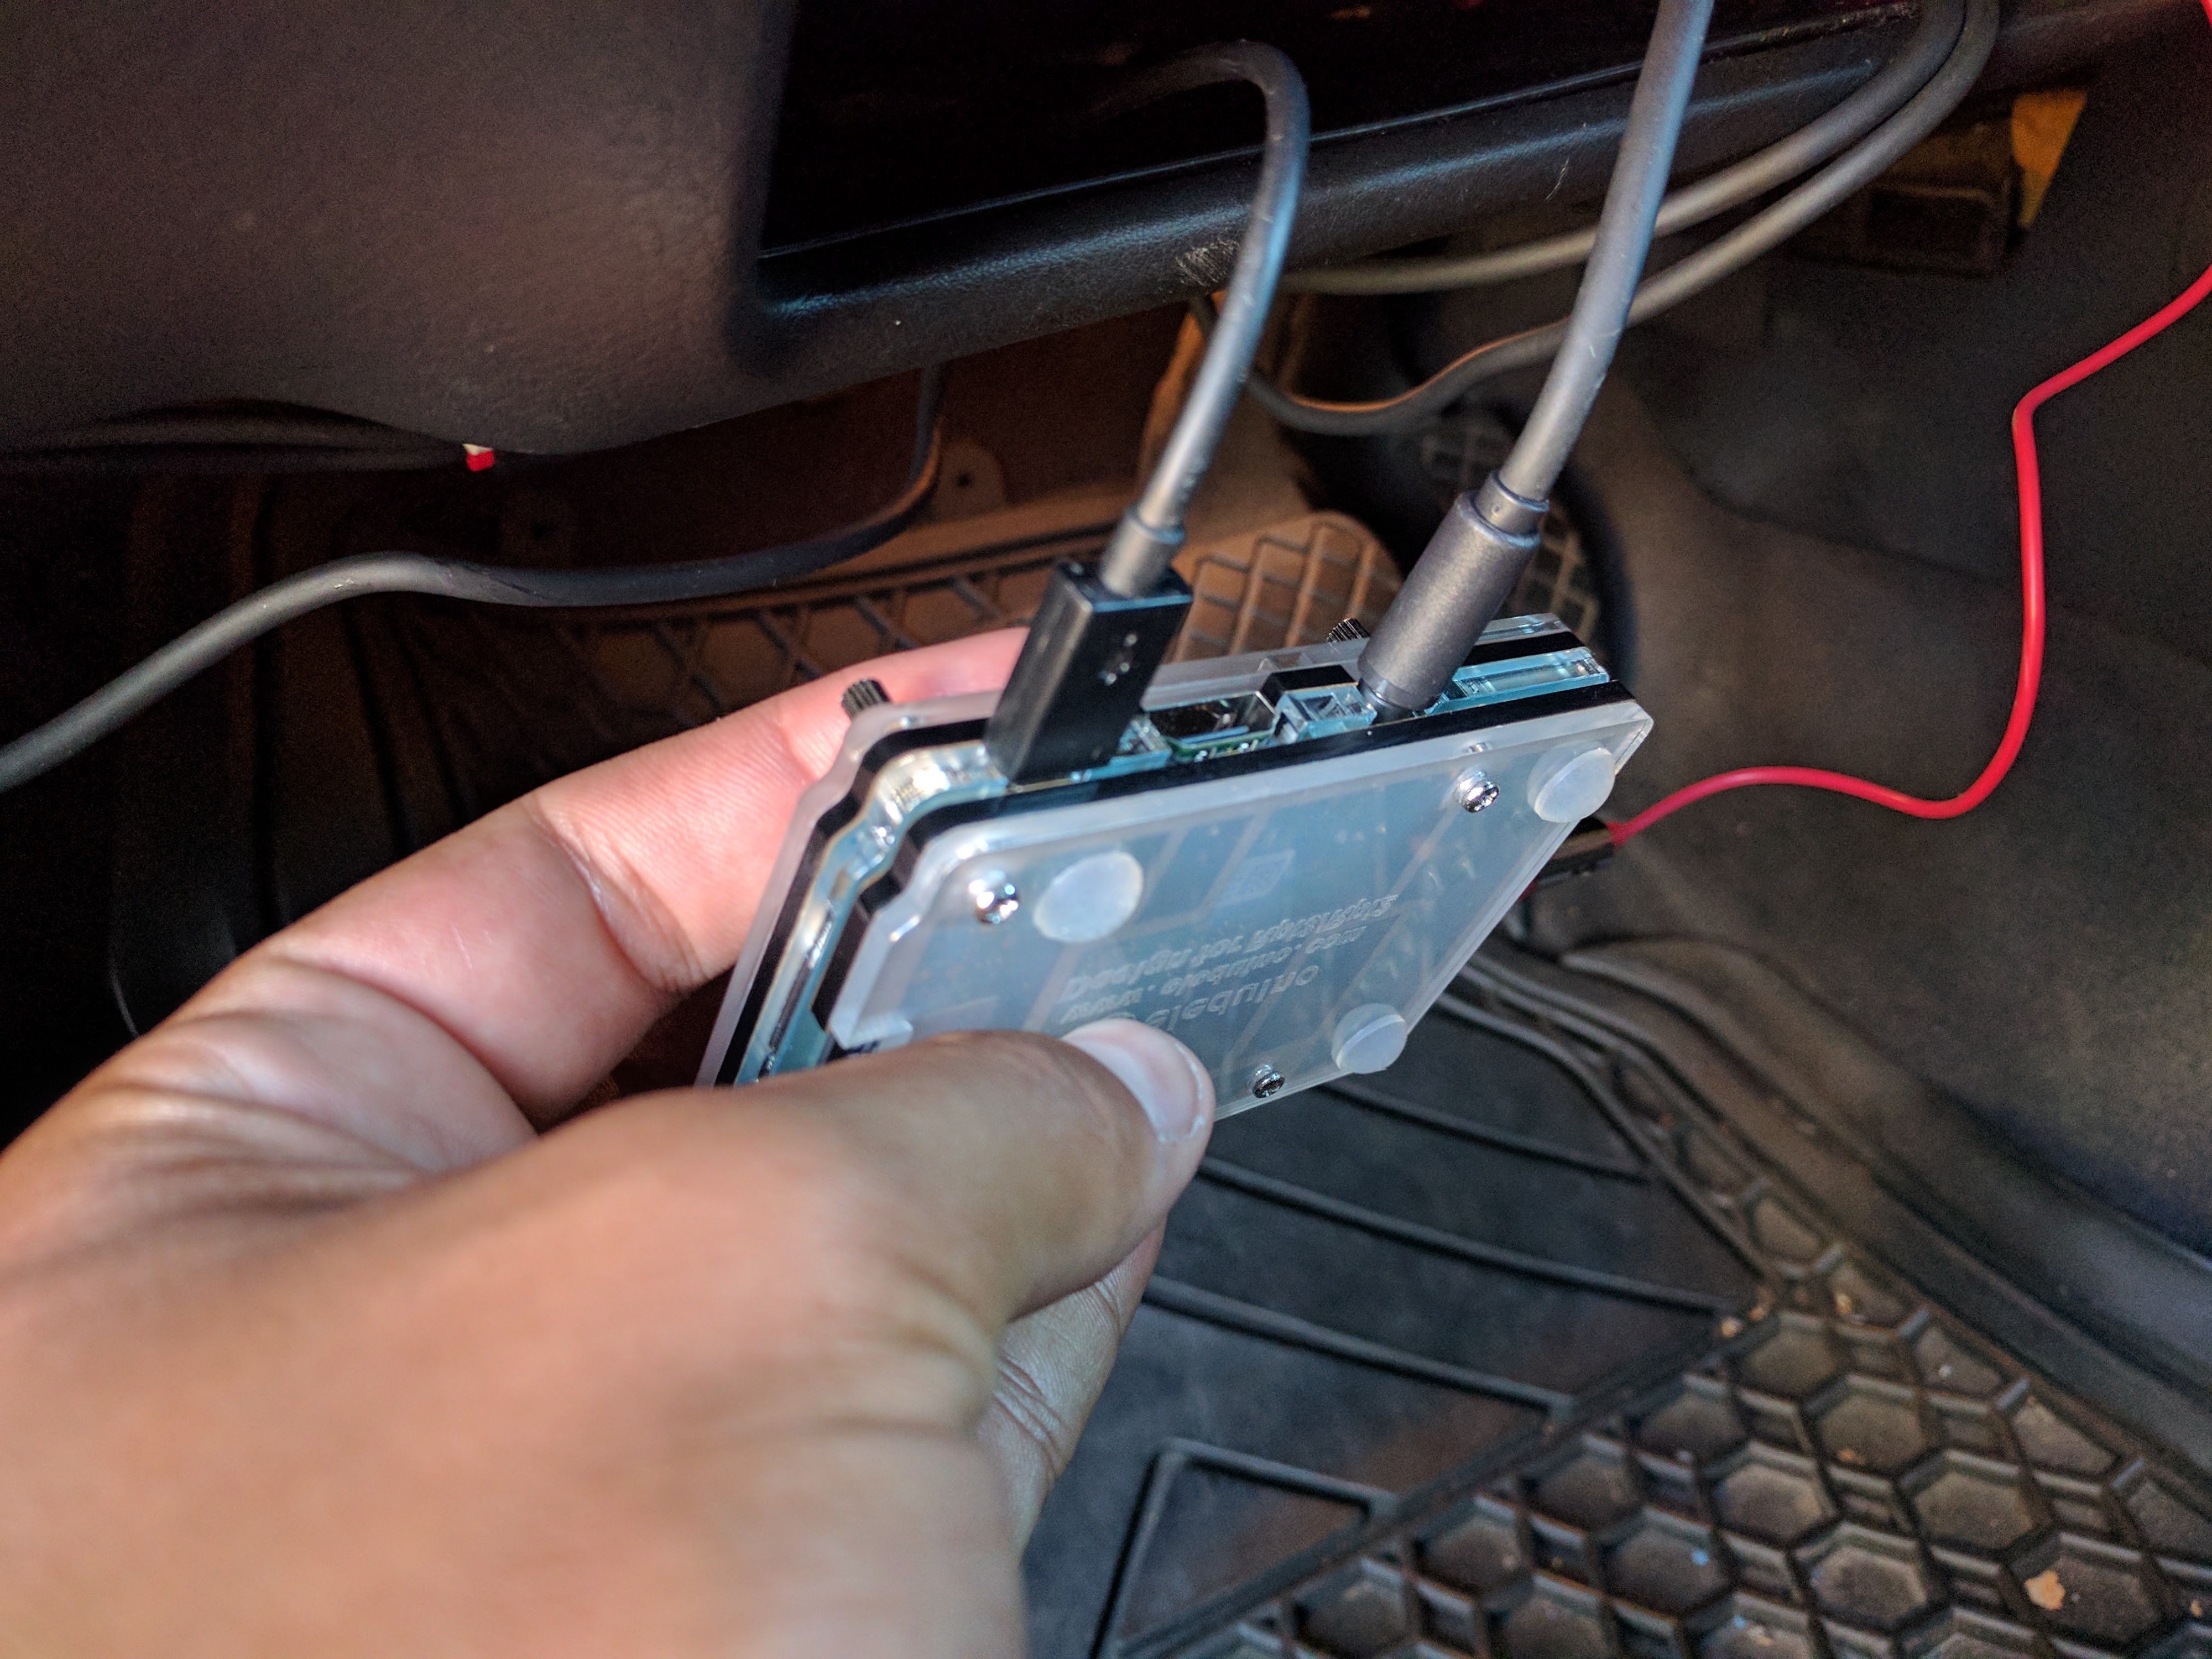
 The Yi Dashcam connected to the USB Socket
The Dashcam is really easy to set up. The Yi dashcam comes with the standard 3m sticky stuff to stick in front of your rear view mirror, and then just stuff the wire across the top and the sides, and wire it into wherever your USB power is. And the nice thing is, the dash cam will automatically turn on and off whenever is receives or loses power from a charging source. Therefore, it just records and will turn on and off with the car! Just like the pi will! And speaking of a pi, let?s get baking (horrible pun I?m sorry):
 DUN DUN DUN DUUUUUN! A Raspberry Pi in a Car!
So here it is. A Raspberry pi in a car. Well isn?t that neat? So how do we get this thing working on the monitor? Well you know that headphone jack on the raspberry pi. It?s actually a composite jack, and a special one that requires specific 3.5mm to RCA connector cables. This may not be news to you, but to me and all my other buddies, we were stoked. So, you can simply plug that Zune cable into the pi. I suggested this one as it is in stock, and the reviews, as well as other pi chatter, and myself confirm that it works. Then, all we need to do is plugin the video (Yellow) into the monitor?s secondary (Yellow). However, before we turn the car on, we need to flash the pi micro SD card to actually show something on the display.
So, You?ll need to flash an image onto your Pis micro SD card using something like Etcher. I put retropie on my pi, because now fast food drive throughs are a lot more fun. Then, plug the micro USB into the second port onto our USB socket, to provide power for the pi. Turn your car onto accessory, and see if the pi powers on, and shows something on the monitor, it all works! 🙂 If you don?t see anything, and the pi has a little LED on it, you may want to verify the pi shows up on a normal HDMI monitor at home, before throwing in the towel.
But, assuming that it works, we still need audio. We have the Red and White RCA connectors, so we use that for the audio right? No, like I said above, audio out on the headphone jack of the Pi, sounds terrible. So we gotta put the USB Soundcard, and possible the cassette adapter, to work.
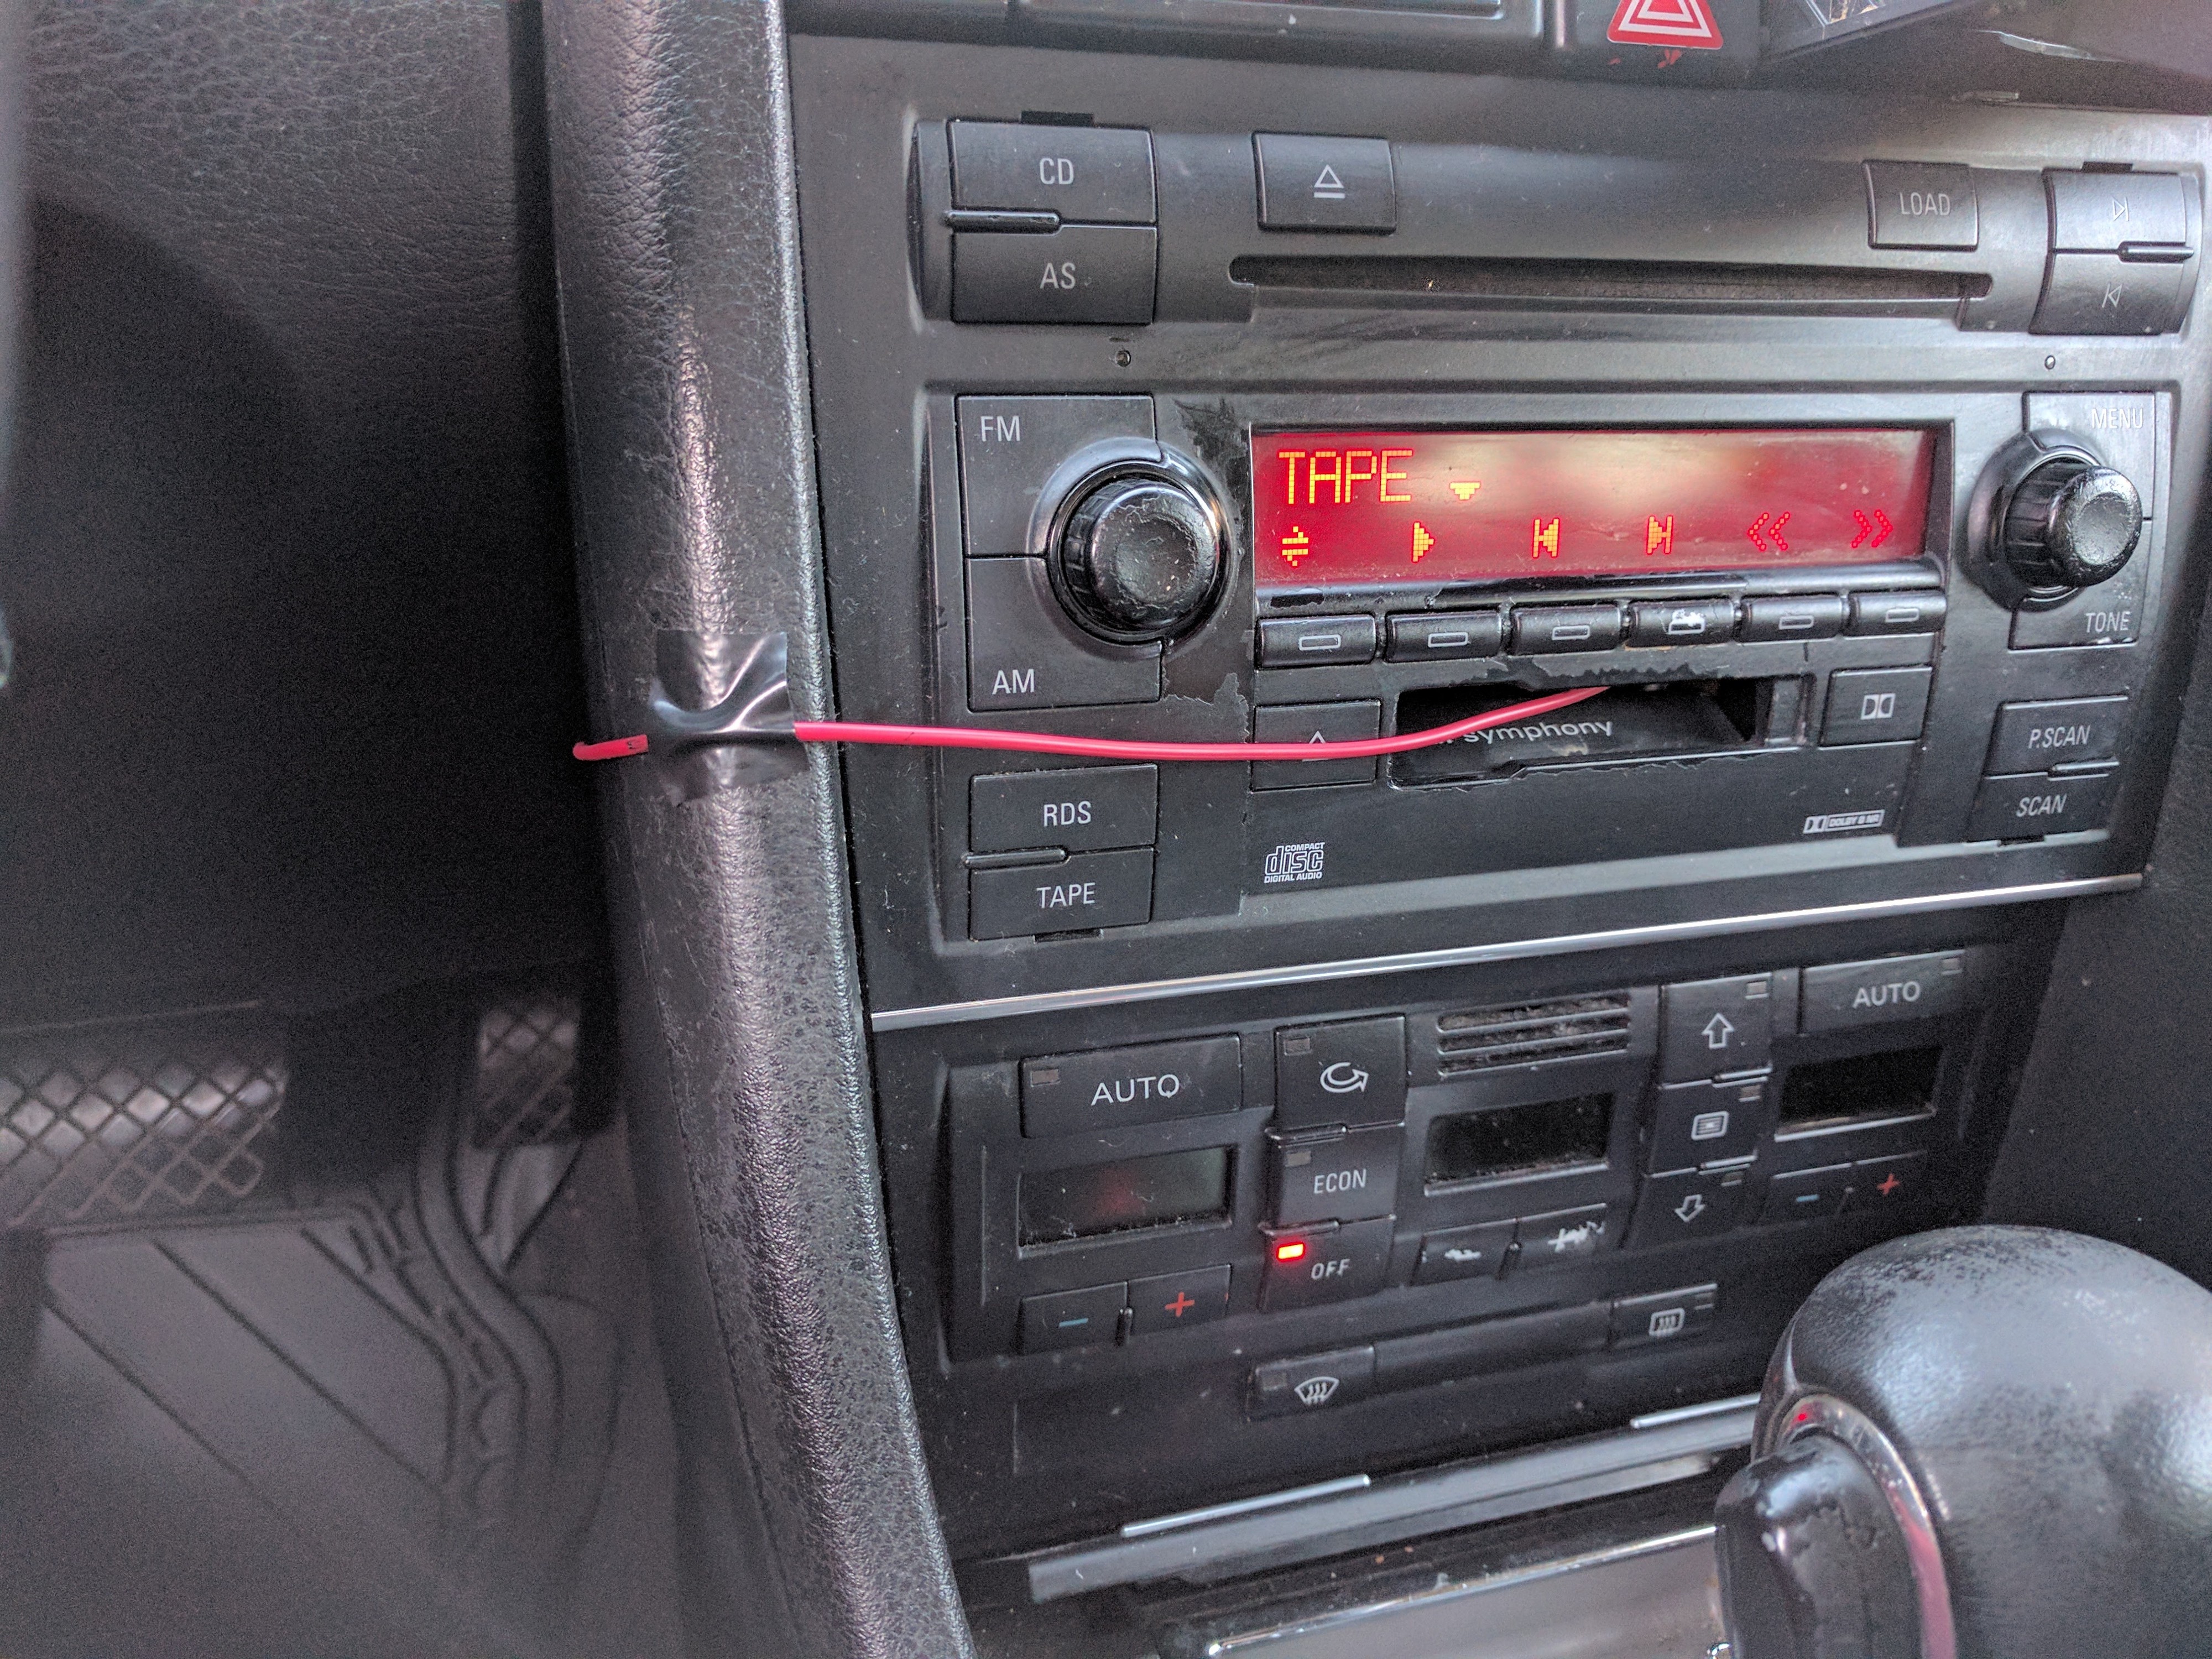 Cassette adapter to take in the pi audio input
So, cassette adapters are easy enough to use. Simply put it in the car cassette port, and plug it into your device through and aux (headphone)port! If you car has an aux port, you can go ahead and use that. And it would still be super cool to have a bluetooth receiver if your car doesn?t have that. Otherwise, you may still want the sound to hear the pi sounds when you are using it. The aux cable of the cassette adapter feeds into the little cubby my pi is in.
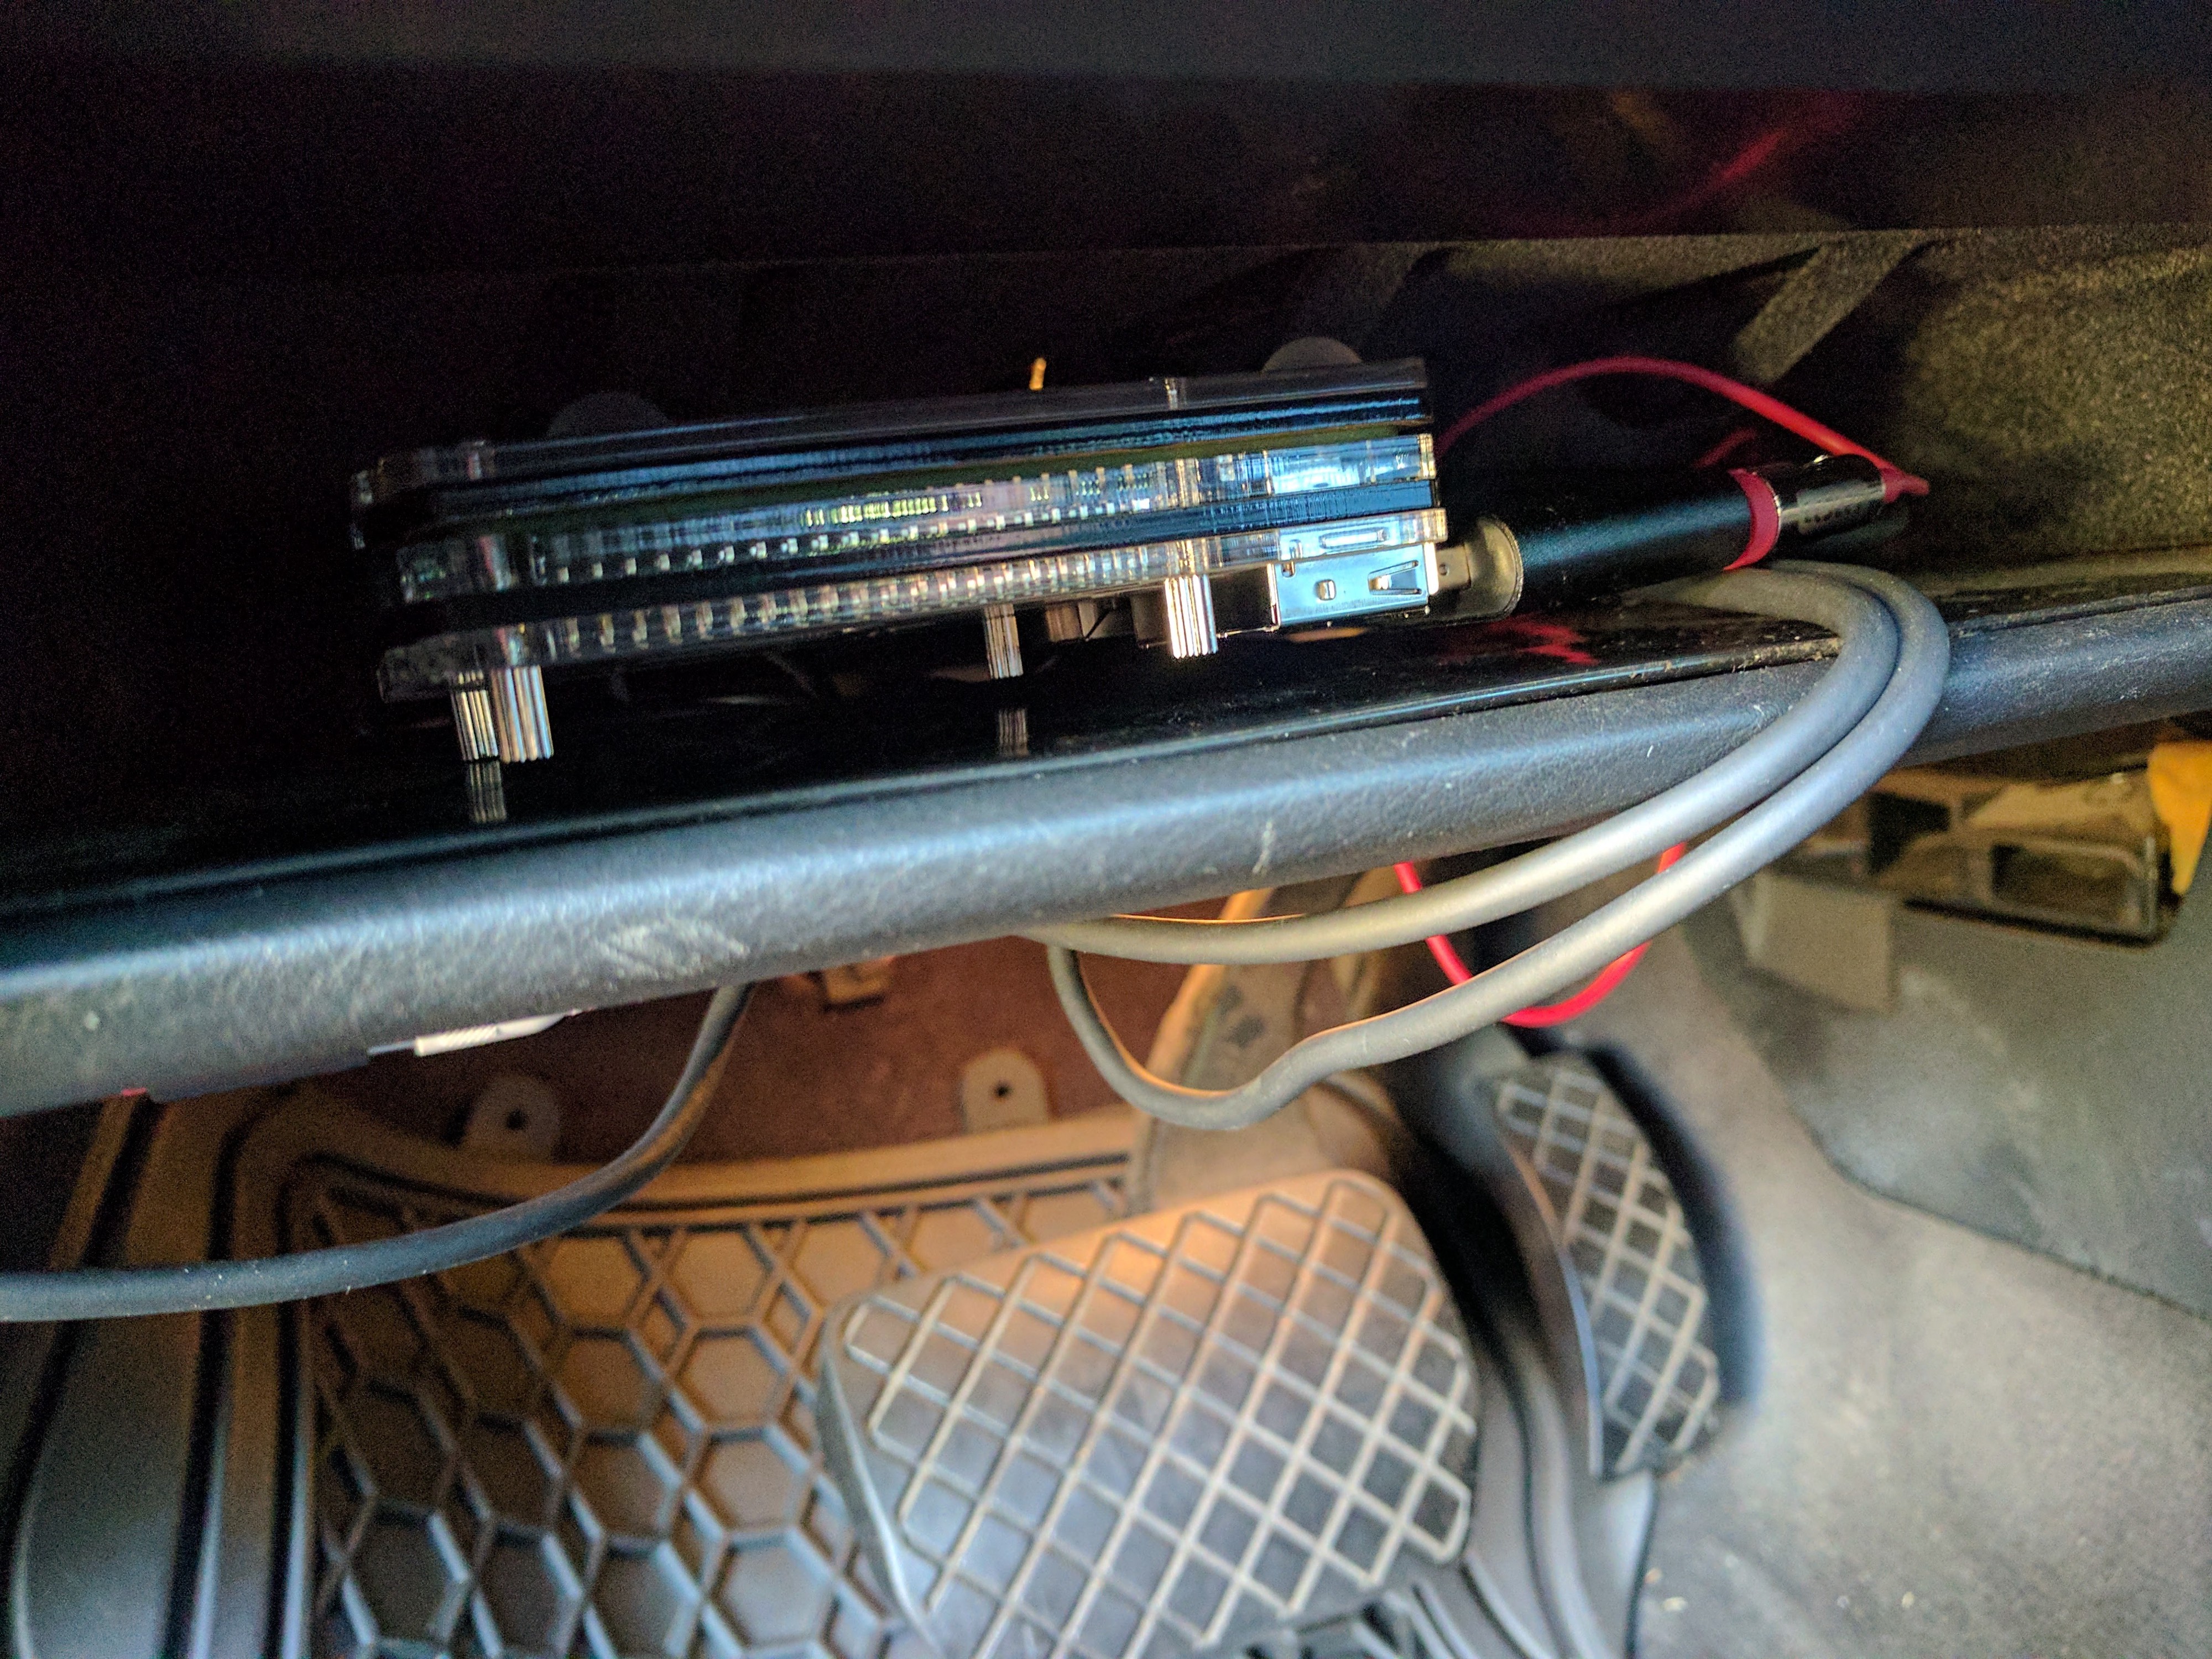 Raspberry Pi in my little cubby my car has. Also shows the Aux cable plugged into the USB sound card.
Here?s another picture of the pi. To get the audio out through the USB sound card, is not too hard. And after you set that up, play some sound, and hear it go out your car radio! Be careful, it may come out super loud, or super quiet, so be prepared with the volume.
So, how about that Bluetooth receiver? Well, you have to use lukasjapan/bt-speaker. I found this to be the most maintained Raspberry Pi Audio receiver project, with the most documentation. Also, what is very handy, most Raspberry Pi Audio receivers will need you to pair your device using the pi, before they allow connecting to it. However, this one will automatically accept all pair requests, and connect to the first device that attempts to connect. While this may not be the most secure, it is perfect for us, since sometimes our friends are going to want to play something through our raspberry pi at some point too! One of the gotchas is that you need to disable wifi in the /boot/config.txt to stop the audio stuttering you will get. And there are a handful of bugs to watch out for. But, once it works, the thing freaking works.
And I guess that is it. One thing that is nice, is that a bluetooth controller and my bluetooth receiver can work at the same time. So I have a bluetooth controller to play games on my retropie image, and listen to music at the same time while I?m picking people up. Here?s some final tips on getting the best experience with all of this:
- One thing that will get annoying real quick, is waiting for the pi to boot before using it when you turn on the car. Especially for things like a bluetooth music receiver for music. At first, I was experiencing 20?30 second boot times when I first started using my pi. First, we need to minimize the unneeded startup services run by systemd. For instance, retropie comes with samba by default to allow you to easily transfer roms. But samba was slowing down my boot time by about 10 seconds! So uninstalling samba, or sudo systemctl stop [samba-service here] && sudo systemctl disable[samba-service here] , can stop and disable the service from being run at boot! Then, one thing that also helped a little bit, was disabling wait for network on boot within the sudo raspi-config . Last but definitely not least, getting a fast SD will also dramatically increase boot times. For instance, I used a random micro SD card I had lying around, and once I got a more modern one, things were super zippy!
- So the audio may not be as loud as you would like. Or perhaps, it is too loud! To open up the pi volume levels, you need to enter the command: alsamixer. From there, you can simply adjust the level of alsa, which all audio of the pi runs through. To save your settings to be loaded after a reboot, use sudo alsactl store . Though if that does not work, try alsactl store without the sudo.
- If you decided to go down the retropie route as I did, you may be asking what is a good controller? Well, I cannot recommend the 8bitdo controllers enough! A friend of mine recommended one to me, and I was hooked. Not only is it a solid bluetooth controller, but often times will work with actual consoles, like the Nintendo Switch! This is the controller I bought. Though, any of the pro series should be great. Also, I guess 8bitdo have a slightly different way of pairing with retropie, so here?s a quick video on how to do that if needed.
That?s all folks! Peace!
