This should be really straightforward, but I found myself googling around. I wrote a recent post about how to create a web app with the Laravel PHP framework but connecting to the database was tricky.
First step, find out what version of OS X you are running. Click the apple icon in the top right corner of your screen and click ?About This Mac?. I got something like this:
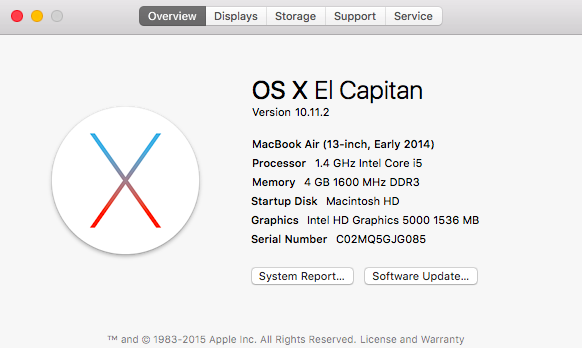 My OSX version is 10.11
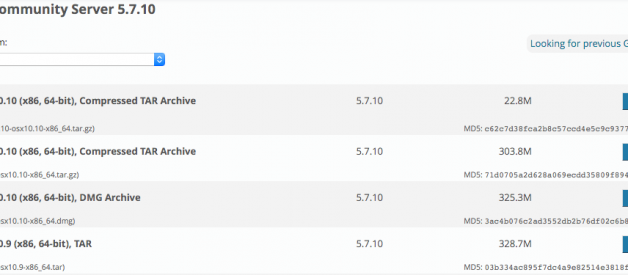
Next step, head over to the MySQL downloads page.
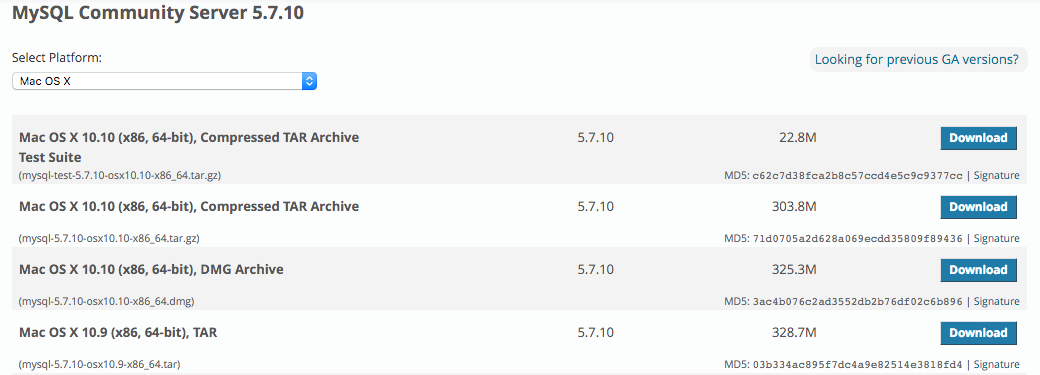 A whole lot of options to choose from, discouraging for first time users
So with my computer I am running 10.11 and we want the .dmg file. Download Mac OS X 10.10 (x86, 64-bit), DMG Archive. Then you get to this lame screen:
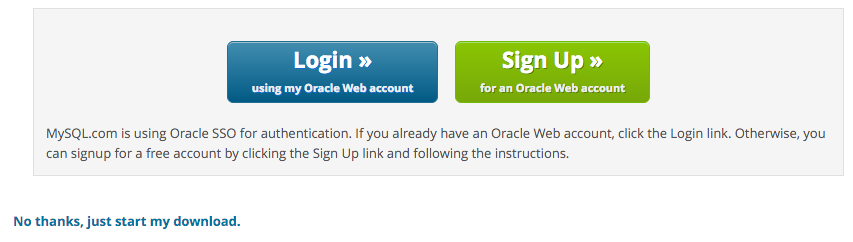
MySQL is free and open source software (FOSS), you do not need to sign up or create an account. Click ?No thanks, just start my download?. I let the download go directly to my ?Downloads? folder when prompted, though you could place it anywhere. The download will take some time because it is 350mb, go get a coffee. Once the download is complete. Double click the file and a screen like this will open
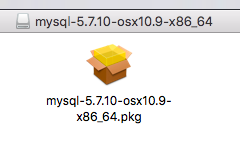 The MySQL installer for OSX (Mac OS X 10.10 (x86, 64-bit), DMG Archive), downloaded from https://dev.mysql.com/downloads/mysql/
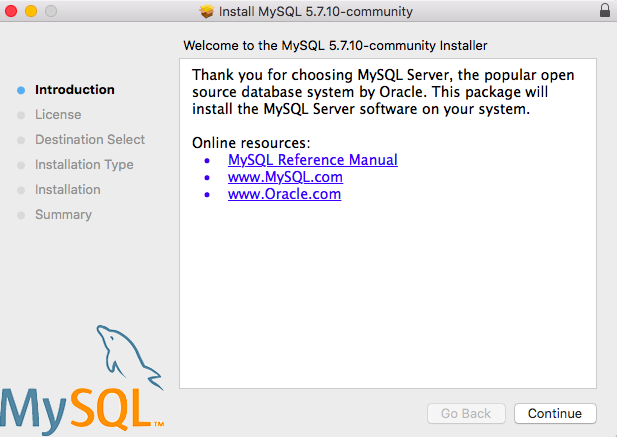
Double click it and go through the install process.
When I did it I got an alert box:
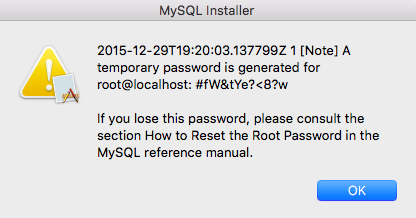 This is okay, but copy and paste the password to have for future reference.
Add to path. This went in ~/.zshrc because I am using ZSH. If you are using bash for terminal (the default on OS X) this will be the ~/.bashrc file or ~/.bash_profile. This post explains the difference between the two files.
$ sublime ~/.zshrc$ source ~/.zshrc
Add the mysql download to your path so that you can use the ?mysql? command from the command line.
export PATH=$PATH:/usr/local/mysql/bin
Then test it out:
$ mysql –versionmysql Ver 14.14 Distrib 5.7.10, for osx10.9 (x86_64) using EditLine wrapper
Now that we have MySQL installed and accessible from the Terminal, it?s time to connect to the database and start the MySQL server. Let?s log in as root user (root@localhost) and use that funky password that popped up in the alert window after our install. In the above case it?s #fW&tYe?<8?w
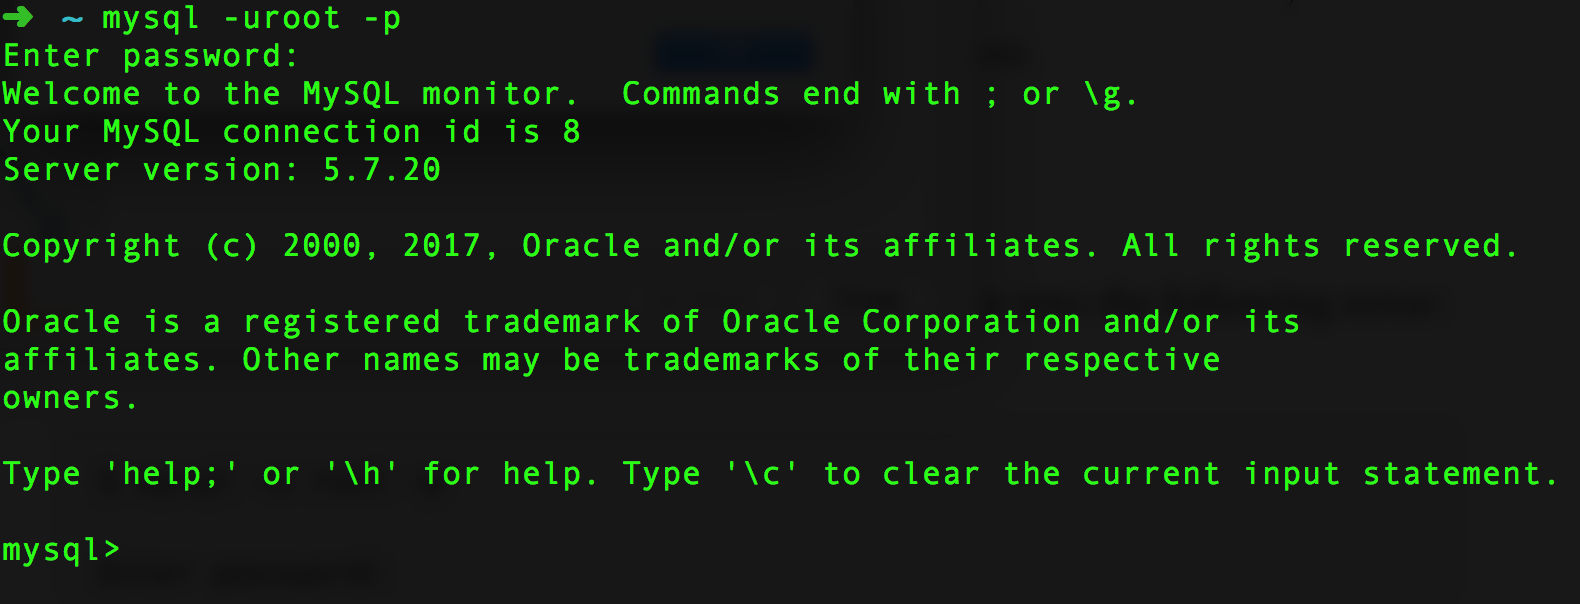 Log in and start the MySQL server
Great! Now we can create databases and run SQL queries right from the command line. That?s an awesome start, but there?s no way anyone is going to remember that password, nor is it enjoyable to type in every time we want to run MySQL. The full docs on changing passwords are here. For OSX you can run the command:
mysql> SET PASSWORD FOR ‘root’@’localhost’ = PASSWORD(‘root’)
The PASSWORD(‘root’) sets my password to ?root?. Easy to remember right? You can set your password to anything you like, such as PASSWORD(‘myN3wp@Ssw0rd’).
To stop the server in the terminal run control + D. Congratulations! You?ve installed MySQL on OSX, made it accessible from the command line and updated your password for the root user.
To start setting up a Laravel application and connect to a database using Sequel Pro you can follow my next tutorial:
Laravel 5 Initial Database Setup and Seeding
Thanks for reading!
Update (9/16/17): Expired passwords
When trying to login to MySQL on OSX recently I ran into the following error:
$ mysql -u root -pEnter password:ERROR 1862 (HY000): Your password has expired. To log in you must change it using a client that supports expired passwords.
There are a lot of StackOverflow threads and articles about this, many require writing SQL commands, though that was difficult for me without access to the terminal. In order to alleiviate this I found this SO answer that saved me:
$ /usr/local/mysql/bin/mysqladmin -u root -p passwordEnter password:New password:Confirm new password:Warning: Since password will be sent to server in plain text, use ssl connection to ensure password safety.
Update 03/29/18:
- Helpful steps for Install MySQL on macOS Sierra as a gist link.
Update 05/14/19:
- I recently ran into an error when trying to fire up the MySQL shell:
mysql: Can’t read dir of ‘/usr/local/etc/my.cnf.d’ (Errcode: 2 “No such file or directory”)
I found the solution in this homebrew issue. Create an empty directory for this path: mkdir /usr/local/etc/my.cnf.d
