
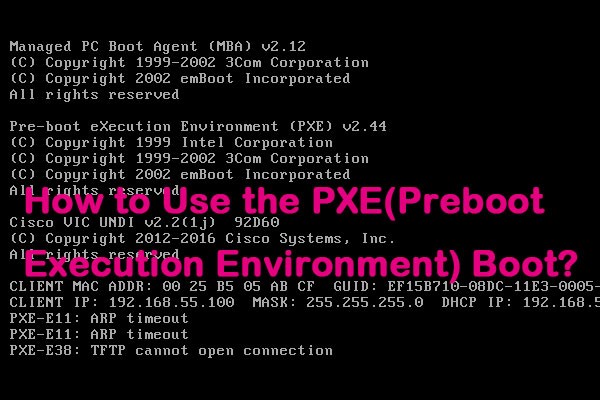
What Is PXE?
What is PXE? PXE is abbreviate of the Preboot Execution Environment. It is a method of booting a terminal computer (client) using only its network card. The concept of PXE originated from the early days of protocols such as BOOTP/DHCP/TFTP, and by 2015 it has become part of the UEFI standard.
It is standards-based and you can use open-source software or vendor-supported products to implement it. PXE is a key part of the data center infrastructure because it can automatically configure servers or workstations over the network.
Having an in-depth knowledge of the PXE stack will benefit anyone engaged in infrastructure deployment of bare-metal servers, embedded devices, and IOT devices.

On the client-side, it requires only a PXE-capable NIC and uses a small set of industry-standard network protocols such as DHCP and TFTP. Here are more details of NIC, the DHCP server, and the TFTP server.
NIC
NIC refers to the Network Interface Controller. Many consumer-grade network cards do not have PXE capabilities. PXE-enabled NIC is the DE facto standard in data center-grade servers. Some PXE-enabled NICs even use open source PXE firmware.
DHCP
DHCP refers to the Dynamic Host Configuration Protocol. There are two types of actors in DHCP ? the DHCP server and the DHCP client. DHCP supports a wide range of options that can be provided to network clients.
But usually, it consists of the IP address used by the client, the default gateway address and the DNS server used for name resolution. For PXE, this is an option that contains the server?s IP address, from which you can download its startup file.
TFTP Server
TFTP refers to the Trivial File Transfer Protocol. It is a simple UDP-based protocol for getting or sending files. The simplicity of it is great for implementation in a firmware environment with limited resources.
TFTP has no bells or whistles because of its simple nature. It only supports getting and putting files. No directory listing, so you need to know the exact path of the file to download. Besides, there is no authentication or authorization.
Although TFTP is still commonly used in PXE environments, advances in technology have led some PXE implementations to support more complex protocols such as HTTP or ISCSI.
PXE boot
Advantages of PXE Boot
This part is about the advantages of the PXE boot server. Besides, you can also know when to use it. The advantages of using the PXE boot server are as follows:
1. For the client machine, the operating system or even a hard disk is not necessary. Then the installers can be less technical.
2. When there is a hardware or software failure, the client computer can be restarted. This allows administrators to diagnose and possibly resolve issues and there will be less error-prone due to automation.
3. New computers can be easily added to the network because PXE is vendor-independent. Using it can reduce time spent per server and the installation tools are centralized and easier to update.
When you want to maintain or install the system for multiple computers without inserting a CD or USB into these computers one by one, you can try the PXE boot to install the system. If your computer does not start properly and cannot be started by loading an image file on the internal hard drive, you can also try the PXE boot.
If the client does not have a CD-ROM drive or USB port available or does not have a CD or USB image, then you can try the PXE boot to start multiple client computers in the LAN. You may need this post ? How to Enable Wake-on-LAN in Windows 10.
How Does PXE Boot Work?
Now, let?s see how does PXE boot work. First, you should configure the DHCP server/scope Options 66 and 67 before the PXE network boots. The PXE boot process starts after the client computer is assigned with an IP address.
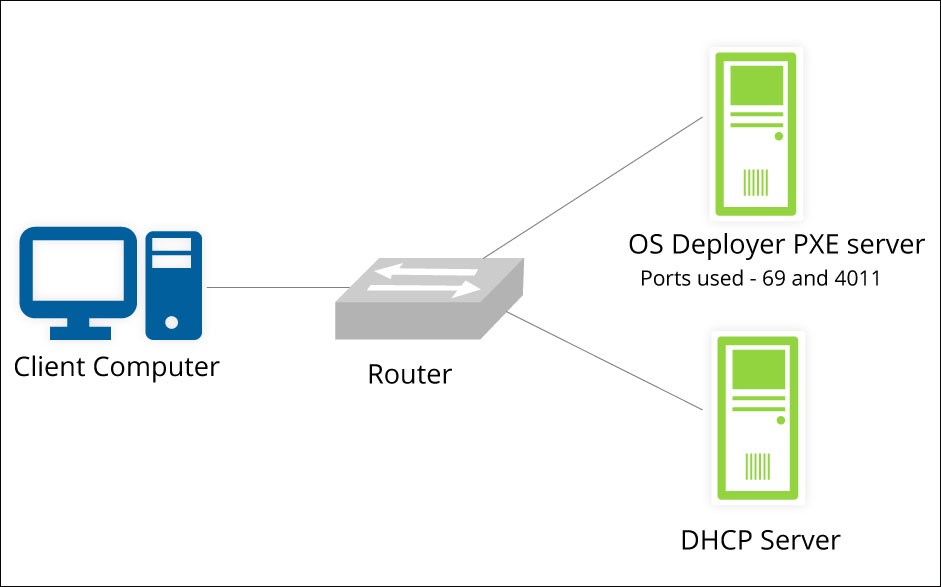
DHCP configuration process
1. The client computer sends a ?discover? packet as a broadcast requesting network configuration. The DHCP server will receive this packet.
2. The DHCP server will send an ?offer? packet to the client. After analyzing the packet, the client will be assigned the network parameters such as IP address, subnet mask, etc.
PXE boot process
1. DHCP will be notified by the client that it is using a PXE server. The Next Boot Server?s Next Boot Server?s IP address(Option 66) and the Boot Filename (Option 67) will be sent to the client by the server.
2. The client will contact the PXE boot server and request a boot file.
3. The PXE server will send the startup file to the client via Trivial File Transfer Protocol (TFTP).
4. In the DHCP server, Options 66 and 67 can be configured under range or server options. This helps to load and start the startup files of client computers.
How to Perform the PXE boot Windows 10?
Just now, I have introduced how PXE boot works. Now, let?s see how to perform the PXE boot Windows 10. There are two methods available. You can choose one based on your needs.
Perform the PXE Boot Windows 10 with MiniTool ShadowMaker
The first method for you is to use the professional backup software ? MiniTool ShadowMaker. You can boot many computers from the microsystem in the network with the PXE Boot feature of MiniTool ShadowMaker. That is to say, the PXE Boot feature is used to make other client PCs boot from the same network.
After booting, all client PCs can back up, restore or clone with tools offered in Windows PE. All in all, the MiniTool PXE Boot feature makes it feasible that maintain multiple computers in LAN.
The backup feature of this software supports backing up your system drive completely, including system partition, system reserved partition and EFI system partition. In addition to restoring the system to the original device, you can also do the universal restore when restoring to a different computer with dissimilar hardware.
MiniTool ShadowMaker provides Trial Edition that gives you a 30-day free trial for all backup features. You can purchase its Pro Edition to use it permanently. Now you can try this software to perform the PXE boot Windows 10. You can follow the instructions step by step.
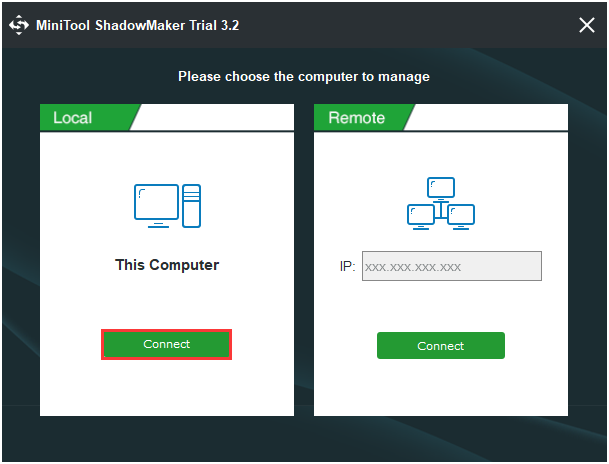
Step 1: Launch MiniTool ShadowMaker. Click Keep Trial, and click Connect in This Computer to enter its main interface.
Step 2: Navigate to the Tools tab and click the PXE part.

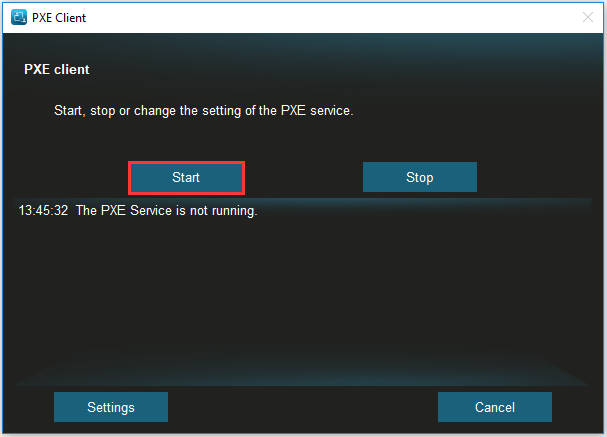
Step 3: Click the Start button to start the PXE service. MiniTool PXE Boot tool will configure related DHCP values automatically. You can click Settings to change the values before you click Start.
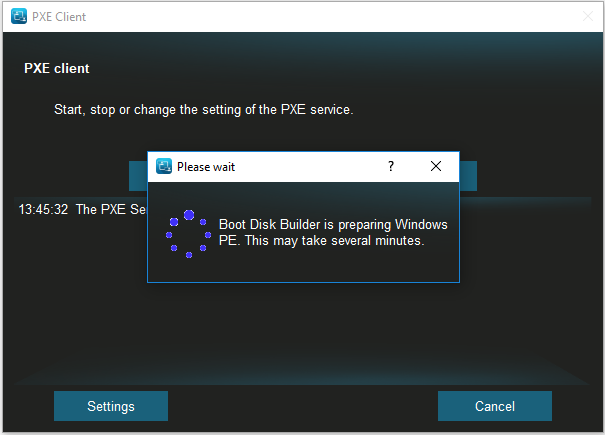
Step 4: MiniTool PXE Boot will start the service to connect client PCs. It may take several minutes. You just need to wait patiently.
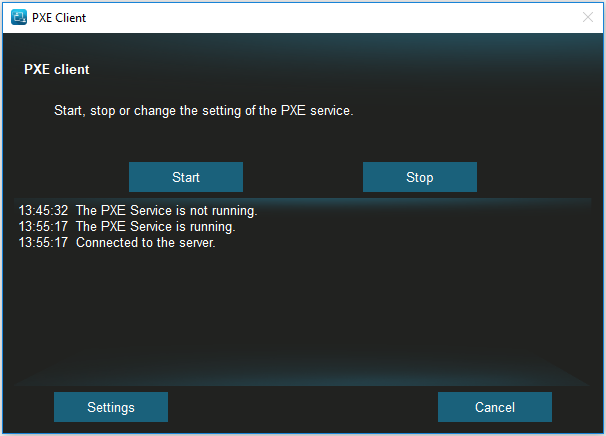
Step 5: When the Connected to the server message appears, you can set the client PCs to boot from the network in BIOS. When all client PCs are booting from PXE network, you can maintain hard drives on many clients easily.
Step 6: After you finish the tasks, you can stop the PXE service by clicking Stop on the host computer.
Perform the PXE boot Windows 10 Without Software
You can also try performing the PXE boot Windows without software. This method is a little complex, you had better follow the steps patiently and carefully. Here is how to do that.
Step 1: Make sure that the PXE network environment is properly set up, that is to say, you should check if the DHCP server and the TFTP server is prepared. Then, enter BIOS by reading this post ? How to Enter BIOS Windows 10/8/7 (HP/Asus/Dell/Lenovo, any PC).
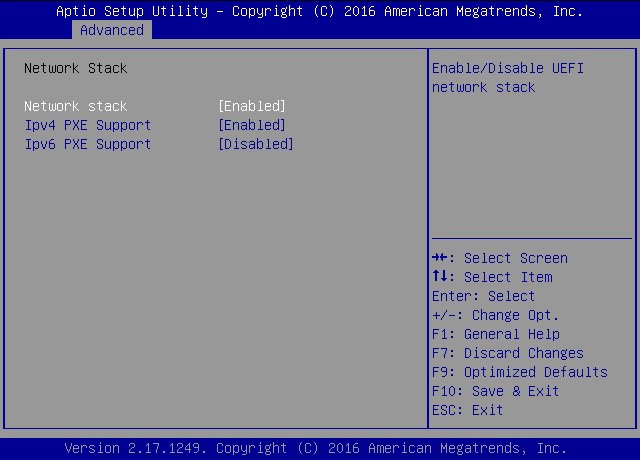
Step 2: Then you should verify that PXE boot is enabled. Press the F2 key to access the Aptio Setup Utility > select Advanced in the top menu bar > select Network Stack.
Step 3: The server will be reset and the BIOS screen will appear again. Press the F8 key to specify a temporary boot device or press the F12 key to network boot (PXE).
Step 4: There are listing the available boot devices in the Please Select Boot Device menu. You need to select the PXE boot port, and press Enter.
Step 5: Now, complete the PXE installation by following the on-screen instructions.
Step 6: Then, follow the instructions for the post-installation tasks for your operating system. After that, you have performed the PXE boot Windows 10 successfully.
This post provides 2 methods to perform the PXE boot Windows 10, and I find that the method with MiniTool ShadowMaker is much better. Click to tweet
Final Words
To sum up, this post has introduced some information about the PXE boot. You can know what PXE is and the advantages of PXE boot as well as how it works. Besides, you can also learn how to perform the PXE boot Windows 10.
What?s more, if you have any problem with MiniTool ShadowMaker, please feel free to contact us via the email [email protected] and we will reply to you as soon as possible.
PXE Boot FAQ
What is UEFI boot mode?
Originally published at https://www.minitool.com on March 6, 2020.


 Boot?)
 Boot?)