
You can save yourself a lot of time in post-production if you learn how to use a grey card properly. Here?s a handy step-by-step guide.
 Before and After.
White balance is a topic that can cause rather spectacular headaches with even the most seasoned of photographers ? but it doesn?t have to be that way. In this video and article, I?ll show you how you can use a grey card to get the perfect white balance ? every time.
Why should you use a grey card?
When you?re shooting in raw (and you should, as I?ve illustrated before), you have a lot of leniency for editing white balance in post production: All the information captured by your camera is stored in the RAW file, which means that you can apply any white balance you like.
The only problem, if you?re suitably anally retentive, is to figure out what the perfect white balance actually is. To get it absolutely right, you need a reference point, and this is where grey cards come into play.
Grey cards are awesome little tools, that should be part of any photographer?s tool box: Basically, they act as a perfectly neutral portion of your image, which means that you can use this as a reference point, for when you want to do your photo editing in post production.
Pro-tip: Slightly de-focusing your lens can improve the results of your sample spot later on in the process.
How do you use a grey card?
Easy!
1 ? Set up your lighting ? you will need to use the grey cards every time the lighting changes, whether that?s because you changed it, or because it altered itself naturally; say, a cloud moved in front of the sun or similar.
2 ? Place a grey card in the image
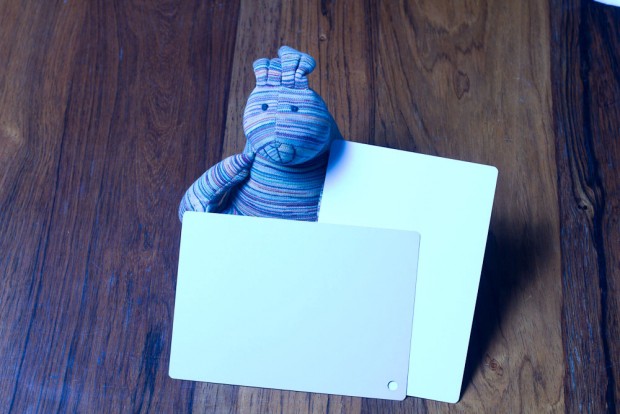 Grey card. Ready for action.
Take a photo with the grey card in the image, and check that the grey card is well lit. If it is, great!
Pro-tip: Slightly de-focusing your lens can improve the results of your sample spot later on in the process: It?s the colour you?re after, not any grain or imperfections that may be present on your grey card.
3 ? Use the white card (optional) ? When I?m working in the studio, I like to use a white card to ensure that I get my exposure perfect. To do that, I simply place the card in the image, and take a photo. I adjust the aperture until the white card is ever so slightly blown out by the lights. That way, I know that the light is as bright as it can stand without risking to harm my photos by over-exposure. The ever-so-slight over-exposure is OK, because I know the white card is the brightest thing in the photograph.
4 ? Take the cards away ? Put the cards away, and take photos as usual. As I mentioned; if the lighting changes, it?s back to step 1.
5 ? Sample in post production ? In post production, open the photo with the grey card in it, and use the White Balance Sampling tool in Lightroom to get a neutral white balance:
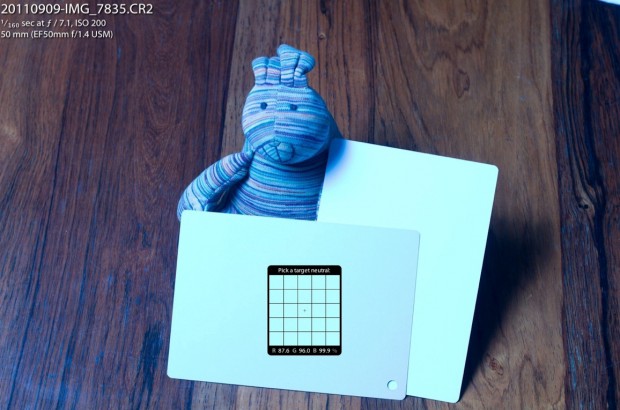
Using the White Balance eyedropper, I sample the centre of the grey card to get a neutral color sample

Perfect white balance that takes a fraction of a second? Oh yesss.
7 ? Copy the white-balance settings ? Once you?re happy with the white balance, simply copy it onto all the other photos in your photo shoot. Hey presto ? 100% perfectly white balanced images with a minimum amount of fuss!
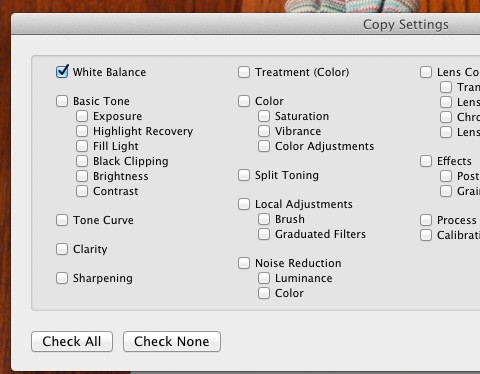
Copy the white balance settings from your freshly balanced image
8 ? Apply to all the other images
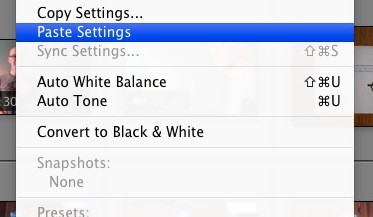
Select your images in Grid view in Lightroom, and right-click on them. Choose
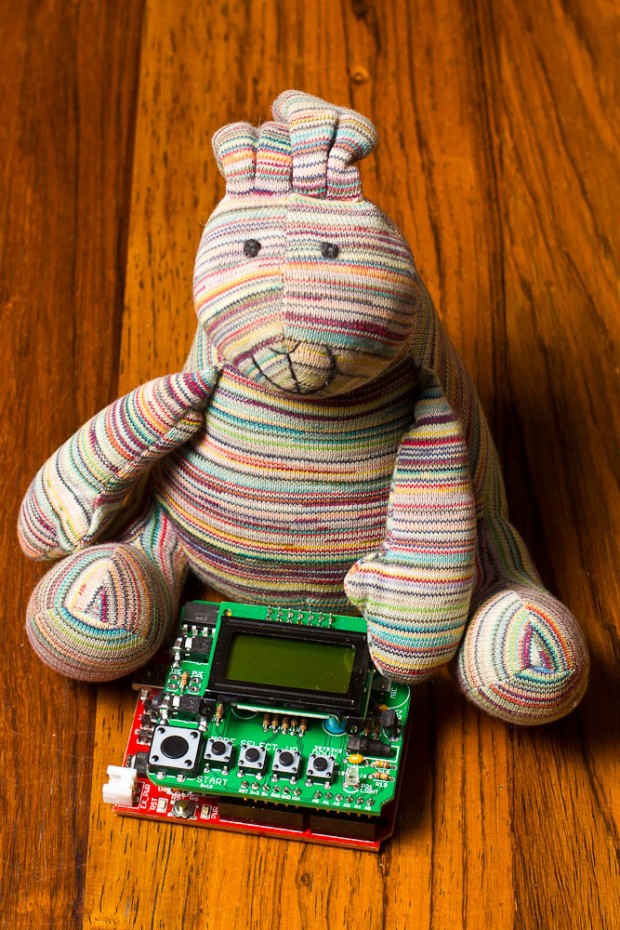 A perfectly balanced photo of Bunny holding a Triggertrap Arduino Shield. Scrumptious!
Did I mention that grey cards aren?t very expensive at all? You can buy them from all sorts of places for $10 or so. Amazon isn?t a bad place to start.
This article is written as a compendium to a lesson in the free Photocritic Photo School. Sign up today for a 26-lesson school that teaches you the basics of photography.

