There are two ways to resend an email that you have already sent.
- Longer Traditional approach manually
- The faster Modern approach through SalesHandy
1. Steps on how to resend an email in Gmail
It is a tiring task to resend an email with Gmail if you follow the traditional formula especially when you have to resend several emails frequently.
Answers to your questions like ? ?How to resend an email in Gmail??, ?How can I send an already sent email again through Gmail??, etc. is finally here.
Step 1: You have to go to your sent emails folder in Gmail, which is usually clustered and not a very fun place to go to.
Step 2: Find the email you?d like to resend.
Step 3: Open the message you want to resend.
Step 4: You?ll have to the ?Reply section and then hit the ?Forward? button.
Step 5: you?ll have to enter the name or email of the prospect. Step six is the easiest, as you have to just hit ?Send? and then you?re finally done.
The entire point of resending an email is for the whole process to be easy and effective. This is a slow and tiring process especially if you?re manually doing it.
Luckily there are tools that will let you resend any email with ease and effectiveness. This is done by combining the email templates abilities of services like SalesHandy, along with the actual resending of the email.
So, now your pursuit of finding a perfect tool for resending your emails daily is over. We have come up with a tailor-made app for you helping you work efficiently and save a lot of time.
2. An efficient alternative to resending an email in Gmail manually
SalesHandy, which has now merged its entire services into one easy-to-use Chrome extension, allows you to work your way towards a more productive email workflow. The secret behind the app is in their templates feature, which can be merged with any email service, including Gmail, once you?ve settled on a set template that you resend regularly.
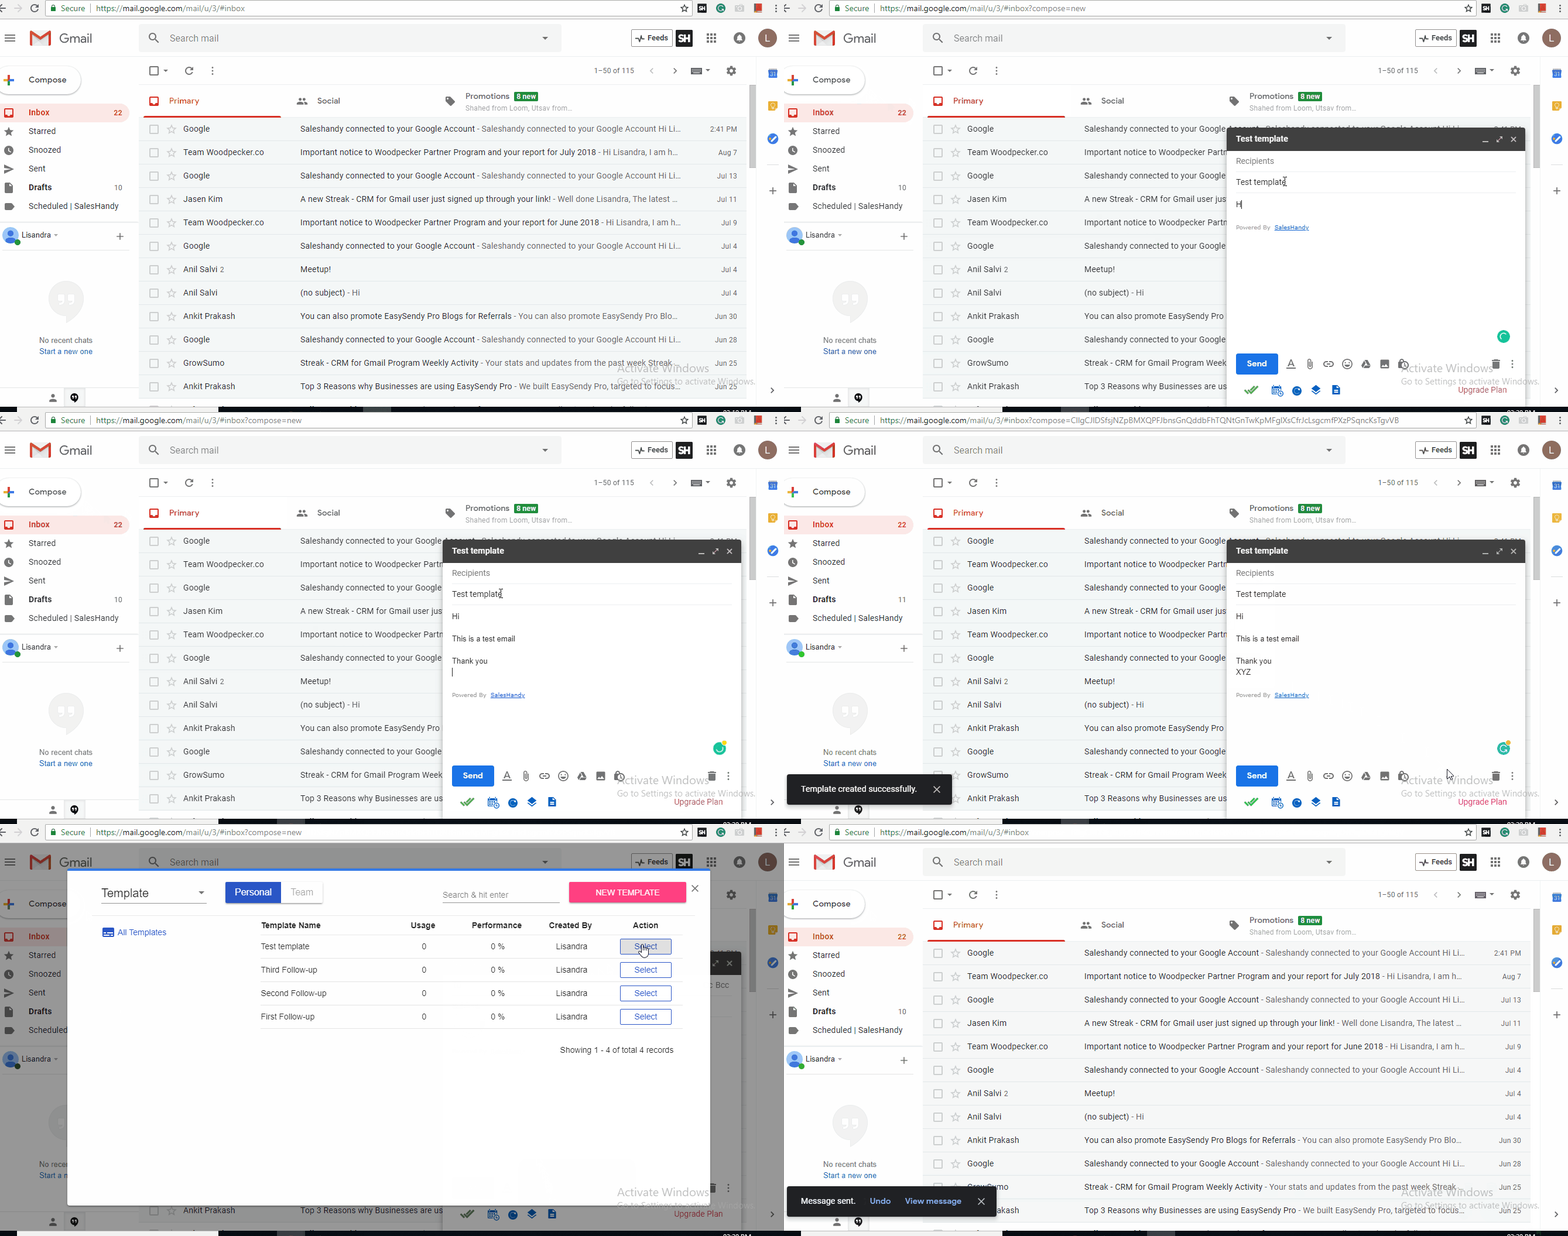
Here is the GIF explaining to you how to create and use email templates through Gmail:

Step 1: Write the email
Step 2: Save the template by clicking on the template icon
Step 3: Re-use it anytime you want
Here is the video explaining you how to create and use email templates through the app. ?
Step 1: In your app, click on the ?Template? button on the left-hand side;
Step 2: Click on ?New Template? on the right-hand side of the screen;
Step 3: Create your email template the way you want it, even with HTML code for promotional emails or anything else;
Step 4: Save the template and use it anytime you want.
The benefits of having templates at hand
- You can easily use the template that is to be sent and resent any number of times you desire;
- You get to benefit from the great tracking tools in the app;
- You?ll be able to see which templates are performing better, which of them have the highest opening rates and which are the ones that are used the most;
- You?ll be able to write even better templates in the future, allowing you to resend effective emails faster.
Time efficiency is key when you?re doing any emails work, especially resending emails that have failed or are inefficient for some reason. That is all possible with the SalesHandy crafty tools of email templates and tracking. Also, besides time management, the effortless interfaces will allow you to work on your projects more easily and enjoy your time at the office more. And now that the entire thing can be done through a Chrome extension, that?s even more productivity and easier development for you than with the regular web app.
Using an extension like the one SalesHandy provides, you?ll drastically improve your times and make significant project than ever before. Don?t trust us, just try it for yourself and see if it fits your needs.
Use SalesHandy and Save your precious time.
Originally published at www.saleshandy.com on September 4, 2018.


