
 HOW TO REMOVE ACTIVATE WINDOWS 10 WATERMARK
You always see activate Windows 10 watermark in the bottom-right corner of your system?s desktop. If you want to remove activate Windows 10 Watermark then you can take help from this content.
Methods to remove activate Windows 10 watermark:
1) Remove watermark manually:
You need to edit the registry to remove the activate watermark from Windows 10. To do this process, go through the steps given below:
Firstly, you need to press Windows + R key to open the Run box in your system.
Then type regedit in the address bar of the Run box and hit enter.
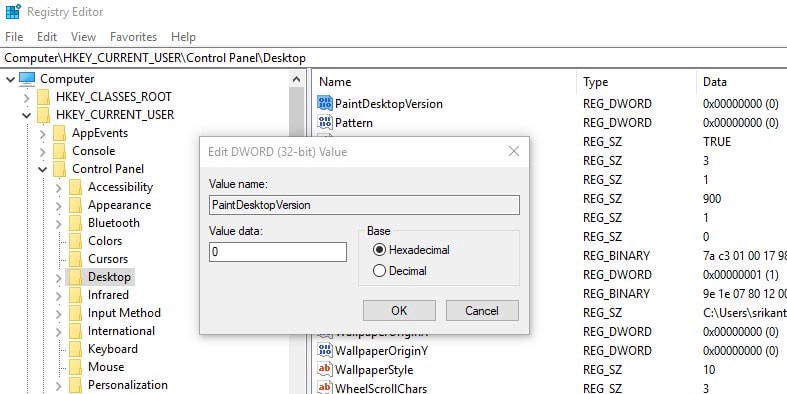
Then expand HKEY_CURRENT_USERControl PanelDesktop.
Now, click on the PaintDesktopVersion option.
After that, enter the value 0 in the Value data field and click on Ok button to save changes.
Now, restart your system.
2) Use the support tool :
To remove the activate watermark, follow the steps given below:
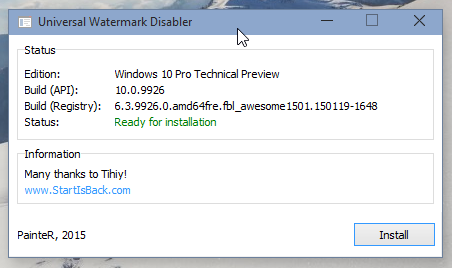
Download the UNIVERSAL WATERMARK DISABLER. It is a tool that is used to remove watermarks from Windows 10.
After downloading this tool, Run the tool and click on the install button.
Then click on the option yes when prompted.
After that, your computer will automatically restart and the watermark will disappear.
Use another tool to remove the watermark from Windows 10:
Follow the steps given below to use that tool:
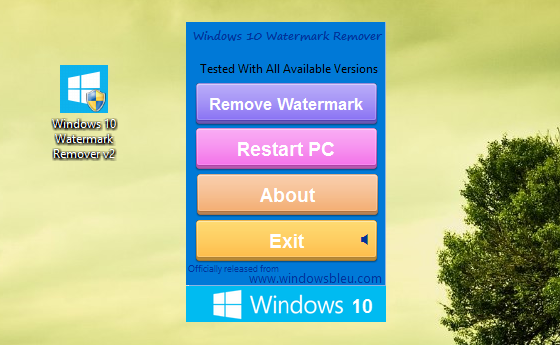
Download the watermark remover for Windows 10.
After downloading, run that downloaded file and click on the remove watermark button to remove the watermark from Windows 10.
After this, your system will automatically reboot and after rebooting you can see that the watermark is completely removed from your computer?s desktop.
3) Ease of access settings:
For this process, follow the steps given below:
Firstly, you need to press Windows + S key and then click on the control panel.
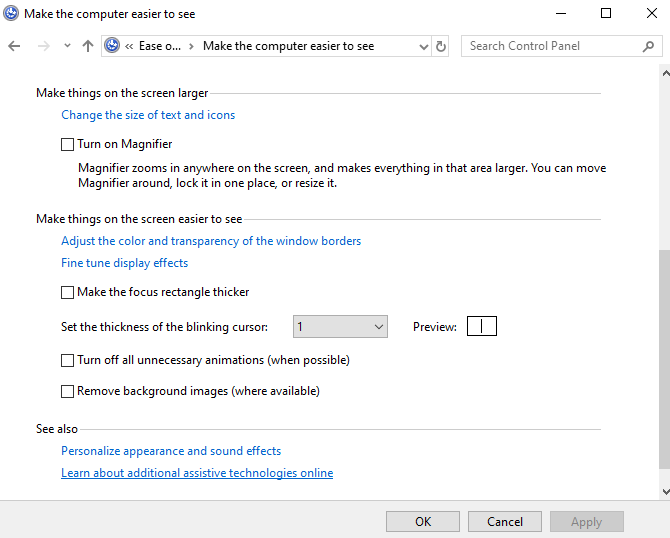
After that, click on the option ease of access center.
Then select the option make the computer easier to see.
After that, tick the box named remove background images (where available).
At last, click on confirm to confirm the action.
4) Do the standard settings:
To do this process, follow the steps given below:
Firstly, you need to type cmd in the search bar available on the desktop screen.
After this, click on the command prompt and choose Run as an administrator option.
Then type bcdedit -set TESTSIGNING OFF in the command prompt Window and hit enter.
At last, you need to close the Window and reboot the system.
You can use these above solutions to remove activate watermark Windows 10.
Read full blog here:- https://www.quickhelpzone.com/remove-activate-windows-10-watermark/

