
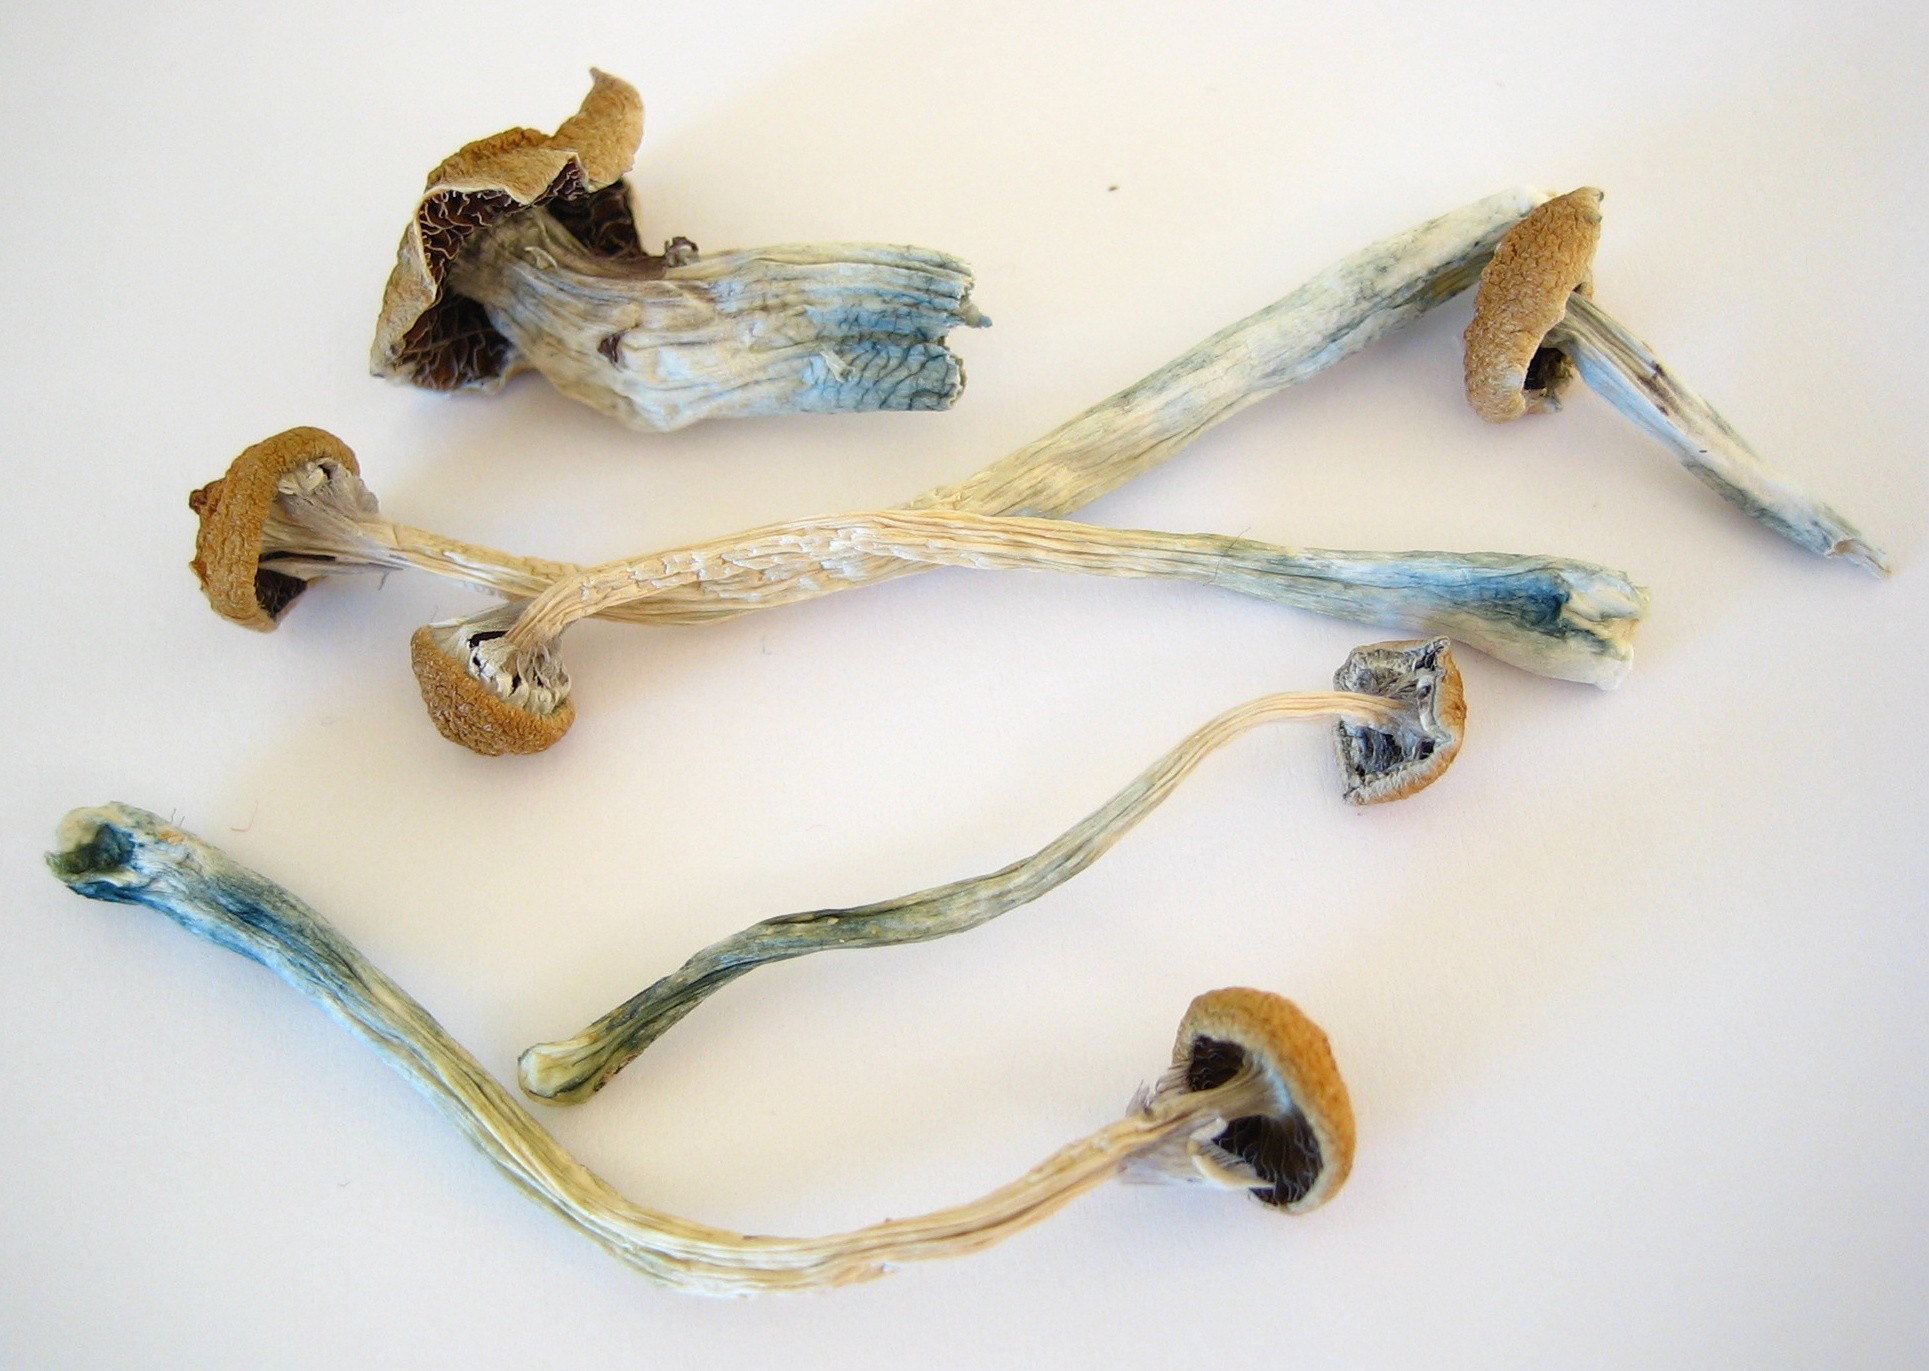
 Dried Psilocybe cubensis shrooms
If you want to be independent from the trove of fungi out in nature and the offerings from some Smart Shops in specific countries, it is recommended to create your own fungi culture at home. For each species there are specific methods of cultivating. The psychedelic mushrooms which are cultivated the most are Psilocybe cubensis, also called the ?Mexican?. The reason why they are that known is that they?re quite easy to grow under controlled circumstances. In Europe they can only be cultivated indoors. On the other hand, there are other species which can grow easily outdoors. Psilocybe cyanescens are native fungi which are growing on wood chips just as the Psilocybe azurescens does. However, the methods to cultivate the two last once is quite different to the technique to grow Psilocybe cubensis.In general, growing your own fungi is a little bit more difficult than growing your own cannabis. Before you start with the fungi culture one must be aware of certain rules and work very precisely. Most of the time the biggest issue is working sterile. If one is starting with the cultivation, you realize pretty fast that fungi cultures are liable for bacteria and mold. Even if you work really properly and sterile your glass with the culture can still get infected. Nevertheless, don?t get discouraged! Always take note of what you?re doing and what went wrong. Try to learn from your mistake.
Instruction to cultivate your own fungi
Source: The following technique was published for the first time in Seattle in September 1991 under the name PF TEK (Psylocybe Fanaticus technique). Around 1998 more than half a million of examples were in circulation. The PF TEK is the most popular ecological fungi grow technique in the world.This authorized version was adapted to situation in Europe by the Stichting Perfect Fungi.
One needs the following accessories:
PharmacyNeedles with needle protectionSterile packed injection needlesSyringes and needles are only necessary when one wants to make its own spores syringes
Construction market or tool shopAwl (or knitting needle)
DrugstoreSpiritus (70?80% volume alcohol)Small and curved line cuticle scissors or small scissors with small tipAntibacterial soapAbsorbent cotton
Gardening shopPlant sprayerPerlitVermikulit (corn size 0?3mm, grade nr. 2)
Household article (supermarket, store, health shop, and so on)TinfoilAutoclaveLighterGlasses with smooth sidewalls15 watts-bulbPurple insect lamp or 370-nm-black light (Philips color 5)Kitchen forkCoolerBeakerMeasuring scoopTranslucent plastic bagRice flour or brown riceSoup bowl Toilette paper
Stationery shopRubber bandsMarkerSellotapePacking film
Pet shopMini-aquariumThermometer for the aquarium
Furthermore, one should have a dust free room (for example a big linen closet or a not very much used shower), a scratch disk, a seating accommodation, a blowtorch and a fridge with freezers.
1 ? Glasses
Take care of the surface of the glasses when you?re choosing. This way, you?ll have a much more comfortable harvesting process. More smaller glasses are better than a lot of big size glasses. The reason therefore is that there will happen contaminations from time to time.
1.1 One takes:
Suitable glasses which are easy to upset like a cake tin. The glasses must not deform during the process of cooking out.
1.2 Glasses which were already used a few times
Practical glasses made out of white glas are marmalade glasses up to 385 ml or preserving jars.
1.3 Plastic glasses and form
Sterilisable jars made out of heat-resistant plastic such as Polypropylen (PP) are very practical. The name is often found in a small triangular symbol. They?re cheap, light and unbreakable, but not sell practical to close.
1.4 Drinking glasses
Drinking glasses are also okay for cultivating. When you use those as a vat you?ll use the tinfoil as a cover. When using them there?s a bigger possibility of getting infected than when you?re using glasses with a screw-cap. When you fix the foil with a rubber band and take a thicker layer of Vermikulit you can minimize the risk.
2 Preparation of the soil and the process of sterilize
Fungi are more easy organisms than plants. They don?t need any chlorophyll and therefore obtain oxygen as well as azotic from outside.
2.1.1 One takes:
- Rice flour or brown rice (self-milled brown rice is better than pre-packed rice flour)
- Medium coarse Vermikulit
- Glasses with smooth sidewalls
- Awl or knitting needle
- Soup bowl
- Beaker
- Sellotape
- Kitchen fork
2.1.2 Recipe for the preparation of the soil
A maximum harvest will be achieved when you use a 1/4 glass with brown rice flour, a 1/2 glass with medium coarse Vermikulit and a 1/4 glass with water.
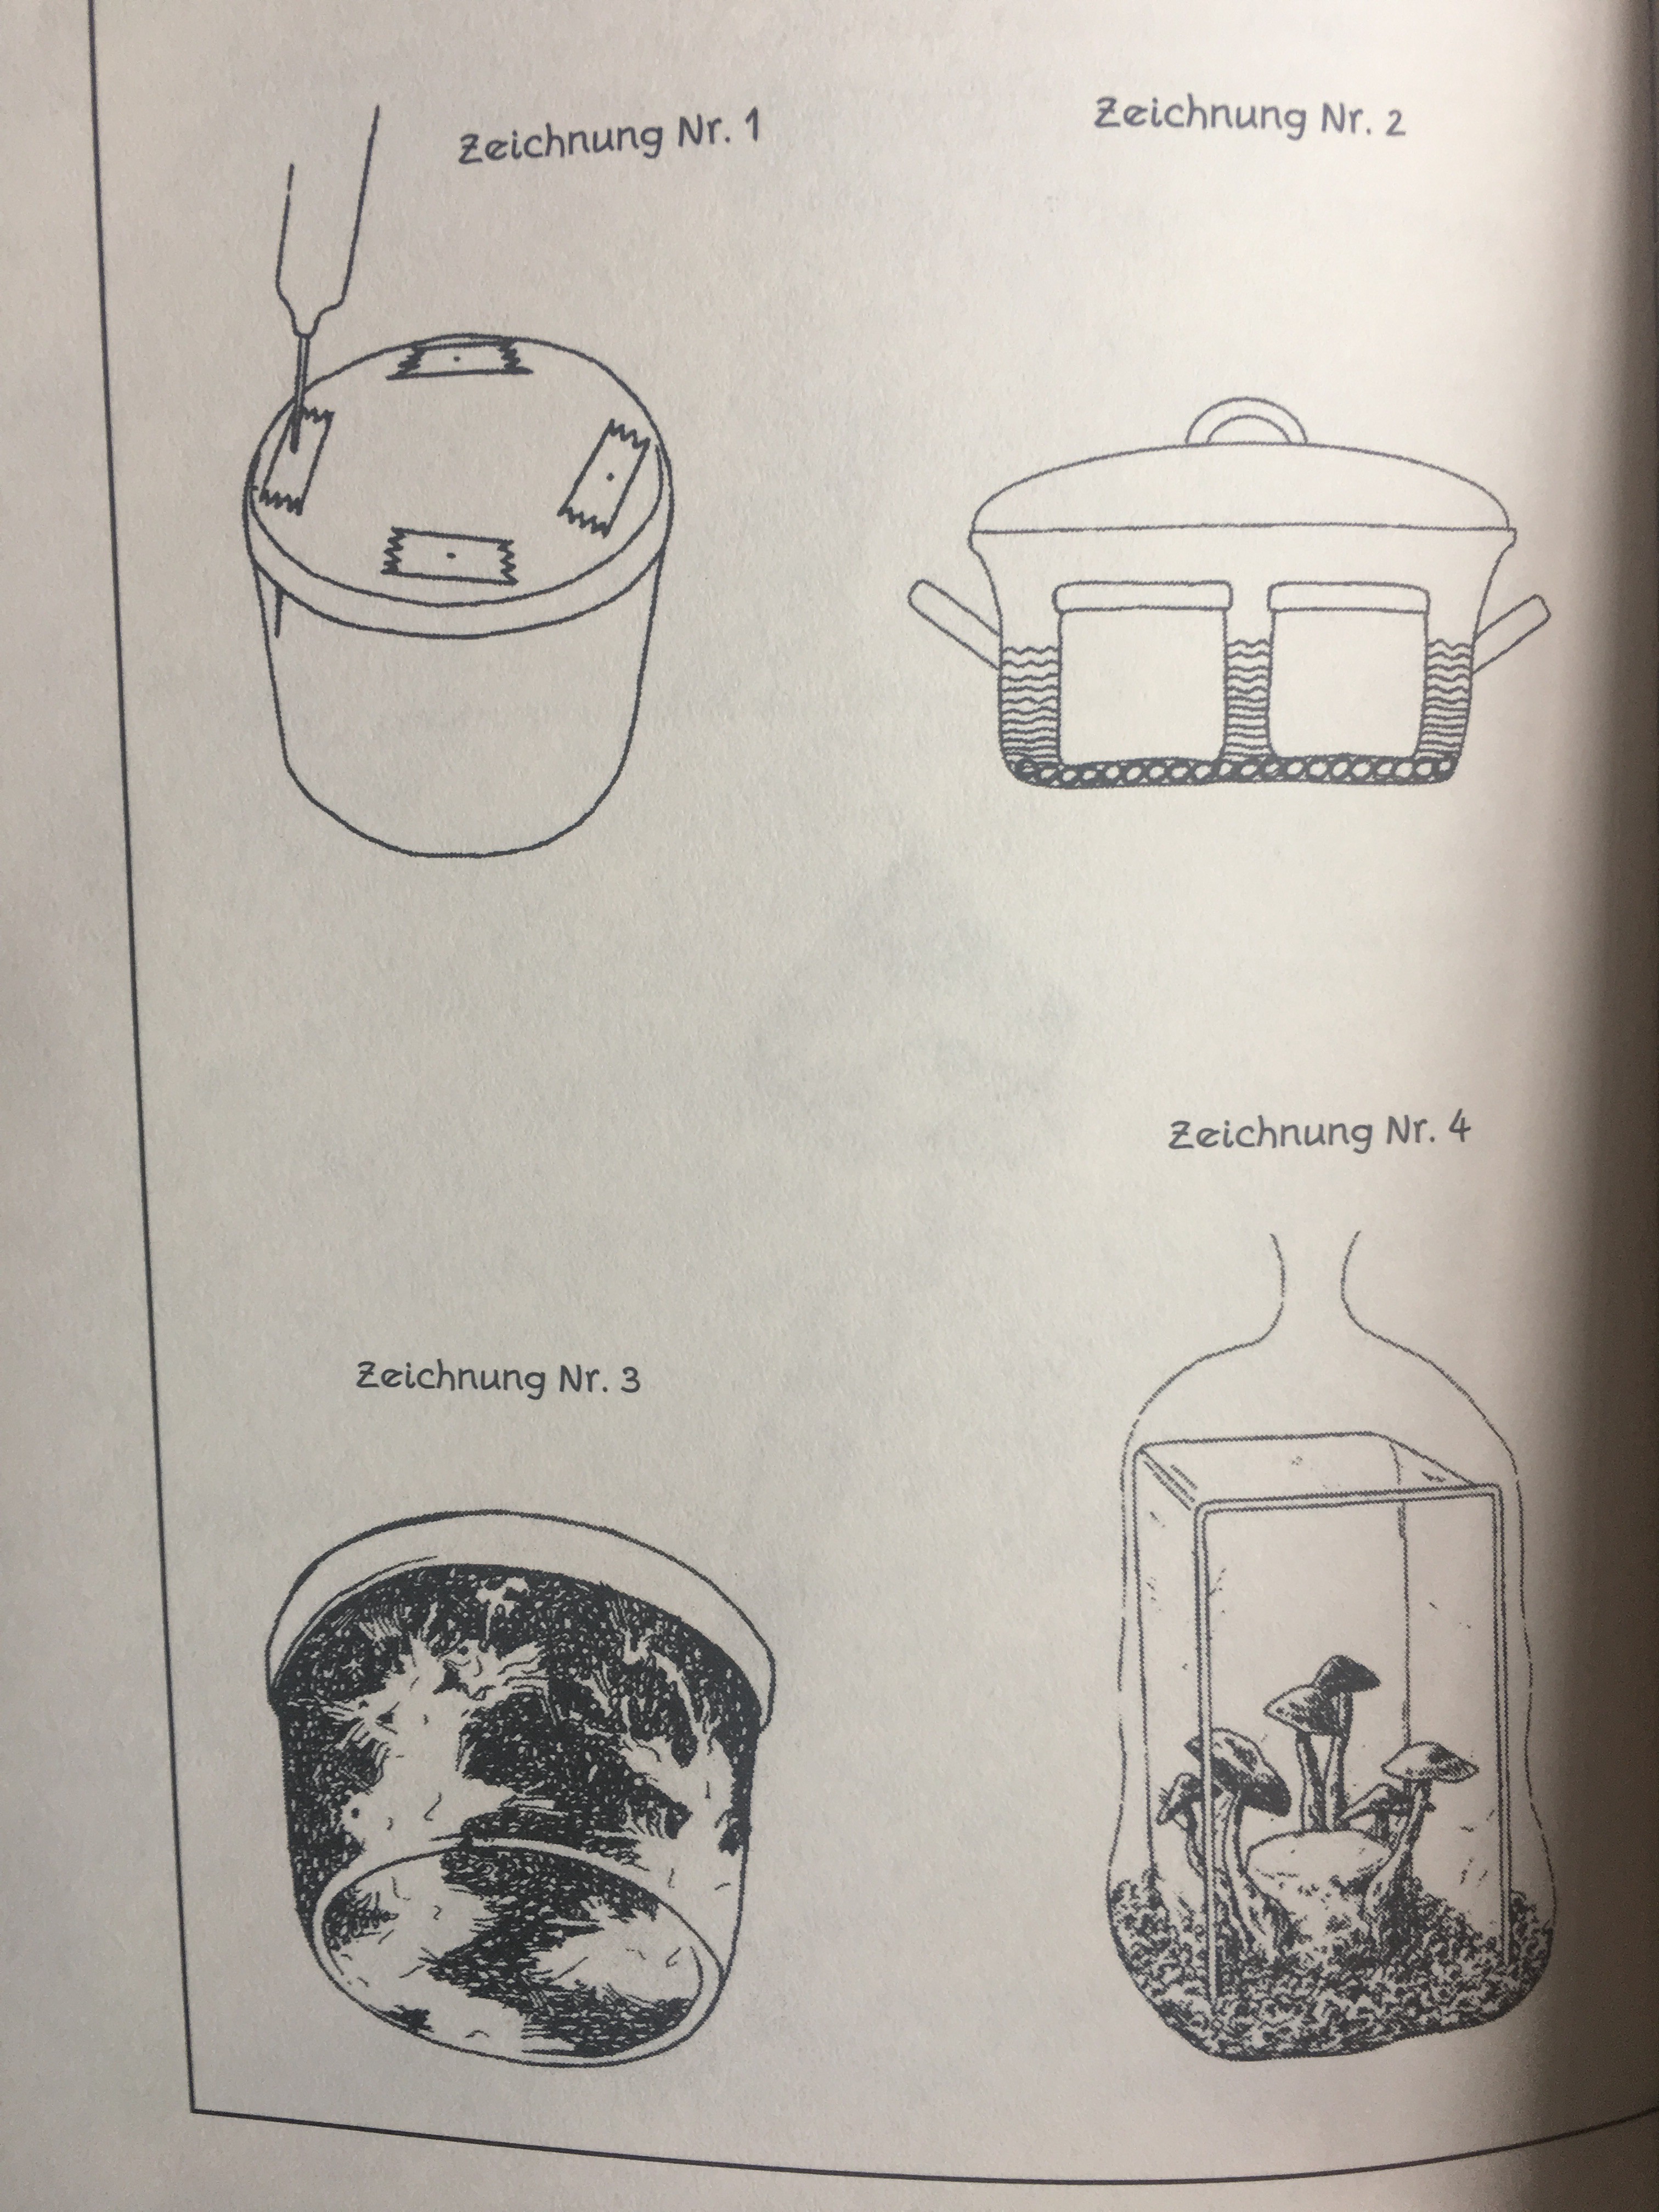
2.2 Procedure for 320 ml glasses
If you use glasses with a plastic cover (or foil covered glasses) start with step 3.
- Screw the cover on the glass.
- Sting four holes into the cover.
- Scoop 160 ml of Vermikulit into the soup bowl.
- Scoop 80 ml of rice flour over it.
- Dash over carefully 80 ml of water.
- Mix everything properly until theres no dry rice flour anymore.
- Mix the soil for each cultivation container individually. This way, you avoid the creation of clumps.
- Fill the classes loosely.
- Hit smoothly the bottom of the glass with your palm. Now, shake the glass a little so that the soil can spread equally.
- Clean the edge of the glass.
- Now put a little layer of dry Vermikulit over the soil.
- If there?s any extra Vermikulit in the glass you can take it carefully out. But do not press in any of it in the soil.
- Stick the holes on the cover with the sellotape and make sure that potential bubbles are removed. Close the cover but not too tight.
2.3 Sterilize
In the first phase of the growth, the Myzel is very vulnerable for infections which can be caused by mold and bacteria. In the process of cooking out, the microorganisms are going to get killed and their reproduction stopped.
2.3.1 One takes:
A pot with easy closable cover. At the bottom of the pot we need to have a grid which avoids that the glasses have contact with the bottom.
2.3.2 Procedure
Cook the glasses for one hour at 100 degree celsius. If you have a fast cooking pot you cook it for about 30 minutes at 120 degree celsius. The cover of the pot has to be closed very good. Otherwise, the soil will dry out. Look to it that no water comes in contact with the soil and take care that there?s enough water in the pot.
2.4 Waiting time
Preserve the glasses by room temperature. After one month the glasses need to look exactly the same and smell like short after the sterilizing. Furthermore, they need to be the same weight as before. One can loose the cover a little bit and smell the content if the Vermikulit stays at the ground.
If there?s an infection, it makes it a lot easier to determine the roots of it.
 Artwork by Isbelio Godoy
3 Inoculate and growth
The seeding of the spores is called inoculate. Not grow through soil is very likely to get infections. To avoid potential infections use the following method:
3.1 One takes:
- Inoculum (an ampulla or syring for 10 galsses ? this is for only for PF & PFE spores)
- Lighter
- Marker
- Needle
- Thermometer
3.2 Procedure
Close every window and door in your house (bathrooms are very good for this procedure). Clean everything with a mixture of antibacterial soap and Spiritus.
- (Glass with plastic cover): Sting with a hot needle four holes into the cover within the swivel. When you?re using drinking glasses this is not necessary. Here use a cover with four holes as a template.
- Shake the syringe so that the spores are spreading itself in the water and remove the protection of the needle.
- Heat the tip of the syringe in a soot-free flame. For a soot-free flame you use a reversed shot glass with a drop of Spiritus out of a pipette. A drop burns exactly the right amount of time.
- Sting a needle through a hole and let it cool.
- Take the syringe between your thumbs and middle as well as ring finger ? the forefinger at the latchkey. Hold the needle to the glass so that the opening of the needle tip is visible.
- During the time the inoculum drops into the glass you have to take the finger from the latchkey and wait for about one second then take the needle back. If the syringe clogs one withdraws it so that you get rid of the congestion. Attention: Don?t breath into the opening!
- Repeat level four to six until every opening is inoculated. Afterwards clean the needle again with the help of a soot-free flame and put on the protection so that you can store the syringe airtight.
- Seal the holes in the cover with a sellotape and write the date on the glass.
- Inoculate the next glass only if the spores in the first glass sprout. Within a month you can harvest for your own consumption this way. More costs unnecessary much time, space and material and can reduce the quality.
3.3 Sprout and growth
Store the glasses within a temperature range of 15?30 degree celsius in a dust free place without any sunlight. A cooler suits excellently for this. If heath is required you can use a bulb to shine of the glasses. Don?t use heath from the bottom as this dries out the soil. Within a week there are small white stains emerging on the Myzel and in the second week Mycelia which is growing through the soil.
 Artist unknown
4 Culture surroundings
As soon as there are primordien emerging from the soil you can remove the glass. (Be careful with not destroying the young shrooms!) Cut the parts which are not grown through with a hot knife out of the cake so that you don?t get any infections. Only full grown through soils should be used for fructification as if this is not the case the risk for infections is much higher.
4.1 Procedure
Turn over the glass and take the cake carefully out of it. If pieces are breaking of you can put it back and it will grow on again. The cake will smell quite badly and remembers to the smell of autumn leaves. Be careful if it smell a little bit sour or musty. Remove drops with toilette paper. Normally, damaged cakes do have stains on it, but this is not connected with the process of decompose.
4.2 Culture environment
In a good culture form:
- the relative humidity stays above 85%
- ventilation and temperature are easily controlable
- the cakes can be illuminated
- everything is easy to clean
4.2.1 One takes:
- Small aquarium or a transparent fruit bowl
- Transparent bag or Plexiglas table and cover
- Cocked out (saturated with water) Perlit
- Plant sprayer with high pressure
4.2.2 Construction and positioning
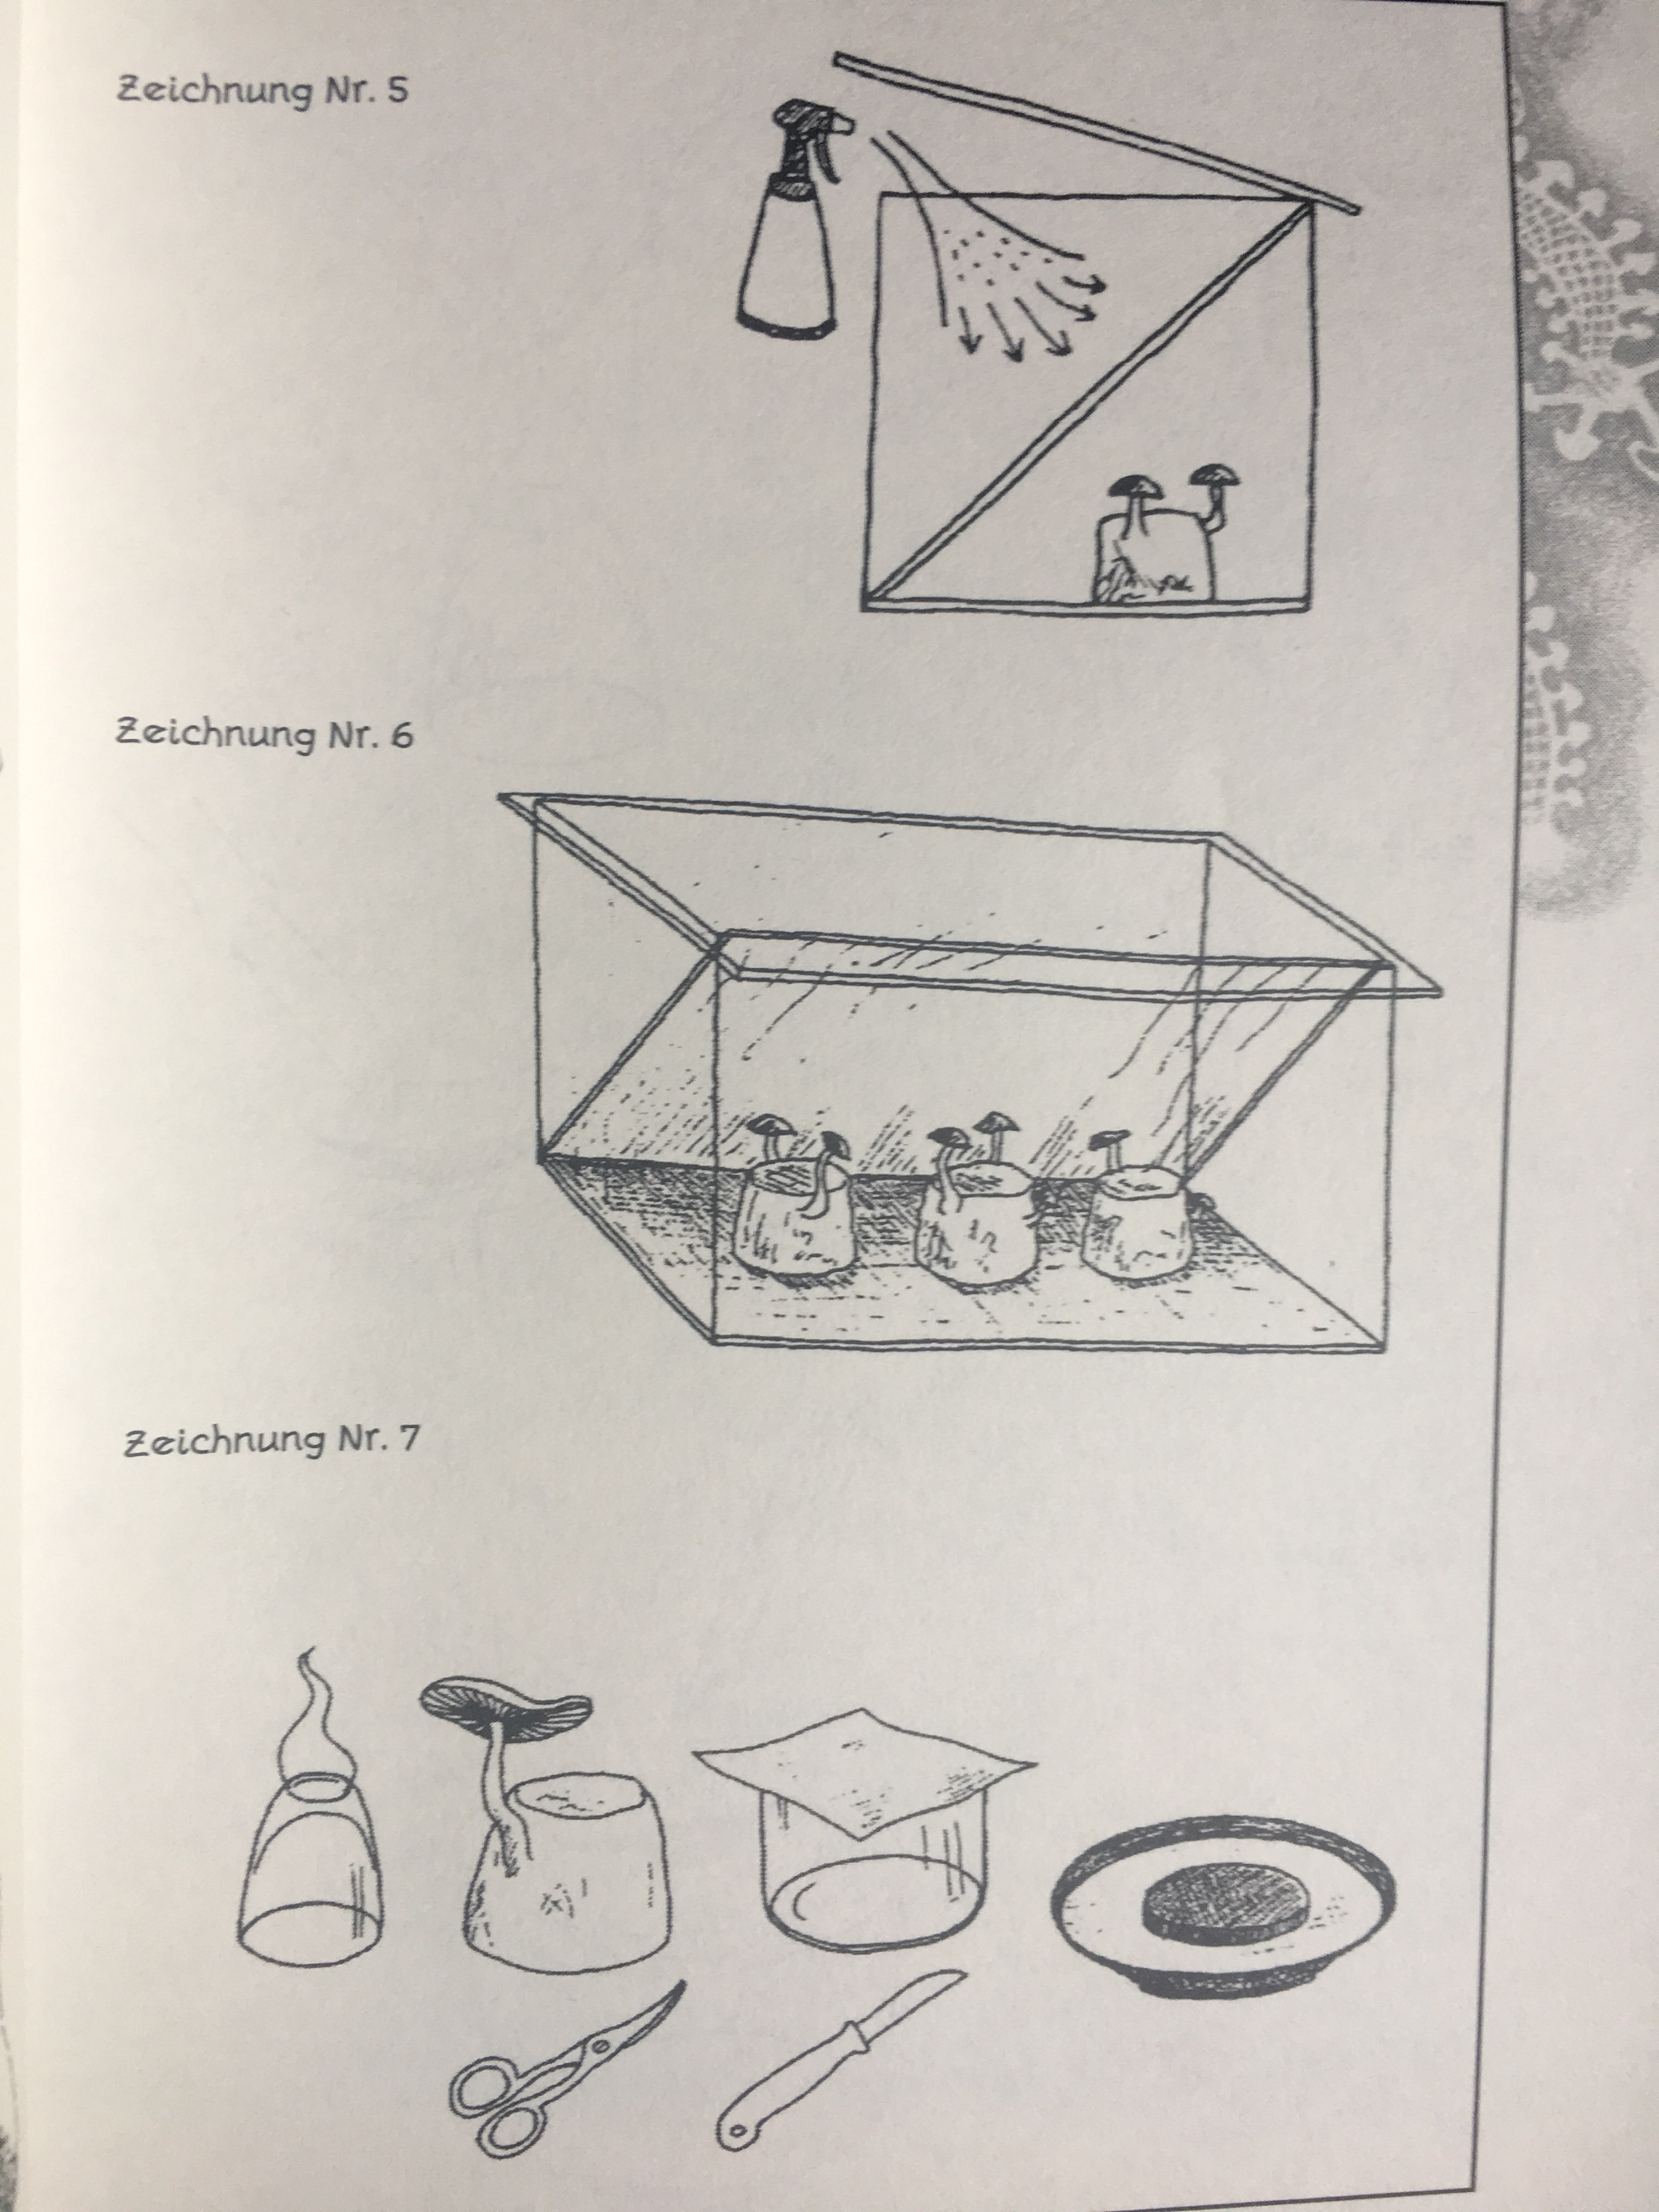
Please see the drawings for the construction. In a bag with only one cake (drawing nr. 4) the humility stays high, you won?t get any infection and you?ll have oxygen scarcity. For the packing of several cakes (see drawing nr. 5 and 6) are advantages and disadvantages the exact opposite. Perlit is capillary and lets water vaporize quicker than Vermikulit. Add the required Perlit while it is cooking. The vapor will take care of the fast humidification of the form. Then put in the small aquarium or the fruit bowl into the bag and then close it. Put or attache the bag into a fridge. Attache a black light over it. Be careful and make sure that you have enough distance between the bag and the black light so that the cake won?t get dried out. Neither the black light nor the cabinet are really necessary ? you?d also be able to attache the bag in a tent or at a tree.
4.3 Nebulize process
Nebulize regularly every 24 hours the air with water. The fog will add frish oxygen and will dissolve azotic. Shrooms are protected against direct water drops, so you don?t need to worry about that one. Redundant water can be led away through a whole on the bottom.
4.4 Light, air and temperature
Most primordien will grow in light of 370 nanometer (decoration blacklight). Shrooms will grow to the light. However, a photo period of more than 12 hours can be harmful to the shrooms.The intensity of the light is not that important. If you still can read with this light that?s fair enough. Daily ventilation is recommended. To much carbon dioxide will inhibit the growth of the hut of several shroom species. With Psilocybe cubensis this won?t be a big issue though. The shrooms are growing with at the fastest pace when you create an environment with about 30 degree celsius. But they won?t be that potent nor solid. From the beginning of building of some shroom pre-states a temperature of 21 degree celsius is preferably.
4.5 Shrooms and malformation
Shroom primordien emerge from white little points which will become yellow little shrooms. The first are deformed and will already stop growing within just a few days.The tip of a ?outbound? baby shroom will get black brown, later black and will deform from round to awkward. The hut will fall premature and will get particularly thick. Other malformations will stay as white nodules. Harvest them with a needle before they get soft ? malformations are very potent!The ordinary shrooms are growing from other pre-states. Harvesting a quarter of the wet soil weight is pretty much normal. In exceptional cases there were 4 crops with up to 60%.
5 Inoculum
Mature spores of breeding shrooms discolor the cake dark. During the preparation of the inoculum there?s the danger of infection. So make sure you?re working properly.
5.1 One takes:
- Glass with cover made out of steal
- Foil
- Pot or oven
- Spiritus
- Suds
- Curved cuticle scissors
- Small knife
- Lighter
- Cotton wool
- Shot glass
5.1.1 Procedure
- Cover the glass with tinfoil and potentially a rubber band. Then put the cover in a mixture of spiritus and suds.
- Put the glasses for about half an hour into the oven at 150 degree celsius or cook them out in a closed pot. In a pot the glass must not have contact with the bottom.
- Close the windows and the doors. Clean the walls and use utensils with suds/spiritus.
- Put the cooled glass on the right side next to the cake with sporulating shrooms. Furthermore, put the reversed cover on the right side (see drawing nr. 7).
- Place a reversed shot glass with a little bit of spiritus (70?80%) on the left side next to the cake. Place the lighter next to it as well.
- Loose the foil so that you can remove it with one hand from the glass.
- Soak a cotton ball in the spiritus. With this you clean the knife and the scissor.
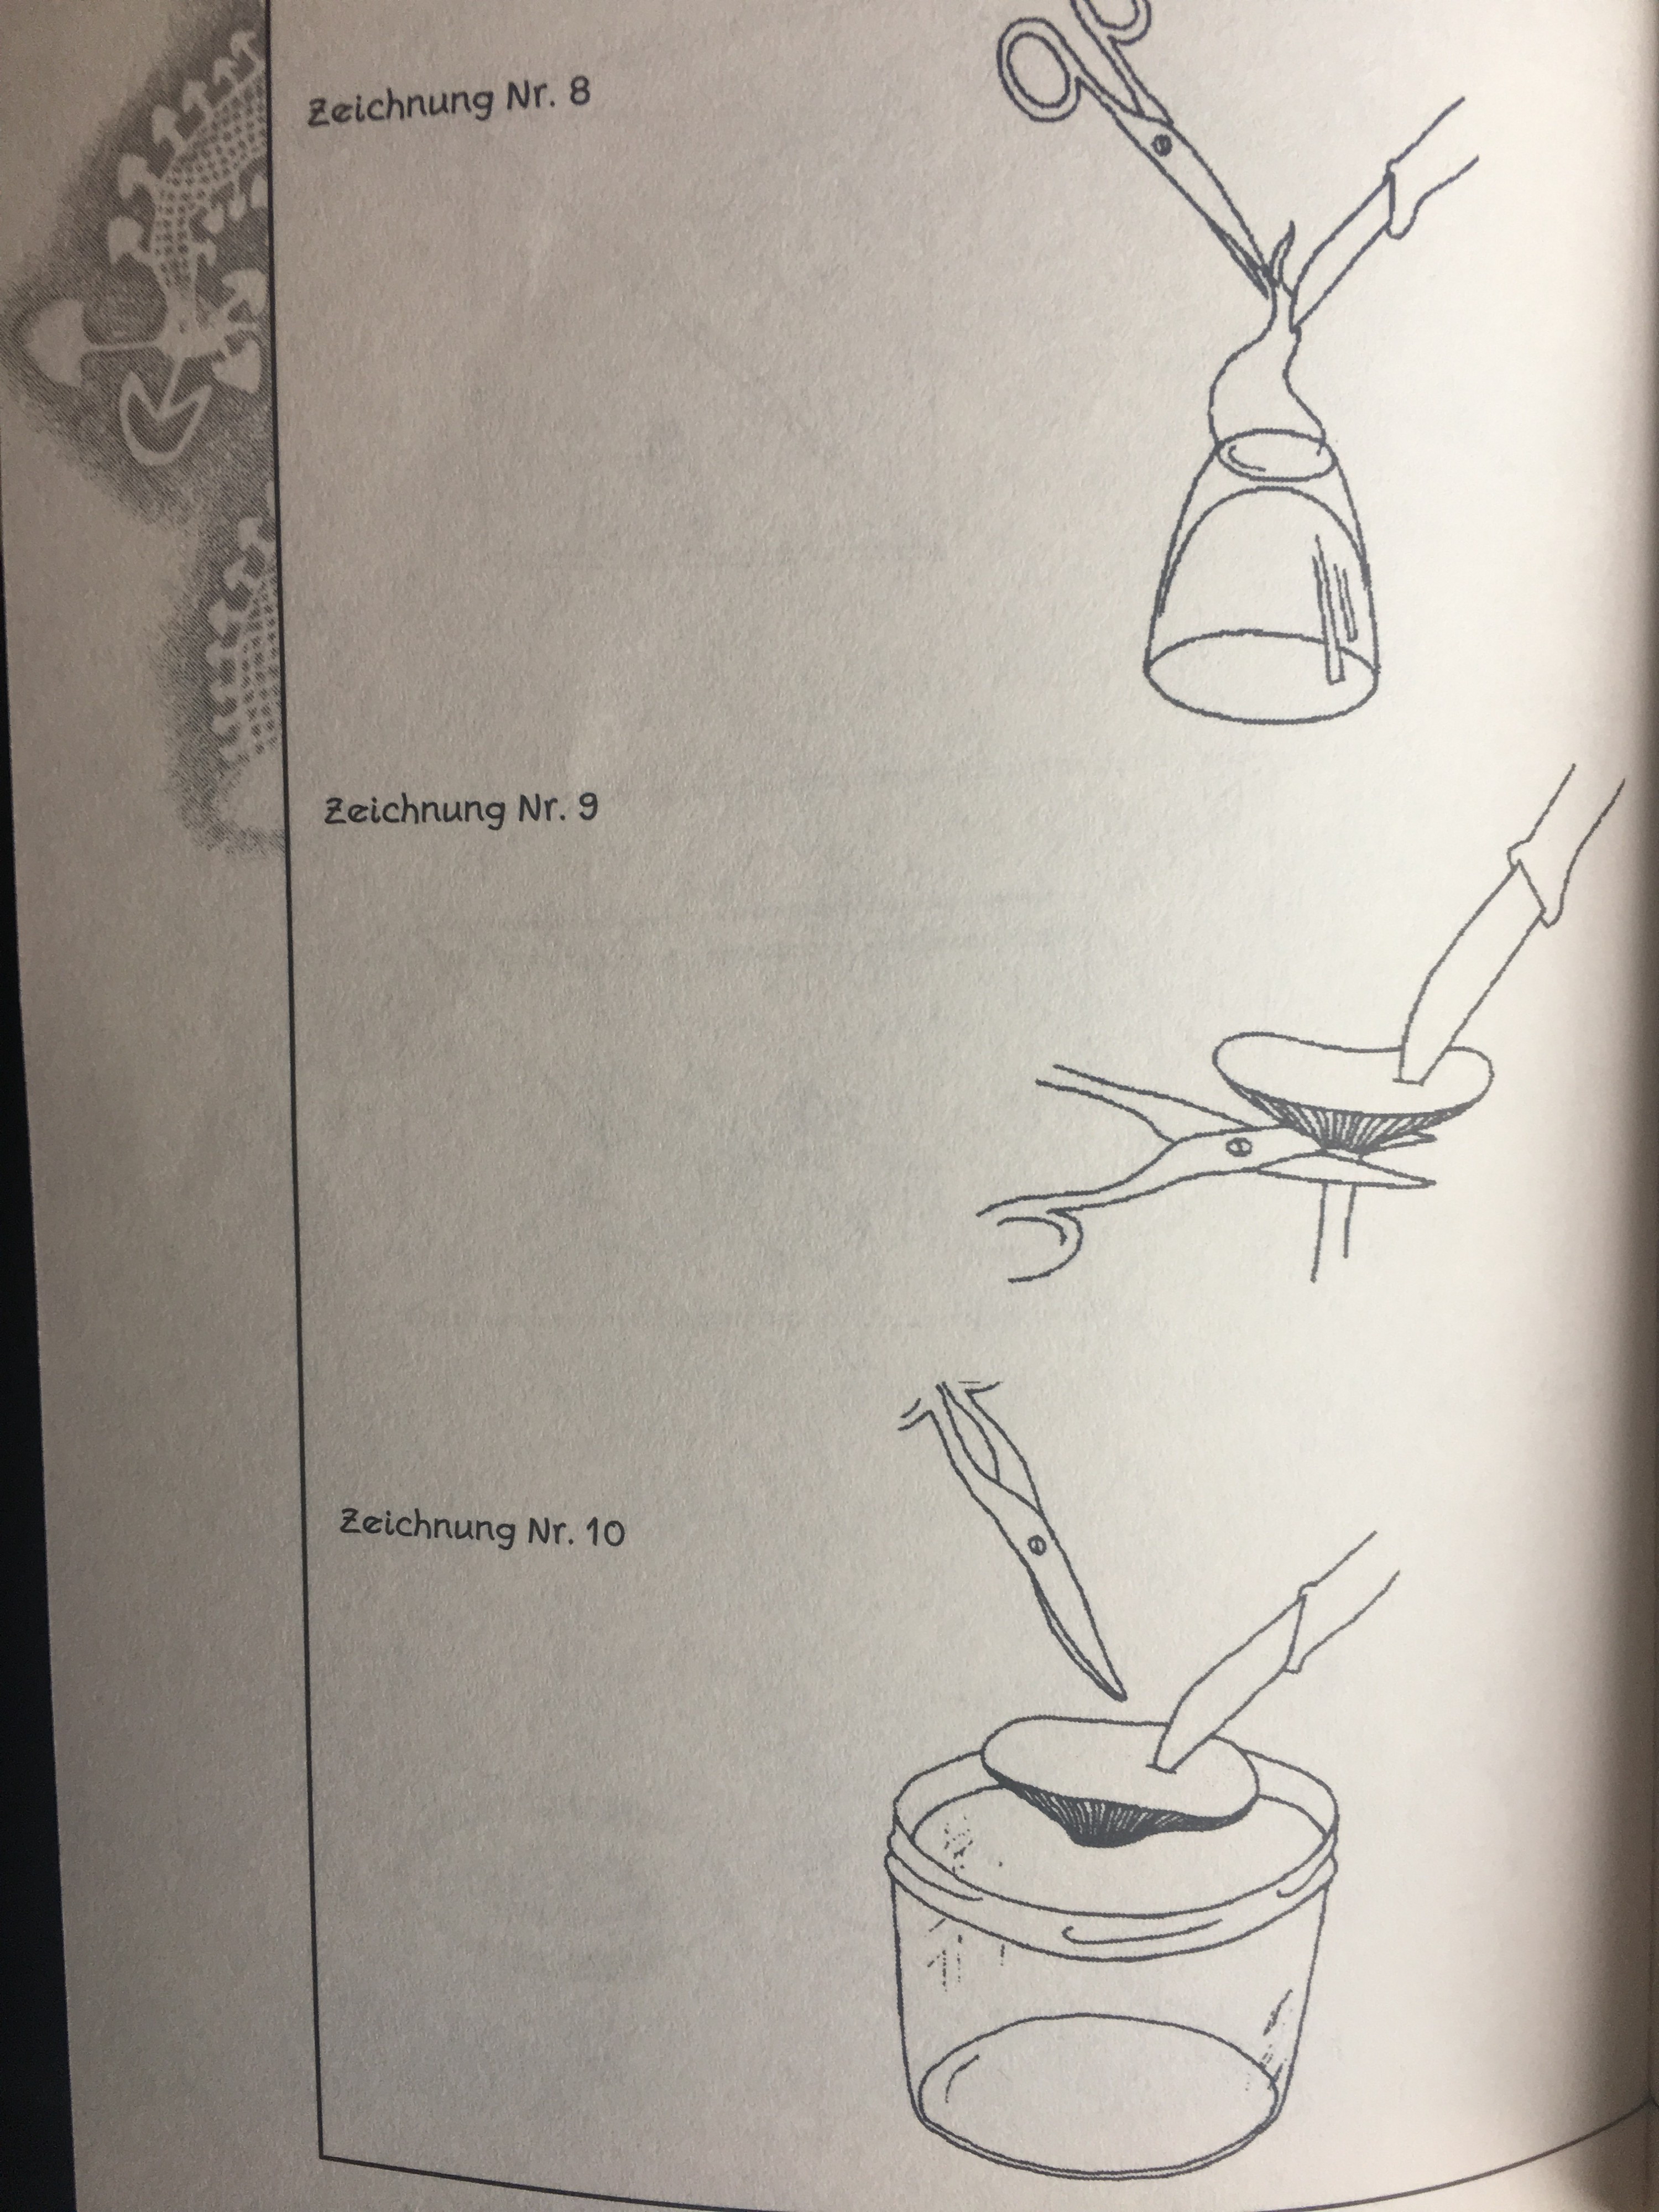
- Light on the spiritus at on the bottom of the shot glass. Sterilize the scissor and the tip of the knife by heating (see drawing nr. 8).
- Sting the hut with the knife and clip off the stem with the scissor (see drawing nr. 9).
- Don?t hold you hands over the glass ? pull away the foil ? cut the hut with the scissor from the knife (see drawing nr. 10) and put it then into the glass which you now can open.
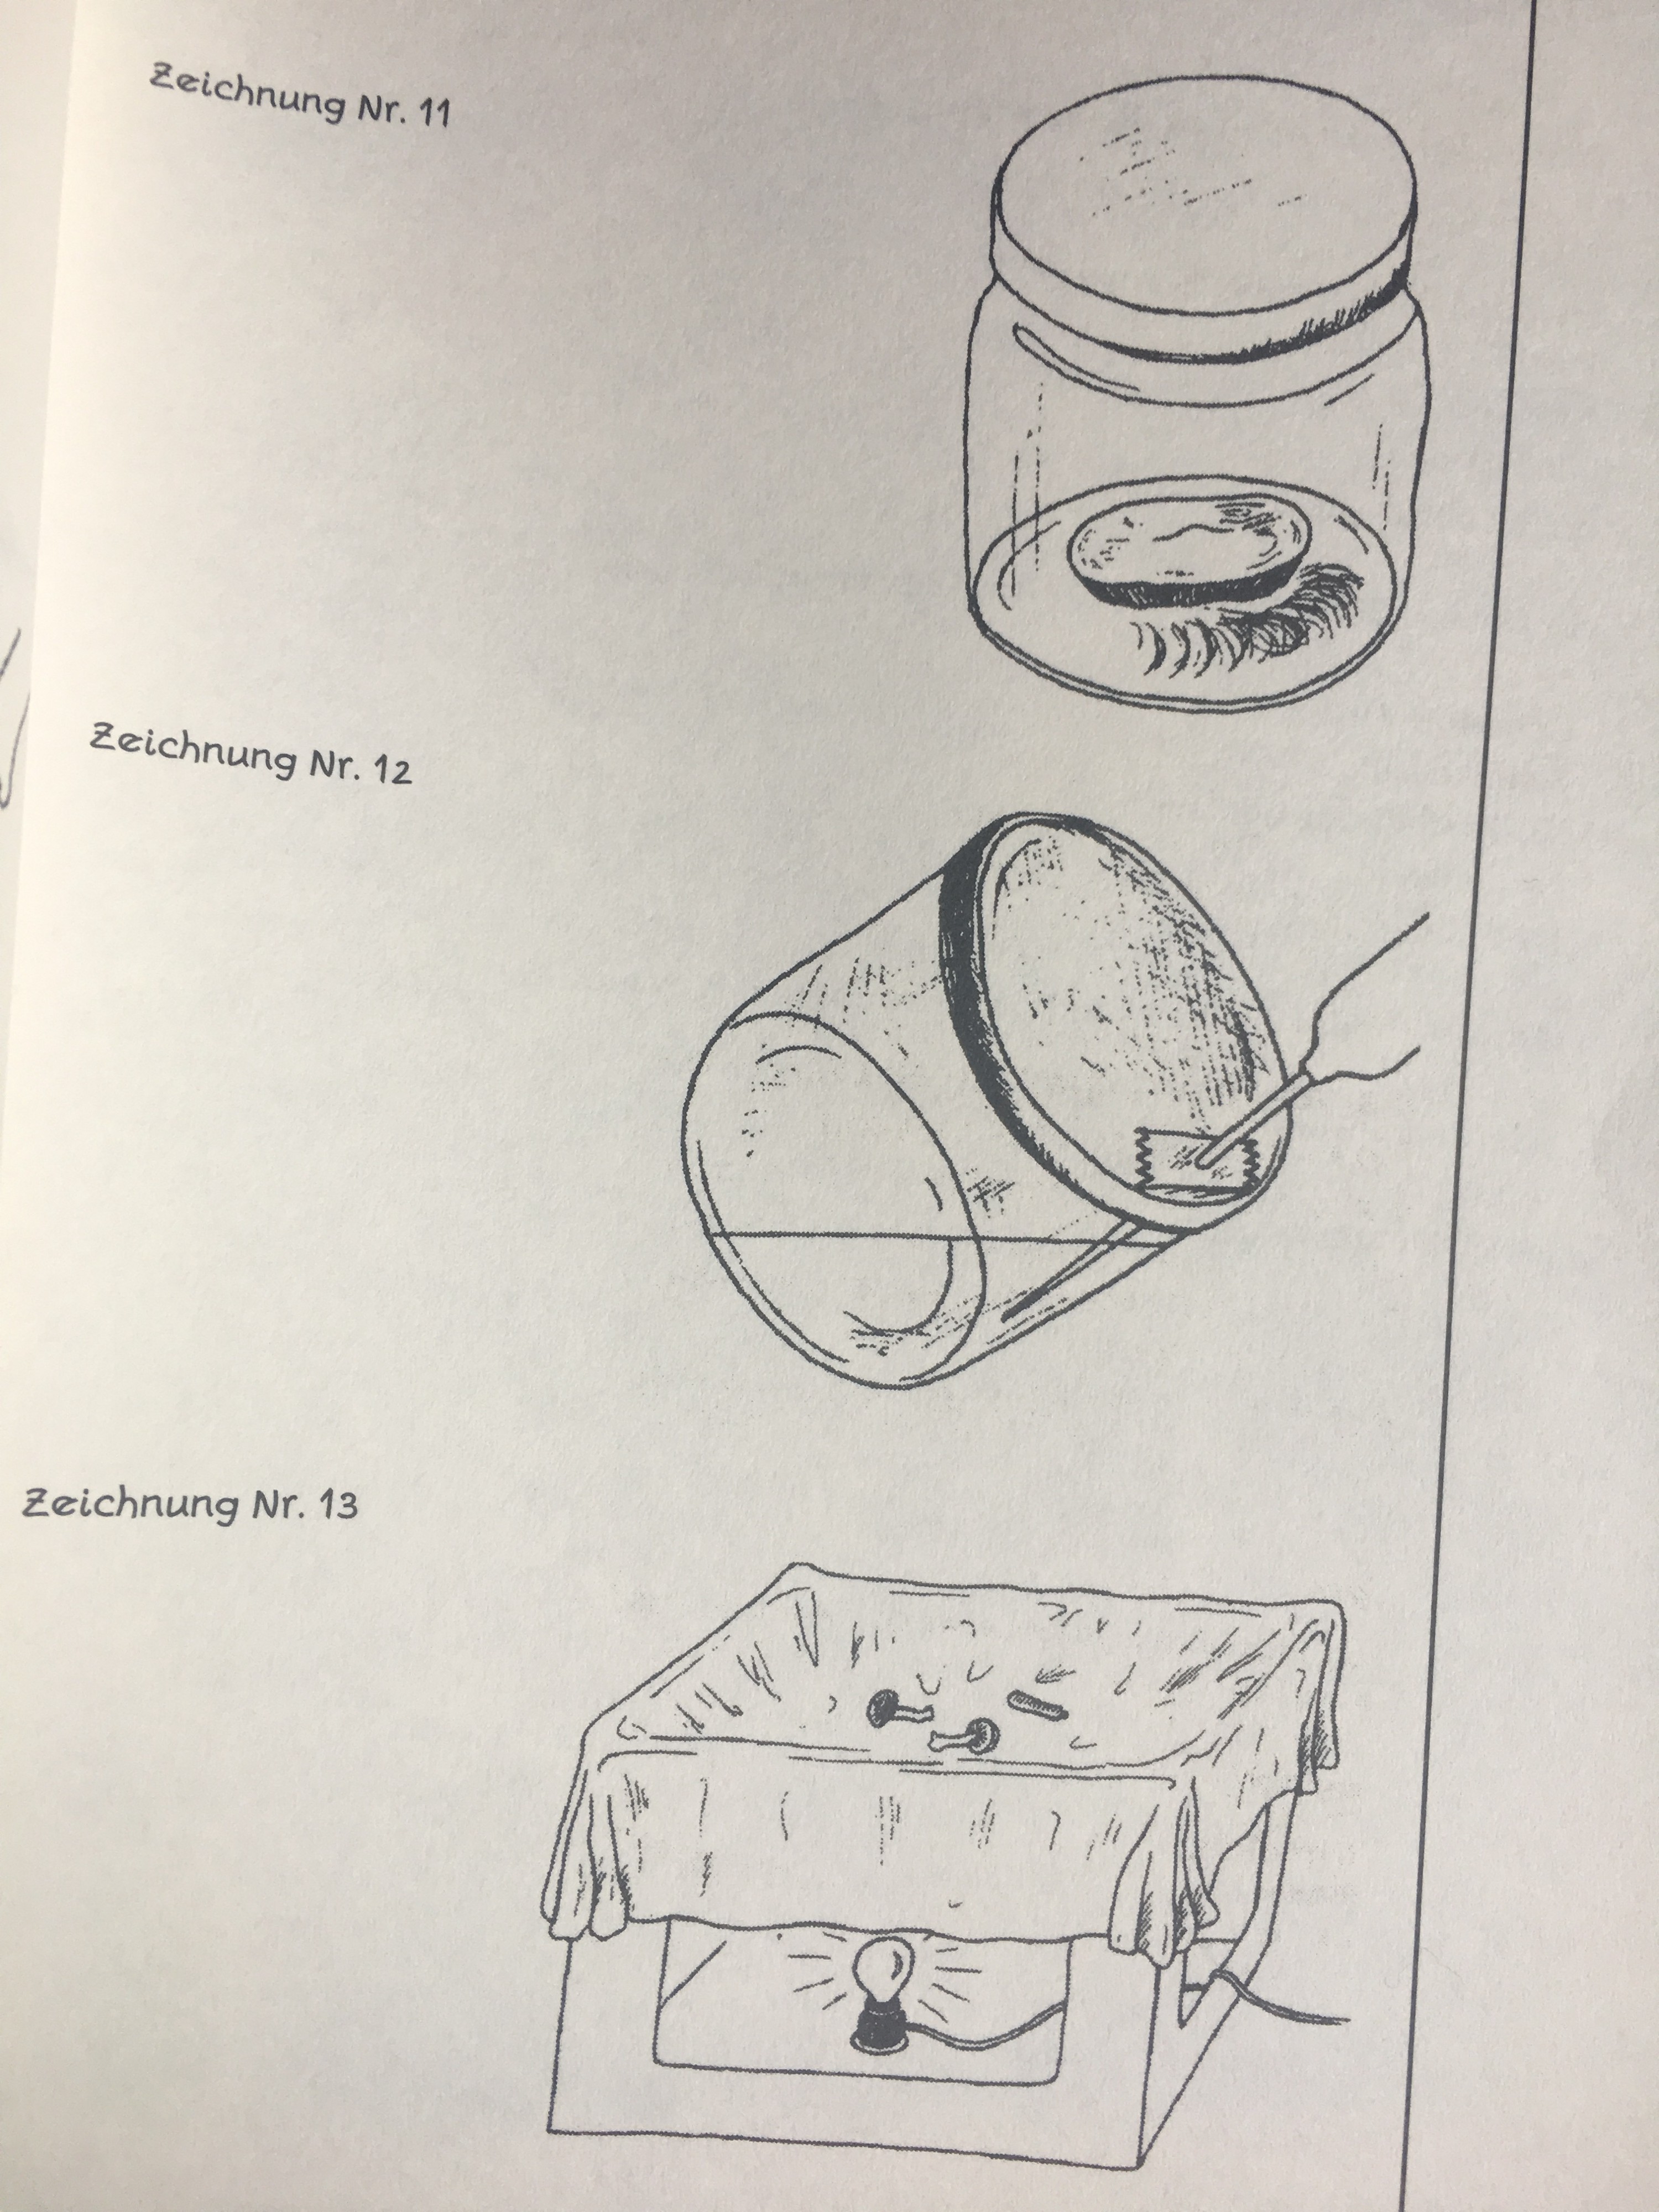
- Let the glass rest for 4 days by room temperature (see drawing nr. 11).
- Remove the hut with a hot knife and let the spore imprint dry. This one should be storable for a year.
5.2 Production of the inoculum
Cook a syringe and a glass of water with a masked whole in the cover for an hour long in a pot filled with water. Sting a opening into the cover of the glass where the spore imprint is stored. Sterilize the needle by heating and inject a little bit of cooled and sterile water over the spores. Stick the opening so that it?s close again and freeze the spore water. Defrost it afterwards in a way so that the glass stands skewed. While doing this, take care of the ice cubes. The water must not touch the cover at any time. Make sure the glass is airtight.
5.3 Filling of the syringes
Take a pot and fill it with water. Then cook a syringe in it as well as a glass filled with water which has a masked opening in the cover. This you time for about an hour. Sterilize the needle by heating and inject a layer of cooled and sterile water into the glass with the spore water. Hold the glass skewed and pull the syringe completely (drawing nr. 12). Sterilize the needle by heating again and pack the syringe airtight.
6 Harvesting and conservation
Young shrooms are better than old ones.
Nota bene: Decide for each shroom whether you sporulate it, eat it or if you want to throw it away. Don?t store the shrooms: the fresher the shrooms are the more potent they will be.
6.1 Harvesting
Effecting substances will concentrate themselves in the huts of the young shrooms. As soon as the sporulating process starts the shrooms will lose little by little of their potency. The moment of harvesting for consuming is then appropriate, when the protection fleece is opening.
6.1.1 Once takes:
- Dry hands
- Sharp knife
- Needle
6.1.2 Procedure
Harvest with dry hands. Push the shroom with a rotating movement away from the cake. Use a needle for the shorter ones. Cut groups of adnate shrooms first and then remove the stumps.
6.2 Conservation
Blue coloring shows oxidation of the Psilocybin. UV light, humidity, warmth and oxygen accelerate this process. Drying and anti-oxidants will slow down this particular process.
6.3 Drying
Drying will reduce stomach and gut discomfort. Dried shrooms are best for storage.
6.3.1 One takes:
- 15 watt bulb
- Thermometer
- T-shirt or sheets
- Box
- Pin
6.3.2 Procedure
Cut wholes in the sides of the box and place the bulb somewhere in it. Stretch the shirt or sheet as a canopy over it and fix it. Put the shrooms and the thermometer on it (drawing nr. 13). Make sure that the temperature won?t exceed 30 degree celsius. As soon as the shrooms start to get wrinkled remove the Vermikulit. Crispy shrooms then can be stored airtight and without humidity in the freezer.
Disclaimer:
This article does not promote or recommend the use of illegal drugs. Many of the substances referenced to in the content are illegal in many countries. This article does not constitute medical advice. As always, please consult your doctor before taking any medicine.
Ayahuasca (@ayahuasca_community) * Instagram photos and videos
10.7k Followers, 1 Following, 311 Posts ? See Instagram photos and videos from Ayahuasca (@ayahuasca_community)
www.instagram.com
https://www.facebook.com/plantmedicinecommunity/

