
Step 0: Check your mac OS Version
We will be using the latest version of Apple?s Xcode 11 to program iOS 13 apps and run our apps in Xcode?s built in iOS simulator.
Xcode is an Integrated Development Environment (IDE) developed by Apple and the vast majority of iOS developers rely on it for making iPhone or iPad applications. Xcode 11 can only be installed on a Mac running macOS 10.14.4 (Mojave) or above. But ideally, you should be running macOS 10.15.0 or above Catalina).
If you are still running an earlier OS such as Mavericks, Yosemite, El Capitan, Sierra etc, you will need to update your OS. Have a look on Apple?s website for instructions on how to do so.
To check your current OS version, go to the apple icon at the top left of your Mac ? ? About This Mac
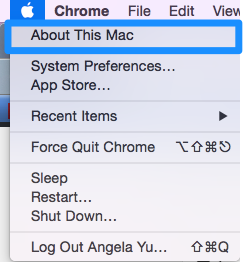
You should see a screen similar to this:

Check that your OS is either Mojave 10.14.4 or above or Catalina 10.15 If your version is lower than this, head over to the Mac App Store and you can upgrade your operating system to the latest version of macOS Catalina for free.
Step 1: Open the App Store
Once you?re sure you are running the correct version of the Mac operating system, you can get started with downloading Xcode 11 through the Mac App Store. Open the App Store app on your Mac. By default, the App Store is in the Dock. You can also find it in your Launchpad.
Step 2: Search for Xcode
In the search field in the top-right corner, type Xcode and press the Return key.
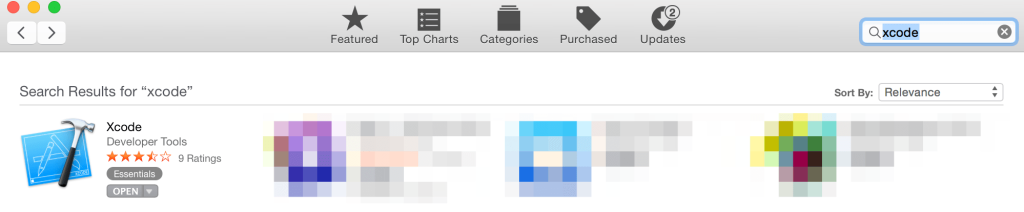
Step 3: Install Xcode
Xcode is a free application developed by Apple, so just click the ?Get? or ?Download? button and start the installation process.

Xcode is several gigabytes in size so downloading it could take a while. By default, Xcode is downloaded into your /Applications directory.
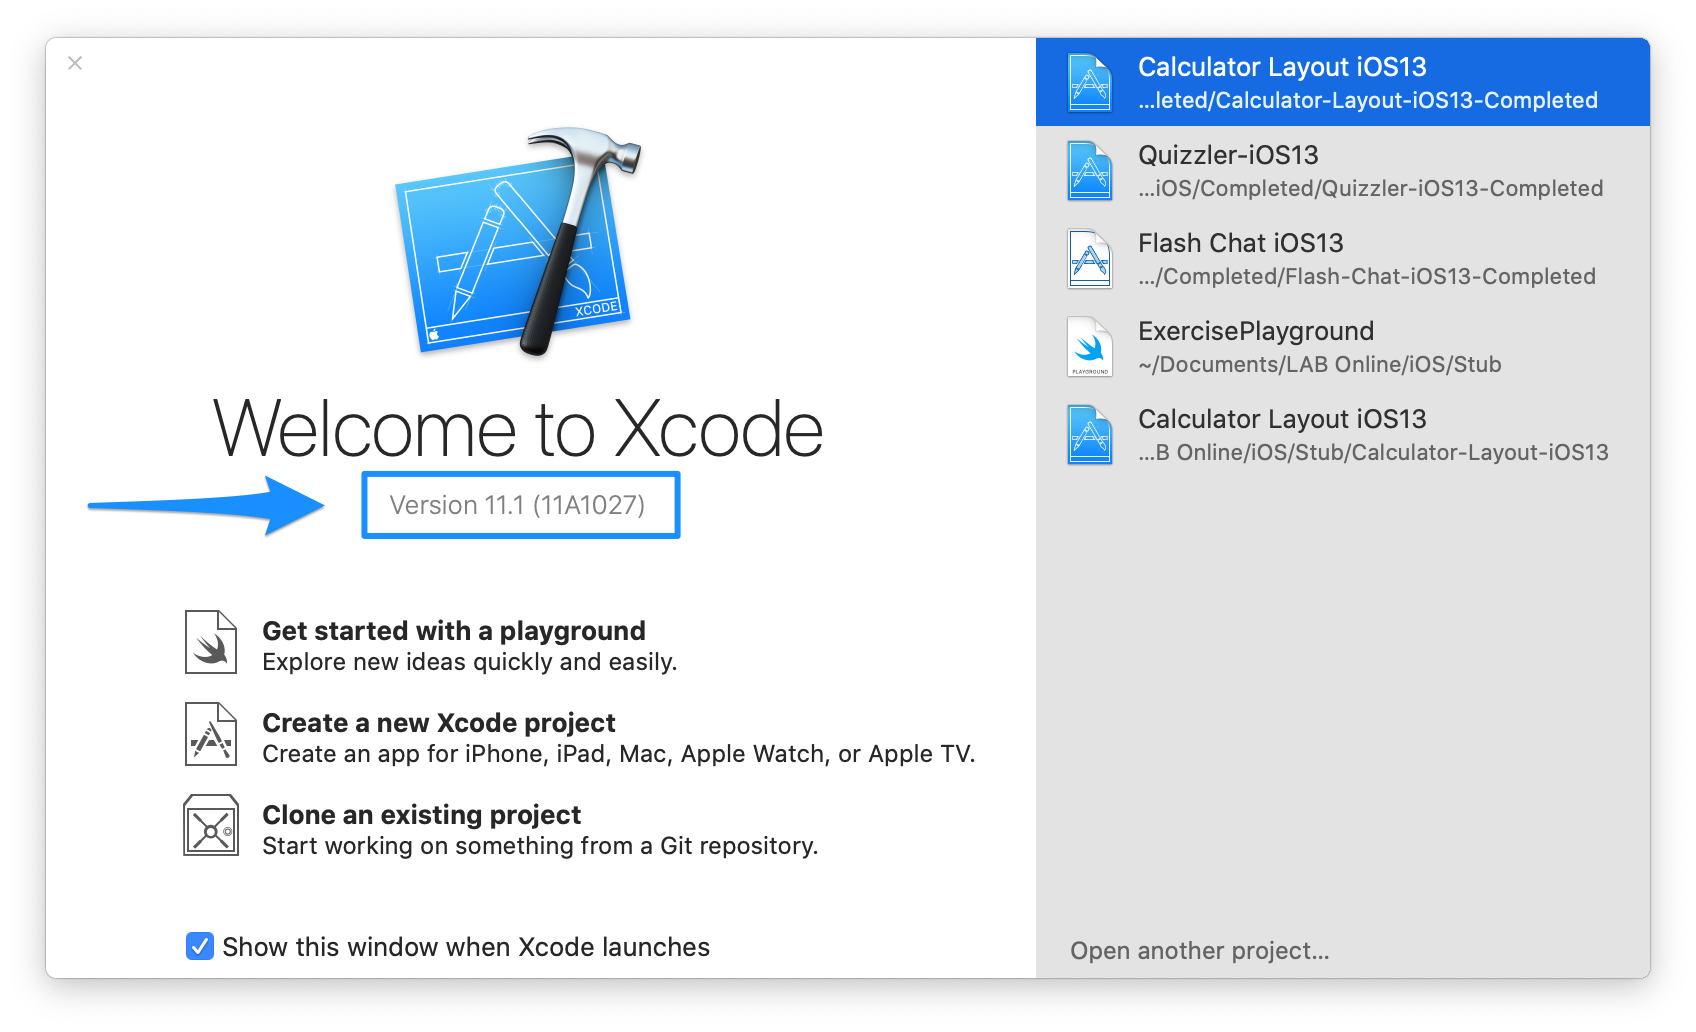
Step 4: Launch Xcode
Launch Xcode. Do you see the Welcome to Xcode window and the version is 11.0 or above (e.g 11.1 or 11.1.2 etc.)? If yes, then great, we?re all done!
[Optional] Step 5: Register as an iOS Developer
Once you?re ready to publish apps to the App Store, you will need to enrol for the iOS Developer Program.
You can obtain a developer license from Apple and it costs $99 per year. Unless you are ready to release your app to the App Store and start clawing back that fee, it is not recommended to start paying Apple right away. But when you are ready to start the registration process, go to the iOS Developer Program Center and enrolment should only take a few minutes.
Troubleshooting
These are some of the ways installation can go wrong. If you?re having problems, check if one of these fixes help to solve your problem.
- You don?t have enough space on your Mac hard-drive. Xcode is a large piece of software, make sure you have at least 10GB free on your hard-drive before attempting installation.
- You have an earlier version of OSX installed. Xcode 11 can only be installed on a Mac running macOS Mojave (10.14.4 or above) or macOS Catalina (10.15 or above). Go back to Step 0 and check to make sure you have upgraded to macOS Catalina as your operating system before you attempt to install Xcode. You can update your OS through the Mac App Store for free or check out Apple?s website for more details. www.apple.com/uk/osx/whats-new/
- Your Mac is too old. If you are trying to update to macOS Catalina but can?t, it might be because you have an outdated computer. Check here for hardware requirements: https://www.apple.com/uk/macos/how-to-upgrade/
- Please DO NOT install a beta version of Xcode as it will impact the installation of your apps on to a physical device. Follow our instructions above and you should have no problems.
All Set
If you?ve completed all the above steps then you?re all set for your course. We look forward to seeing you online or in-person!


