
 One of the designs we considered for our arcade?s banner
Some of my fondest childhood memories were the sleepovers with friends where we would playing retro games on an old CRT TV until the sun peeked over the horizon. Video games have been a foundational part of my growing up, and with the rapid development of the gaming industry in the 2000s, I had nearly forgotten about the vintage games that were sitting in my attic collecting dust. It wasn?t until my first internship, where the company I worked for had their own DIY arcade machine, that I was hit by a wave of nostalgia from my childhood.
Ever since then, it?s been a dream of mine to build my own arcade, and in my first term of university, that?s what a couple of friends and I ended up doing.
Here?s how we did it.

For our design, we decided to go with a full-size arcade machine with two sets of controls for fighting games such as Street Fighter, Super Smash Brothers, and Tekken.
For our plans, we went with a pre-made plan from TheGeekPub to save time.
You can find these plans here.
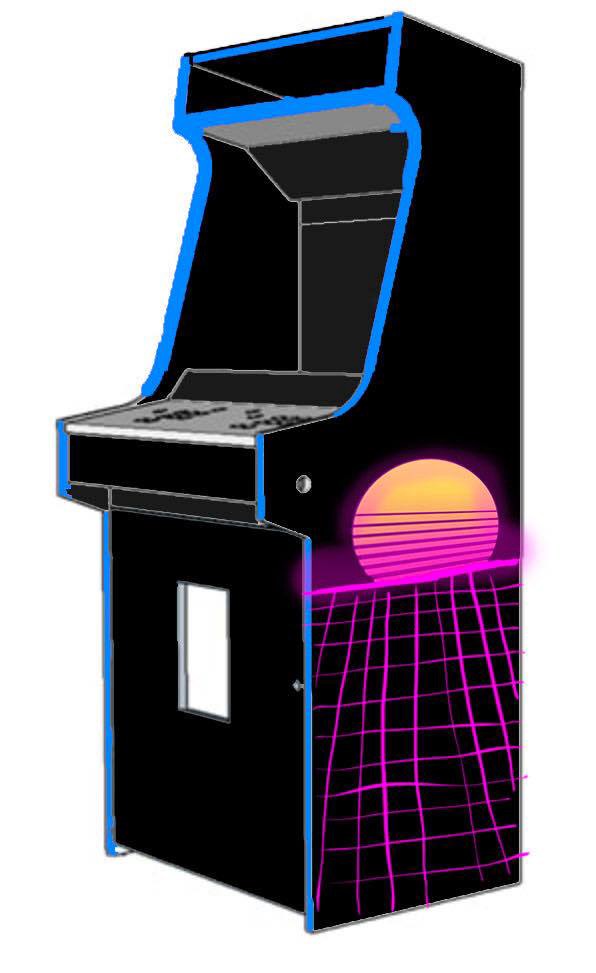
On the left is a quick mockup of what we wanted our arcade to look like.
The design we ended up going with was 27? wide, 66? tall, and 24? deep from front-to-back.
We wanted to have a keyboard tray in the front for easy configuration, as well as a swinging door where we could store extra materials and tools.

The total cost of the machine was $650 CAD, with the parts costing the most being the monitor, paint, joysticks, the Raspberry Pi, and the wood.
We thankfully didn?t have to buy any tools since we spent most of our time in our university?s machine shop. Technically, everything here can be done with nothing more than a jigsaw and a hand-drill, but having other tools will significantly expedite the process.
Here?s a list of all the hardware we used to build the arcade, along with the tools used. For a detailed cost breakdown, with links to buy the parts, check out this spreadsheet.
Electronics
- 20 Hikig LED Push Buttons & 2 Joysticks
- 2x Easyget Zero-Delay USB Encoder
- 27? Acer Monitor
- Raspberry Pi 3
- USB Speaker
- Keyboard
- Mouse
Hardware
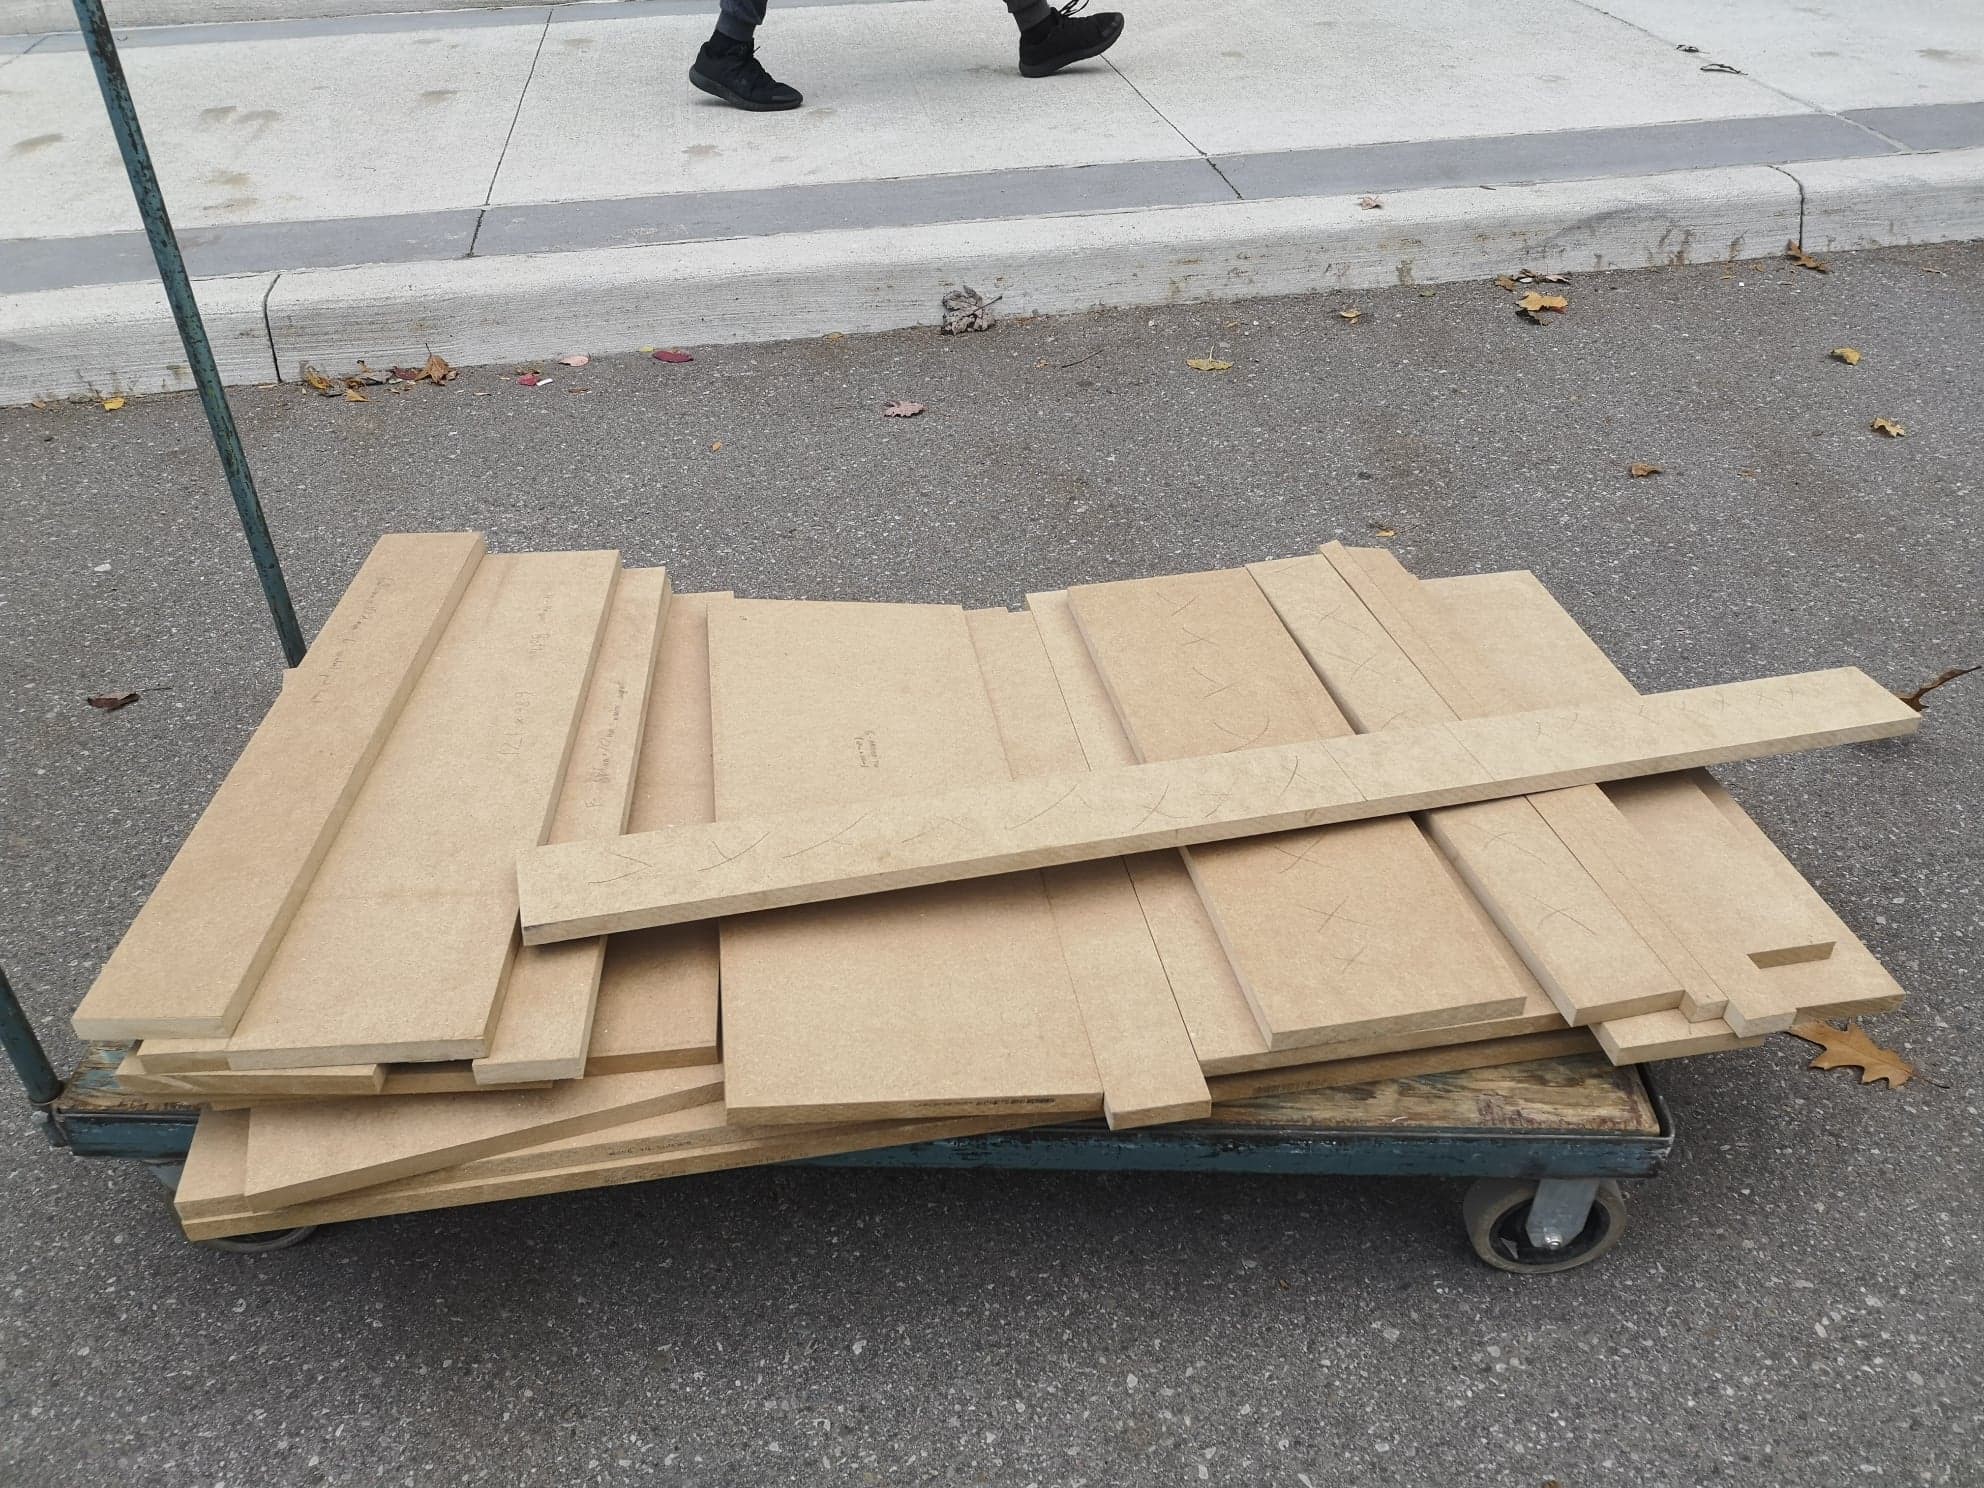
- 2x MDF wood 3/4? x 49 x 97?
- 2x Inset overlay clip hinges
- 8 x 5/8-inch Particle board screws
- L-brackets for support
- 3? Caster wheels w/ brakes
- Mailbox lock for the cabinet
- 1 1/2? Nails
- Wood glue
- 10? x 18? Sheet of Plexiglas
- 5 cans of flat black primer
- 5 cans of black gloss paint
- 3 cans of pink spray paint
- 1 can of fluorescent yellow spray paint
Tools Used
- Circular saw
- Jigsaw
- Drill press with varying Forstner bits
- Router
- Orbital sander
- Milling machine
- Cordless drill
- Wood clamps

?Initial Planning
We started by taking the two sheets of MDF and traced out the dimensions for each component. We then cut the sheets using a circular saw.
?
?
?
?
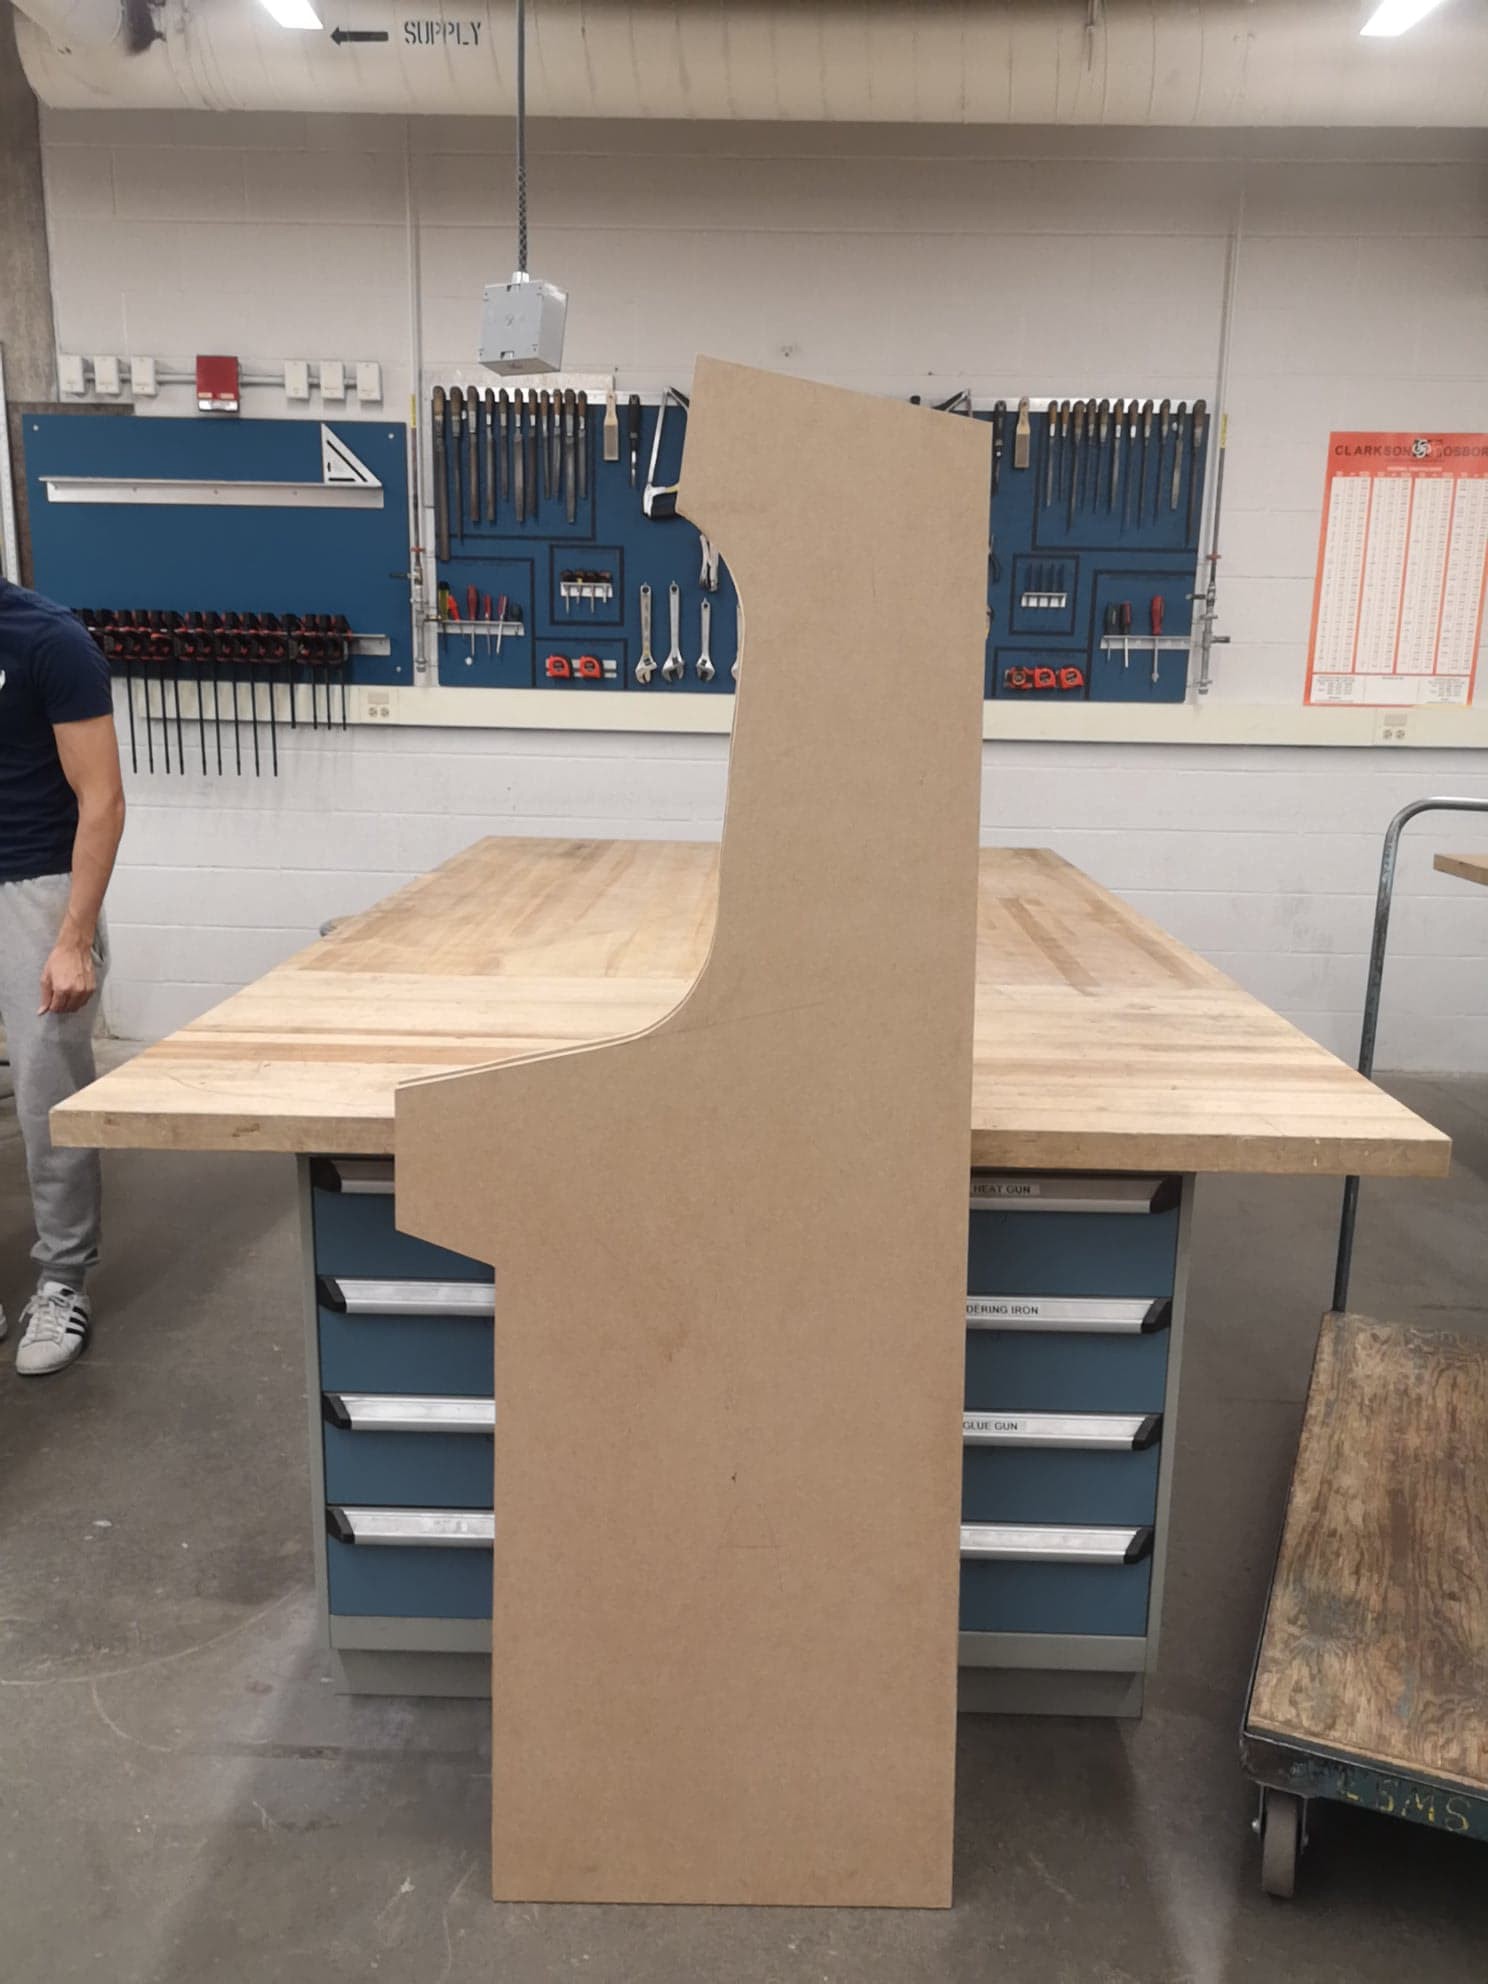
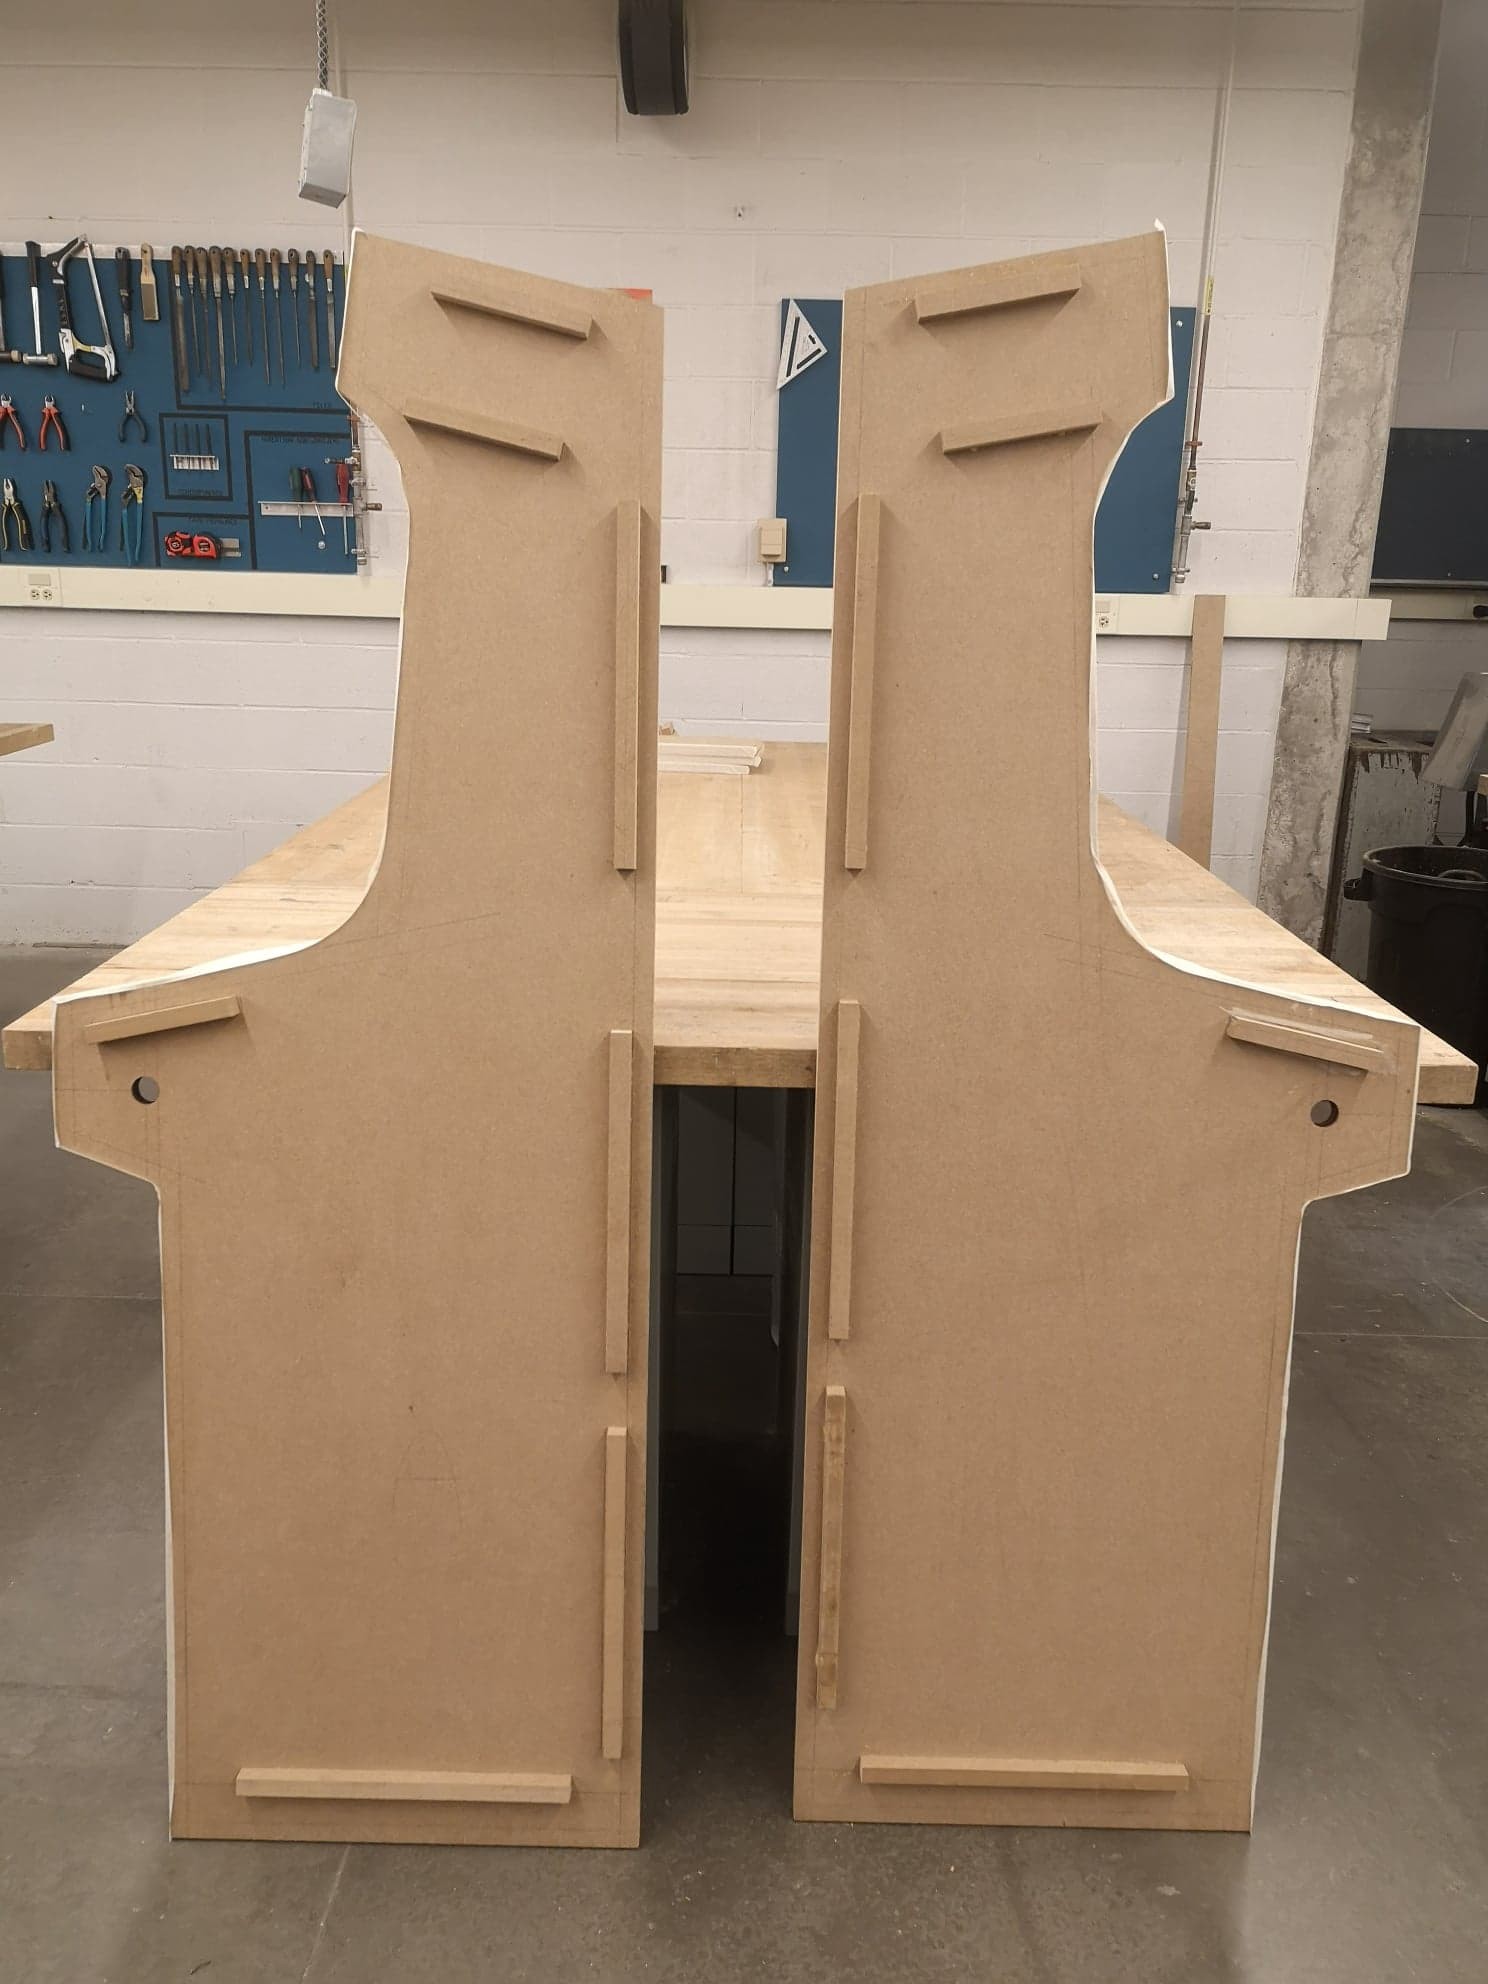
Cutting the Sides
We traced out an outline for one side of the arcade onto a sheet of MDF, using a compass for rounded edges. After cutting that piece using a jigsaw, we laid it on top of the other and transferred the lines over. After cutting that piece down, we sanded both sides to match.
?
?
?
?
?
?
Backer Blocks
In preparation for assembly, we used scrap wood to cut 1×1″ backer blocks for the other pieces to rest on. Although the size/length of the blocks isn?t that important, take great care in making sure they line up on both sides. Ours were a bit off and they caused a lot of issues.
?
?
?
?
?
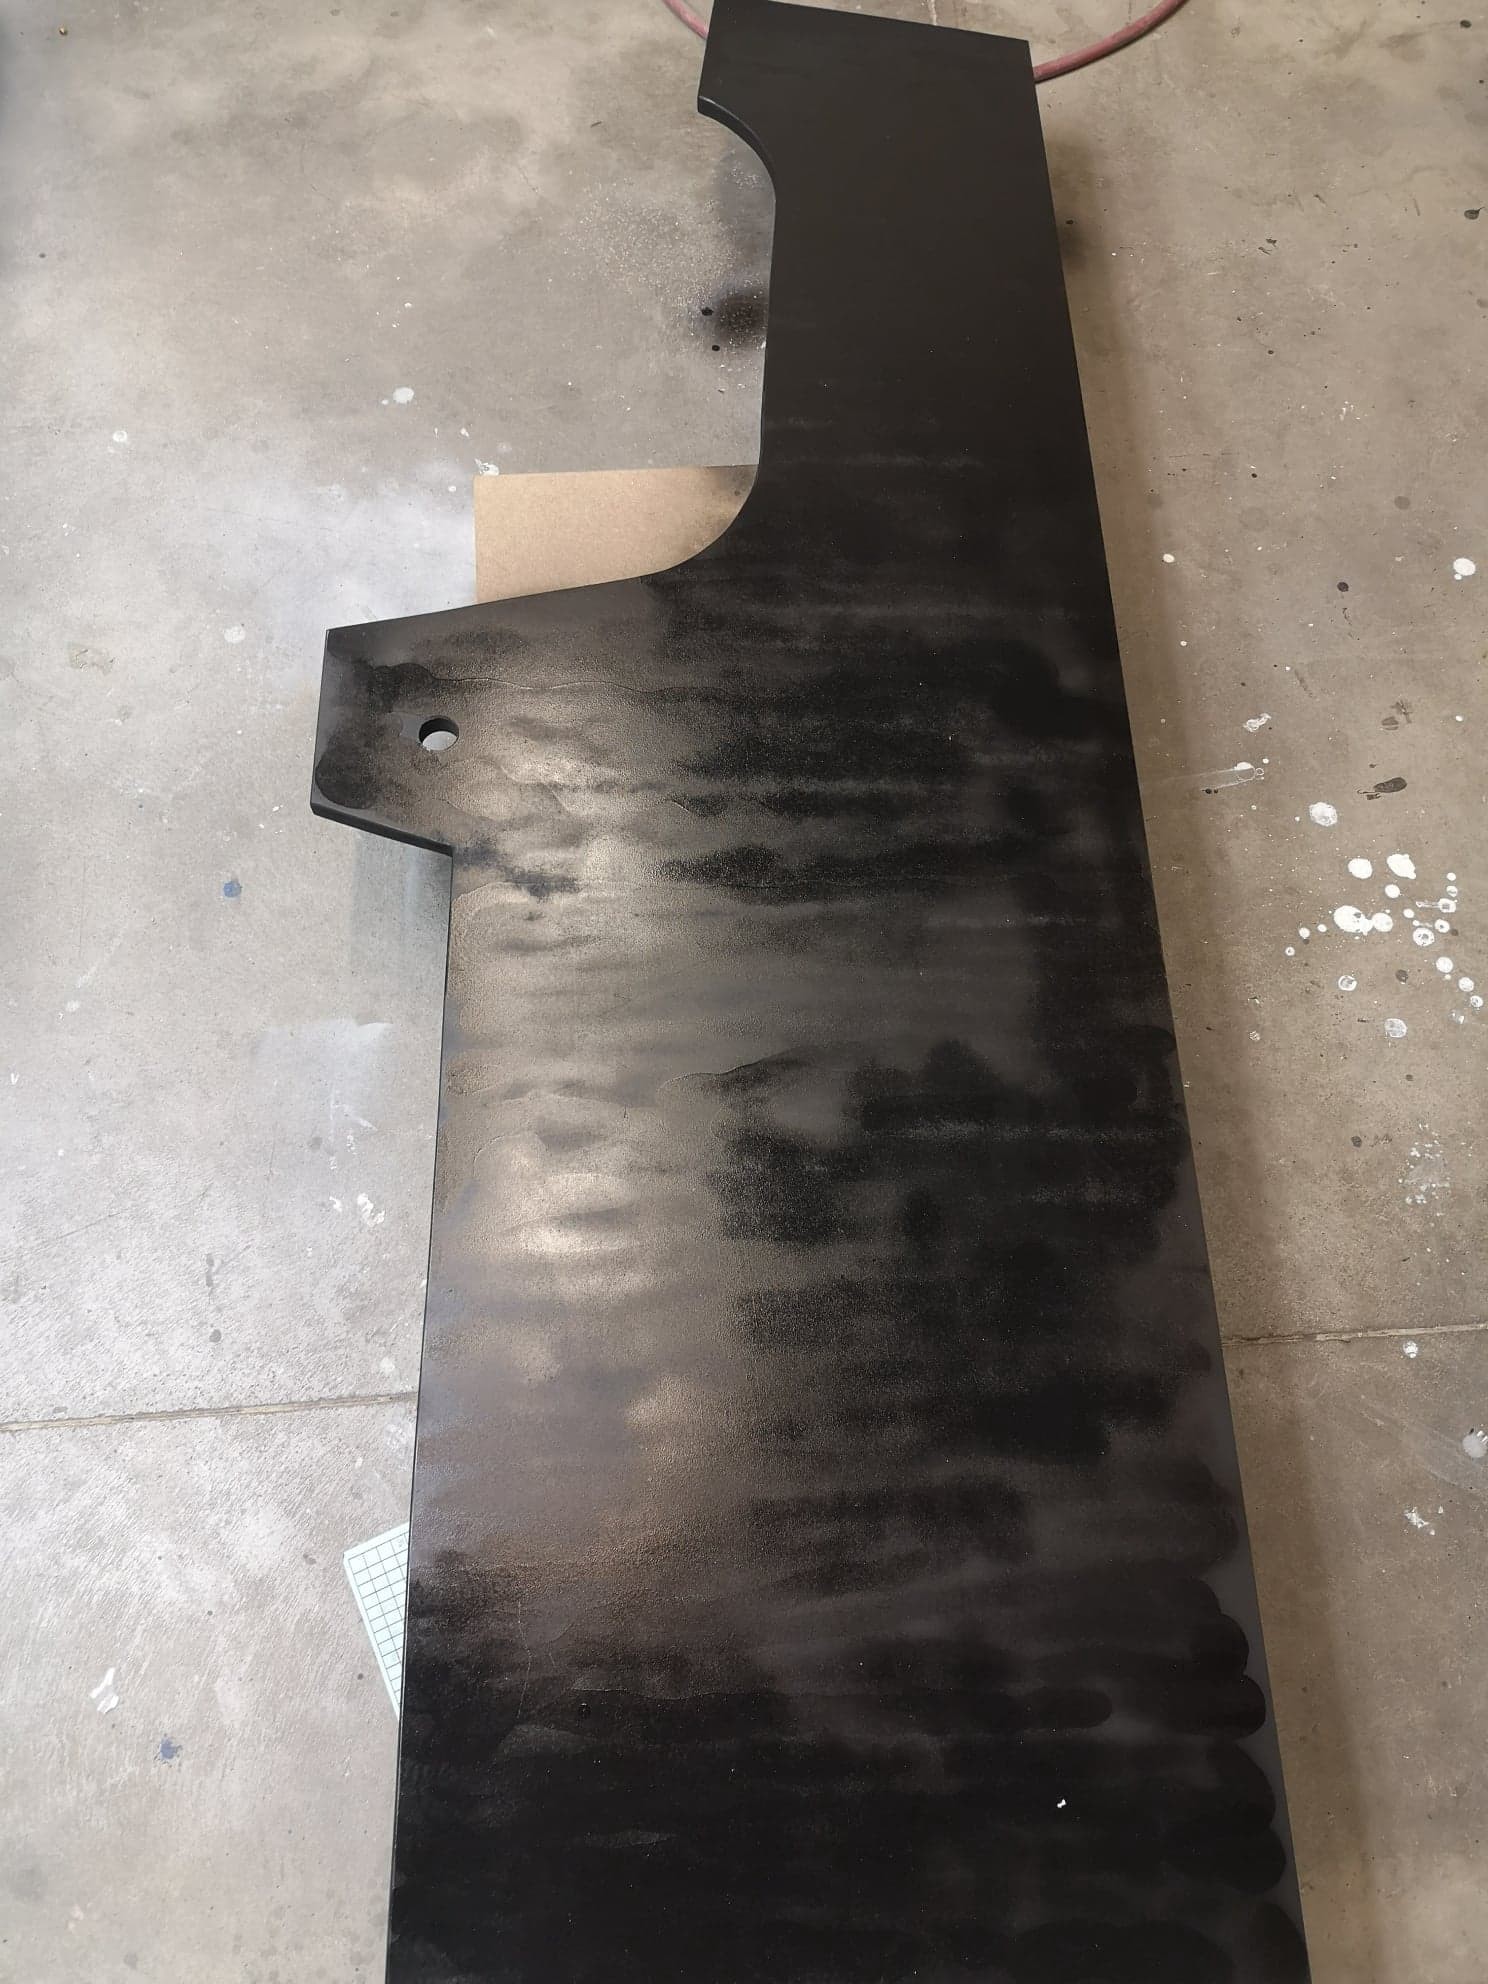
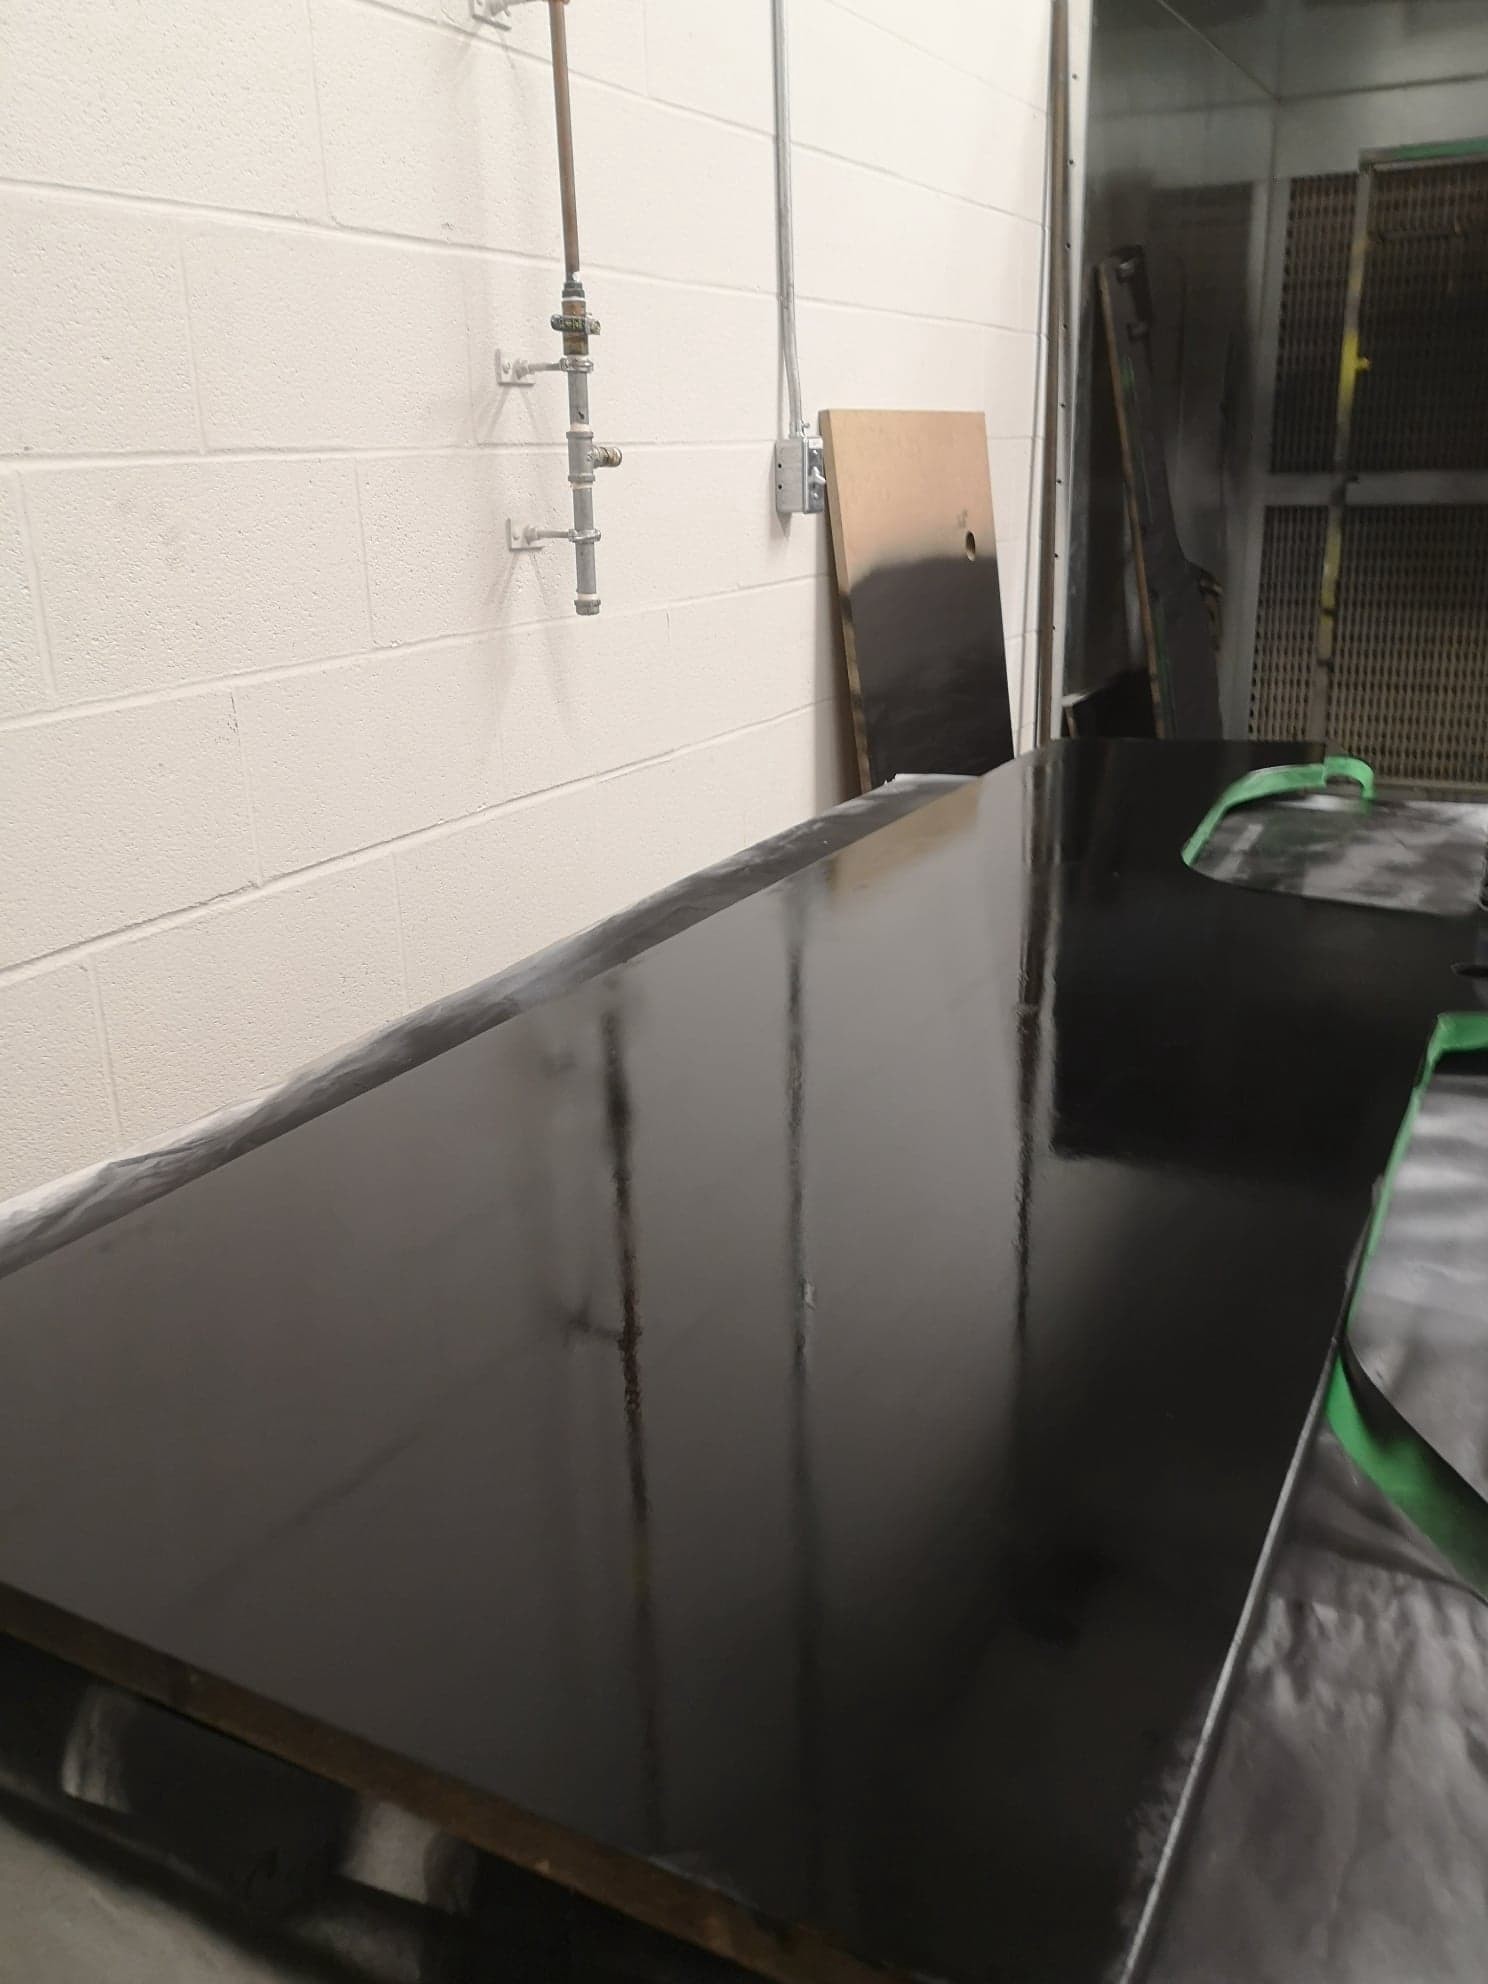
Painting (attempt 1)
We started by sanding down our pieces with an orbital sander and increasingly-finer grains of sandpaper. We then applied a matte primer followed by a gloss black finish. The gloss layer turned out to be a mess: it was very difficult to get an even layer with spray cans and even the smallest particle of dust would cause an effect known as orange peeling. In retrospect, we probably should?ve gone with a bucket of paint and a paintbrush.
?
?
?
? attempt 3
It took us multiple painstaking attempts of sanding away the previous paint, re-priming, and re-painting before we finally managed to nail a clear finish.
Using the spray can at an angle helped a lot.
By the end of the process, we had spent nearly $100 on paint. But hey, at least it looks nice? _(?)_/
?
?
?
?
?
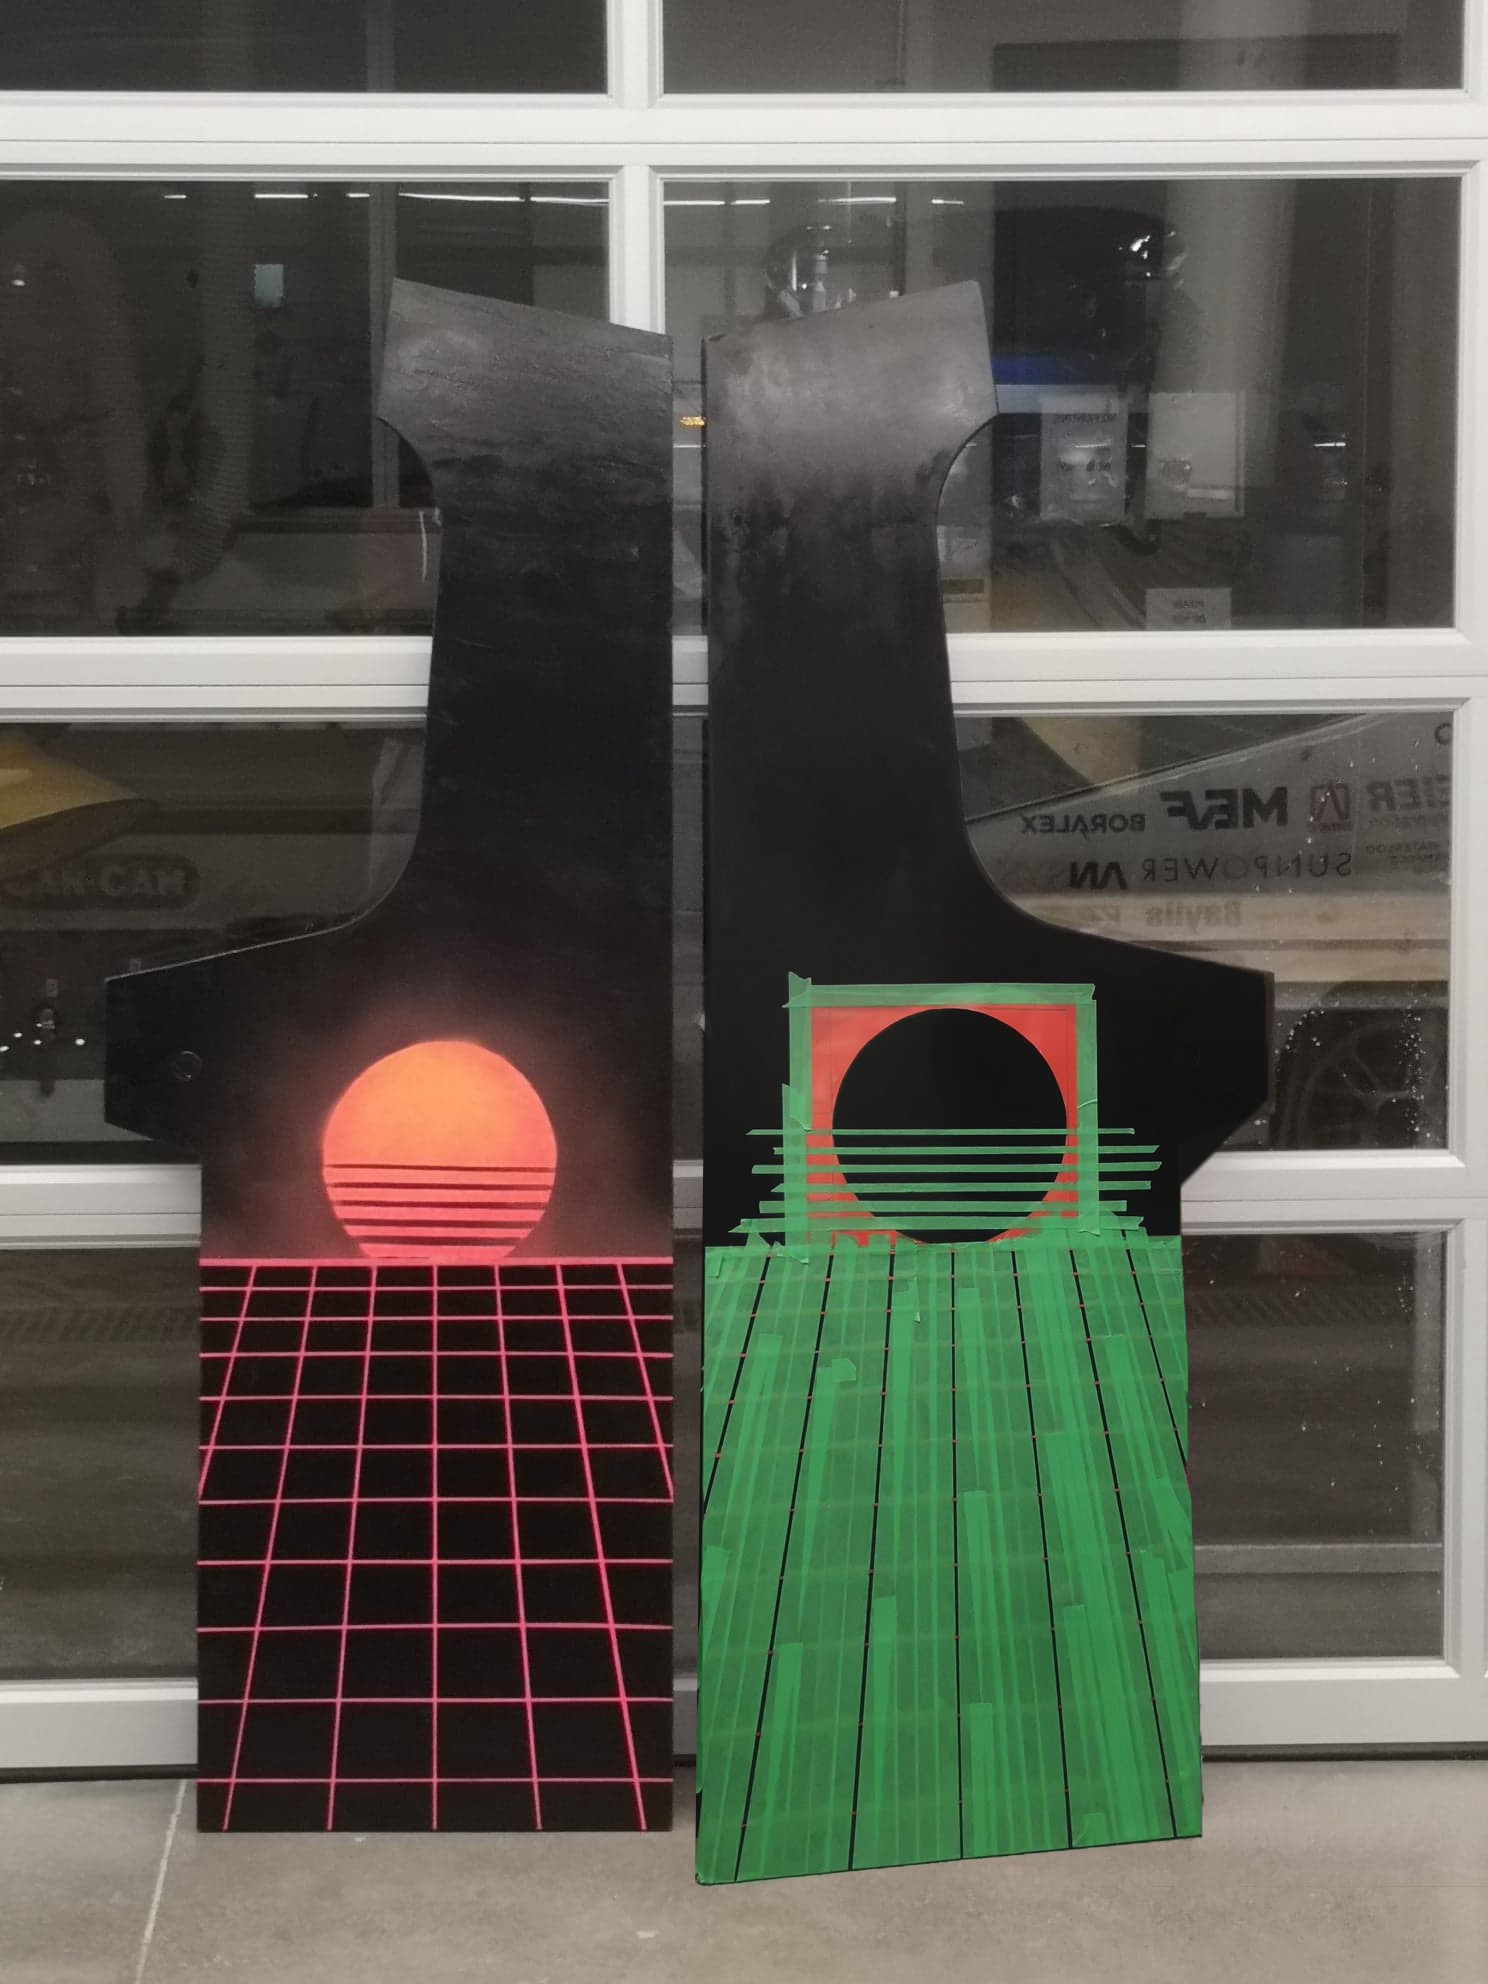
Vaporwave Styling
To complete the retro look, we created a design consisting of a sun with horizon lines. This pattern was transferred to the side panels with strips of painter?s tape cut with an X-Acto knife.
a e s t h e t i c~?
?
?
?
?

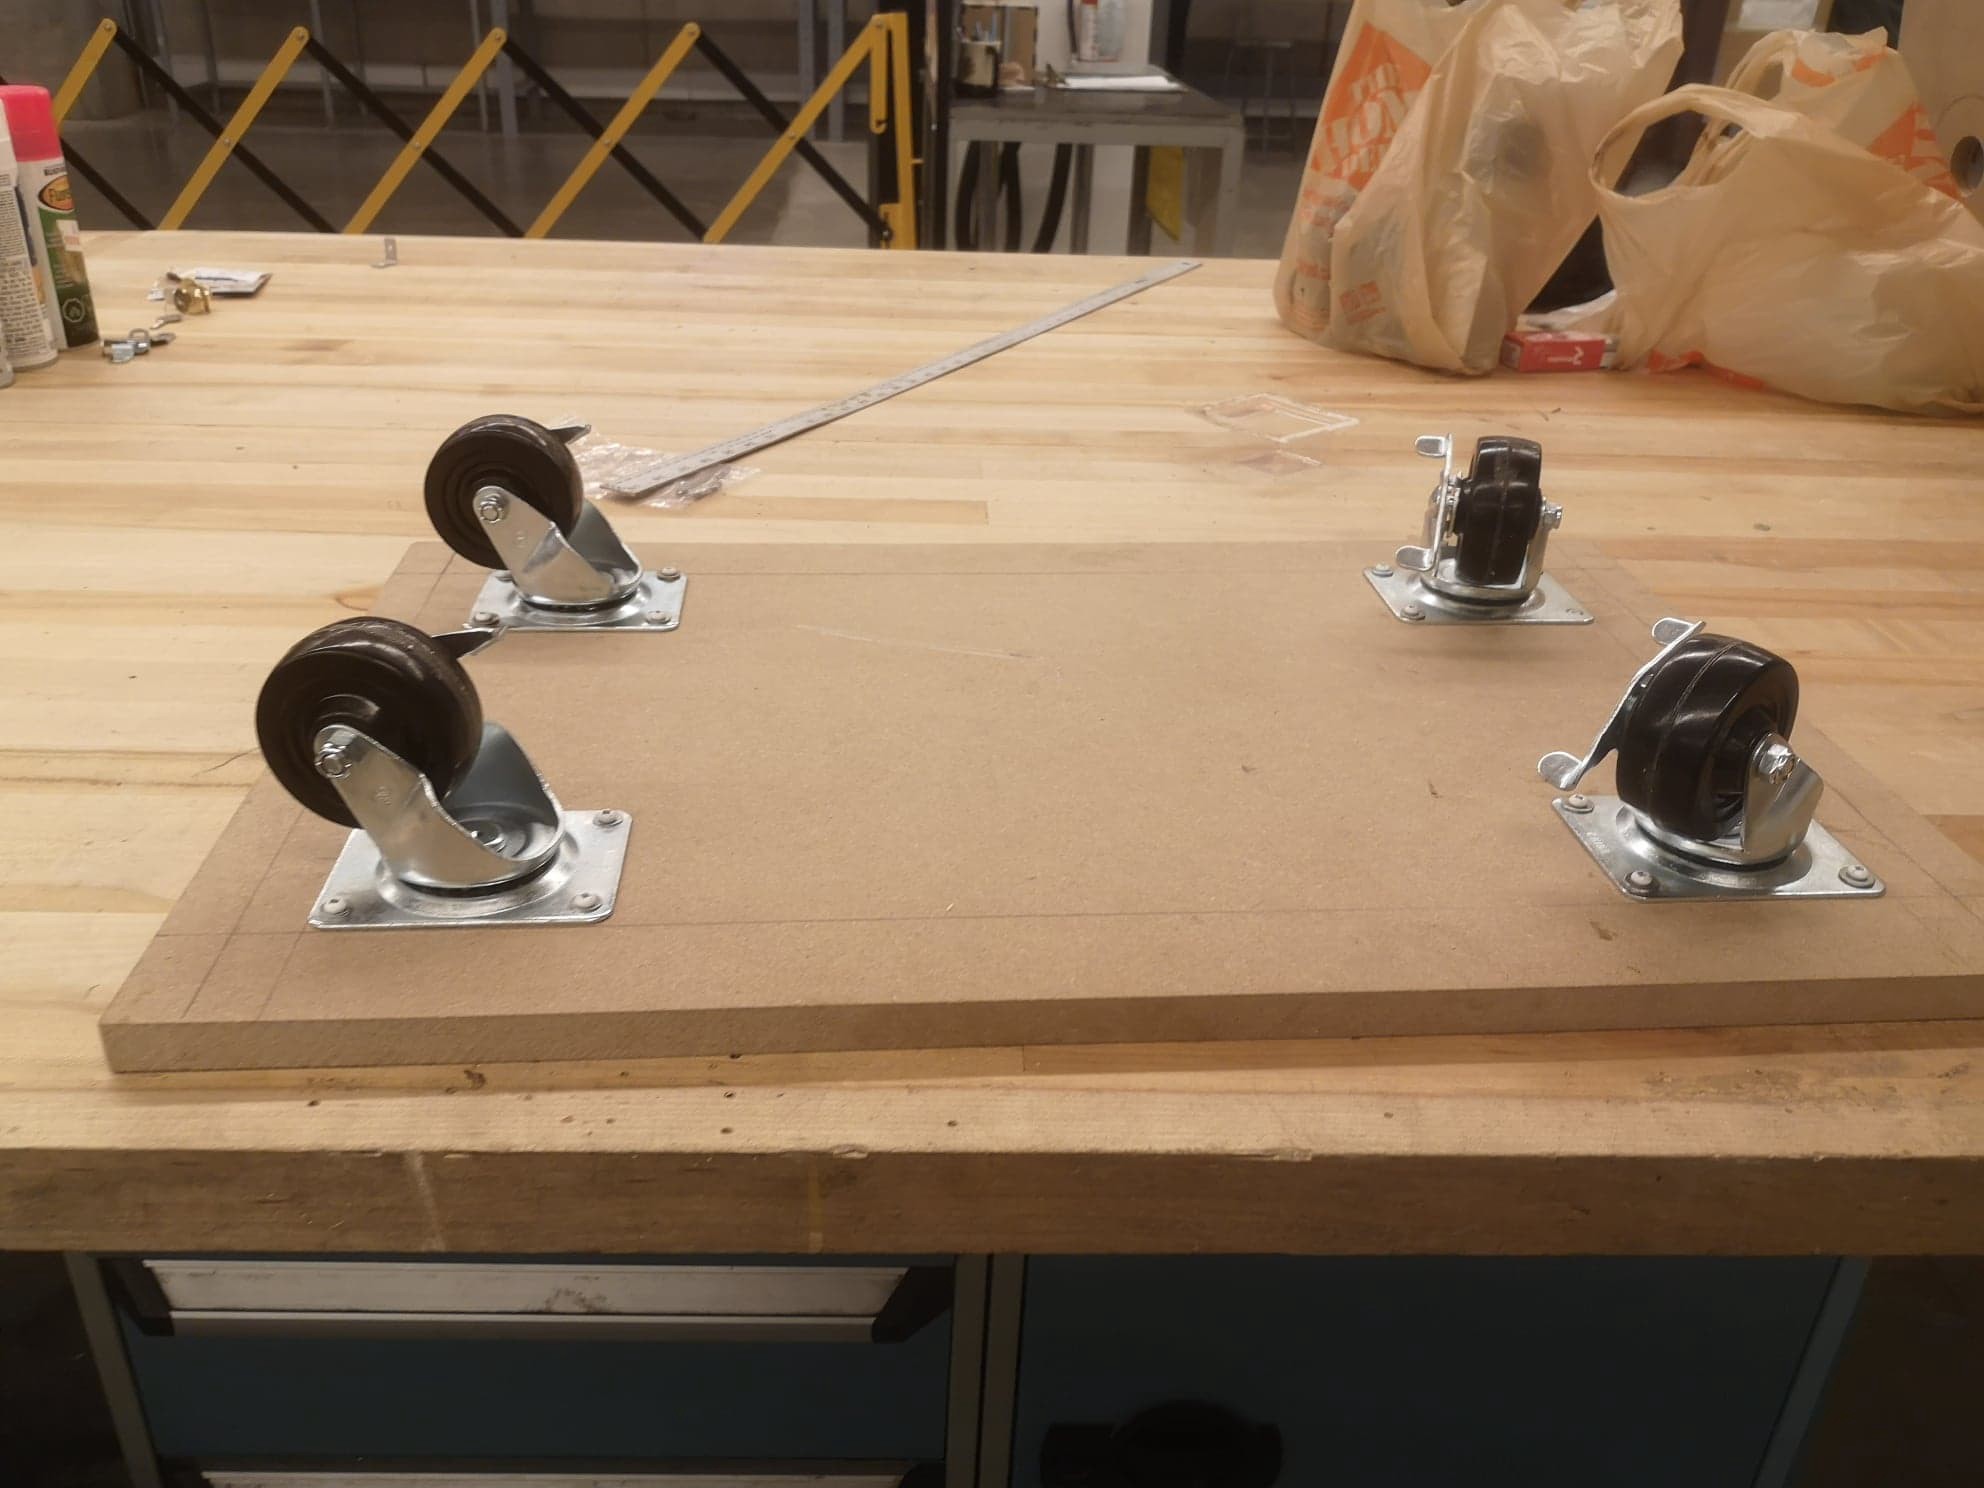
Wheels
To make our arcade easily transportable between locations, we installed a few casters on the bottom panel.
TIP: If you complete this step early, you can use it to transport other parts.
?
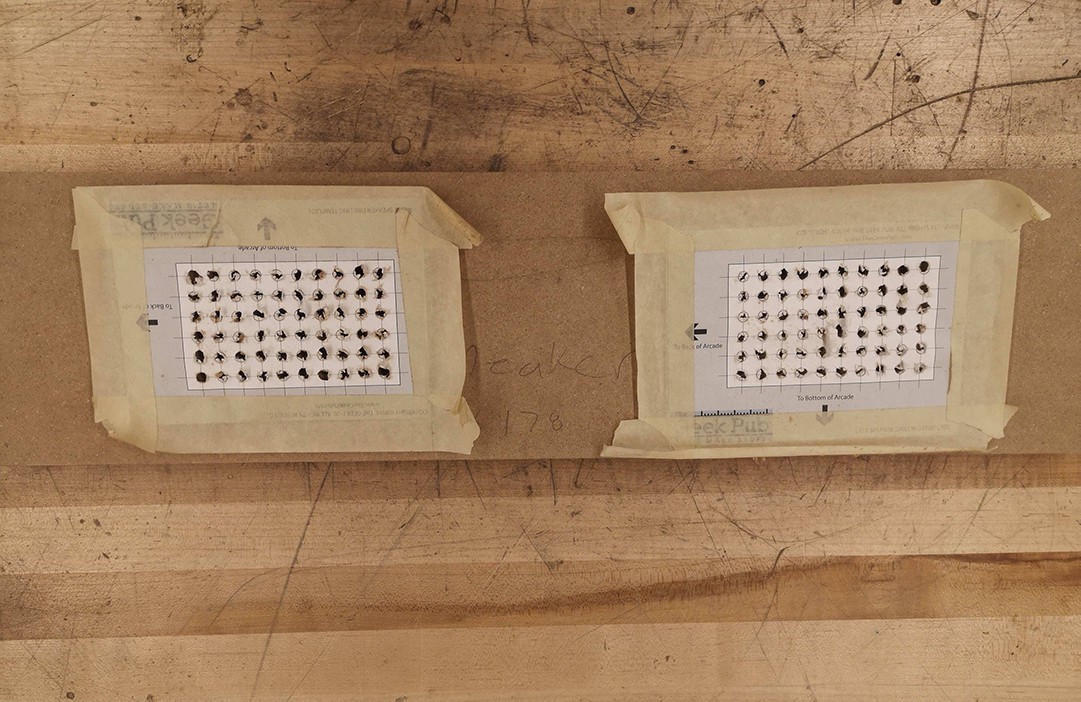
Speaker
To make our speaker, we used a drilling template and went at it using a standard hand drill. We then fastened $5 speakers from the dollar store using a strip of rubber and nails.
?
?
?
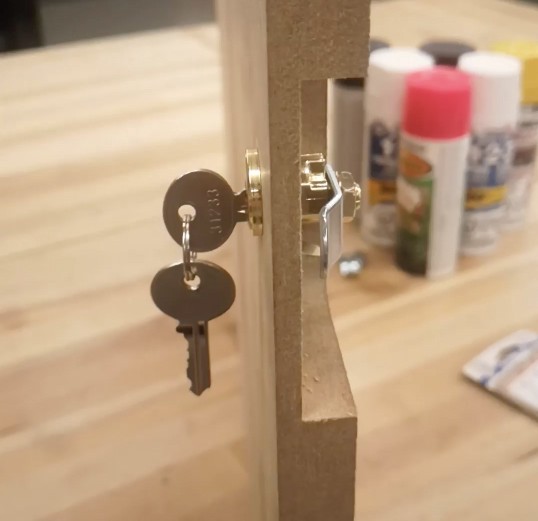
Cabinet Lock
As the front door for our arcade is intended to be used as a cabinet, we milled down a section of the wood in order to fit a standard mailbox lock.
The locking mechanism works by fastening itself to an L-bracket mounted on the right side of the cabinet.
?
?
?
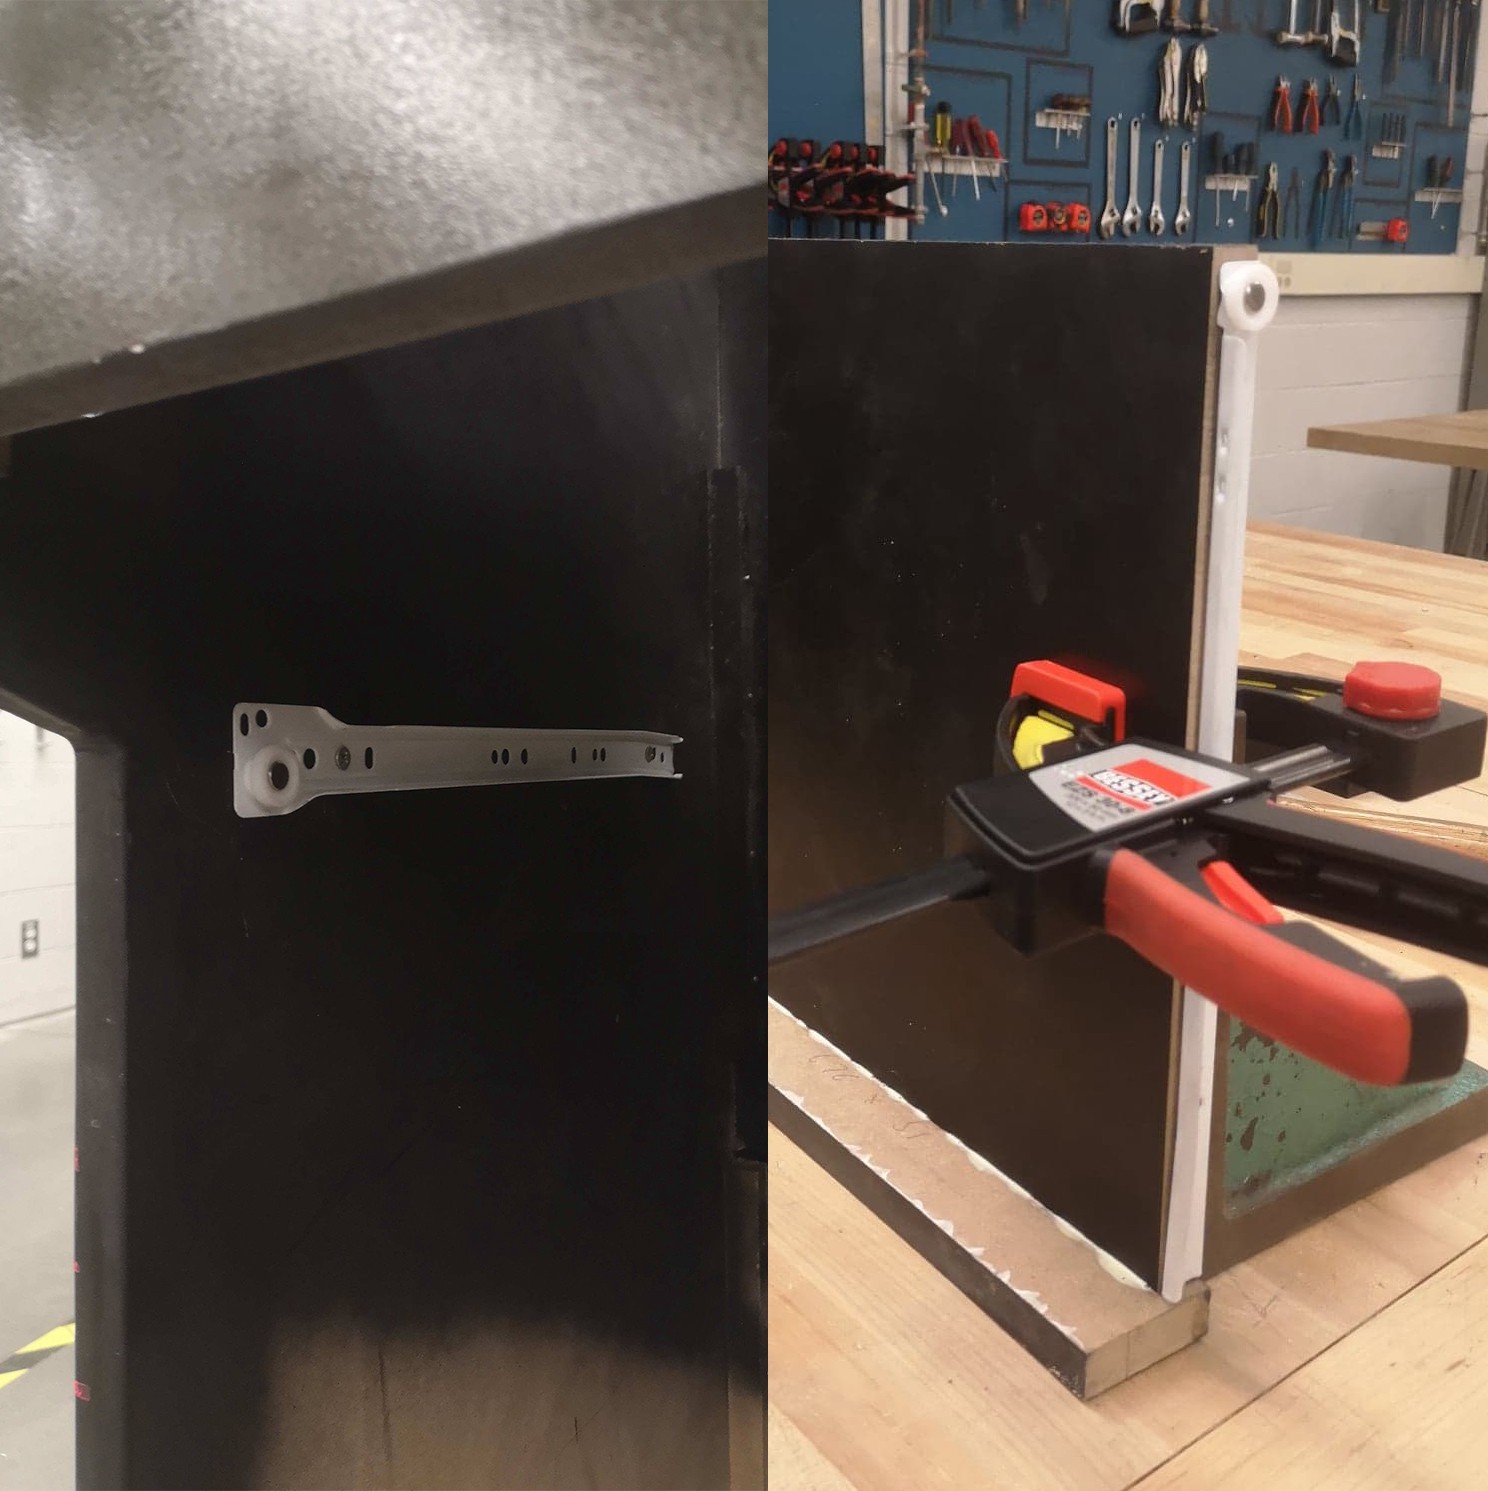
Keyboard Tray
We installed a keyboard tray by attaching a pair of rollers to a piece of wood. As we?re new to hardware, we didn?t know the rails had a clever design where you can adjust the height/inset before fastening the screws.
?
?
?
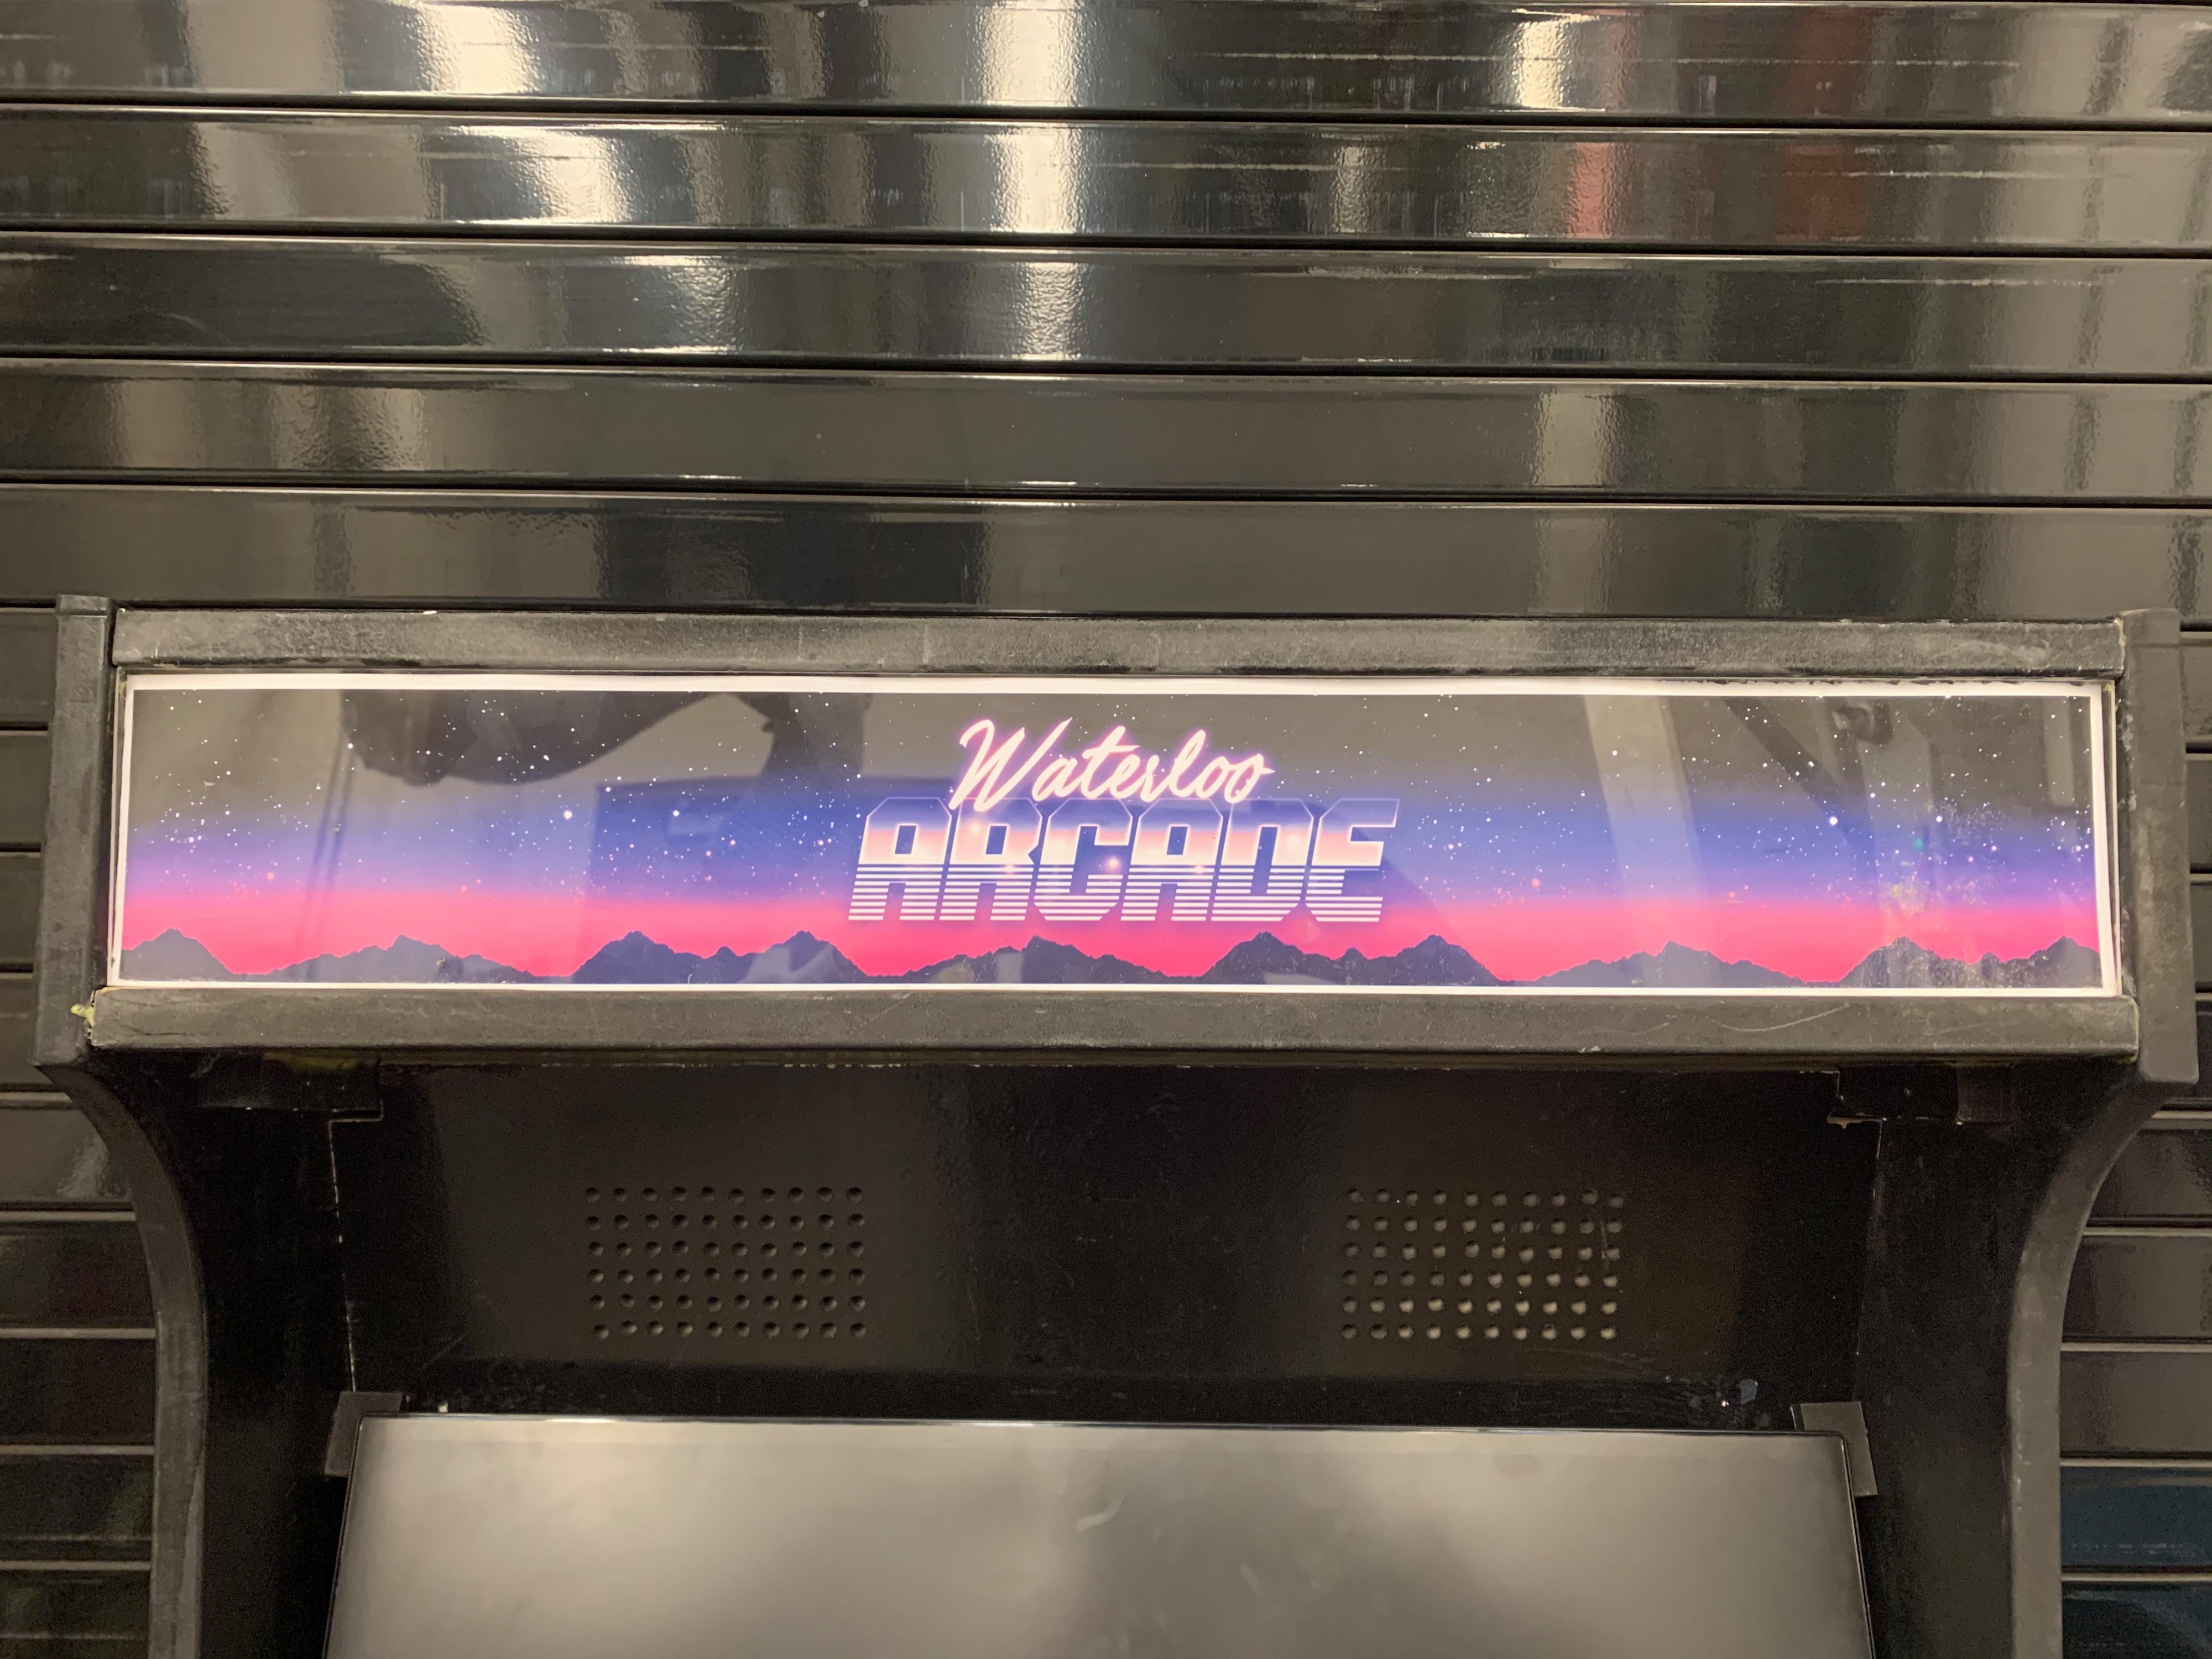
Marquee
We designed our marquee in Photoshop and got it printed for around $10. We then cut down a piece of Plexiglas and mounted it on the backer blocks.
?
?
?
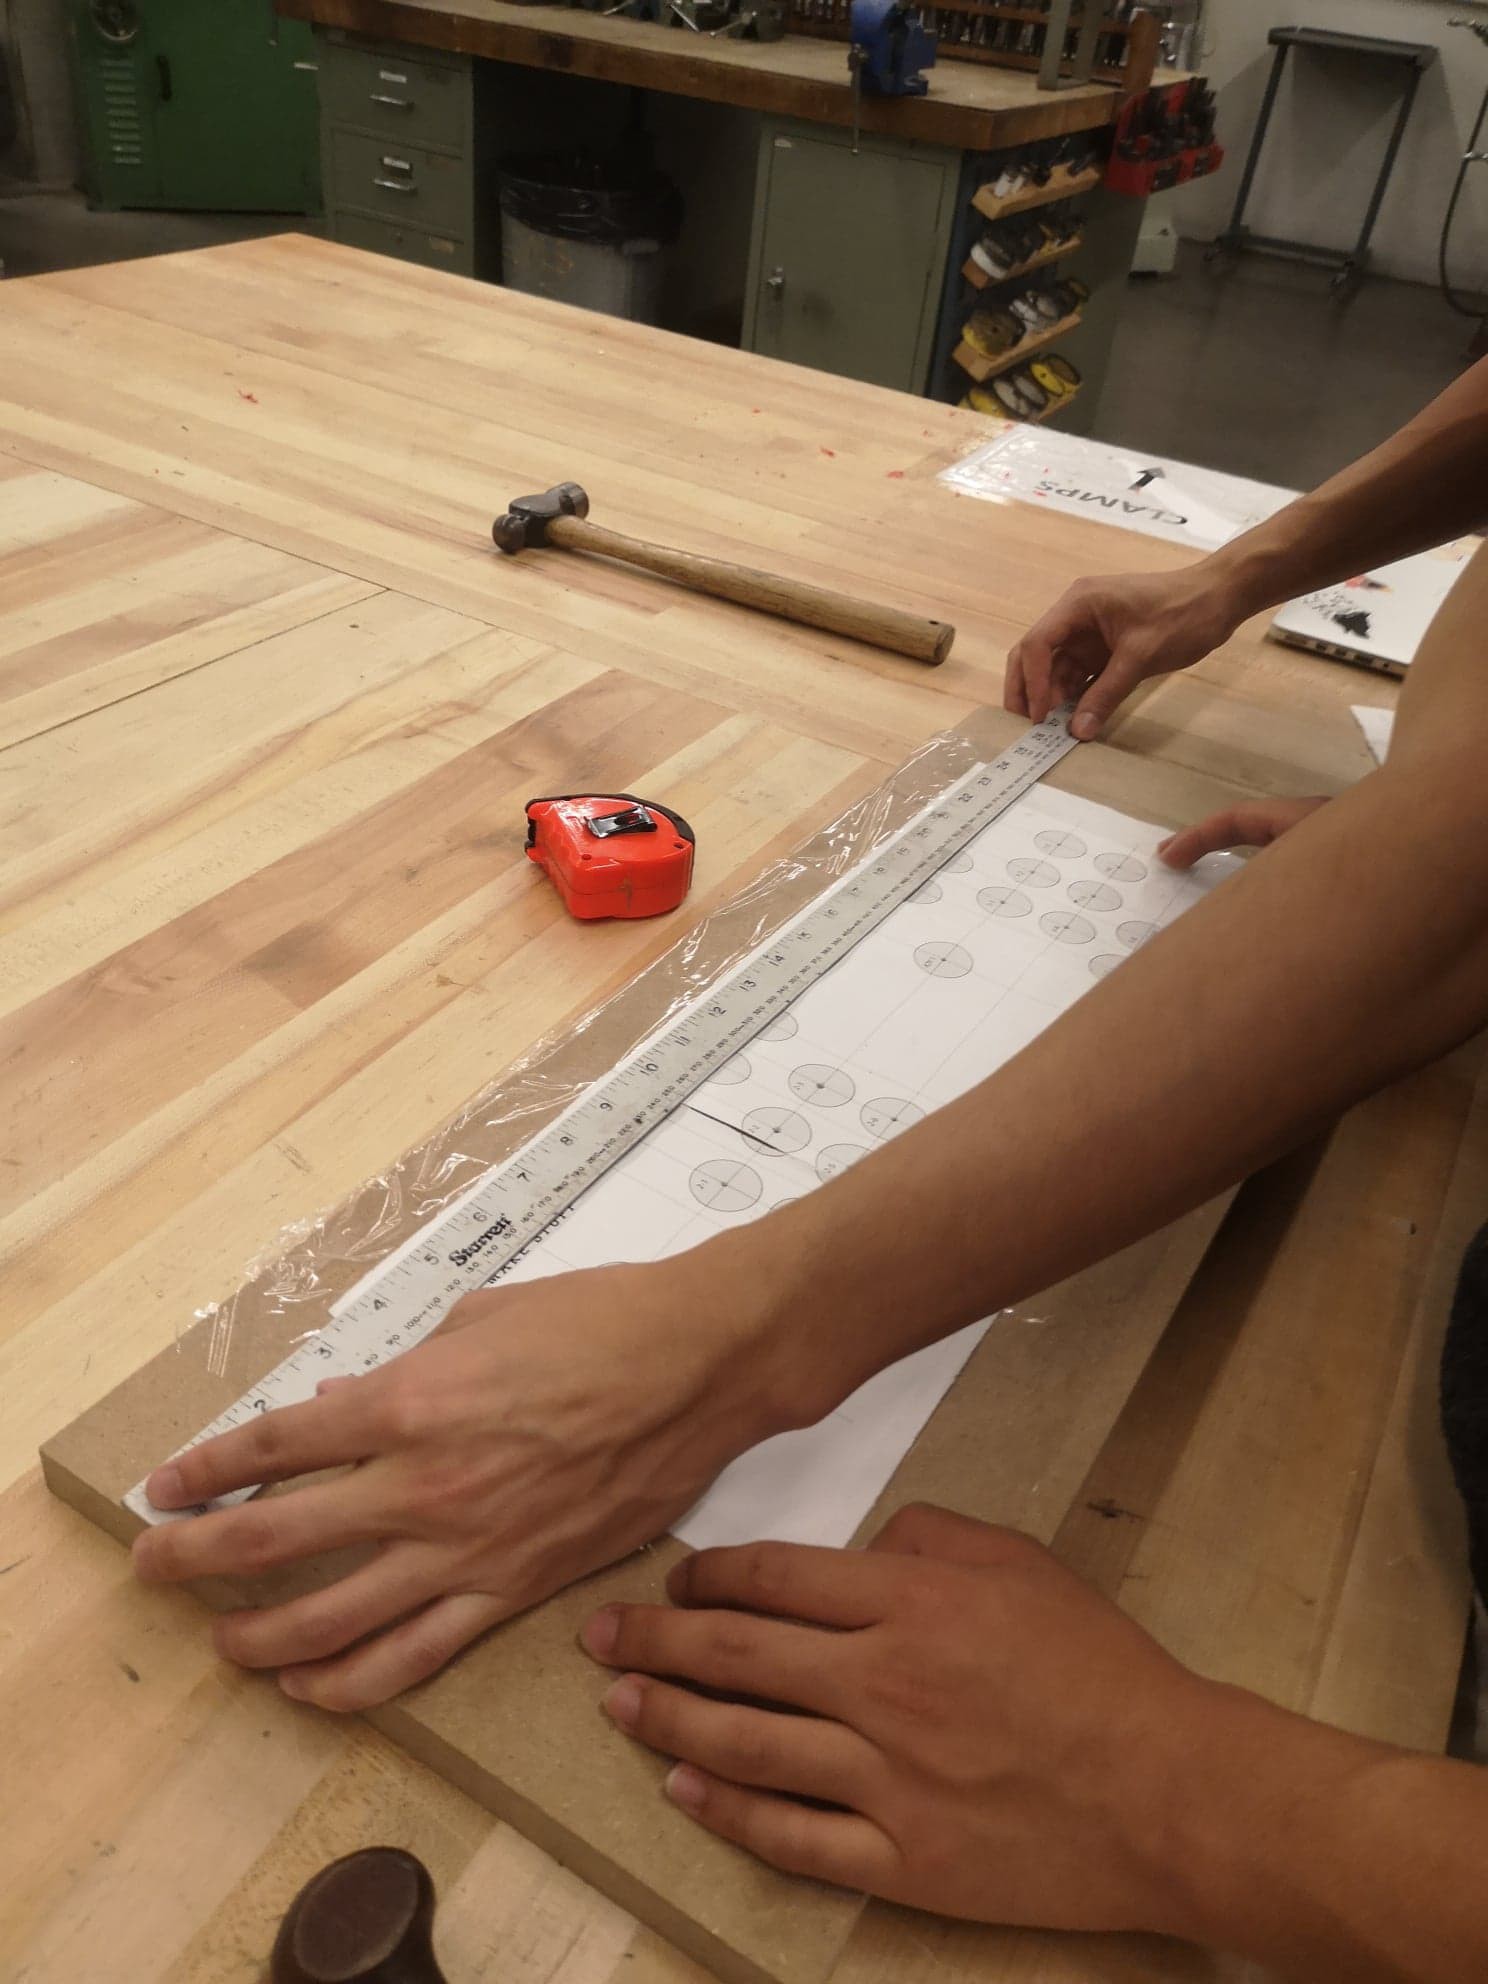
Control Panel
To make the control panel, we stuck a drilling template to a piece of MDF wood using tape and then used a drill press with a 1 1/8″ Forster bit to drill holes for the buttons.
There are different button layouts available, so choose wisely! We made the mistake of choosing one where the buttons didn?t line up with the arc of our fingers, leading to a clumsier experience.
?
?
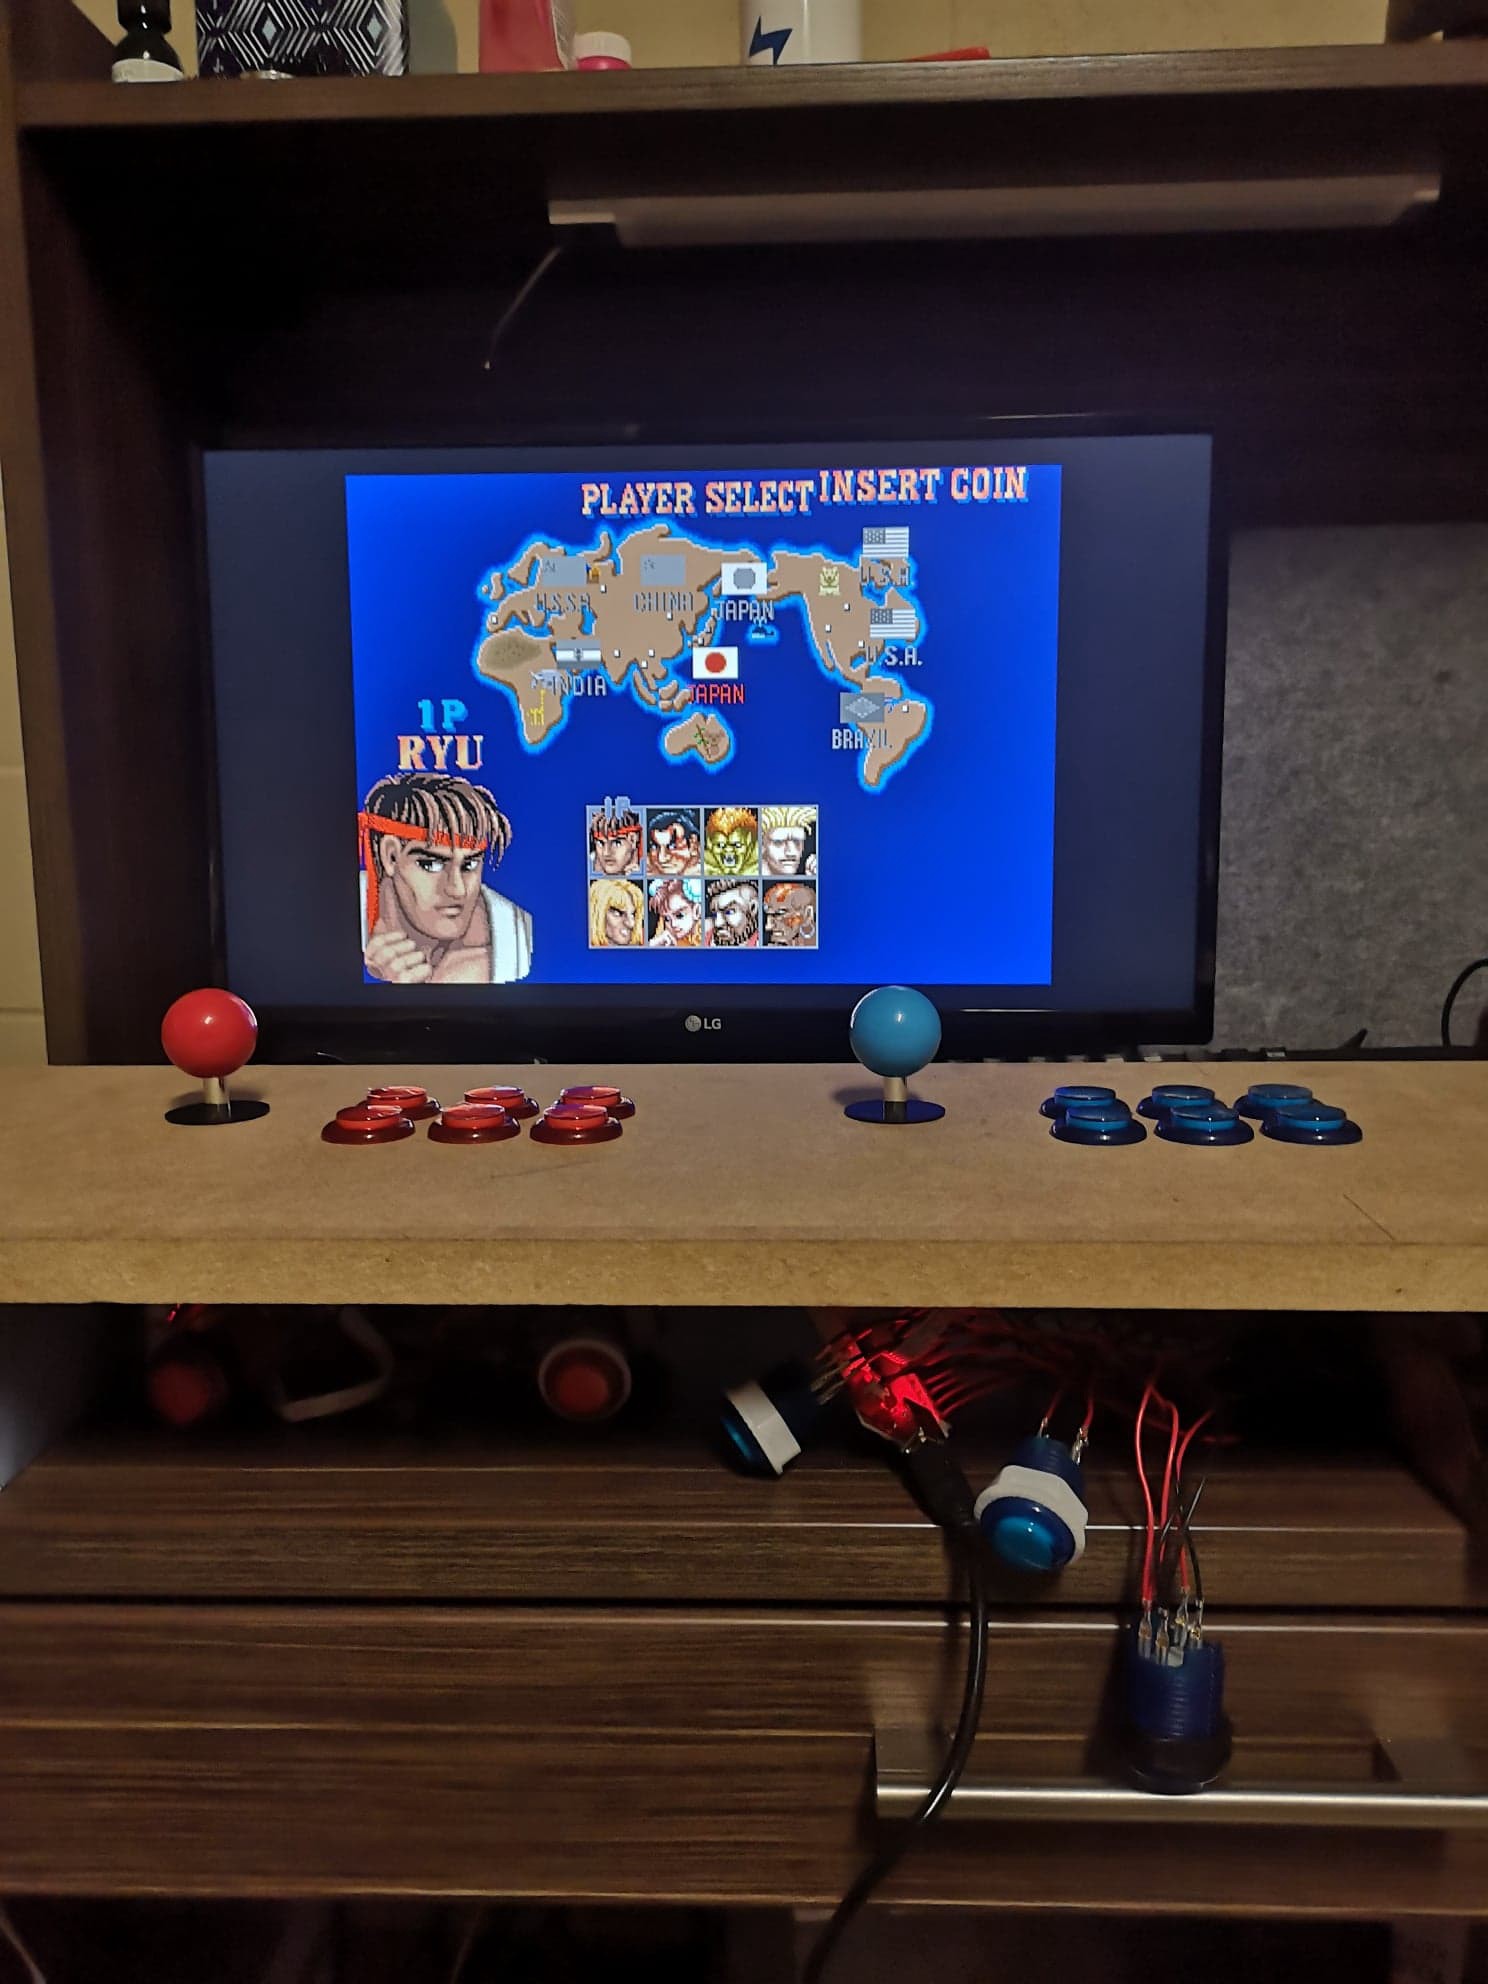
Wiring it Up
This step is pretty simple: screw the buttons into the control panel, connect each button to a USB encoder, and plug the USB output into the Raspberry Pi.
Once your controls are ready to go, simply plug in a monitor, keyboard, and mouse into your Raspberry Pi and follow these steps on Installing RetroPie.
This should be everything you need to get a game up and running!

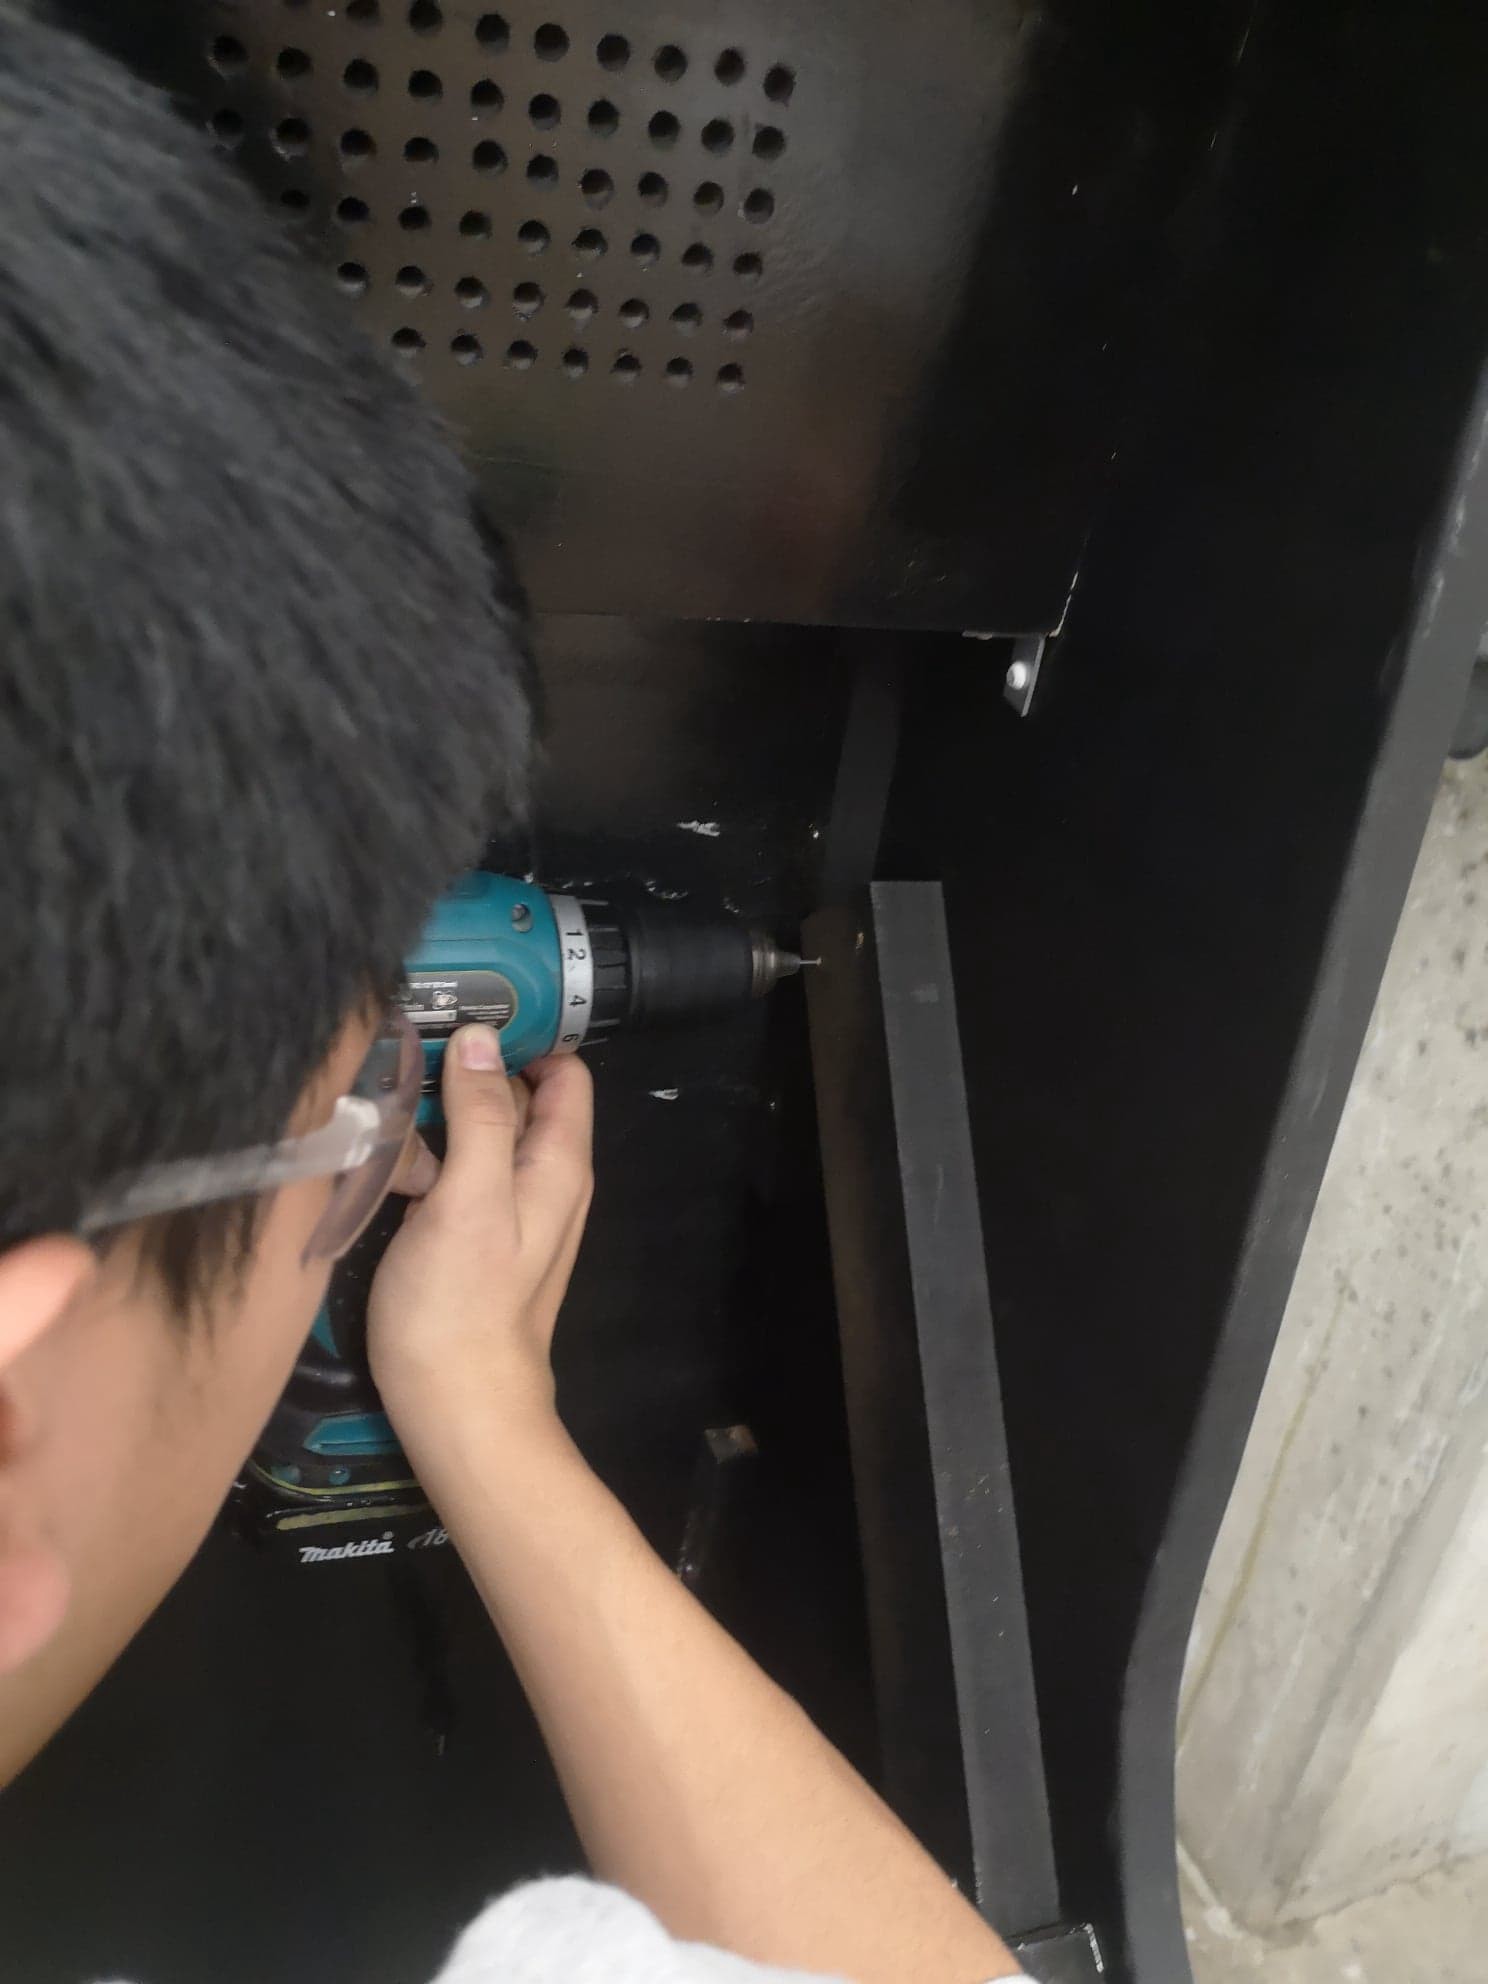
Putting Everything Together
The last thing we need to do is assemble everything. We already have all the components so this shouldn?t take too long.
Start by laying one side panel flat on its surface, and use nails to fasten the top, middle, bottom, and back panels onto the backer blocks. L-brackets and wood glue can be used for additional support.
Then, place the other side panel on top, and once again use nails to fix everything in place.
The front door can be mounted using inset clip hinges.
Installing the Monitor
The final step is installing the monitor. The best practice is to buy the monitor first, and to plan the width of your arcade accordingly, leaving around an inch of wiggle room for a 3/4″ backer block on each side.
Alternatively, if the shape of your monitor permits, you can opt to install a panel across the entire width for your monitor to rest on.
No matter which approach you take, it?s best to have one person align/trace the backer blocks while the other holds the monitor in-place (while being careful not to drop it!)
Wrapping It Up
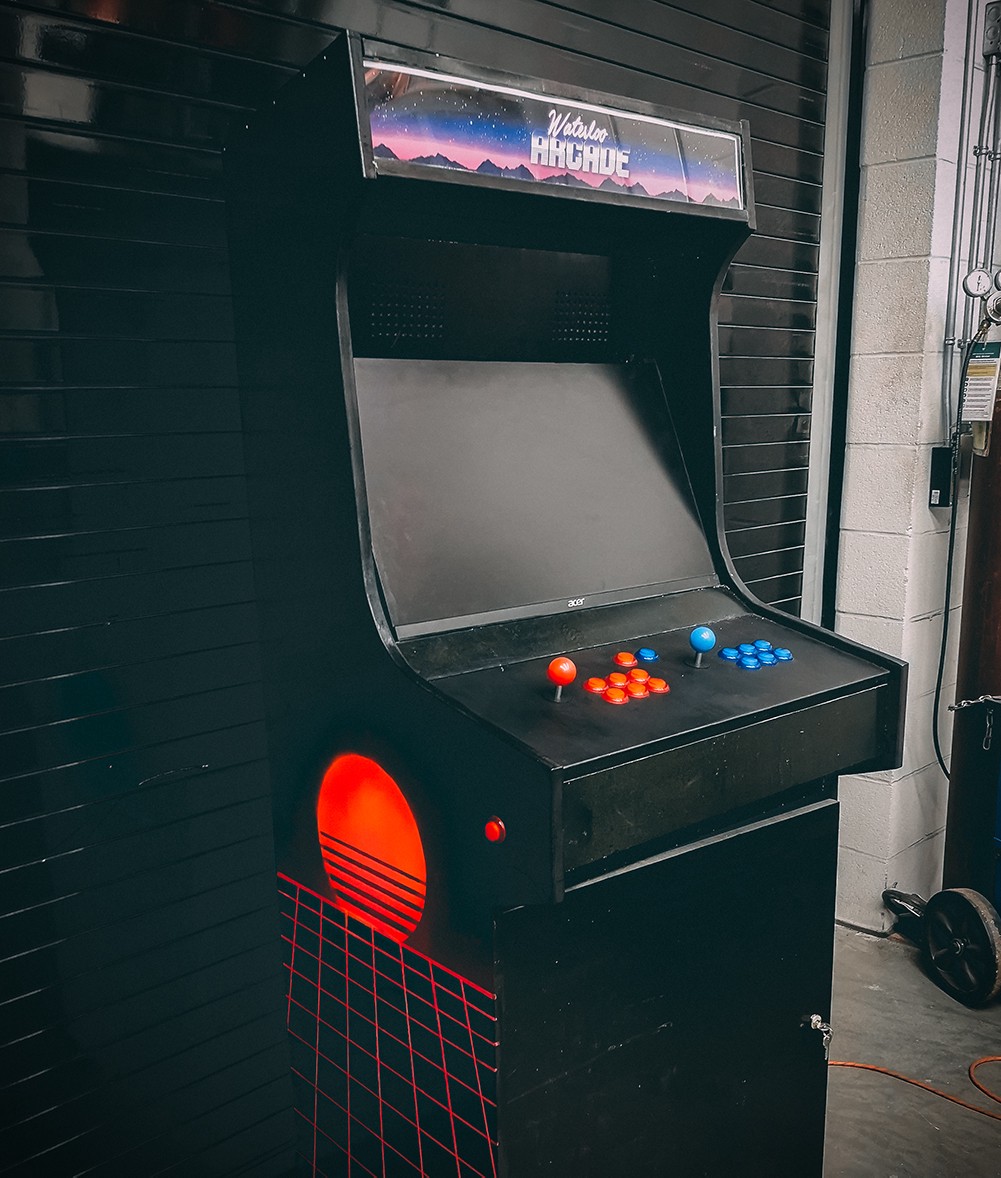
That?s it! Here?s what the arcade looks like, assembled and everything!
This project wouldn?t have been possible without the help of the folks at Waterloo Engineering?s Machine Student Shop. Thank you for helping us with any questions we had, and teaching us how to use the different tools.
Connect with us!
Kelvin ZhangWilliam TranKevin ZhangFrank Chen
.
