Retro gaming is firmly established as its own corner of the gaming market in 2020, but wouldn?t it be nice to play all those older games you bought years ago, without having to dust off your old consoles, and hoping everything still works?
Originally published at https://britgamer.co.uk/article/emulation-steam-link on 20 January 2020.
Note: this article does not cover acquiring or creating ROMs for emulation purposes. There is a legal grey area over whether one can own a ROM copy of a game one has physically purchased, and owning ROMs for titles one has not purchased is definitely not legal. Except when they?re abandonware. Which? still might not be legal. It?s complicated! This article avoids that topic entirely.
The ten foot style
Console gaming is all about sitting on a sofa, probably in the living room, with a controller, and interacting with a TV, which is typically a lot bigger than a computer monitor.
Even though, as a PC gamer, I might be accustomed to sitting in a chair at a PC, it?s not always the same feeling when you want a play a game that was designed for console. Those were designed with the TV in mind, and while it might seem like it would be strange to be concerned about what room you?re in, it kind of does make a difference.
Kind of like drinking milk out of a mug, versus a glass.
Prerequisites
To have the full experience I?m talking about here, you?ll need a Steam Link(discontinued by Valve at the time of writing, so you?ll have to look on eBay or similar), a PC with Steam, and a bit of free software.
The really nice thing is that to emulate most things, especially the older consoles, takes very little horsepower from your PC, so even older ones can handle it just fine.
That said, if you?re looking at Wii U emulation via CEMU, or PS3 emulation via RPCS3, you will need a more powerful rig, although there?s often many settings in the emulators that can tweak various things like resolution and upscaling.
Even if you lack a Steam Link, there?s nothing to stop you using these exact same steps to get this working on a PC, with all the same conveniences, minus the means by which to play on the TV.
A note on performance
Emulation is exactly that: pretending to be something it?s not.
Hardware varies wildly amongst consoles, and very little of it is similar to PC architecture (Xbox being the closest, historically). This means that your PC is working harder than the equivalent native console in order to play the game.
For reference, a modern i7 with a GTX 1080 Ti should be able to handle pretty much anything you throw at it. At 4k. At 60 frames per second. That?s mainly because the pure processing and rendering capabilities of modern PCs are far, far beyond even the most recent consoles.
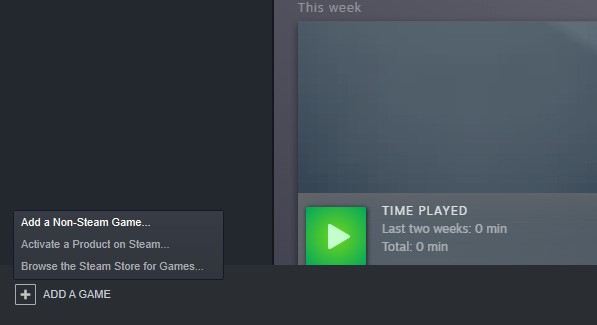
Steam supports non-Steam games
One feature that is not well-documented is that Steam allows you to add shortcuts for anything. Generally, it?s intended to launch games that are not purchased through Steam, but, in theory, you could use it to launch the Windows calculator if you wanted.
The best part is, the Steam overlay is supported, which means easy access to Steam screenshots, notifications, and chat while you?re playing (or? er? doing quadratic equations).
The interface hasn?t been changed since Steam first launched, as far as I can remember, so it?s a bit clunky, but more on fixing that later.
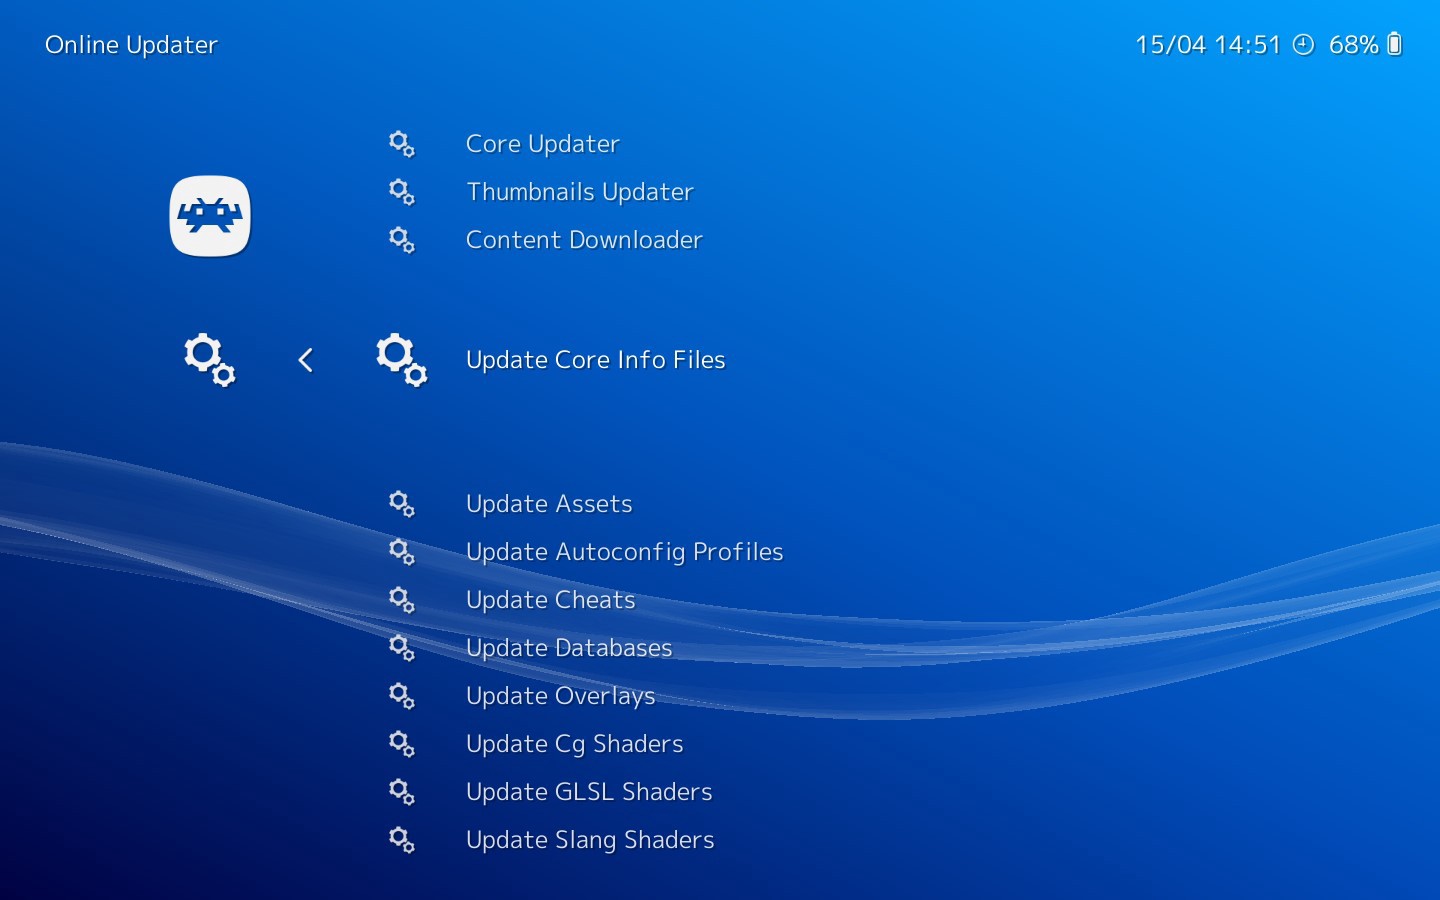
Introducing RetroArch
There?s a lot of emulators, and a lot of consoles. Sometimes, there?s multiple different emulators for the same console, each with different advantages and flaws. It?s hard to keep track. But where there?s a will there?s a way, so enter RetroArch.
The idea is simple: you have one program that can launch all of the emulators you want to use. That means one set of controller settings, one list of where to find the ROMs, and one interface.
The interface is personal taste, I guess. It follows a very similar system to the XMB (cross media bar) from the PlayStation, and it?s easy enough to use, but suffers slightly from the ?information burial? problem, leaving a lot of unused space where you have to scroll quite a way to find all the options.
A quick note on this: use the arrow keys to move, ENTER to select a menu item, and BACKSPACE to go ?up? from the current menu. This is because as PC gamers, our muscle memory is trained to use ESC to exit from a menu, but, pressing ESC twice in RetroArch will actually exit the entire program, no matter where you are.
Of course, if you?ve plugged in a controller, you just use A and B (Xbox controller) or X and O (PlayStation controller).
Importantly, you can press F1 on the keyboard to access the RetroArch menu whenever an emulator is active, so you can tweak settings, exit the game, etc.
Controller support
There?s one set of controller settings for the entire program, which is great news. It means you configure it once, and you don?t need to set it up for each individual emulator. In general, you can just turn on the controller, and RetroArch will detect and use it, very little extra configuration required.
Having said that, there are certain (ahem, Nintendo) consoles that require a few extra things. Anything with Wii motion controls is unlikely to work well, and I haven?t tried, so I probably best not cover that here.
Six-axis style motion controls, such as those found on the Nintendo Swtich, do work, but you need a controller that supports them. Both the PS4 controller and Steam Controller (again, discontinued by Valve) have six-axis gyros and will work, but they need setting up separately.
I have tested mine with the Steam Controller, the Xbox 360 controller using a wireless USB adapter (it?s the actual controller from an Xbox 360, paired with a bluetooth adapter), the PS4 controller, and the Xbox One controller, all of which work with no setup required (except for motion controls) and no issues at all.
You can connect multiple controllers too, for multiplayer, or if you want to separate motion controls to another controller, but be aware that you?ll have to choose which is controller 1 and which is controller 2, or you might not get a response on the one you want to use.
The Core concept
RetroArch refers to each actual emulator as a ?core?. This is because, instead of downloading the actual emulator itself and running it in the background, the ?emulatey? part of the emulator is distilled to its ?core? and put inside a file (such as a DLL file on Windows).
These will usually be called libretro_something.dll, and the ?lib? part just means ?library?, in that, you can?t run this emulator on its own, but it?s got the ?library? of information that RetroArch needs to know about in order to use it.
You can use Load Core from the RetroArch menu, and, it will show you a list and let you download a core if you don?t already have it.
Be wary though, there?s often more than one emulator core for each console. With that in mind, if you choose to download more than one core that supports a particular ROM type, you will need to choose which core to use each time you load it. For example, if you want to load a SNES ROM, and you have two SNES emulator cores in RetroArch, it will constantly ask you which core to use, which can be annoying.
Once you have a few cores installed, we can carry on. Bear in mind you can add more cores any time you like, so even if you just install one for now, you can add more later.
It?s ESC twice in a row to exit RetroArch, or just use the exit option from the menu.
It?s also worth knowing that not all emulators are supported by RetroArch. Providing a RetroArch version of an emulator is an optional process, not a requirement, so some emulator developers have chosen not to do it, for various reasons.
You can still use standalone emulators
Don?t worry ? if your emulator is not available in RetroArch, you can still use it standalone. It just means that instead of loading RetroArch to start any emulator, you?ll have to manually load that particular emulator when you want to use it.
You can even do this to have both a standalone and a RetroArch core for the same emulator. This is sometimes a good idea because the latest version of the emulator is not yet added to RetroArch, or a number of other reasons.
Note that if you do this, and have any standalone emulators, they all have different settings, such as controller settings, and each one will need setting up manually. This can be really tedious for a large collection of standalone emulators, and is one of the main things RetroArch has attempted to solve.
Also, save games (and save states) are not cross-compatible. If you have saved a ROM in RetroArch, and load the same ROM in a standalone emulator, your save game will not appear, despite it being the same ROM.
This is actually a generalisation ? this is mostly the case, but depending on the emulator, some might share save slots, and it?s usually possible to copy/paste files on your drive to transfer saves, but it?s easier to assume it?s not possible, unless you need to constantly switch from RetroArch to standalone for the same game, which is pretty unlikely.
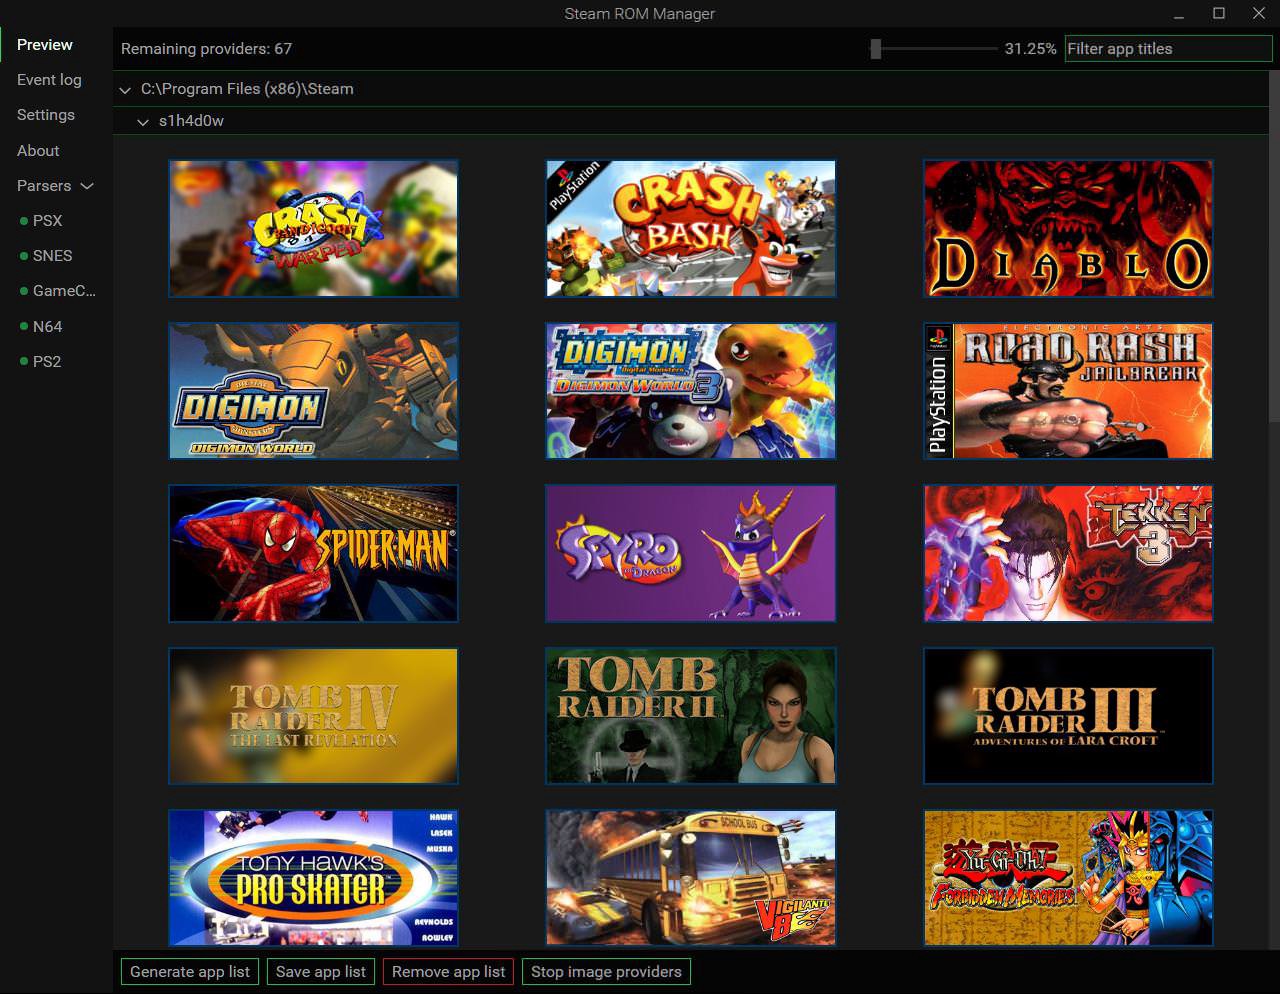
Introducing the Steam ROM Manager
You?re all set now, you?re good to go. You just need to add RetroArch as a Steam shortcut, load RetroArch, pick the game you want, and?
?wait, wouldn?t it be better to just use Steam? After all, Steam is supposed to be the one place you go to launch any game, so it doesn?t make sense to load Steam, then use it to load RetroArch, then use that to load the game. There must be a better way.
Luckily, Steam?s shortcuts are stored in a database that can be written by other software. This is where Steam ROM Manager comes in. It works like this?
You set up Steam ROM Manager by telling it which emulators you have, and where they are. Then you tell it where your ROMs are located.
It scans your directories, matches the ROMs to the emulators, and adds each game as a shortcut to Steam automatically. As a bonus, it even downloads cover art for your games! (More on this later.)
As we get further and further into this setup process, each step does become a bit more technical and a bit more tedious, so, with that in mind, feel free to back out at any point and just ?stick with what works?, because it?s more important to get some added convenience to your emulation experience, rather than get brain-fucked into giving up altogether.
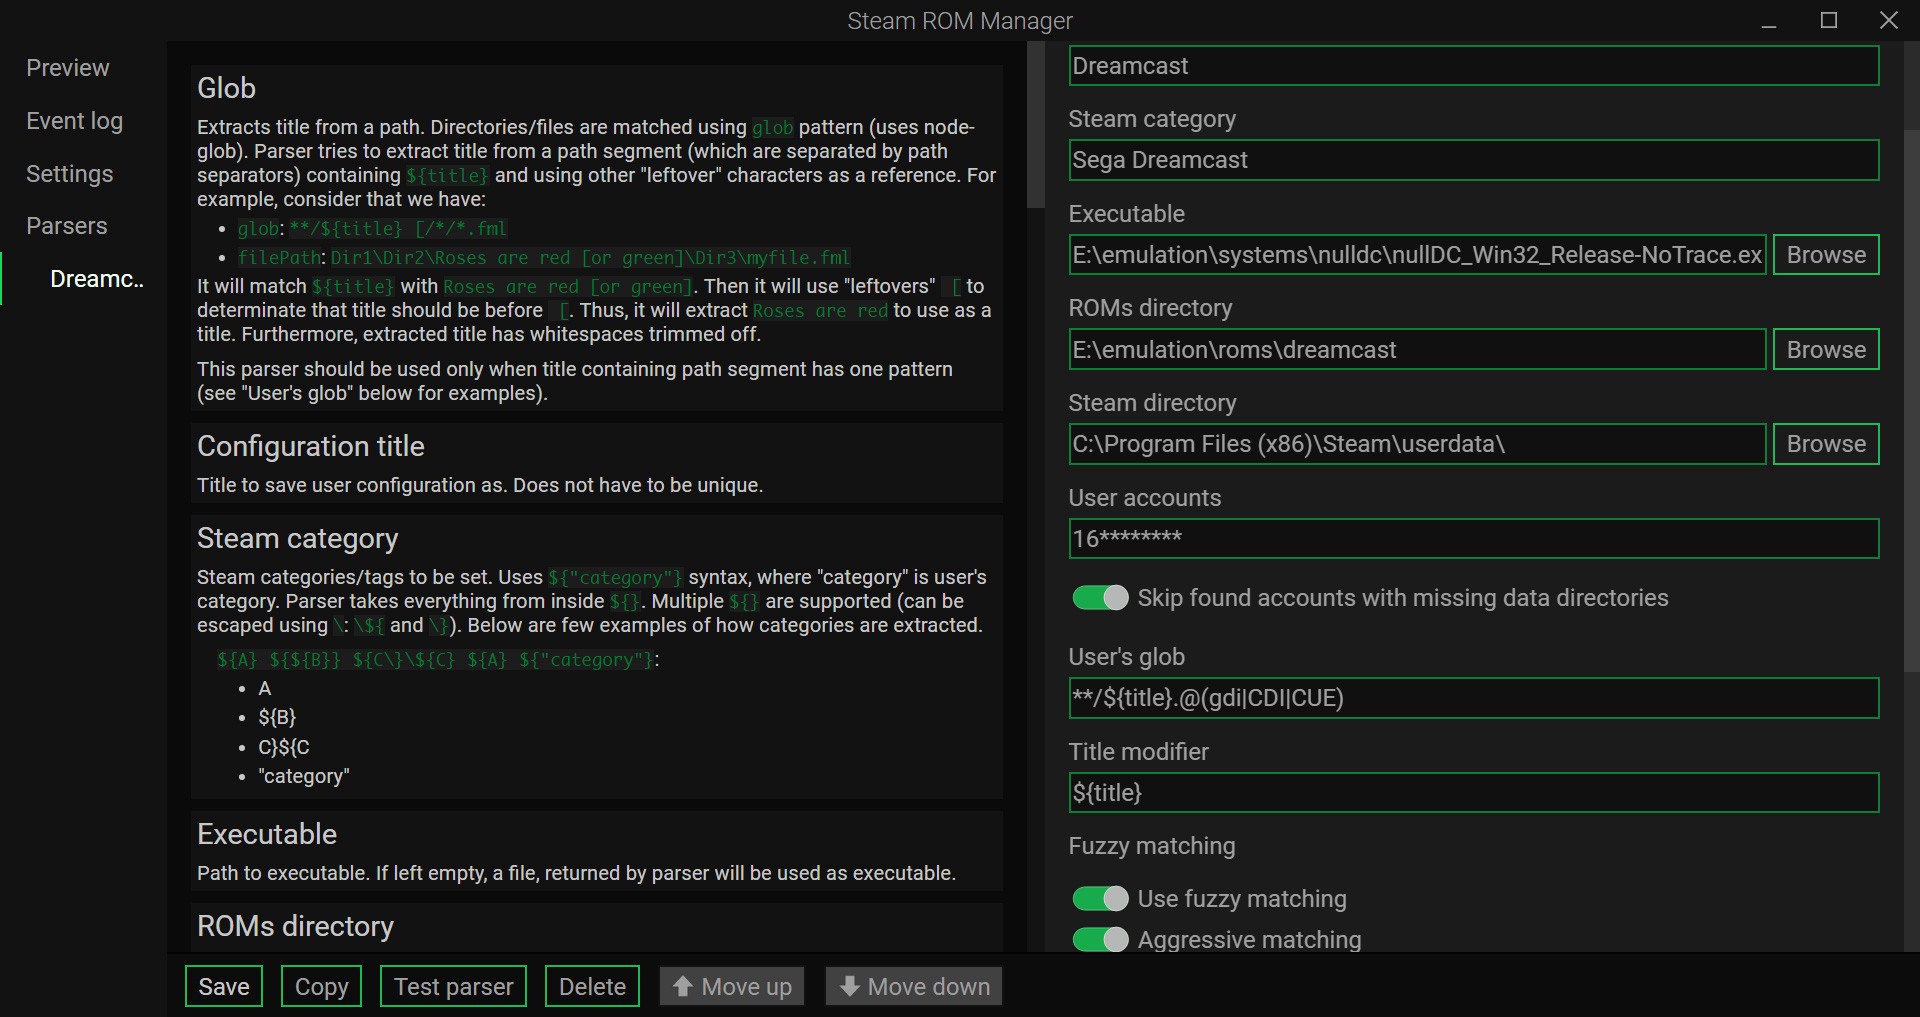
In the Steam ROM Manager left menu, there?s an item called Parsers. This is where you set up each emulator.
This interface is pure shit, unfortunately. To use it to add a new emulator, you need to use the drop-down in the top right. Yep, it?s that non-obvious.
Be aware that there?s separate drop-down presets for the standalone and RetroArch versions of the emulators, so pick the one that matches your setup. If your emulator doesn?t appear in this list, you?re on your own. It?s not impossible to set up, but it?s too technical for this guide, I?m afraid.
Once you?ve chosen a preset, you need to pick the Executable (the emulator itself), the ROMs directory, and the Steam directory. This is annoying as hell, because your Steam directory is always the same no matter which emulator, and it asks you to pick it every time you set up a new emulator!
If you?re using a standalone emulator, the Executable part is going to the .exe file usually found in the emulator?s directory. Mostly, on Windows, you?ll find these in C:Program Files or in C:Program Files (x86) (thank Microsoft for the terrible idea of putting them in two separate directories).
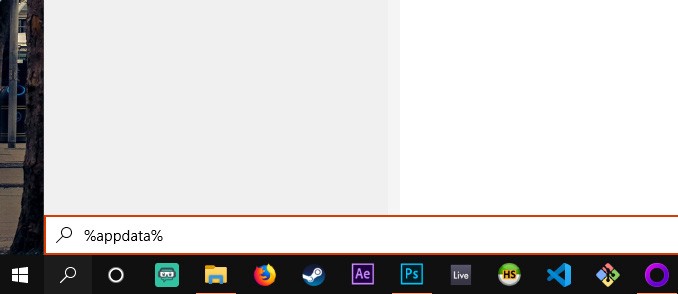
However, RetroArch is actually stored in the AppData directory. This is often hard to find on Windows (again, terrible design decisions by Microsoft). I find the easiest way is to open the start menu in Windows, then in the ?run? box, type %appdata% and press ENTER. This will take you straight there, and you can easily find the RetroArch directory.
This is also user-specific, so if you have multiple users on your Windows, they each need a separate RetroArch installation.
The ROMs directory part is obvious, but here?s a note on structure. Ideally, you want to have a separate directory for each platform. So, you might have C:RomsPS2 for PlayStation 2, and C:RomsN64 for Nintendo 64.
This makes it much easier for your emulators and programs to understand which files are for which system.
Also bear in mind that if you move your ROMs directory, or if you move files around or rename them, your Steam ROM Manager shortcuts will stop working, so you need to update them all.
Lastly, the Steam Directory is looking for the directory itself, not steam.exe or anything like that. You just need to point it at the directory (folder). Usually you?re looking for C:Program Files (x86)Steam unless you installed it elsewhere.
Also note that your SteamLibrary is not the same thing. SteamLibrary is where your Steam games are saved. Steam Directory is where the program itself is installed. They might be in the same location! But, also, they might not!
Test and save
The cover art for each game will be searched using the ROM filename. That?s why it?s a good idea to make sure your ROM files have sensible names. If you find that one isn?t showing the art, check that the name resembles what you?d search for. You can also search manually on the Steam Grid Database to see if the art exists. There?s a chance that there just isn?t any art for the particular ROM in question.
You can manually add your own art if it can?t find anything automatically. You?ll eventually see a list of all the ROMs that Steam ROM Manager knows about, but you need to save before you can use them!
Once you press save, you must restart Steam for the changes to show up. They will only be detected when Steam first loads, so unless you restart, you won?t see them.
Collections
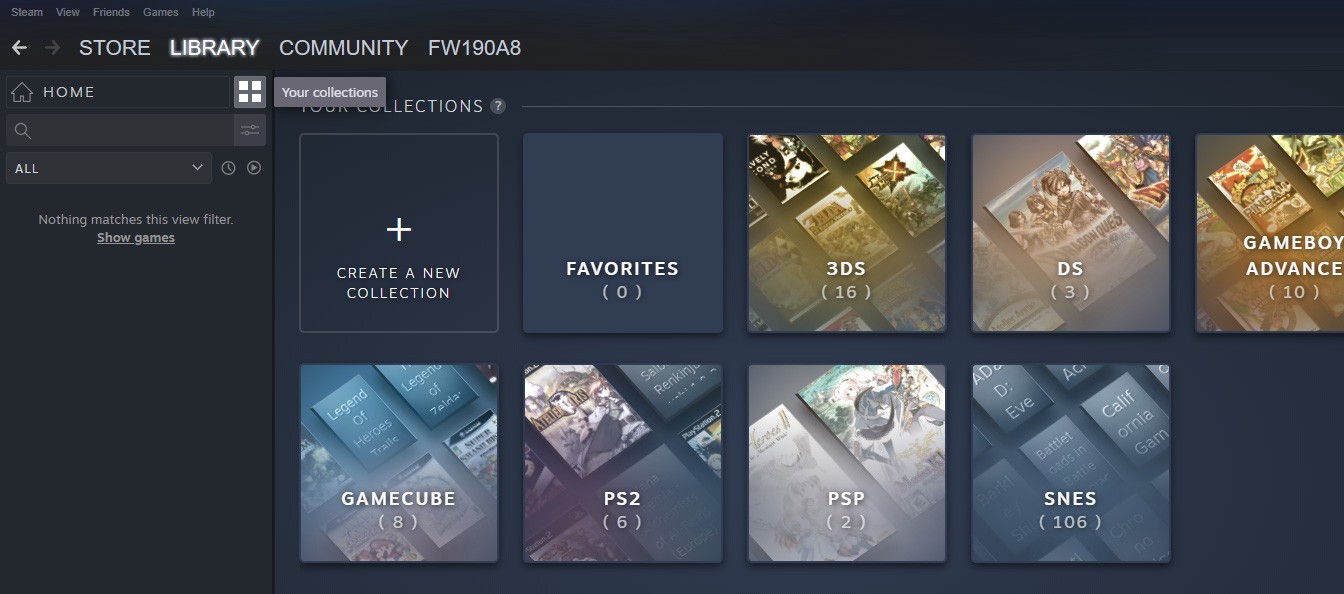
Once you load Steam, your games will show up. But there?s more! If you have more than a handful of ROMs, it?s worth considering some collections. There?s a collections button in the Steam library interface, near the search box.
You can create and name as many collections as you like, and put games in collections by right-clicking them in the main game list. A game can also exist in more than one collection, so organisation is entirely up to you!
Once you start adding things to a collection, it will generate a thumbnail automatically based on the cover art of the collection?s contents. But wait?

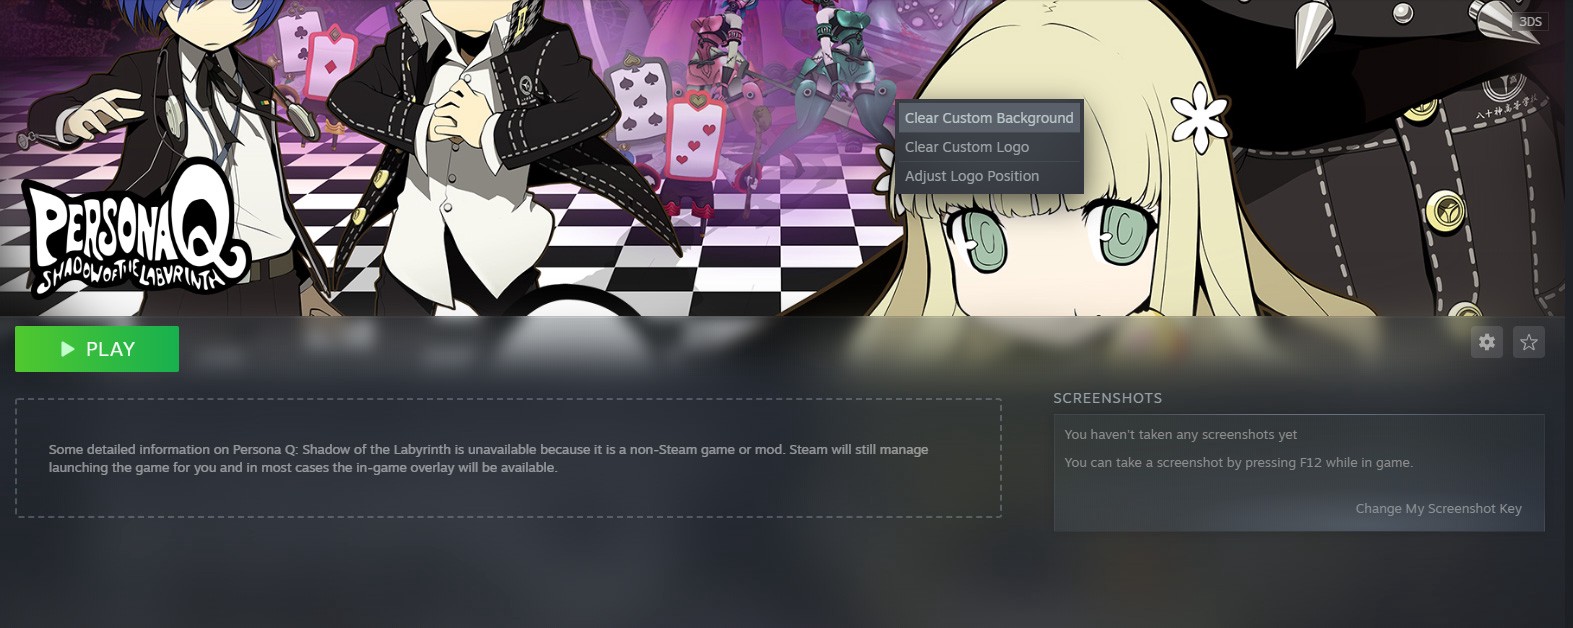
Unfortunately, by default, Steam ROM Manager doesn?t yet (at the time of writing) support all the custom artwork. There?s three pieces of artwork (excluding the icon):
- Background image is what is shown when viewing the game in Steam, before you launch it. It?s the massive picture at the top.
- Custom logo is also on the preview page in Steam. It?s a smaller image overlaid on the background image, designed to contain the game?s logo.
- Custom artwork is the cover image for the game, displayed in the collections view.
If you want nice custom artwork in Steam, it?s going to be a case of setting this up manually, and having a folder of images on your PC that Steam can use for this. Hopefully this is something we will see added to Steam ROM Manager in a later release, though! That?s a lot of effort if you have more than a small handful of ROMs.
Annoyingly, not all cover art was made for covers that are the size specifically used in Steam, and there?s no way to change it, so, for example, the more square-shaped 3DS cover art won?t appear correctly. The sides will be cropped off. It?s not a huge deal.
Big Picture
Lastly, since the Steam Link uses Big Picture mode, there?s a few tricks to finding what you?re looking for. In general, the setup is extremely easy, and just requires you to turn on your Steam Link once you?ve saved your games to Steam using the Steam ROM Manager.
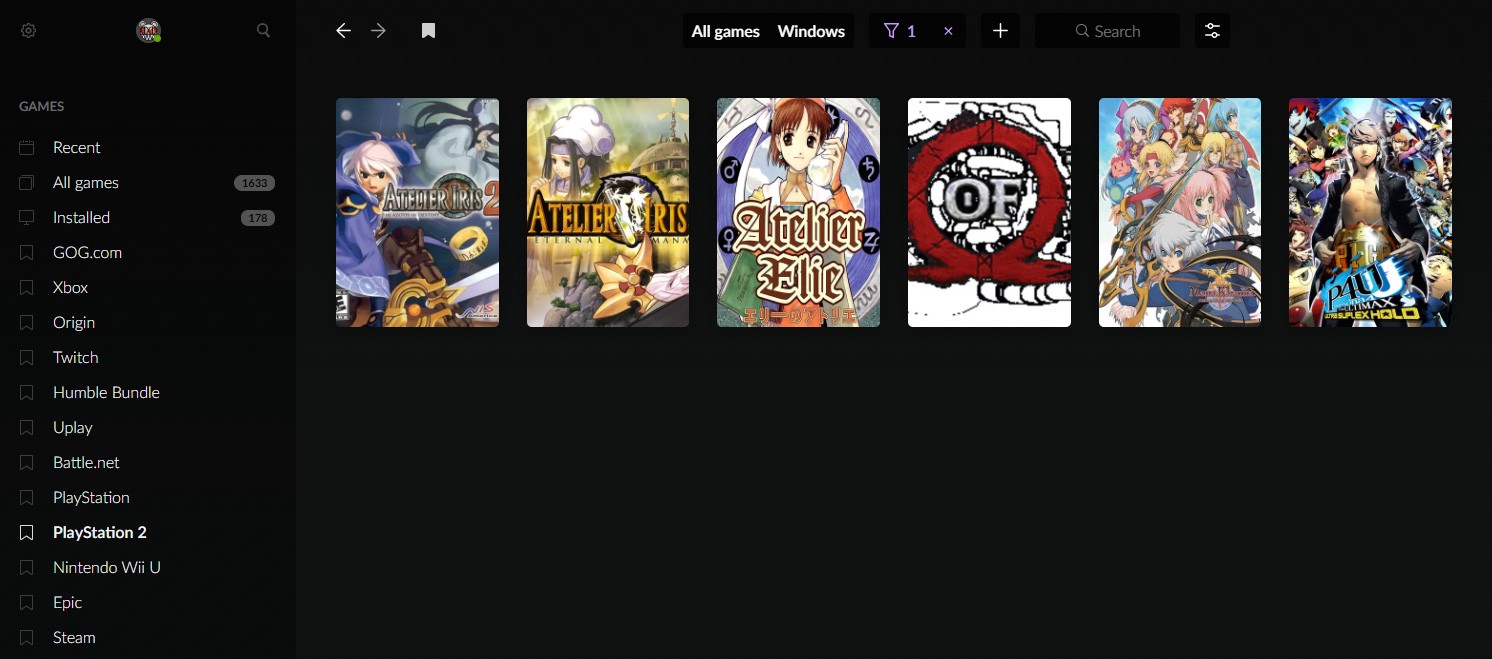
However, you need to go to your full games list and use Filters to view a particular collection, and it?s not obvious it?s there.
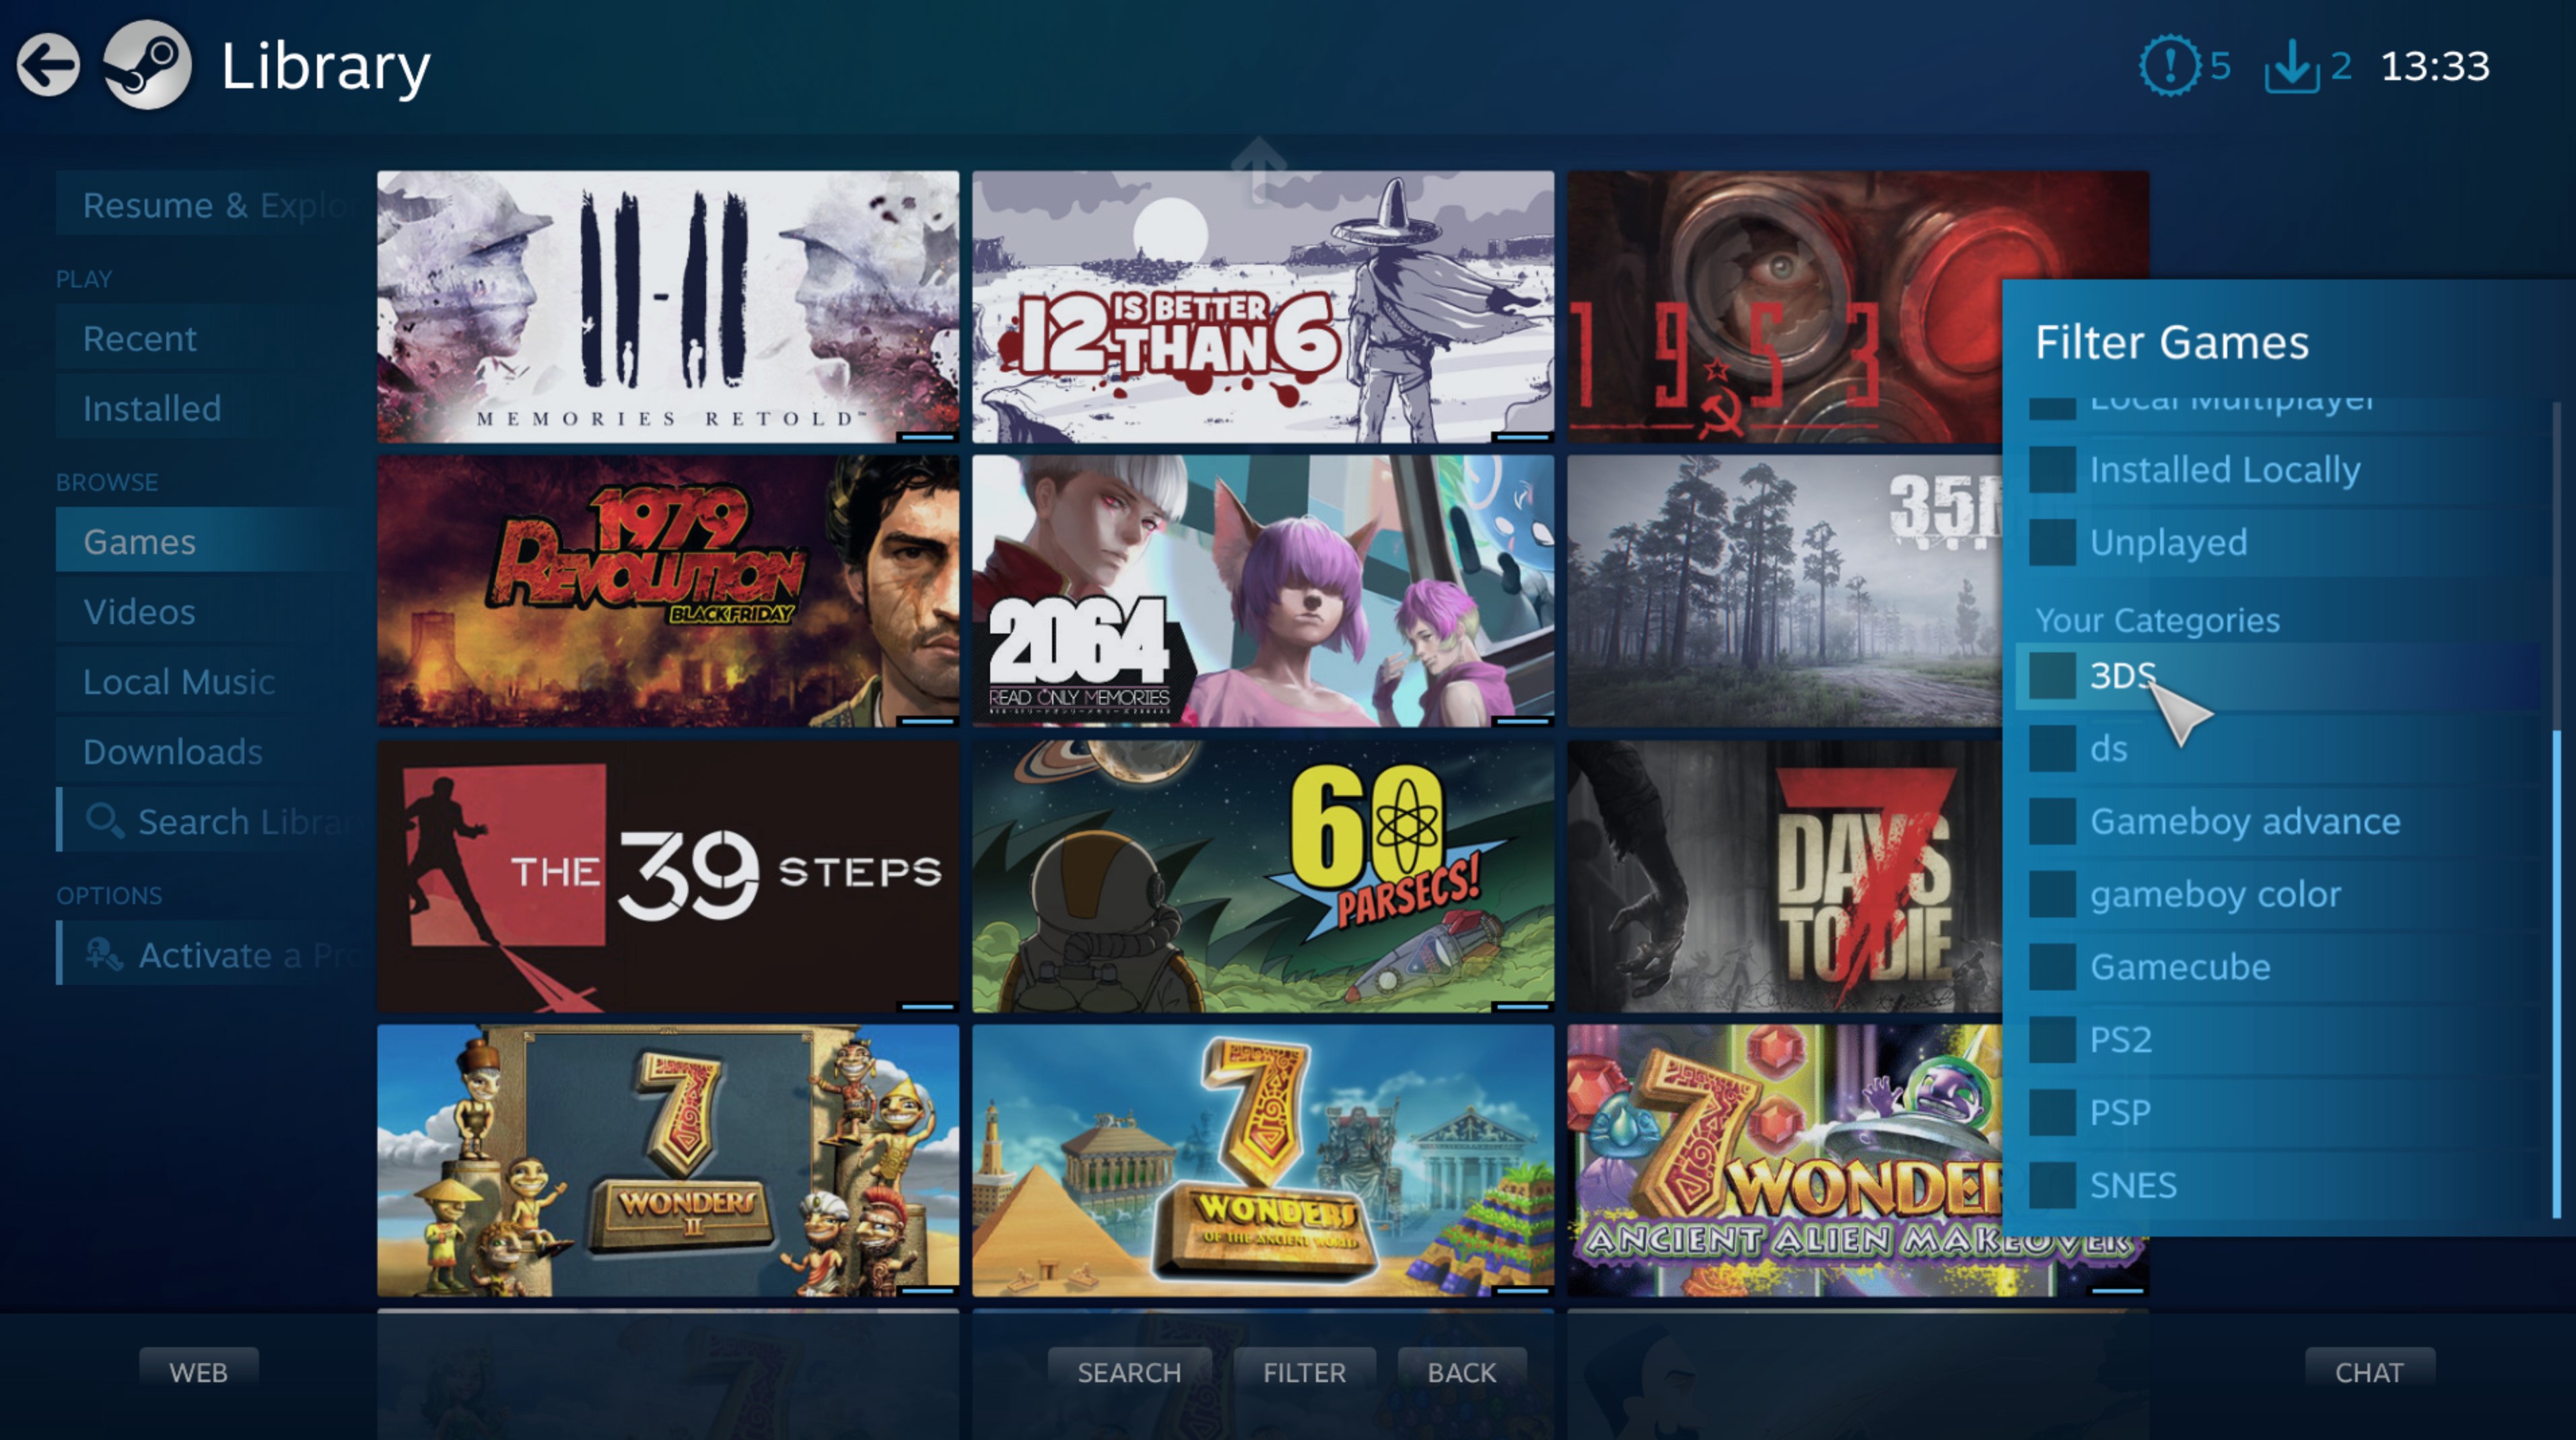
Now you?ve filtered to find your game, you might notice that the preview images in Big Picture aren?t working. I don?t know how to solve this one! For me, some of the images work and others don?t, and I can?t find any way to check or change these in Steam.
I think it?s the custom artwork being provided by Steam ROM Manager, not the custom artwork you?ve set manually, but I can?t figure out why some works and some doesn?t.
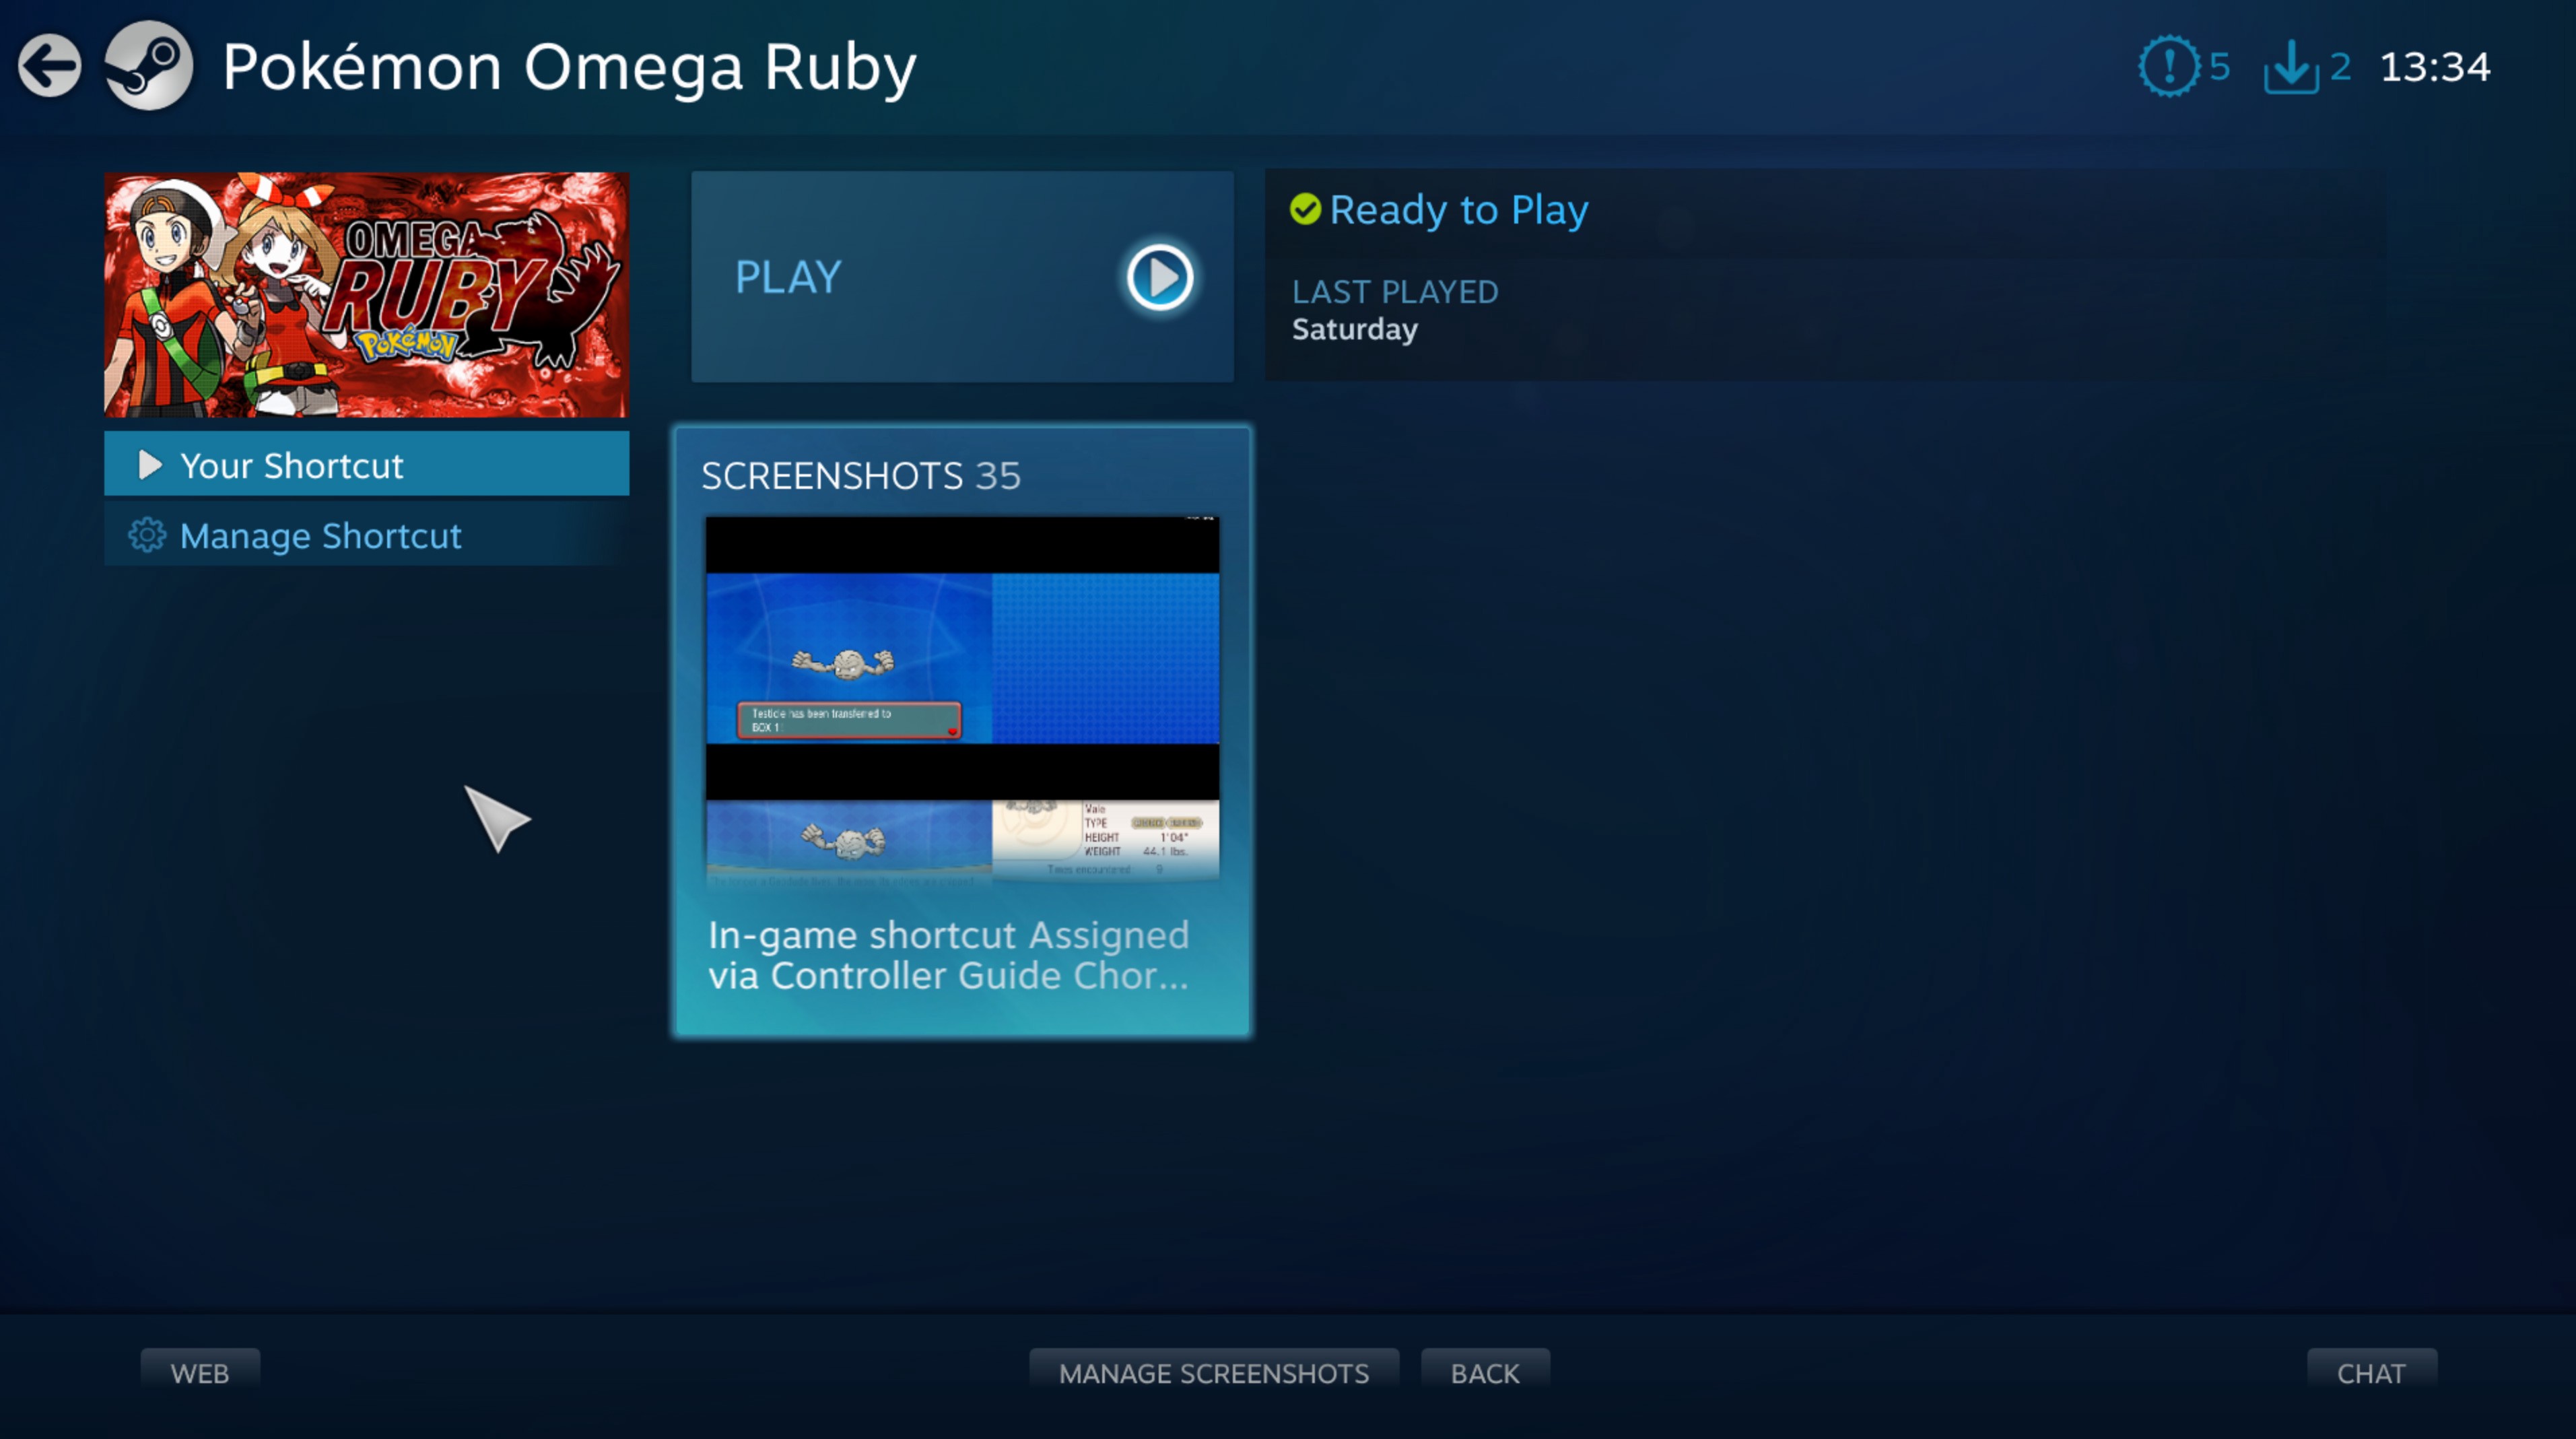
Anyway, while you?re playing a game, it will boot the emulator (or RetroArch) directly and you?re straight in.
Usually the default controller for Steam Link (this can be a Steam Controller, but it?s also possible to pair up an Xbox One or PS4 controller) will be detected automatically and away you go.
Steam will allow you to take screenshots as normal, and also show the name of the game you?re playing in your friends list (but it will say ?non-Steam game? next to it). If you also use Discord, and you have it turned on, the name will be shown there too, but it?s sometimes flaky.
Limitations
I found this whole process was really easy and, once it?s set up, it?s so simple to launch and play titles from the Steam Link on the TV. However, there?s a few things that don?t quite work as expected, and a few problems I ran into.
For some reason, some games refuse to boot properly when launched via a shortcut. If you encounter this problem, I?d recommend setting up a manual Steam shortcut directly to RetroArch (remember it?s in the AppData directory, as mentioned above), and just using your Steam Link to launch RetroArch. From there, you can launch the ROM. It?s not as convenient, but it?s a limitation of some of the emulators.
The DS emulator DesmeME works fine, but there?s a few tricks to this. Firstly, your TV is likely to be 16:9, as in, wider than it is tall. The DS is designed to have one screen on top of another, so there?s a lot of wasted space on screen.
Hit F1 in RetroArch, and go to Options. This brings up a screen of options specific to the emulator (core) you?re using. Here, you can choose a variety of options like side-by-side, or one small screen and one large one. DeSmuME is actually good for having lots of options, but other emulators vary in RetroArch.
Touch screen controls are a pain, due to the nature of the controller you?re using. In something like Citra, there?s a cursor on the touch screen that you can move using the right analog stick on the controller, but, this is much less accurate than using a stylus, as the console was originally designed to use, so anything involving timing or rapid movement is probably impossible.
That said, if you?re gaming on PC, you can use the mouse for the touchscreen input, so it?s a lot easier.
In DeSmuME, for DS games, although the touchscreen cursor appears on my PC, it?s not sent to the Steam Link. The touch screen controls work, but the cursor is rendered invisible, making it almost impossible to use on a Steam Link. I?m not sure why this is the case, or how to solve this issue, despite trying many different options for the cursor. Many DS games don?t use the touch screen heavily, or provide D-pad controls as an alternative, in which case, you?ll be fine.
Because Steam Link is essentially capturing a window on your PC and sending it to your TV, it?s prone to getting confused occasionally. A normal game will start, display one window, and then keep displaying that window until you quit. Emulation, especially with RetroArch, is different in that sometimes it will switch, stretch, or resize the window when transitioning from the RetroArch menu to the emulator, and back again.
This sometimes leads to the wrong window being selected in Steam Link, or no window at all. Luckily, if you are using a Steam Controller, you can hold the Steam button, and use the right trackpad, and this will force your PC to use the mouse pointer. The right trigger is then your mouse click action. In this way, you can often temporarily grab the mouse and move it to select the window you want.
Also, if your emulation pauses and seemingly won?t respond, it?s worth checking that your PC hasn?t triggered another window (such as annoying Windows Updates or something). This is often the case, and just going to your PC and clicking on the RetroArch (or emulator) window is enough to resume play. It?s less than ideal, but it?s only happened to me a few times in many hours of play.
RetroArch on Steam
There?s plans for the RetroArch team to bring the software directly into Steam rather than a standalone application. You can read about it on their Steam post. When you?re reading this, it might have already been released, so it?s worth checking, in case you can skip a few of the steps mentioned here!
Mapping controller shortcuts
There?s two shortcuts I usually assign to the controller using the Steam Controller Configuration page (accessed by pressing the Steam button while in-game).
The first is the screenshot button. I love taking a bunch of screenshots, and, while RetroArch has its own screenshot system built in (as well as many standalone emulators), I like the ease of management and upload with the Steam version.
The second is the F1 key, which is vital in order to display the RetroArch menu itself while you?re playing. If you?re using a standalone emulator, there?s usually a button you can press to access the emulation settings, but, they all use different buttons, so you need to figure out which button it is and map it for each separate emulator.
For the Steam Controller, I usually map this to the bumpers (the buttons behind the controller) because no consoles have ever had these buttons and they aren?t in use for anything else. If I?m using an Xbox One Controller, it?s necessary to find a button that the emulator isn?t using, so it depends how old the game is, and whether that console uses all the controller buttons or not.
Lastly, don?t forget that in Steam, controller configuration is separate for each game. This means that if you?ve set up shortcuts using Steam ROM Manager, each and every shortcut will have its own controller configuration.
Once you?ve set it up once though, you can save it to Steam as a controller template, right there in Big Picture, and just load it again the first time you load any game.
If you?re using a single RetroArch shortcut to launch your games, or you?ve set up the controller on this game previously, you don?t need to repeat this every time.
Bonus: GOG Galaxy 2.0 integration
If you haven?t got GOG Galaxy 2.0 yet, it?s in Open Beta at the time of writing and I highly recommend it for anyone, not just for those looking to use emulators.
It?s yet another game client, but specifically designed to integrate all your other games clients and list all your games in one nice interface, instead of having to remember to open Origin or UPlay or Epic Games or whatever else.
It also comes packed with a huge number of client integration, but, perhaps the most useful feature is the ability for third parties to develop their own integrations.
This means that although GOG Galaxy 2.0 doesn?t ship with any emulator integrations, people have developed these, and made them available for you to use! The installation process is quite manual at the moment, and often involves a tiny bit of config file editing (and signing up to something like the free Giant Bomb API), but if you want that next level experience, go for it. I?ll leave you to Google to find the individual integrations for each emulator though.

Games listed in GOG Galaxy 2.0 don?t integrate with Steam Link at all. Steam can?t read the games you?ve got set up there, which is unfortunate, because the integration with GOG Galaxy 2.0 is better than using Steam ROM Manager (this isn?t a fault of Steam ROM Manager, it?s just the way Steam works).
So, although the integrations are useful to launch emulators directly from your PC using GOG Galaxy 2.0, it?s not going to help you getting those shortcuts added to Steam so that you can launch them on your Steam Link.
But, it?s impressive nonetheless, with data like screenshots, cover art, and descriptions being pulled directly from the internet automatically for each game (again, providing you name your ROM files correctly)!
