
Easily with free online tools.
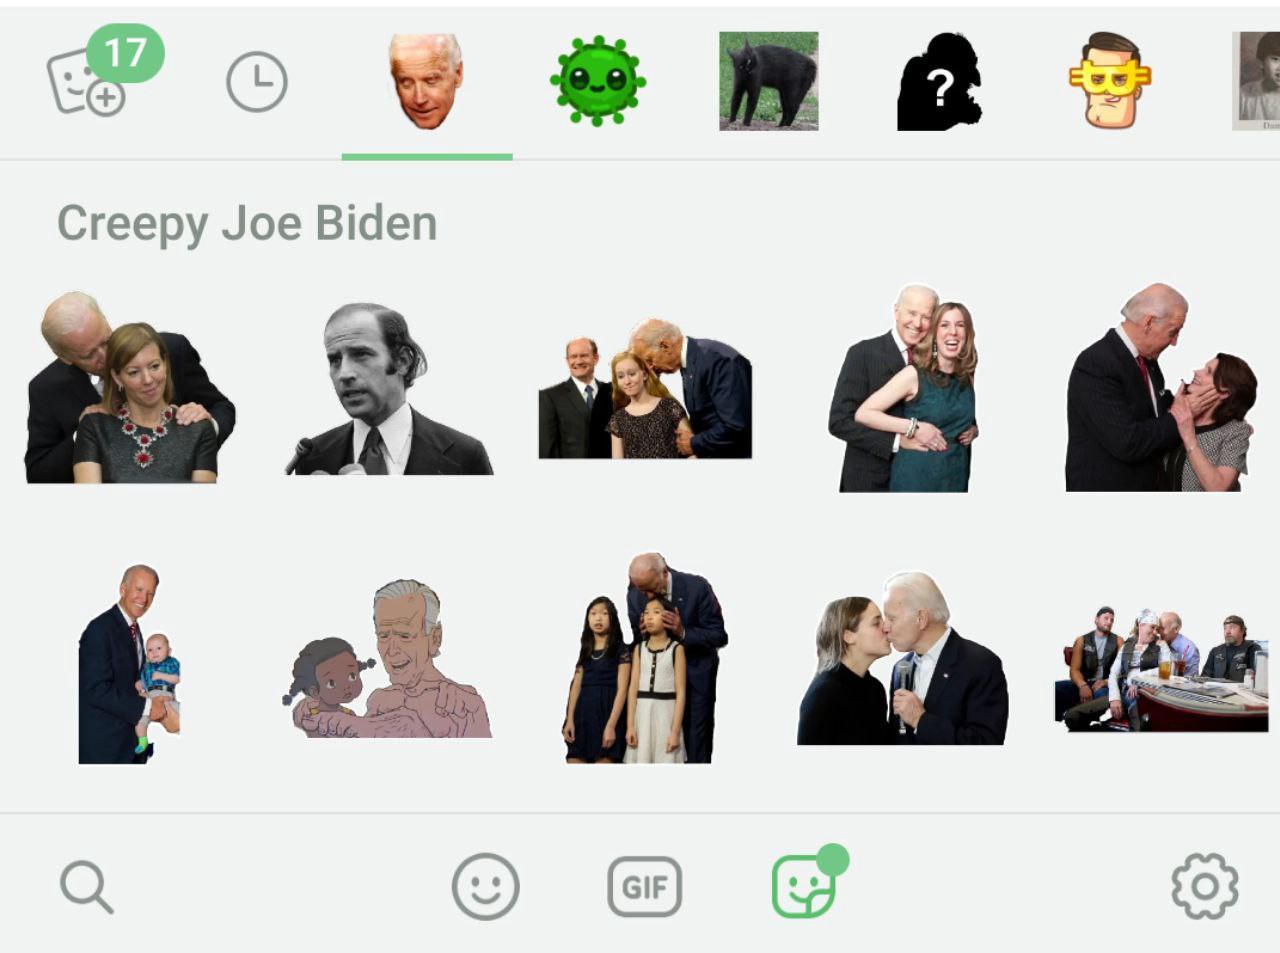
For reasons I?ve shared many times before, I love Telegram Messenger. One fun little feature is sticker packs, sets of stickers that are easy to add to your account and share with your friends. There isn?t a formal way to discover packs, so my favorites I?ve gleaned from groups and channels.
What about that perfect pack that doesn?t exist? I ran into this dilemma recently, to be amazed by how easy it is to create one. In fact, it?s so easy that for the actual pack organization, just start a conversation with the @Stickers bot and follow its directions ? I?ll leave those details for the two of you to sort out.
In this short post I?m sharing a couple simple tools and steps to prepare images to be acceptable as stickers.
Find Your Images and Remove the Background with Trace from Sticker Mule
I used Google Images Search to quickly find plenty of pictures to begin working with.
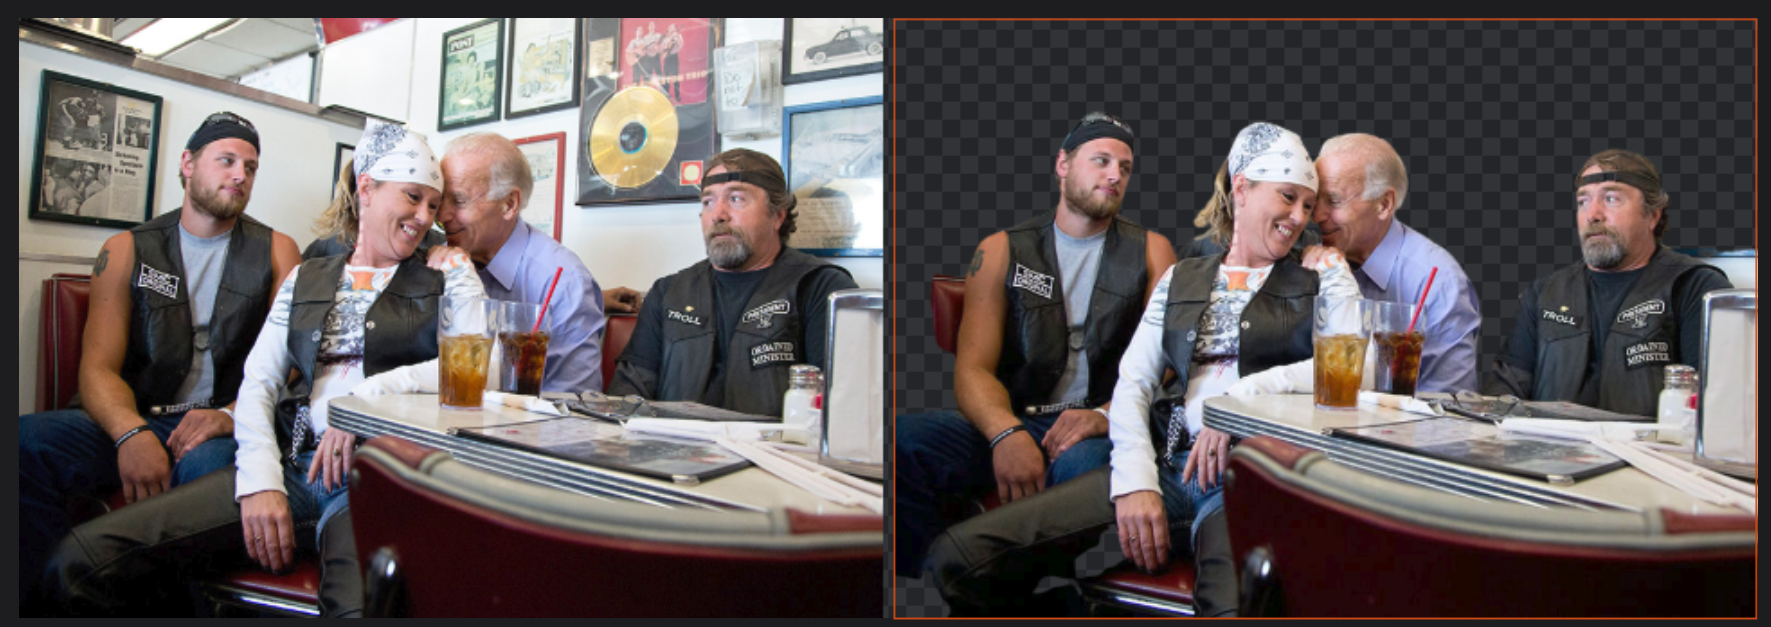
The best tool I?ve found to simply and easily remove backgrounds from images without technical skill is Trace from Sticker Mule. It?s funny ? but makes sense, I guess ? that a prep tool provided by the best sticker printing company out there works great for digital stickers, too.
In addition to removing noisy backgrounds, it adds a transparent layer and converts to .png, conveniently both requirements for Telegram stickers.
There are a limited number downloads per day with this free tool, so if you are planning on doing a sticker marathon you?ll need to sign into multiple accounts.
 ???
???
Pixlr Editor Will Help Finalize Your Sticker Specs
In addition to .png with a transparent layer, Telegram needs a particular size, and wants a white outline. We can make this happen with Pixlr Editor, a free browser-based photo editor:
Make sure there?s room for your white outline
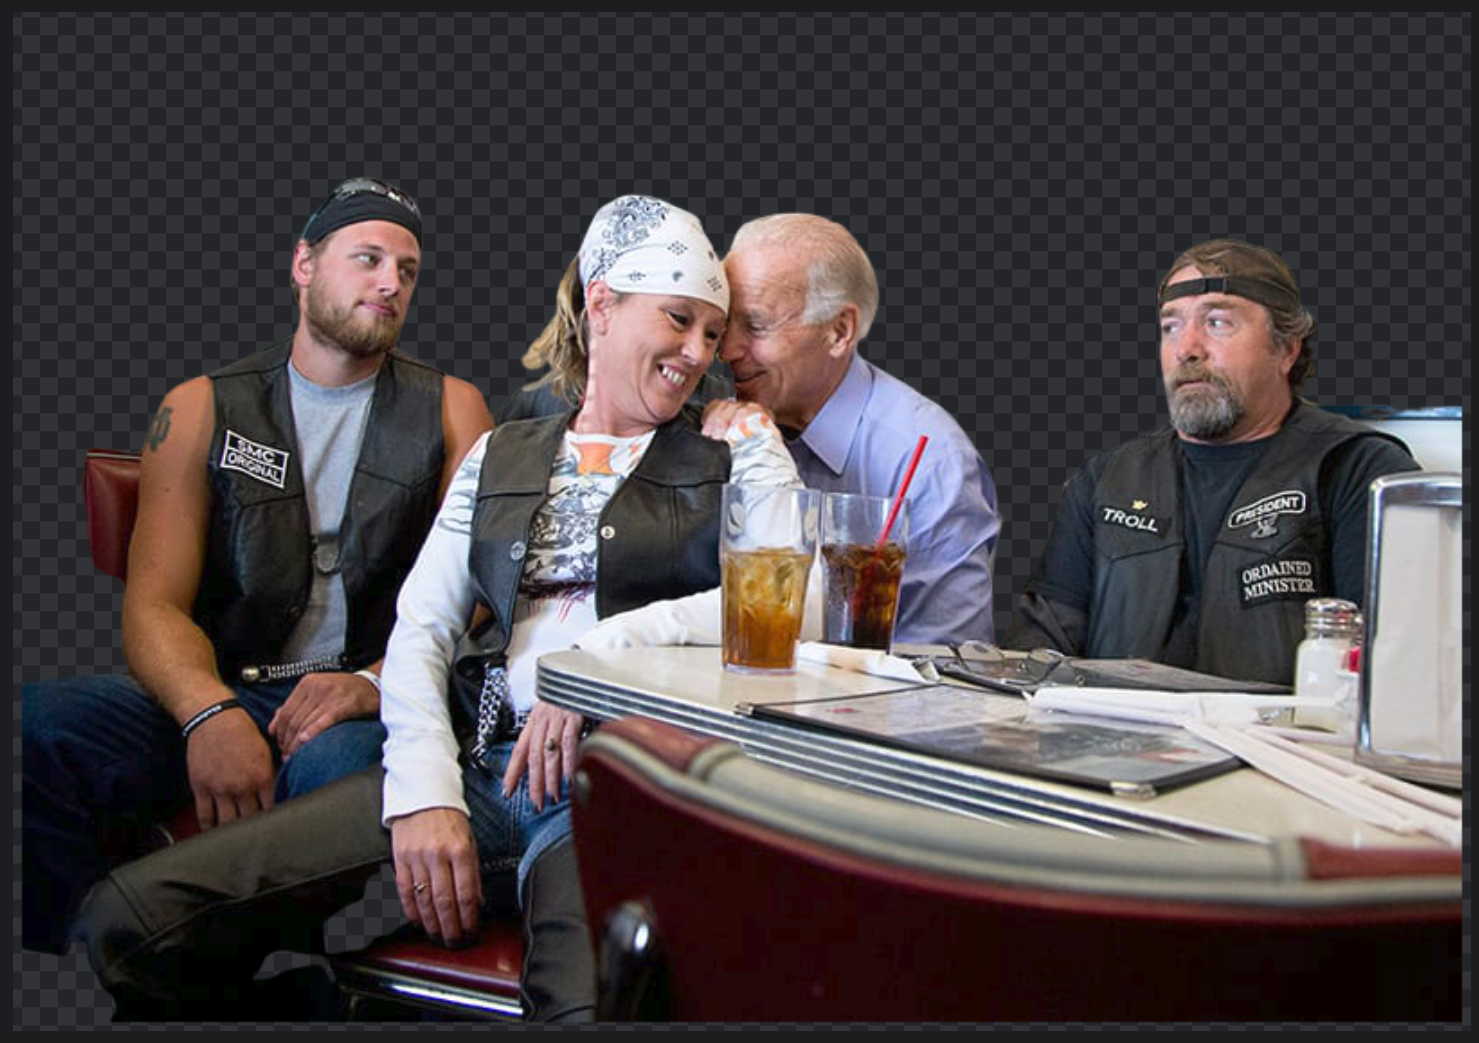
Get your image cropped how you like it.
If the image goes all the way to the edge, use Image > Canvas Size.. from the tool bar to add a little room on all sides for the border. (The outline is added last so it isn?t distorted when we resize the image.)
 Resized canvas with padding added to all sides.
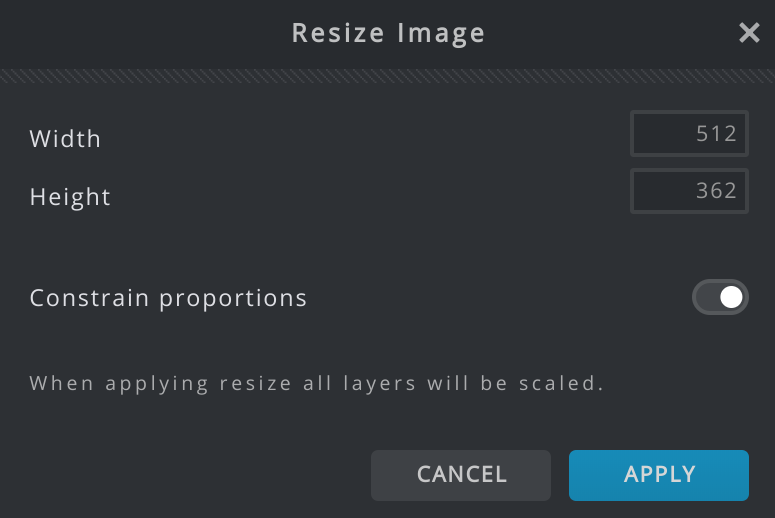
Resize your image to 512 px
Your sticker needs to fit in a 512 px square, so one or both sides need to match.
This is your easiest step, accomplished by selecting Image > Image Size.. Choose your longest side, keeping Constrain proportions on to avoid distortion, and set it to 512.
Note: if you want square stickers, make sure both sides are equal when sizing the canvas, then resize your image.
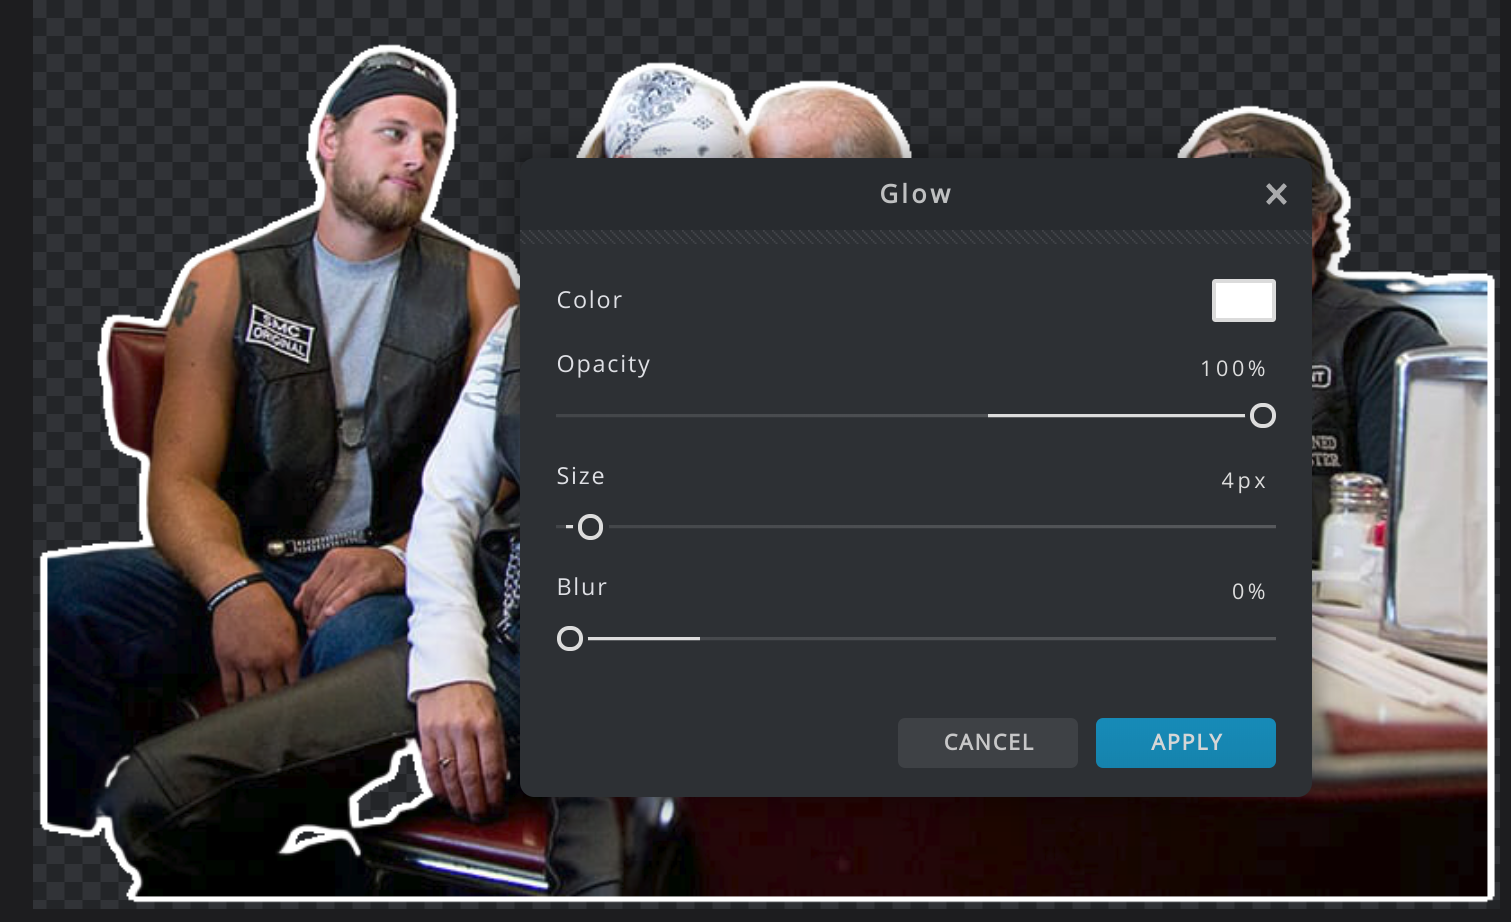
Add the white outline
I couldn?t open the Photoshop file the bot gave as an example, but a lazy search turned up 4 px as the suggested outline width.
While Pixlr has an Outline tool, I recommend using Filter > Glow. Outline seemed to only get the outside edges of the layer, but Glow also hits those donut holes, as well.
The settings for the outline are:
- White
- 100% Opacity
- 4px Size
- 0% Blur
Send the bot your sticker and make some more!
You?re all set to save your image and send it to the bot. The bot will ask for an emoji to identify it, and for some more stickers.
Repeat these steps until you have a set you?re proud of. In no time, like me, you?ll have the sticker pack you?d always hoped for, and you?ll be ready to publish and share:
t.me/addstickers/CreepyJoe
