This article was written in 2017 and since then a lot has changed in react ecosystem. You can find updated version of the article using react.js hooks and bootstrap here on my website: Login Forms or on medium here: Medium Article

Reactjs is a popular frontend view library from facebook for creating single page apps.In today?s tutorial we are going to create basic login and sign up forms using create-react-app module of reactjs.
First install create-react-app globally:
npm install -g create-react-app
Create new project for in your Documents:
create-react-app cloudprintcd cloudprint/npm start
If you have yarn package manager installed then run yarnpkg start.
Open localhost:3000 in your browser to see basic react app in action.
Now that we are done with setup process lets start actual coding:
We are going to use axios module for sending requests to backend and material ui kit to create ui components since they are responsive and have nice animations. Let install them with the following command:
npm install –save material-ui axios react-tap-event-plugin
The directory structure that we are going to use is as follows:
src? ??? App.css? ??? App.js? ??? App.test.js? ??? index.css? ??? index.js? ??? Login.js? ??? Loginscreen.js? ??? logo.svg? ??? Register.js? ??? UploadScreen.js
Here Loginscreen.js is the page which acts as a container to switch between login and registration components defined in Login.js and Register.js respectively. UploadScreen in my case was the page which I needed to display after successful user login which will change as per your needs. App.js is the parent component of all the pages.
Lets us start with render method of Login.js which contains username and password fields as follows:
import MuiThemeProvider from ‘material-ui/styles/MuiThemeProvider’;import AppBar from ‘material-ui/AppBar’;import RaisedButton from ‘material-ui/RaisedButton’;import TextField from ‘material-ui/TextField’;class Login extends Component {constructor(props){ super(props); this.state={ username:”, password:” } }render() { return ( <div> <MuiThemeProvider> <div> <AppBar title=”Login” /> <TextField hintText=”Enter your Username” floatingLabelText=”Username” onChange = {(event,newValue) => this.setState({username:newValue})} /> <br/> <TextField type=”password” hintText=”Enter your Password” floatingLabelText=”Password” onChange = {(event,newValue) => this.setState({password:newValue})} /> <br/> <RaisedButton label=”Submit” primary={true} style={style} onClick={(event) => this.handleClick(event)}/> </div> </MuiThemeProvider> </div> ); }}const style = { margin: 15,};export default Login;
We are storing username and password values in state variables which change on each keystroke in onClick function.We need to send user details to backend on click on submit button which will be executed in handleClick function called in line 28. We need to define handleClick function as follows:
handleClick(event){ var apiBaseUrl = “http://localhost:4000/api/”; var self = this; var payload={ “email”:this.state.username, “password”:this.state.password } axios.post(apiBaseUrl+’login’, payload) .then(function (response) { console.log(response); if(response.data.code == 200){ console.log(“Login successfull”); var uploadScreen=; uploadScreen.push(<UploadScreen appContext={self.props.appContext}/>) self.props.appContext.setState({loginPage:,uploadScreen:uploadScreen}) } else if(response.data.code == 204){ console.log(“Username password do not match”); alert(“username password do not match”) } else{ console.log(“Username does not exists”); alert(“Username does not exist”); } }) .catch(function (error) { console.log(error); }); }
We are making a post request to backend and expecting different codes for various scenarios as explained in backend tutorial.We are switching page from login to upload on successful request which I will explain shortly.
Lets start working on render method of registration component in Register.js next:
import React, { Component } from ‘react’;import MuiThemeProvider from ‘material-ui/styles/MuiThemeProvider’;import AppBar from ‘material-ui/AppBar’;import RaisedButton from ‘material-ui/RaisedButton’;import TextField from ‘material-ui/TextField’;import axios from ‘axios’;class Register extends Component { constructor(props){ super(props); this.state={ first_name:”, last_name:”, email:”, password:” } } render() { return ( <div> <MuiThemeProvider> <div> <AppBar title=”Register” /> <TextField hintText=”Enter your First Name” floatingLabelText=”First Name” onChange = {(event,newValue) => this.setState({first_name:newValue})} /> <br/> <TextField hintText=”Enter your Last Name” floatingLabelText=”Last Name” onChange = {(event,newValue) => this.setState({last_name:newValue})} /> <br/> <TextField hintText=”Enter your Email” type=”email” floatingLabelText=”Email” onChange = {(event,newValue) => this.setState({email:newValue})} /> <br/> <TextField type = “password” hintText=”Enter your Password” floatingLabelText=”Password” onChange = {(event,newValue) => this.setState({password:newValue})} /> <br/> <RaisedButton label=”Submit” primary={true} style={style} onClick={(event) => this.handleClick(event)}/> </div> </MuiThemeProvider> </div> ); }}const style = { margin: 15,};export default Register;
We are taking firstname,lastname,email and password from user and storing them in relevant state variables. We need to send these details to backend on click of submit button which is executed by handleClick function on line 52.
Let us now define handleClick function as follows:
import Login from ‘./Login’;class Register extends Component {…handleClick(event){ var apiBaseUrl = “http://localhost:4000/api/”; console.log(“values”,this.state.first_name,this.state.last_name,this.state.email,this.state.password); //To be done:check for empty values before hitting submit var self = this; var payload={ “first_name”: this.state.first_name, “last_name”:this.state.last_name, “email”:this.state.email, “password”:this.state.password } axios.post(apiBaseUrl+’/register’, payload) .then(function (response) { console.log(response); if(response.data.code == 200){ // console.log(“registration successfull”); var loginscreen=; loginscreen.push(<Login parentContext={this}/>); var loginmessage = “Not Registered yet.Go to registration”; self.props.parentContext.setState({loginscreen:loginscreen, loginmessage:loginmessage, buttonLabel:”Register”, isLogin:true }); } }) .catch(function (error) { console.log(error); }); }}
On receiving code 200 from backend as handled in backend tutorial we are reverting user back to login page for login or you can redirect them to index page if you wish. I have sent context of Loginscreen.js page as parentContext prop which allows us to manipulate state variables of loginscreen from child.
Now lets look at the code of Loginscreen.js:
import React, { Component } from ‘react’;import MuiThemeProvider from ‘material-ui/styles/MuiThemeProvider’;import RaisedButton from ‘material-ui/RaisedButton’;import Login from ‘./Login’;import Register from ‘./Register’;class Loginscreen extends Component { constructor(props){ super(props); this.state={ username:”, password:”, loginscreen:, loginmessage:”, buttonLabel:’Register’, isLogin:true } } componentWillMount(){ var loginscreen=; loginscreen.push(<Login parentContext={this} appContext={this.props.parentContext}/>); var loginmessage = “Not registered yet, Register Now”; this.setState({ loginscreen:loginscreen, loginmessage:loginmessage }) } render() { return ( <div className=”loginscreen”> {this.state.loginscreen} <div> {this.state.loginmessage} <MuiThemeProvider> <div> <RaisedButton label={this.state.buttonLabel} primary={true} style={style} onClick={(event) => this.handleClick(event)}/> </div> </MuiThemeProvider> </div> </div> ); }}const style = { margin: 15,};export default Loginscreen;
Here we set login component as default component to be displayed on first user visit which we have done in componentWillMount method.We are passing loginscreen context as? ?parentContext? prop and App.js context as ?appContext? prop.
We need to switch component when user clicks on register button which is executed by handleClick function as follows:
handleClick(event){ // console.log(“event”,event); var loginmessage; if(this.state.isLogin){ var loginscreen=; loginscreen.push(<Register parentContext={this}/>); loginmessage = “Already registered.Go to Login”; this.setState({ loginscreen:loginscreen, loginmessage:loginmessage, buttonLabel:”Login”, isLogin:false }) } else{ var loginscreen=; loginscreen.push(<Login parentContext={this}/>); loginmessage = “Not Registered yet.Go to registration”; this.setState({ loginscreen:loginscreen, loginmessage:loginmessage, buttonLabel:”Register”, isLogin:true }) } }
We are essentially switching between login and registration component based on value of isLogin flag which was set to true initially in constructor method.
Now let us now complete the project by adding code to App.js file:
import React, { Component } from ‘react’;import injectTapEventPlugin from ‘react-tap-event-plugin’;// Needed for onTouchTap// http://stackoverflow.com/a/34015469/988941injectTapEventPlugin();import ‘./App.css’;import Loginscreen from ‘./Loginscreen’class App extends Component { constructor(props){ super(props); this.state={ loginPage:, uploadScreen: } } componentWillMount(){ var loginPage =; loginPage.push(<Loginscreen parentContext={this}/>); this.setState({ loginPage:loginPage }) } render() { return ( <div className=”App”> {this.state.loginPage} {this.state.uploadScreen} </div> ); }}const style = { margin: 15,};export default App;
We have set loginscreen as default page in componentWillMount method and passed context of app as ?parentContext? prop to loginscreen. This same props was passed down to login component as appContext prop which we used to change state variables of App.js from login as follows:
if(response.data.code == 200){ console.log(“Login successfull”); var uploadScreen=; uploadScreen.push(<UploadScreen appContext={self.props.appContext}/>) self.props.appContext.setState({loginPage:,uploadScreen:uploadScreen}) }
You can add your own code to UploadScreen based on your needs.This concludes the coding part of the app.You can find entire source code with backend here: Github
Here are final login and registration screens:
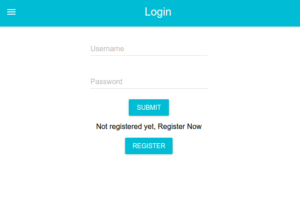
loginreact
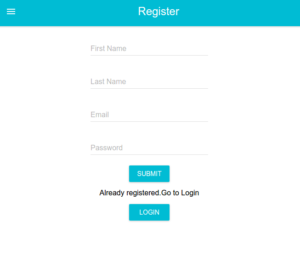
registerreact
Bonus Tips:
Use react router
I have switched pages in this tutorial using contexts of components but a better solution to handle routes would be to use react router.
Default prop types and linting
I have not added any defaultproptypes since I was in a little rush to finish the project but in a production level project kindly use proptypes to specify types of props expected by components and eslinter to use proper syntax standards like using const for baseurls since it allows developers collaborating with you to understand code a lot better.
Use Redux or Mobx
Redux was not essential for such simple project however using it for complex projects does make the code much more maintainable so I highly recommend using it in your web apps.
Connect Deeper
Mention your doubts in the comments section. You can follow me on LinkedIn or Twitter for further guidance.

