This is where the magic happens! If you haven?t already ? please first check out the ?Understanding Tilesets? part of this guide before digging into this section. It?s crucial to first understand how these tiles function before trying to make your own.
If you have already ? perfect! Let?s get started.
Find Inspiration & Embrace the Pixels
This might seem a bit of a flowery first step ? but never underestimate the power of having an inspiration as a starting point. Knowing what theme, or style you are going after before you start making your tiles and sprites can really speed up the process of creating them.
There?s a really helpful online repository of RPGmaker games made by the online community called RPGmaker.net that?s totally free to check out. Often times creators of these games are more than willing to talk about the ways that they went about creating different things in their games and can share some helpful information. There?s also screen shots of their games in action ? this way you can see how they approached making their own tiles.
 Ex.1 ? RPGmaker.net is a really valuable resource for community examples.
In RPGmaker you are working with a very pixel art based environment so looking up other games that embrace this style can help too. My personal favourites are Sword & Sworcery, Papers Please and Hyper Light Drifter. Think of pixel art not as the limiting factor in the creation of your art, but as a style in it?s own. This is a unique opportunity to try something new, and to learn valuable skills to help you in the future.
Pick a Palette and Stick With It
Colour is the glue that binds when it comes to pixel art games. Having an overall colour theme for your game is not only valuable from an art making perspective ? but raises the quality of your game as a whole.
Colour helps tell a story. Whether you notice it or not, colour is used often in games to give players an immediate idea of the environment they are dealing with. Typically, in just the first moments of gameplay, you have on some level an understanding of what you?re about to experience. A screen awash in darkness aims to unsettle, where as a fresh and vibrant scene gives the impression of new beginnings ? and the start of something big.
We associate colours with different spaces and states of being: green with the earth, creation, envy; blue with the cold, water, dreams; red with heat, warmth, passion. It goes on ? nearly every feeling, thought, emotion can be associated with a colour. This is an invaluable resource in a game.
Think of the story your game aims to tell, and pick a palette that fits. Good examples of this can be found in the games I previously mentioned.
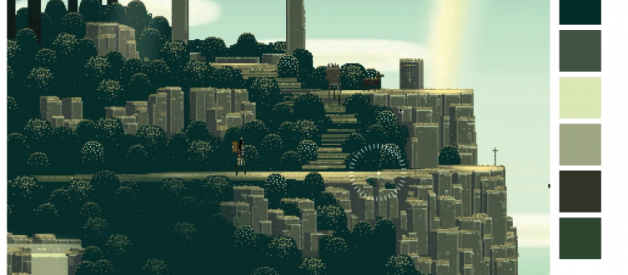
 Ex.2 ? Sword & Sorcery features a palette of deep greens and browns for a portion of the game, suggesting a fantasy exploratory feeling that comes along with the deep foresty/earth tones used in the map.
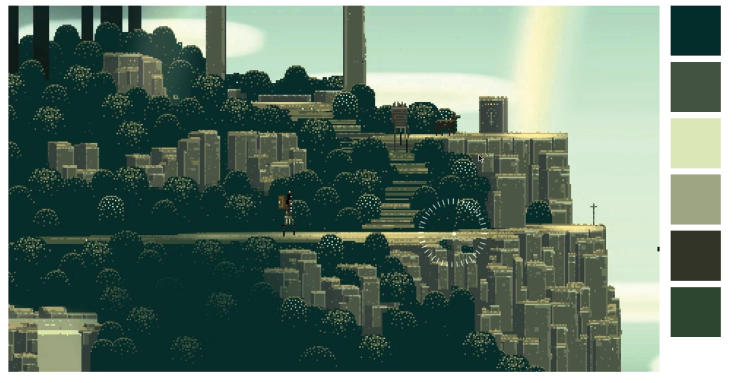
 Ex.2? Sword & Sorcery later changes the colour pallet to a deep purple which gives off the feeling of magic and mystery. Notice how the colour of the player character remains the same as the previous photo? almost to suggest that the character is out of place, as if they are exploring somewhere they shouldn?t be.
Finding your own unique palette can be a bit of a challenge, looking at a site like Adobe Color can be a good start.
Note: Just because you have a colour palette picked out doesn?t mean that you are bound by it for the rest of the game. You can change your palette between levels and scenes. But, do it with purpose. Make the palette darker and deeper as levels go on ? as a marker of the character?s journey towards some grim final boss, or make a level switch from orange to green to signify the change of emotion of the main character. Any change you are making ? do it with feeling and intention behind it. This is important as it will translate to how the player will experience your game as a whole.
Getting Started
The best starting place I can suggest for making tiles with RPGmaker would be by opening the files that come originally with the engine and using them as your guide. Like you saw in the previous section, these suckers are complex, so keeping them in mind throughout your drawing process can save you a lot of headaches in the future. A large part of the creation process with this engine lays in the careful art of trial and error. So, buckle up.
You can find the pre-made tilesets that RPGmaker comes with by creating a new game file in your documents folder and digging into the game files (Documents>Games>Project1>img>tilesets).
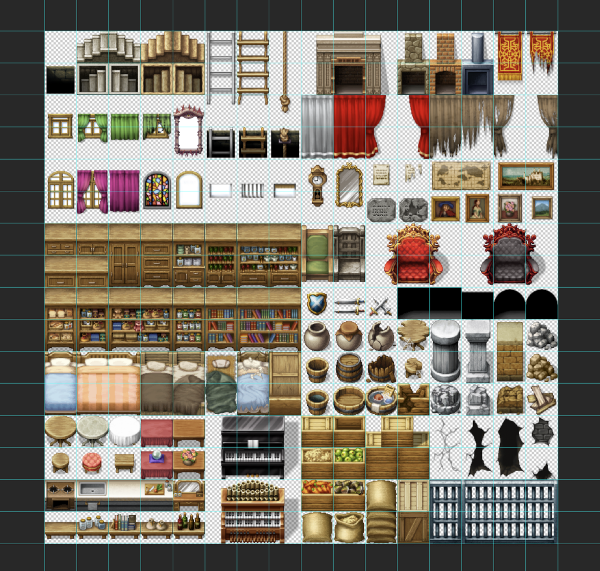 Ex.3 ? Tileset ?Inside_B.png? ? Comes automatically with the RPGmaker install.
In your image editing program of choice (I?m using Photoshop for these examples but open-source programs like GIMP or Inkscape work too), set up your guides in the grid formation of 48x48px so you can keep track of the tile space you are working with.
Pixel Art Basics
In the most literal sense, you are confined in a pretty tight box with pixel art. But, this is a unique challenge that artists of any skill level can approach and learn from. If this is your first time with pixel art there?s some valuable lessons to be learned before you start. Here?s a couple links to guides to help get you started: learning about dithering, and everything in this sweet article about pixel art as a whole.
In this guide I won?t be getting into the details of making pixel art itself, there?s plenty of resources out there already ? I?ll just stick to the information specific to working with RPGmaker.
In my experience, the less you deal with details like shading and complex forms the better. Often times creators of RPGmaker games are working within a pretty narrow window of time and need to crank out sprites and tiles quite quickly. (Lookin? at you CMPUT 250.) So, keeping things simple is both time effective and easier on you as the artist.
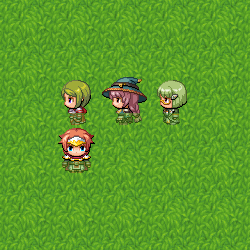
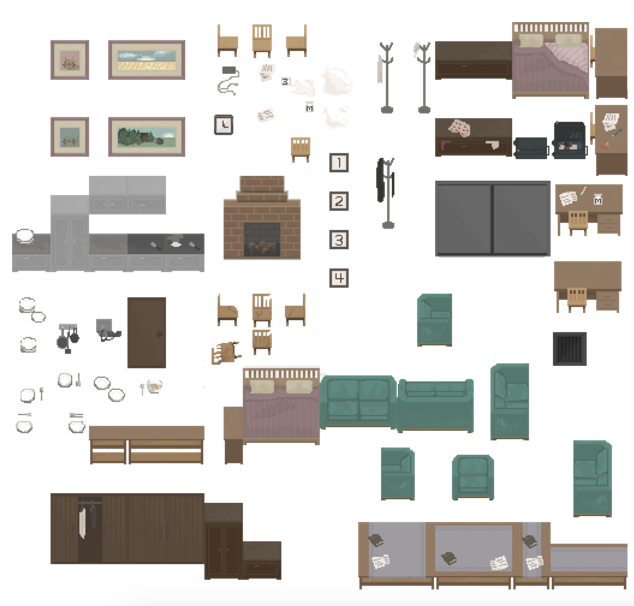 Ex.4.1 ? Day1_B from our game The Tempus Hotel
In the creation of tiles for our game, The Tempus Hotel, I kept the style simple and made the shading an all or nothing experience, only shading entire planes of things rather than trying to mess too much with dithering. This worked for our game environment since the setting was an old hotel. The mood was meant to be flat and a bit stagnant. I kept the colour palette muted for the first level to really drive home the dull atmosphere we were going for. As the levels went on though we wanted the game environment begin to break down ? I made the colour deepen and become more purple toned to give off that unsettling vibe of decay and dark magic. Reusing the previous objects but adding slight differences of damage and disarray, in an effort to disturb and unhinge the previous calm and boring environment.
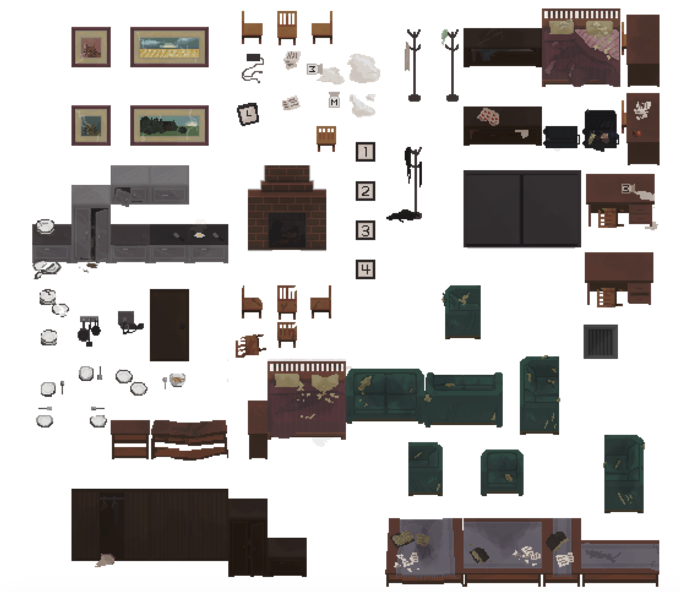 Ex.4.2 ? Day4_B from The Tempus Hotel
Keep it in Perspective
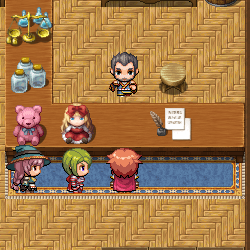
The perspective of the engine is a top down view so the angle that you draw your tiles will need to match this. Walls are two tiles high and show the roof on top, so objects should be showing their top most surface at their highest point. (The couch in Ex.4 is a good example of this.)
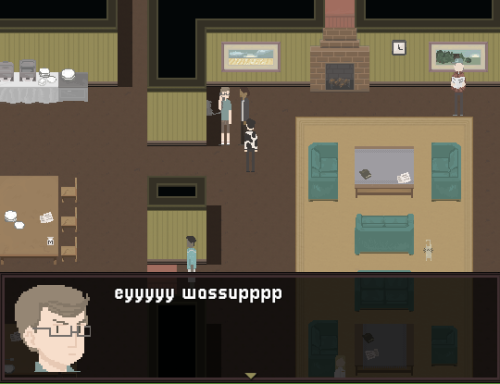 Ex.5 ?Early in-game screen shot of The Tempus Hotel
Scale is another key to having a cohesive environment, keep in mind the limitations of the grid system and the height of your characters. When deciding on how big to make an element in the game try and imagine the way in which a character would potentially interact with it. Is this couch big enough to sit on? Are these books too small to pick up and read? Even if the player won?t be interacting with certain objects ? maintaining appropriate sizing of background elements can aid in the believability of a scene and will benefit the immersion of the player. Imagination plays just as big of a role in the player?s mind as their in-game actions.
Importing Tiles into RPGmaker MV
Providing you follow the file specifications outlined in ?Understanding Tilesets? this process should be pretty straight forward.
There are two ways that you can do this: you can manually paste your tile image files into the folder (Documents>Games>?Game File Name?>img>tilesets) or you can import them in using the ?Resource Manager? in the engine.
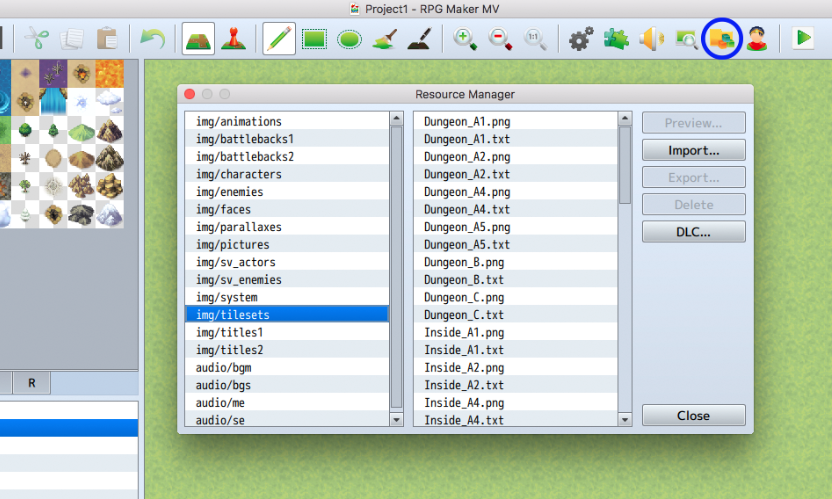 Ex.6 ? The Resource Manager Panel
After you?ve imported the tiles into RPGmaker you?ll need to create a ?Tileset? in the database. This is the button with the two grey cogs in Ex.6. Navigate to the ?Tilesets? tab. In this window you?ll need to hit the ?Change Maximum? button at the bottom left (Ex.7) and enter as many as you need. Once you?ve made a new space you can name your new set and select the tiles that you want to use in this new set. The A1 set you?ve created can be selected under ?A1 (Animation), A2 goes under the ?A2 (Ground), etc. If you don?t have all of the images for the set that?s fine, you don?t need to have all of the Image slots filled to be able to use your tileset. Bam! Your tiles are in, just one more step to go.
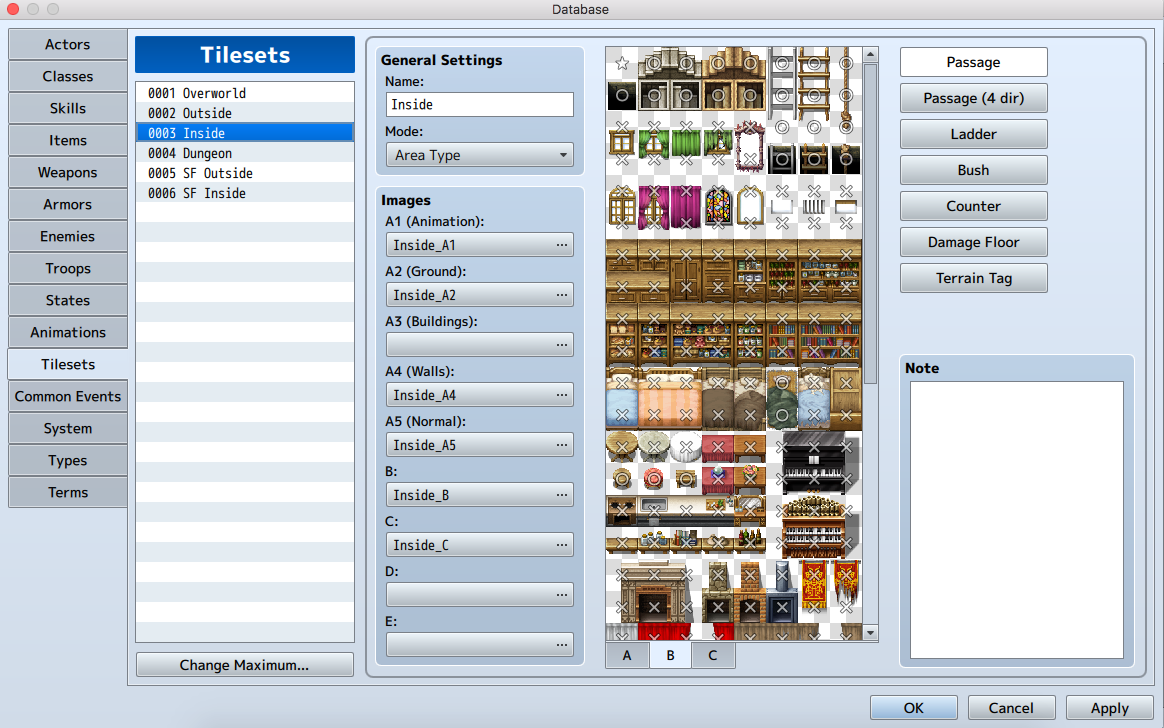 Ex.7 ? The Database > Tilesets Tab
The Grid
When making tiles for RPGmaker you?ll need to be aware of the function of the grid and how the player will be able to navigate in and around it. Since the movement is so simple in this engine (moving single tiles at a time in eight possible directions) the way that tiles can be moved through is fairly simple.
When importing the tiles you?ll need to tell the engine which tiles can be moved through and which cannot, as well as which directions they are accessible by. This is an important step and may result in some pretty tricky bugs later in your game if it isn?t reviewed carefully.
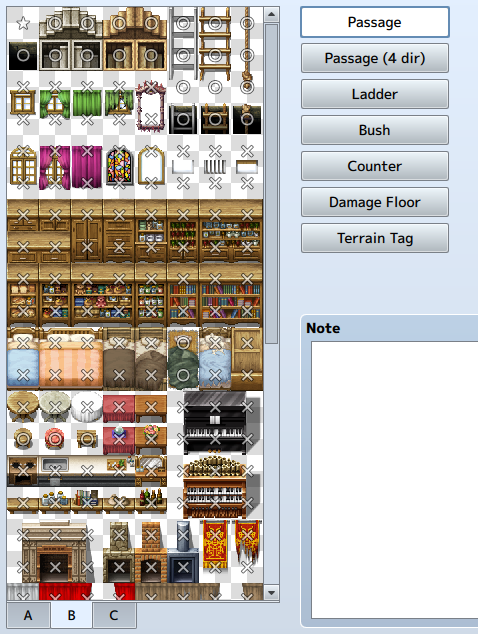 Ex.8 ? The Passage Tab
There are a couple different modes where the movements and actions regarding your tiles can be set. You can see these modes by clicking on the tabs on the right of the window. (Ex.8)
Passage is telling the engine which tiles the can be walked on or not. These can be changed by simply clicking on the tiles. [x] refers to tiles that cannot be walked on, and [o] refers that tiles can.
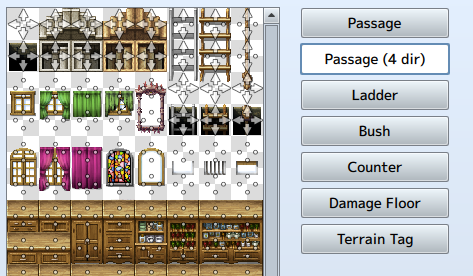 Ex.9 ? The Passage (4 dir) Tab
Passage (4 dir) is where you can set the directions that the player can use to walk through the tiles. (Ex.9) Each tile has four possible directions and are set by clicking the tiles and cycling between either an arrow or a dot, representing the ability/inability to enter from that direction.
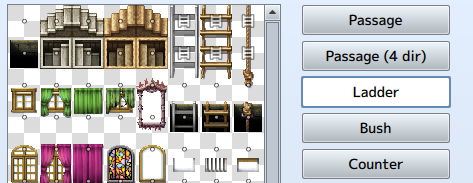 Ex.10 ? The Ladder Tab
Ladder refers to which tiles can be used like a ladder. Setting an tile to this mode means that when a character interacts with this tile their sprite will be fixed to the upward facing direction, with their back turned to the screen, to give the appearance that they are climbing a ladder. (Ex.10) This mode is set by clicking the tile you wish to be used as a ladder and a small ladder icon will appear overtop.
 Ex.11 ? An example of the Bush setting in action. Image from the RPGmaker MV tileset guide. https://rmmv.neocities.org/page/01_08_10.html
Bush refers to tiles that give the appearance of a character walking through dense grass or a bush, the bottom 12px of the character will be lowered to half opacity to fake this effect. (Ex.11) This mode is set by clicking the tile, and will appear as two wiggly wave lines.
 Ex.12 ? An example of the Counter setting in action. Image from the RPGmaker MV tileset guide. https://rmmv.neocities.org/page/01_08_10.html
Counter refers to the tiles that will need to allow the player to interact with other characters or events that may be behind the tile. Like talking to someone across the counter from you. (Ex.12) Just click the tiles that you want to be in this mode and a diamond shape will appear.
Damage Floor refers to tiles that will cause the player damage when walking across them. They will appear as two upward facing spikes when selected.
Terrain Tag refers to tiles that you can assign a value to ranging from 0?7. The use for these tags are not pre-defined in the engine but can be useful for the programmers to know when coding elements of the game that depend on the characters standing on certain tiles. The ?Terrain Tag? of the tile that the characters are standing on can be retrieved by setting a [Get Location Info] event command.
You?ve made your own custom tileset!
Once you?ve set all this up you?re good to start using your tileset in the game. You can select you custom set when making a new map in the engine and selecting yours from the list.
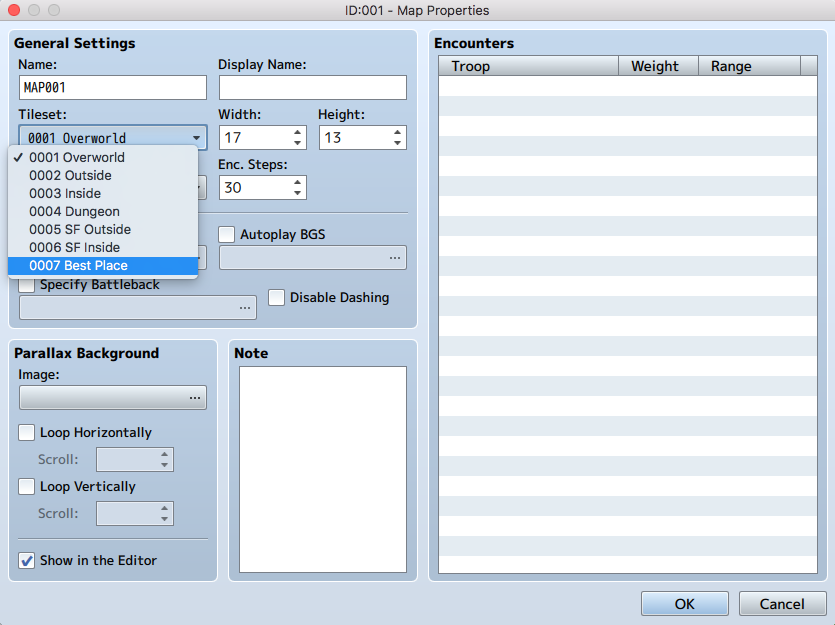 Ex.13 ? The map properties window.
Congrats on making your new set! Next, we?ll talk about making custom character sprites.
(I will post the next step sometime in the next week ? thanks for your patience!)
