
 https://pixabay.com/en/patch-stone-facade-repair-setting-2328289/
One of the concepts that is difficult for me to keep straight is the differences between the HTTP methods of POST, PUT, and PATCH. They have similar functionality in that they are used to create new resources or edit existing ones. But when asked (and I have been on interviews) what the specific differences are between them, I have often found myself stumbling. This is a short article that will attempt to easily explain those differences.
First, what are HTTP methods? These are the methods that our browsers use behind-the-scenes when communicating with a RESTful API. They conform to a set of guidelines that have been agreed upon when retrieving or changing data.
The most common HTTP verbs are GET and POST. GET is used when retrieving existing resources and POST is used when creating new resources. When you fill out a form online and click ?Submit?, usually this triggers a POST request on the back end to create a new resource in a database.
Other times you may just need to change information in an existing resource. This is where PUT and PATCH come in. A PUT request contains a new version of the existing resource containing both the new and unchanged data. A PATCH request also modifies an existing resource but it only contains the data that needs to be changed.
Those are the basic differences so let?s see these three in action.
For this simple example I am using the ?json-server? NPM package to mimic a backend server and then testing the routes with Postman.
Setting up json-server
First I will add the ?json-server? package (I have been using Yarn lately but these can all be done with NPM too).
yarn add json-server
The ?json-server? documentation says to create a ?db.json? file to store the data so that is the next step.
touch db.json
You then start the server with the following command
json-server –watch db.json
Of course, if you named your .json file something else you would put that name in the command. Also, if you (like me) didn?t install the ?json-server? package globally, you can run this command with a ?package.json? script.
//package.json…”scripts”: { “server”: “json-server –watch db.json”}…
Then the server would run with the following command.
yarn run server
At this point the server should be running and by default it runs on port 3000. So if you browse to http://localhost:3000, you should see a congratulations message from json-server.
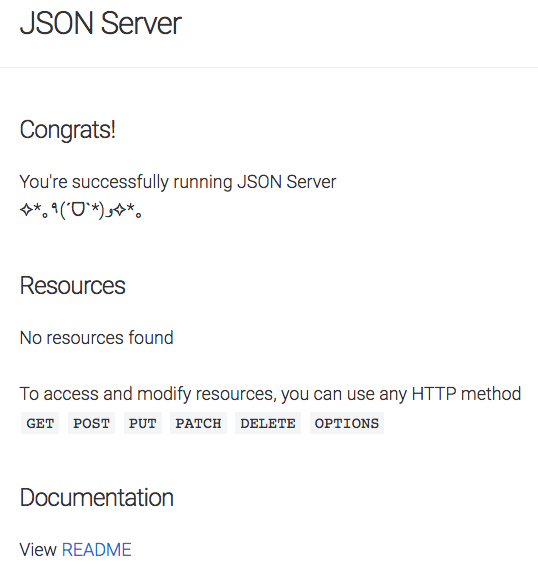 The json-server success message
Note that no resources were found because our ?db.json? file is empty. We should change that.
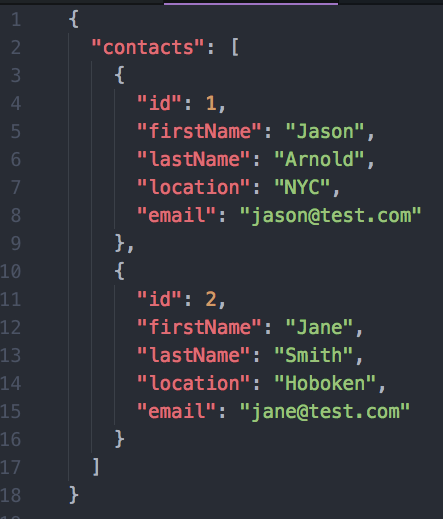
I?ll create a JSON object with a key of ?contacts? and a value of an array of contact information. So, the db.json file now looks like this.
//db.json{ “contacts”: [ { “id”: 1, “firstName”: “Jason”, “lastName”: “Arnold”, “location”: “NYC”, “email”: “[email protected]” } ]}
Once this is done and you refresh the page, you should now see resources listed, and if you click on the resource link you should see the JSON object displayed in your browser.
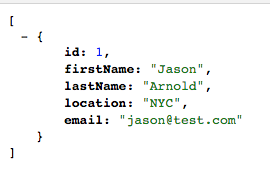 JSON data returned from json-server
Note that I?m also using the ?JSONView? Chrome extension so your data may look a bit different.
Testing with Postman
Now we can move over to using routes with Postman. At this point, I?m assuming you have some basic knowledge of Postman. If you don?t, not to worry, it is pretty easy to use. I wrote this Medium article about how to set it up and run basic tests.
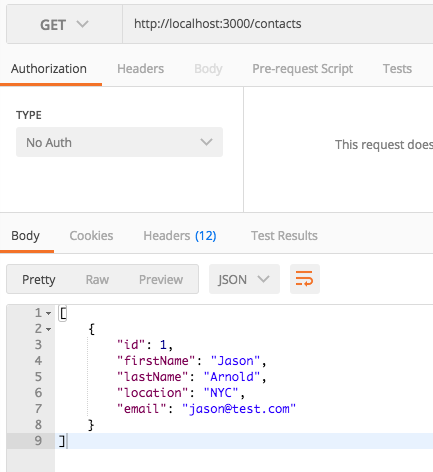
First I want to make sure that Postman can also see our data, so with the server still running, I send a GET request to http://localhost:3000/contacts and see the data returned.
POST requests
Everything looks good here so lets try a POST request. With a POST, request we need to provide all of the data we want included in our resource. In this case, that would be the id, first and last names, location, and email. In Postman, change the method next to the URL to ?POST?, and under the ?Body? tab choose the ?raw? radio button and then ?JSON (application/json)? from the drop down. You can now type in the JSON you want to send along with the POST request.
 POST request to /contacts
If this is successful, you should see the new data in your ?db.json? file.
 The updated db.json file.
PUT requests
We?ve successfully added a new resource using POST! But what if we want to edit one of these? Let?s try PUT first. As I said before, PUT needs to contain a new version of the resource with the updated data. This includes all of the data that is staying the same.
So, If you wanted to change the email of one of the contacts, you would send along the updated email address but also the names and location. Note that the URL needs to now reference the ?id? of the resource we are modifying.
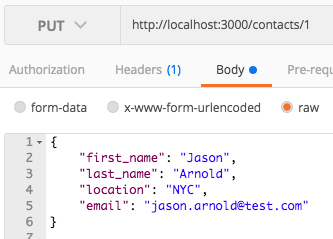 A PUT request to /contacts/1
A new resource object including the new information is now sent to the server and the ?db.json? file reflects the new information.
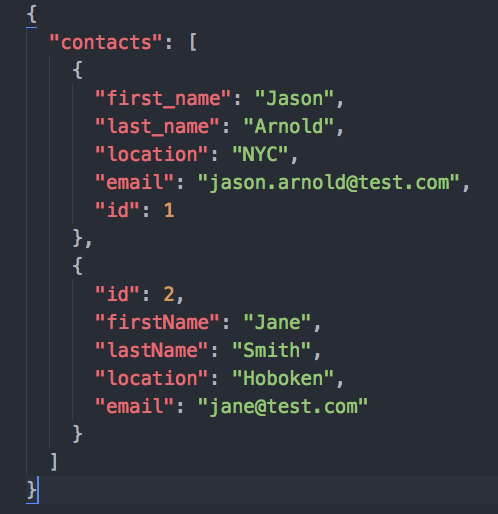 The db.json file with the new email address
If you wanted to change the resource with id 2, you would do the same steps but just add 2 (or any other id) to the end of the URL instead of 1.
But what if you forget that PUT needs all of the existing information and you only send along the new information? What happens then? Let?s try it out and see.
Here, my URL is the same as before. I?m sending a POST request to http://localhost:3000/contacts/1 but the information I?m including is just a new email address.
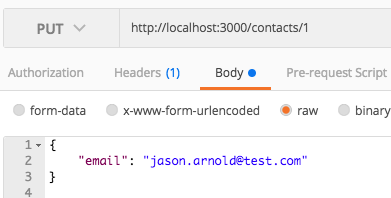 A PUT request with just the new information.
And here is the state of our db.json file.
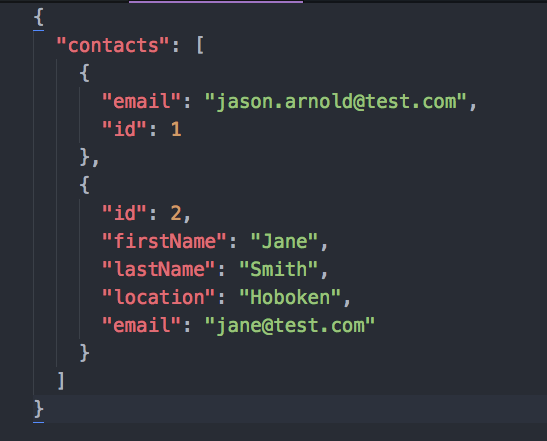
Oops! Not exactly what we wanted. This just drives home that point that the information you send along with PUT, and nothing else, will become the new resource.
Sending along all of the information when updating isn?t that big of a deal with small objects that have only a few pieces of information. But what if we?re dealing with large objects with hundreds of pieces of info? If you want to edit one thing you have to make sure and get all of the rest of the existing data and send it along too? Nope. If you are just modifying one thing in a resource and you want the rest of it to remain untouched, you can use PATCH.
PATCH requests
I?ve restored the first object from before and now I want to change the location of the first object, but I only want to send along the new information, so I?ll use PATCH instead of PUT.
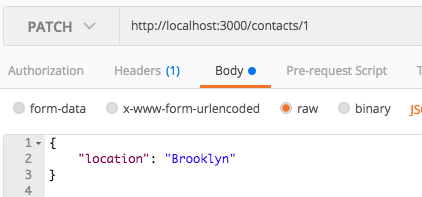 A PATCH request to json-server
And the object in our db.json file has been updated.
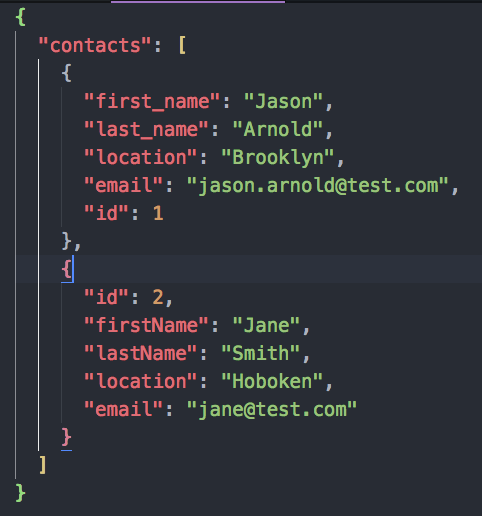
PATCH updates only those things that you include with it and it leaves everything else in the resource as is.
Conclusion
POST, PUT, and PATCH are somewhat similar in their functionality but each needs to be used at the right time in the right way.
POST ? creating a new resource
PUT ? updating a resource with new and existing information
PATCH ? modifying an existing resource with just new information
I hope this has shed some light on the differences between these three methods. Here are a few more links that I used in writing this post that you may find useful.
- An article on setting up json-server and testing with Postman.
- An outline of the HTTP methods used in RESTful APIs

