Here we bring you some more simple guide to get started with something new to try on. Let?s do Paper Mache this coming weekend as its really easy and fun to create things our of paper. We can create anything with paper mache, from useful and pretty bowls to unique lampshades- all you need to know is the basic technique behind great paper mache!
Papier-mch (pap-yay mash-ay) or paper mch (paper mash-ay) is an easy to make, hard material that can be used to cover various surfaces. It is often used in arts and crafts to make various sculptures, fruit bowls, puppets, dolls and much more. The surface is easy to paint, allowing you to add patterns, bright colors, and interesting designs to your finished product. This article details how to make the basic papier mch that can be used for any project that you have in mind.
It?s great for little fingers and grown ups can also make all sorts of wonderful art projects ? it will keep you all entertained for ages.
Materials Required:
- Paper/Newspaper
- Flour
- Adhesive
- Water
- Salt
- Table covering
- Emulsion paint
- Vaseline
- Paintbrush
Its best to keep all above prepared before starting, so when done lets begin with the steps now:
Step:1. Paper/Newspaper Strips:
There is no exact size your strips could be. In fact, if you want to add volume to your structure by molding the strips, you will need different sizes. So tear away freely.
Step:2. Paper Meche Adhesive:
There are variations of adhesives that can be made depending on the availability to you. Choose any one of the below:
- Glue/PVA: Add two parts of white glue to one part water into a mixing bowl. These quantities can be changed to suit the size of your project. Or, if you have a stronger bonding glue, one part white glue and one part water will do the trick.
- Flour and Water: Mix one part flour with one part water. For super large and intense projects, you may want to substitute white glue for the water.
- Wallpaper Paste: Add two parts wallpaper paste and one part water into a mixing bowl. This method is good if you?re thinking seriously long-term ? it can last years.
Step:3. Surface to Paper Mache:
Balloons You can start with cheap and indispensable ballons . No release agent needed. The balloon will tear itself away from your dried papier mache easily when burst.
Bowls and PlatesThese will need to have a release agent applied first to stop the papier mache sticking to them.
Creating Paper Mache
Step:4. Dip a strip of newspaper into the mixture:
You?re going to get your fingers messy! The messier you get, the better job you?re doing.
Step:5. Layering the surface or figure:
Smooth it out, using either your fingers or a paintbrush. Be sure to get as many of the creases and bumps out as you can. You are aiming to get a very smooth surface for painting and decorating.
Step:6. Repeat laying strips:
Do this until the entire surface is covered atleast three times over. This is especially important if you?re removing the base when it?s dry ? it needs to be strong to hold.
Step:7. Leave to dry:
When it is completely dried out, you can gradually add more layers to get to the required strength and thickness of the mache.
Step:8. Start Coloring:
When it is all completely dry ? this may take overnight ? paint with two coats of emulsion paint to seal it, leave to dry then paint your desired colour.
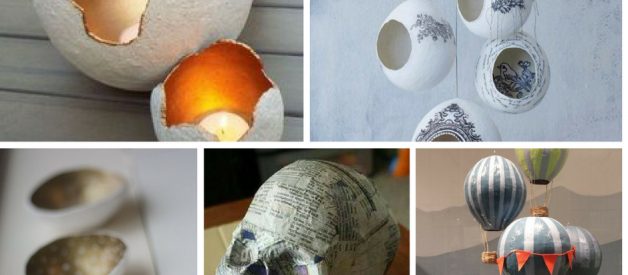
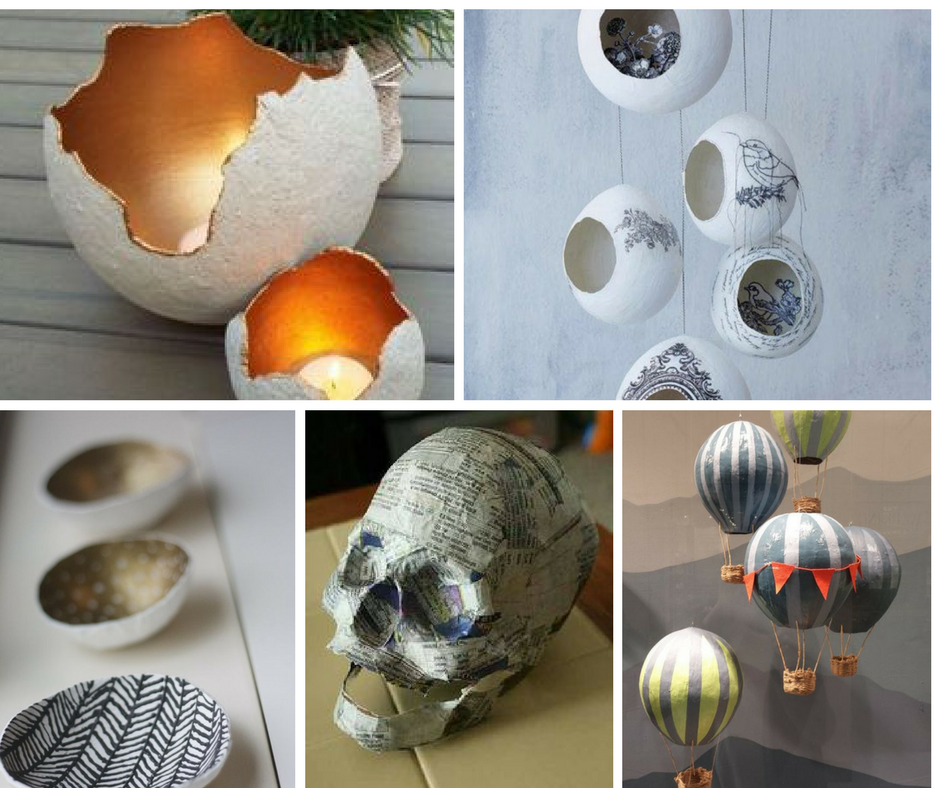
For your first attempt at a paper mache project, try these easy-to-do balloon inspired makes.
a)Hanging Lanterns
b)Decorative Bowls
c)Tea Light Holder
We hope it would be helpful in starting your own Paper Mache projects soon. Please do response back with your feedback or clap for your support if it helped you out.
More Craft Guide to come, keep following Prika-All About Crafts.
P.C:-Pinterest