If you know me, you know I?m a fan of the smoked meats. Living in Austin, Texas, it?s kind of a requirement. Aside from eating a (frankly) absurd amount of the stuff, I?ve been cooking it myself for the better part of a decade now. Usually on random pits or at a friend?s place, but we recently moved into a house and I decided to step up my game.
I bought a Kamado cooker. And like a kid with a new toy, I want to tell you allll about it.
What is a Kamado?
Kamado is just another name for grill, or range. In fact, it?s the Japanese word for stove. It?s got a long history (and a Wikipedia page!), but I?m guessing you might know it better as The Big Green Egg.
 A typical egg.
In addition to the Egg, you might have seen dozens alternate brands and knock-offs, sold anywhere from home supply stores to gas stations (seriously, Buc-ee?s is crazy).
Kamado grills, regardless of brand, work on a few basic principles:
- it?s a wood burning vessel, no gasses here
- it?s got crazy thick walls, perfect insulation for long cooks
- it?s got vents on the top and bottom, for temp control
If that sounds like a regular grill, it?s because it mostly is. That middle item (thick walls) definitely gets some bonus points, but what I really like about a Kamado is the ability to smoke and grill on a single pit.
And not just sorta smoke and grill, but superbly do both. I?m talking 12hr smokes at 225. Or a crazy hot 900 sear for the perfect steak.
The key is air flow, and most kamado cookers control it with a big ceramic insert. It rests between the burning coals and the grill surface, pushing heat out around the edges, deflecting it away from your precious meaty cargo.
If you?d rather cook with direct heat, you can yank this insert out, creating an ideal setup for live-fire grilling. This doodle probably shows it best:
 On the left: direct grilling. On the right: a ceramic insert diverts heat, for smoking.
It?s like having two grills on my patio! The only problem: some brand-name Kamado grills are crazy expensive. And I?m sure they are worth the price! But with zero Kamado experience, I just wasn?t ready to swing that yet. Which leads us to the real point of this article?
Going cheap: Akorn
Spoiler Alert: I bought a new Char-Griller Akorn Kamado Cooker (they spell ?Kooker? with a K, but I just can?t even) for around $230 on sale. That?s like a third or a forth of some other grills I was looking at.
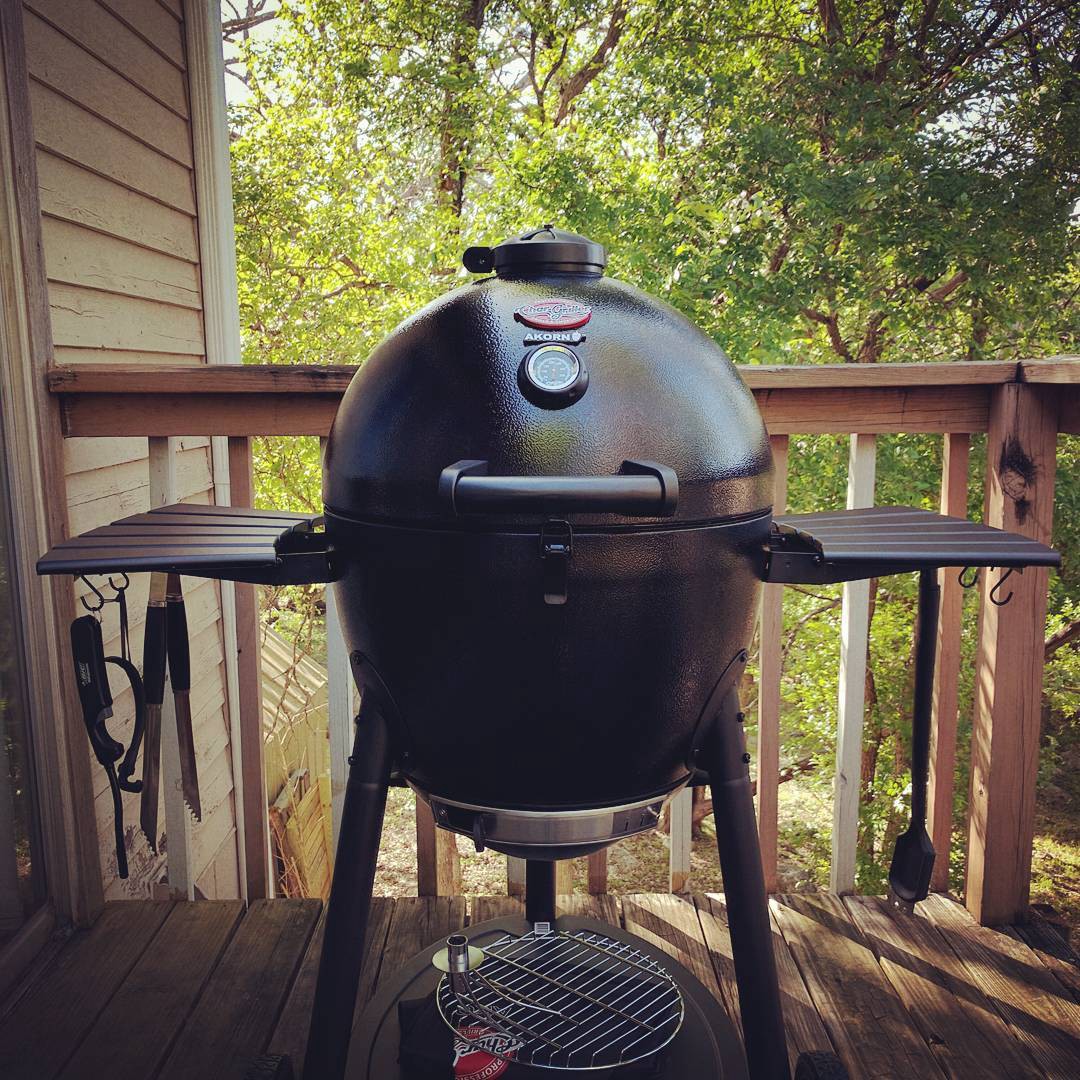 There are many like it, but this one is mine.
I wasn?t really expecting much, from Char-Griller (I?ve owned previous non-Kamado models, big meh), especially at this price point.
But I?ve had it for 6 months now, put it through dozens and dozens of cooks (seriously, I might have a problem), and this thing is a total champ. Yes they?ve cut corners. Yes the grill is metal with a ceramic coating, instead of solid terra cotta (this also meant I could carry it up my stairs myself, hah). Yes the side trays and the bottom wheels are bit janky.
But the pit itself? The egg part? I?m in love.
And it?s holding up great. I bought a cover for it, but frequently laze out after a long cook and fail to put it on. it?s been in hard weather, lots. If someone stole it tomorrow, I?d buy another just like it.
But you do you! With so many to pick from, you probably can?t go wrong. I just went cheap.
Kamado Skills
Making a fire
One reason I bought a Kamado was the simple fact that I like to make fires. Stacking coals, stoking embers, sitting around (really, I bought a little stool just for fire duty sittin?).
As I mentioned earlier, with a Kamado, you?ve got two main cook options: a raging direct fire, or a low and slow smoke. How you setup the grill for each is pretty key, so I wanted to explain each, but let?s start with another amazing chart:
 On the left: direct heat setup, aka big hot fire. On the right: a top-down burn, for long smokes.
For smoking: dump some charcoal into the main chamber and arrange it into a peak (sloppy is fine). Insert a firestarter near the top of the pile (I use all-natural stuff, like Tumbleweeds or Fatwood), making sure to top it with a couple bits of charcoal. Light!
Usually you?ll want to let the fire burn a good 15?30 minutes to get a solid start. I always start the fire and return the the kitchen to finish prep, checking the pit occasionally until I see what I like (good embers, thin wispy smoke from the top vent, not pillowing dark gray).
This is called a top-down burn, and it?ll do just what it sounds like. Start at the top peak, and slowly burn it?s way down to the edges. A good top-down fire can last you for 12 hours or more, thanks to the grill?s insulated sides and the tight air control.
With the fire burning, it?s time to add the smoking stone insert (which diverts the heat away from the meat), then the grill grate itself. Wait another 5?10 mins for the fire to regain it?s footing (the insert kinda snuffs it, until it can figure out what?s going on), then add your food.
For grilling: this is a less precise affair. If you already grill frequently, you probably has a process you like. Use that. I love the chimney starter, it?s a long time favorite. When grilling, my usual concern is starting a big fire fast.
For lots of heat, dump even more charcoal into the main chamber. Use multiple firestarters. You want the entire chamber filled with hot, hot embers. Top-down isn?t important.
As with smoking, you?ll want to let your coals burn for 15?30 mins. Old timers would say this wait was to ?let the lighter fluid burn off?. That might?ve been true, but we?ve got no fluid and it?s still dang important. You want coals that are really burning, not just scorching and throwing gross black smoke. When you see fire you like, add the grill grate and food.
On types on wood
I?m not even going to pretend I belong in this debate. Choice of wood is a long-argued and highly-differentiating factor of all sorts of grilling. The key is to experiment, to find what you like. Most grocery or outdoor stores carry a number of different varieties of hardwood, lump, and charcoal. Try them all. I?m only including this section because I expected someone to ask.
Controlling the temperature
For the most part, cooking with a Kamado is a set it and forget it process. It?s just that the setting it part is kinda tough. To control the temperature, the grill uses two ports, one on the top and one on the bottom.
If you grill, this is a pretty familiar setup. The principle is simple: the bottom port controls how much air you let in, and the top port controls how much air (and smoke) you let out. Super amazing doodle time!

On the Akorn (and likely other grills), the bottom intake opening is numbered with notches, from 0?5, which gives you some sort of measurable control. Lots of times when I?m trying to ease the temperature up or down a little, I?ll move the bottom intake by a half-notch, wait 15 minutes, checking results along the way.
The top exhaust controls how much air is released, which affects things like the temperature and the amount of smoke in the pit. When my temperature is dialed in, I usually jusssst about close the top exhaust. If I notice my smoke start to dwindle (usually a couple hours in), I?ll open the port a bit, which actually clears the smoke, but the extra oxygen can stoke the fire. In about 10?15 mins, smoke will start to trail out the top, and I?ll again jussssst about close it.
If it sounds like it?s a lot of tinkering: it is and it isn?t. When you start the cook, you might need to make a handful of adjustments, but over the 12 hour timeline the thing basically manages itself.
Smoked Chicken Wings
This is probably the recipe I?ve hammered on the most. I even had a paper+pen notebook containing madman scratchings from each cook.

- 3lbs wing portions (I usually buy them split)
- salt + pepper
- 1/2 cup Frank?s RedHot
- 1/2 melted butter
Method: lay out all your chicken before you start the fire and pat it dry with a paper towel. Salt and pepper to taste (hint: heavy pepper).
Smoke the wings at 350 for 1 hour. You?ll be able to hear them starting to crackle and drip.
Move wings to a sheet tray. If you?ve got guests (Super Bowl friends?) on the way, wrap everything in foil and it?ll hold for hours.
Right before you serve, toss the wings (uncovered) under a 450 broiler in your oven. This only takes a couple minutes, and will make the skin so crispy you?ll swear the wings were fried. I usually blast both sides.
Optional: To make buffalo sauce, combine the RedHot and butter in a huge bowl. Add wings to the same bowl, toss, serve, collect high fives.
Ham
Aside from smoking meats, lately I?ve been experimented with curing. I?ve done a couple pastramis, but by far the easiest and most delicious was this country ham I smoked for a recent poker night.

- 3lb pork loin or shoulder (some fat is good)
- 1 cup Morton Tender Quick (or some other curing salt/method)
- 5 garlic cloves, smashed
- 1/2 cup brown sugar (raw or turbinado is best)
- 3 tbsp pickling spice (I just used McCormick from the store)
Method: before pork can become ham, we need to cure it. That means we?re gonna soak the meat in a salty, spicy brine for a few days before we smoke it. Bring a big pot of water up to a very low simmer, adding everything but the ham. Stir to dissolve all the salt and sugar, then remove from heat.
Once your brine is completely cool, you can pour it over your ham. If you?ve got one, use an injector to shoot some brine directly into the meat.
As for storage, I use a big Rubbermaid kitchen container, but giant pots or even bags would probably work fine. Put a lid on it, wrap it, seal it, whatever, just make sure it?s air tight and toss it in the fridge.
After two days, pull the meat out and flip it over. If you?ve got an injector, hit it with another few shots of brine.
After 4 days of curing, pull out the ham and wipe off any excess brine/spice. Coat the ham with a generous cracking of black pepper.
Smoke the ham at 250 for about 3 hours, or until the internal temp is around 165. Pull the ham and wrap it in foil to rest for at least half an hour.
I serve ham with fresh tortillas (Taco Cabana drive-thru, what upppp) and a whole slew of Yellowbird Sauce (my favorite local hot sauce).
Steaks

- steaks
- bigass fire
Method: this recipe isn?t really much of anything, except a reminder that a steak finished with a sear on a scorching hot grill is a thing of beauty.
Start by cooking a steak. The one you see in the picture was cooked sous vide (using the Anova), but you can also use a low oven, crock pot, bagged steak in low simmering water, plain ol? pan, etc. Basically cook the steak rare, however you like, with as little browning as possible (that comes next).
Build a ripping hot fire. The thermometer on the lid of the Akorn tops out around 700, but I?m pretty sure I?ve taken it higher (and wouldn?t know, and I don?t shut the lid once things are this nuts).
Sear the steaks for a minute or two on each side. You might hear some hissing and popping, that?s alright. Do not walk away from your steaks.
Once both sides look to your liking, take those bad boys inside and apply them liberally all over your face.
The stake pictured above is served over rice pilaf with a pan sauce (made from the sous vide drippings) and serrano Yellowbird Sauce (you might be noticing a trend here? cook good meat, add hot sauce).
Other stuff you might wanna try
Another reason I bought into the Kamado craze was huge community of cooks out there. Aside from internet how-to?s galore (cough, not unlike this article, cough), there are are ton of awesome accessories out there, which you can use to soup up your grill according to your own mad desires.
I come from a tinkering, DIY family of nerds, so getting to evolve my grill over time was a huge draw. Here are a few things I?ve bought and added to my arsenal.

Smoking stone
I mentioned it above plenty, but if you?re planning on smoking with a Kamado, you?ll need a ceramic insert between the fire and the meat. Some expensive grills come with them installed, but my budget Akorn made it an a-la-carte option. You?ll definitely wanna pick one up. Amazon Link

Instant-read Thermometer
This is a tough one, because there are like a bazillion to pick from. But since I?m cheap, I?ve been using this $10 Weber unit and quite liking it. It reads in seconds, the head swivels, and that?s all. No fancy features, no bluetooth, but hey! It was ten dollars, folks.Amazon Link

Jalapeo Rack
Stuffed jalapeos are one of my (not to mention, everyone?s) favorite BBQ sides, but making them without a rack is difficult (not impossible, just difficult). I?d vote the best stuffing is pimento cheese, but the possibilities are endless.Amazon Link
Wrapping Up
While this pretty far from a comprehensive guide, I hope these tips and explanations are enough to get you kooking. (oh lord, I did it)
It?s a perfect hobby for someone who likes to tinker, make things, and share. Even if you?re a terrible cook, you can be a great pit master. All it takes is time, practice, and lots of six packs.
Note: this guide is filled with Amazon links. If you buy from them, I get a few monies. But! Shop around, find the best deal. With BBQ gear, I find specials all the time, in random places. I bought my pit from Lowe?s, on sale, with a 20% coupon. It was a crazy deal. On Amazon, the Akorn grill is around $290.Happy hunting!


 on a budget)
 on a budget)