You?ve decided. It?s time to start your very own website.
Why?
Well, you?re a writer. An artist. A creative person, with important messages to share.
And as you?ve grown in your abilities, you?ve come to realize that you need your own site to share them effectively.
You know that having your own site will make you look more professional, AND it will give you that added boost of inspiration to take your creativity to the next level.
But you?re not sure how to get started. As a non-tech-savvy person, your head is swirling with questions:
- How do you create your own website with its own unique URL and easy-to-use interface?
- How can you make your website look like the sites of those top bloggers and writers that you admire?
- What is the difference between a hosted and self-hosted website?
You procrastinate, afraid to leave Facebook or your old hosted blog. And every day that passes is another day filled with regret that you still haven?t set up your own website.
I feel you ? I?ve been there, too.
But recently, I taught myself to set up a couple websites of my own, and guess what?
It?s not as hard as you think!
After combing through dozens of articles, I created an entire site from scratch (stay tuned for more info) and transferred a site from one host to another without screwing up (a miracle, I tell you).
If you?d like to learn how to set up your own site as well, this article will tell you EVERYTHING you need to know to get started, even if you currently know absolutely nothing about websites.
The following is a step-by-step guide to setting up your first self-hosted website.
There are two main options for people who want to blog or put content online: hosted and self-hosted websites.
Hosted Websites
Having a hosted website is like being a renter, rather than a homeowner.
On the one hand, you have a place to live and your landlord takes care of certain fees and maintenance.
On the other hand, you depend on the mercy of the landlord to keep things livable for you, and you can?t redesign the house as you please.
When it comes to hosted websites, your ?landlord? is your host. Hosts are businesses that provide technology and services so that you can easily create a website on the internet.
These companies offer all-in-one services for free (or cheap) to beginners and hobbyists who want to write and post content online. Well-known hosts include WordPress.com, Blogger, Wix, Squarespace, Weebly, etc.
These hosted platforms allow you to immediately start publishing content without having to manage all that icky behind-the-scenes stuff like SSL certifications, upgrades, and other techy configurations.
But at some point, you will hit a ceiling. Hosting platforms have their downsides, they:
- limit what you can add to or change about your website
- make it difficult to monetize your site ? ie, create an email list and grow your audience
- and worst of all ? if anything ever happens to the hosting platform or if you offend them in some way, they have complete authority to wipe your content out of existence. No second chances.
 Flickr
Self-Hosted Websites
If you want more freedom and control over your intellectual property, then you need a self-hosted site.
With self-hosting, you create your own website and then you purchase space through a hosting company to store your site and make it available to the public.
Basically, having your own self-hosted site allows you ultimate flexibility and customization. You completely own the content and the site and you can do whatever you want with it. You:
- Have more control over everything about your site
- Have more storage
- Make money and cultivate an audience through your site
- Include extra bells and whistles for fun or necessity
Perhaps you already know all that, though. So enough dilly-dallying, let?s jump into the good stuff:
How to Create Your Own Self-Hosted Website/Blog
If you?re like most people who want to start their own website, you?re not interested in coding everything from scratch.
You just want a straightforward, simple platform to share your thoughts, products, and ideas with a larger audience, with the flexibility that comes from self-hosting.
Here?s how to accomplish exactly that, in step-by-step order:
- choose a host
- choose a domain name
- set up your blog
- plan your content
In the rest of this article, we?ll dive deep into the details on each of these steps.
1. Choose a Well-Rounded Web Host Provider
A self-hosted website needs a place to live. That?s where website hosting providers come in.
There are a variety of hosts providing different services at different price points. Well-known hosts include: Siteground*, Bluehost, GoDaddy, and more.
If you want, you can spend several weeks comparing and contrasting different hosting vendors. But I?m assuming, as a beginner, that you don?t have that kind of interest and time right now, so let me cut to the chase.
When it comes to choosing a host, here are a few things to look out for:
- Pricing: Don?t just look for the lowest advertised price. Realize that you have to pay annually for the right to keep your site on a host?s server, and some hosts take advantage of that by offering really low introductory rates and then renewing at a much higher price point.
- Customer service: Especially as a beginner, you need a host with excellent round-the-clock customer service so that you have someone to go to in case of emergencies, or if you just need to ask someone to walk you through a situation you?ve never seen before.
- Quality: You want a host that offers speedy, reliable service for your site. Websites that crash or take too long to load are a turn-off for visitors, and you can?t afford that. It?s better to pay a higher price for a better quality host than to land a cheap host who doesn?t care about you or your site.
- Other perks: Does your host offer extra benefits like daily backups, extra domain names, free site transfers, and options (like CDN Integration) to keep your site functioning smoothly when it starts to attract hundreds of thousands of visitors? These perks may not mean a lot to you now, but they will come in handy later.
My Personal Recommendation: Siteground
Based on my research, the site host that offers the best combination of features is Siteground*.
- In terms of pricing, they are neither expensive nor cheap, but reasonable.
- They offer three tiers of hosting: Startup (offers hosting for one website), Grow Big, and GoGeek (these last two offer hosting for multiple sites). They promise excellent website speeds and live up to that promise.
- And the backend (also called the cPanel) is clear and easy to use. Translation: easy set-up!
I currently use the GrowBig option which offers to host for multiple websites, free SSL certificates (this keeps sensitive information safely encrypted), free email accounts, daily backups, free site transferring, and more.
Even better, Siteground offers fantastic customer support, including 24/7 live chat AND phone support. When I was teaching myself how to transfer and design my own site from zero, this was very helpful.
My suggestion is: if you need help with site transferring or want to host more than one site (which I recommend, because you may want to change your site name one day, or set up separate sites for separate topics), go with Siteground?s GrowBig plan, and subscribe for the maximum opening term of 3 years (after your initial purchase, the renewal price goes up).
 Elementor.com
If you choose a bad host, you can create a lot of headaches for yourself, from hidden fees to lousy service to slow loading times on your site and even website crashes.
But if you choose a good host, it will be ? in the words of the talented Humphrey Bogart ? ?the beginning of a beautiful friendship.?
2. Choose Your Website (Domain) Name
Once you?ve settled on a host, it?s time to name your site.
Some people can spend months or even years trying to pick out the perfect name for their website. Don?t. Domain names aren?t set in stone forever, and especially when you are just starting out, you have wiggle room to change things.
Just pick one that is good enough, and get started. As you learn and grow, you may change your mind or not, but there?s plenty of time for that.
But if you let something like domain name selection trip you up at this stage of the game, you may be missing out on excellent opportunities to grow your audience and business.
Here are some tips:
How to Choose An Effective Domain Name
When it comes to domain names, here are some best-practice guidelines that can help you choose the most helpful one for you:
- Some people like to use their own names in their websites (eg: sethgodin.com) But don?t do this unless you plan to never ever sell your site. You don?t want to let others take your personal brand in directions you never intended.
- Use a name that describes your site?s mission or purpose (ie. iwillteachyoutoberich.com)
- Use a name that describes your site?s intended audience (ie. techsavvymama.com)
- Avoid vagueness or misleading domain names (ie. tinybuddha.com is not about Buddhism)
- Watch out for awkward spellings (ie. Therapist Finder has the unfortunate URL ?therapistfinder.com.? ? If you can?t see why this is a problematic name, remove the first three letters ?)
- Don?t worry if your domain name is long (most people don?t type out entire URLs anymore, anyway. They click on links and rely on autofill)
- In general, using .com is still the rule of thumb. .org is generally used for nonprofits, .net does not have a strong public perception, and the other extensions are still too unfamiliar to most online users.
Using the above tips, come up with a list of potential domain names, and narrow them down to your favorites. Then it is time to register your final choice(s).
Note: if you can?t choose between two really good names, you can always purchase both.
You can just let the names sit there, or if you have the time to set up two sites, feel free to do so, especially if you?ve purchased Siteground?s Grow Big package, which allows you to host multiple sites.
You can do what I do and use one site as an experimental site for practice and one as the actual site for people to see.
How to Register Your Domain Name (So no one but YOU can use it!)
When you want to lock in your domain name, you will have to purchase/reserve it on something called a domain registrar.
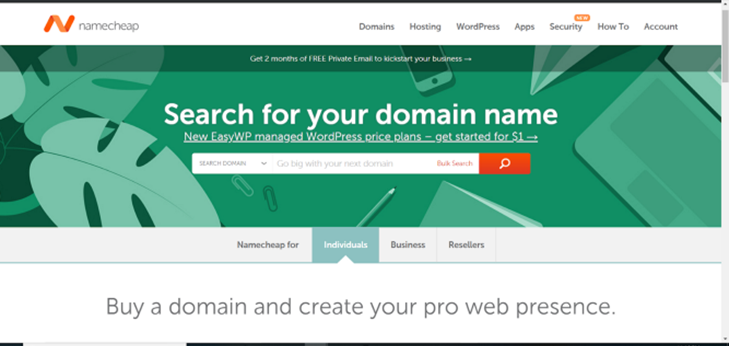
Personally, I use Namecheap because just like the name says: it?s cheap. Non-premium domains cost less than $10.
And your domain name registrar is generally not as important as your web host provider. You just need a decently priced registrar.
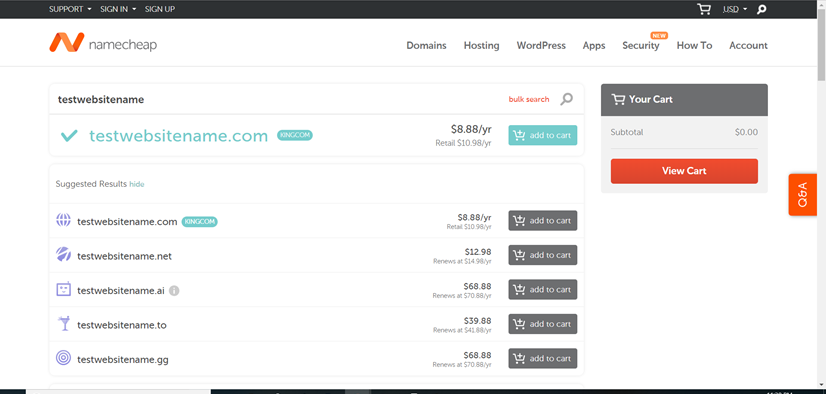
So when you have your domain name ideas in hand, go to a domain registrar and type them in to see if they are available.
On Namecheap, the site also displays different extensions and prices. It will look something like this:
Note: You can usually register your domain name with your web host. But it?s often better to keep them separate because a) it can be cheaper and b) if you ever decide to change hosts, it?s less of a hassle. I learned this lesson the hard way.
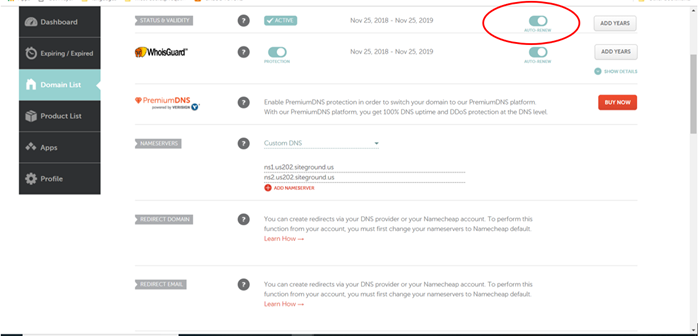
Final tip: Remember to renew your domain name annually ? most sites allow you to set up automatic renewal, which I would recommend.
If you accidentally let your domain name expire, you usually have a grace period of a few weeks to renew your domain name before it is released into the wild (ie, the domain name marketplace) again.
But it?s better not to risk expiration if you want to keep your domain and site from hiccups. With Namecheap, auto-renewing is easy. Just toggle on this button in your account dashboard:
 Namecheap
3. Set Up Your Blog From Scratch
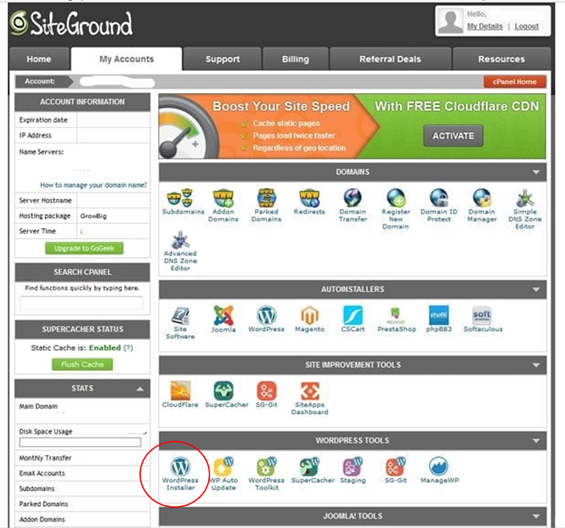
If you choose to use Siteground, I recommend using WordPress software to set up your site. Here?s how:
First, go to ?My Accounts,? and click on WordPress Installer:
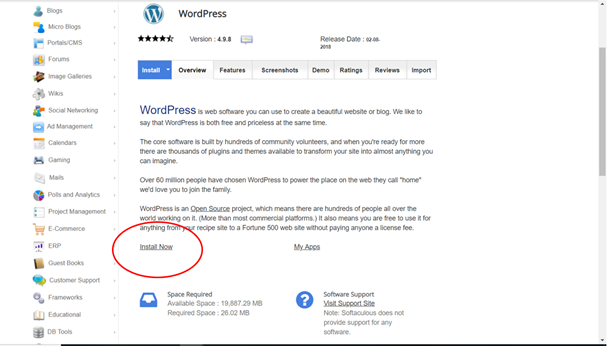
Then click on ?install now.?
Once that is finished, go back to your original cPanel (Go to your SiteGround dashboard ?click ?Accounts? ? hit the green ?Go to Admin Panel? button, and you will see your WordPress dashboard:
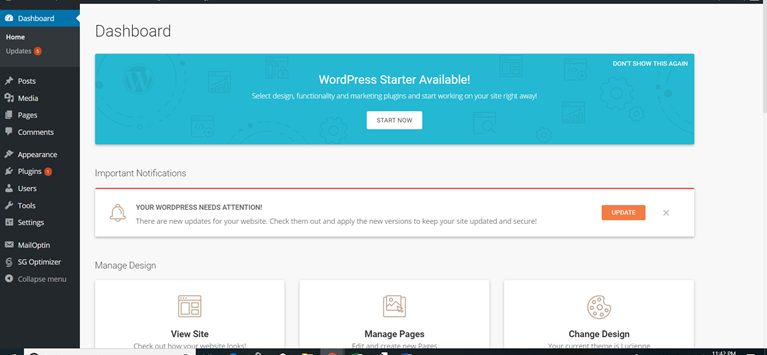
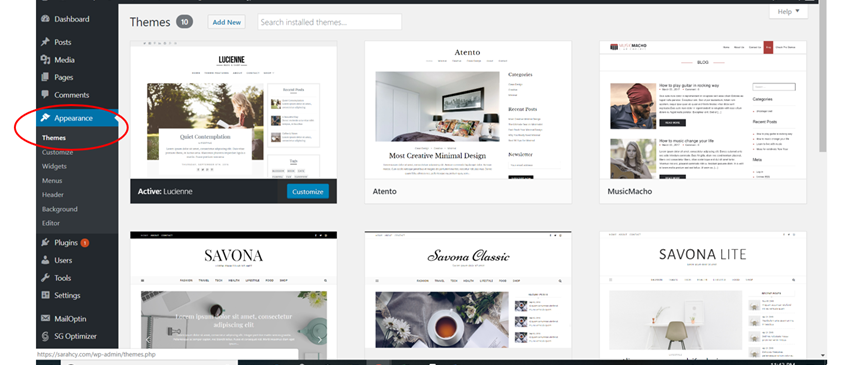
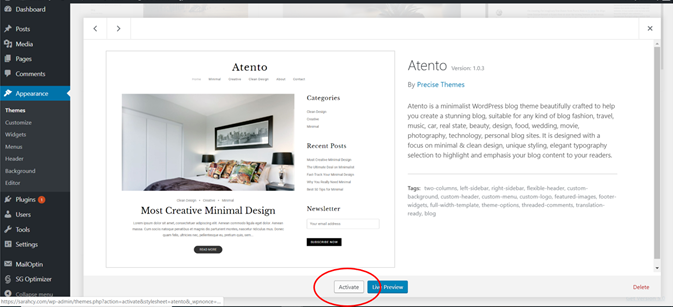
Click on ?Appearance ?Themes? on the left-hand side, and choose your theme by clicking on the sample image you want and then clicking the ?Activate? button.
After that, you can customize your site by clicking the blue ?customize? button, and this will pop up:
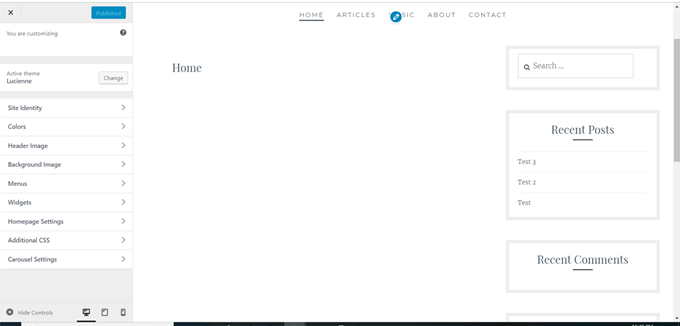
From the left-hand menu, you can design your website by changing your site title and tagline (see: ?site identity?), colors, header and background images, menus (the different navigation links on the top of your site, eg: home, blog, about, contact), and more.
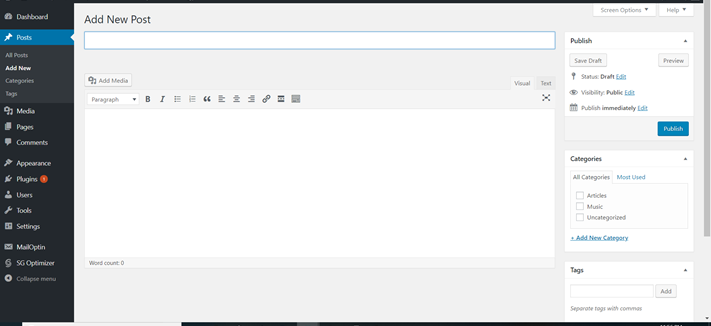
If you want to create blog posts, simply go to your dashboard and click on ?posts? and then ?add new? (on the left-hand menu):
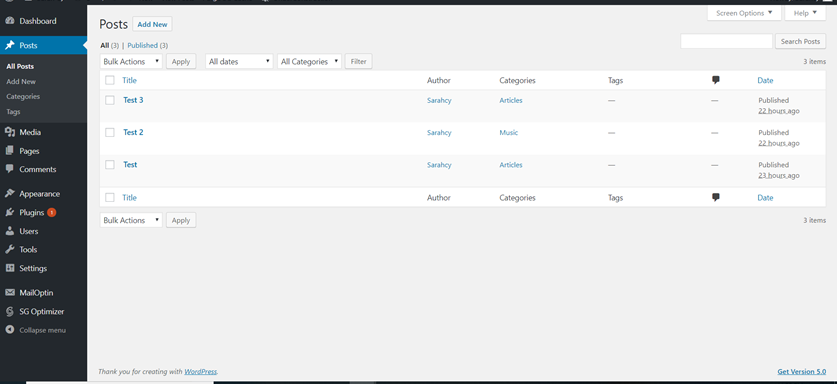
And now you can write and publish whatever you want!
Many blogs are entirely devoted to how to make WordPress do amazing things, so I will leave it to them to teach you the specifics, but this is basically how you get started.
In the future, you can easily access your WordPress dashboard by typing in your domain name and then adding ?wp-admin? (For example: testsitename.com/wp-admin)
4. Plan And Post Your Content
Now that your site is set up, you are free to post whatever content you want.
If you want a successful site, content is, of course, the most important factor. So continue to hone your writing skills, and come up with a plan to post regularly, curate a loyal audience (building up an email list), and grow your site!
For tips on writing and quality content creation, check out these articles:
Want to be a Great Writer? Then Don?t Focus on Writing. (Do This Instead)
?Work according to Program and not according to mood. Stop at the appointed time!? ? Henry Miller
writingcooperative.com
Good Writing is Not Written, It?s Assembled
2 Powerful Writing Lessons from Ryan Holiday and Derek Halpern
writingcooperative.com
How to Write Irresistible Headlines That Entice, Intrigue, and Insist on Being Read!
?Don?t judge a book by its cover,? they say.
writingcooperative.com
5 Ways to Come Up With Ideas When You Have Nothing to Write About
If you want to be a serious writer, you have to write. A lot.
writingcooperative.com
Welcome to Your Brand-New Website!
And that?s it.
That is how you set up your own self-hosted site from scratch.
Not too difficult, if you?re willing to try it.
Coming up with a domain name is really the most lengthy part of the whole process. Although you can also take some time to play around with the design of your site, and look into various plugins.
(If you don?t know what plugins are, they?re pieces of software that add features and functionality to your site, allowing you to create landing pages to capture email leads, track site visitors, and much more)
Now that you have your own site, though, you are free ? free to upgrade, free to experiment, free to create and design your home on the website any way you like.
So go forth and conquer!
Ready to Setup Your Site?
Siteground links are affiliate links. If you choose to give Siteground a try and head over there through this link, let me know in the comments below, and I?ll do my best to help!

This story is published in The Startup, Medium?s largest entrepreneurship publication followed by +397,714 people.
Subscribe to receive our top stories here.


