There are many other techniques online for making buttons work like levers in Minecraft, but this particular T flip-flop switch method is the easiest, most compact and most silent variation I?ve found to date (see Hat Tip section below).
This is my easy-to-follow guide on building this wonderful little toggle switch.
Simply put, a ?T flip-flop? or ?toggle flip-flop? (or sometimes just ?flip flop?) switch is a 1-bit memory cell that can store the impulse from a button into a constant signal, effectively turning a button into a type of lever.
 Complex T flip-flop switch example using sticky pistons. This one is not silent or compact!
Since the button is not a lever, there is one major advantage to using this type of switch: it can receive signals from multiple inputs (or buttons). Levers, however, lock the redstone current ?on? when they?re activated, and won?t allow a competing input to toggle the signal (or at least not easily as far as I?m aware).
 Lever opening an iron door
For example, if you have a lever that opens a door from the outside, you cannot close the door from the inside (using a separate lever or button). Only when the lever is deactivated (door is closed), can a separate signal open/close the door. This isn?t ideal, and it?s probably the precise reason you?ve been looking for another switch method.
So, how do you use a button to open door long term (constant signal) rather than through a brief impulse? The answer: a ?T flip-flop? switch.
Ok, how do I build this toggle switch?
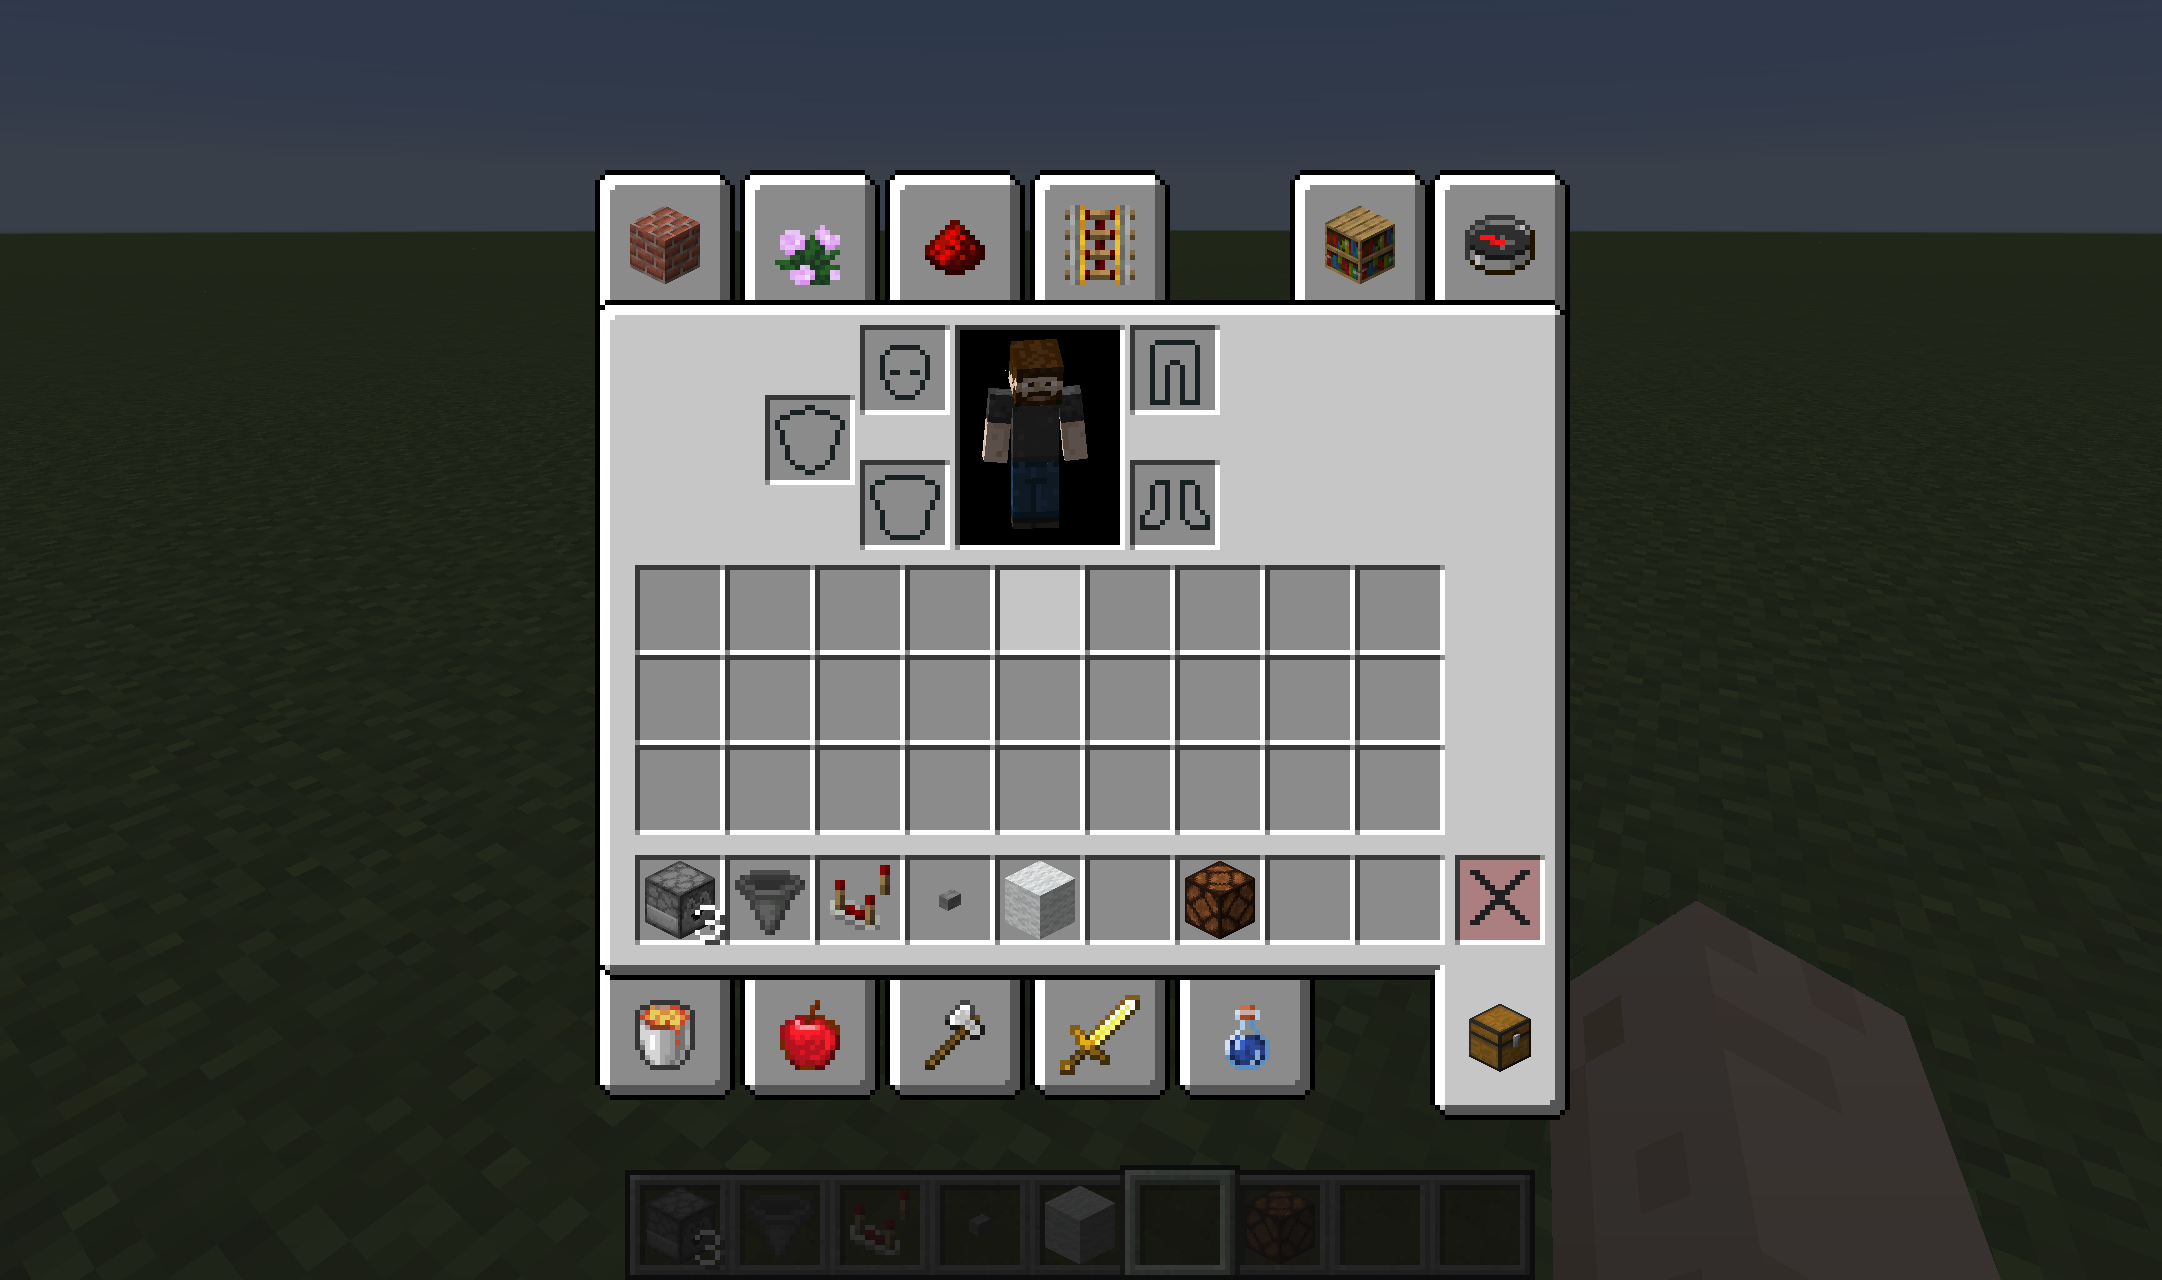
Ingredients
 Inventory screenshot showing the necessary items for the build (see above list of ingredients).
First, lets get our minimum set of ingredients/items:
- 3 Droppers
- 1 Hopper
- 1 Redstone Comparator
- 1 Button
- 1 Block of any kind; I used Wool
- 1 Block of any kind to continue the circuit**
** Note: for this guide, I connected the switch to a redstone lamp so it?s super simple to tell when the circuit is on or off. More on this aspect later.
Step 1
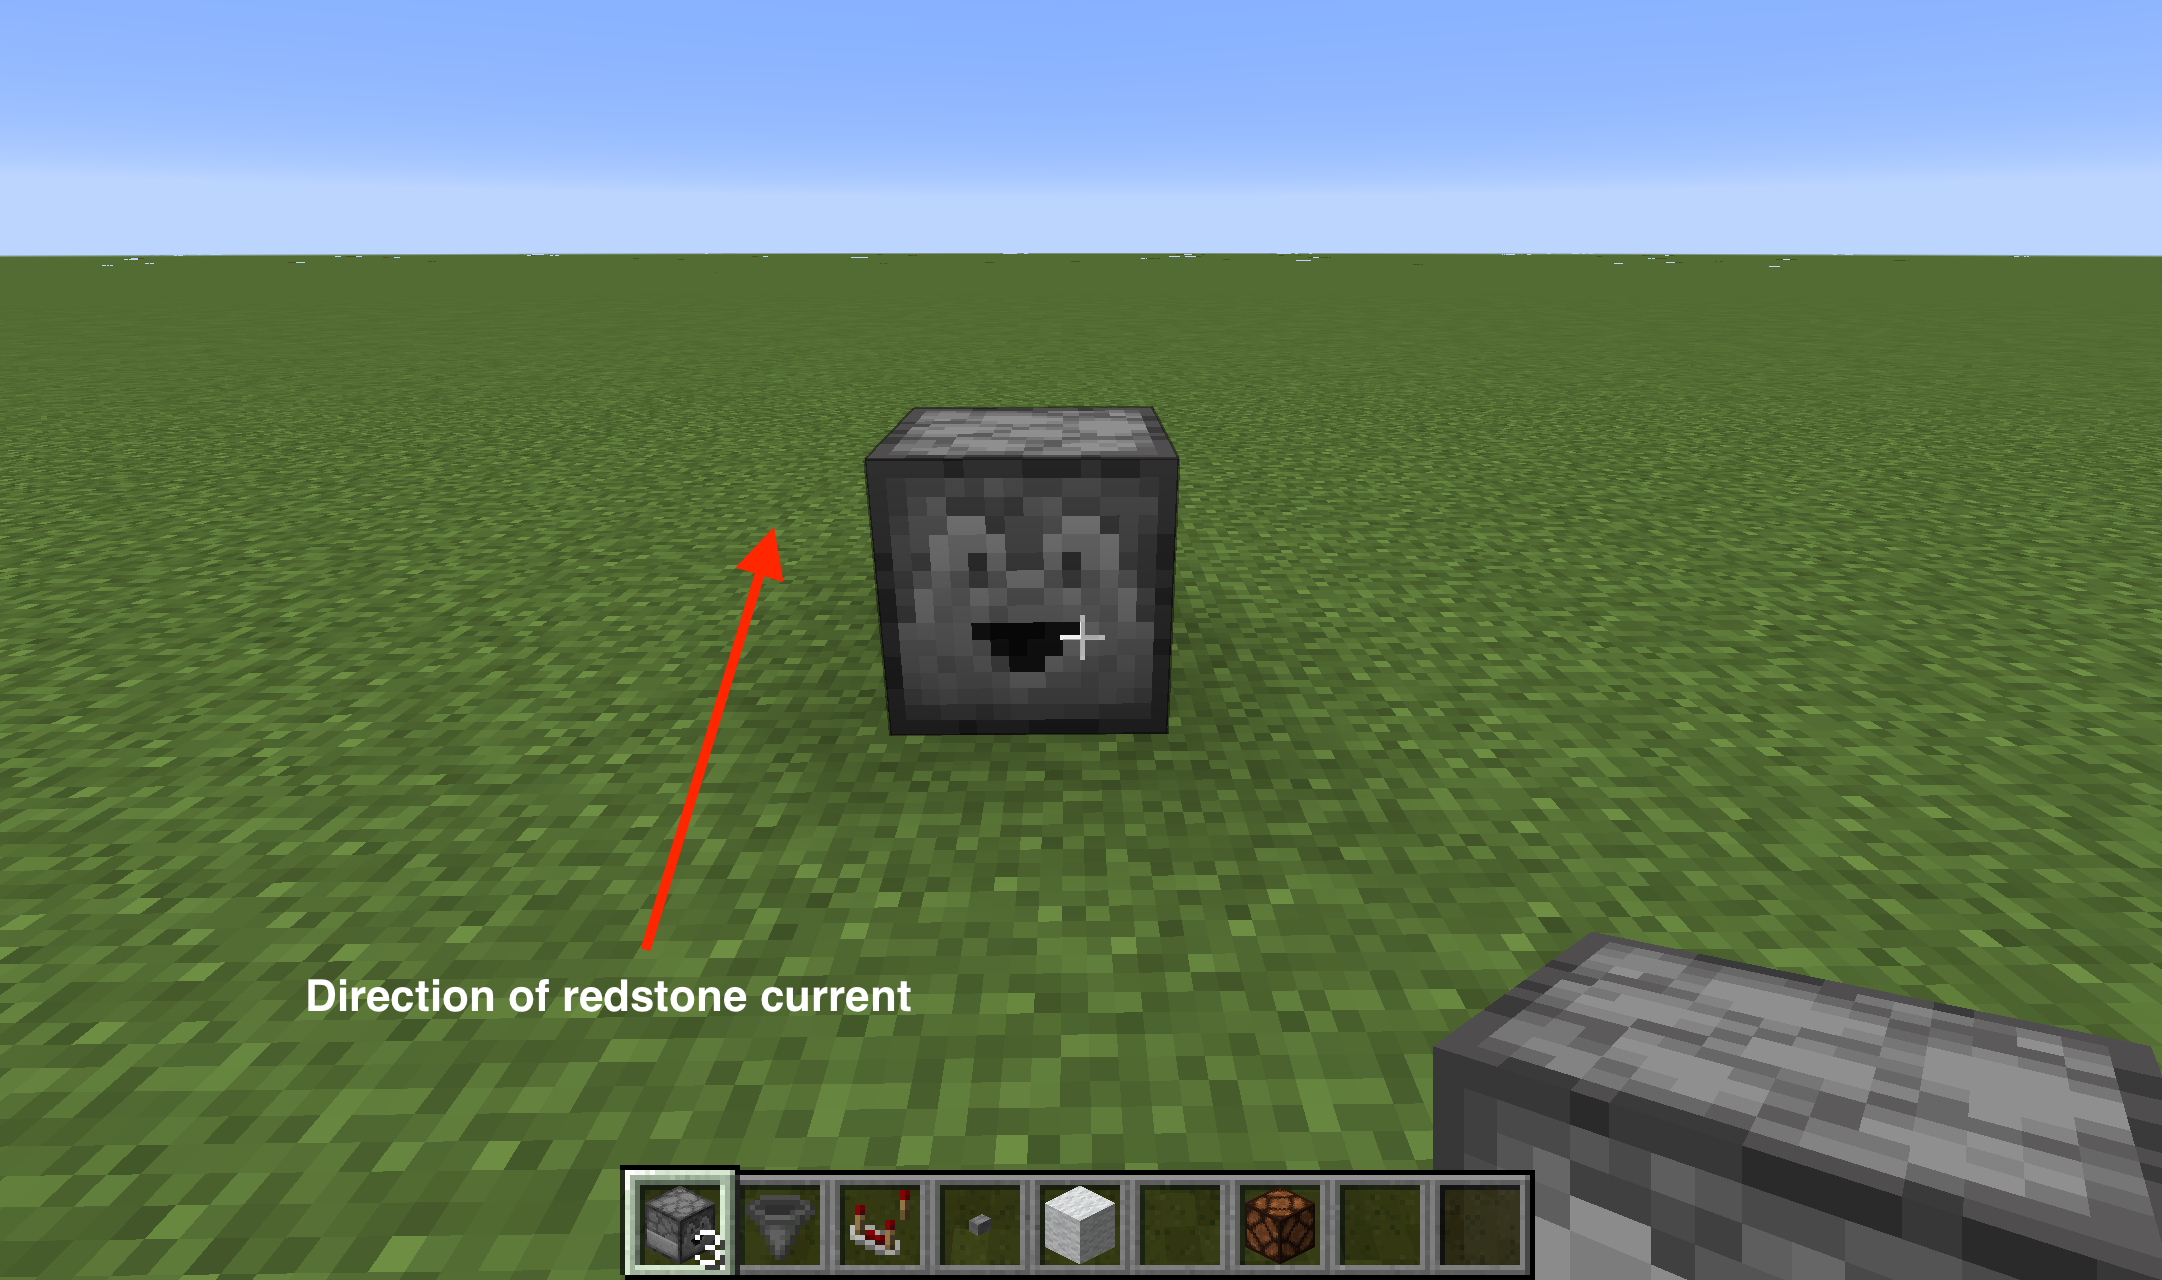 Step 1: Place dropper facing you, with redstone current flowing forward (as shown by the red arrow)
With you facing in the direction you want your redstone current to run, place the first dropper facing you.
Step 2
 Step 2: The second dropper is placed facing upward, just in front of the first (redstone current is shown by the red arrow).
Place a second dropper just behind the first dropper, facing upward. This will mean the first dropper is now flowing into the second one (facing it).
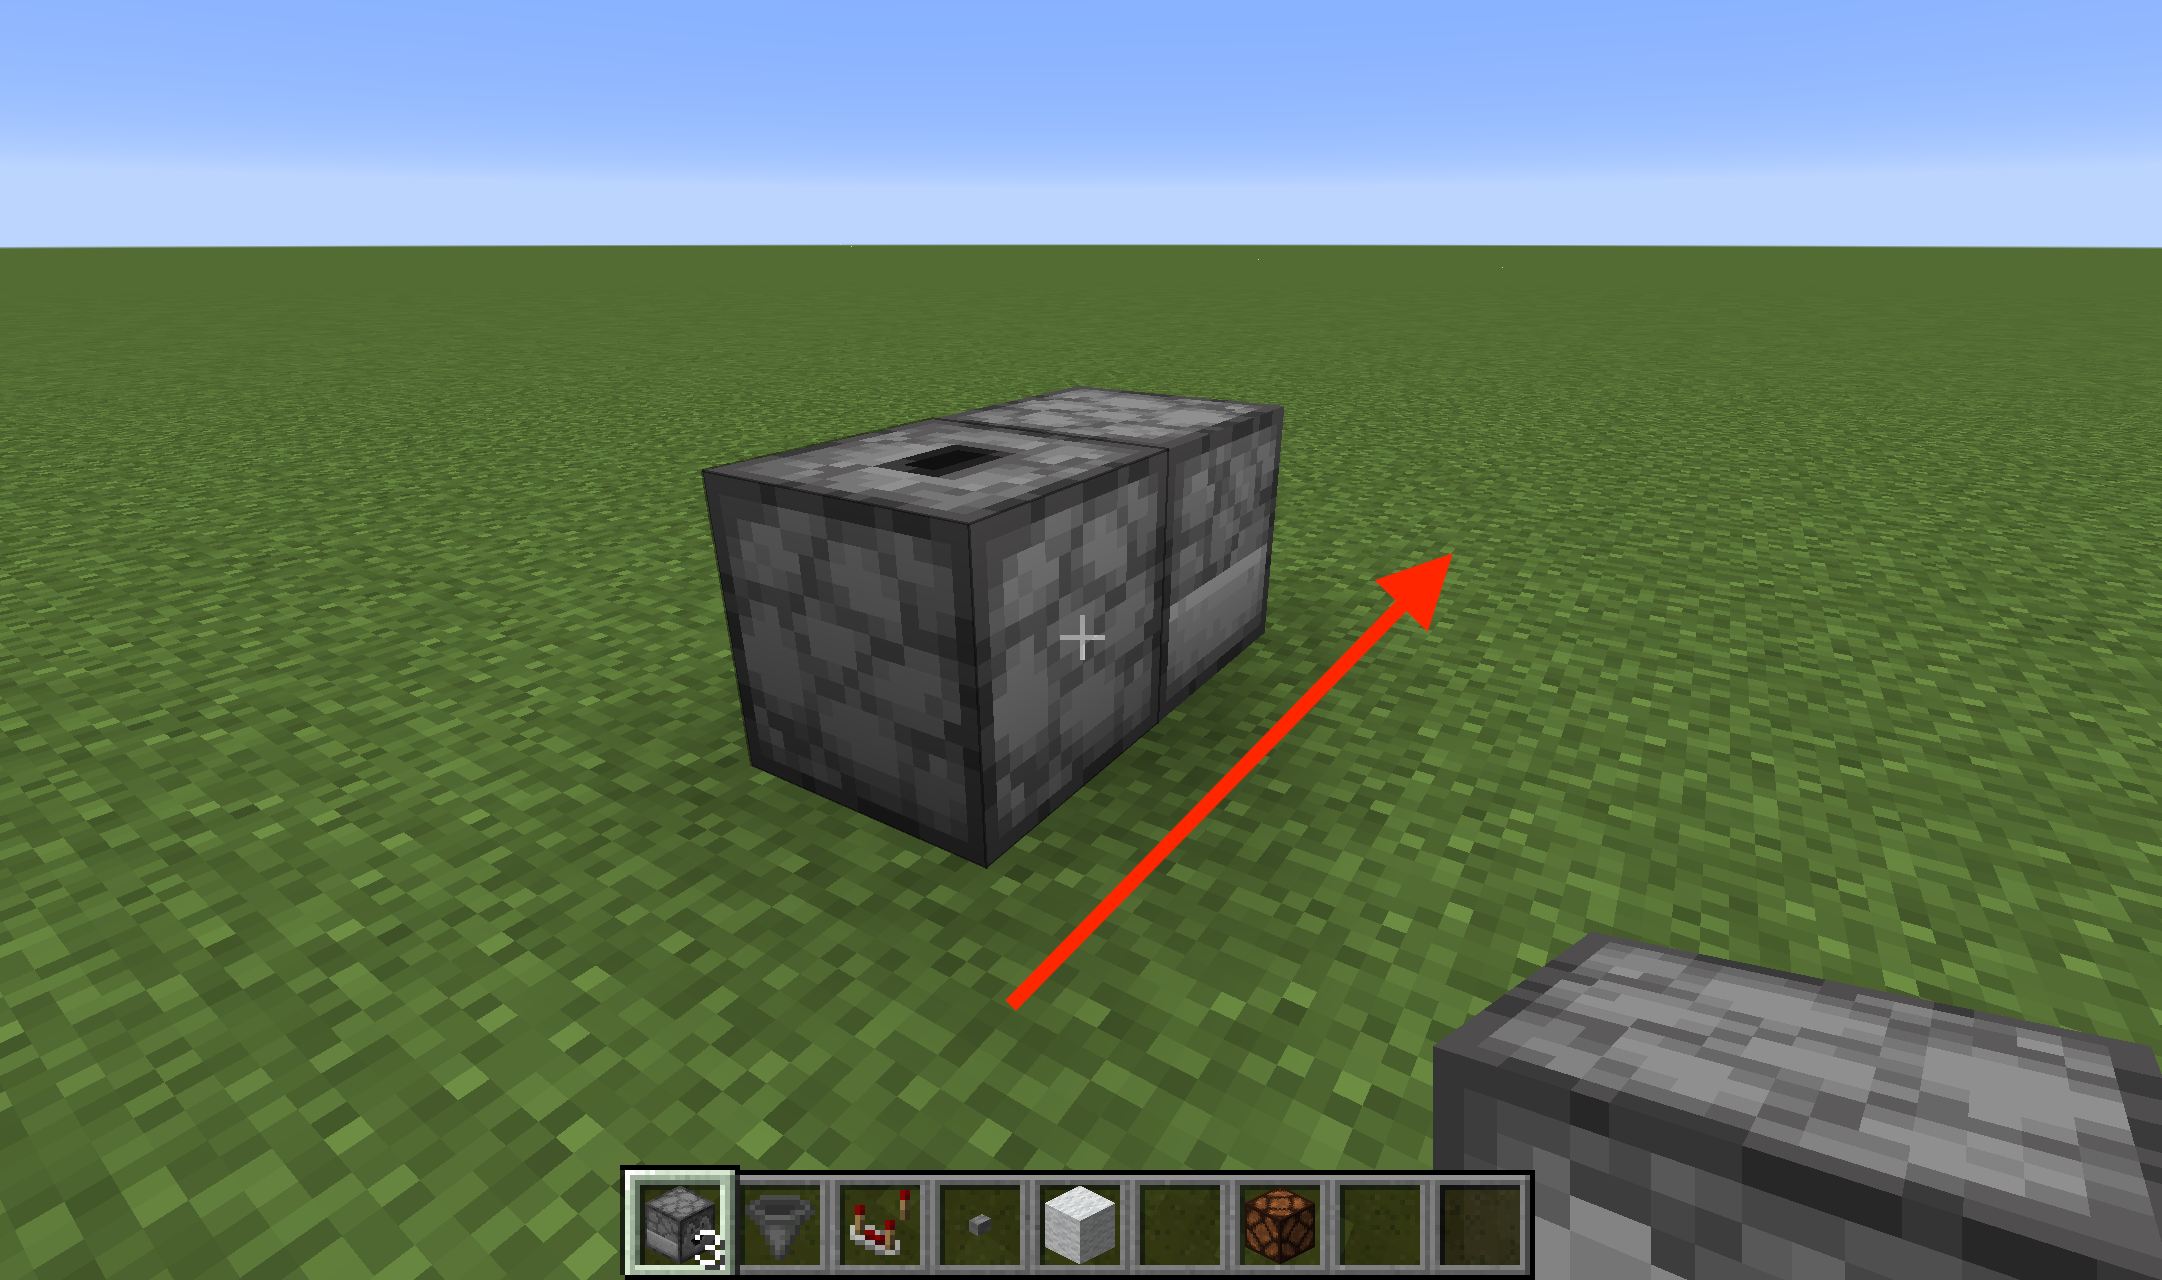
Step 3
 Step 3: The third dropper is place on top of the second dropper facing in the direction of the redstone current (as shown by the red arrow)
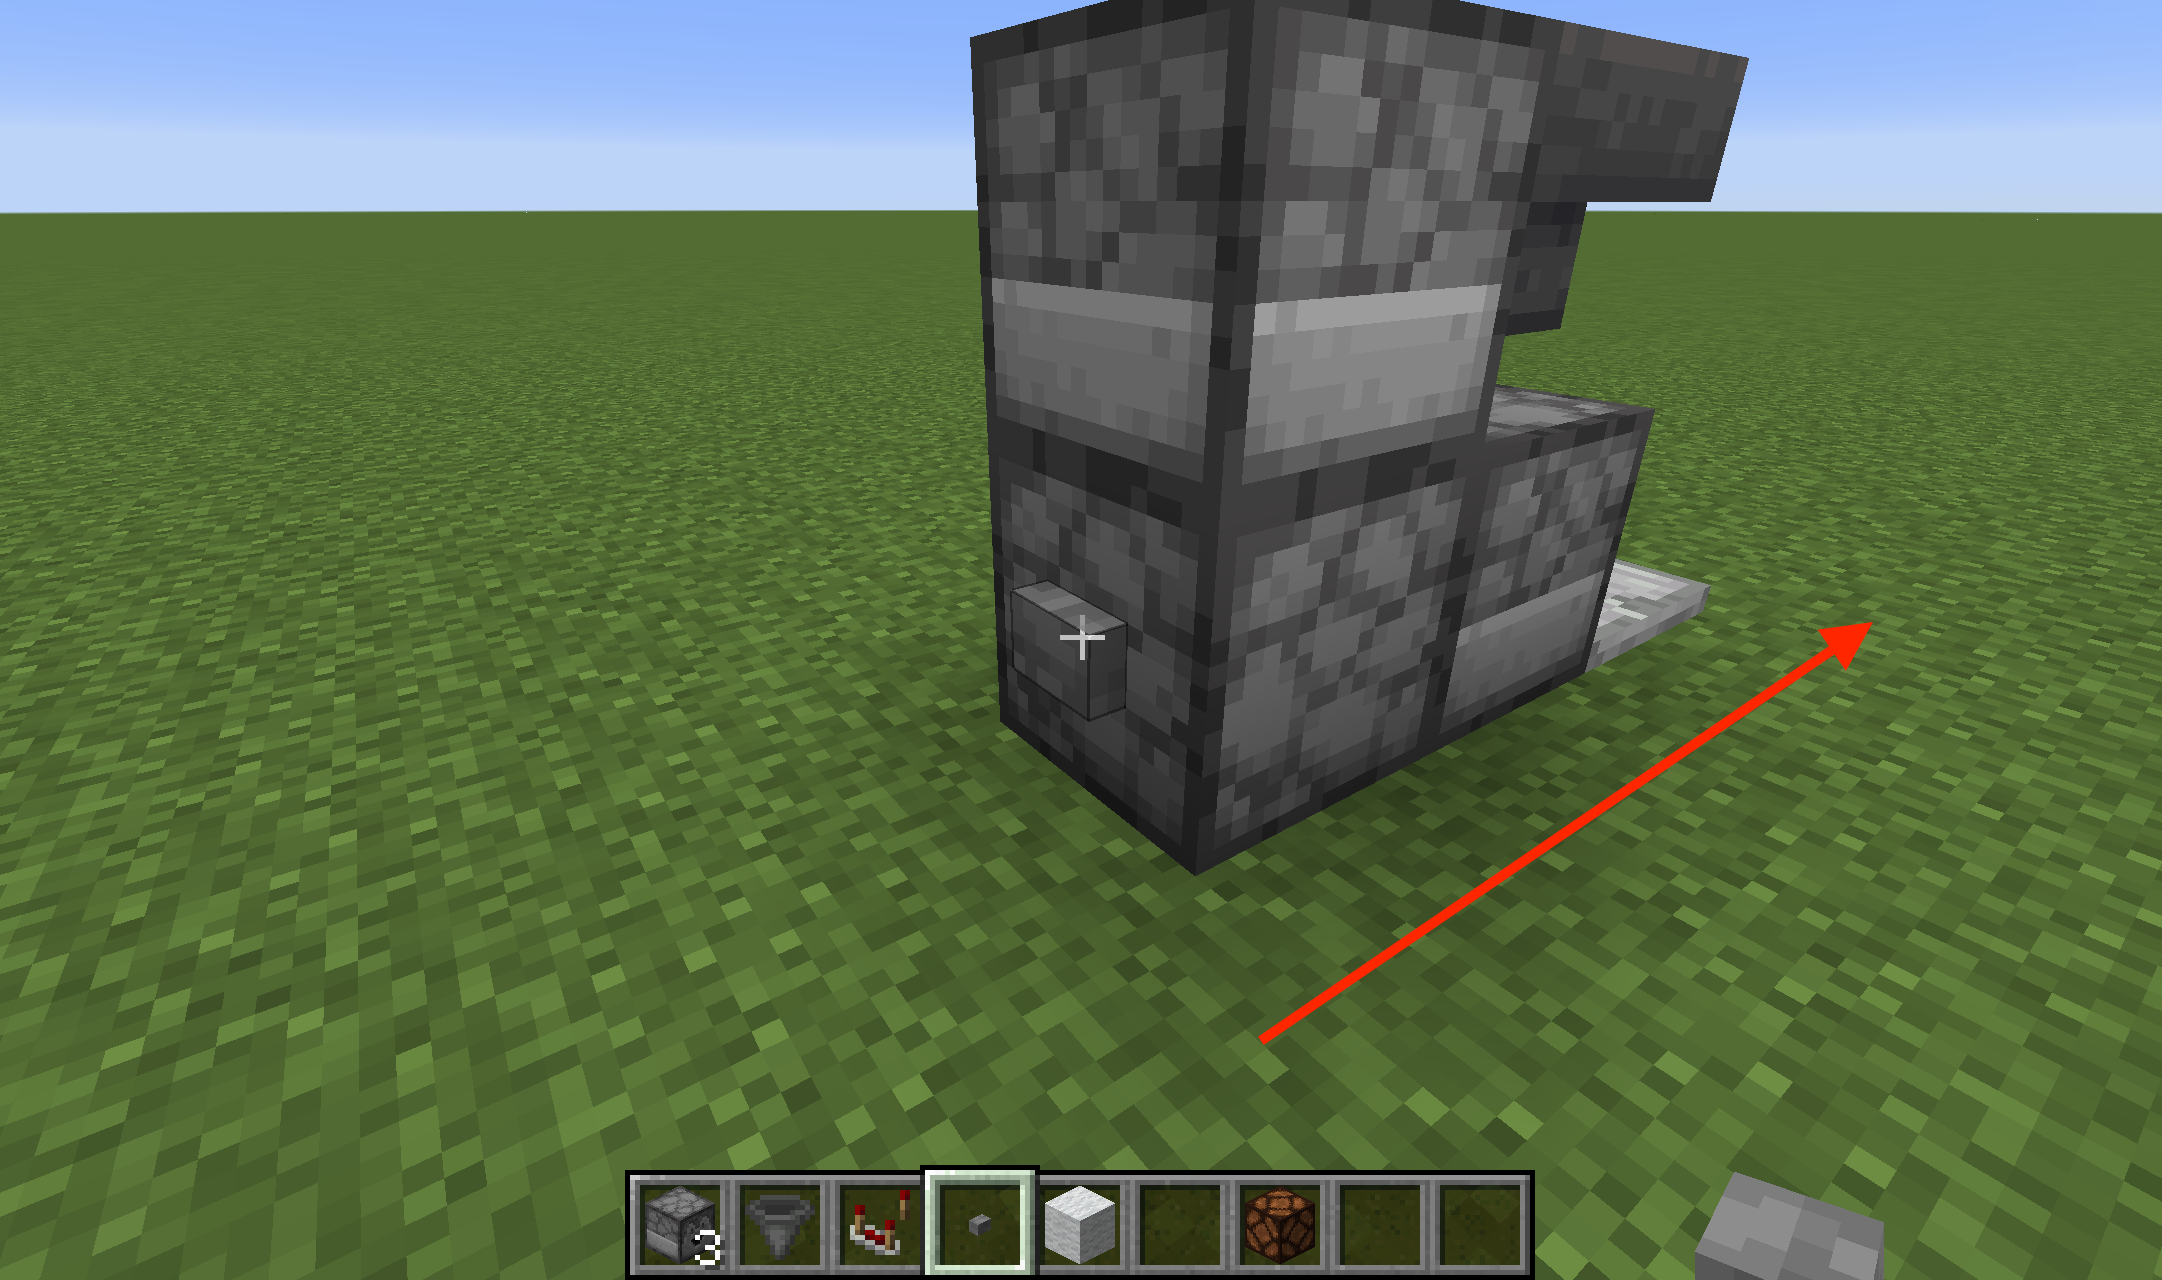
While crouching, place the third dropper on top of the second dropper, but facing the direction of the redstone current (opposite the first dropper).
Note: crouching while placing the third dropper will prevent you from clicking into the second dropper?s inventory.
Step 4
 Step 4: A hopper is now placed on top of the first dropper (redstone current is shown by the red arrow).
While crouching again, place a hopper on top of the first dropper.
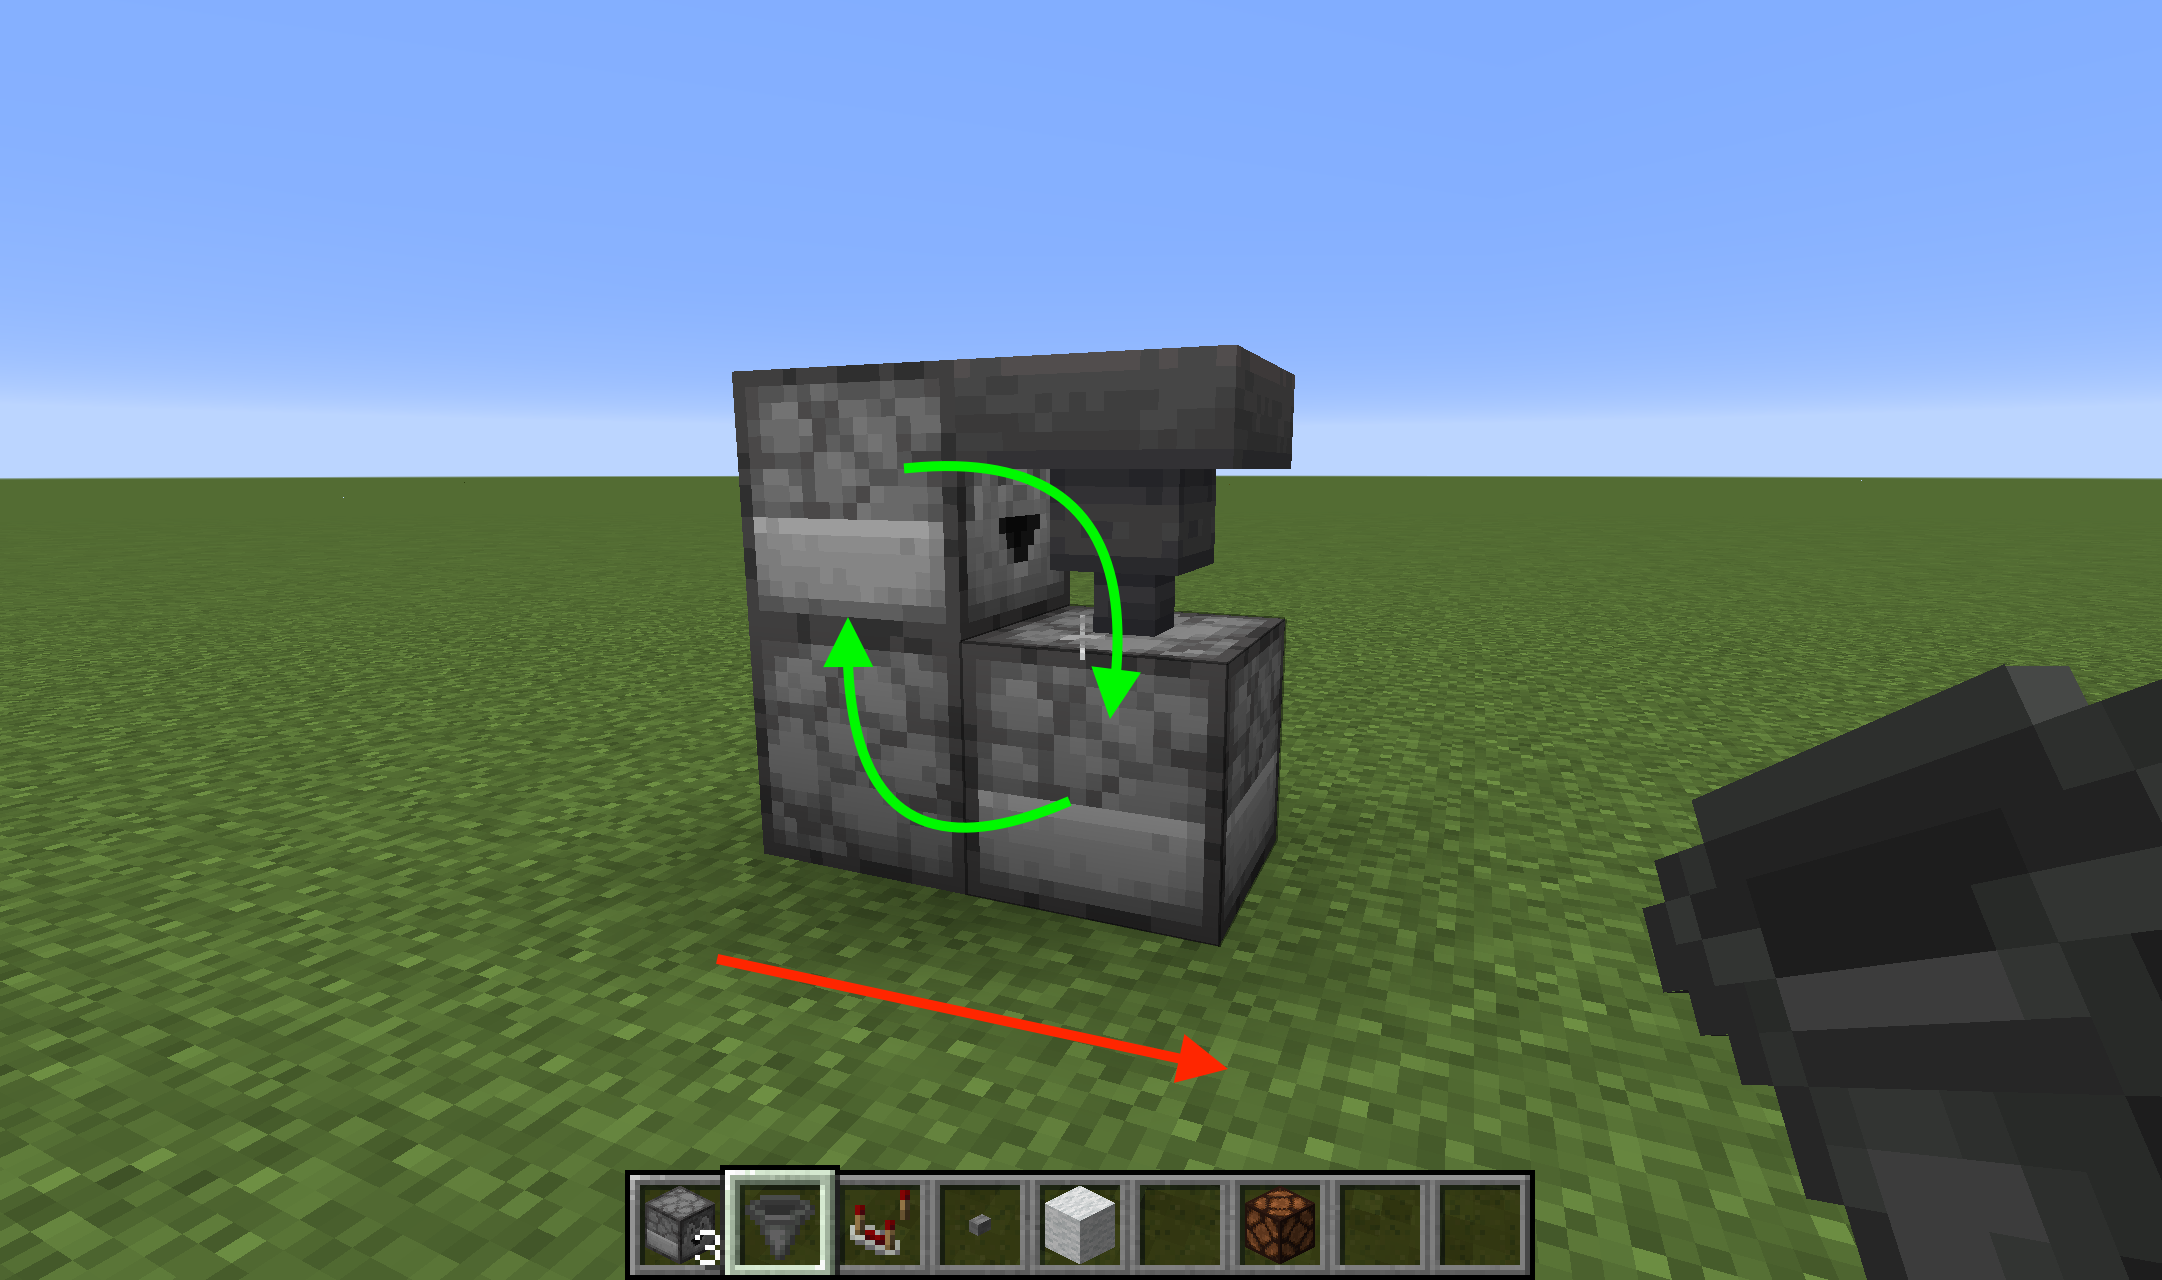 Droppers and hopper should now be feeding one another, indicated by the green circular arrows. The redstone current is shown by the red arrow.
What this setup will accomplish is a circuit where the droppers and hopper are feeding one another. More on the importance of this later.
Step 5
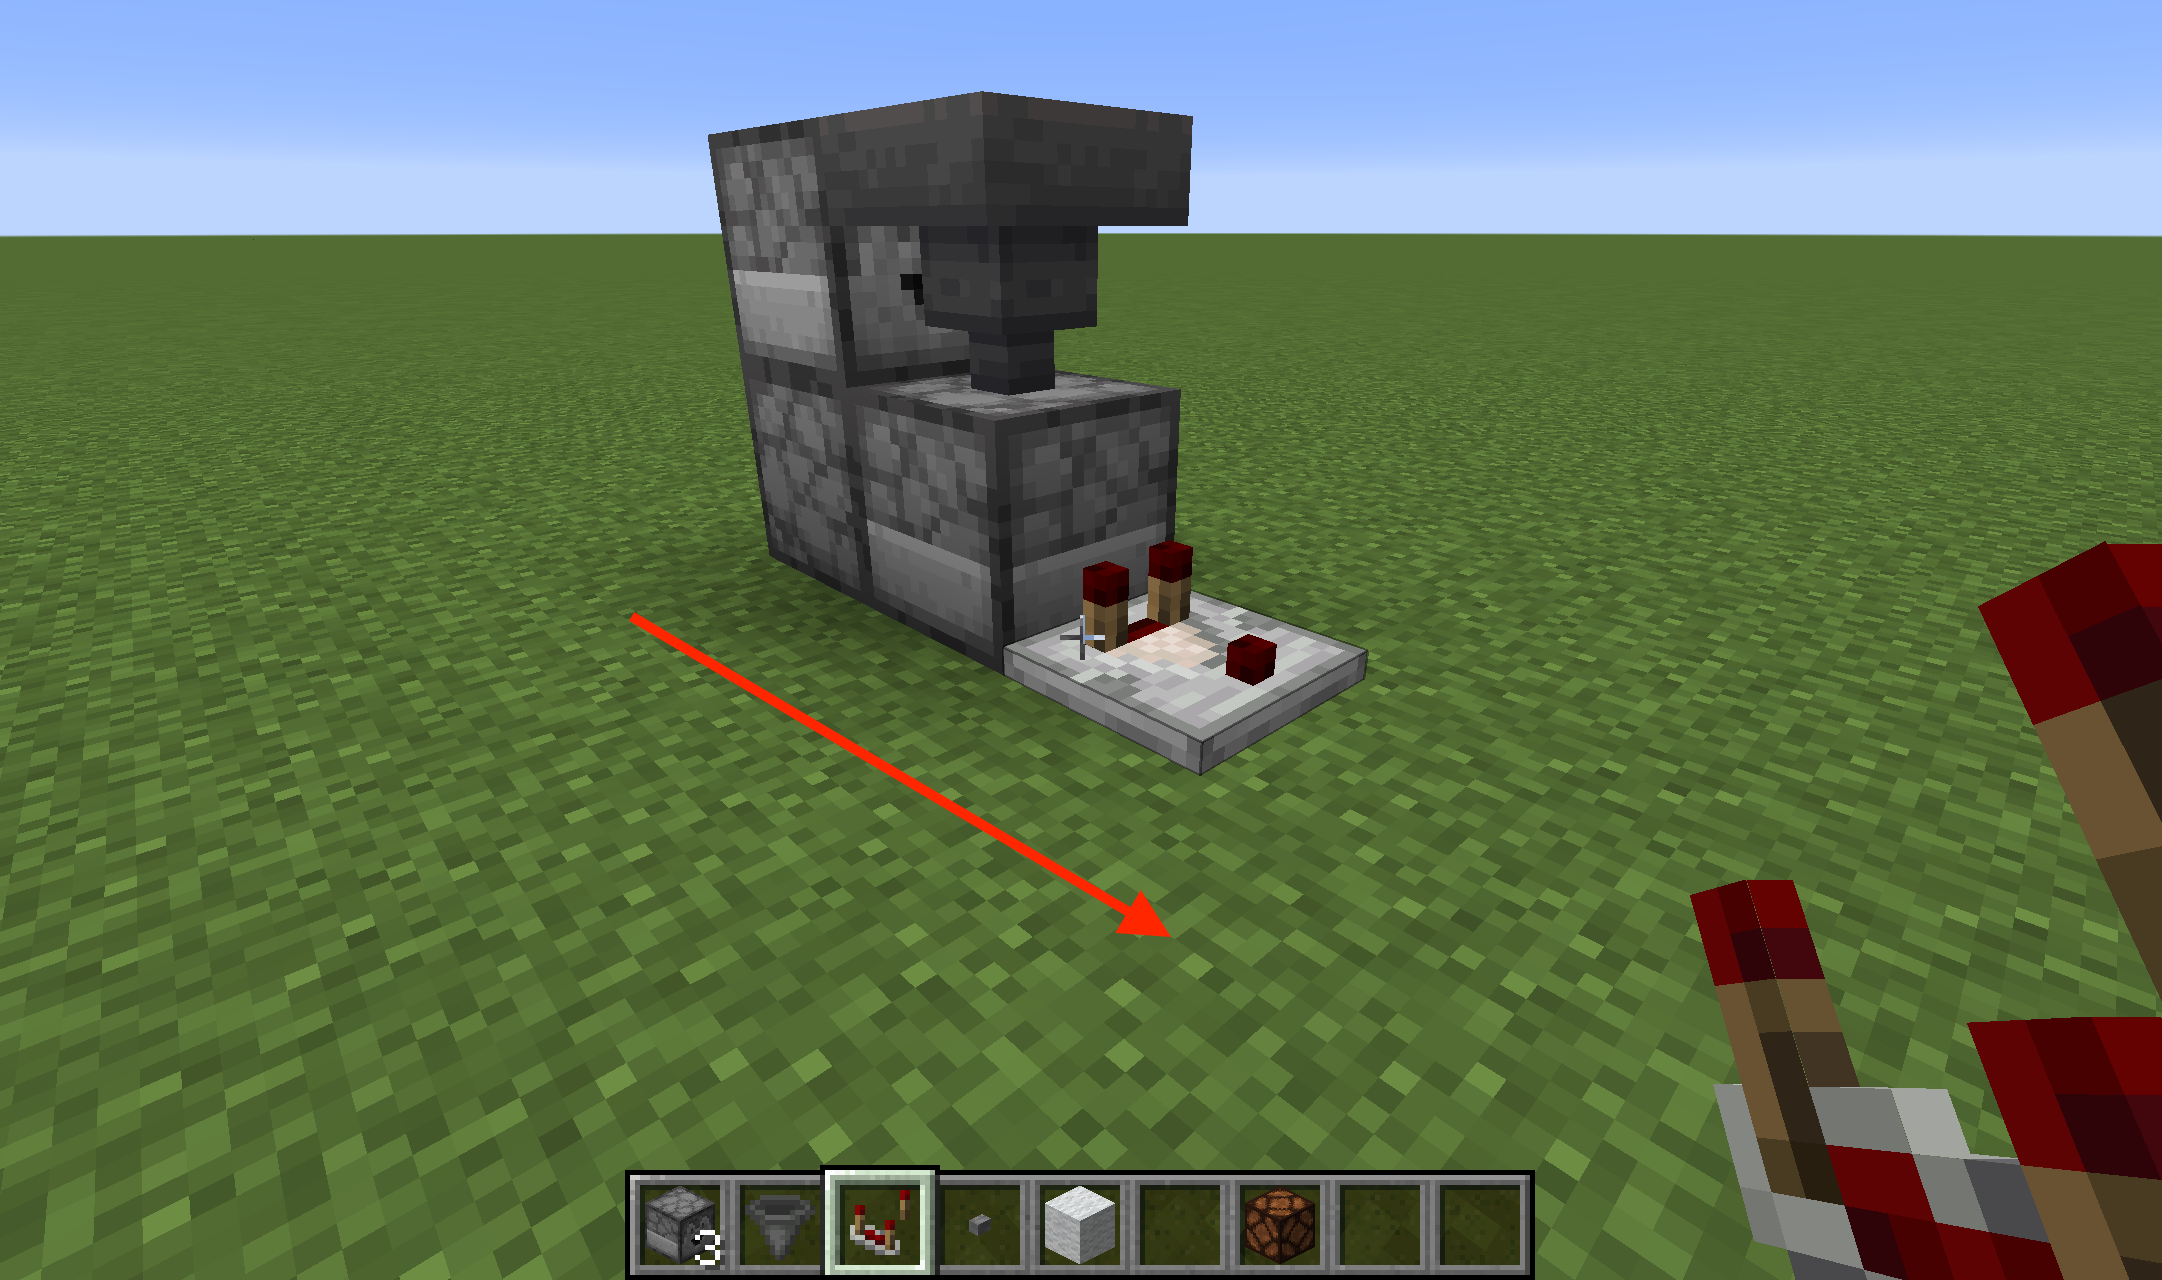 Step 5: A comparator is placed in front of the first hopper facing the direction of the redstone current (as shown by the red arrow).
Now, place a comparator in front of the very first dropper, so that its arrow (in the middle of the comparator) faces in the direction of the redstone current.
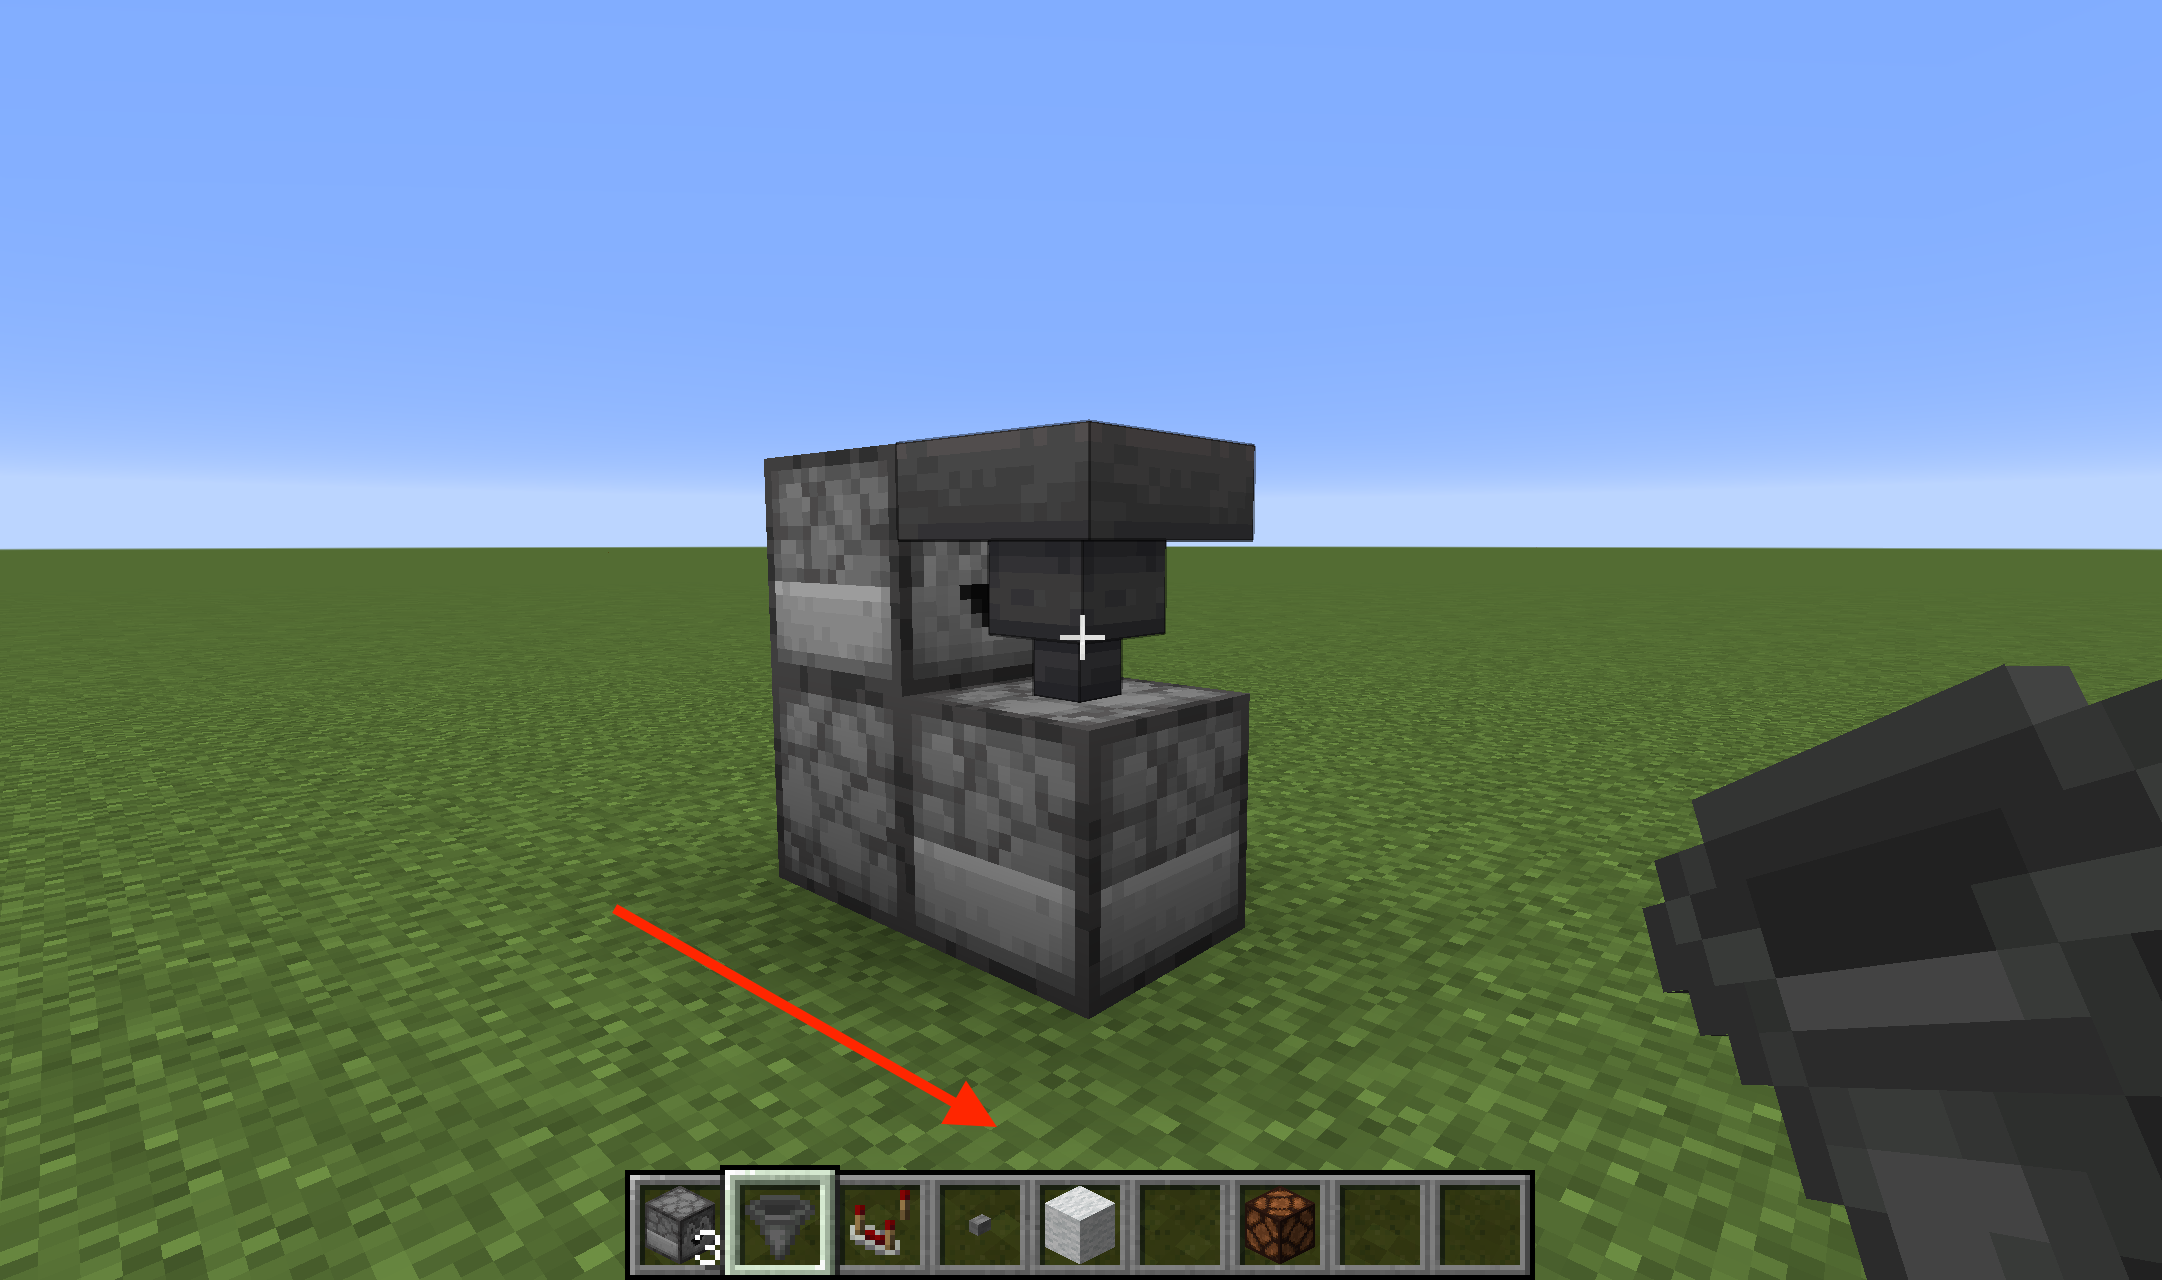
Step 6
 Step 6: Place a button on the back of the second dropper
While crouching, place a button on the back of the second dropper.
The back of the second dropper is your where your input source should direct its impulse.
Step 7
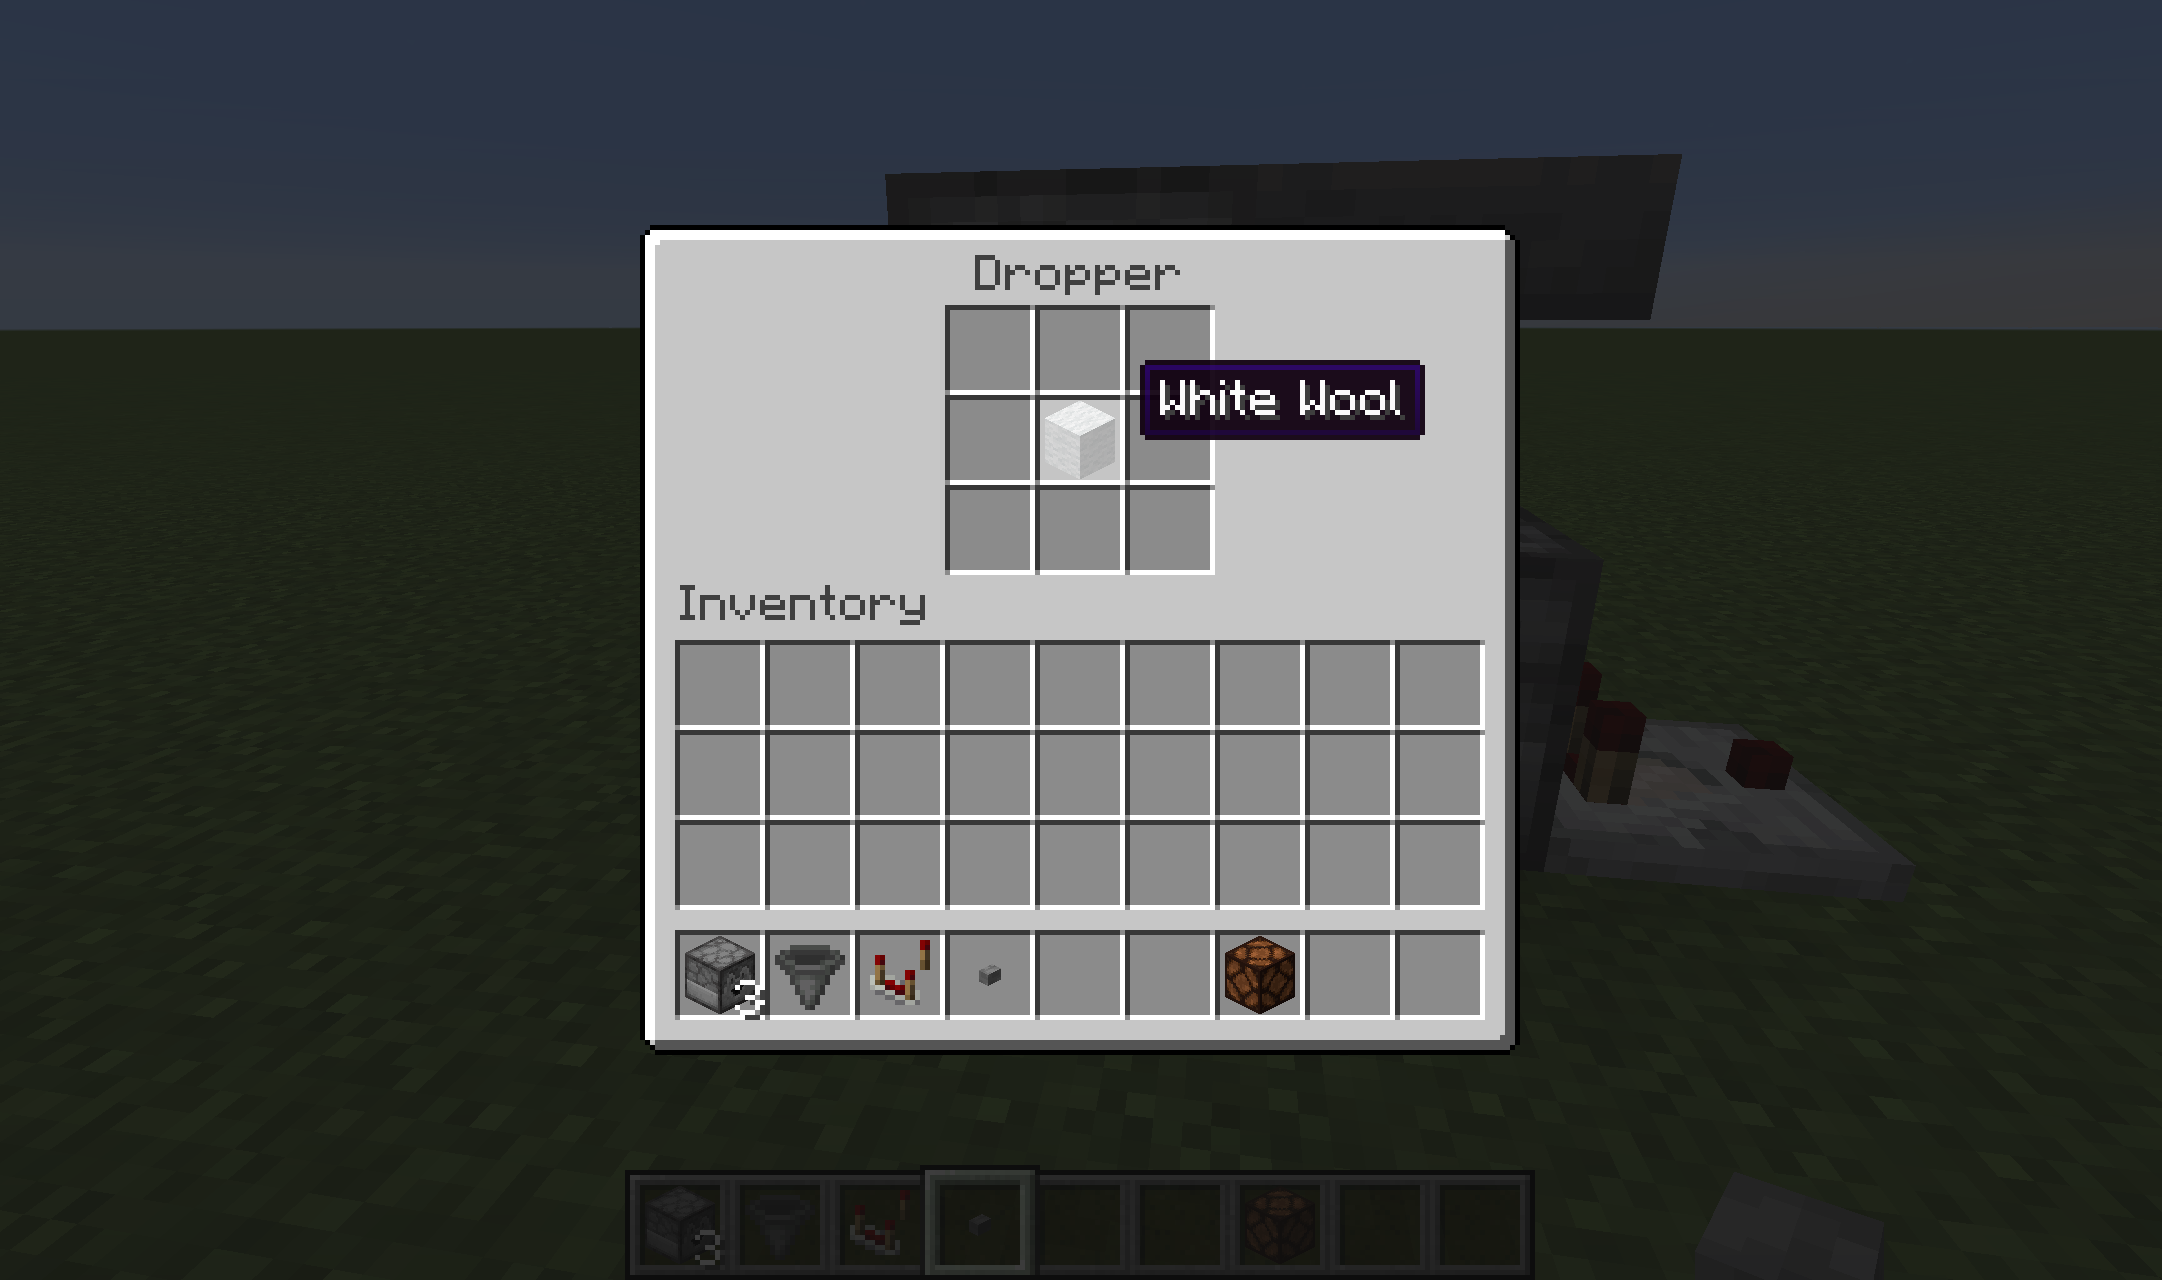 Step 7: Any block is now placed inside the second dropper (I?ve chosen white wool).
Place any block inside the second dropper. For this guide I?ve chosen white wool.
The basic T flip-flop switch cell is now complete. On to the last step: giving it light!
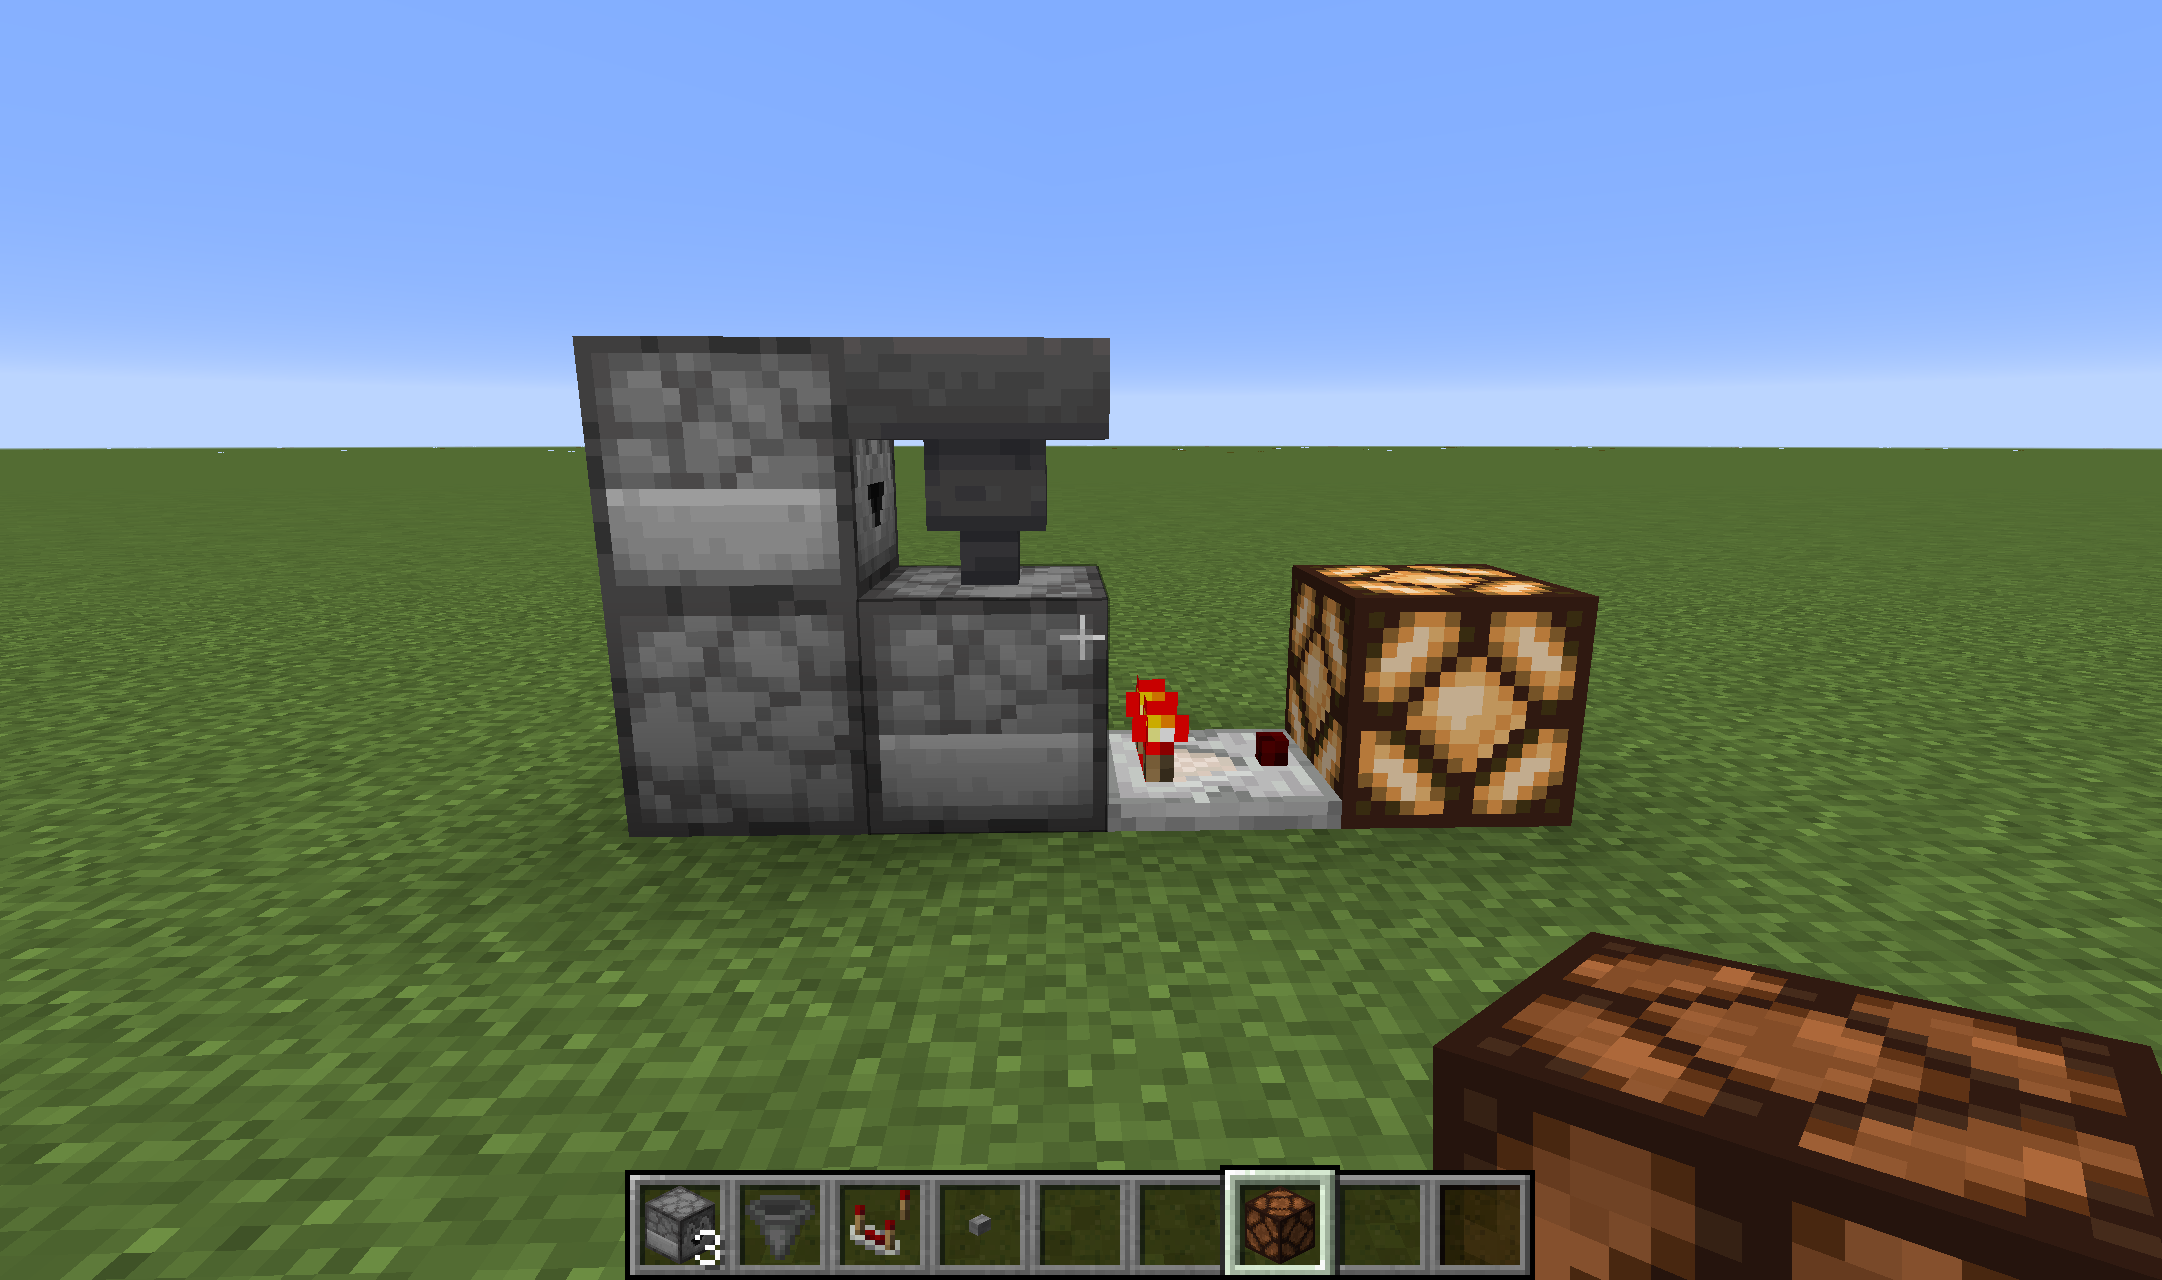
Step 8
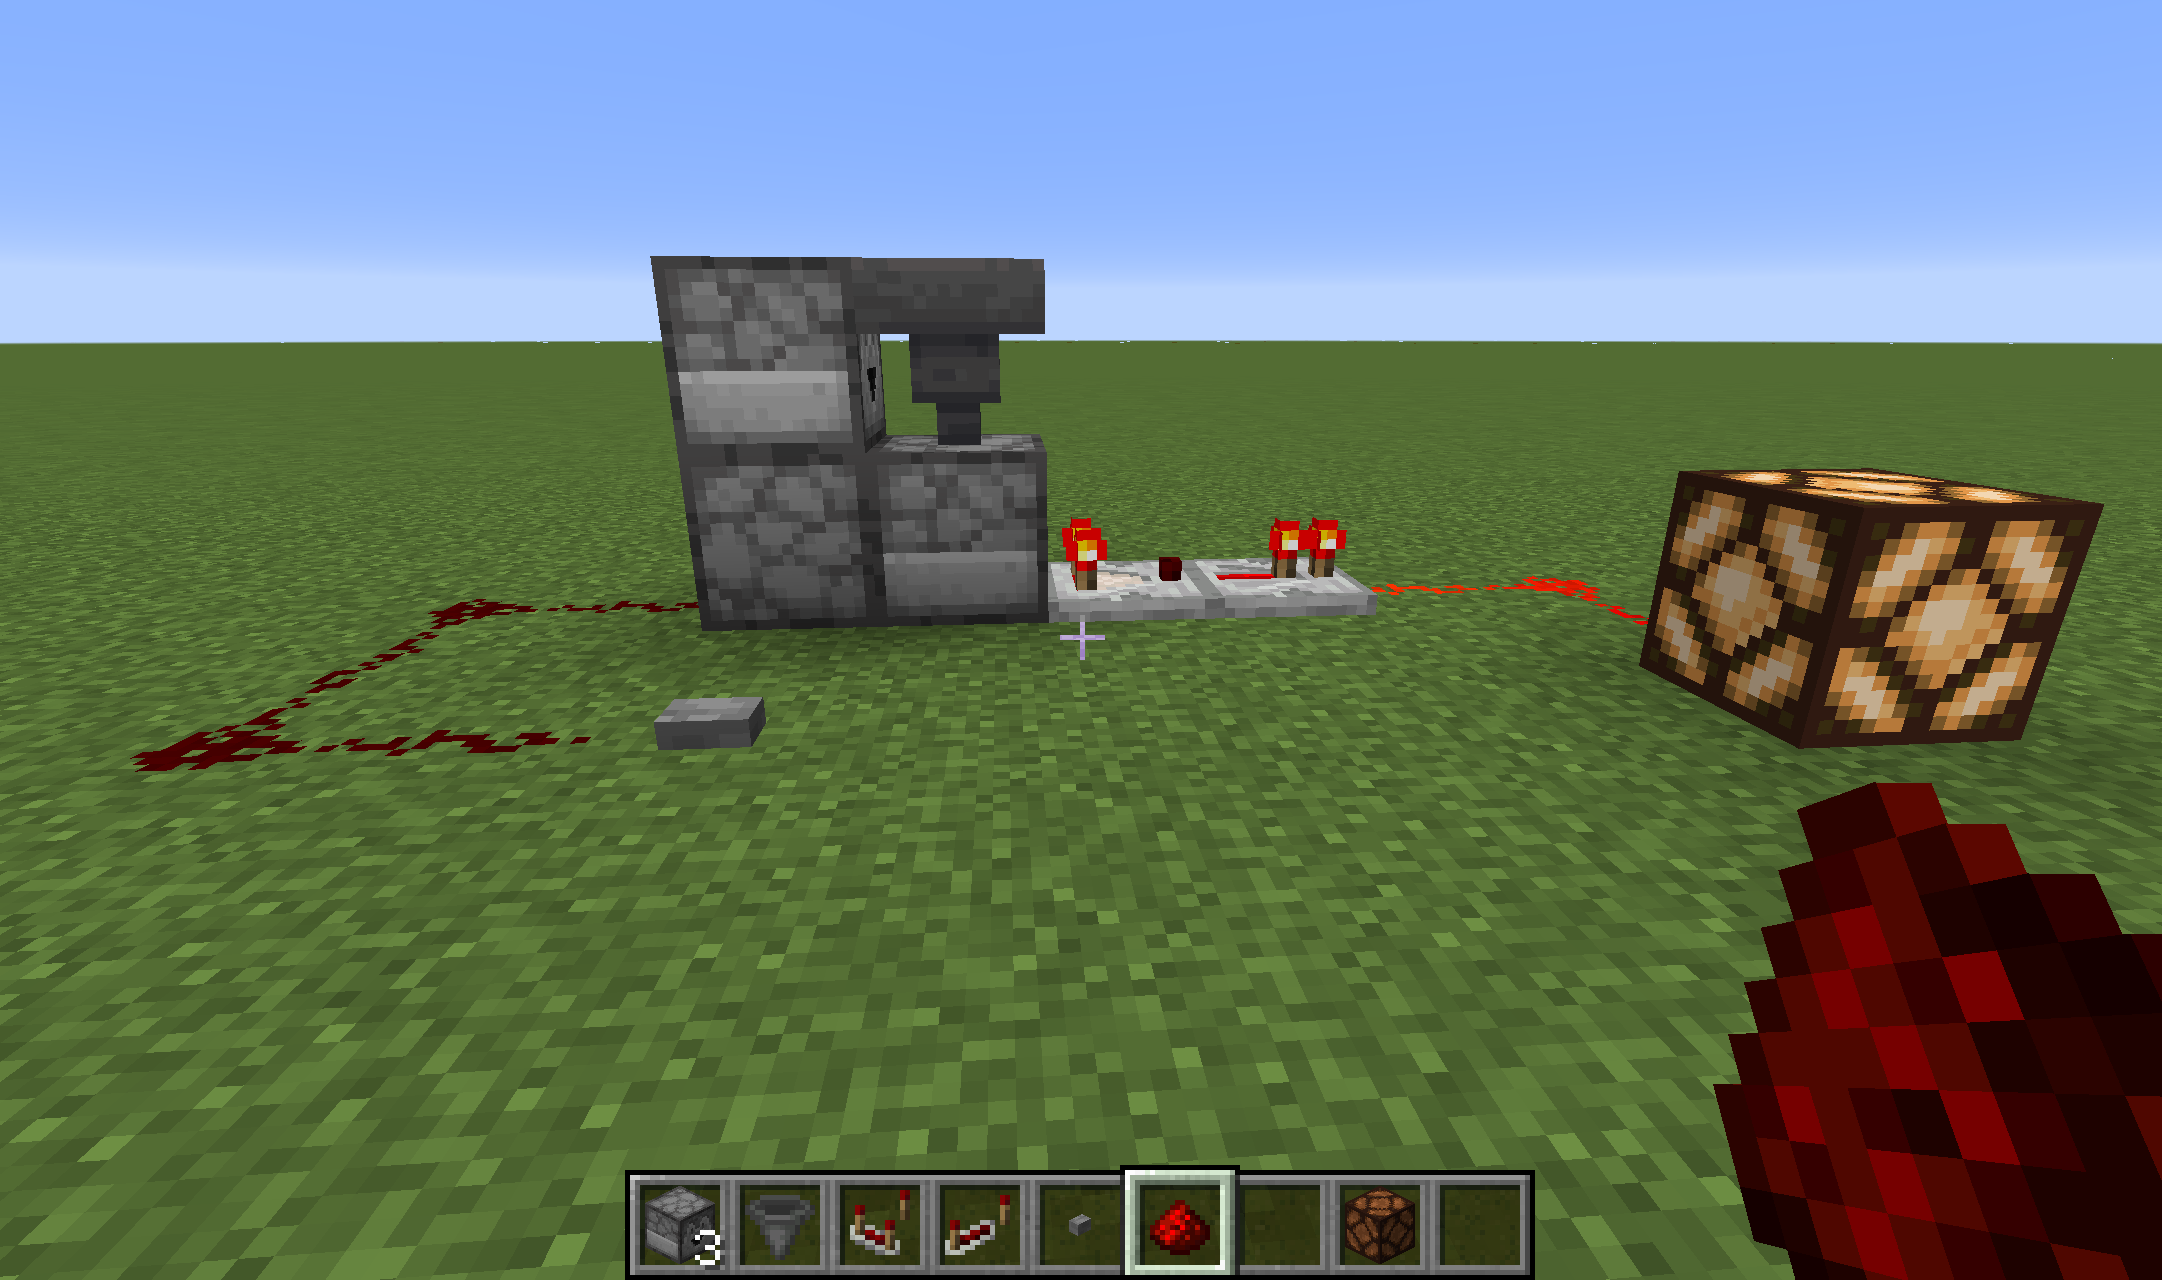
 Step 8: A redstone lamp is place in front of the comparator (redstone current shown by red arrow).
Place a redstone lamp just in front of the comparator to complete the build in its most simple form.
You now have a working T flip-flop switch! Simply push the button at the back, watch the lamp switch on, and marvel at how silent it is.
 Working T flip-flop switch showing redstone lamp glowing after button is pushed.
How does it work?
This circuit is so simple, you?ll be wondering why you didn?t think of it?I know I felt that way at least!
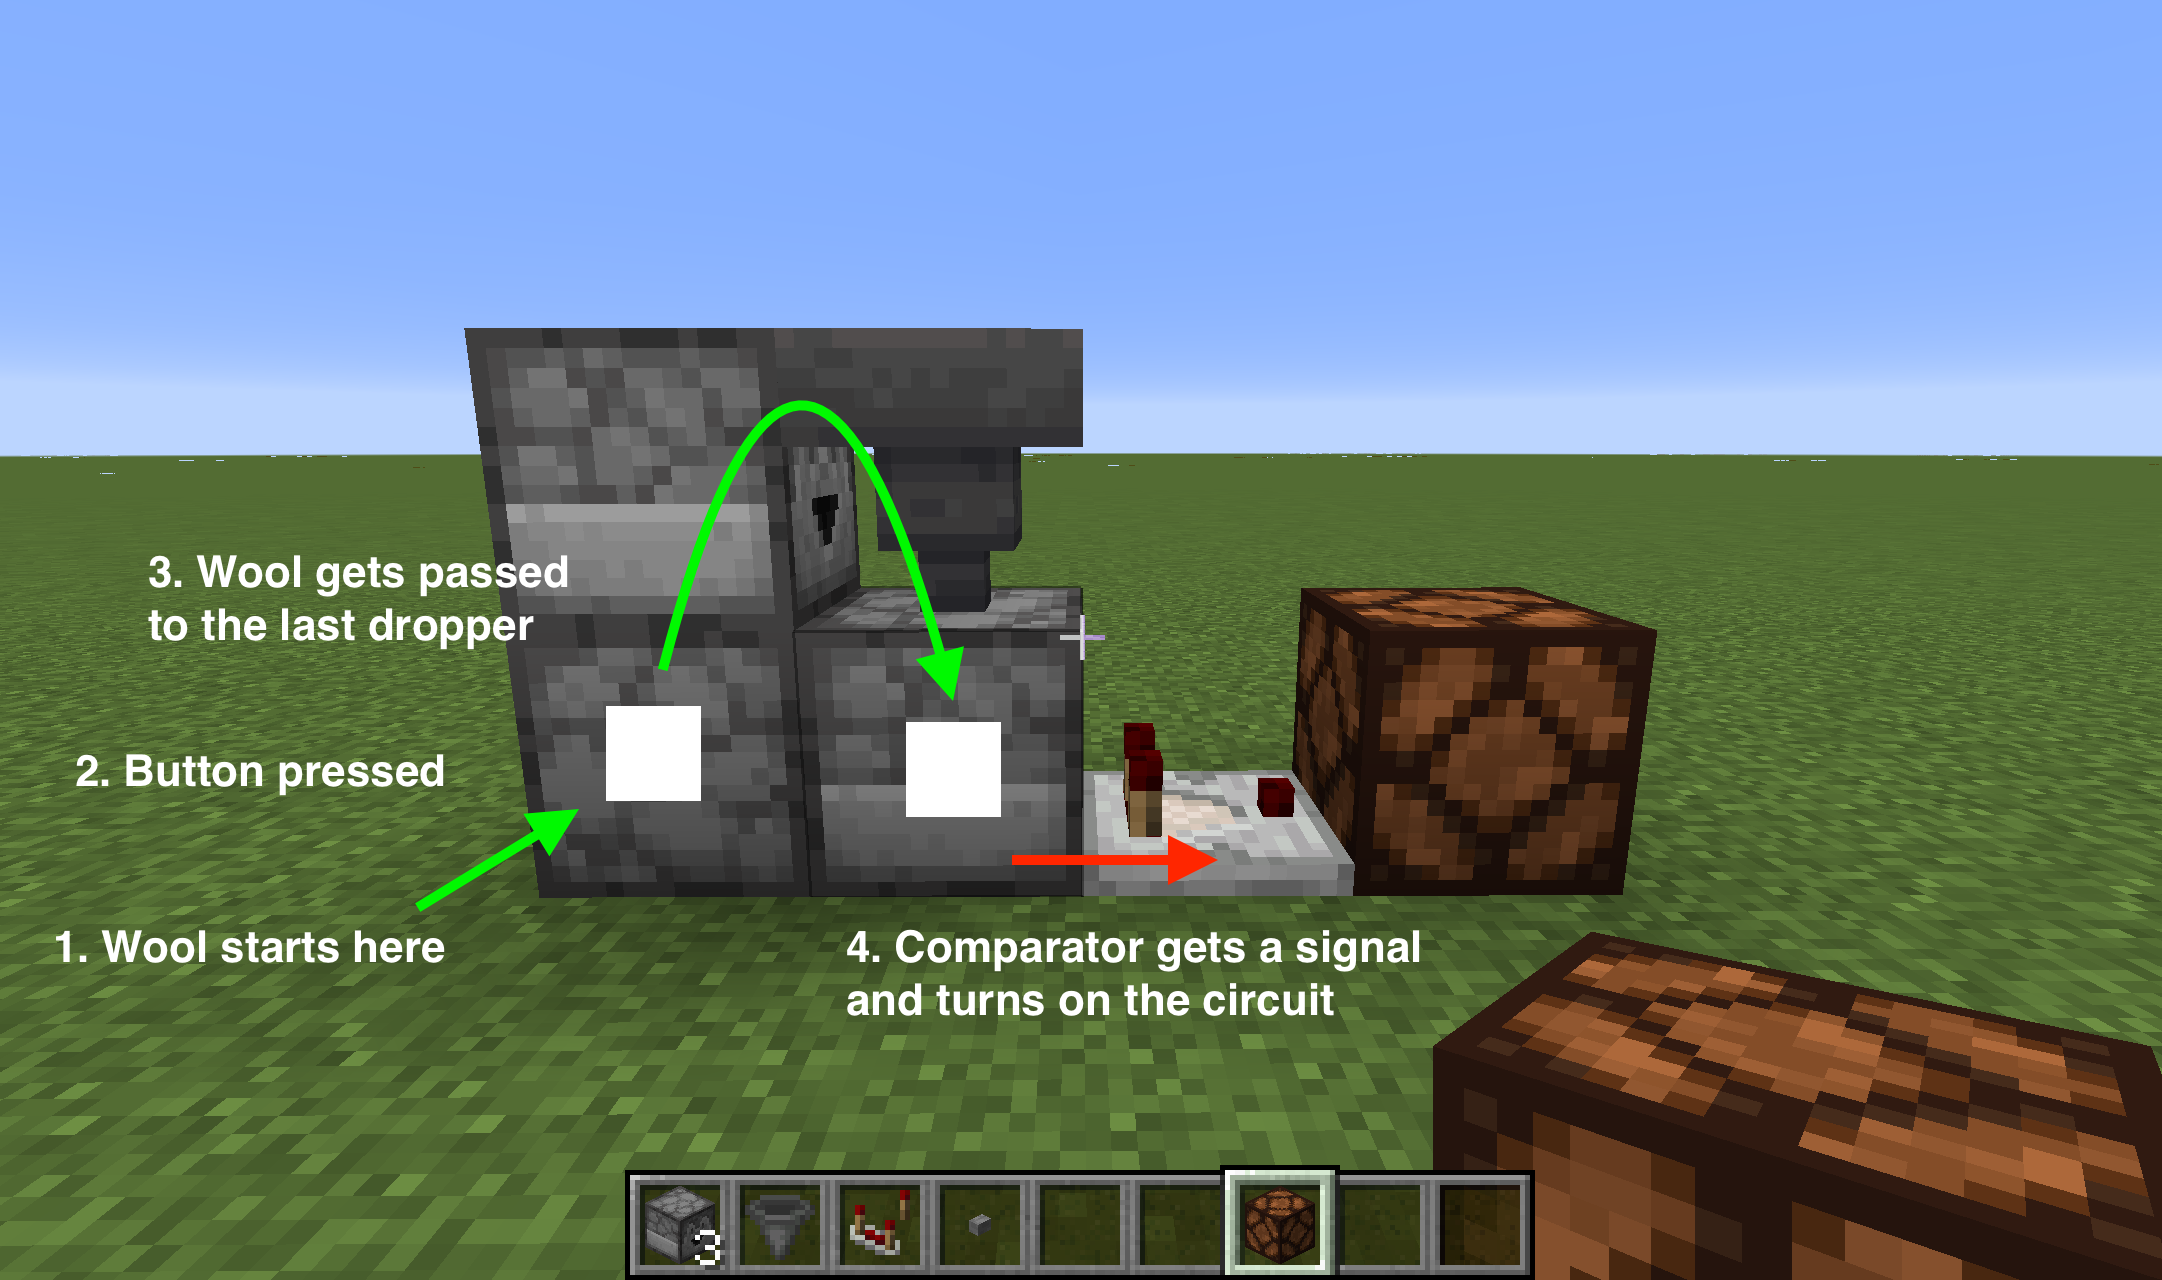 Screenshot diagram showing how the wool is passed through the droppers.
Basically, when the button is pressed (or the second dropper receives an impulse signal), it ?drops? the wool inside to the dropper above it, which then ?drops? the wool into the hopper (since the impulse is still active from the button). The hopper then drops the wool into the dropper below it.
When droppers have an item inside them, they are ?activated?. So, at this point, the comparator can now ?compare? the ?activated? state of the dropper behind it and turn on the signal to the redstone lamp. This signal stays on as long as this dropper is filled with the wool, and it will remain here until the button sends another impulse.
When the button is pressed a second time, the dropper next to the comparator ?drops? the wool back into the first dropper and the comparator turns off the signal (since the final dropper is no longer activated).
How can I put this toggle switch to use?
In the example above, I?ve place a redstone lamp directly beside the comparator and a button directly on the second-placed dropper. However, you can easily modify the placement of the input (button) and the output (redstone lamp) and extend the circuit.
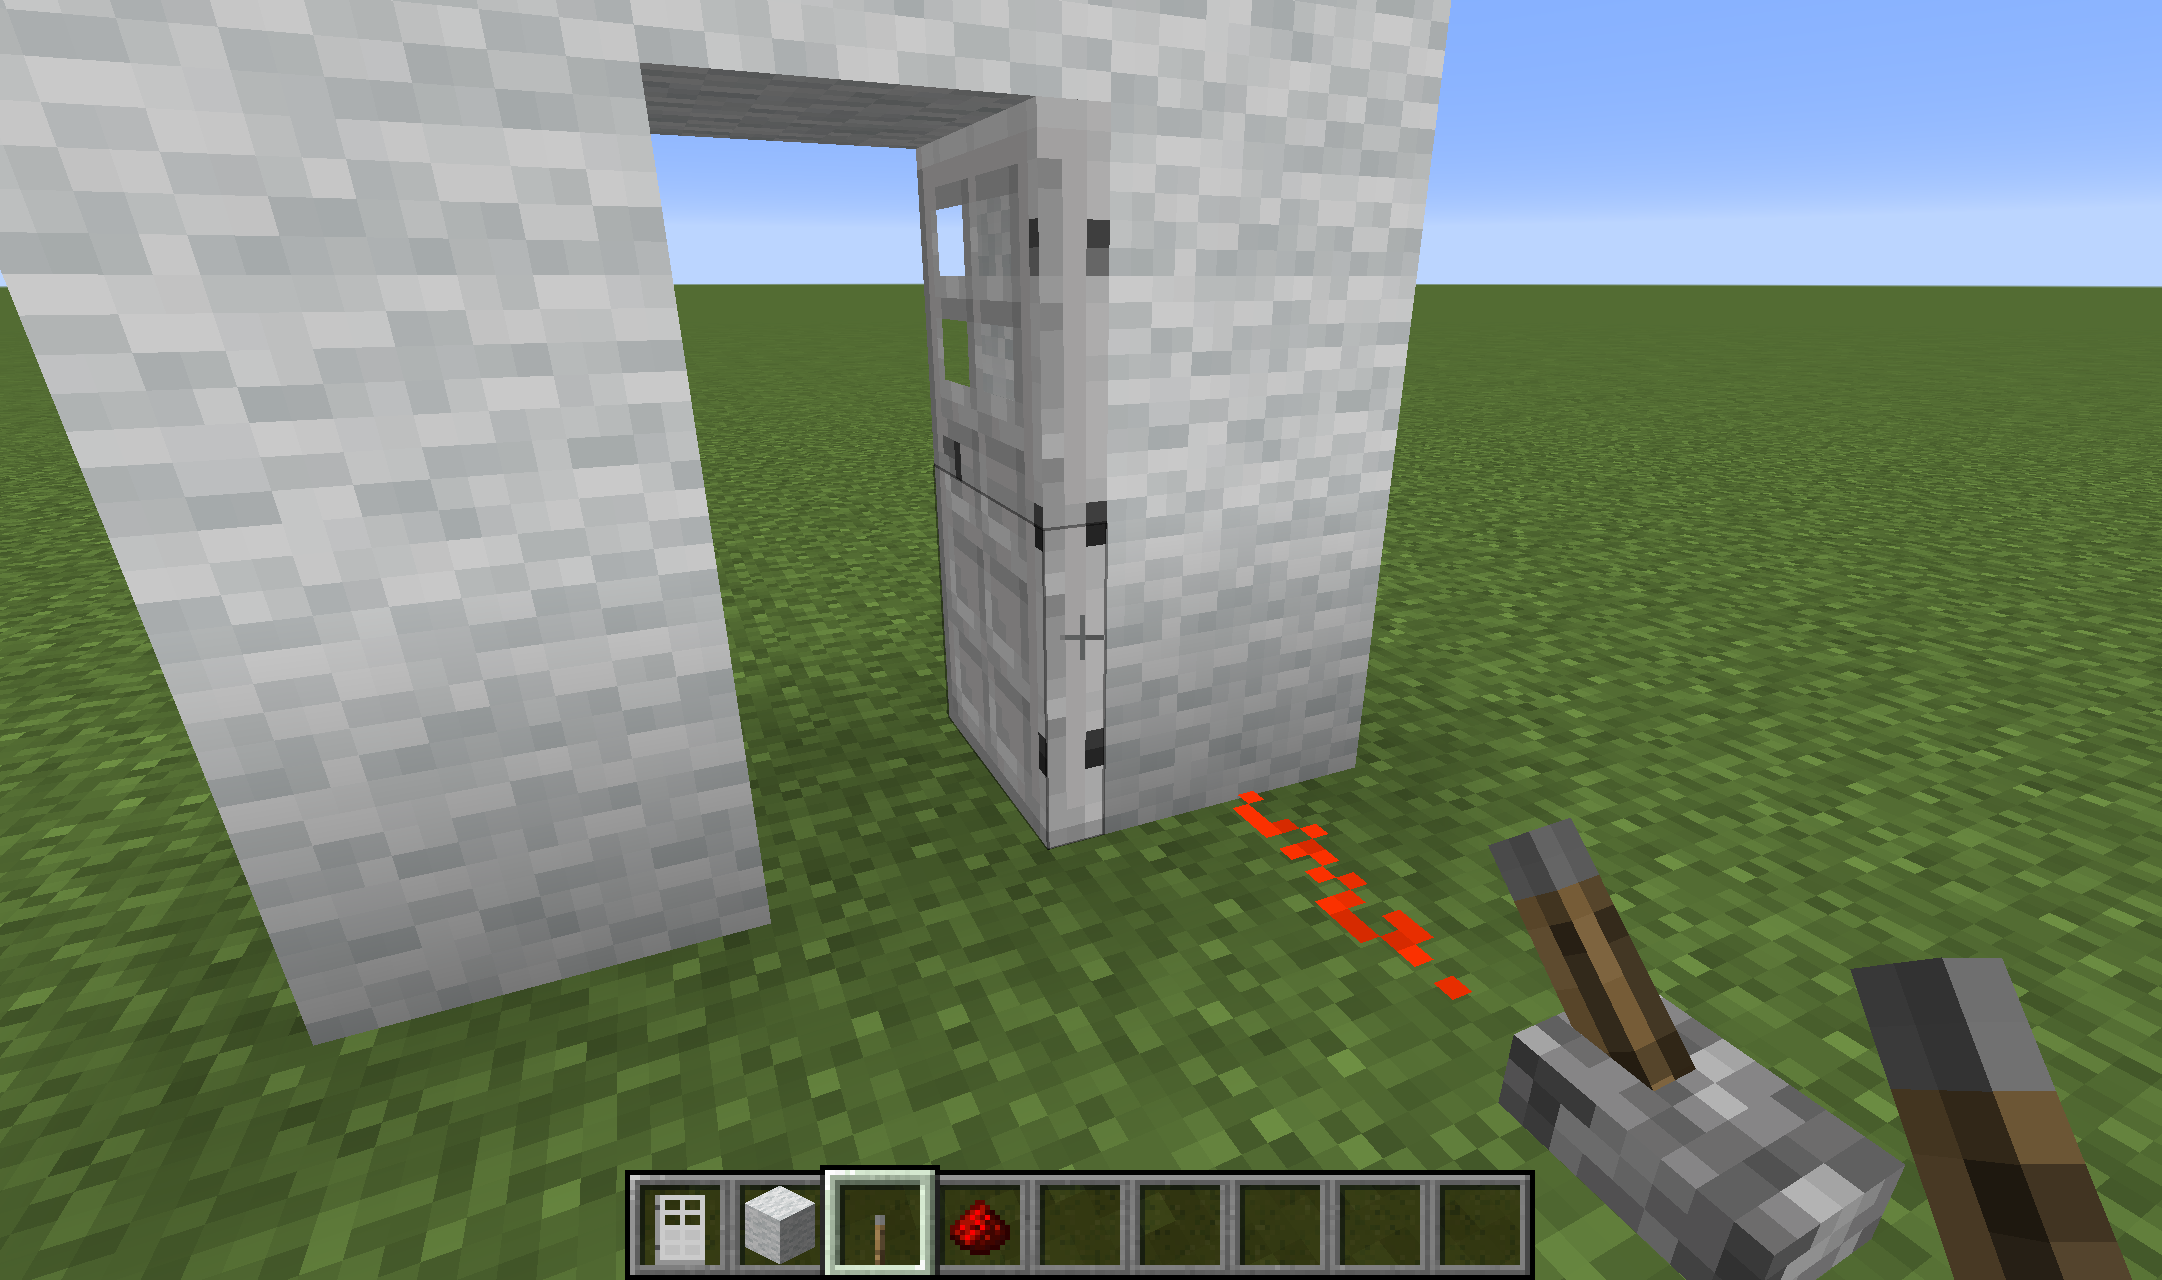
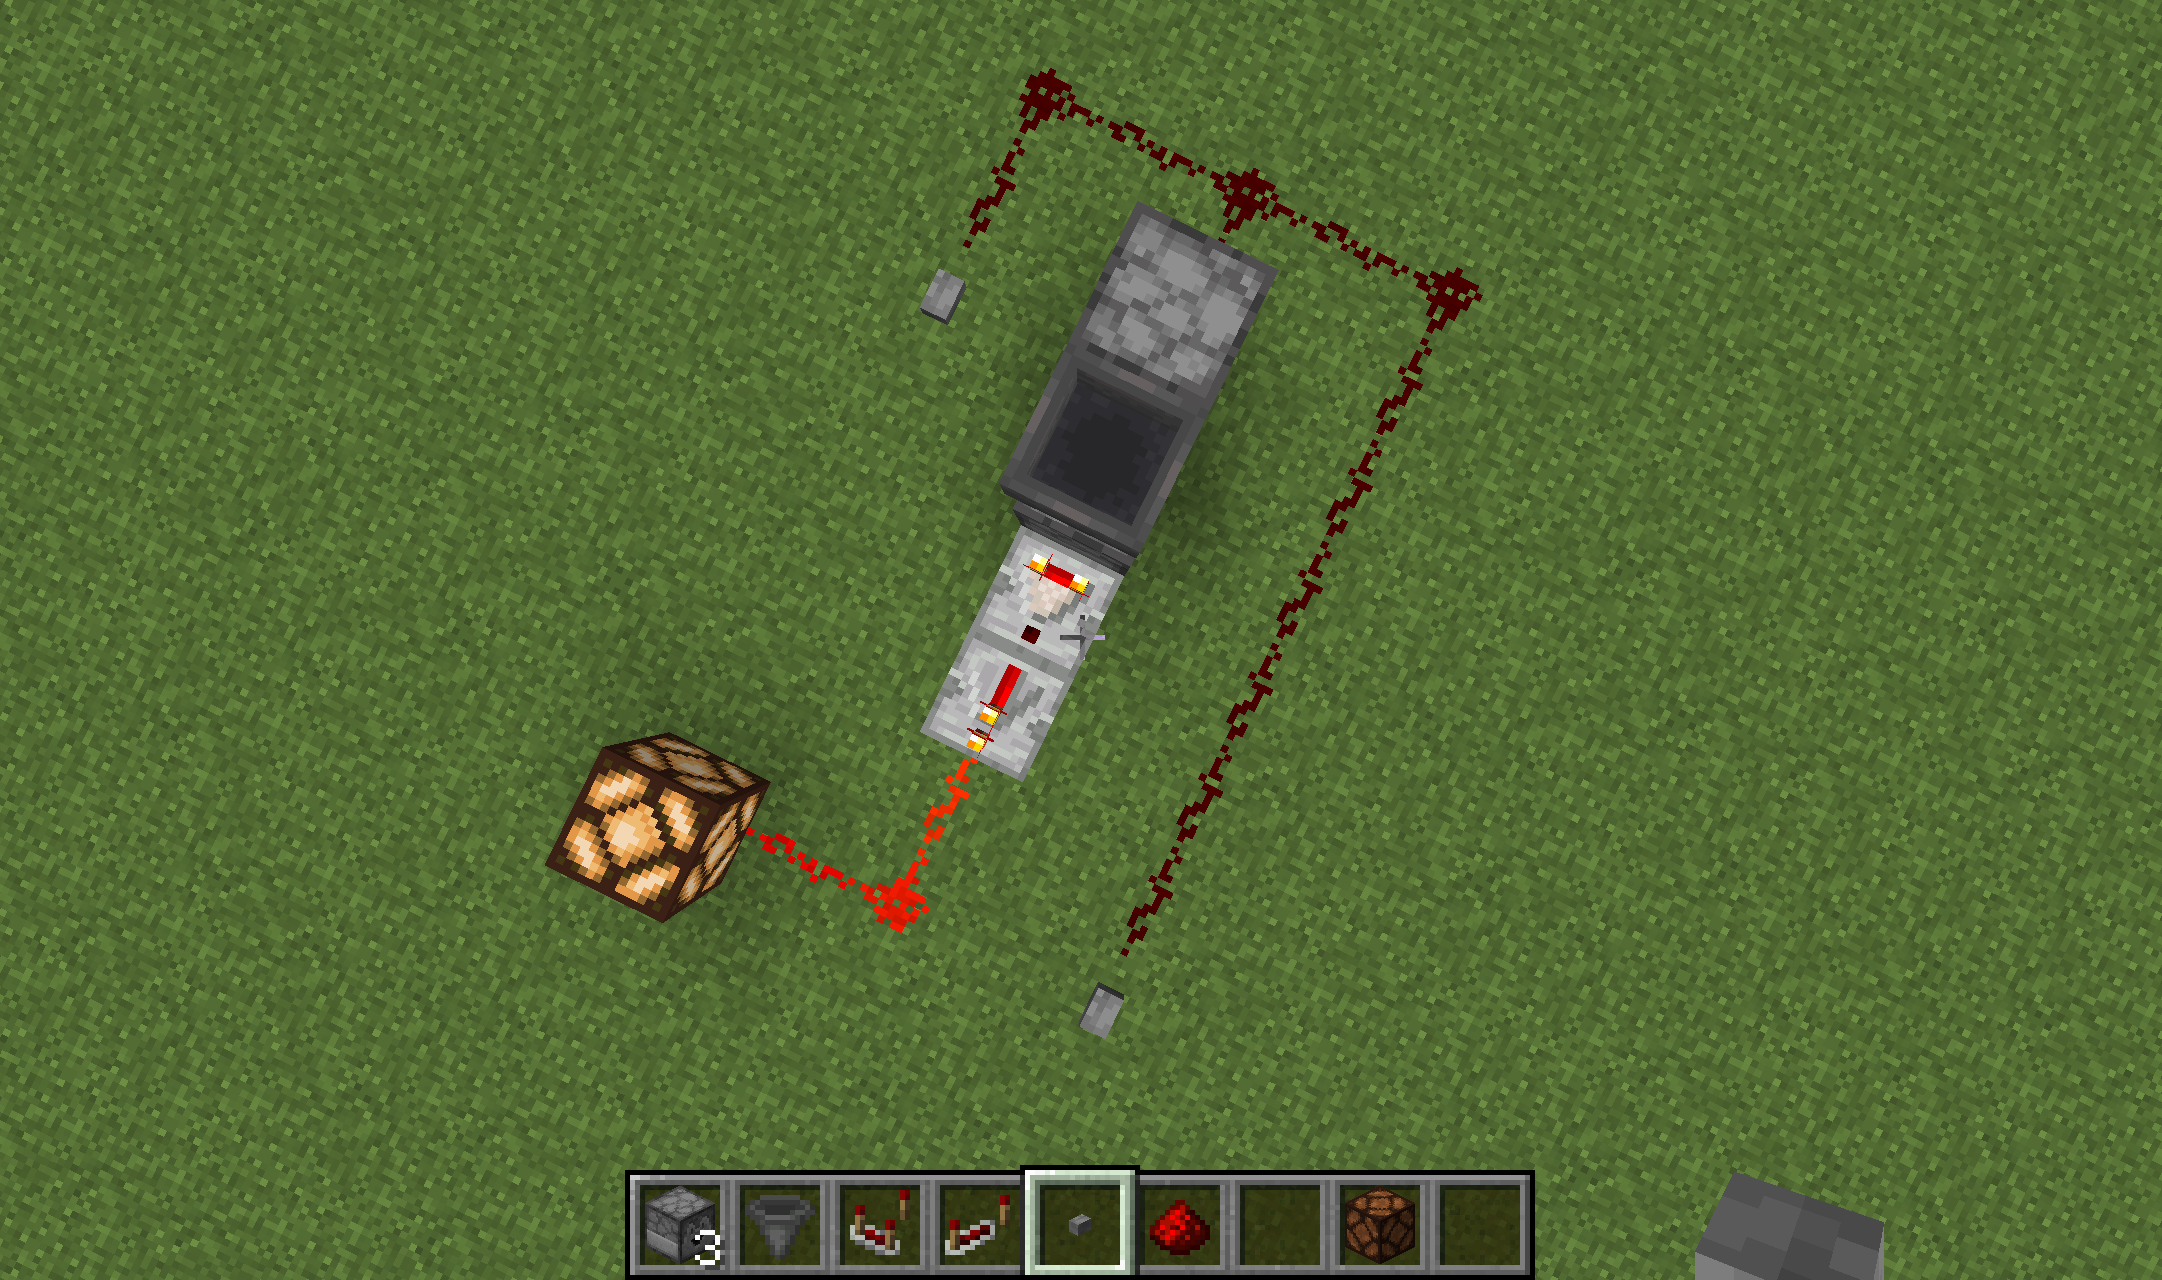
 Screenshot showing lit redstone lamp from an extended T flip-flop switch
By placing a redstone repeater facing the direction of the current followed by redstone dust, it will boost the signal from the comparator and toward your lamp (or door or whatever your desired output might be). Likewise, the input button can easily be extended by a trail of redstone dust into the back of the second-placed dropper.
You can also create two input sources by extending redstone dust from the back of the second dropper to two separate buttons.
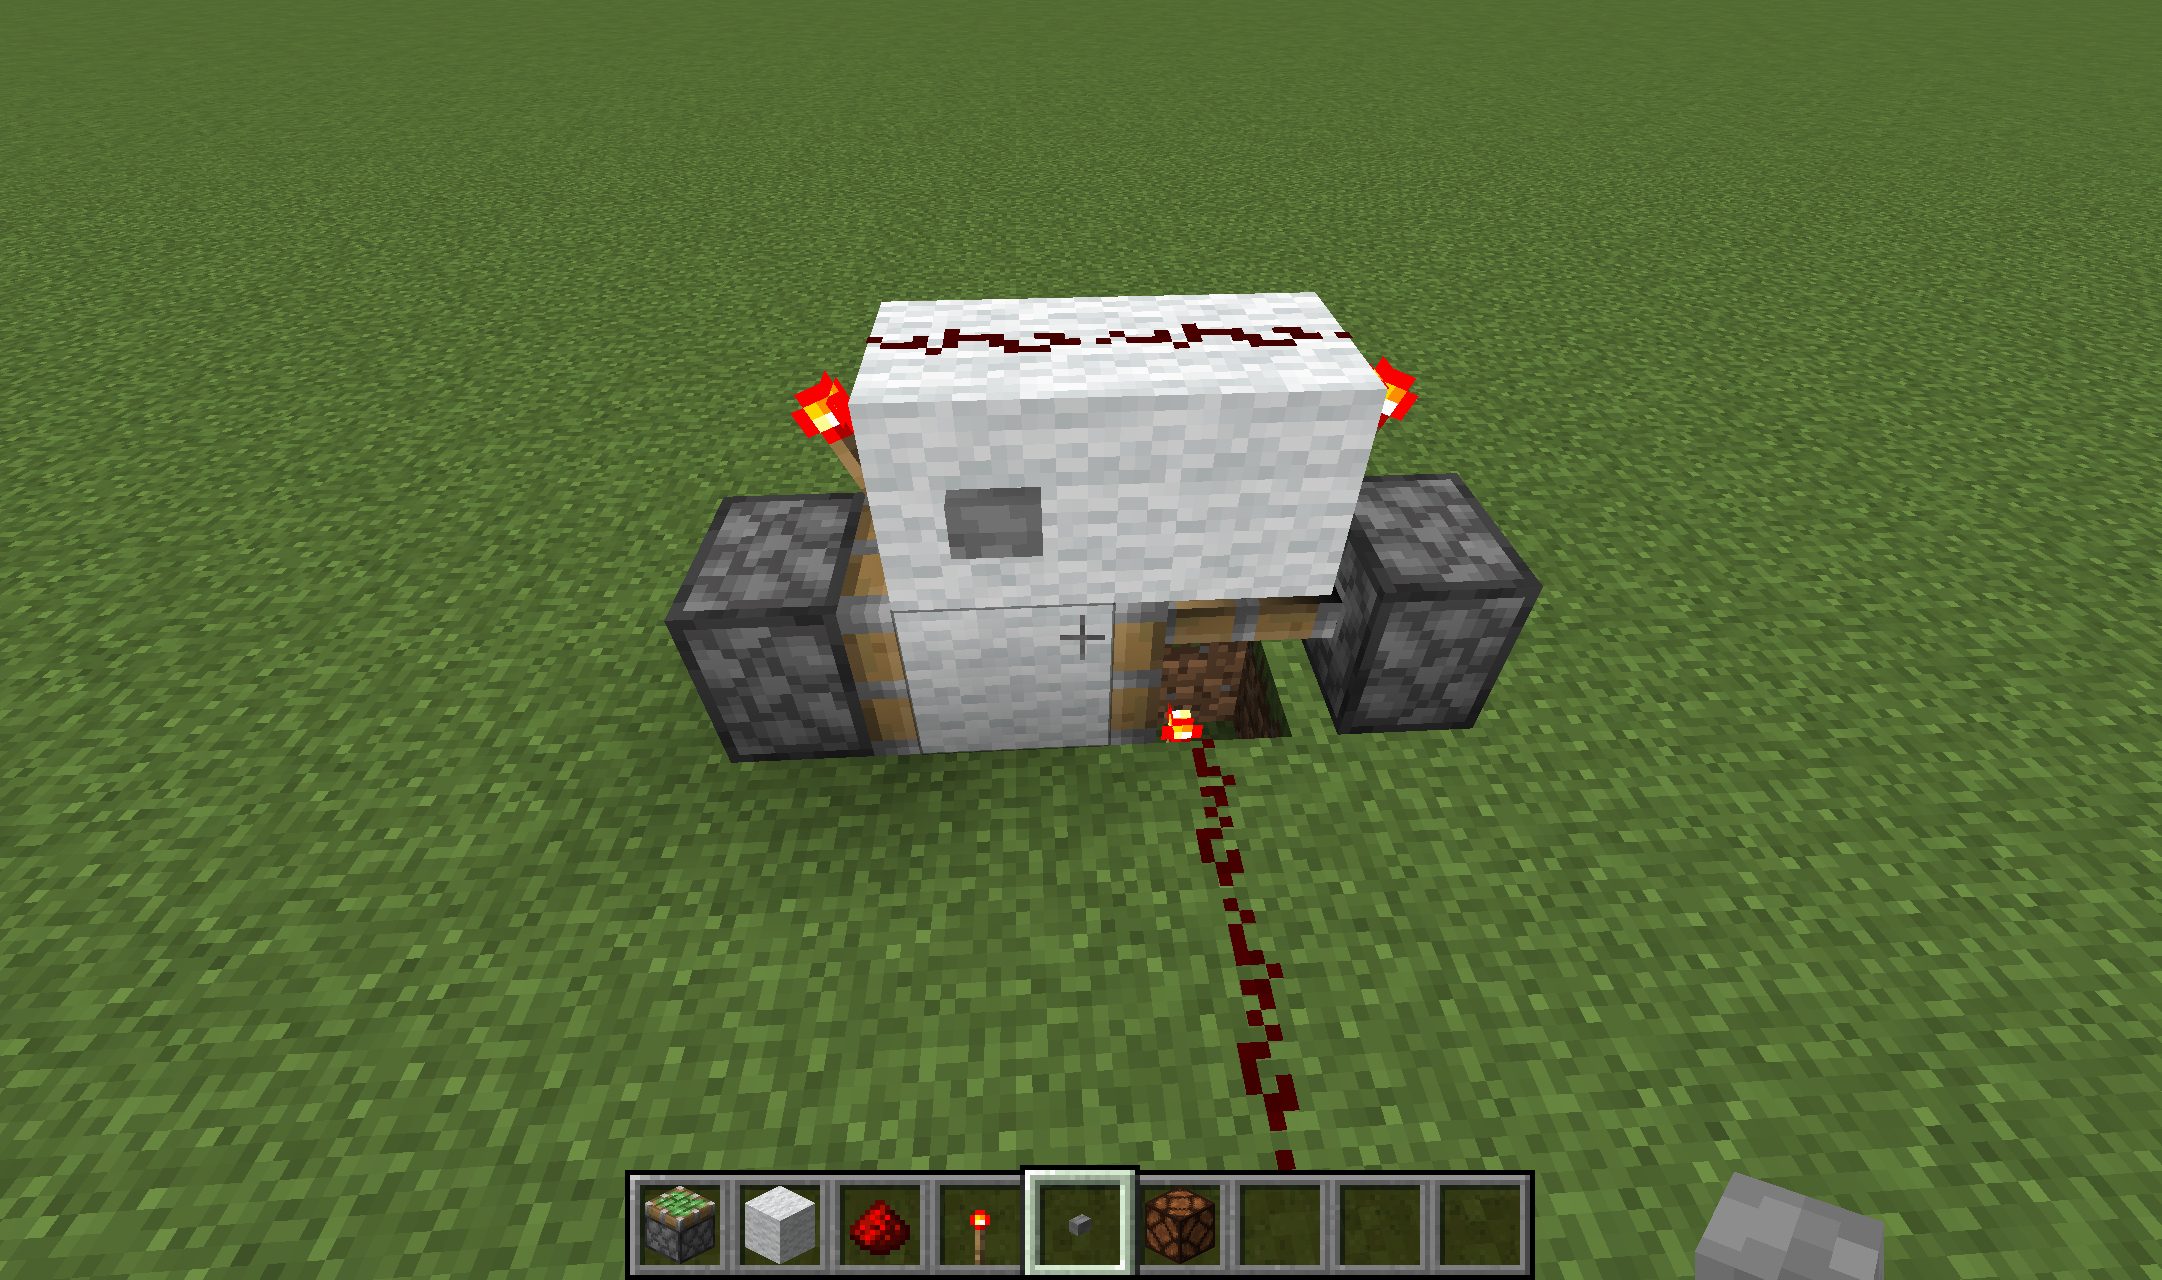
 Aerial view showing two buttons feeding input into the back of the second dropper.
Having two inputs comes in handy when you?re wanting the option of opening and closing a door (or maybe even a hidden door) from both sides.
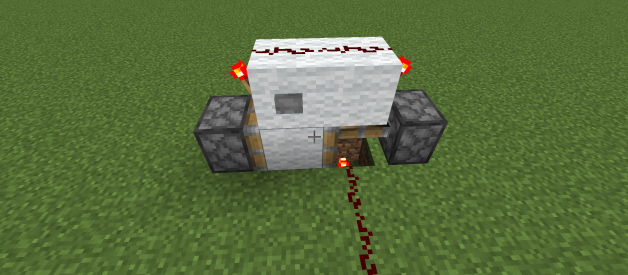
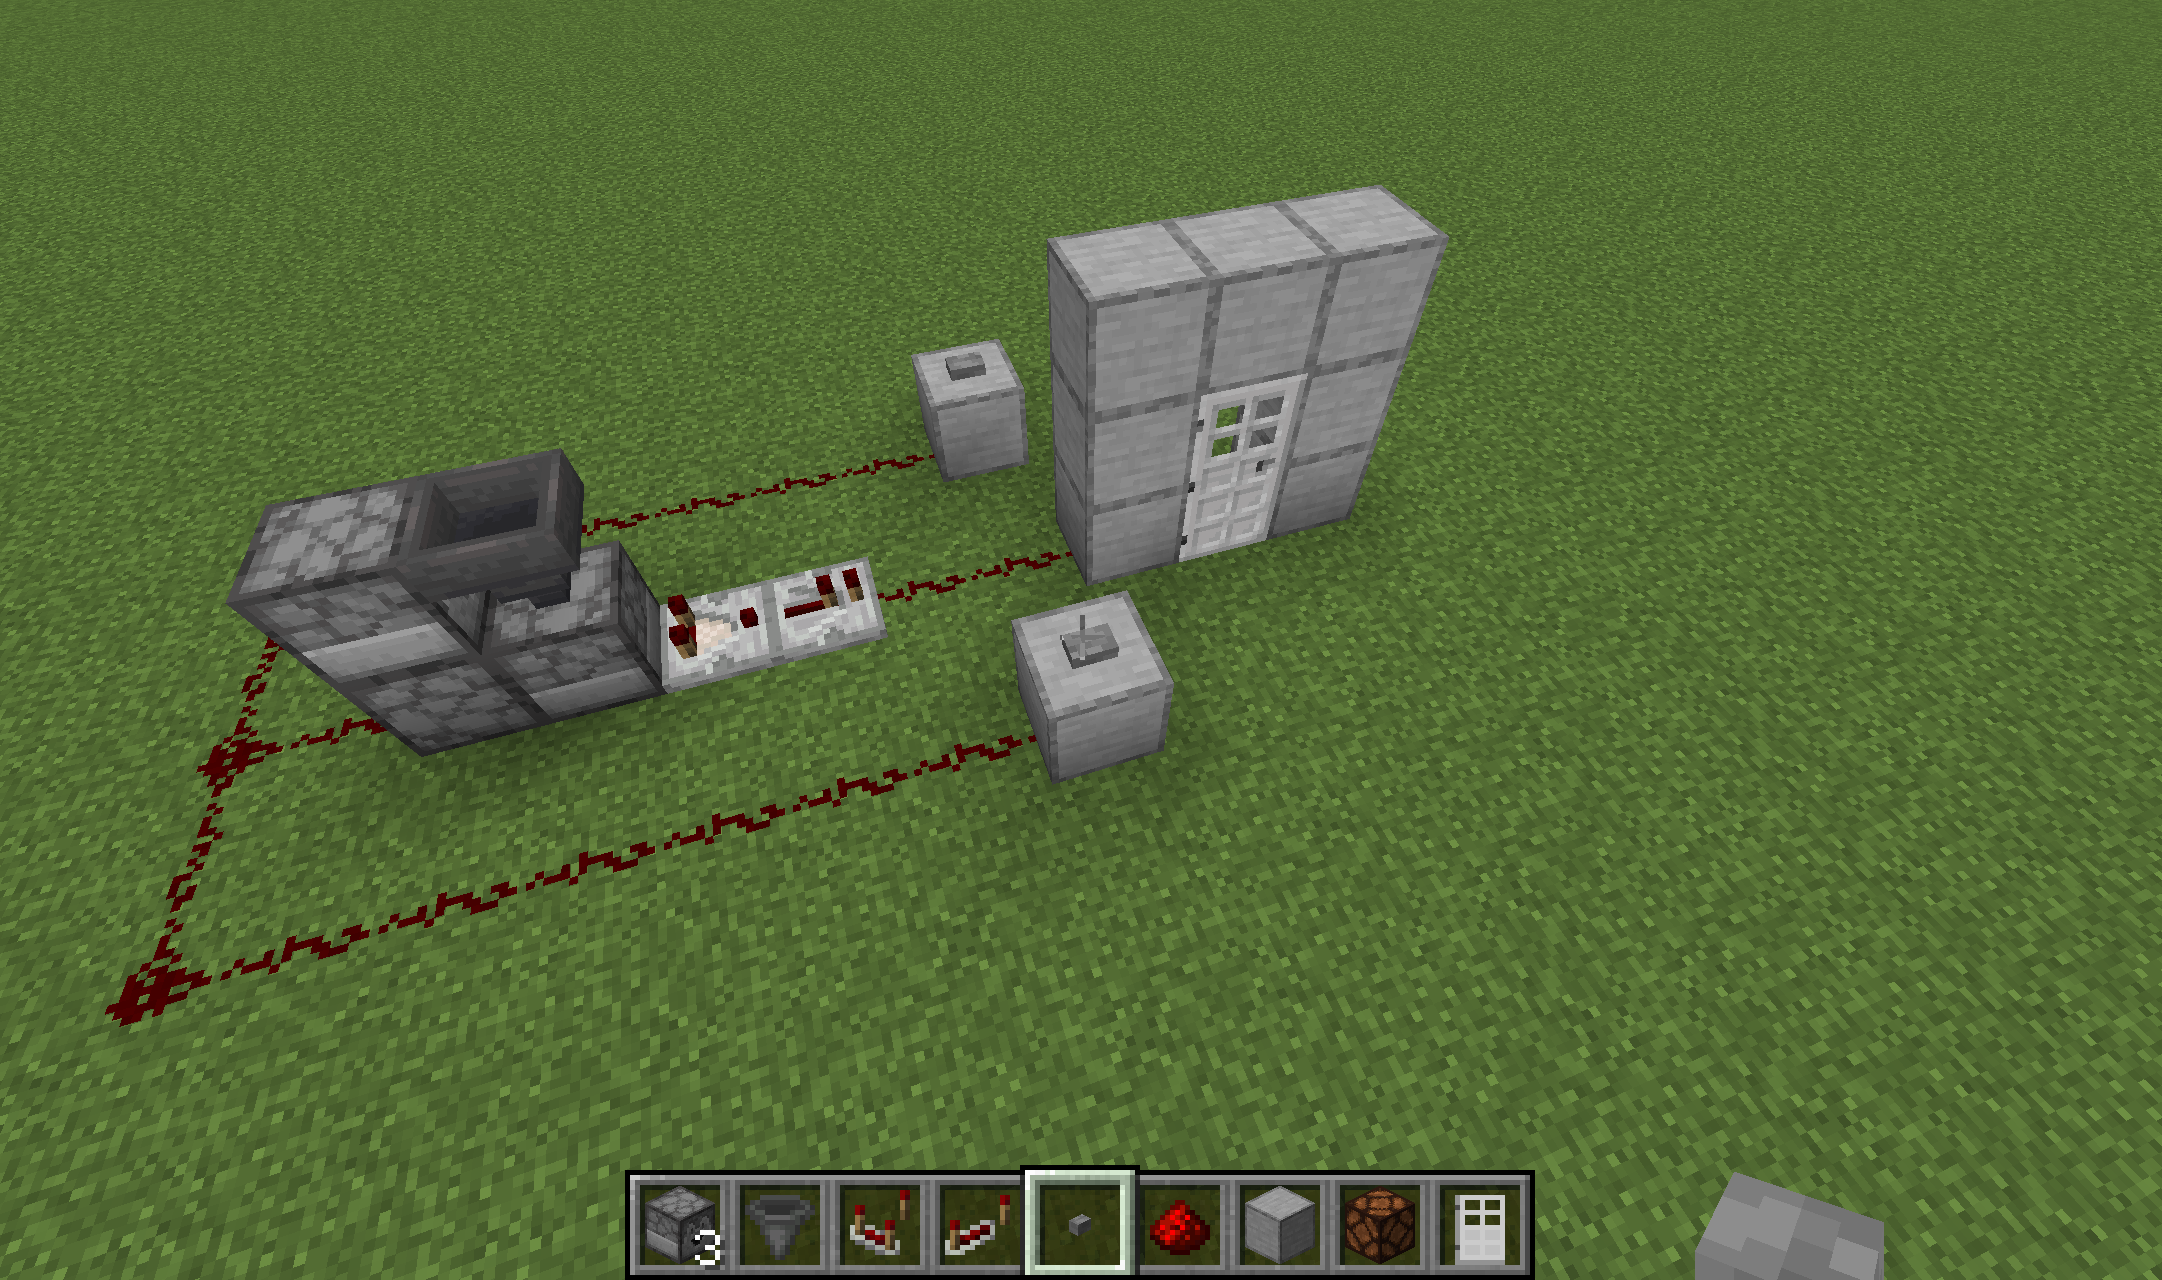 Screenshot example of this simple T flip-flop switch with two buttons on either side of an iron door.
Hat Tip
Credit to Jesse Stay, Thomas Stay, Jacob Cordeiro for their Build Design B, where I learned about this design.
Feedback
If you have any questions, comments or ideas on how this switch can be improved, please feel free to share!

