Voicemeeter Banana
Voicemeeter Banana is a mixer program for your windows computer. Using Voicemeeter will allow for greater control of your audio and much more creativity for your stream, videos and general use.
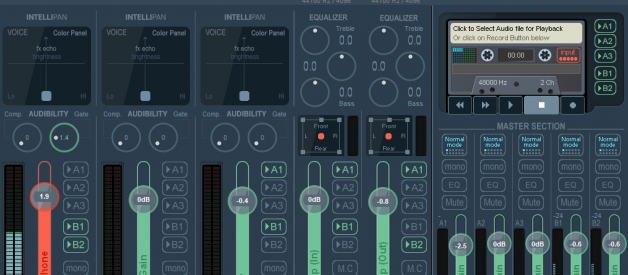
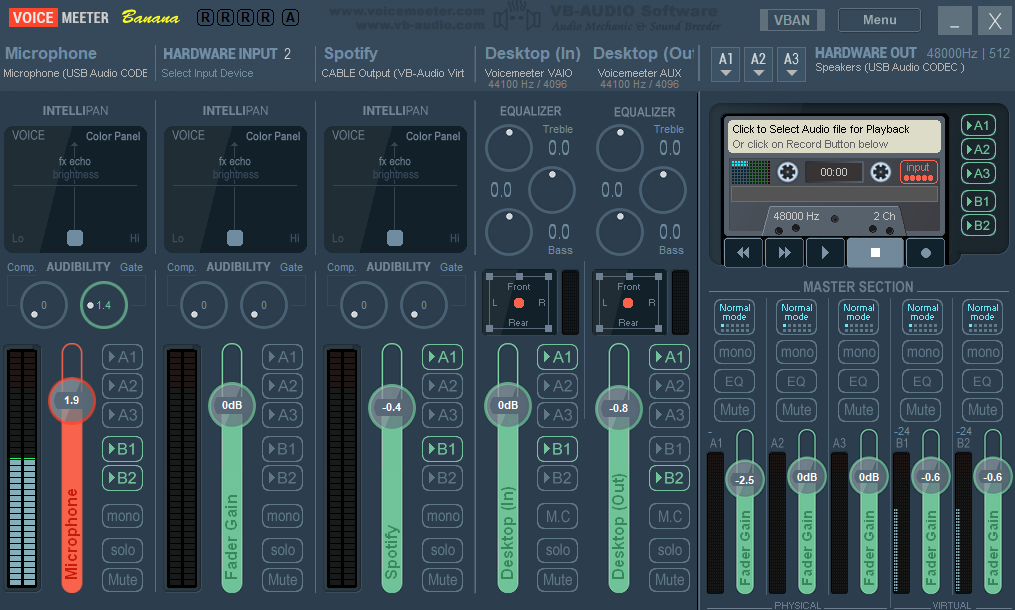
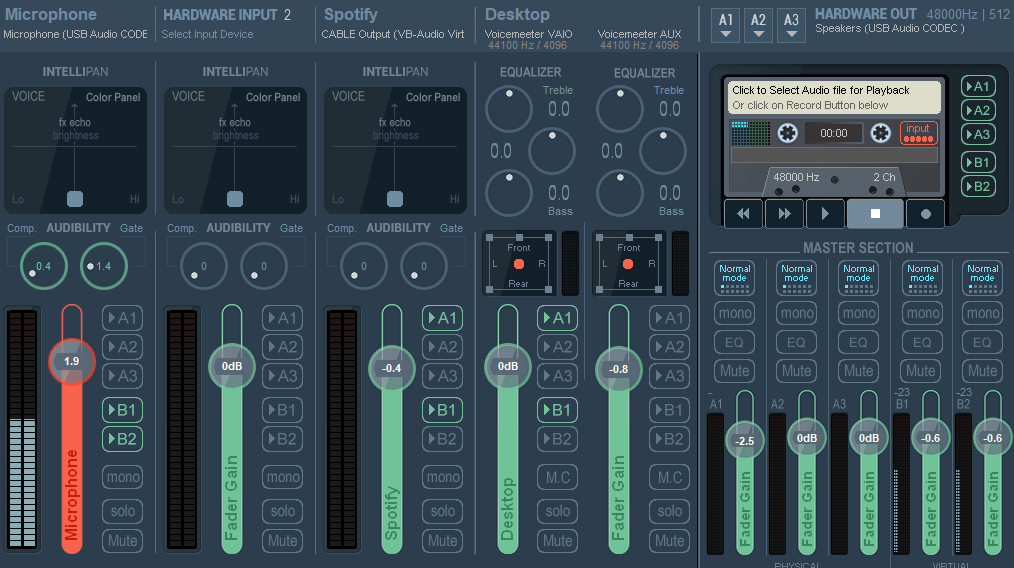
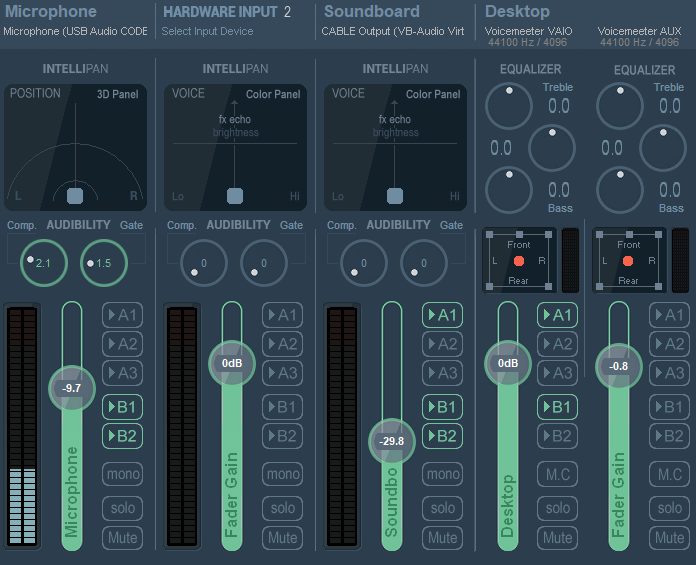
When you download Voicemeeter Banana the screenshot above shown is the layout of Voicemeeter Banana when installed.
Voicemeeter Banana works by having 5 ins (A1, A2, A3, Hardware ins and B1, B2 Virtual Ins) and 5 outs (A1, A2, A3, Hardware outs, B1, B2 Virtual outs). Confusing I know.
If you want to read the actual manual for the Voicemeeter Banana which I highly recommend since I won?t be going through everything. It will also give added understanding on the functions of everything and how it all runs. Go to:
https://www.vb-audio.com/Voicemeeter/VoicemeeterBanana_UserManual.pdf
Accompanying video to help you understand this tutorial:
Quick rundown of the sections you need to know.
Hardware Inputs
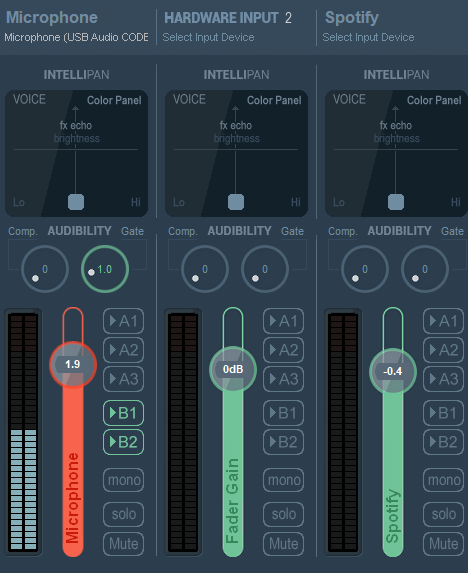
These are the hardware inputs, generally where at least your microphone will be selected or virtual cable inputs (A1, A2, A3 ins).
Virtual Inputs
These are the virtual inputs, so computer playback. (B1,B2 ins)
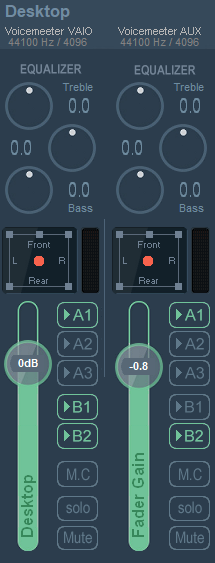
All Outputs
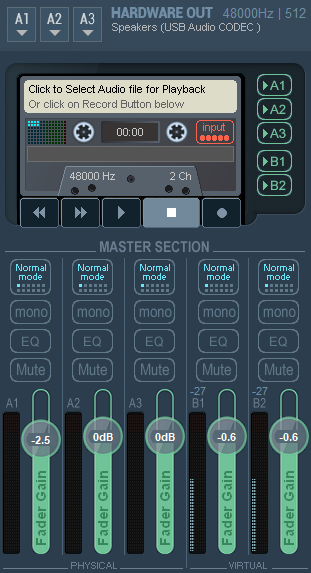
These are all the outputs, up top is the hardware out. This is the speakers, headphones etc (A1,A2,A3 outs, physical). The B1 and B2 outputs are Voicemeeter VAIO and VoiceMeeter AUX VAIO which are the virtual inputs.
The casette section is an inbuilt recorder which can be utilised to quickly hear how the levels and sounds.
Below is a level and eq section for all outs. This section you can change the volume to your headset and differ it to volume to the stream. I generally don?t mess with the modes and EQ?s because it?s complicated but if you are an audiophile, it?s quite extensive.
Start up
To start the setup it is necessary to download Voicemeeter Banana. For extra stuff that will explored later you will need VB virtual audio cable too. Both of these can be downloaded from https://www.vb-audio.com/
After installing it is necessary to restart your computer for the audio drivers.
When you restart, you will not have any audio straight away until Voicemeeter is launched and setup, I have mine on startup. Otherwise you need to launch it for every time you boot up your computer.
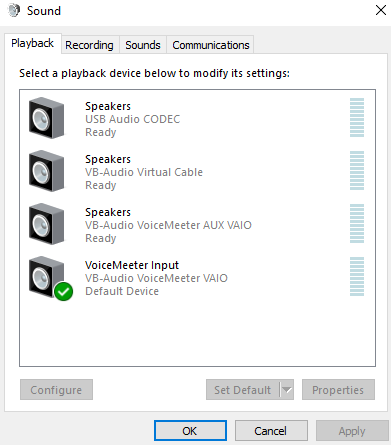
Next is to change your playback default devices in windows. Change the playback default to Voicemeeter Input ( VB-Audio Voicemeeter VAIO). This is also known as B1 input in Voicemeeter Banana.
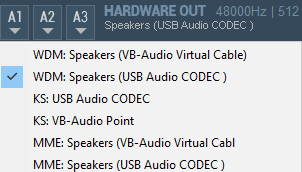
In Voicemeeter Banana where it says hardware out (top right area), press the A1 and select your headset/speakers. Wherever you want the desktop sounds to go, so you can listen to it. As you can see there is WDM, MME and KS. Generally speaking choose WDM because this has a lower latency than MME. KS is the best of all but isn?t used a lot.
From this step you need to press/select the ? ? A1? button in the Voicemeeter VAIO section. This routes the audio from the B1 input to the A1 output ( B1 (computer playback you selected before) -> A1 (hardware output speakers/headset you chose).

After this step, test out any audio coming from you computer maybe a youtube video, spotify or video game.
If all is well, next is to set up your microphone input
Microphone
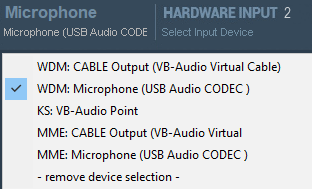
Next up is to set up your microphone. In the hardware input section press one of the titles where it says hardware input. I chose hardware input 1, since most people do that. Choose your microphone.
So when that is done, route it to your headset by selecting the ??A1? button to test. Though you should see the level meter go up and down when you talk.
Once that is sorted next is to set up your obs, xsplit or streamlabs obs, which I am currently using, to hear the microphone and desktop sounds.
Streaming Software Setup
To start off you need to select an virtual output channel that will act as the input into your streaming software. I chose B1 (Voicemeeter VAIO output). To get your microphone and desktop audio to B1 channel, select the ??B1? button in both sections.
Next is to setup this input into your streaming software, as stated before I am using streamlabs obs so the screenshots will be of that. This will be a similar approach that you would select a microphone into OBS.
Select an input in your audio mixer area, click the cog and go into properties. You only need one input since Voicemeeter will handle everything else now. (mute other channels if necessary)
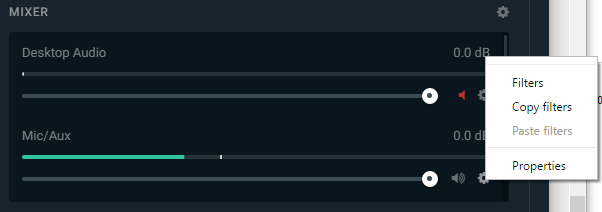
Then in the properties section in devices dropdown, select Voicemeeter VAIO as the option.
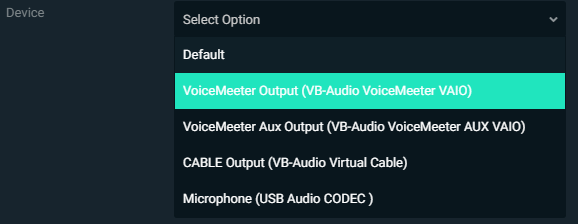
After this section your streaming software should pick up your mic and desktop sounds running through Voicemeeter. From this point you can stream and it should operate basically as before.
From now on you can fine tune things and change up for the possibility of soundboards in discord, listening to music that stream can?t hear, gates/compression to limit background noise and a variety of combinations that when you get used to how it all works you can decide. I?ll be running through some of the things mentioned above starting with your microphone tuning.
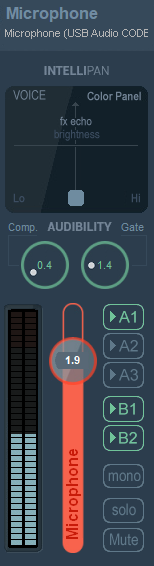
Microphone Tuning (Gates, effects and section in depth)
There is a few sections of the microphone/hardware input section that hasn?t been explained. Important section is the compression and gate section.

Up top is the where you select the hardware input from the sections before. Don?t need to go into much detail about that.
Below that the ?intellipan? section is a colour panel where you can quickly change the sound of the audio. I recommend reading the Audio Controls section in the Voicemeeter manual to understand this stuff better since they explain it well.
By right clicking the dark box of the intellpan section it will cycle through 3 different panels. You can move the blue rounded square around and if you want it back to default place, just double click it.
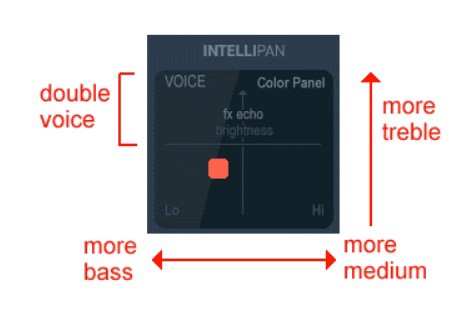
1st Panel (Default)
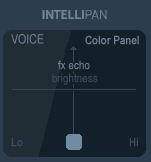
This section enables you to quickly change bass, treble, medium and even add a reverb.
See this diagram from the manual to understand but also just play around by listening to yourself works well too!
2nd Panel: Modulation
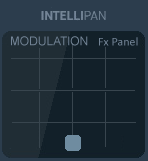
Not much to say here just play around with and your voice will be all funky.
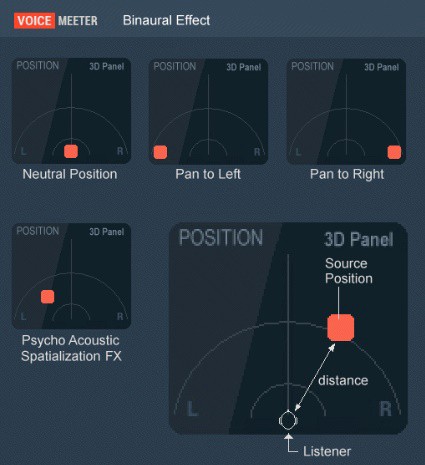
3rd Panel: Distance and Positioning (stereo L/R)
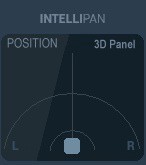
This moves where the sound is coming from and how far away it sounds.
See this diagram from the manual for some example placements.
The next section is where you need to read if you have background noise that you want to eliminate or limit what gets picked up by the microphone.
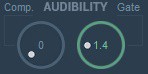
There is a compression knob to the left and a gate to the right. Compression enables your highs and lows to be closer together. The gate on the right enables to cut out sounds that are low, like background noise. Play around these settings to cut out background noise and use the compression make your voice more level when you are talking quiet and loud.
Compression setting has something called ?auto-make up? which means when you use compression it will automatically boost the signal. This means that it might be necessary to lower the dB level meter.

The last section is the sound indicator, level db meter and routing section. It also has buttons mono, solo and mute. Mono makes stereo (L/R) sound into equal both sides. Solo button mutes all other sound meaning that only sound is from that channel. The mute is opposite of Solo, it mutes the channel.
Soundboard using Virtual Cable
Voicemeeter allows to easily incorporate a soundboard into anything you want. Whether it be just for discord gaming shenanigans or for streaming content. Also being able to do this will show you some more of the utility of the Voicemeeter software.
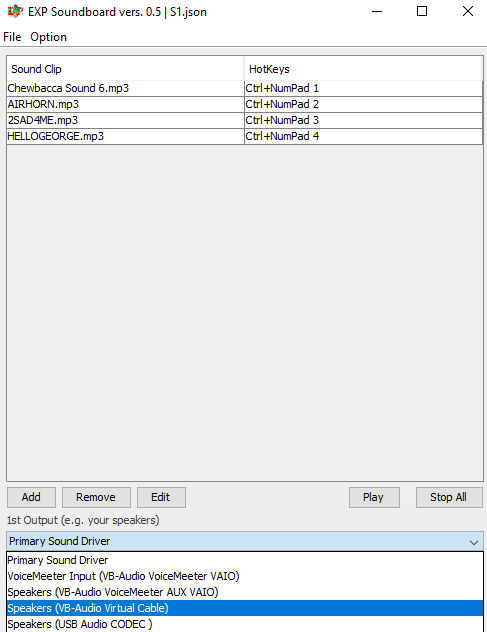
First install Virtual Cable and soundboard software of your choice, I recommend EXP soundboard. EXP is super easy to use and simple.
Once both have been installed you then choose where you want the soundboard output sounds to go, you want to choose Virtual Cable if you want to utilise it through Discord/games.
Next step is to setup Voicemeeter to have Virtual Cable as a hardware input. Simply select input device and choose Virtual Cable in Voicemeeter.
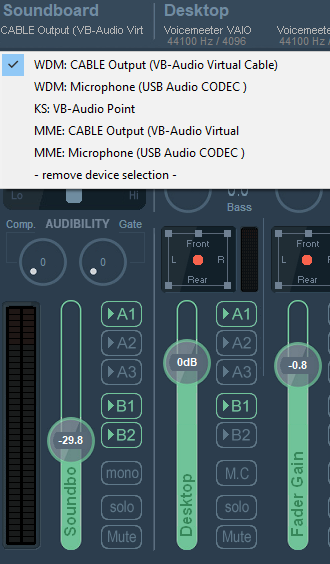
After this stage make sure you route it to your headset and streaming output (if you have followed the guide ??A1, headset/speakers. ?B1, stream audio output).
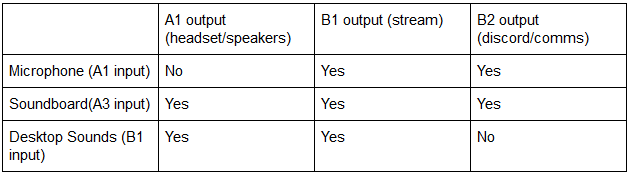
You will also see I have B2 route checked mark. This is the output I have chosen for Discord microphone. Make sure you setup your microphone routed to B2 too, so that when you do the next step the mic and soundboard will go through.
As you can see in the above image, microphone and soundboard are routed to B2.
Before we make it work in discord, let?s make a table of where things are going, in case all these have you a bit confused.
The best way to set up the soundboard is so that the default recording device is B2 output (Voicemeeter AUX VAIO) in windows.
Make the windows recording device default to B2 in the playback settings.
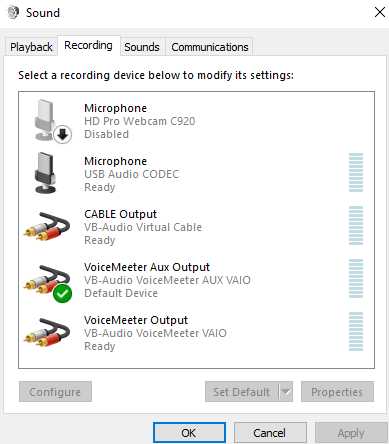
This makes it the default device for all applications that uses an input/microphone setting. This way you can use it for everything etc. in games too. It also means that the voice gate/compression stated before will be in effect.
Conclusion
Hopefully, at this point, you have a bit of an understanding on how to use Voicemeeter. If not have no fear there are many Youtube videos and other tutorials. There is also the manual which is helpful as well.
You can also contact me personally on twitter, discord or any other means.
