Hi everyone. In this article I will describe the Drag&Drop feature from jQuery UI library that I have had to use several times and can not access multiple sources.
First of all, you can access the jQuery UI library’s own site here. First you need to download the library and add it to your own progeny. You can use NPM.
Let?s start with the Drag feature. To make an html element draggable, you first need to define draggable on the JavaScript side.
<!doctype html><html lang=”en”><head><script src=”https://code.jquery.com/jquery-1.12.4.js”></script> <script src=”https://code.jquery.com/ui/1.12.1/jquery-ui.js”></script><style> #draggable { width: 150px; height: 150px; padding: 0.5em; </style><script> $( function() { $( “#draggable” ).draggable();} );</script></head><body> <div id=”draggable” class=”ui-widget-content”> <p>Drag me around</p> </div></body></html>
As you can see here, we gave draggable property to html object whose id is draggable. At this point, the html object has become a drag-able object within the page.
Screenshoot :

Draggable features
1- Auto Scroll feature At the same time, while dragging the HTML object, we need to give true to the scroll variable in order to win scrollability in the page or in another HTML object it is in.
Using :
<script> $( function() { $( “#draggable” ).draggable({ scroll: true });</script>
At the same time, we can make adjustments such as scroll speed and precision. Examples of these are:
<script> $(function(){ $(“#draggable2”.draggable({scroll:true, scrollSensitivity:10}); $(“#draggable3”).draggable({ scroll: true,scrollSpeed:100 }); });</script>
2- Axis and Containment Features
The Axis property is used to move the draggable HTML object in only one direction (x, y).
Containment allows the draggable HTML object to be draggable only within the container object.
For example:
<script> $(function(){ $(“#draggable”).draggable({ axis: “y”}); $(“#draggable2”).draggable({ axis: “x”}); $(“#draggable3″).draggable({containment:”#wrapper”}); $(“#draggable4”).draggable({ containment: “parent” }); } );});</script>
3- Cursor feature
We can define cursor properties for the draggable object. This is to determine the shape and position on the screen when you start dragging and holding the object on the object.
The Cursor property determines how the mouse object will appear on the screen.
The cursor-at property specifies the position of the mouse object when we start dragging.
For example:
<script> $( function() { $(“#draggable”).draggable({ cursor: “move” }); $(“#draggable2”).draggable({ cursorAt: { top: -5, left: -5 } }); $(“#draggable3”).draggable({ cursorAt: { bottom: 0 } }); } );</script>
4- Draggable functions
There are functions that let you control the draggable html object.
The functions are very important for Drag & Drop.
Start: When you start dragging, it is a function that works for a time. When you hold the object, it works and then it will not work until you drag it again.
Drag: The drag function starts running as soon as you start to drag and drop the object on the screen. As you would expect, the drag function works too many times during dragging.
Stop: The Stop function is a function that allows you to leave the draggable object and run it for a while. It will not work until you drag and drop it again.
For example :
<script> $( function() {$( “#draggable” ).draggable({start: function( event, ui ) { // nesne srklenmeye ba?lad??? anda yap?lacak i?lemler. console.log(event); console.log(ui); }, drag: function( event, ui ) { //Srklenme an?nda yap?lacak i?lemler. console.log(event); console.log(ui); }, stop: function( event, ui ) { //Srkleme bitti?i anda yap?lacak i?lemler. console.log(event); console.log(ui); }});</script>
Here is another issue I would like to mention; what are the event and ui parameters in each function? The two parameters I use most often when using Drag & Drop are the event and ui parameters. With these parameters you can reach the id, class and so on of the object you dragged. You can also change properties like. You can examine it in more detail with the commands ?console.log? I wrote in the interval.
5- Revert feature
As can be understood from the Revert name, it is a feature that allows you to return to the starting position after dragging an object.
For example :
<script> $( function() {$( “#draggable” ).draggable({revert: true });</script>
Let?s talk about Drop feature :
The Drop feature allows you to drop a draggable HTML object (which has the DragGable property) on the screen onto another HTML object. So if we want to do both dragging and dropping, we have to use both draggable and droppable properties together.
For example :
<!doctype html><html lang=”en”><head><link rel=”stylesheet” href=”//code.jquery.com/ui/1.12.1/themes/base/jquery-ui.css”><style>#draggable { width: 100px; height: 100px; padding: 0.5em; float: left; margin: 10px 10px 10px 0; }#droppable { width: 150px; height: 150px; padding: 0.5em; float: left; margin: 10px; }</style><script src=”https://code.jquery.com/jquery-1.12.4.js”></script><script src=”https://code.jquery.com/ui/1.12.1/jquery-ui.js”></script><script>$( function() { $( “#draggable” ).draggable(); $( “#droppable” ).droppable({ drop: function( event, ui ) { $( this ) .addClass(“ui-state-highlight”).find(“p”).html(“Dropped!”); } });});</script></head><body> <div id=”draggable” class=”ui-widget-content”> <p>Drag me to my target</p> </div> <div id=”droppable” class=”ui-widget-header”> <p>Drop here</p> </div></body></html>
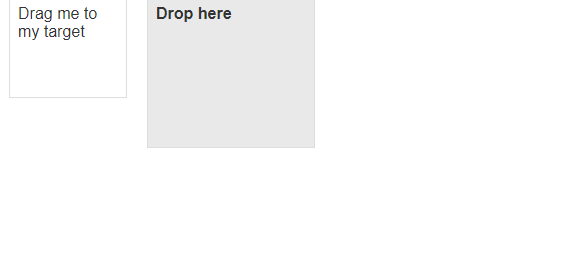
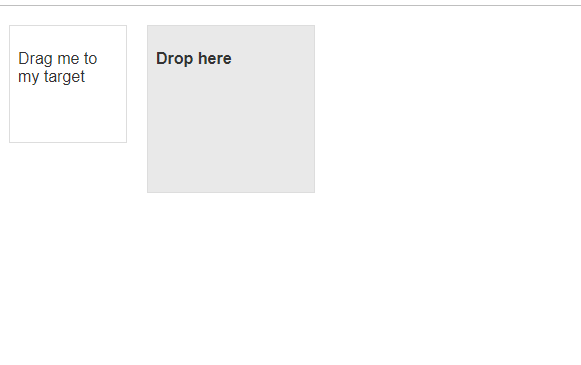
If you run this code, you will get a screen like this.
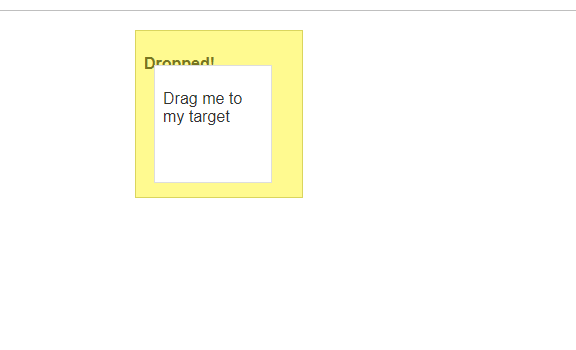
If you drag the object on the left and drop it in the object on the right, the result will be as follows.
We used the drop function in the code. Draggable has 3 functions, while Droppable only has 1 function.
Drop: The draggable HTML object is a one-time-running function when dropped into an object that is droppable.
Droppable features
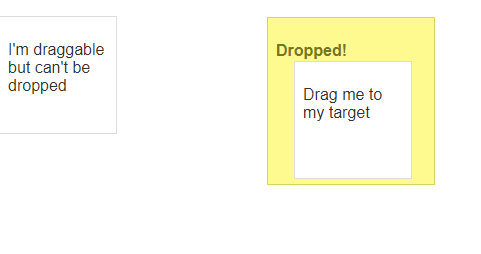
Here I will describe the most commonly used property, the accept property. It is used to determine which of the draggable objects on the screen or which css class will be accepted by the Droppable object.
For example :
<!doctype html><html lang=”en”><head><link rel=”stylesheet” href=”//code.jquery.com/ui/1.12.1/themes/base/jquery-ui.css”><style>#droppable { width: 150px; height: 150px; padding: 0.5em; float: left; margin: 10px; }#draggable, #draggable-nonvalid { width: 100px; height: 100px; padding: 0.5em; float: left; margin: 10px 10px 10px 0; }</style><script src=”https://code.jquery.com/jquery-1.12.4.js”></script><script src=”https://code.jquery.com/ui/1.12.1/jquery-ui.js”></script><script>$( function() { $( “#draggable, #draggable-nonvalid” ).draggable(); $( “#droppable” ).droppable({ accept: “#draggable”, classes: { “ui-droppable-active”: “ui-state-active”, “ui-droppable-hover”: “ui-state-hover” },drop: function( event, ui ) { $( this ) .addClass( “ui-state-highlight” ) .find( “p” ) .html( “Dropped!” ); } });});</script></head> <body> <div id=”draggable-nonvalid” class=”ui-widget-content”> <p>I’m draggable but can’t be dropped</p> </div> <div id=”draggable” class=”ui-widget-content”> <p>Drag me to my target</p> </div> <div id=”droppable” class=”ui-widget-header”> <p>accept: ‘#draggable'</p> </div> </body></html>
Here?s a screenshot of the code:
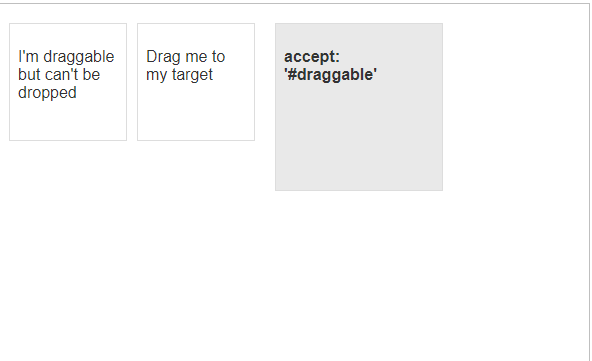
However, if we drop the draggable object on the droppable object on the right, the css classes and the drop function will work.
In this article I have discussed Drag & Drop. I hope it will be useful for those who are working or thinking about working.
Thank you for reading. Sharing and applause will increase motivation :).

