
TL;DR
— because sometimes you’re not just going from Windows to Linux :-)you’re going from Linux to Linux, and that’s cool
if == input fileof == output fileusage example: $ sudo dd status=progress if=name-of.iso of=/dev/sdb
This assumes you already have an ISO file that you want to move to an external ?thumb drive? type of USB storage volume; but if not, head on over to: https://manjaro.org/ where you?ll find the loveliest ISO grabbing experience of your life. Here you get to ?Choose an Edition.? Personally, I would steer you towards the i3 version: ?DOWNLOAD I3 EDITION.? But if you want to be inefficient and use a non-tiling window manager, try:?DOWNLOAD XFCE EDITION? or ?DOWNLOAD GNOME EDITION? or really whatever you like.
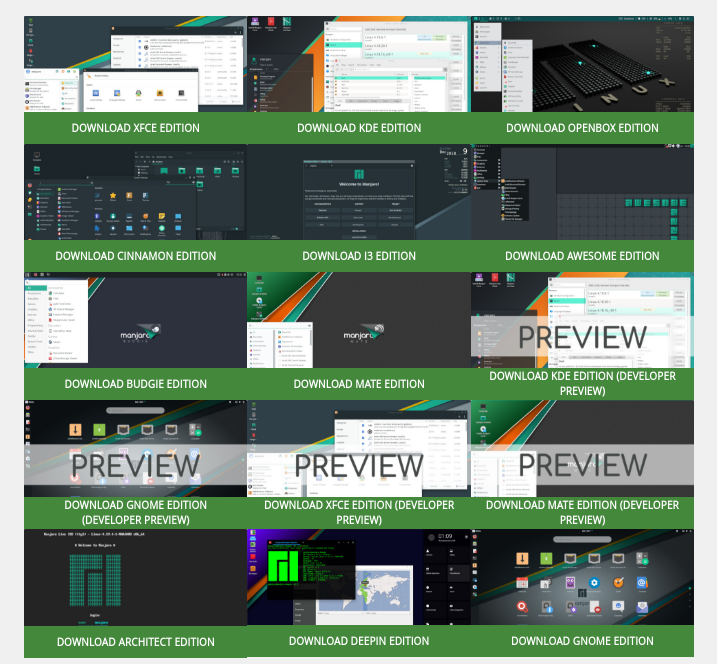 grabbed from manjaro.org
Download one:

After you retrieve your ISO, wherever that may come from, it?s time to use DD to write that ISO onto a ?usb thumb drive? of some sort.
If you?ve used Windows in the past to create Linux OS bootable USB drives, you?ve probably run into Rufus somewhere along the way. The tagline for Rufus is: ?Create bootable USB drives the easy way.? Much respect to the folks behind Rufus for making the process of creating bootable Linux on USB drives dead simple on Windows.
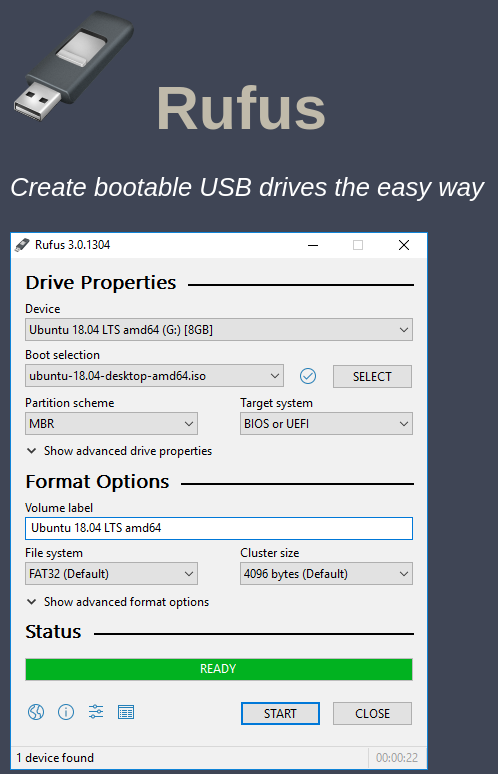 grabbed from rufus.ie homepage
But, let?s say you?ve graduated from Windows and now you?re a full blown Linux person. There are still some graphic utilities you can use to create bootable USB drives with Linux on them, but why not learn the ins and outs of doing it from the terminal. It?s actually less confusing of a process than you might think, and in my opinion, it?s just easier all around.
I?ll describe the process below and some of the thinking that might be attendant.
First connect the USB drive and unmount it, assuming you know its designation (if not keep reading a couple more paragraphs before executing any commands), with something like the following:
$ umount /dev/sdb*
This assumes that your USB drive is showing up as /dev/sdb. If you have multiple hard drives already connected to your machine, the drive that you?d like to target might be something like /dev/sdc or /dev/sdd or /dev/sde? you get the picture.We can have a look at the partitions and file systems on the system with this command:
$ sudo fdisk -l# — “df -h” and “lsblk” is also useful
After then confirming which is your target drive, and unmounting ($ umount /dev/sdb*) it, we need to format the unmounted drive. Let?s do this formatting with:
$ sudo mkfs.ext4 /dev/sdb– if you have trouble with this, you might try gparted or something
Depending on your situation this may take a couple of minutes of waiting without visual feedback from the terminal.
This assumes that your usb drive is /dev/sdb of course. If you?re fancy and want to use something besides ext4 format, you could use vfat or ntfs.. for example with: $ sudo mkfs.vfat /dev/sdb1 Now we?re all ready to copy the ISO file to the usb drive using the dd command.I?d recommend navigating to the directory where you downloaded the ISO.For this example, let?s say you put the ISO in your user?s /home/Downloads directory.$ cd ~/Downloadsthen you can ls (list / take a look at) your file with:$ ls *.isoNow we should see our ISO file, and we?re inside the same directory with it. We can verify our current working directory with:$ pwd? pwd stands for Print Working Directory.Since, we?re already in the right directory, we can use:
$ sudo dd if=name-of-iso.iso of=/dev/sdb status=”progress”
Where ?name-of-iso.iso? is of course replaced by the actual name of your ISO file.At the time of writing, I?m following along here, using the dd command to put bootable Manjaro Architect on a 16GB Sandisk Cruzer Glide 3.0 USB drive. My command looks like this$ sudo dd if=manjaro-architect-17.1.9-stable-x86_64.iso of=/dev/sdb status=?progress?
This may take several minutes to execute without any visual feedback from the terminal if you don?t use status=?progress?. You can use htop from another terminal window if you want to see the process running. However, if you don?t get an error, you can assumed the process is running. You should see something like these results returned:1054648+0 records in1054648+0 records out539979776 bytes (540 MB, 515 MiB) copied, 107.609 s, 5.0 MB/s? which is what we?d expect to see after copying the Manjaro Architect ISO onto the usb drive. If we?re using a larger ISO, like Fedora AtomicWorkstation, the resultant size would be 2.3 GB. Other operating system ISO files will translate into even larger file sizes.
After navigating this article, the usb drive is bootable, by the machine you used to create it or another machine. This can be used to make any operating system ISO file bootable on a USB drive.Ahem.. we won?t mention it, but this even works for creating bootable windows, assuming you set up the file system as ntfs, substituting ?$ sudo mkfs.ext4 /dev/sdb? with ?$ sudo mkfs.ntfs /dev/sdb?
Best,Tim Beach
The section below includes some feedback from readers. Thanks to everyone for their comments.
As Chris Rodliffe points out (and this refers to not using status=?progress?):
“? One point you could mention is that the writing process with dd can take significant time (e.g. 15?20 minutes per gigabyte using USB 2.0) and dd does not issue progress reports. Beginners are apt to become anxious when the machine has been sitting there for ten minutes without apparently doing anything. I find it best to leave the machine to it and go play on the Internet with a spare machine or read a book.”
~ ps, As intrnl points out:
the status=progress option is handy. intrnl also points out that the oflag=direct option is useful, but in my tests it caused the process to take much more time. Maybe I?m doing it wrong.
### for example: [timbeach@timbeach-t420s Downloads]$ sudo dd status=progress if=manjaro-i3-18.0-stable-x86_64.iso of=/dev/sdb
~ As Christian Molina points out: Also you can see the process activity using strace -p <process number> command: $ sudo strace -p <process-id-of-dd>
strace is not installed by default on Manjaro-i3. To get it on a normal Arch based system:
$ sudo pacman -S strace
After installing, you can get the process id of the dd command by opening another terminal and using htop. After tying ?htop? into the terminal, you can use vim style search by typing ?/? then ?dd? or whatever you are searching for. This will allow you to find the process id, so you can use strace to see what?s going on with dd as it?s running. strace is pretty great.
