
Update! This and many more tutorials on fantasy and D&D map making is availible also on my website, together with loads of free-to-download maps, check it out ? click here!
Hi everyone, as a follow-up on my last tutorial, on how to draw basic, top-down dungeon maps, I thought I?d write a guide on how to draw isometric maps.
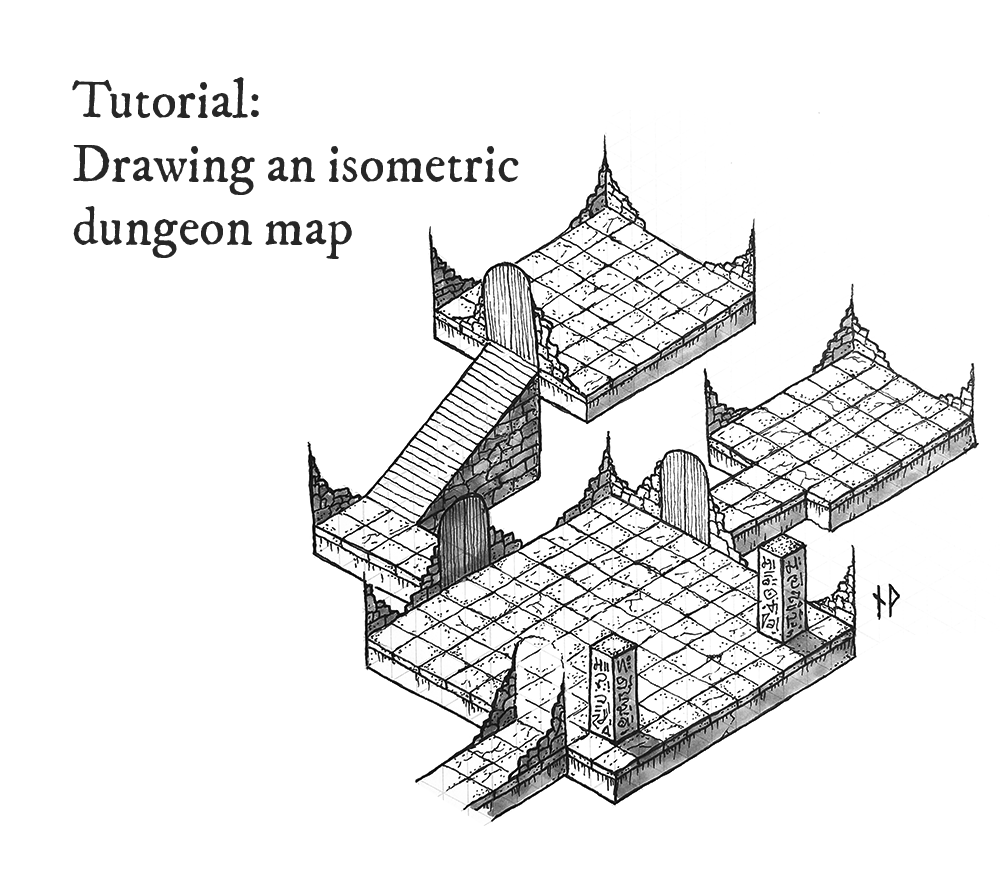 This image will be the end result of this tutorial.
I really like isometric maps; not only do they look good, but are also a great way of describing the difference in height between objects and floor levels, making such maps really useful for the dungeon master. Also, it doesn?t hurt that some of my favourite computer games are all isometric RPG?s (like Diablo, Baldur?s Gate, Pillars of Eternity and Tyranny).
Anyway, let?s get started!
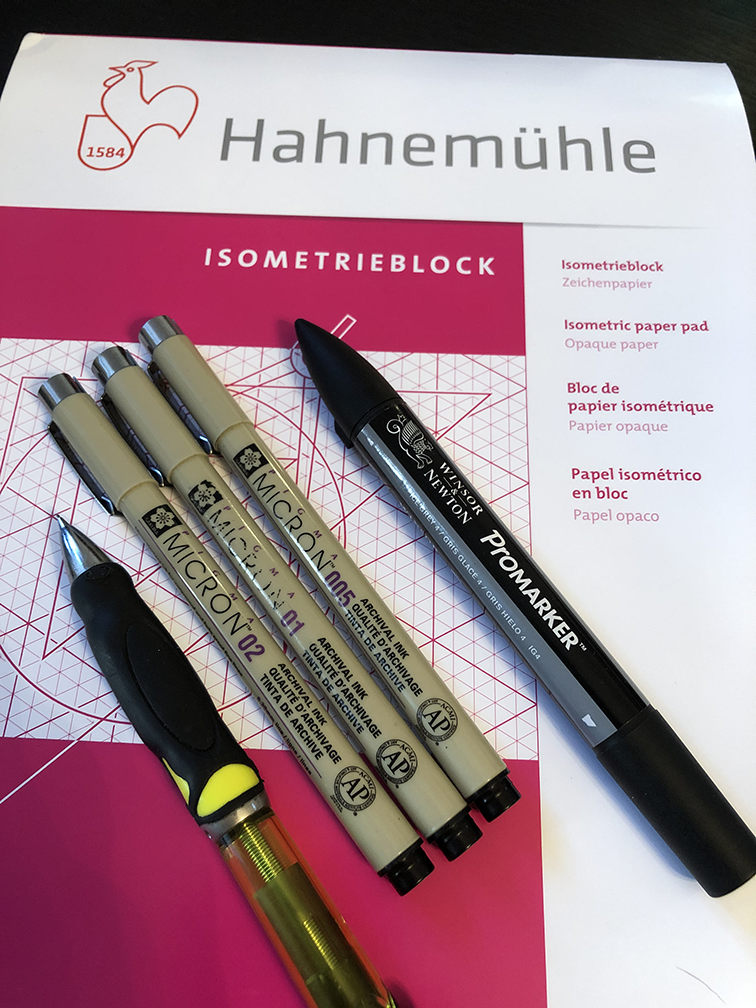
The gear
For this tutorial, I will be using a set of Micron markers (0.05, 0.1 and 0.2), a mechanical pen and an Ice Grey 4 Promarker. Also, I strongly recommend you to get isometric paper for this kind of map, as it makes the process much easier. I have a pad made by Hahnemhle.
If you live in Sweden, like me, all of this stuff can easily be ordered from https://www.penstore.se/ I really recommend this store (they do not sponsor me in any way).
Step 1: outlines
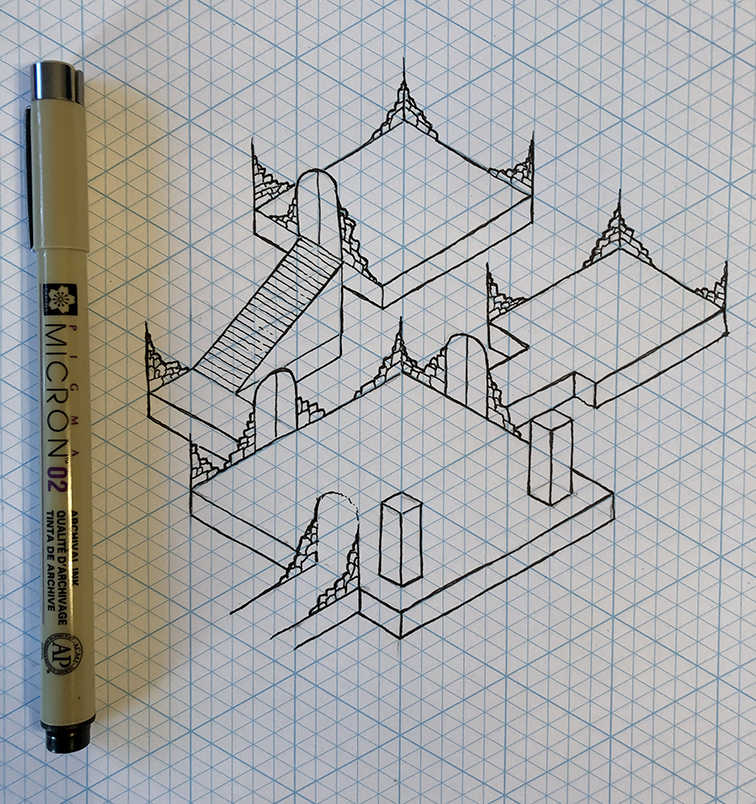
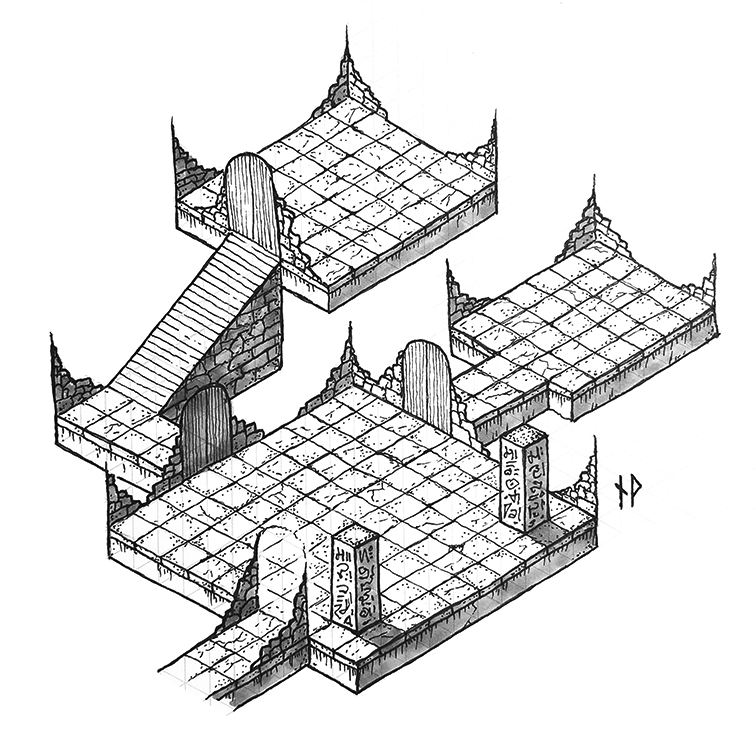
I start by drawing the rough outlines of the map with a mechanical pencil. There?s no need for using a ruler, it doesn?t have to be perfect. This is a bit trickier than when you?re drawing a top-down map, as you need to consider the height differences. Objects need to be considered from three dimensions (for example the pillars and the stairs). Try to initially think about the objects as cubes, as you can see I have done with the stairs, that makes it a lot easier
This is the most complex part of the drawing if you?re not used to isometric perspective, so make sure you?re happy with what you got before moving on to the next step.
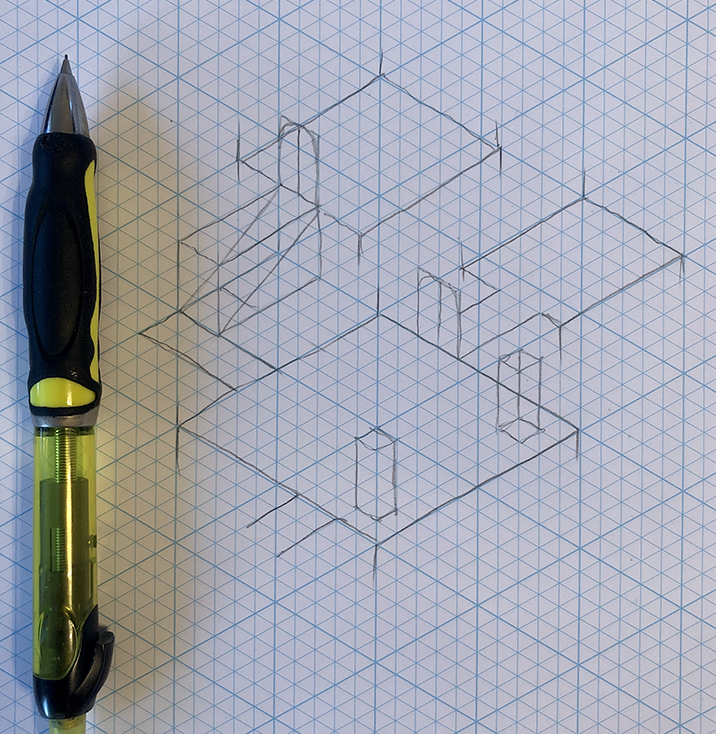 Step one: draw outlines
Step two: ink outlines
When you are happy with your pencil drawing, go ahead and put down the first ink. I use a 0.1 marker for this step (I will add some weight to them later on).
As you can see, I also added parts of stone walls to the corners, as it provides a sense of a confined environment, without obscuring the map too much ? we don?t want to cover up important stuff!
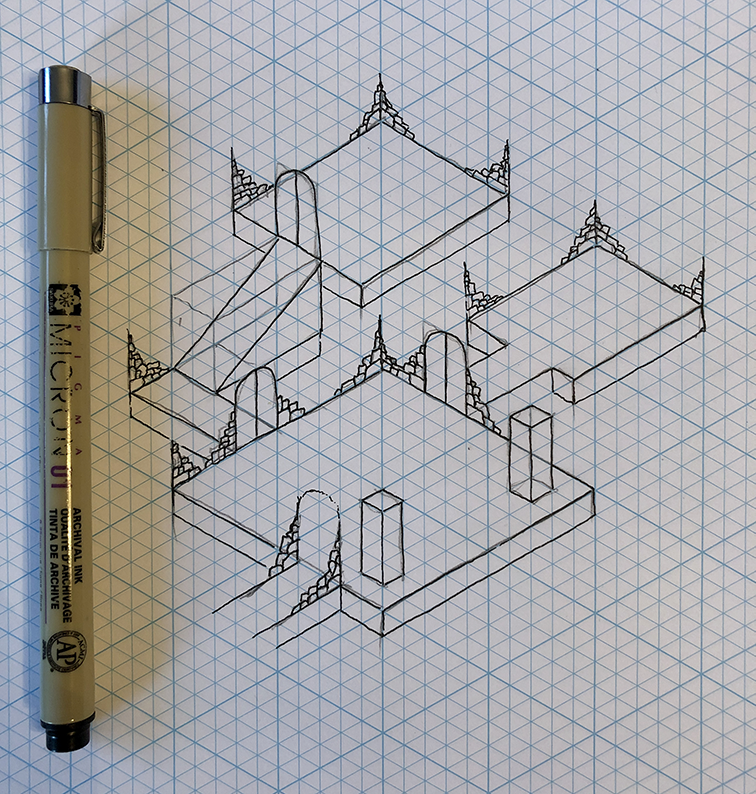 Step two: ink outlines
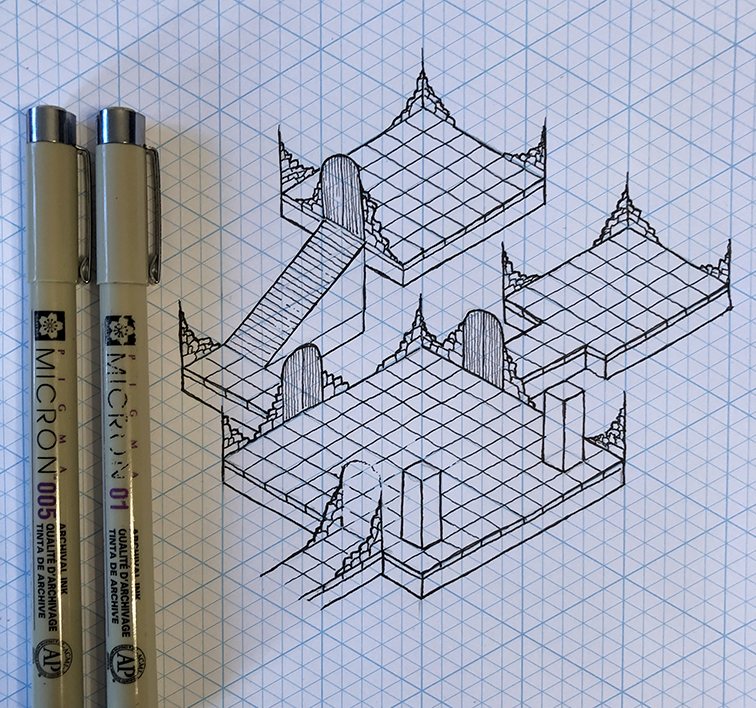
Step three: add weight
After erasing the pencil outlines, I go over the inked outlines once more with a thicker marker, in this case a 0.2. This is done for two reasons: first of all the 0.1 outlines takes a bit of a beating when using the eraser, and second I want to provide a bit of contrast to the texture we?ll be adding to the map in the next few steps.
You could go for an even heavier outline, but I settled for 0.2 in this one.
 Step three: adding weight to the outlines
Step four: draw flagstones
In the next step I add flagstones with a 0.1 marker. Flagstones are good as they provide a nice surface to add texture to the dungeon, but also helps the dungeon master should he need a grid to draw out the rooms on a battle mat.
Note that I added some extra definition to the flagstones, making it look like they are a ?layer? on top of the ground.
I also added some some wood texture to the doors with a 0.05 marker.
 Step four: draw flagstones
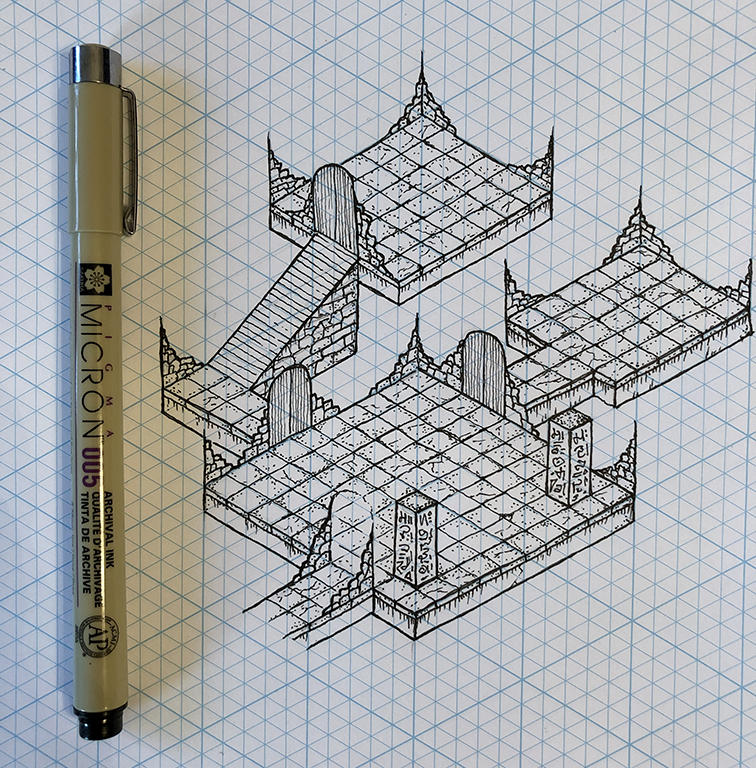
Step five: texture time!
Time to add texture to the dungeon. This is the most time-consuming step, so if you?re drawing a large map, make sure you have a glass of whisky (or whatever your poison is) and some good background music.
Use a 0.05 marker to add random dots, scratches and cracks to the flagstones, walls and ground. Also, I drew some arcane symbols to the pillars to add a bit of mystery. Perhaps these are puzzles for the adventurers to solve for the doors to open ? who knows?
 Step five: add texture
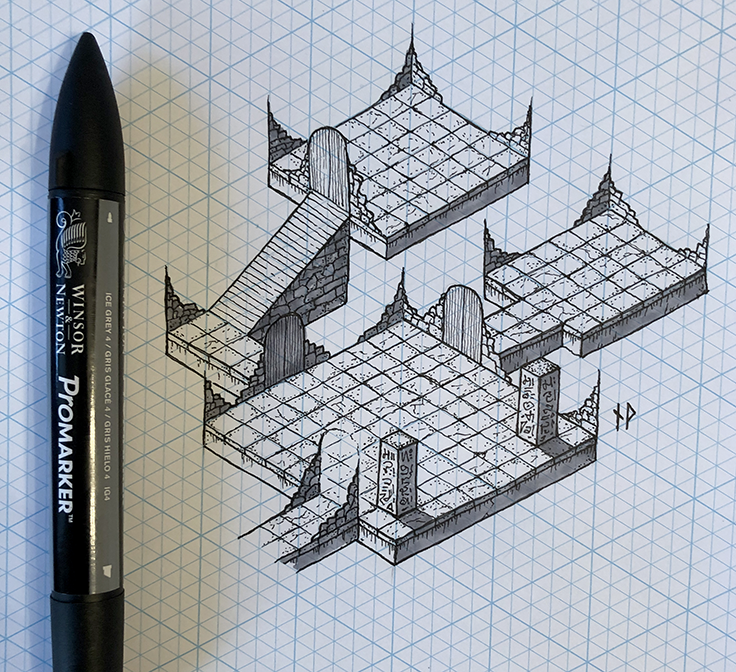
Step six: add shadows
Decide which surfaces should have shadows. In this case, I decided the surfaces facing south east should be darker, and drew the shadows with a grey Promarker.
Adding the shadows makes it easier to read and understand the map as it helps the eye understand how to interpret the perspective. It also adds a bit of contrast, making it look more interesting.
 Step six: add shadows
Step seven: clean up
I use Photoshop to clean up the map. My preferred way to get rid of the grid is by taking the steps in this tutorial. I?m not an expert on image software, so I rely on the knowledge of other people.
 The finished map!
There! The map is done and ready for play!
More resources:
I post a lot of my work on my website, at https://www.wistedt.net/. There you can find many maps and other RPG recources that are free to download for personal use.
If you would like to see more maps and monsters in your social feed, feel free to follow me on Instagram: https://www.instagram.com/paths.peculiar/
If you would like to read my first map making tutorial, for top down maps, you can find it here: https://medium.com/@niklaswistedt/tutorial-how-to-draw-a-basic-dungeon-map-c9f5c4408327
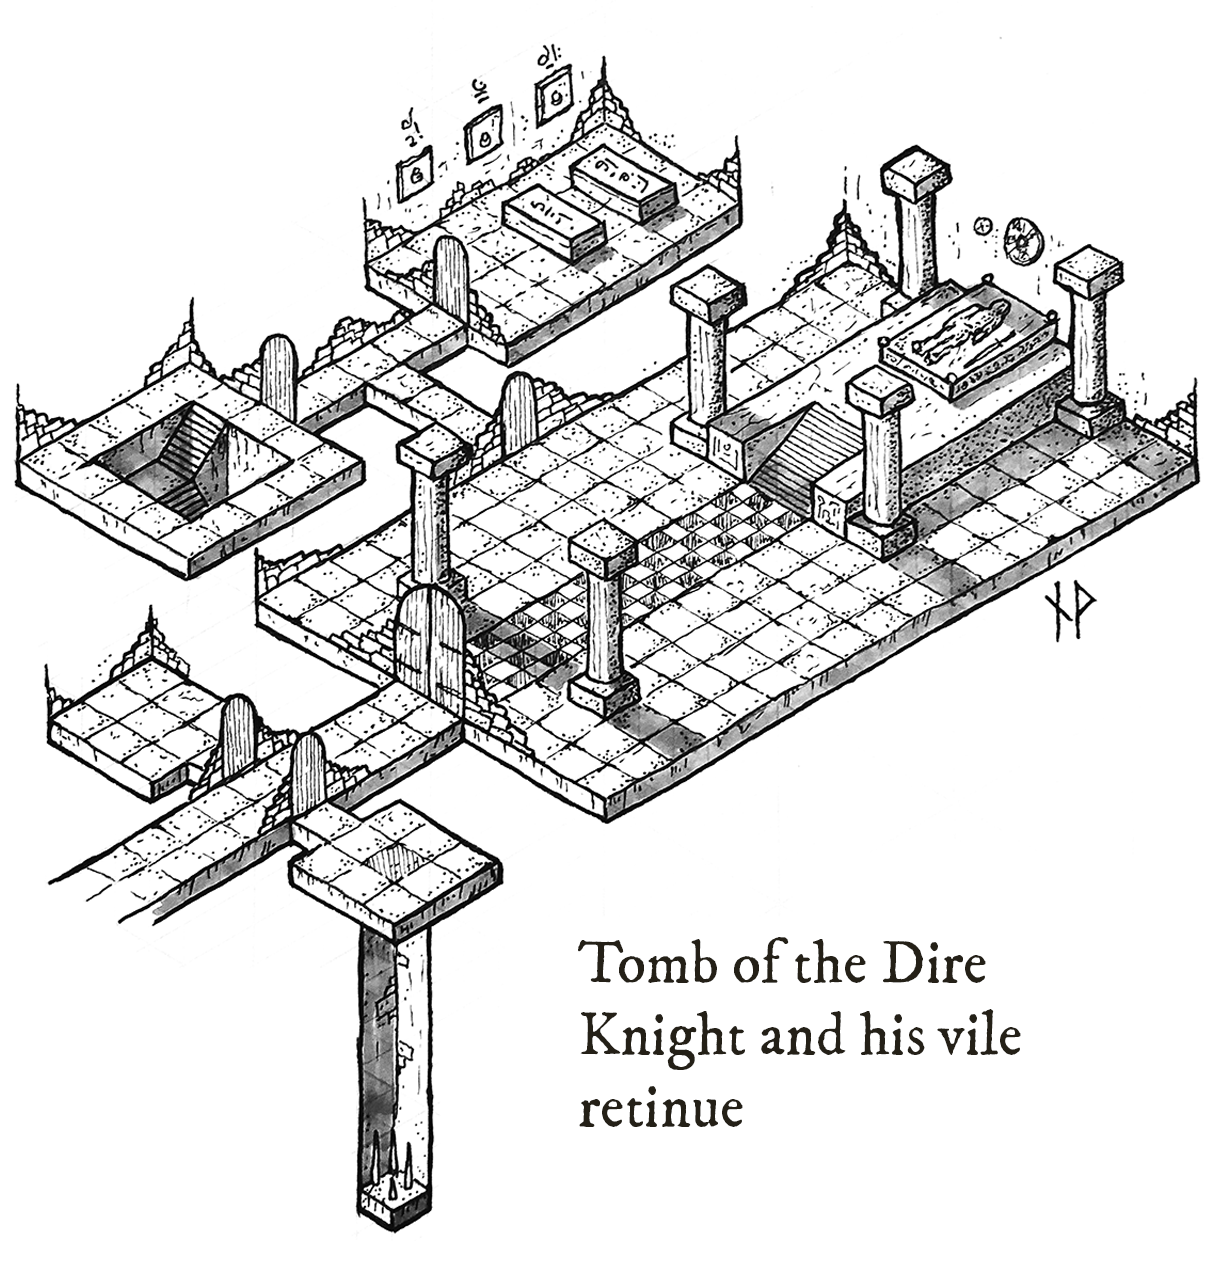
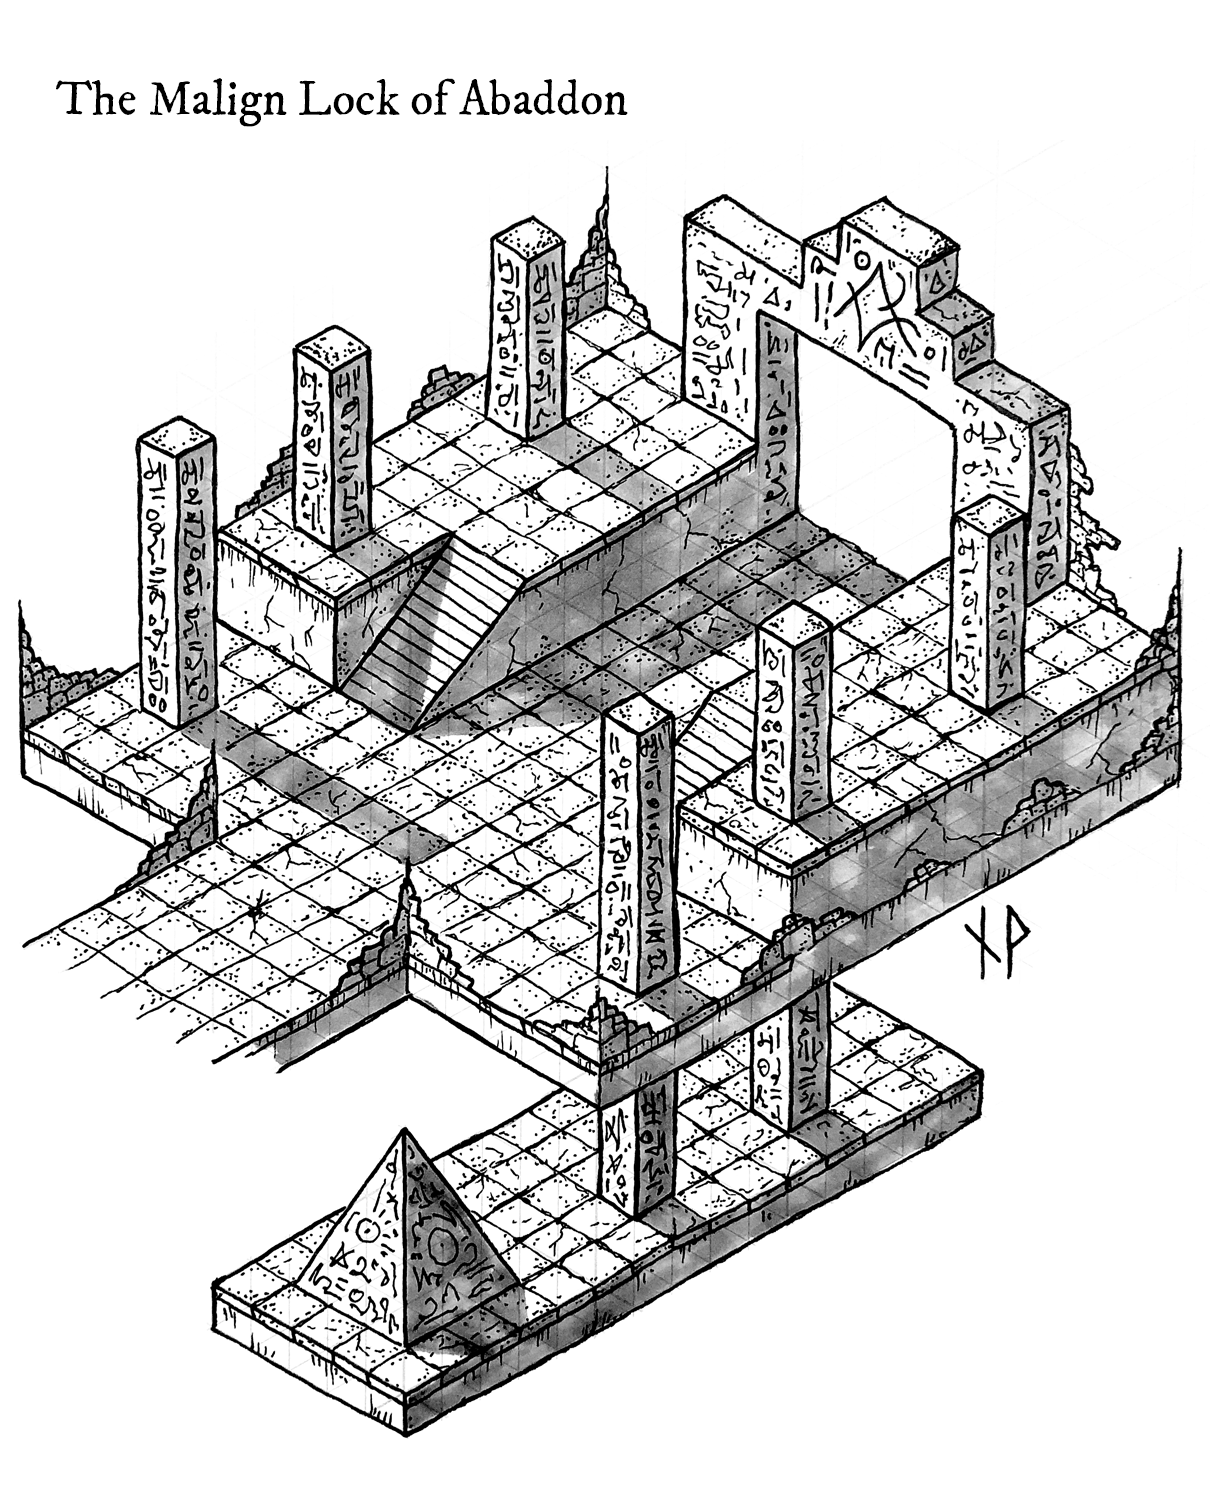
Bonus: more maps!
Here are some examples of other isometric maps I?ve drawn, using the above steps:


