Update! This and many more tutorials on fantasy and D&D map making is availible also on my website, together with loads of free-to-download maps, check it out ? click here!
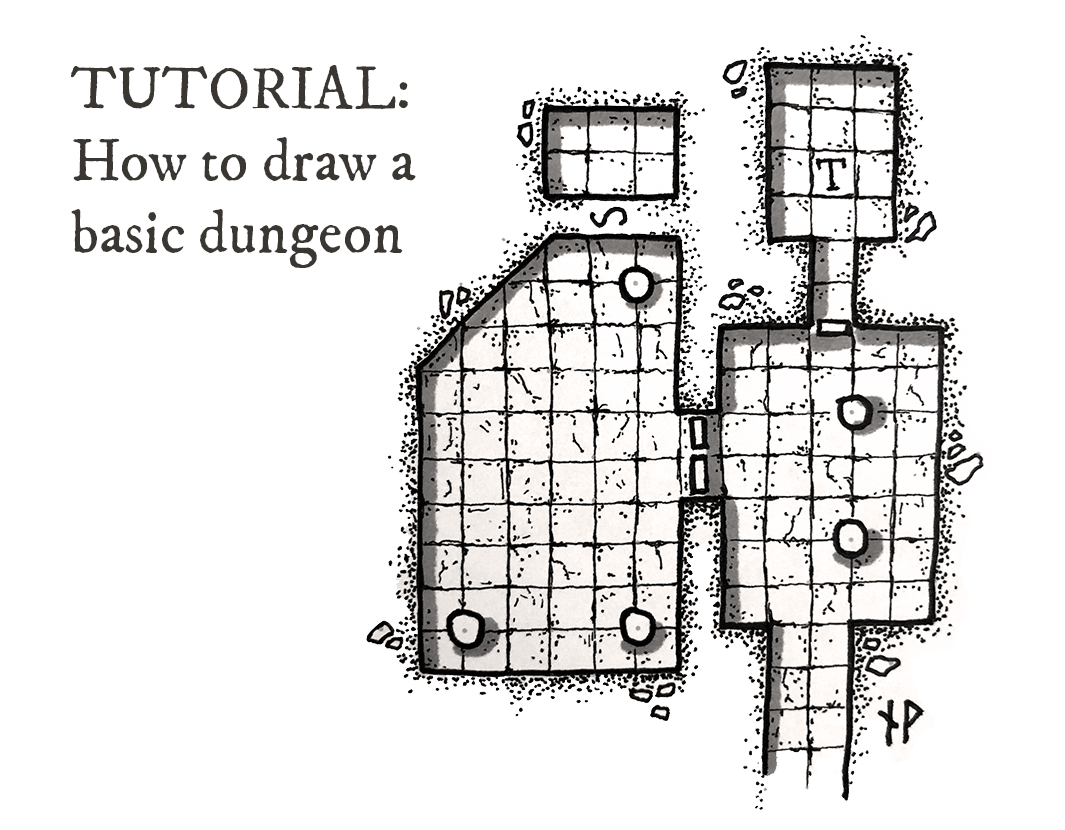
 This map will be the end result of this tutorial.
I enjoy drawing maps for roleplaying games like Dungeons & Dragons. Ever since I was a kid, I enjoyed drawing, especially mystical places like monster strongholds, secret lairs and abandoned catacombs. Sometimes when I post my maps online, people ask me for advice on how to get started, and even though I?m far from an authority on the subject, I though a short and simple tutorial could be of help, so here goes!
This tutorial will show you how to draw a simple top-down map, with no special features such as furniture or other objects. You can of course add a lot of complexity by adding ?dungeon dressing?, or even draw the map from another perspective, such as isometric. But let?s get started with this style.
Note: since this tutorial was published, I?ve also made a tutorial on how to draw isometric maps, you can read it here: https://medium.com/@niklaswistedt/tutorial-how-to-draw-an-isometric-dungeon-map-dc1a88737be0
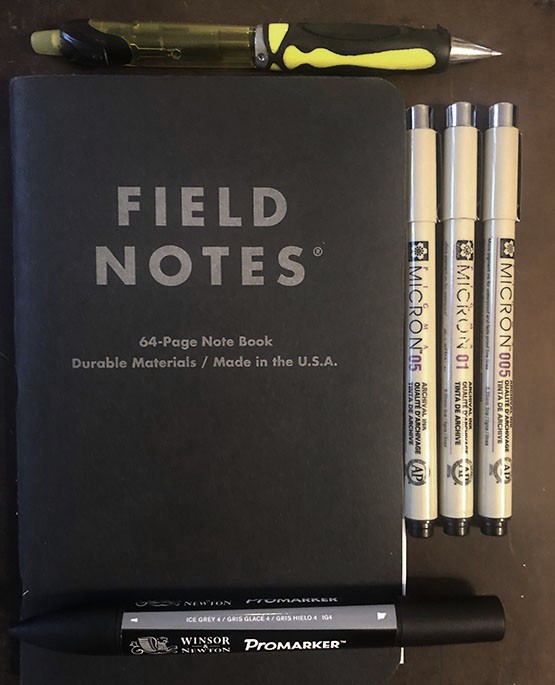
The gear
A lot of people prefer to draw digital maps, using tools like Photoshop. I, however, prefer to draw by hand.
First of all, make sure you have decent tools to work with. For this tutorial, I?ve used three sizes of Micron markers (0.5, 0.1 and 0.05), an ice grey 4 Promarker, a mechanical pencil and a note book with dotted paper, from Field Notes (however, you could just as well use normal grid paper). None of this stuff is especially expensive, and can be bought online. I don?t have a scanner, so all images in the tutorial are taken with an iPhone camera. The end result has had some work done in Photoshop (adjusted levels, removing dots).
Step one: rough outlines
Start by drawing your dungeon walls with a mechanical pencil. It doesn?t have to be perfect straight lines, so no need for a ruler. Imperfect lines gives a nice organic look to the map.
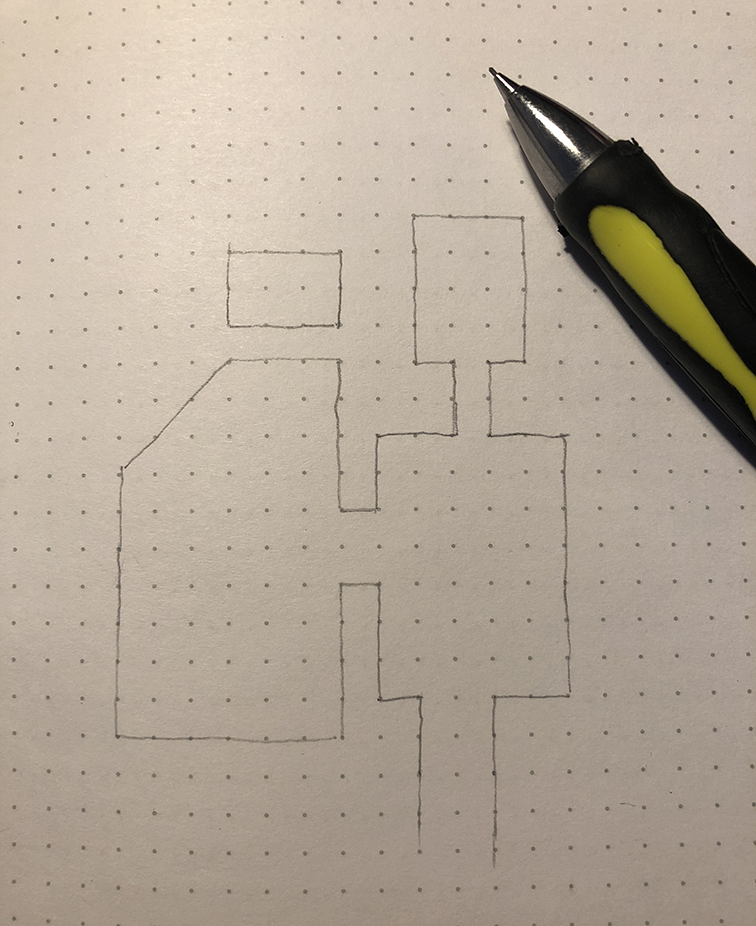 Step one: rough outlines with mechanical pencil
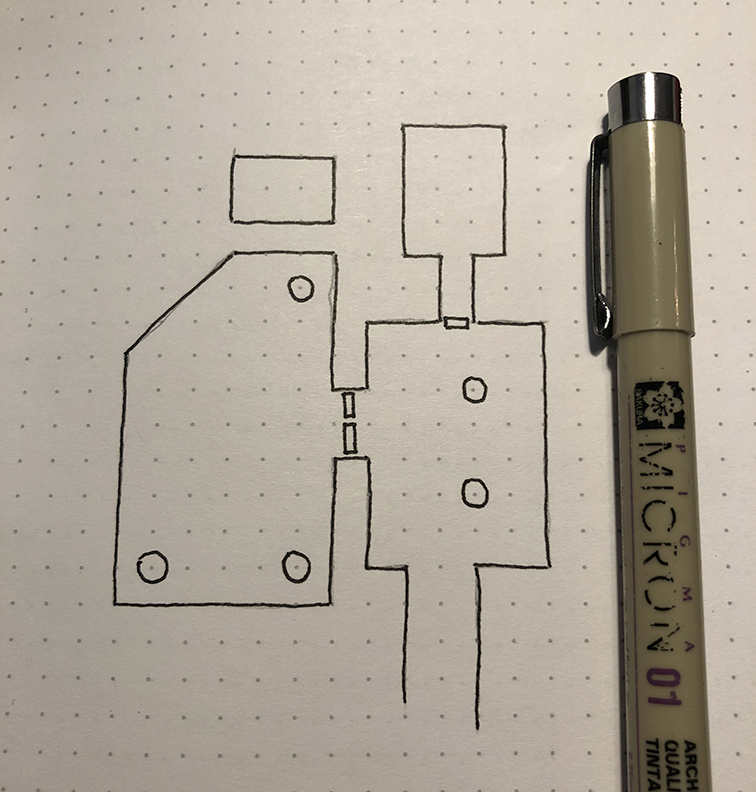
Step two: ink outlines
Use a thin (0.1) marker to draw your outlines. Again, it doesn?t have to be perfect. Let the ink dry for a minute, and then erase the pencil lines. This can affect the inked outlines as well, but no worries, we will take care of that in the next step.
I?ve also added a couple of doors and some pillars to the dungeon. It?s usually a good idea to add the pillars where flagstones will intersect, to provide some nice contrast, as you will see later on in the tutorial.
 Step two: ink outlines
Step three: add weight to outlines
Add weight to your outlines with a thicker marker (0.5)
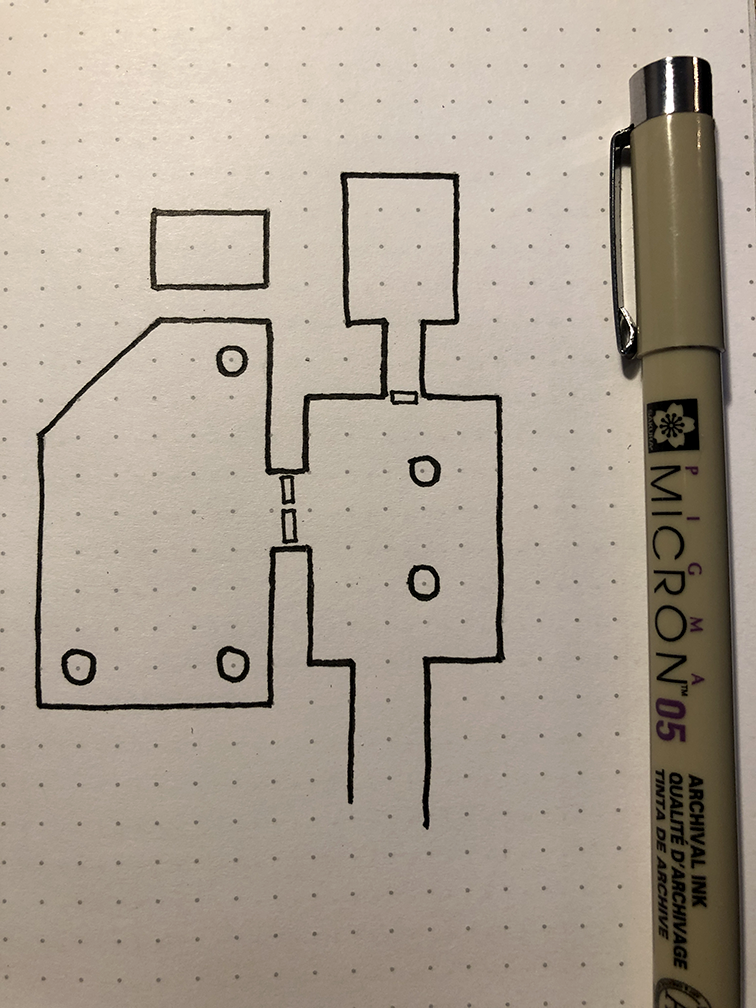 Step three: Adding weight to the outlines with a thicker marker
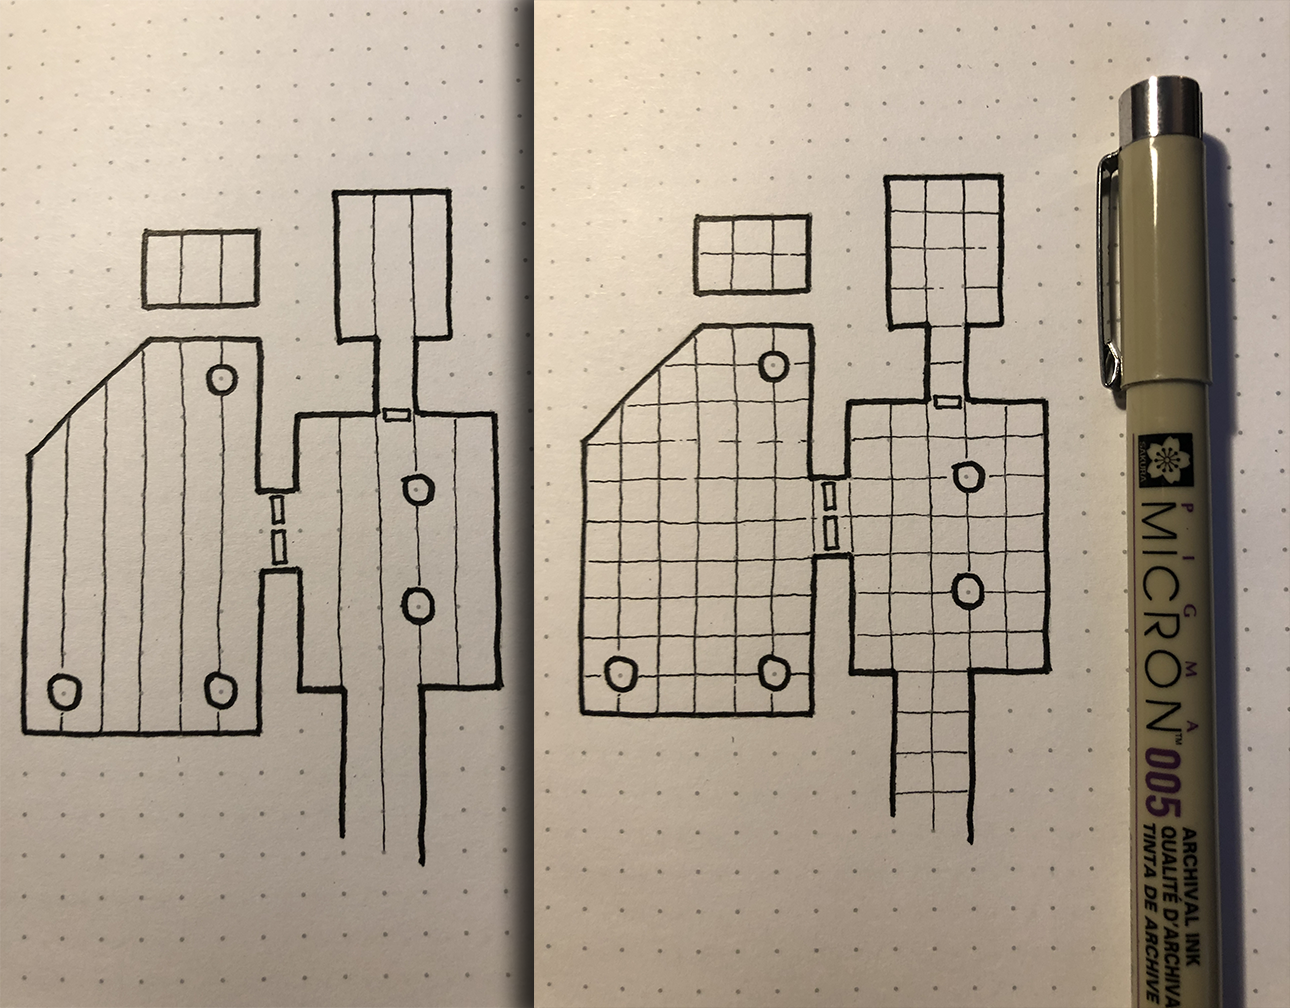
Step four: draw flagstones
Flagstones are great. Not only do they add nice detail to the dungeon, they also help by providing a grid for the map, making it easier for the dungeon master to draw it on a battle mat should he want to use miniatures for running a combat encounter. Use a thin (0.05) marker to draw the lines for the flagstones.
As you can see, the pillars provide contrast to the flagstone pattern, as they are placed where the flagstones intersect, and not directly on top of a single flagstone.
 Step four: draw flagstones
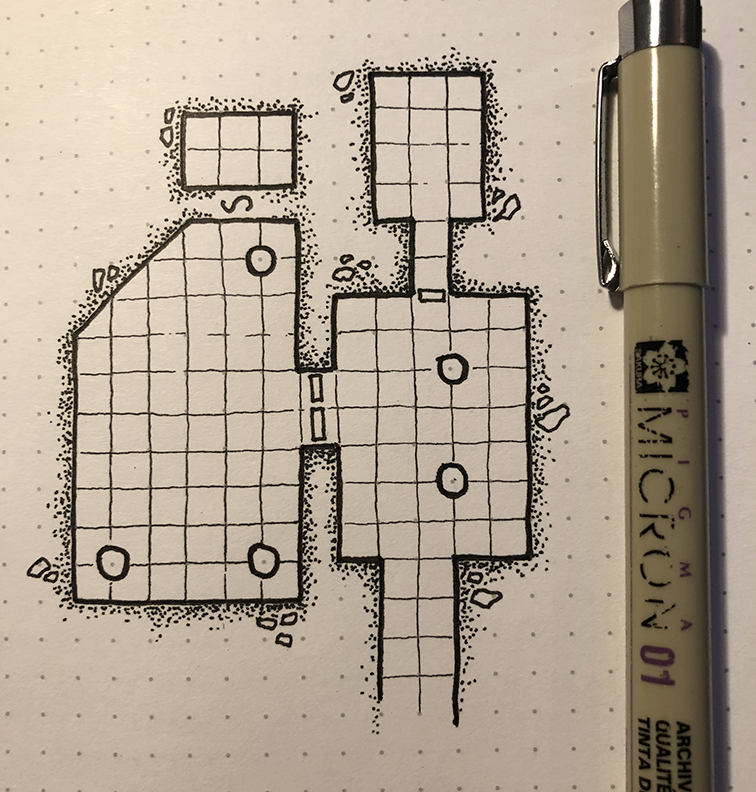
Step five: Add texture
Add some texture to the surface around the dungeon. I like adding some rocks and then use small dots to provide some contrast. The idea is to have a higher ?dot density? the closer you are to the dungeon wall. Use a 0.1 Micron marker.
I added an ?S? to the map, marking out a secret door that the players will need to search for in order to find.
 Step five: add rocks and dots
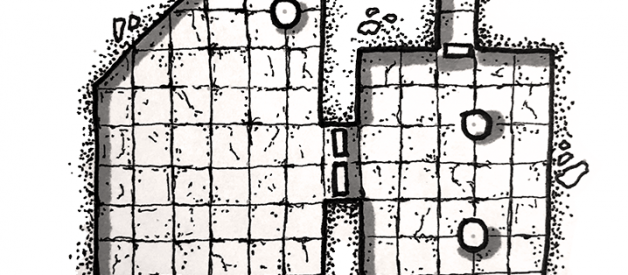
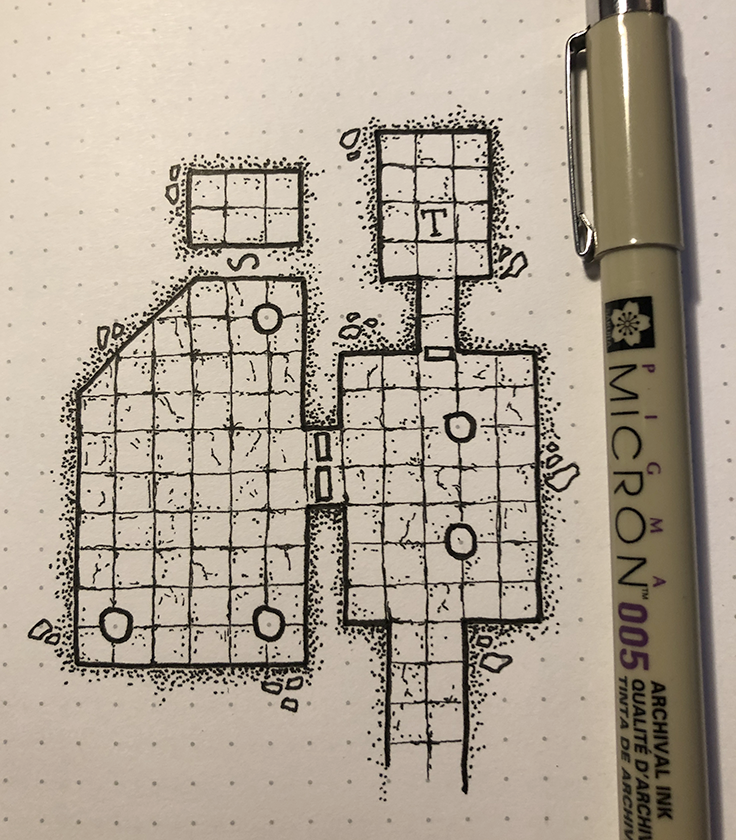
Step six: add texture to flagstones
Add some texture (dots, small scratches, cracks) to the flagstones. Also, randomly emphasise some of the gaps between the flagstones too. Random is the keyword here: don?t repeat patterns as it will look planned and artificial.
Use a thin (0.5) marker for this step.
I decided to add a ?T? to one of the flagstones, indicating a trap.
 Step six: add random gaps, dots and cracks to the flagstones.
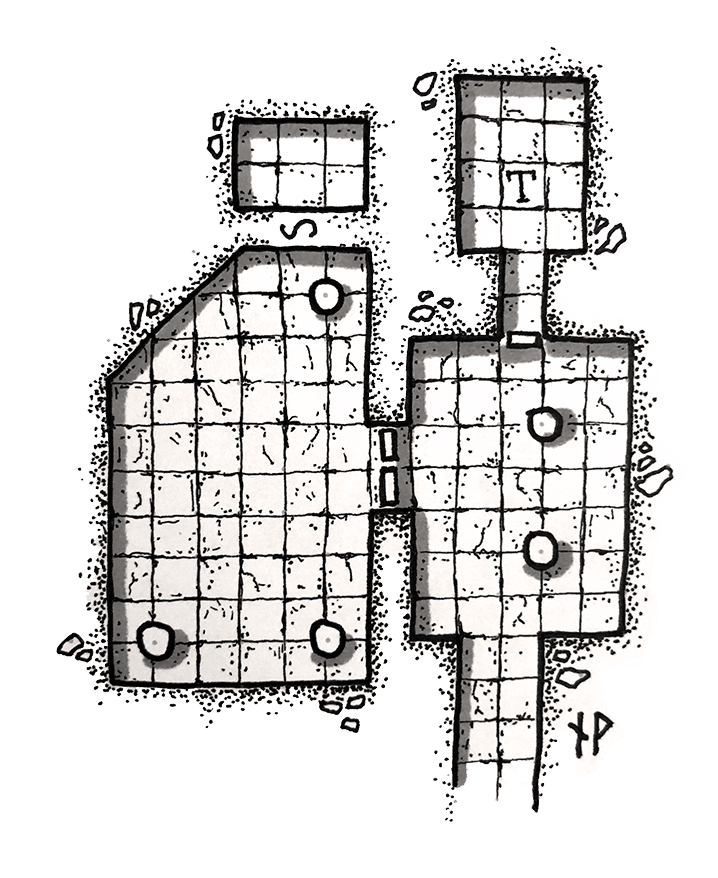
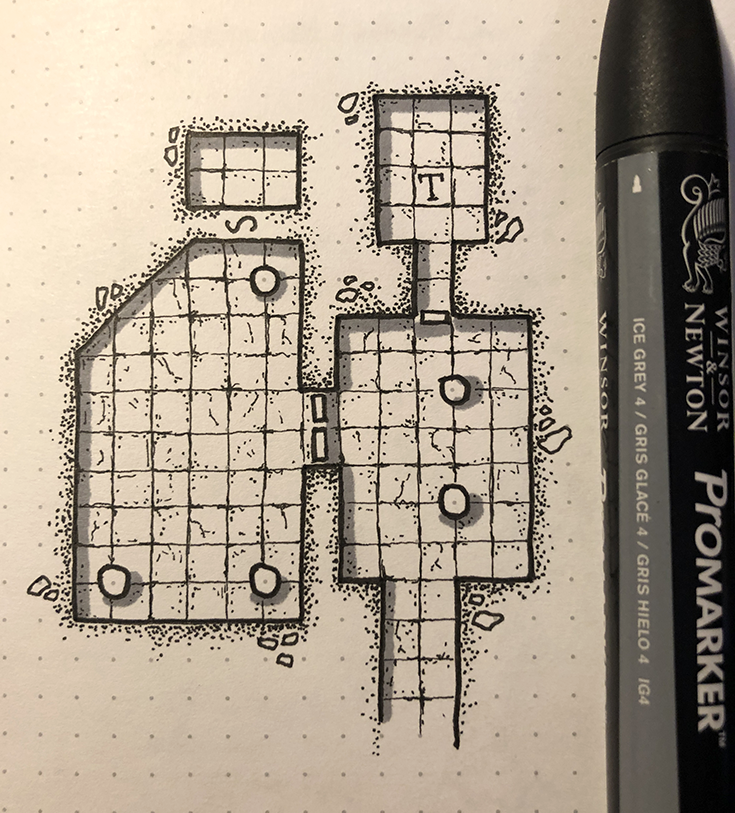
Step seven: add shadows
To add some depth to the map, and making it look a bit more interesting, I add some simple shadows to it. First decide where your imagined light source is located, in this case from the upper left corner. Then add shadows with a marker to the corresponding walls (in this case the upper and left walls). I also added some shadow to the pillars.
Use a grey Promarker (or similar) for this step.
 Step seven: use a marker to add simple shadows.
Step eight: clean up
I use my phone to photograph the map I?ve drawn, making sure it?s daylight outside to get a decent picture. Of course, if you have a scanner that?s a much better alternative. I?m considering buying one, but I?m a bit lazy, and also have a small desk.
I then use Photoshop to work with the levels, and getting the colors right, also removing some of the dots.
And there you go, the final result! You now have a dungeon to fill up with monsters, treasure, puzzles and traps. Happy gaming!
 Step eight: the map has been cleaned up in Photoshop
Please leave a comment if you enjoyed this tutorial, and let me know if you have any feedback.
More resources:
I post a lot of my work on my website, at https://www.wistedt.net/. There you can find many maps and other RPG recources that are free to download for personal use.
If you enjoy my maps, please feel free to follow me on Instagram, where I usually post my work: https://www.instagram.com/paths.peculiar/
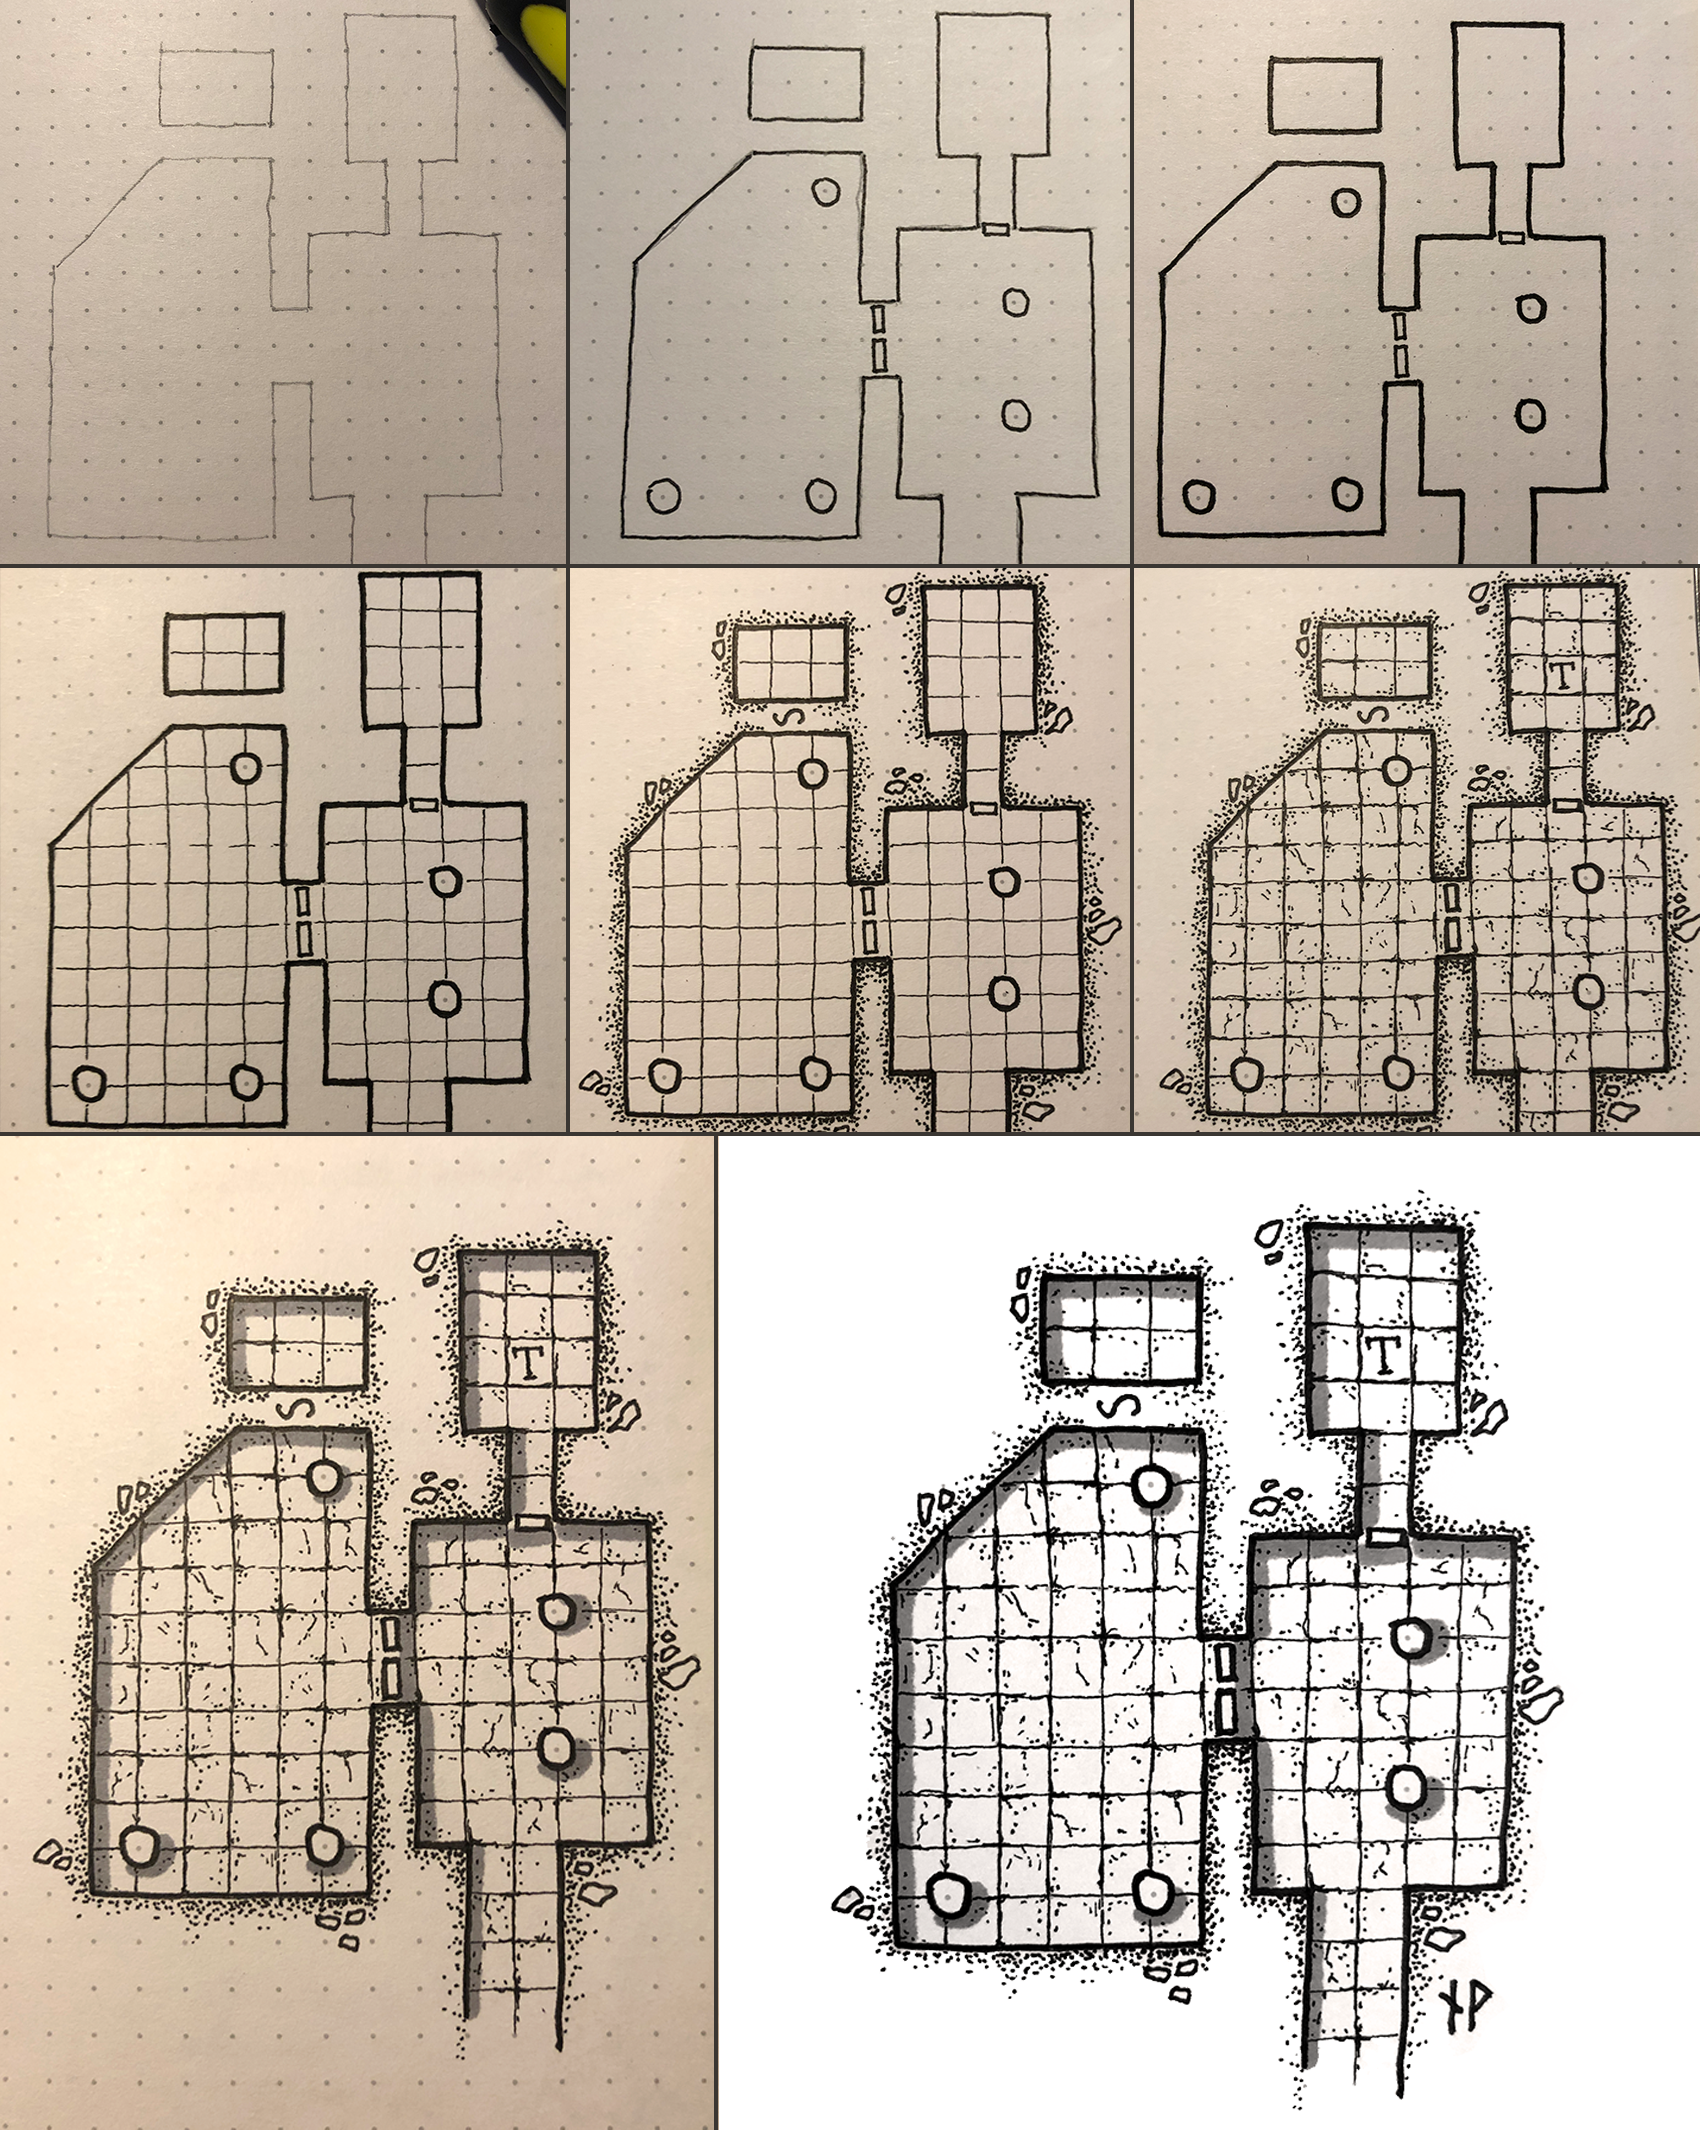 Overview of the steps ? thanks for reading!
