About Igfxem.exe and Its High CPU Issue
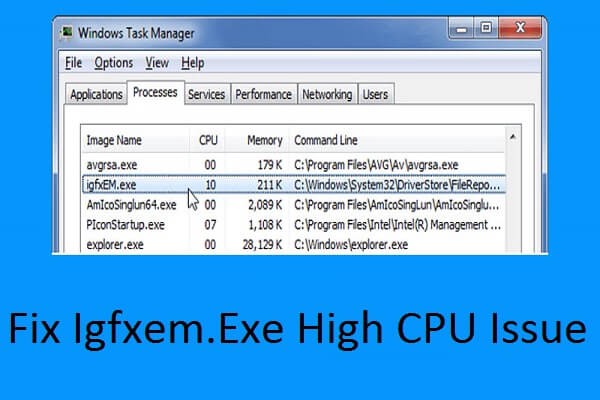
Igfxem.exe, related to Intel?s Common User Interface, is a genuine software component installed in your system automatically. It is an intermediary between your Intel graphics card and the GUI, and thus it is also known as Intel graphics Executable Main Module.
Although igfxem.exe makes plenty of settings easily available and adjustable from its menu, it might lead to high CPU or high disk usage issue. Why does this happen?
Actually, the igfxem.exe determines how the settings or configurations are accessed by other programs to perform its function. During this process, it can easily conflict with these programs and thus igfxem.exe high CPU issue occurs.
Besides, there are some other potential reasons for this problem, including malware/virus, outdated graphics cards driver and etc. Fortunately, this issue can be fixed easily by following the methods listed below.
Fix 1: Restart the Igfxem.exe Process
At first, you can try restarting the igfxem.exe process in Task Manager, which should be the quickest and simplest solution to igfxem.exe module high disk usage issue. Here?s how to do it.
Step 2: Under Processes tab and locate igfxem.exe (or igfxEM Module shown in the following picture). Highlight the process and click End task button.
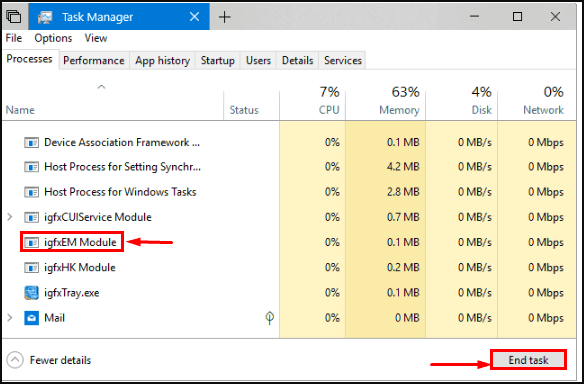
This operation disables the file temporarily and helps to minimize CPU usage. If igfxem.exe issue still exists after performing this operation, try the next solution directly.
Fix 2: Stop All Unimportant Process
If your PC runs into igfxem.exe high CPU issue and restarting this process fails to fix it, you might need to switch your attention to other unimportant processes that seem to be occupying CPU resources.
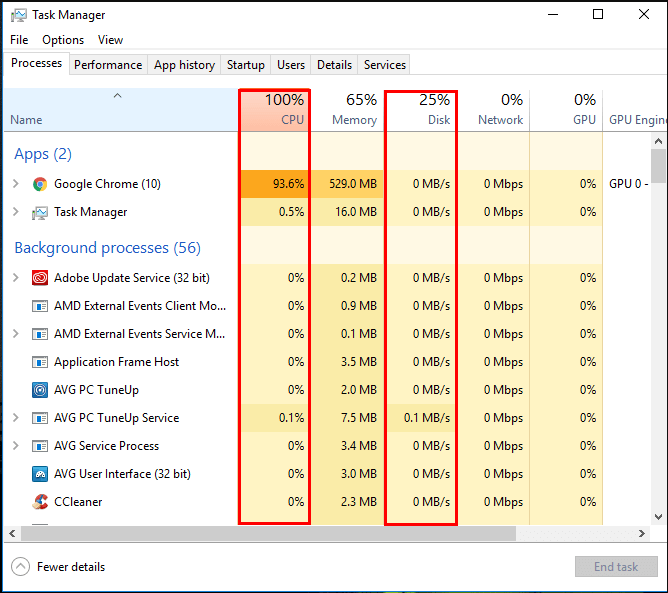
To find and stop these unimportant processes, you should also open Task Manager. Here, you can see the CPU/disk usage of all the running processes. Then, stop all the unimportant process by following the steps in Fix 1.
Fix 3: Disable Igfxem Module
Alternatively, you can also disable igfxem module in System Configuration to fix igfxem.exe high CPU issue. This will prevent igfxem.exe from running at startup. Follow the instructions below to complete the operation.
Step 2: Type msconfig and click OK to open System Configuration.
Step 3: Switch to Services tab and scroll down to locate igfxem module.
Step 4: Uncheck the service, and click Apply and OK to save the change you have made.
The igfxem.exe high CPU issue should have been resolved after disabling the service.
Fix 4: Scan for Malware and Virus
As malware/virus might be a reason for this issue, performing a full scan for your system should be a great solution. You can employ your preferred installed third-party antivirus, or use built-in tool in your Windows ? Windows Defender.
Follow the steps below to perform a full scan using Windows Defender.
Step 2: Go to Update & Security > Windows Security > Virus & threat protection.
Step 3: In the new window, click Run a new advanced scan.
Step 4: Choose Full scan and click Scan now.
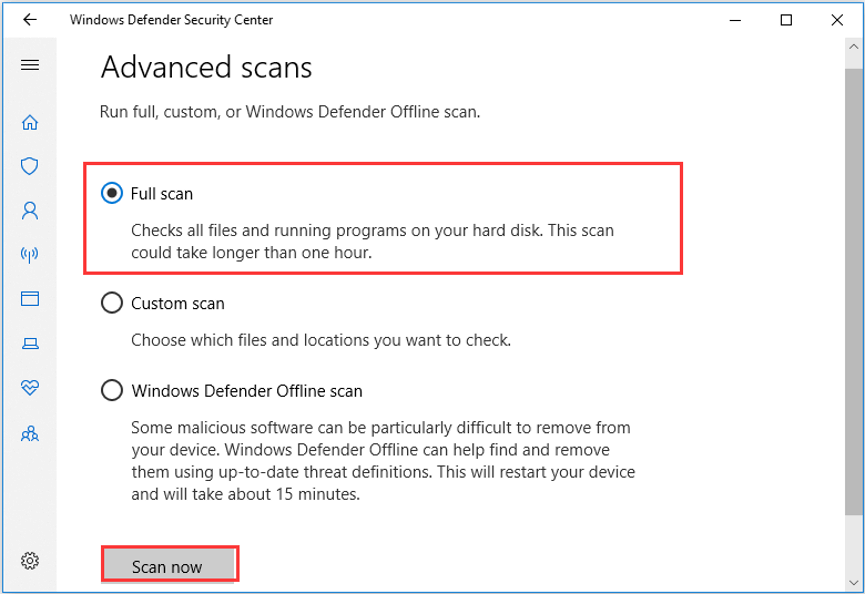
Wait for the process to complete and then you can check if the high CPU issue is fixed.

Finally, you can try updating your Intel Graphics cards driver if all the solutions above fail to fix the issue. The steps are listed below.
Step 1: Go to the Download Center of Intel and download the latest applicable driver to a certain location (unzip it if it is zipped).
Step 2: Open Device Manager and expand Display adapters section.
Step 3: Right-click your Intel graphics and choose Update driver.
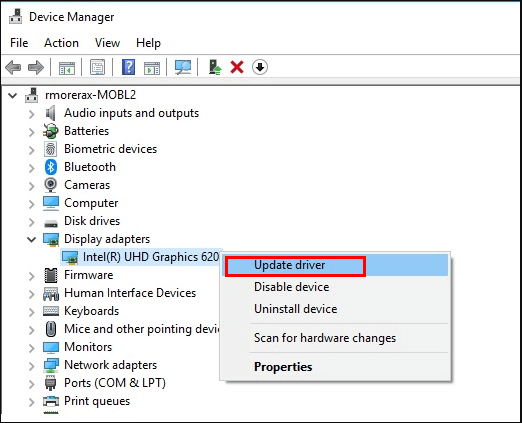
Step 4: In the pop-up window, select Browse my computer for driver software.
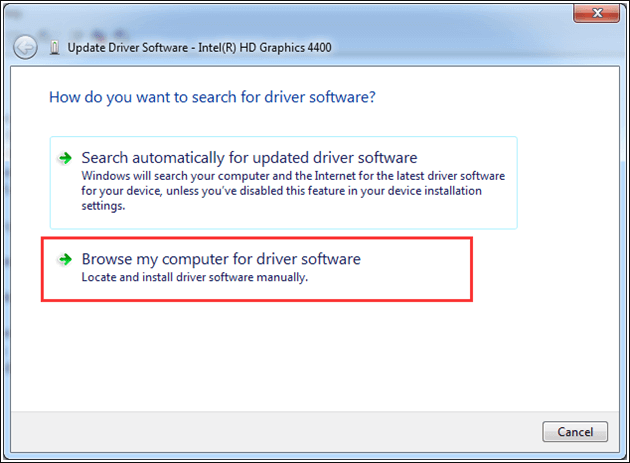
Step 5: Click Browse and go to the directory where you save the downloaded driver files. Click OK and Next to install the driver.
Once it?s done, restart your computer and check if igfxem module high disk usage issue is fixed.
Originally published at https://www.partitionwizard.com on February 5, 2020.


