
How To Easily Synchronize Audio and Video In Premiere Pro!
How to easily Sync Audio and Video In Premiere Pro Tutorial
When it comes to video production, recording audio and video separately is common. Synchronizing Audio and Video can be a headache if you don?t know how to do it properly. I?ll show you how you can Easily Sync Audio and Video In Premiere Pro!
 ?Universal Studio clapboard? by lan deng on Unsplash
When it comes to syncing audio, the first thing to do comes when recording video. This can be done with a Production Slate/ Clapboard or by simply clapping. This will create a visible peak in the audio, which you can use to sync the audio and video using the video?s internal audio, and your recorded audio. It should look something like this:
 Synced sound in Premiere Pro.
There are three ways to sync Audio in Premiere Pro!
- Manually Syncing Audio and Video
- Merging Clips to Sync Audio and Video
- Synchronizing clips on the timeline
Each one of these has it?s purpose, but the first one, Manually Syncing might be the most important to learn. This can be done on any editing software, and learning how to do this is crucial in learning how to edit.
The first thing you want to do, is locate your Audio and Video in your media bins.
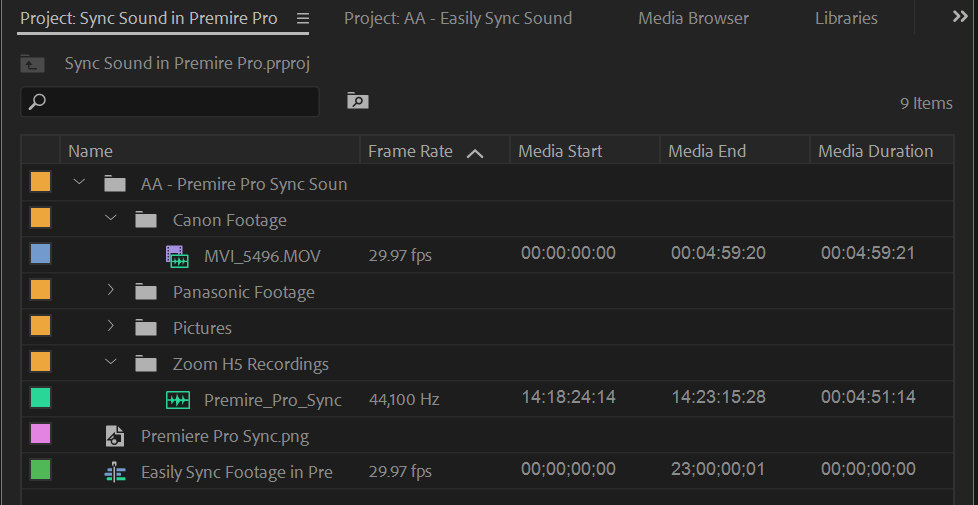 Audio and Video in files
For this I will sync the footage from my Canon camera, and my external audio device. I?ll drag them on the timeline, so I can see the audio peaks from my slate. If you don?t have a point of reference for your audio, like a clapboard or hand clap, you can still match the audio, but will be much more difficult.
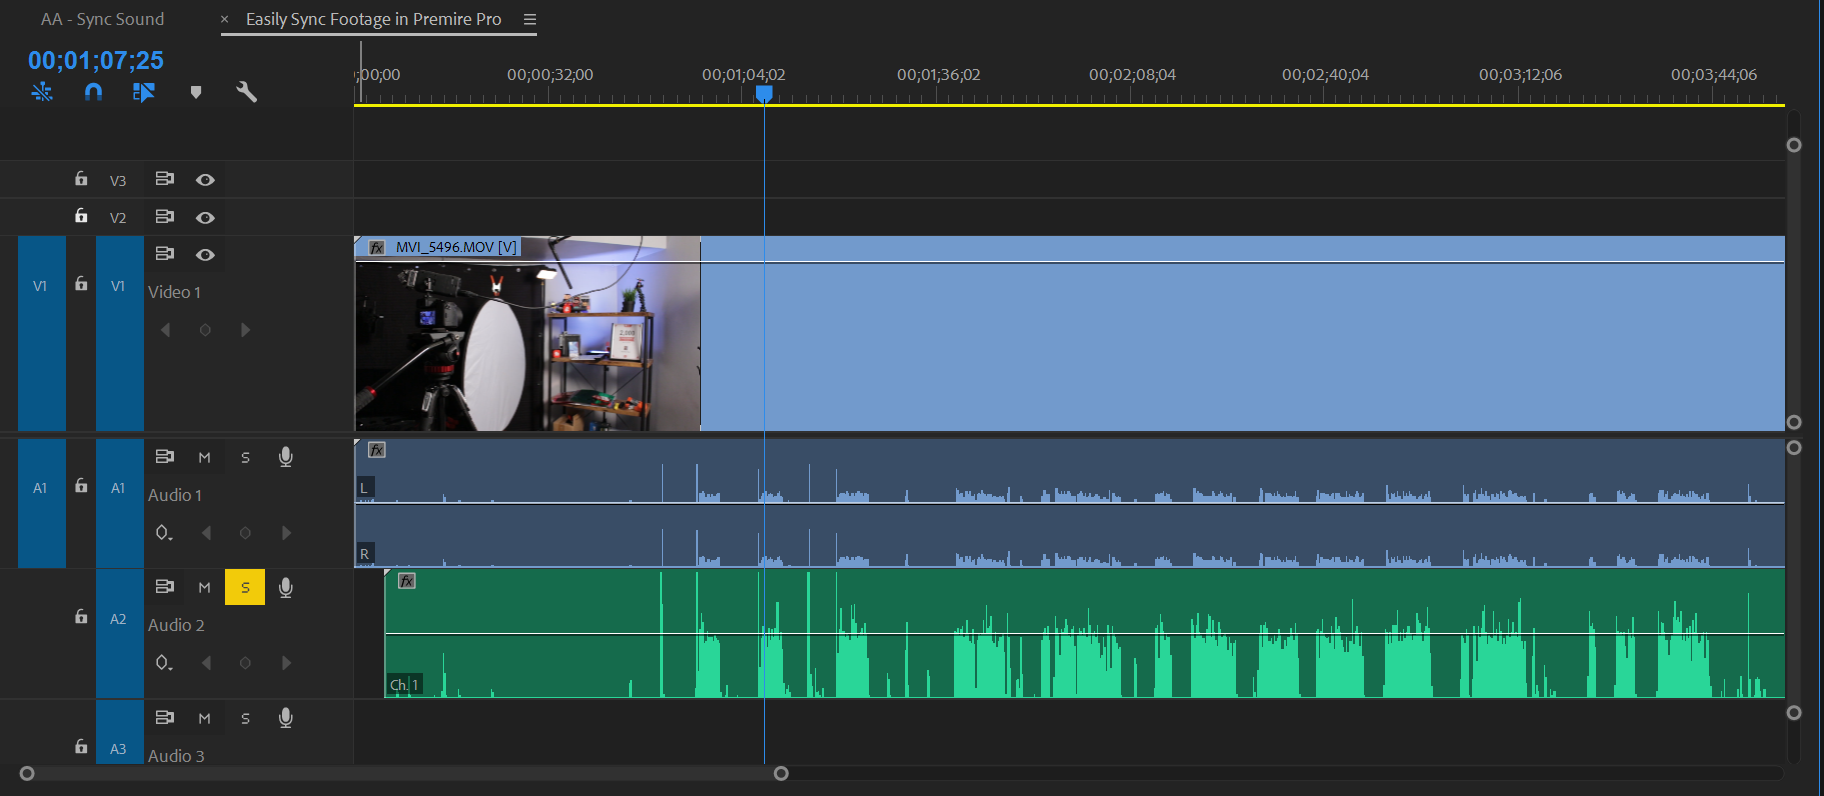
 Audio and Video in the timeline before manually syncing.
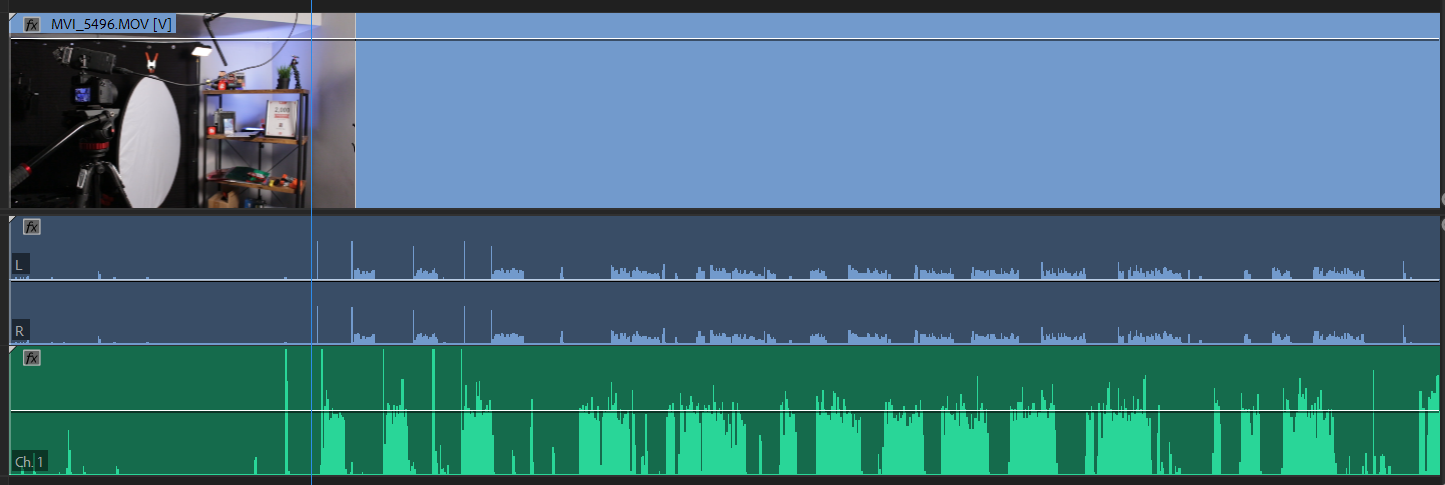
You want to use the internal camera audio (Blue Audio) as a reference point for your external audio (Green Audio). All you have to do, is manually drag the Bottom Audio, to be perfectly lined up with the top audio, and then playback the clip to make sure they are synced. Once you do this Solo the bottom track to make sure your audio and visual match.
 Audio and Video Synced, and external audio solo?d to verify sync was successful.
Once you are happy with your clips, delete the in camera audio and keep your external audio. Then you can either group or link the audio and video so you don?t de-sync the audio.
Step Two Merging Clips to Sync Audio and Video
The second way of syncing clips, is a process called Merging. This allows you to select the media in the bins you wish to merge, and you can do so. You can only have one video, but can sync up to 16 audio clips to that one video.
To merge the clips hold Control on PC (Command on Mac) and select the two clips you wish to merge.
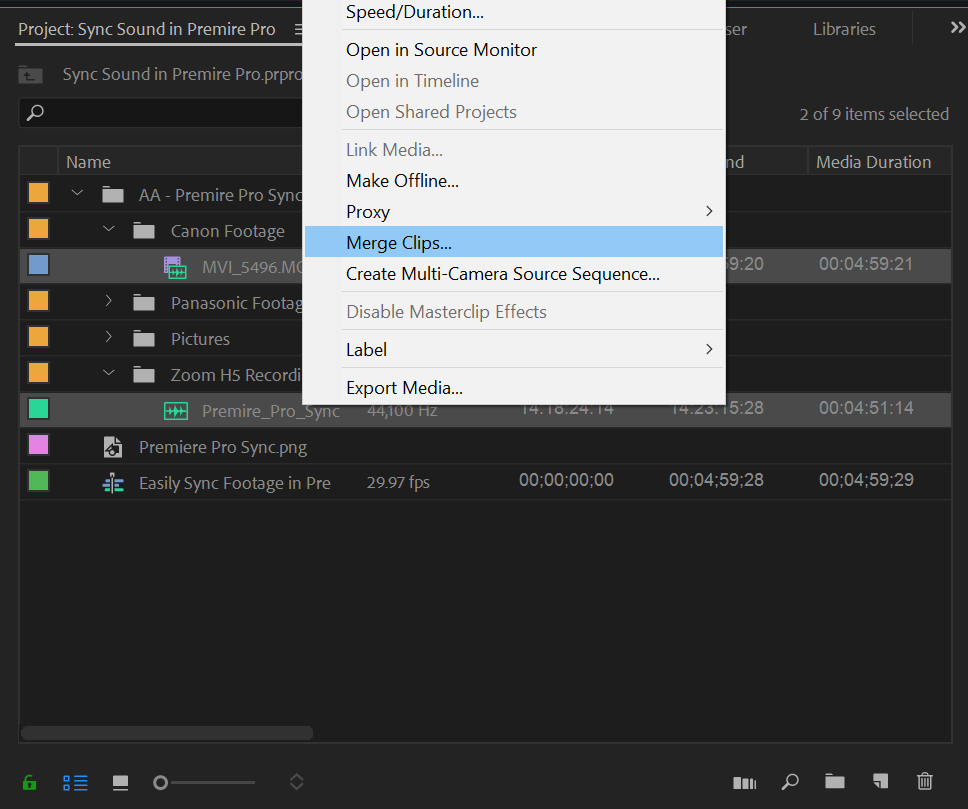 How to use the Merge the Audio and Video using the merge function
This will bring up The Merge Clips Menu with a couple of options. What we want to focus on is Audio. Select the Audio option, and then hit OK.
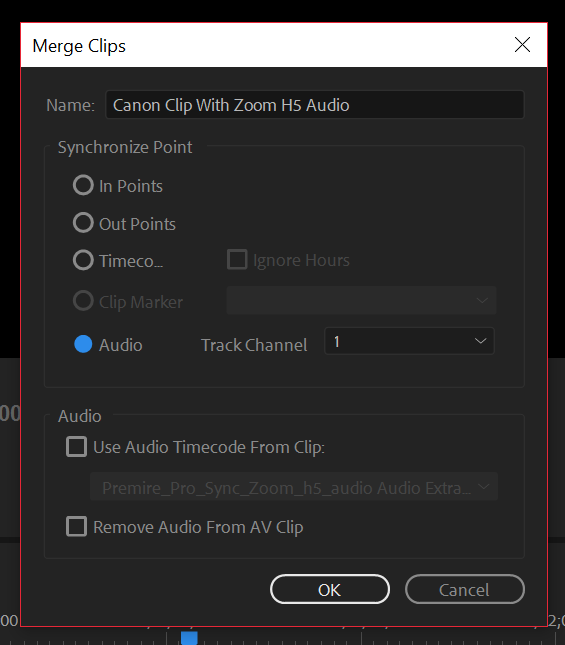 Merge Clip Menu in Premiere Pro.
This will allow premiere to analyze your video?s audio with the External audio, and look for similarities. In our case it was the clapboard hit, and then it automatically syncs the clips. Then you will get a new file where you imported your media, with the name you gave it in the Merge Clips Menu.
 Merged Clip
Then drag your new Merged clip on the timeline. If you select ?Remove Audio From AV Clip? it will remove the camera?s internal audio, and use the external audio, so you don?t have to remove it!
Step Three Synchronizing clips on the timeline.
Similarly to Merge Clip, Synchronizing clips analyzes the audio of your external recording device, with the audio of your camera. This method allows you to use multiple cameras recording the same scene, where as merge only allows one video source.
To Synchronize the clips, you must first drag the external audio on to the timeline. I recommend putting the audio in track one, and then locking it so you can add the multiple camera angles above it, and then have their audio below the audio you want to keep.
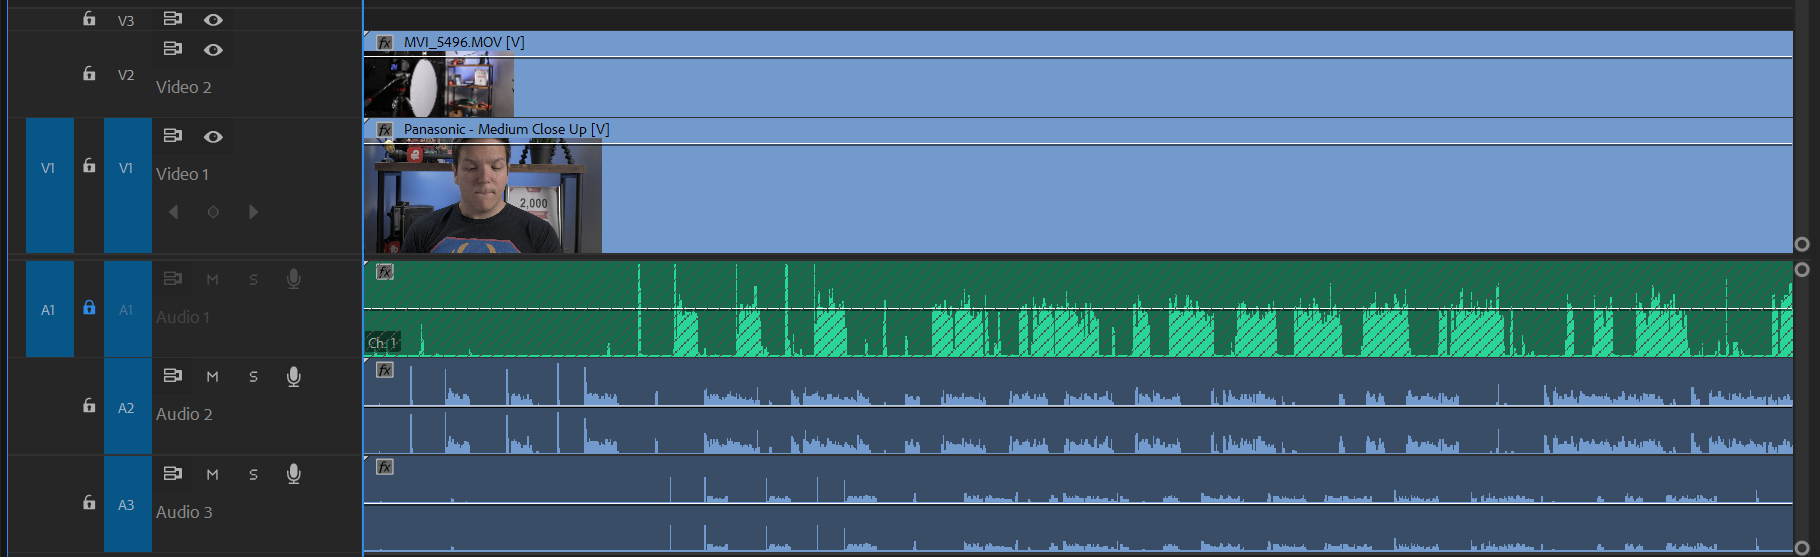 Images before synchronizing in premiere pro
Then, unlock the external audio recording track, hit Control A (Command A on Mac) To select all of the clips, and right click to Synchronize.
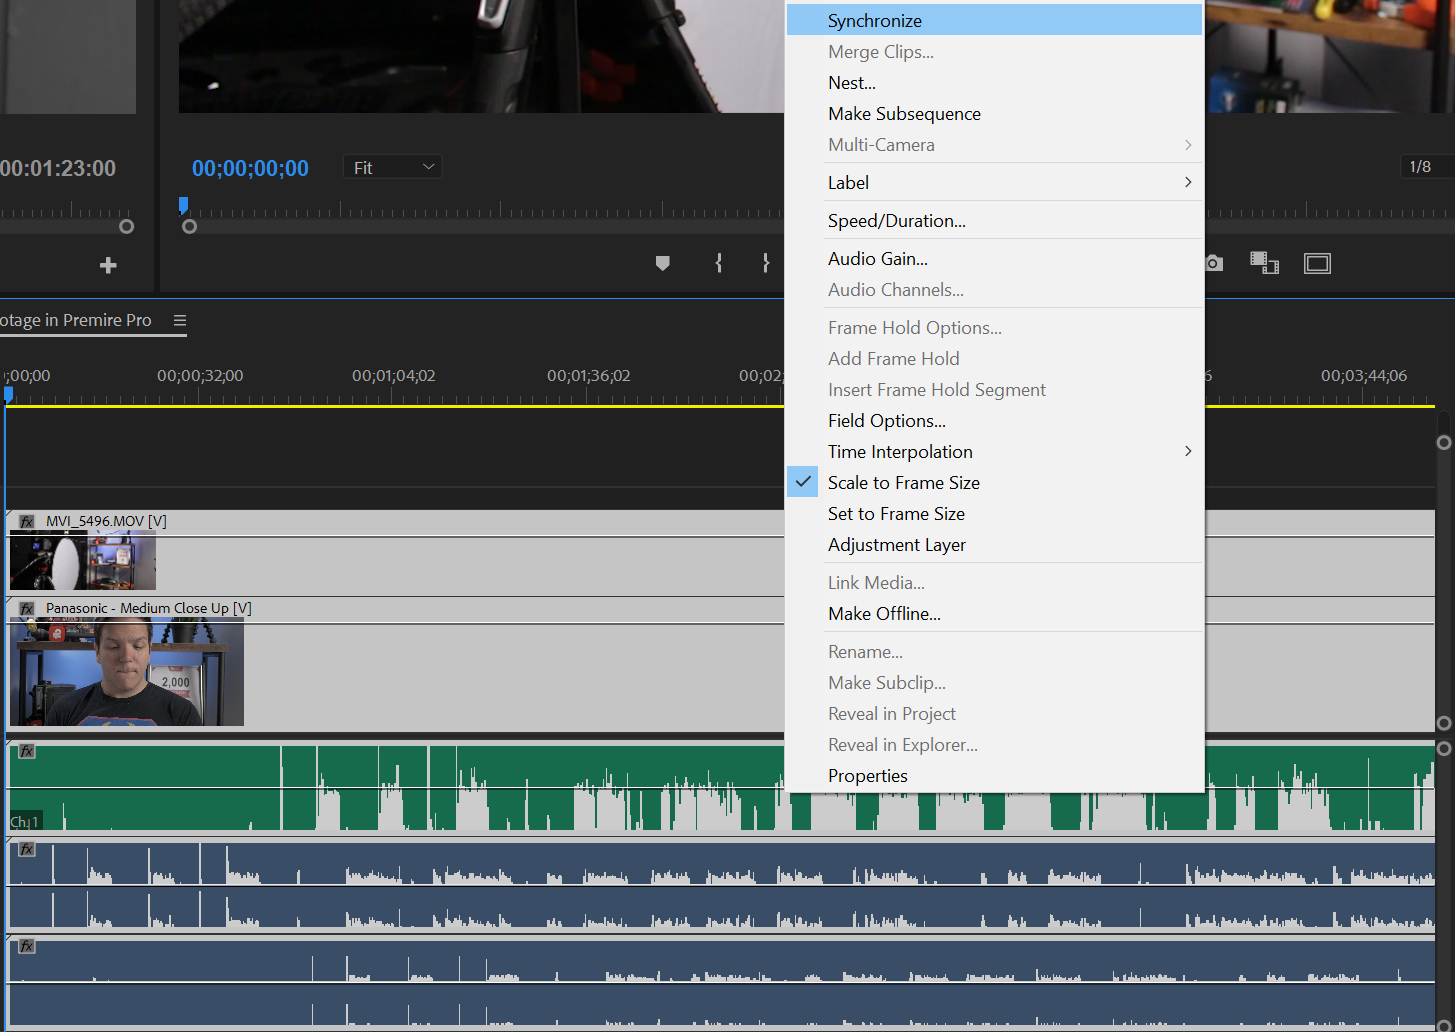 Synchronizing Multiple camera?s in Premiere Pro.
Then similarly to Merge Clip, you select audio, and premiere will sync the audio to the external sound. Once it?s synced, you are good to remove the internal camera audio, and you have multiple clips synced to one sound source!
That?s really all there is to it! Syncing audio and Video In Premiere Pro can be very easy! There are other tools out there like Plural-eyes, but this is a free and pretty reliable way to do it within Premiere Pro!
 Thumbnail From Andrew Kan?s YouTube Video.

