Today?s blog is a bit special among the amazing things I?ve gotten my students to do with their computers, and with spreadsheets in particular. Not just because it has taken me four extra days to write and post it, but because there just really is that much packed into it.
Mathematically, we are doing a unit about polynomial functions and part of this unit involves doing synthetic division to locate roots (i.e. where the graph of the function intersects the x-axis, aka zeros). I won?t bore you with too many of the details or what synthetic division is or how to do it. Typically the point of it though is to either a) evaluate a large polynomial without having to raise numbers to large exponents, or b) find the zeroes/x-intercepts of a graph. By doing synthetic division, obtaining the remainder will accomplish both of these goals and do so much more quickly and easily than the alternatives, especially with high degree polynomials like P(x) = 13x+11x?+9x?+?+ 3x+1x?
Here is an example of a student who took the task to the max and created a synthetic division calculator that works for polynomials up to degree 15!
If you have ever done long or synthetic division for polynomials, then you may also recall that it is a pretty simple algorithm that gets annoyingly monotonous when you have to do it for 20 homework problems or for larger polynomials (like the one above). It becomes particularly wearisome when the only reason you are doing the division in the first place is to see whether or not the remainder is equal to zero, which is exactly the case in many a precalculus class.
In addition to being overall simpler and easier to execute than long division or evaluating a polynomial directly, synthetic division also has the advantage that it lends itself nicely to learning how to use spreadsheets to do make math easier, while reducing opportunities for arithmetic errors. In many respects, this lesson is similar to my the one on making a matrix calculator. However, for this one, I have added a few extra whistles and bells that not only got students more excited, but also elevates their game to the point they may almost be able to get away with saying they are ?proficient in Excel? when applying for a job.
In addition to using basic commands to add and multiply values referenced in various cells, I also introduced
- using the dollar sign to lock cells
- using conditional formatting
- using the iferror command
- using the ampersand (&) and quotations symbols to string formulas with text
- using QuickTime to do a make a video recording of what they do on their screen.
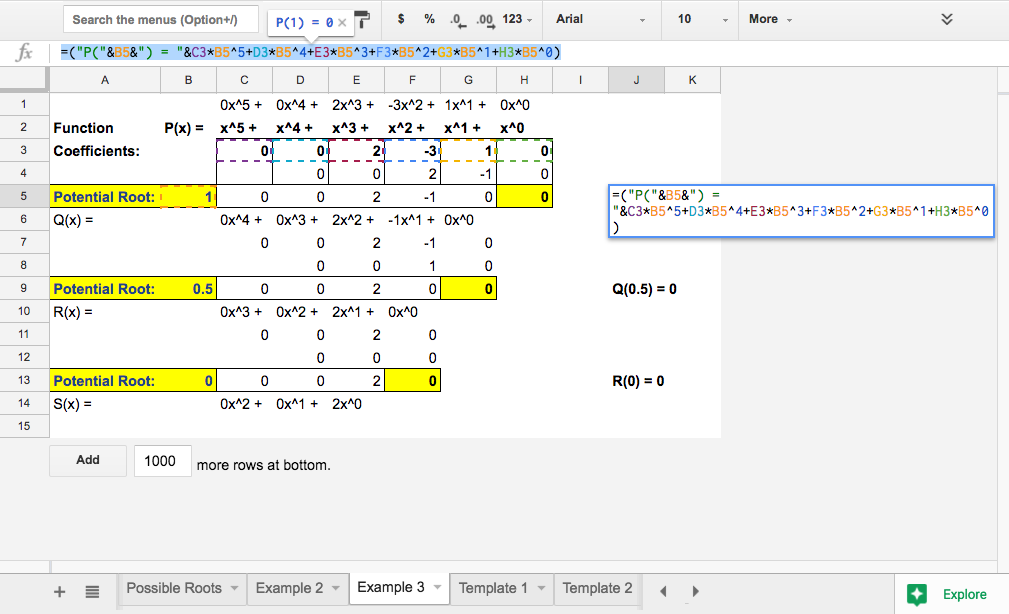
We?ve already learned previously that copying and pasting a formula automatically updates the formula. In synthetic division however, we want to only update one of the values, which is then multiplied by a possible root.. Because we will want to change the possible root for later tests, it is not helpful to simply type its value into the formula, lest we want to have to change the formula every time. So instead, it is best to store the possible root in its own cell and lock the name of the cell in our formula as you can see below:
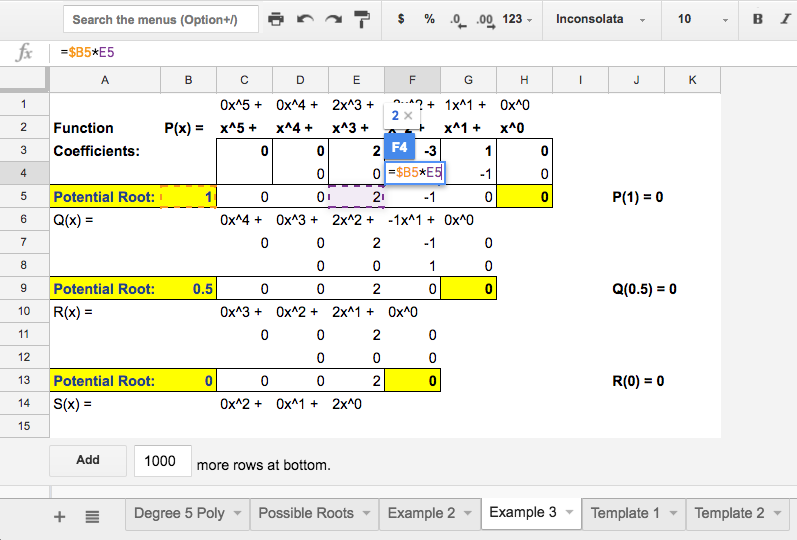
 Note the formula in the picture at left. Cell B5 stores the value of the potential root (in this case 1) and for that reason, we want it to remain unchanged when we paste it into the other cells as seen in the picture at right.
This feature of locking cells is actually quite powerful and can save a ton of time when used with the proper foresight, which I will demonstrate a little later. I should mention that in this assignment, I give the students a template from which they are able to make a copy.
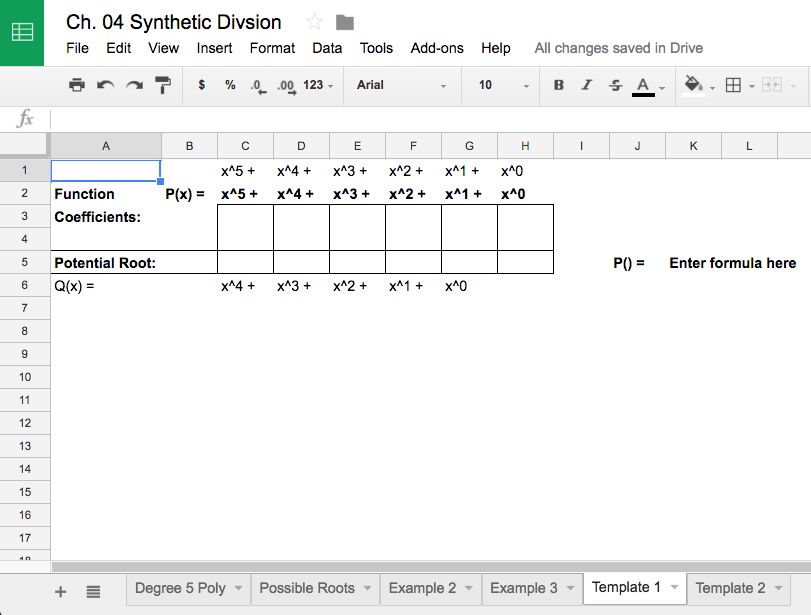
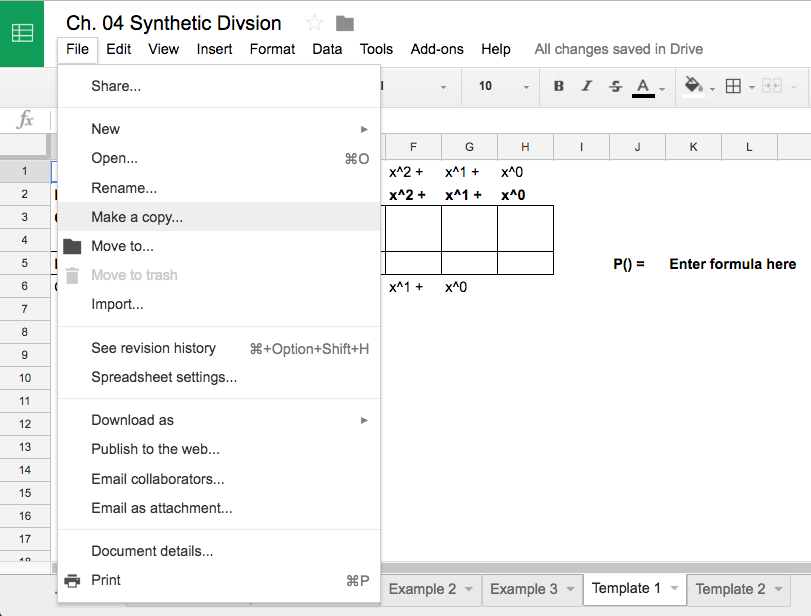 Left: The basic template I provide my students. Right: How to make a copy of said template (or any document for that matter).
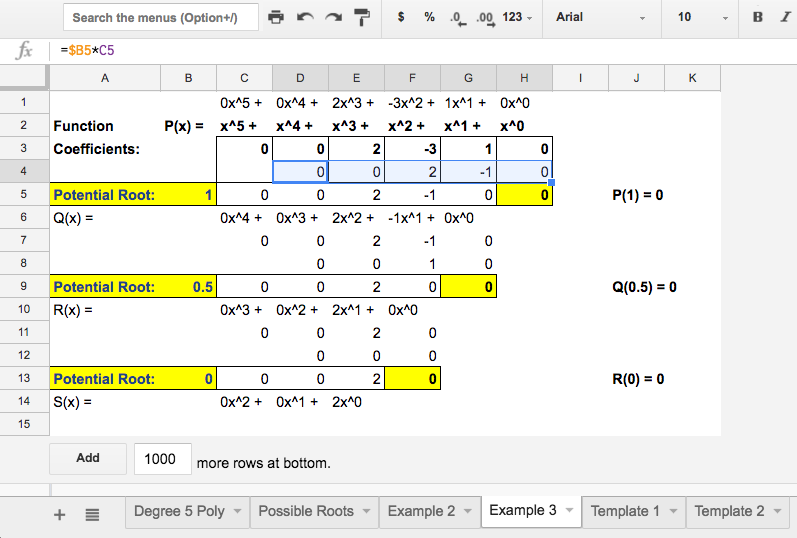
From this template, the students just enter the basic commands (e.g. add and multiply two cells together) to create their synthetic division calculator.
However, because we are interested in whether or not this process yields a zero in the remainder box (the bottom left), I then instruct the class to conditionally format that cell to be one color if it is equal to zero, and another if it is not.

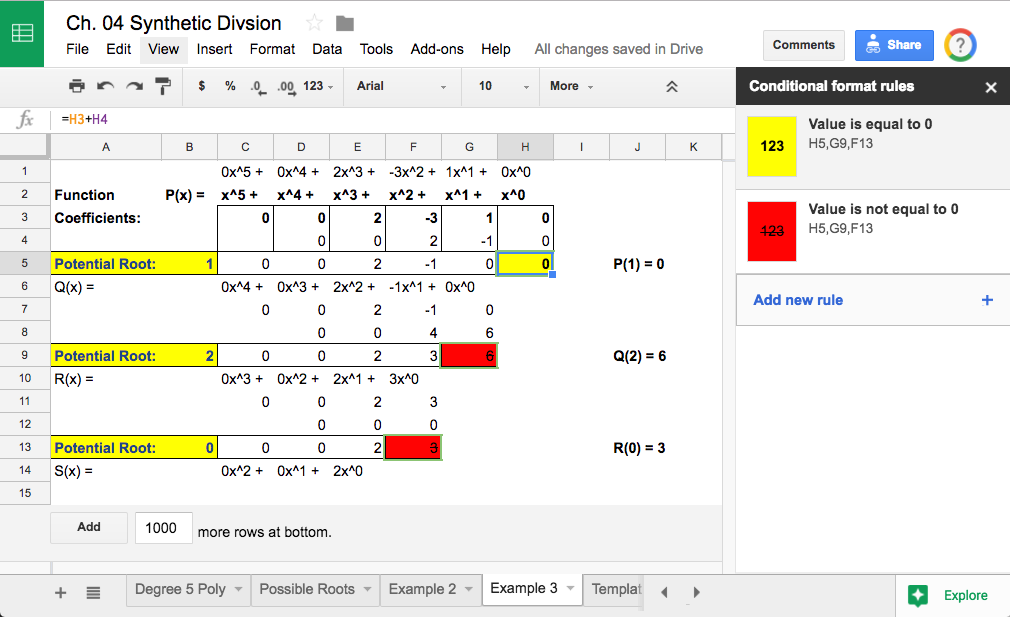 Left: How to add conditional formatting. Right: Example of conditional formatting in action.
With the conditional formatting, they now have a visual cue of whether or not their possible root is in fact a zero for the graph without having to actively process the value of the remainder. Although it is a very subtle embellishment, it is a powerful and useful one when trying to identify specific values in larger arrays of data (e.g. grade books, accounting, resource utilization over time, etc.)
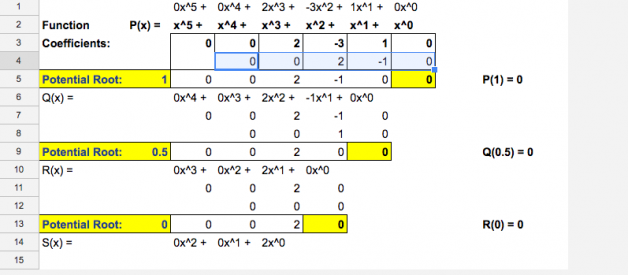
While the calculator for synthetic division is now effectively done, students still have to identify which values can even possible be roots before they test them. For that, they learn to mind their Ps and Qs by using the rational root theorem. To quickly obtain all the possible ratios, I provide them with a template that they can complete to do this as well. In doing so, they learn about the iferror() command, which is useful when you know your formula might produce in error due to dividing by zero or an empty cell.

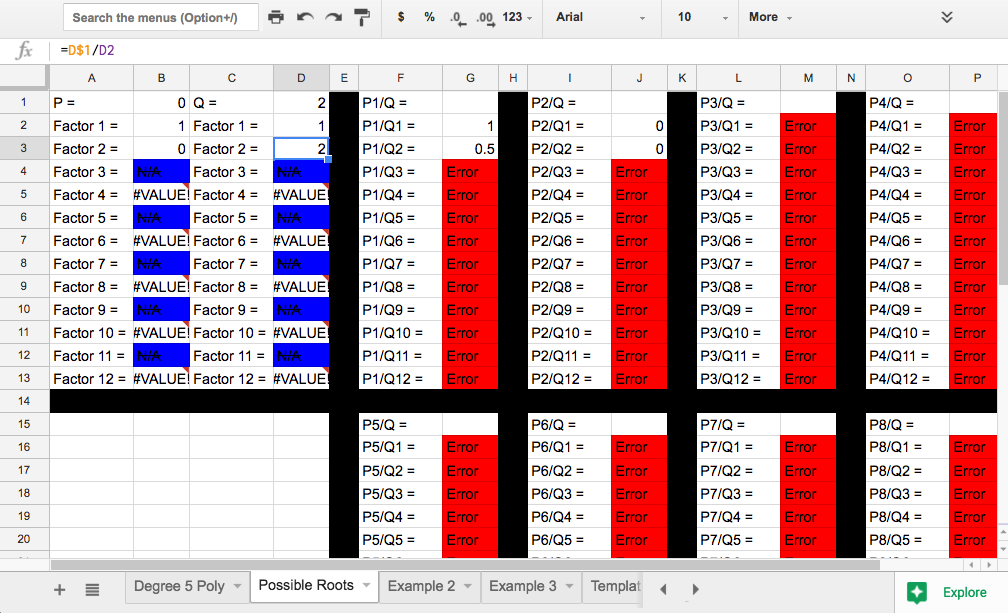 Left: Template with sample code for students to learn by imitating. Note the use of the dollar sign to lock particular cells or columns/rows as the formula gets copied and pasted. Right: An example of the template filled out for the polynomial given in the first sample -there are only three possible roots: 1, 0.5, and 0.
Using the iferror() command in conjunction with conditional formatting allows one to quickly limit their focus to only where there might be possible roots listed. This particular template works for polynomials with any coefficient between 0 and 100, which may yield up to 12 possible factors for both the p- and q-values.
Conventional high school math classes typically avoid such cases (just as they do large polynomials) because the amount of time that would be necessary just to find all the possible roots would become overwhelming, but using this approach, it now requires no more effort than simply typing in 12 numbers total (six factors for the p-value, and six for the q-value since the factored pair will also be automatically generated).
I may have been a wee bit misleading in saying that I teach my students how to use ampersands (&) and quotation marks (? ?)in that I do not explicitly offer instruction for how to use them. I do however provide examples in my templates for the students who need a bit more of a challenge to try to replicate. Eventually however, they will need to learn how to use these features, and by that time they will have some examples to look back at as well.
With all elements of the synthetic division calculator complete, now comes the fun part -putting it to work. After doing the matrix calculator assignment, I learned my lesson that it is a lot off work to go in and check that they work manually. So instead, I decided to have my students prove to me that it works and allow this to take place at both their and my convenience AND learn new skills in the process.
To submit their evidence that their synthetic division calculator does in fact work, I decided to have my students create a short video (maximum of two minutes) using QuickTime, or other screen record software, in which they demonstrate their calculator being used to solve for possible roots of some polynomial. I told my students they could choose problems or examples from the book, my lectures, or anywhere else as long as they demonstrate that their calculator does in fact work. The other caveat was that they have to narrate their video, explaining what they are doing as they are doing it and why.
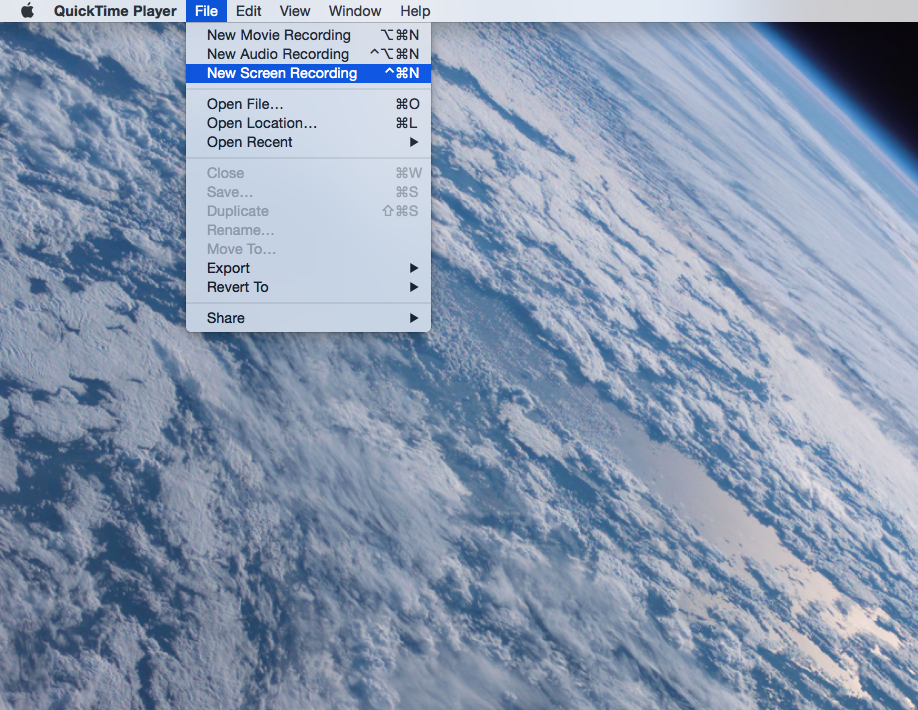
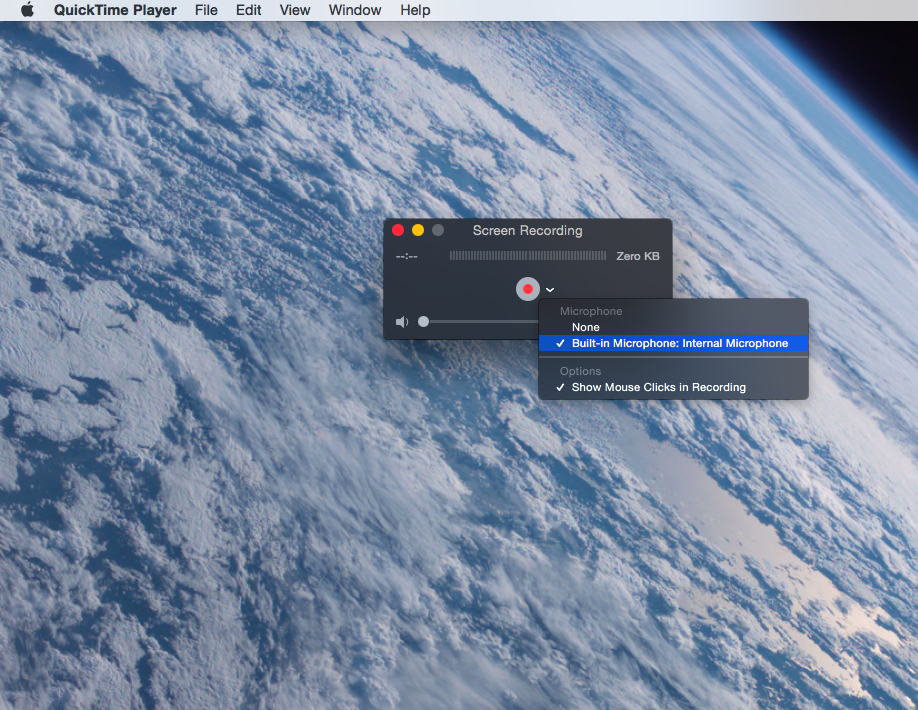 How to use QuickTime to make a video recording of work on your screen.
Overall the project came together quite nicely. For privacy reasons, I had my students upload their videos to a cloud storage folder hosted by the district since all of the videos originally have their personal information at the top. I have since cropped the videos so you can view them here. I hope you enjoy.
This video is simply clean and articulate in explaining how it all works.

