This post is for complete newbies to Ubuntu Linux. It explains how to setup proxy.
Proxy in Network Settings
Most people know about this, but for the sake of completeness,
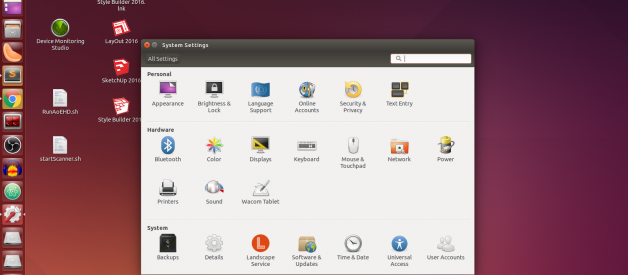
- Open System Settings in Ubuntu.
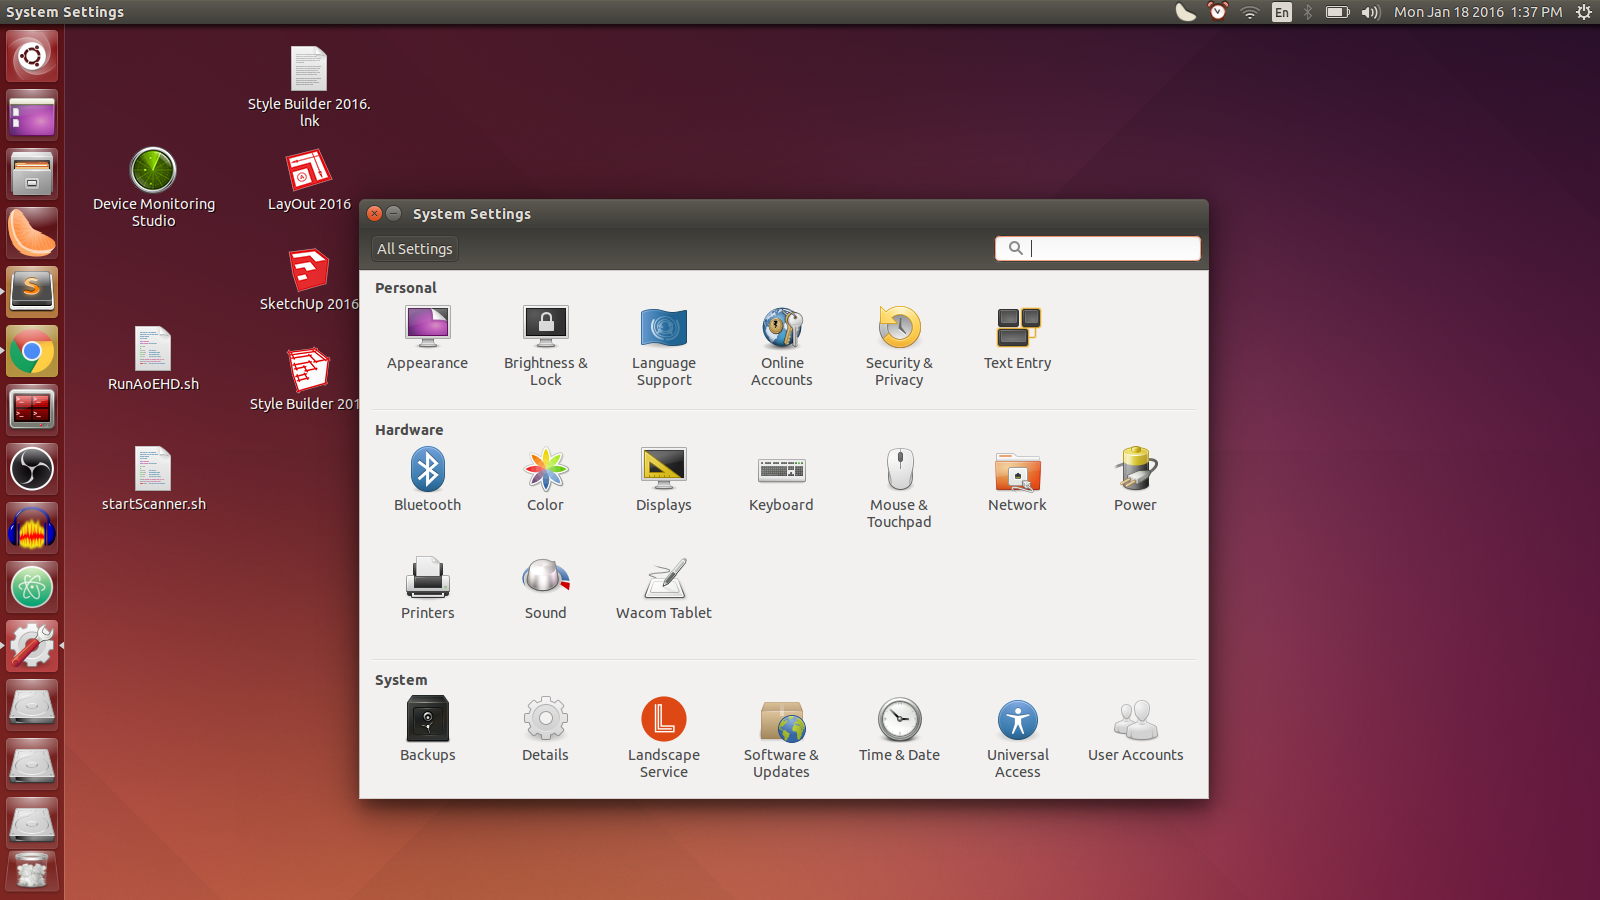
- Under Hardware, click on Network
- On the left hand side plane, click on Network Proxy
- In the Method drop down list, choose Manual
- Fill up the http and https proxy. No need to set ftp and socks proxy.
- Click on Apply system wide.
 System Settings Dialog Box
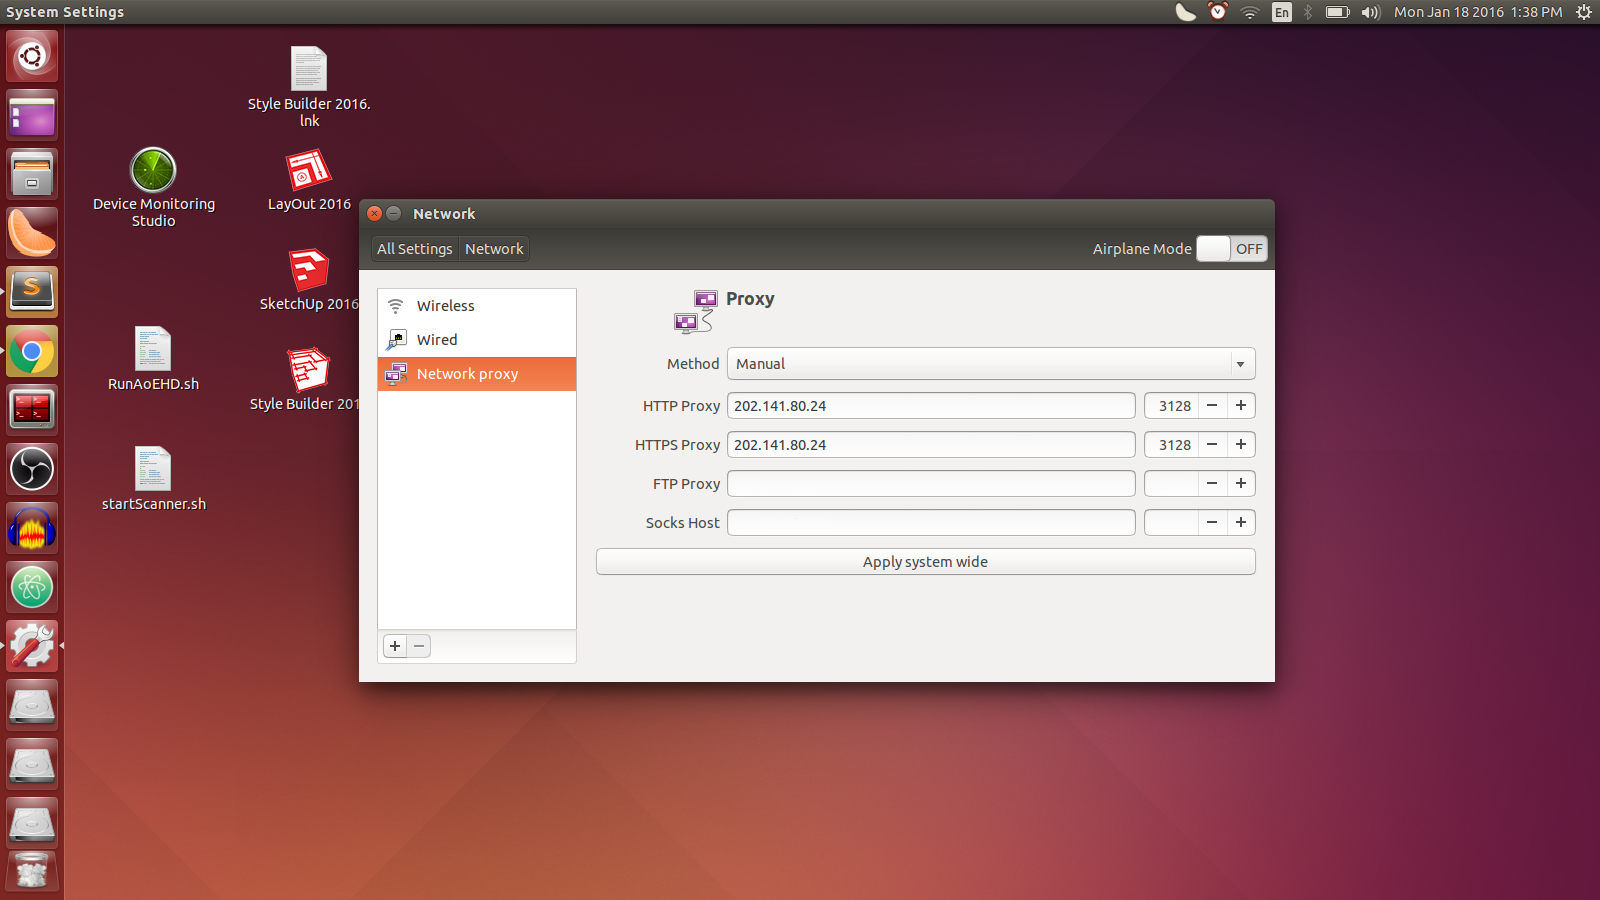 Network Settings Dialog Box
Proxy in /etc/apt/apt.conf
Just like you have a Google Play Store for downloading Android apps, you have an apt-get package manager for installing applications in Ubuntu.
If you have used Chrome or Firefox, you must have noticed that they interactively ask for proxy username and password. Unlike them, apt-get does not. Instead, it fails, saying ?407 Proxy Authentication Required?
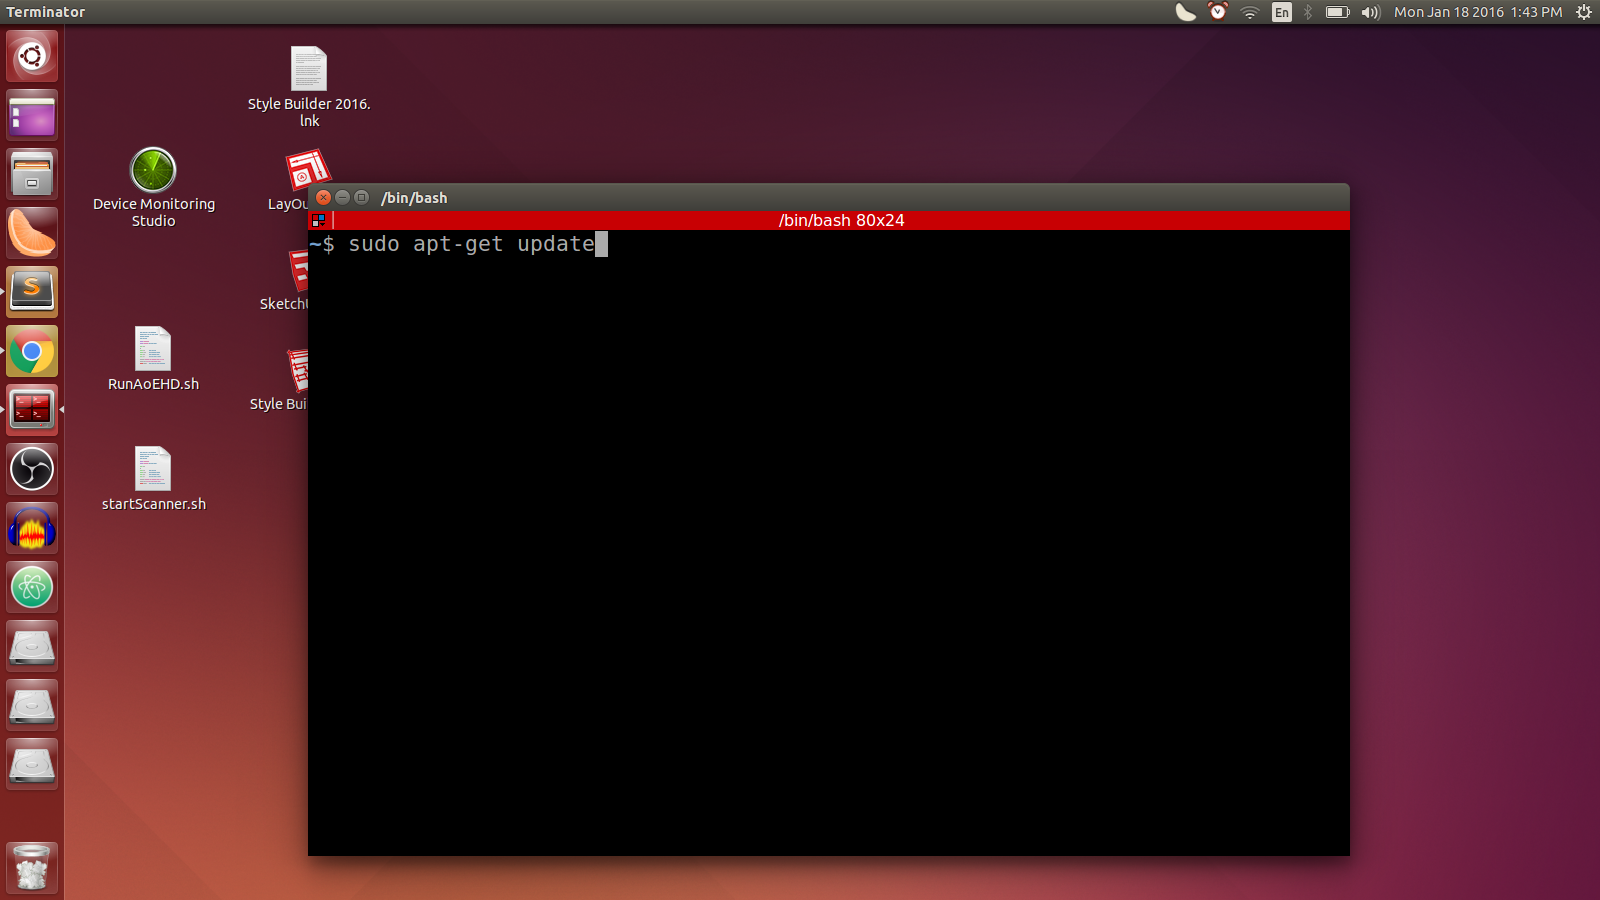 Running ?sudo apt-get update? in a terminal
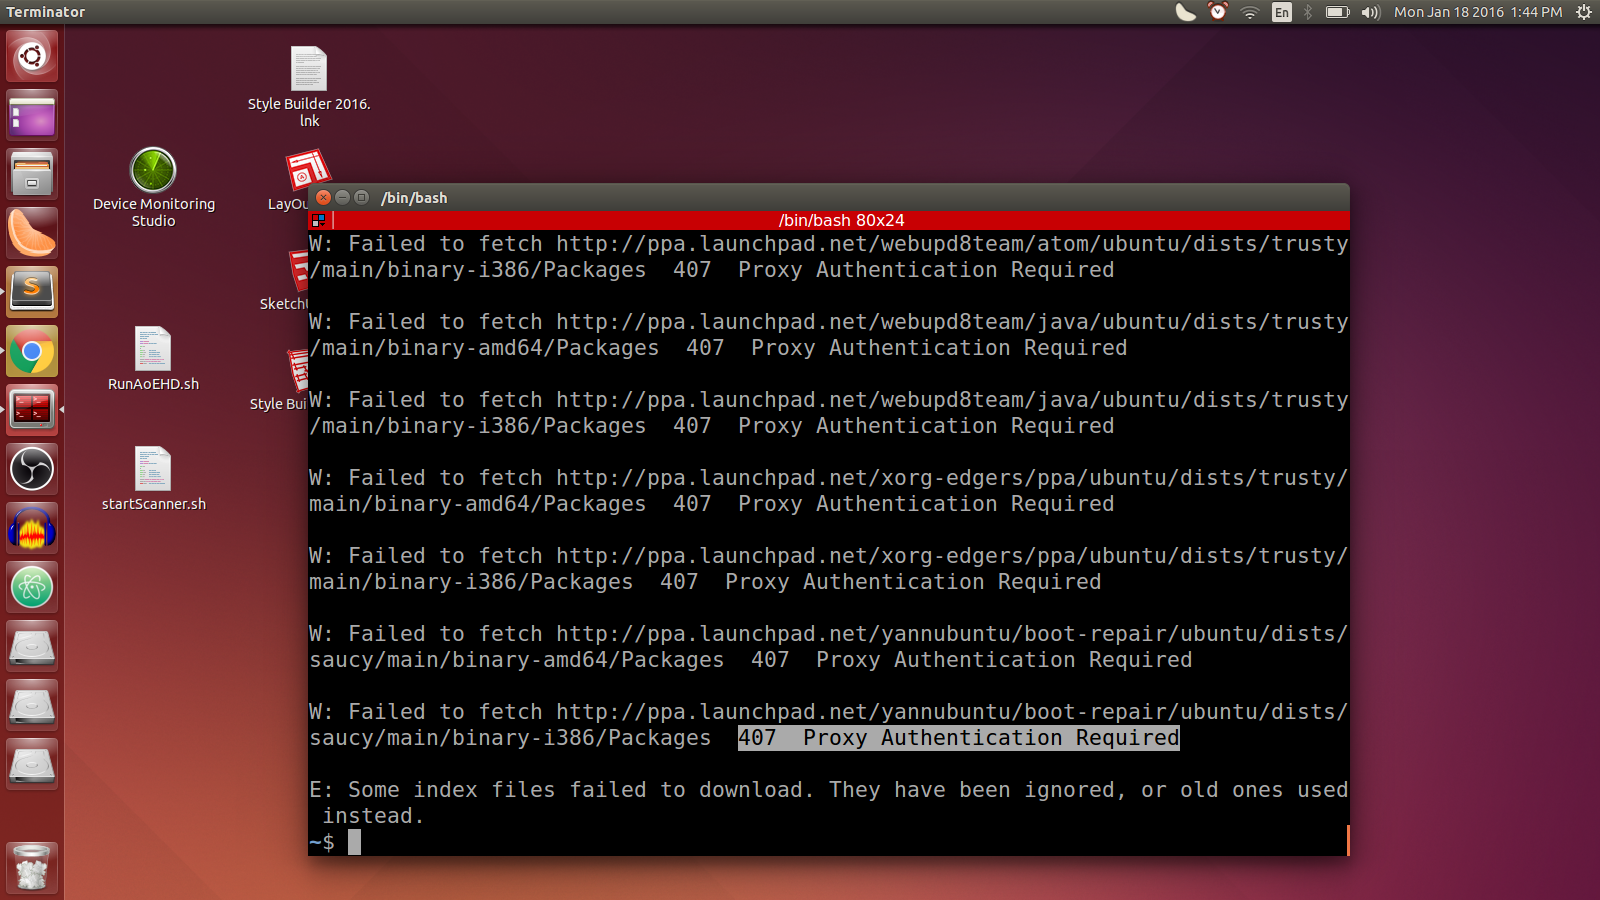 The ?407 Proxy Authentication Error?
Fortunately, apt-get uses proxy that you store in a file ?/etc/apt/apt.conf?
Lets open this file and have a look. Open a terminal, and type
sudo gedit /etc/apt/apt.conf
We see that gedit(a text editor) opens the file, and it has the following contents.
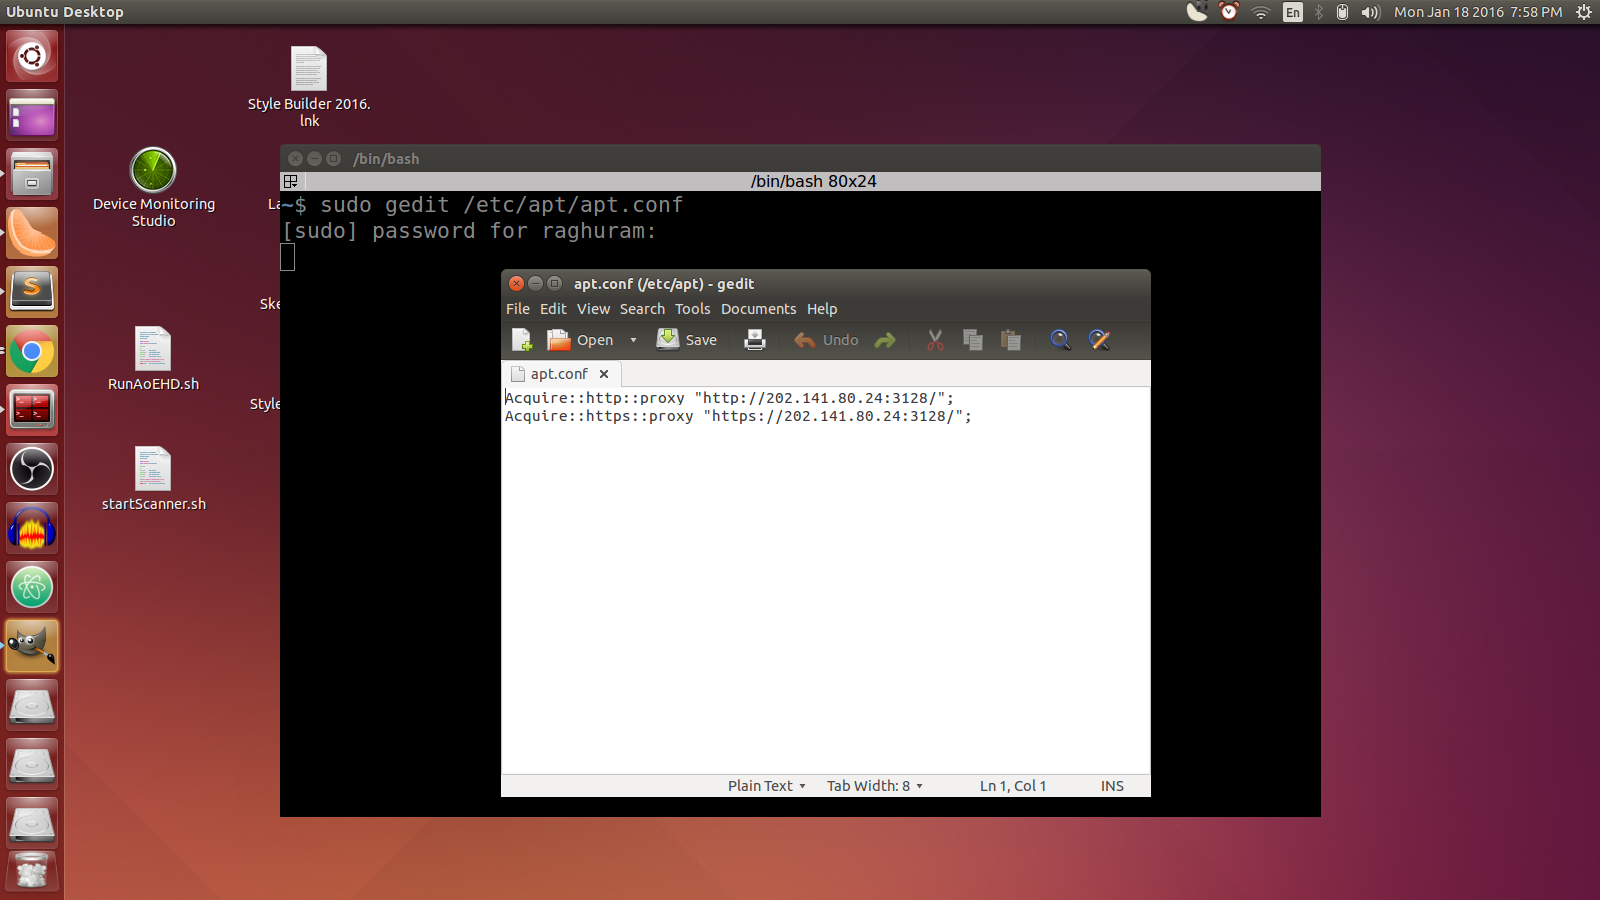
Now, we modify the file as follows,
Replace <user>,<pass>,<proxy> and <port> by your actual details. Save and close the text file. If you get any GTK-Warning on your terminal, ignore it.
Now, to check if apt-get is working, type ?sudo apt-get update? in the terminal and press enter.
If you have done everything correctly, you shouldn?t get the ?407 Proxy Authentication Required? error anymore.
Proxy in ~/.bashrc
Setting Proxy in bashrc itself would just take a minute . You would just have to follow some instructions and everything would work. But we are not going to do that. Instead, we are going to understand what we are doing and why we are doing it. Because that?s the Linux way.
Environment Variables
Before explaining about .bashrc file, I need to explain what environment variables are.
In Linux, an environment variable is a system variable. Its just like a variable that you know from any other programming language – It has a name and a value. But instead of being part of a program, its part of your terminal.
So, why do we need environment variables? Broadly, environment variables provide information to the various processes running on your system.
The Proxy Environment Variables
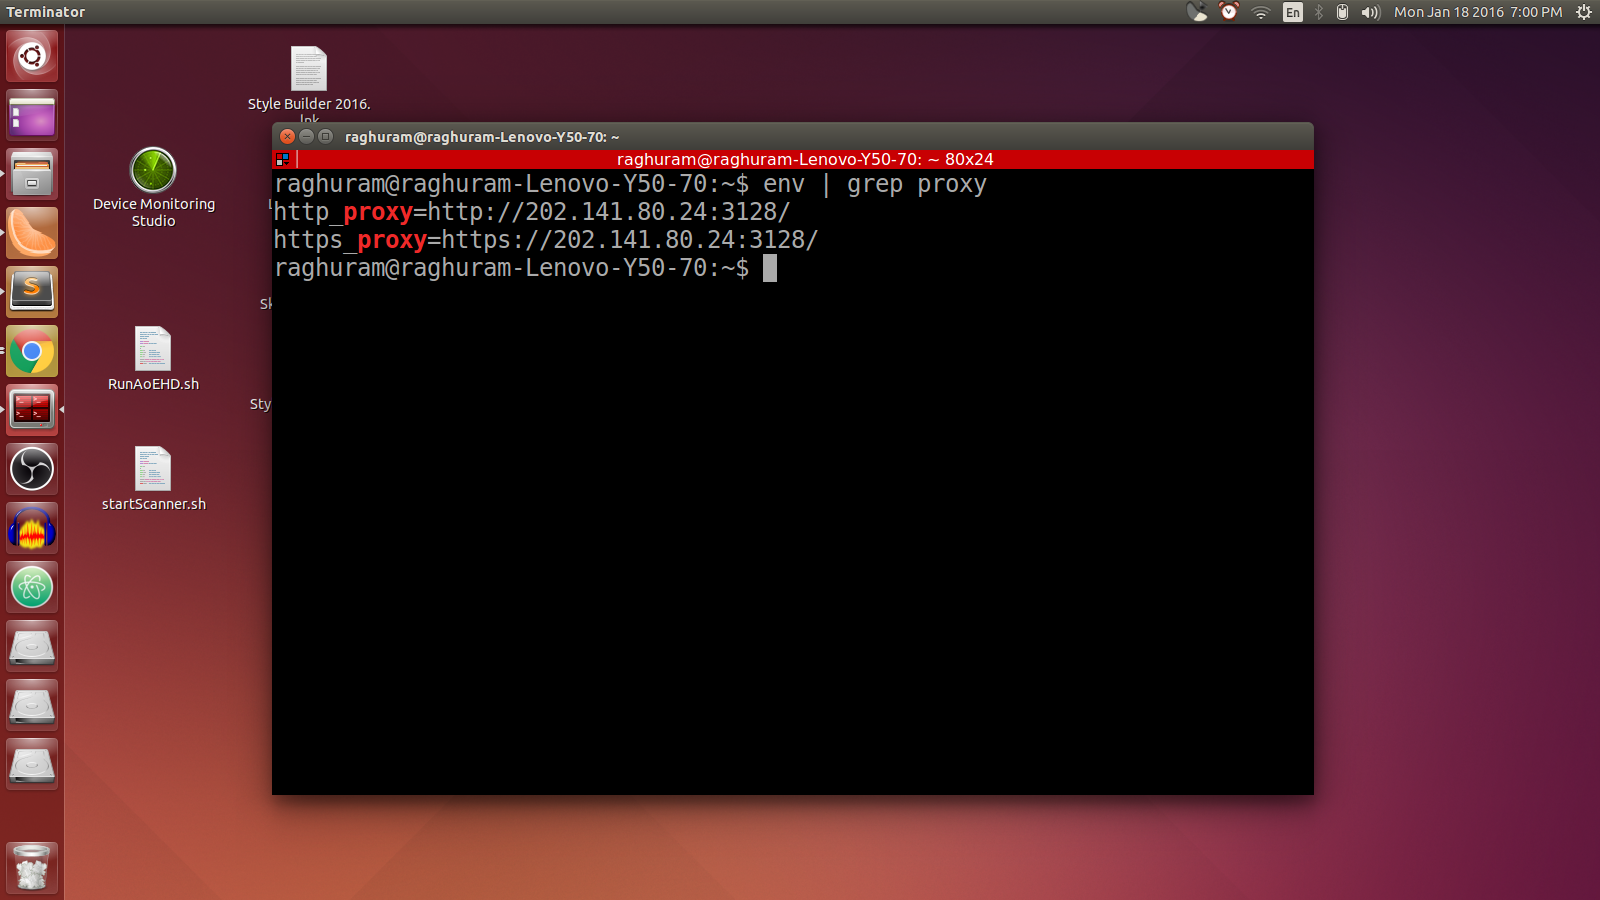
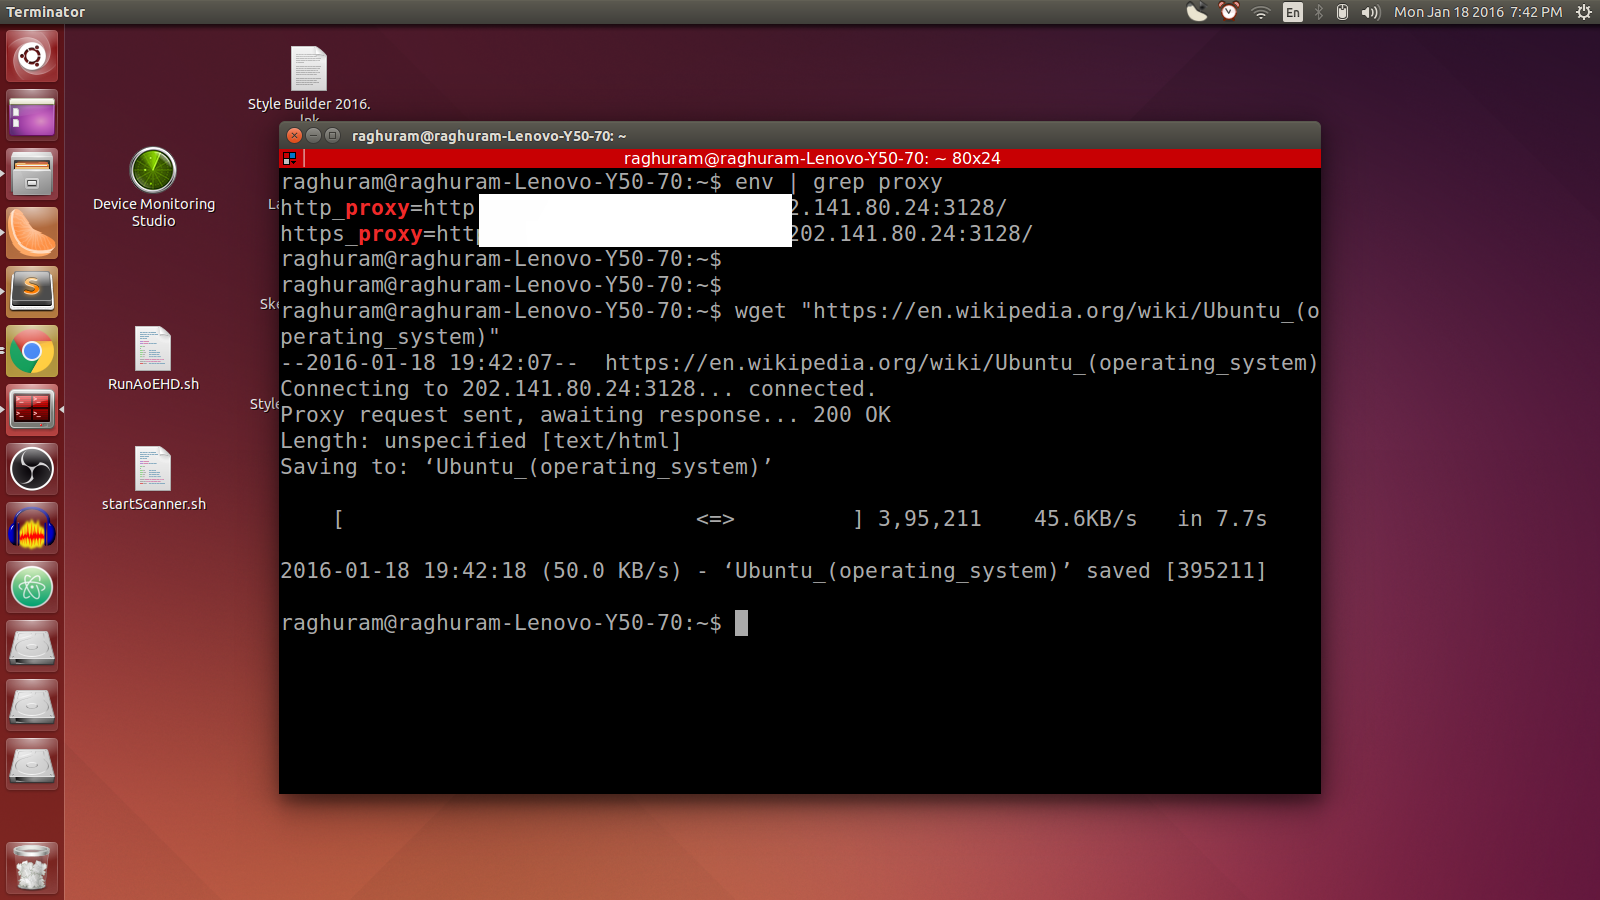
One such example is the proxy environment variables.To view the proxy environment variables, open a terminal and type,
env | grep proxy
The proxy environment variables are used by various processes to connect to the internet. One such example is the wget.Try doing,
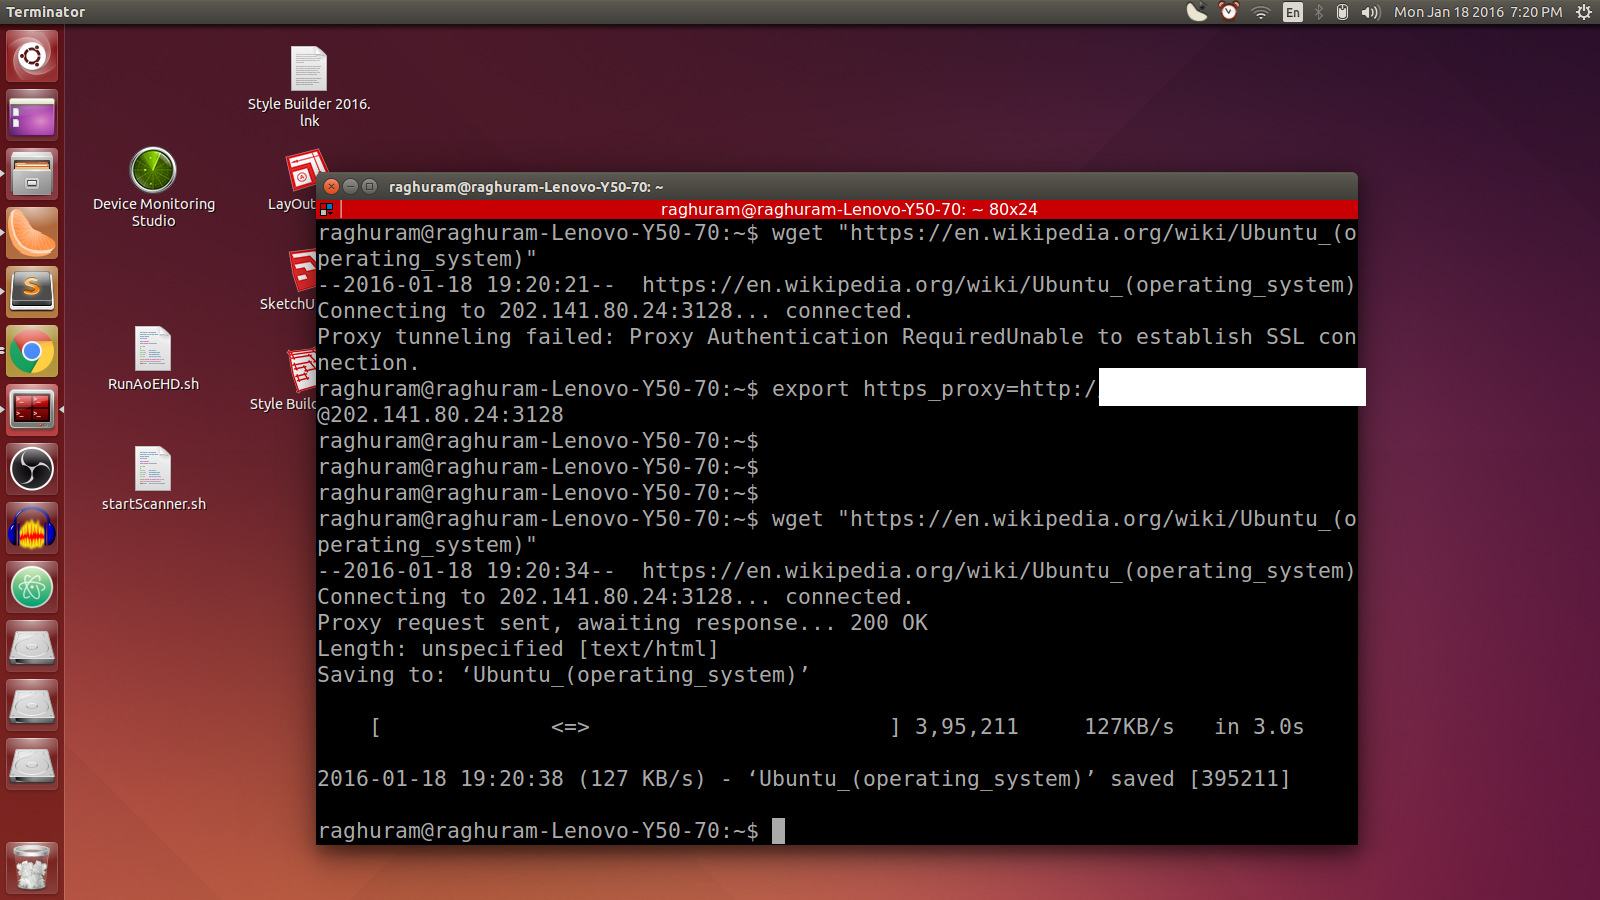
wget ?https://en.wikipedia.org/wiki/Ubuntu_(operating_system)”
It will say something like,
Proxy tunneling failed: Proxy Authentication Required
As you might have guessed, wget is also like apt-get, in the sense that it doesn?t ask you for proxy username and password. Instead, it fails with a 407.
Remember 407. If you ever see it, you know that its a proxy issue.
Thus, we have to modify the proxy environment variables to include username and password.Try doing,
export https_proxy=http://<user>:<pass>@<proxy>:<port>/
Again, replace <user>, <pass>, <proxy> and <port> with your own details. Example below.
export https_proxy=http://k.raghuram:[email protected]:3128/
Note : export is a Linux command used to set and modify environment variables.
Then, try the wget again. This time, it will work.The screenshot is given for your reference.
All seems good. Close the terminal.
 wget behind proxy
But wait, its not so simple.
Open another terminal and type,
env | grep proxy
You will see that the proxy environment variables have been reset.
Environment variables belong to a shell. Changes made to the environment of one shell does is not reflected in another shell.
Thus, we have to type the export command every time we open a terminal . How tedious.
Here comes our lord and saviour – bashrc.
The ~/.bashrc file
The bashrc file is a file that is executed when you open a terminal. Thus, you can put code into it, and it will be executed, as if you wrote that code after you opened the terminal.
So, we can put the export commands inside the bashrc file, and finally setup the proxy.
Open a terminal, and type,
gedit ~/.bashrc
And add the following lines at the top,
export http_proxy=http://<user>:<pass>@<proxy>:<port>/export https_proxy=http://<user>:<pass>@<proxy>:<port>/
Of course, replace the details with your own.
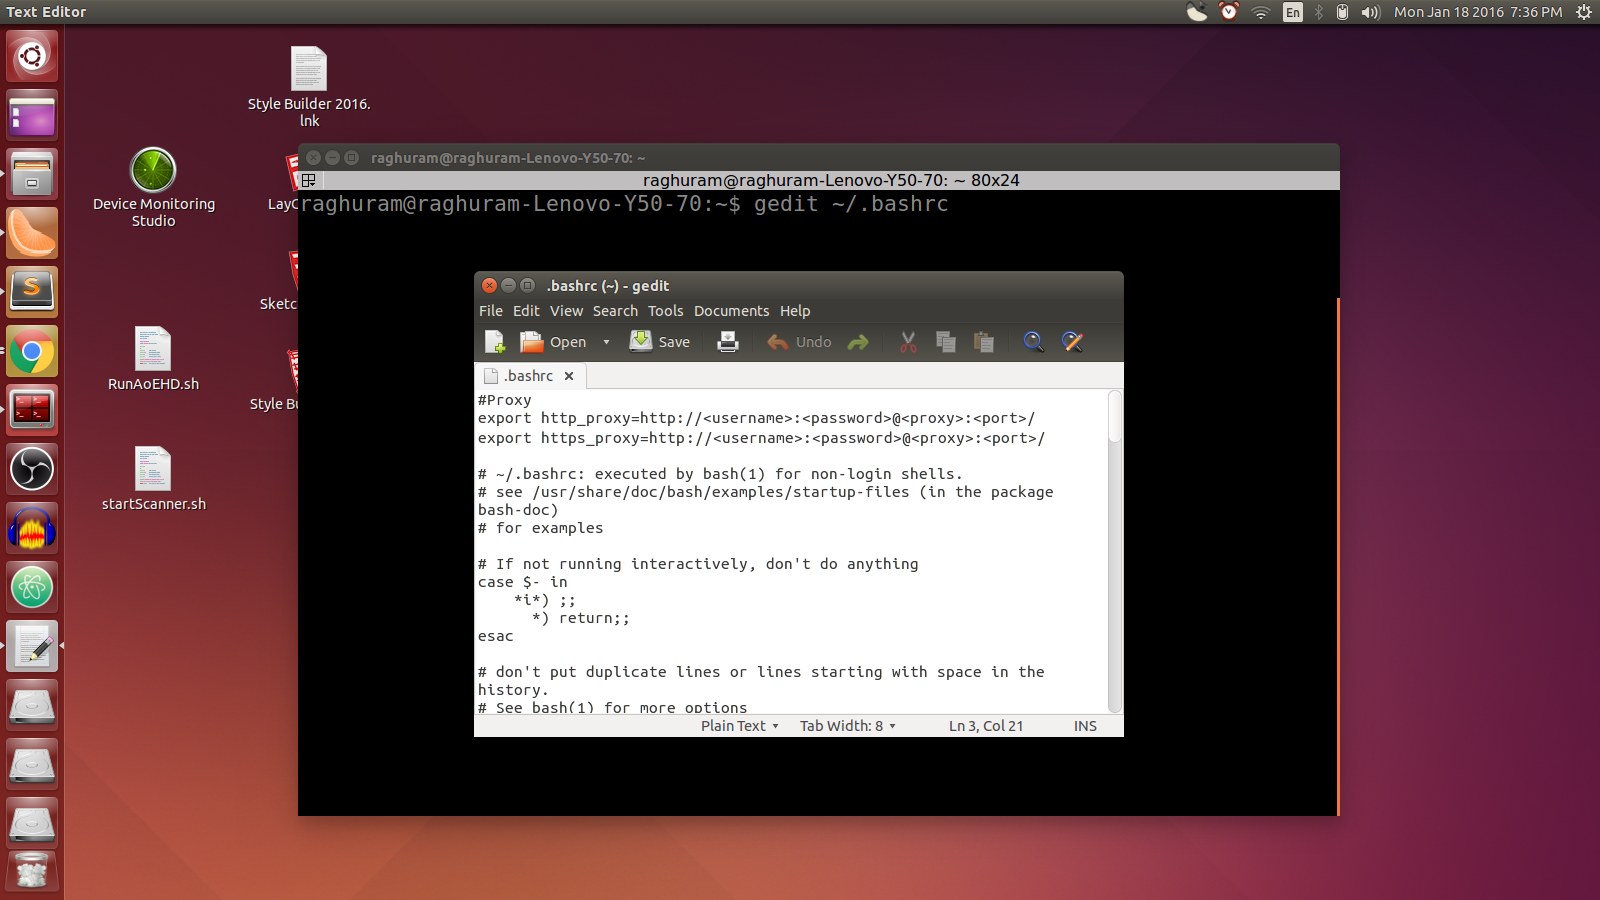 The modified bashrc file
Save and close the file.
Like I said earlier, bashrc runs every time you open a new shell. So close the terminal and open it again. Alternatively, you can run source to execute the bashrc file.
source ~/.bashrc
Now, lets try this once again.
env | grep proxy wget ?https://en.wikipedia.org/wiki/Ubuntu_(operating_system)”
Done. But is it?
If you reached here, then I have to say, you have successfully setup proxy in Linux.
But, the more you learn, the more there is to learn.
For example, bashrc method only works for a particular user. So if you run a command using sudo, it does not work.
To make it work, you have to use the -E option of sudo. Check out the man page of sudo to learn more about the -E option.
Also, what is the difference between shell and terminal? Are they the same?
More to come.
Originally published at raghuramkrishnaswami.wordpress.com on January 18, 2016.Updated on 12 Oct 2017

