Lessons learned from painting a bike frame for the very first time.
 R.K. 00
About the frame
Most folks have heard about the infamous LA traffic, and it?s real. First order of business was to find something relatively bombproof with low maintenance and cheap. So cheap that I?d be more upset about the Uber fair home than the bike missing (stolen.) A few days on craigslist and $150 later ? I was cruising through the streets LA on a fixed gear. It was definitely modeled after someone else’s taste. It was covered in spray paint, had miss matched wheels (one was sprayed the other wasn?t), and the bike was covered with a bunch of stickers. Now, I can appreciate a tactful stickerbomb, this was no such stickerbomb.
 Just so many, bad, stickers.
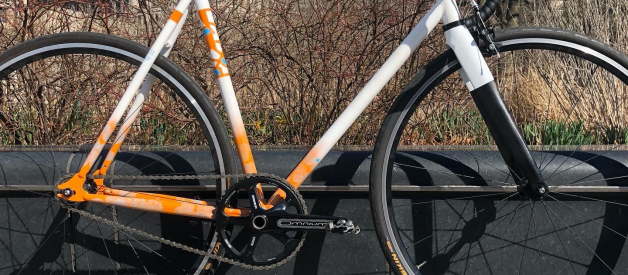
Four or five years later, I now cruise the lively streets of NYC on the same bike. With about a 10 mile ride between home and work ? it?s become the perfect commuter. It was time to show the bike some love. First went all of the stickers then new wheels. Bit by bit everything got changed until now where the only original component is the actual frame (not too far off from the Ship of Theseus concept.)
Procreate, on the iPad Pro, was the only tool I used play with ideas. Even though the level of detail wasn?t perfect, it was enough to get an idea. This gave me a chance to see what it?d actually look like on a frame, a chance to think about how to go about painting a given design, and a lot of the time lead to more ideas. Often times something would look great in my head, but not so much in person ? better to find out in a picture than actually painting it.
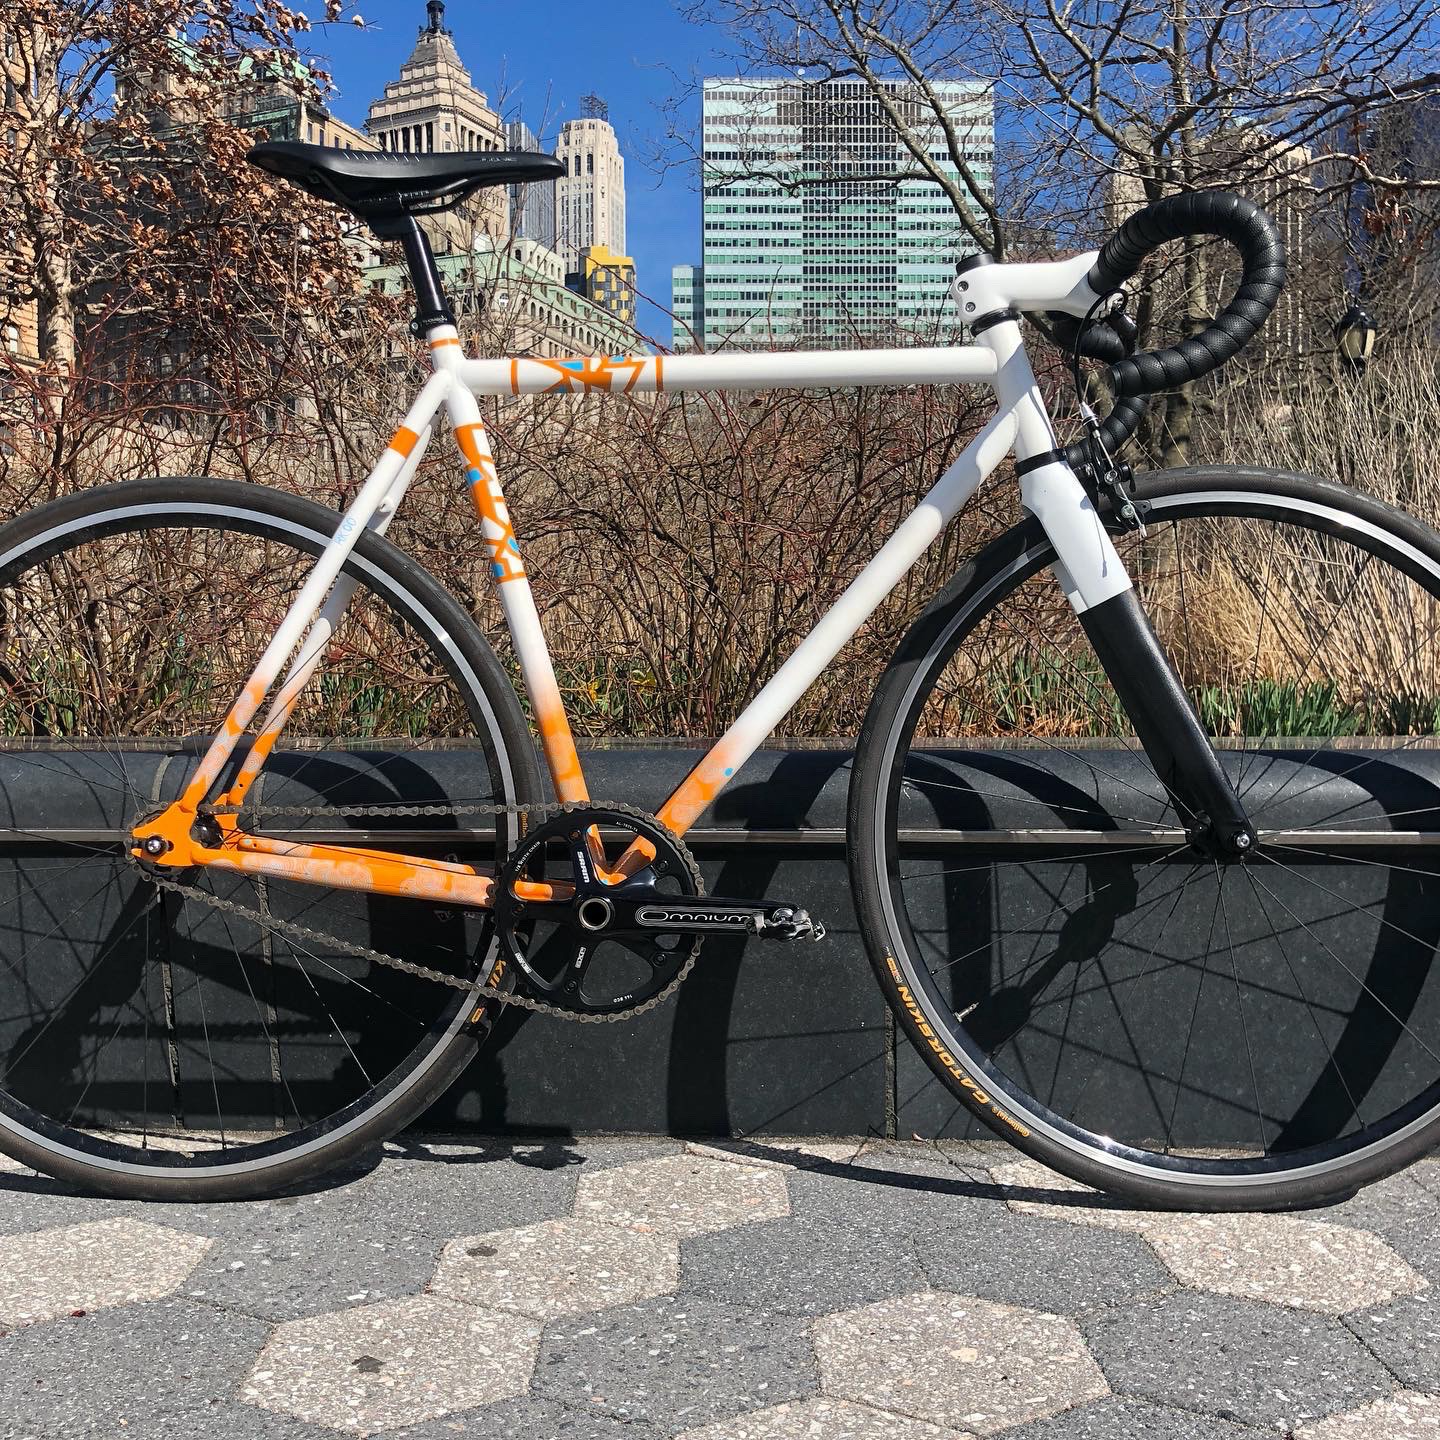
 Obligatory bike pic when riding through Brooklyn, NY.
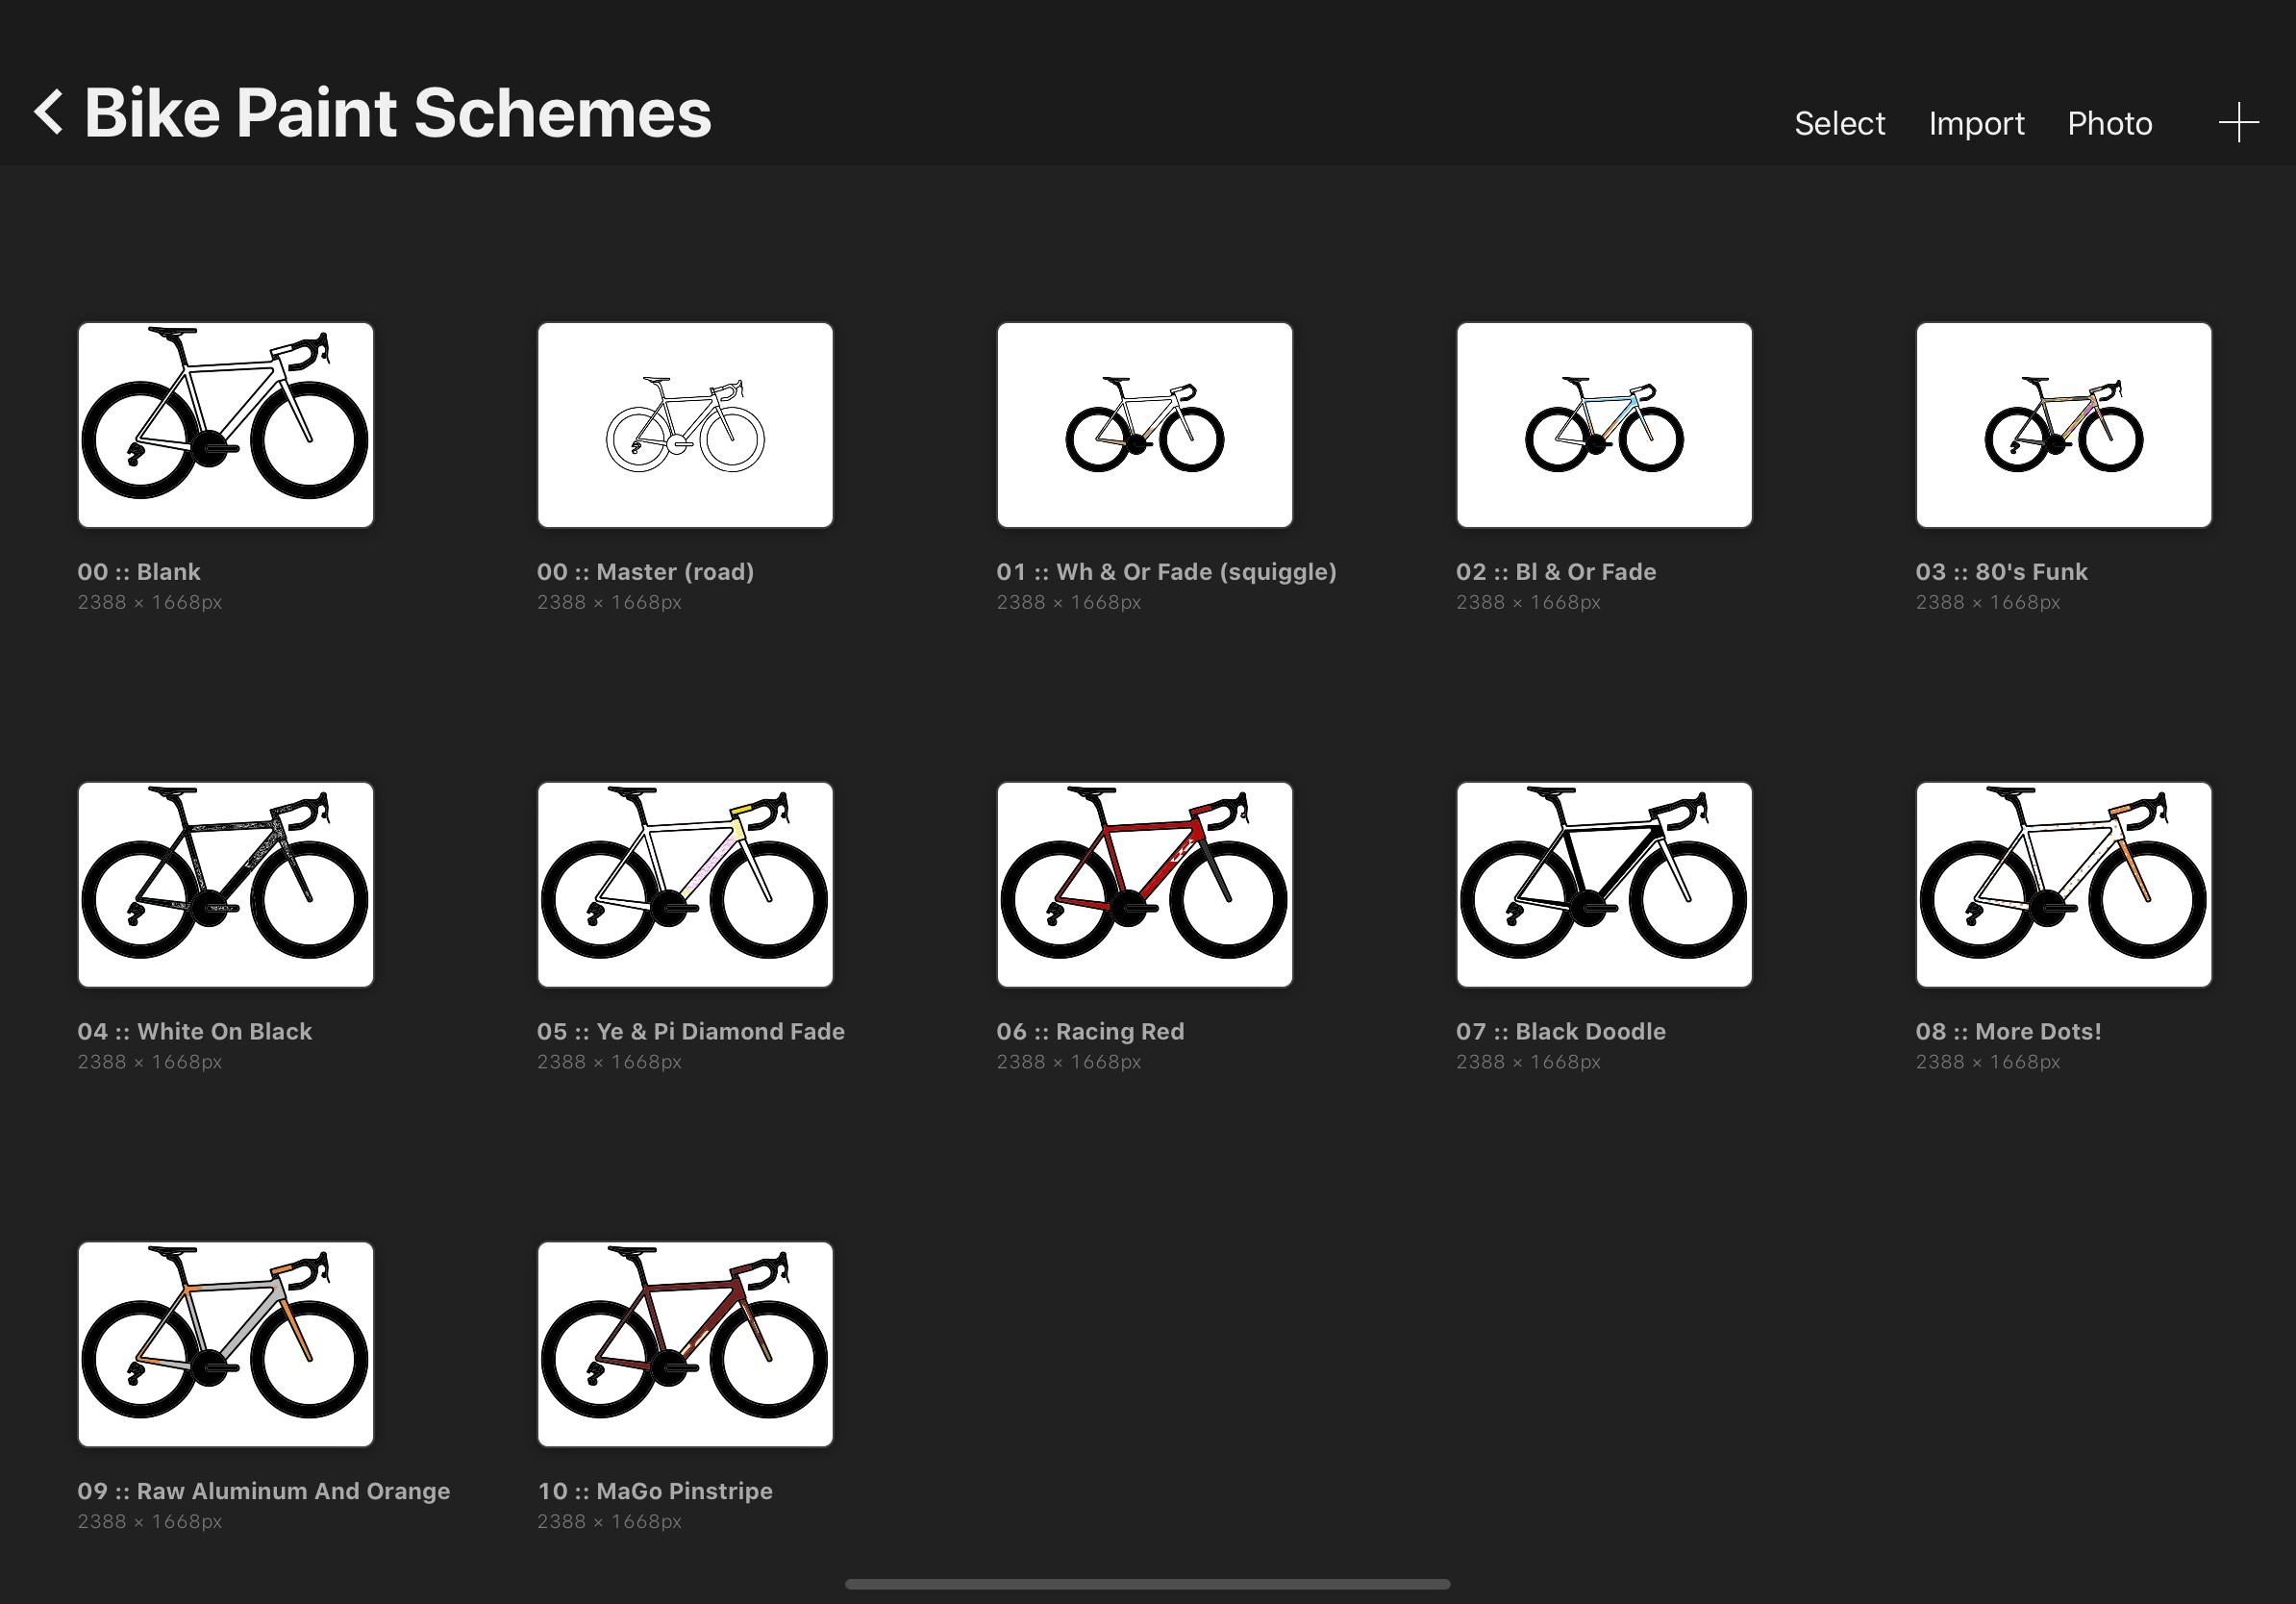
Now there?s a folder of frame images that need painting. Some designs are masked, some are drawn freehand, most include fades, and a whole lot of color.
At this point it was all about watching YouTube and checking out Instagram for inspiration, ideas, and techniques. Even with all of that, there was so much more to learn. Playing with different designs & and scouring social media for more ideas and techniques.
 Totally justifies spending $$$ on a new iPad?
The process & lessons learned
Setting up
Painting a frame is 70% prepping and about 30% actually painting. There is lot to be done before any paint touches the frame, including figuring out a design, building a work station, and removing paint / sanding.
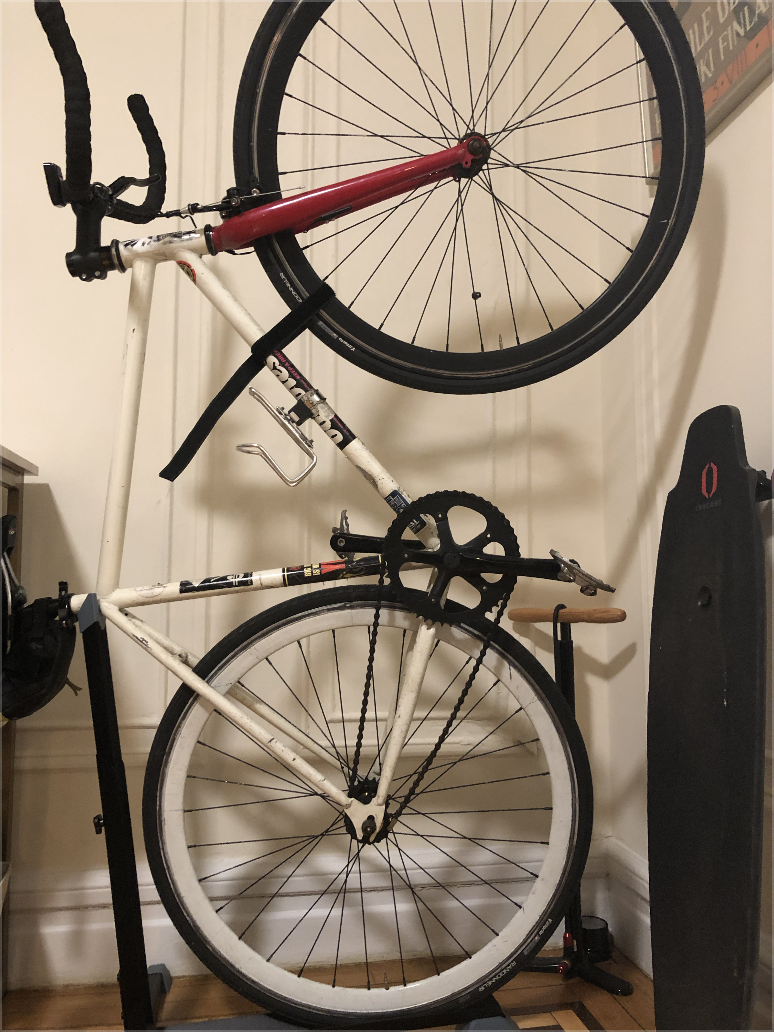
The work stand.
There are a few avenues to explore when it comes to holding up a frame. Ultimately this depends on the space and material avaiable. I?ve seen folks hanging frames from the ceiling, standing it up on a wood pallet, or just hanging it off a secured pole. I knew the pole option was the one for me because this design called for often flipping the frame over to get to the bottom bracket easier. This definitely helped when trying to get an even coat of paint around the tubes.
 Broom + work stand + old shower curtain
Removing paint is actually the worst
Before paint finds it?s way onto the frame it was time to scrape. I used a gooey paint remover because there were a lot of awkward angles and vertical tubes. Using a more liquid-based paint remover would have been more difficult to keep on the frame. With a disposable brush & a cut up quart container, I covered the frame and let it sit for a few hours.
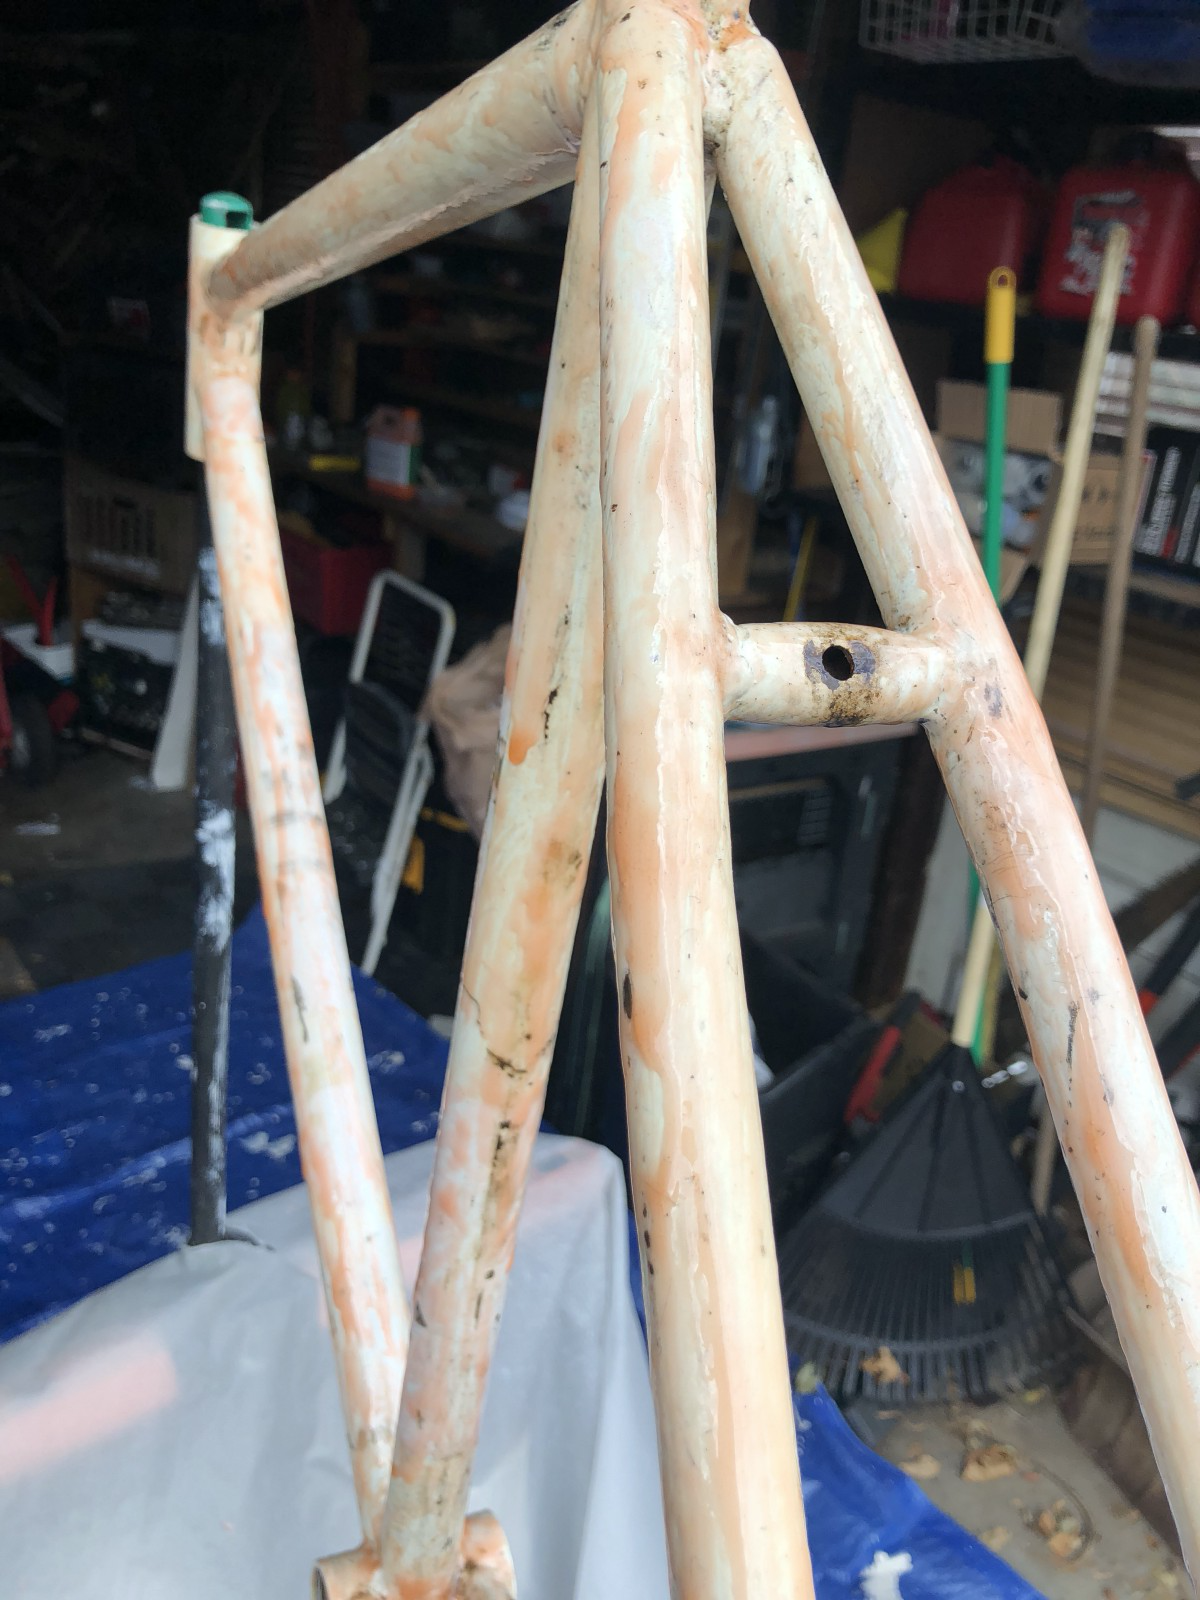
Then it was time to blast some music and start scraping. Then scrape more. The tubes were the fun part, paint was still tough to scrape but you felt there was a sense of progress. The real challenge lay ahead once it came time for areas like the seat post, head tube, bottom bracket, and drop outs. Reapplying more goo to the hard to scrape areas and waiting another hour before scraping, then just having patience to get those time areas. I repeated this process three or four times to ensure as much paint is removed.
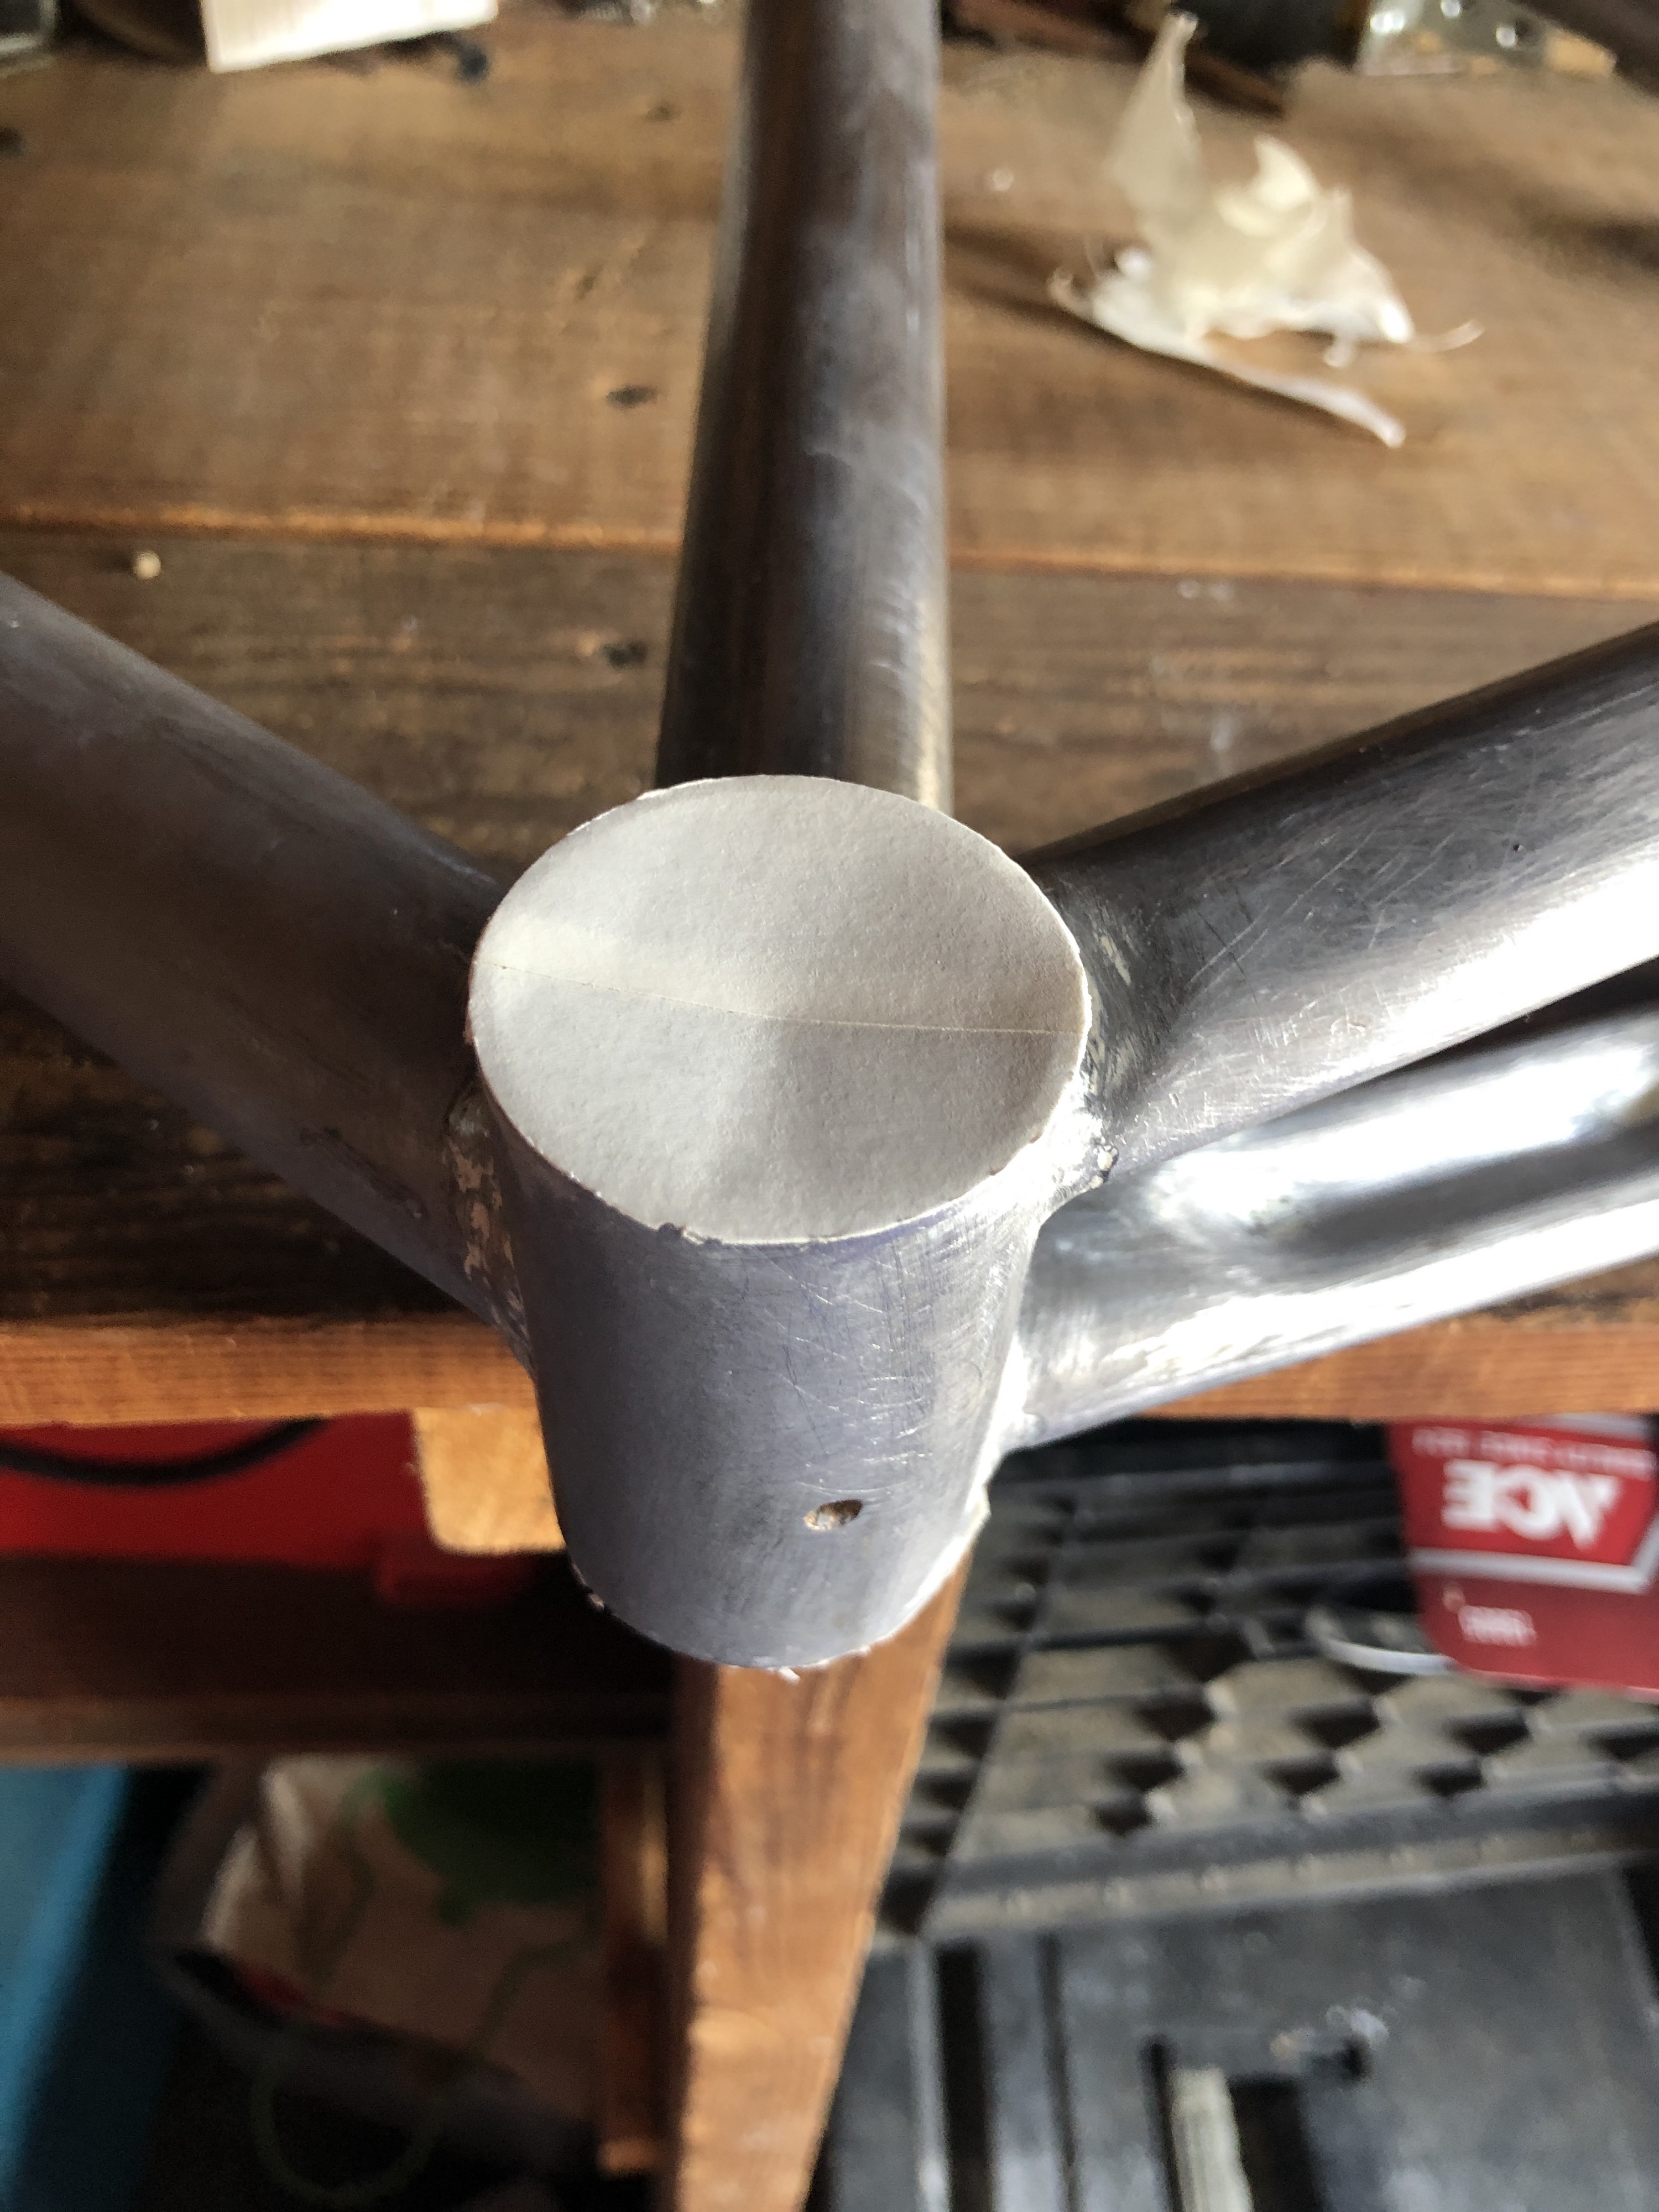
Once the frame was at a point where there were still specks of paint scattered, it?s time for sand paper. Again, hugely motivating on the tubes as you see more and more aluminum expose itself. Then, it was time for those hard to reach places again. This time I looked over to the work bench and noticed a really large screw. This screw was the key to removing paint in and around the welds.
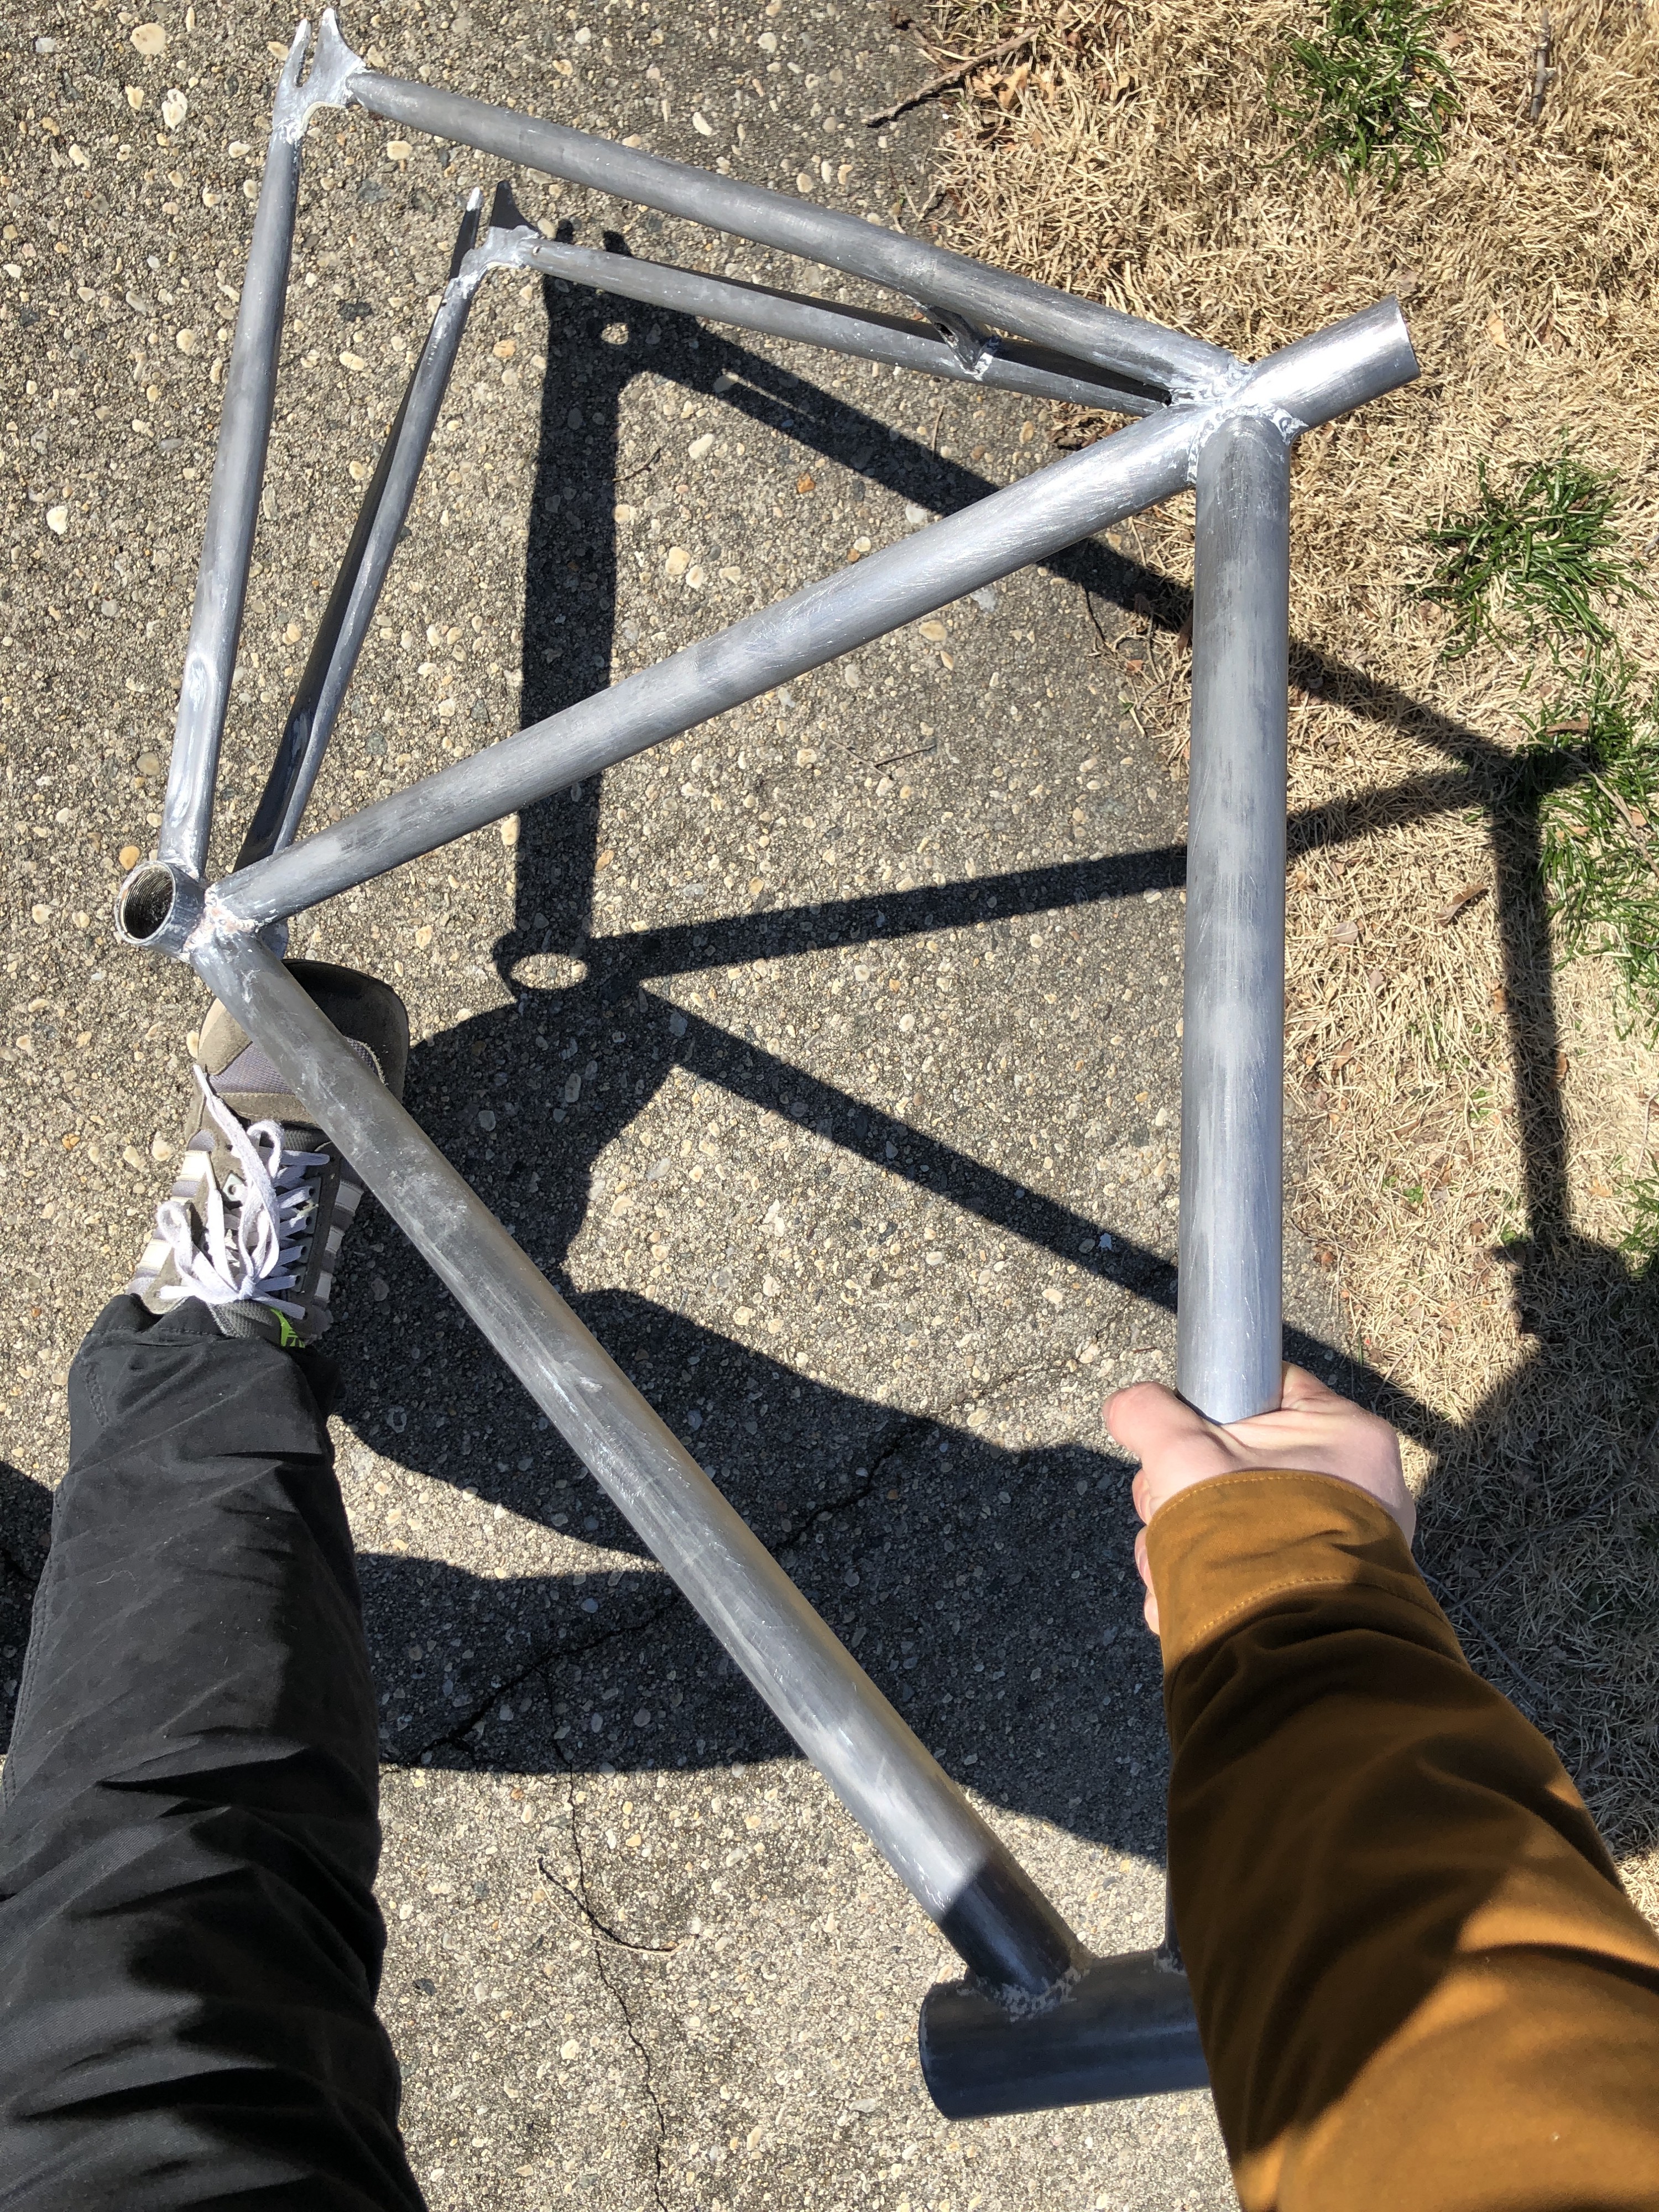 Not perfect, but we?re getting there.
In total it took about +10 hours to remove the paint from the frame. This included applying the goo, waiting, scraping, repeating, and sanding. Don?t use this technique for carbon fiber frames. It will remove the bond holding the carbon fibers together and jeopardize the structural integrity of the frame. Luckily, anything carbon that was used in this project was unpainted and the frame was aluminum.
Next time I will pair the paint removing goop, with a heat gun.
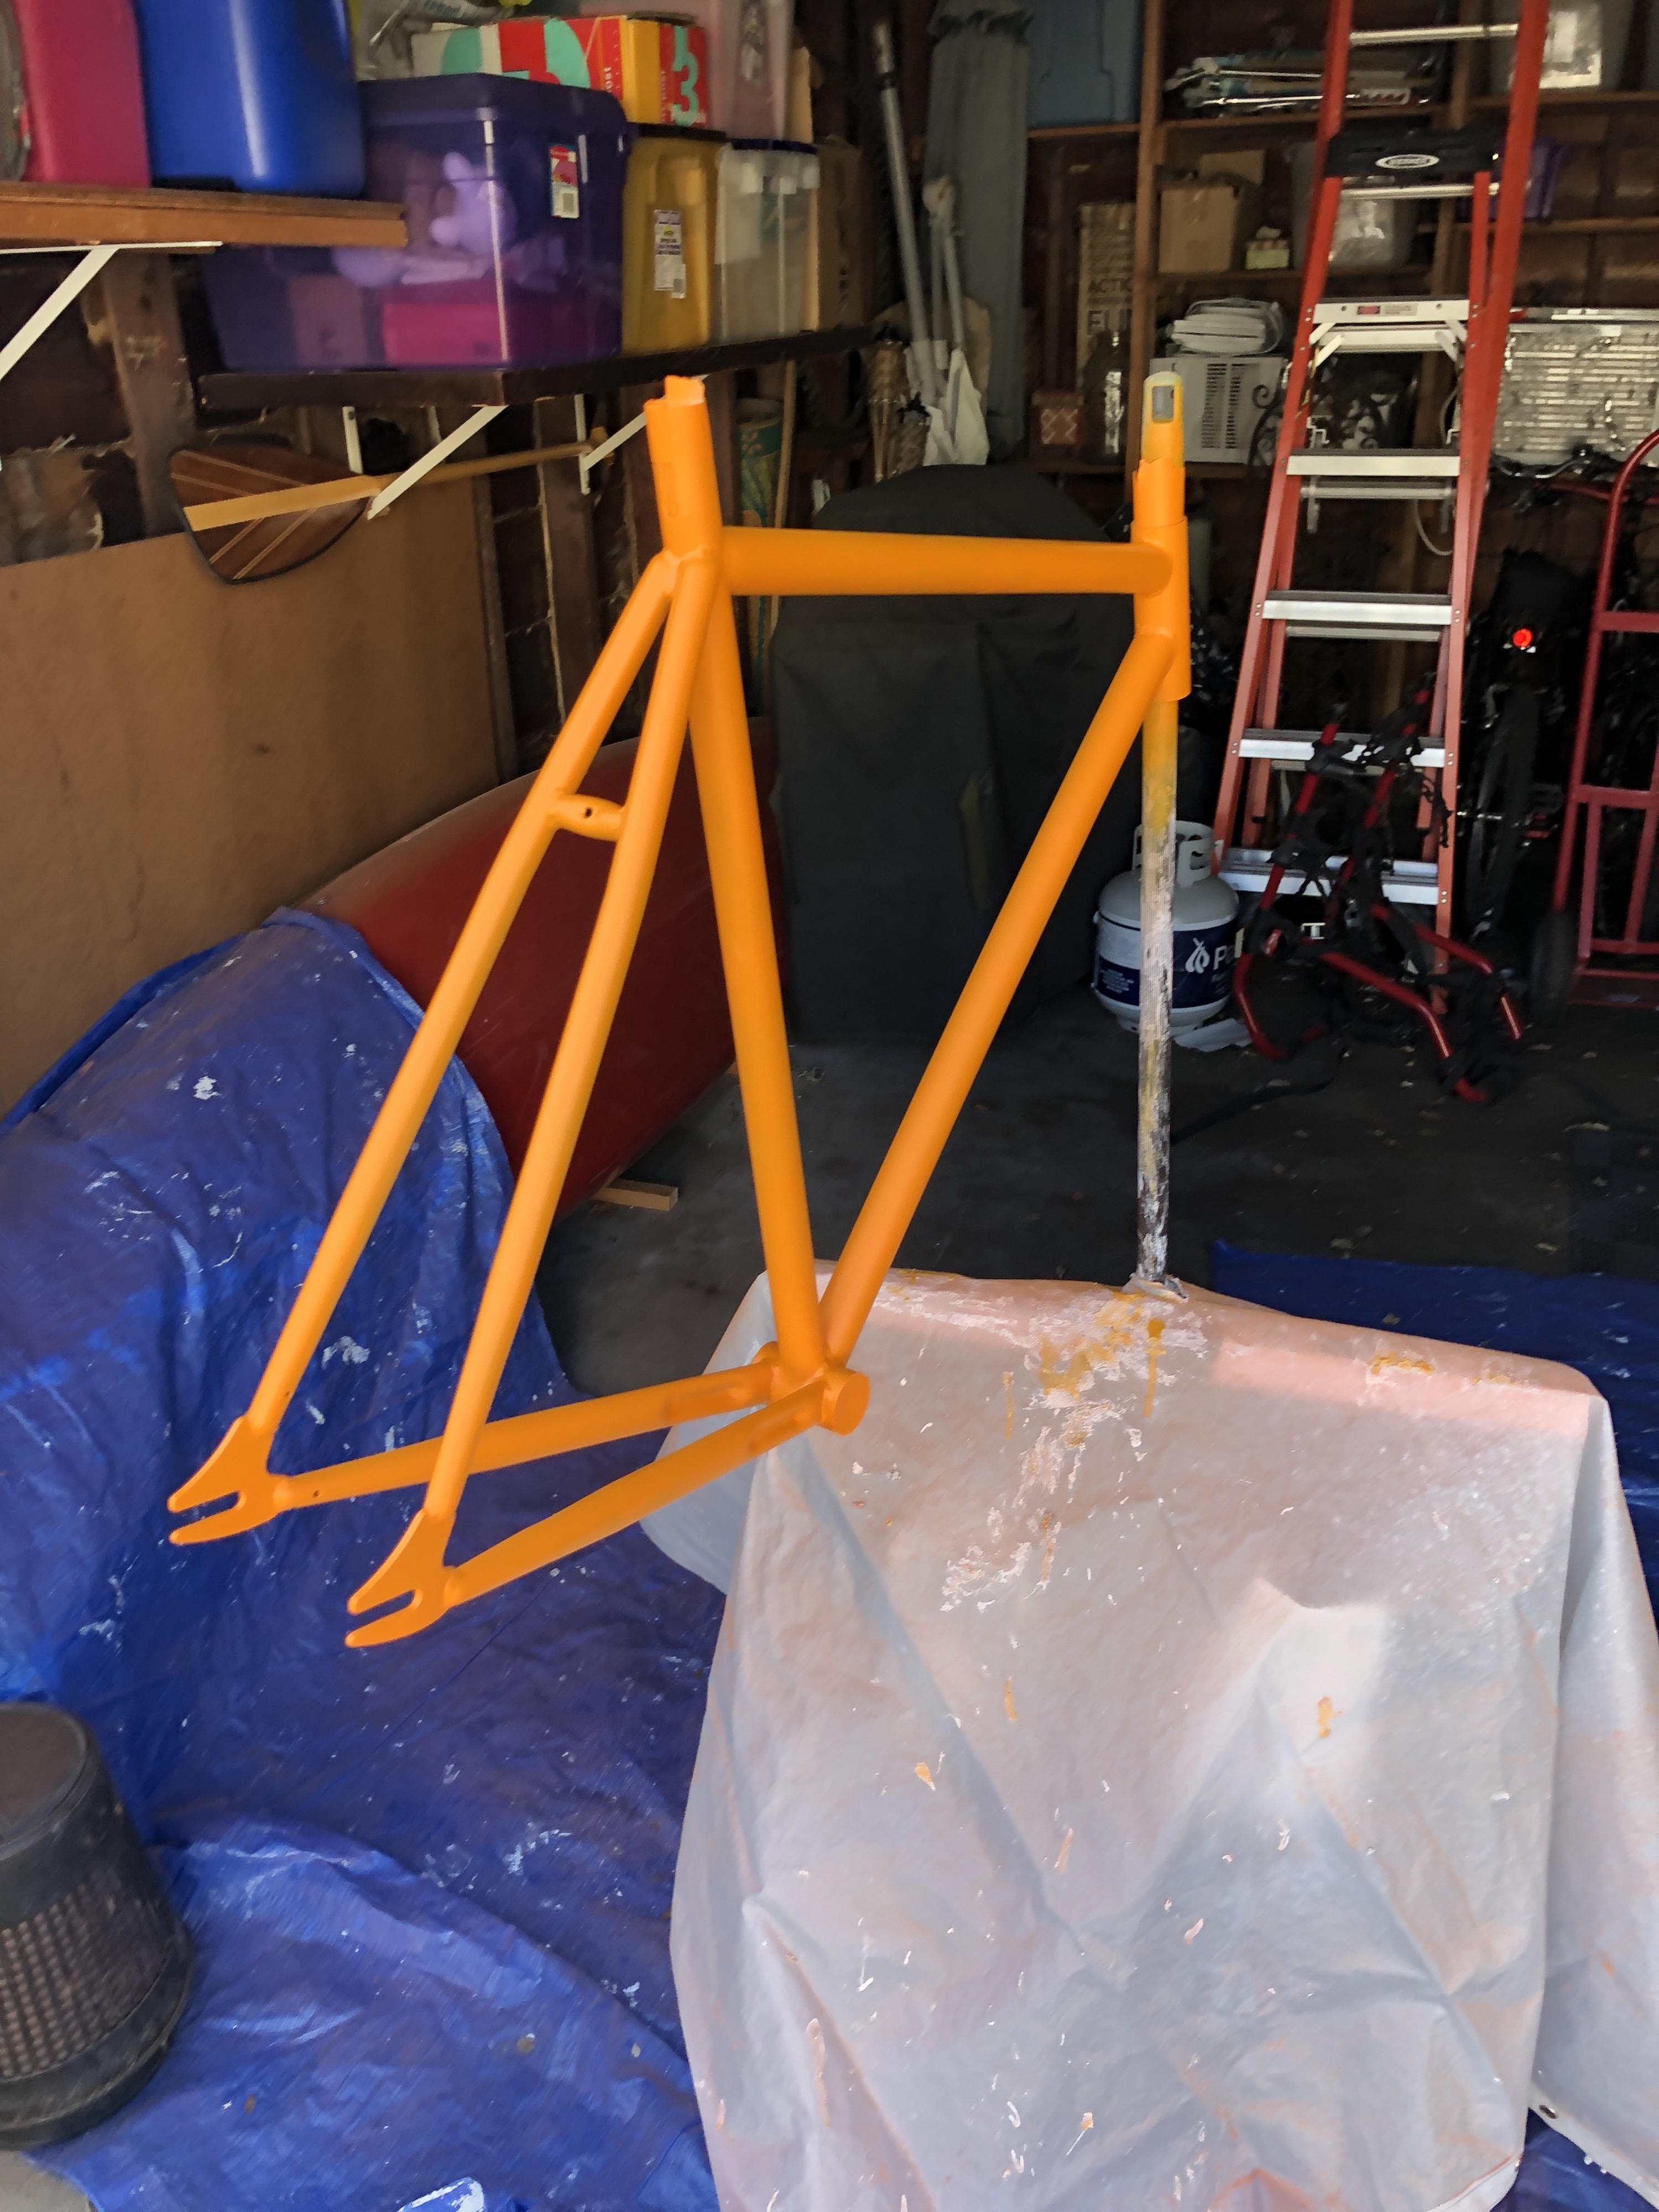
Buy extra paint
The only thing worse than running out of paint mid project is scraping paint off of a frame.
I ordered six cans total. Two primers- one for metal and the other for carbon fiber. Three colors- orange, white, and a light blue (not used.) One glossy finishing coat. Having never used spray cans before, I recommend spending a little bit of time spraying something else to get a feel for the paints, how the spray is affected by the temperature and angle you?re holding it.
I also went out and got a bunch of paint pens in the same colors. The colors didn?t perfectly match, but the blue pen was closer to what I had in mind than the blue paint, so it was time to adapt.
Next time I?ll pick up extra primer and paint used all over the frame to ensure I have enough for multiple even coats and to practice fading between colors.
Patience is super important
With painting a frame waiting adequate time between coats, to remove masking tape, to sand, or to rebuild the bike once the paint job is complete is very important. I often worked on the front fork and stem when waiting for a coat of paint to dry on the frame. I found waiting about 10 minutes to really let the paint dry and set made a big difference. *Pro tip ? give the frame a quick (light) rub down or light sanding between coats. There was often a little dry (dust-like) stuff that came off because the type of paint that I used included a powder coat built in.
Mask areas that touch bolts & shouldn?t get painted
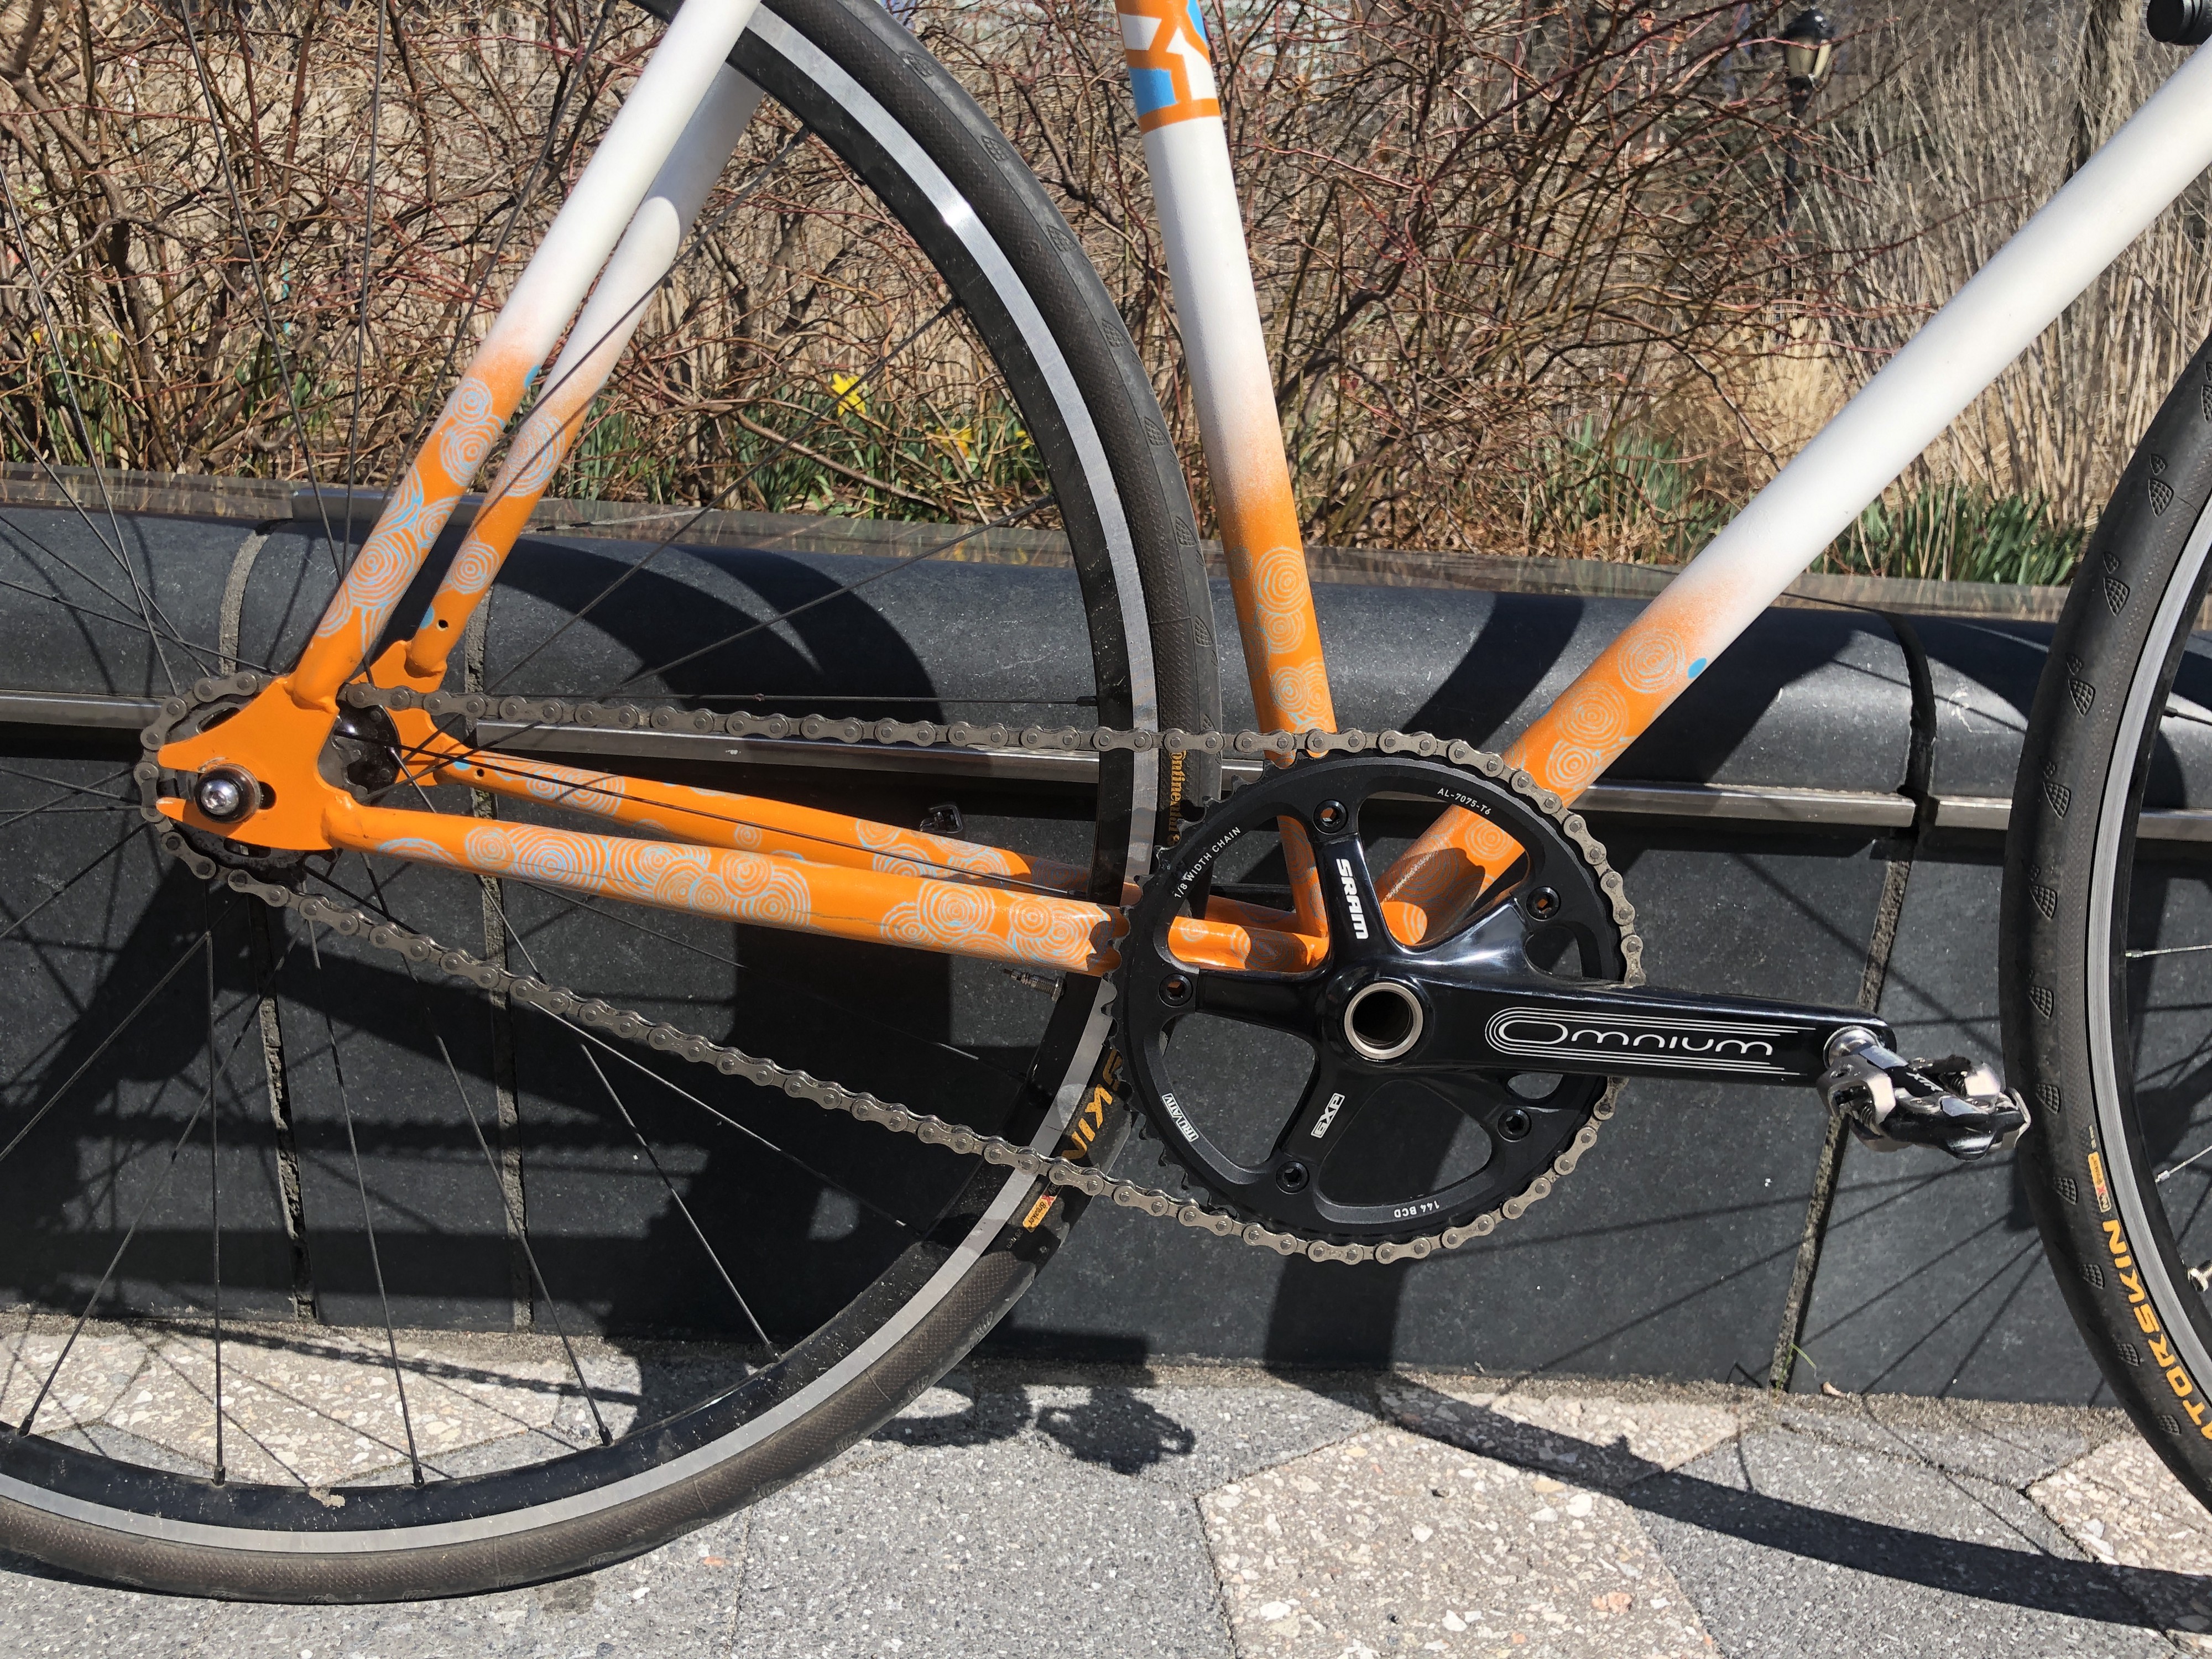
Mask areas that have to deal with torque / rubbing when bolts get tightened. Only when reassembling the bike I saw how torquing down on the stem bolts started to scrape away some of the paint beneath it. I masked off the hole where the front brake gets mounted and the sides of the bottom bracket; those came out noticeably cleaner than the stem and front/rear drop outs.
 Keep paint out of the bottom bracket and headset.
Spray the hard to reach places first
It?s tempting to follow what most folks do in YouTube videos ? just start going to town on the frame. Starting by spraying the joints, for example where the seat and chain stays meet to seat tube or around the head tube. This will help ensure a more even later of paint. It?ll gives you a chance to see how much paint flowed to the surrounding areas, saving a little paint for when you get to those areas. Not doing this caused some areas to have a little extra paint ? almost like a whole new layer.
Primer, wait, sand, primer, then paint
If you want your color(s) to really shine through evenly get two layers of primer onto that frame before even thinking about paint. Waiting the appropriate amount of time and sanding in between coats is the best way to ensure there?s an even base for the paint. Follow the advice above and go for those hard to reach places first.
This was my very first project and thus was an experiment. There were a lot of questions floating around my head prior to, and while, working on this project. One of which was, how much of a difference will having multiple coats of paint / primer really make?
From a distance the frame looks pretty even. However, take a closer look and it?ll be clear that even though the paint is clearly the same color ? it?s not 100% even.
 +10 points for not spraying the canoe!
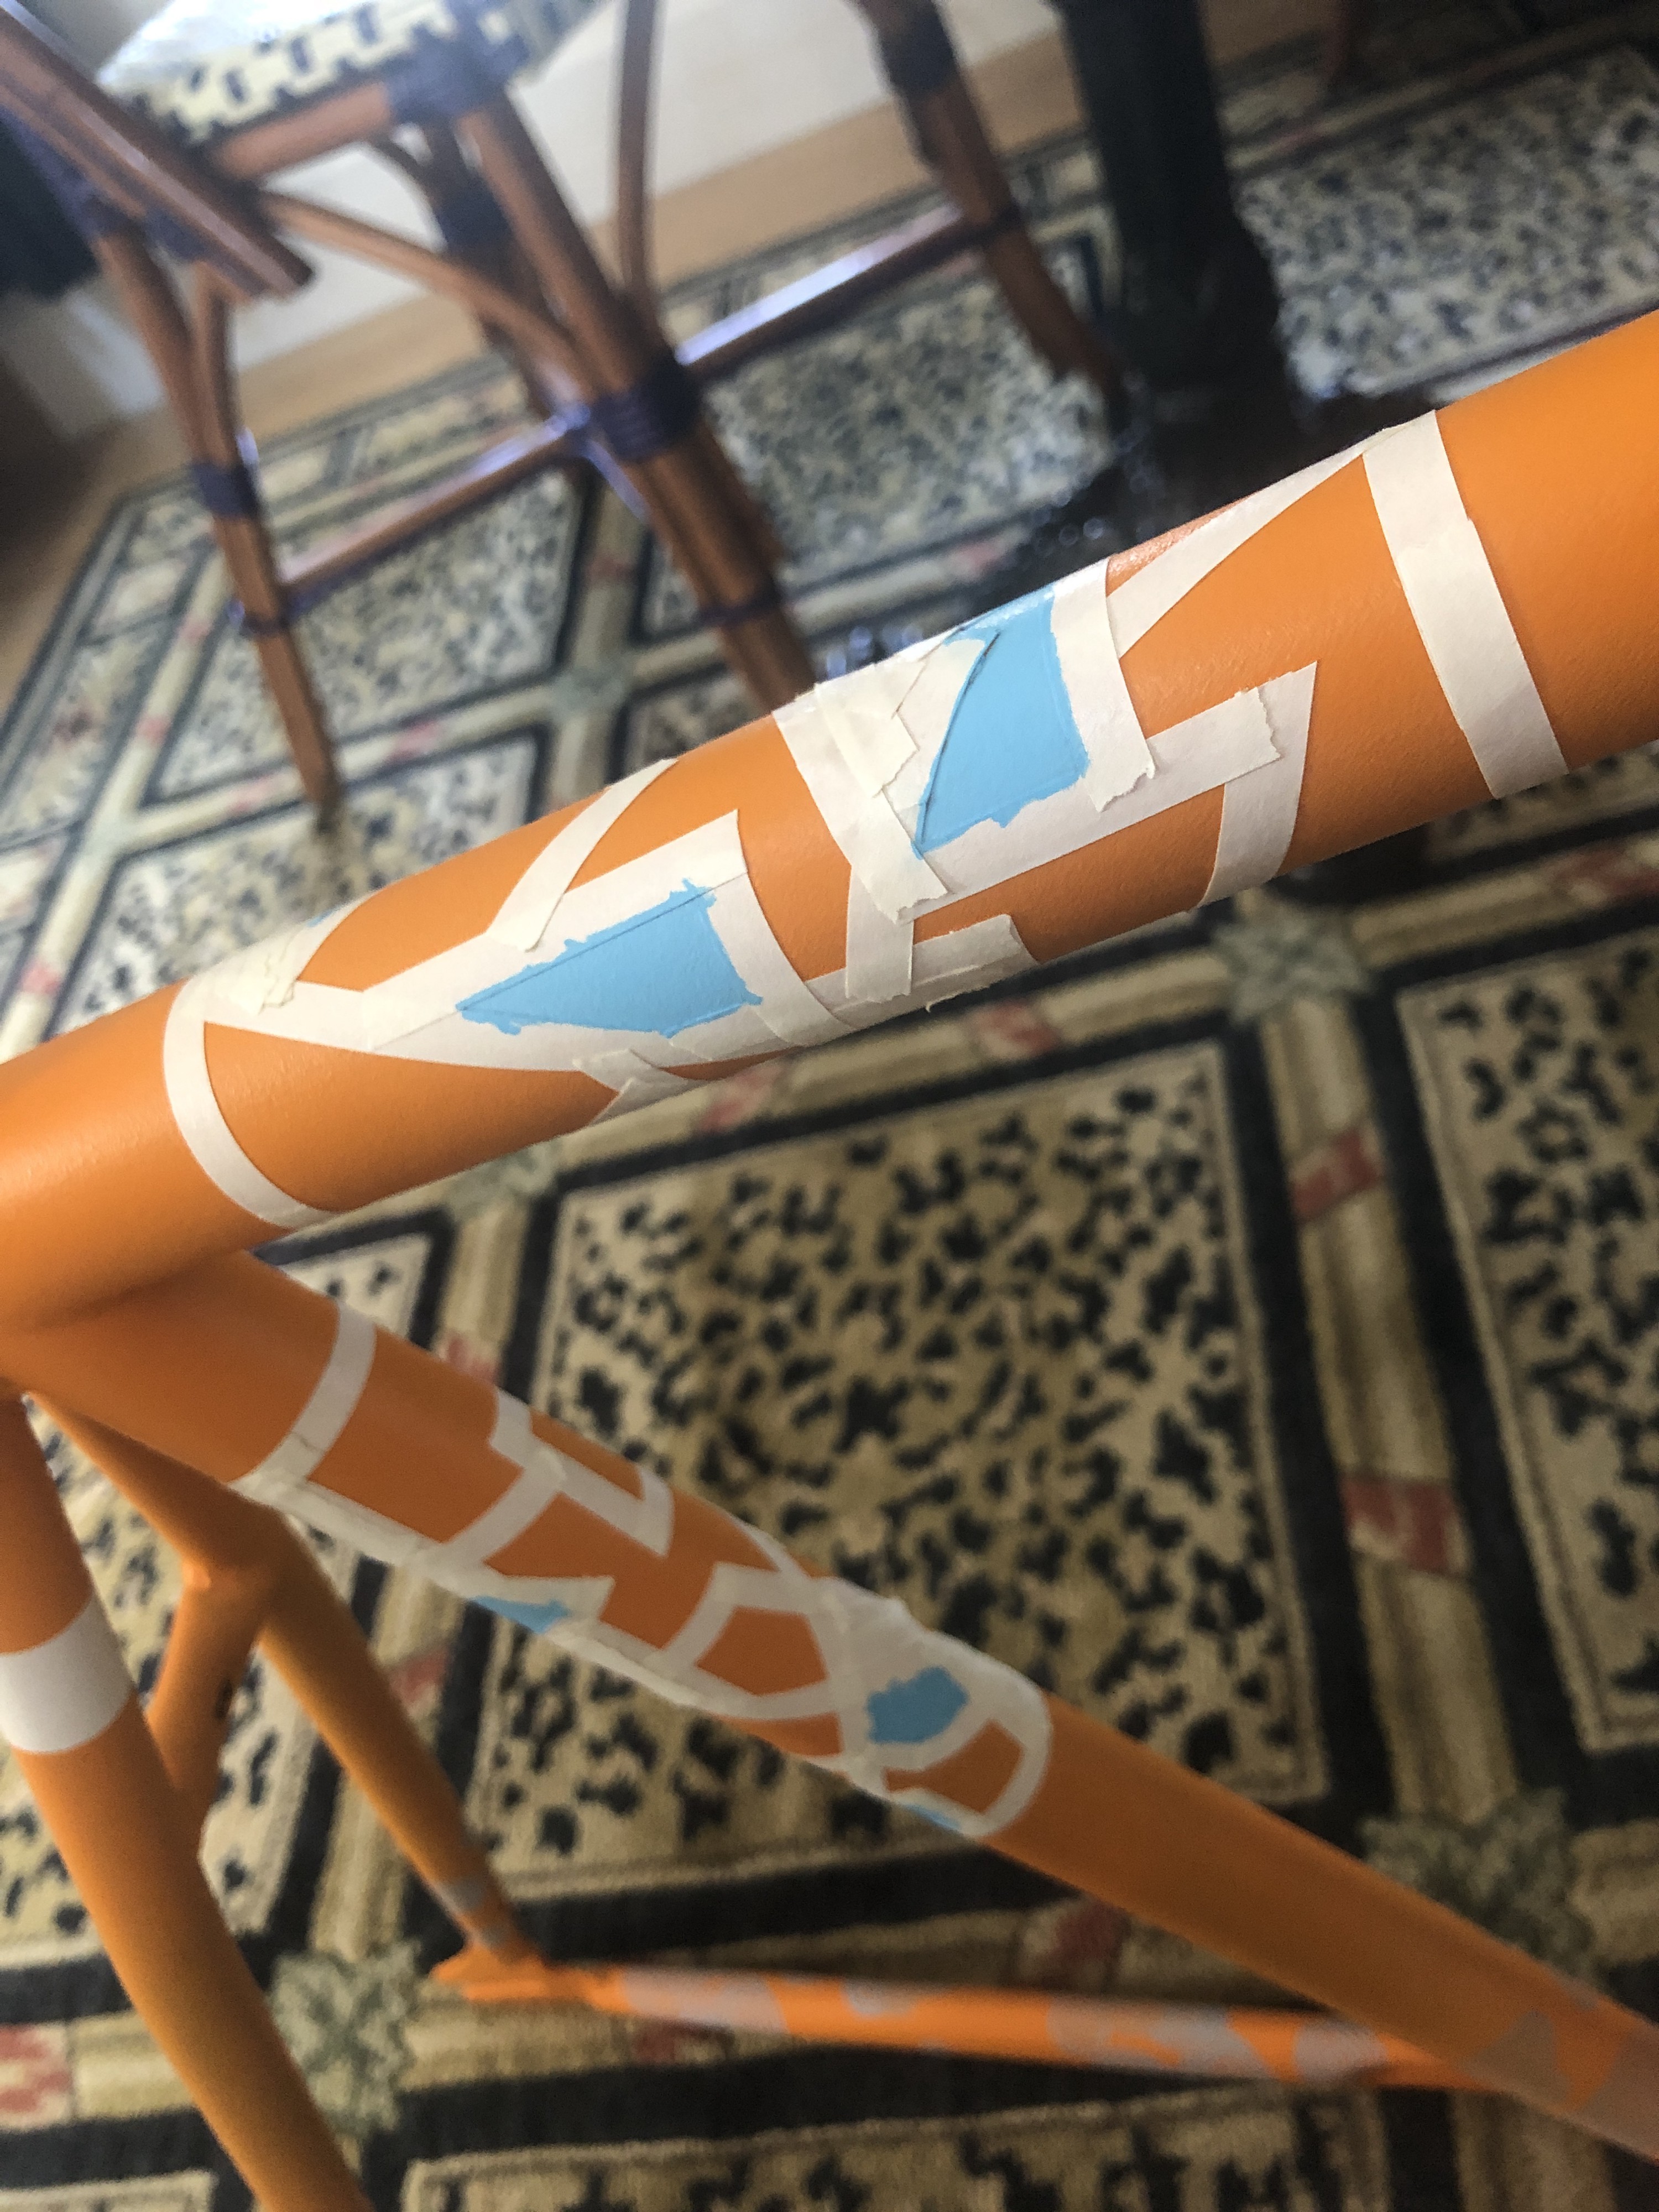
Unmasking the mysteries of? Masking
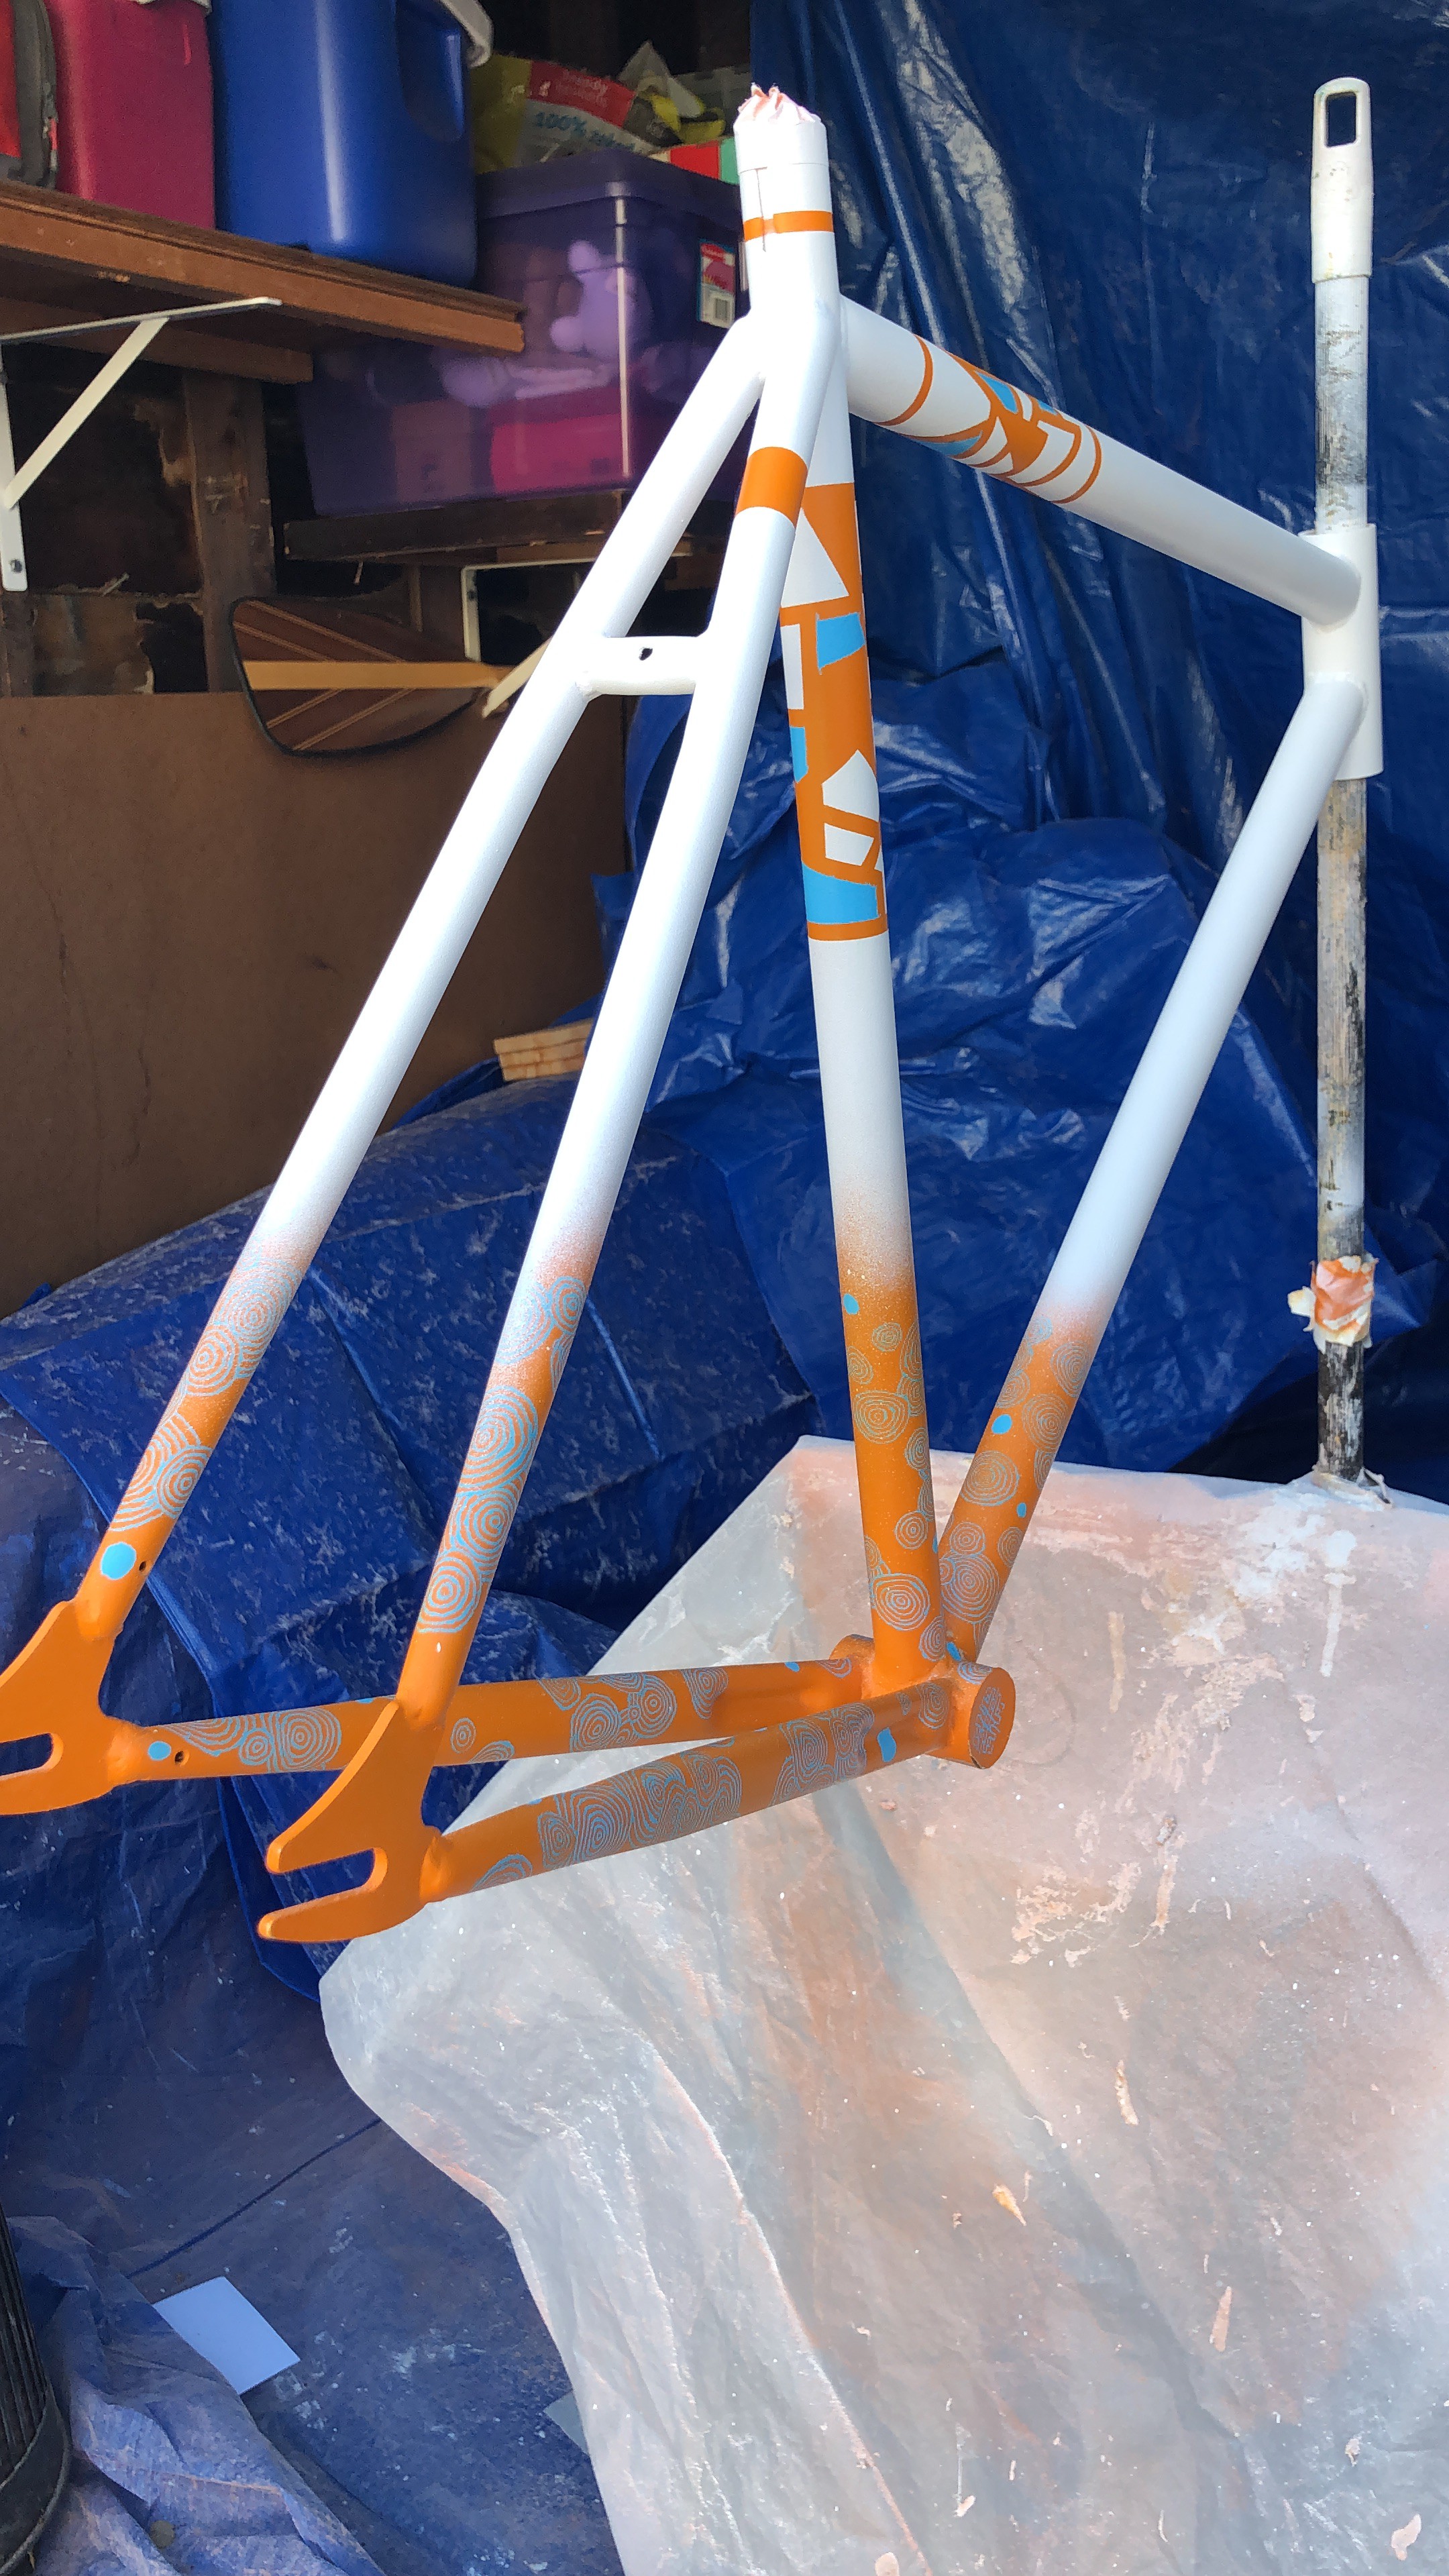
The original design for this frame did not call for any designs involving masking, but the base layer was drying, I was excited, and this was supposed to be an experiment. So the tape came out. Having no experience with masking designs, it quickly ended up being super enjoyable part of painting this frame. Depending on how complicated the masking gets & how many colors are involved there a little bit of mystery in regards to how the design will come out. I think this is brilliant because there should be a sense of curiosity & excitement as you remove the tape and find out what it looks like.
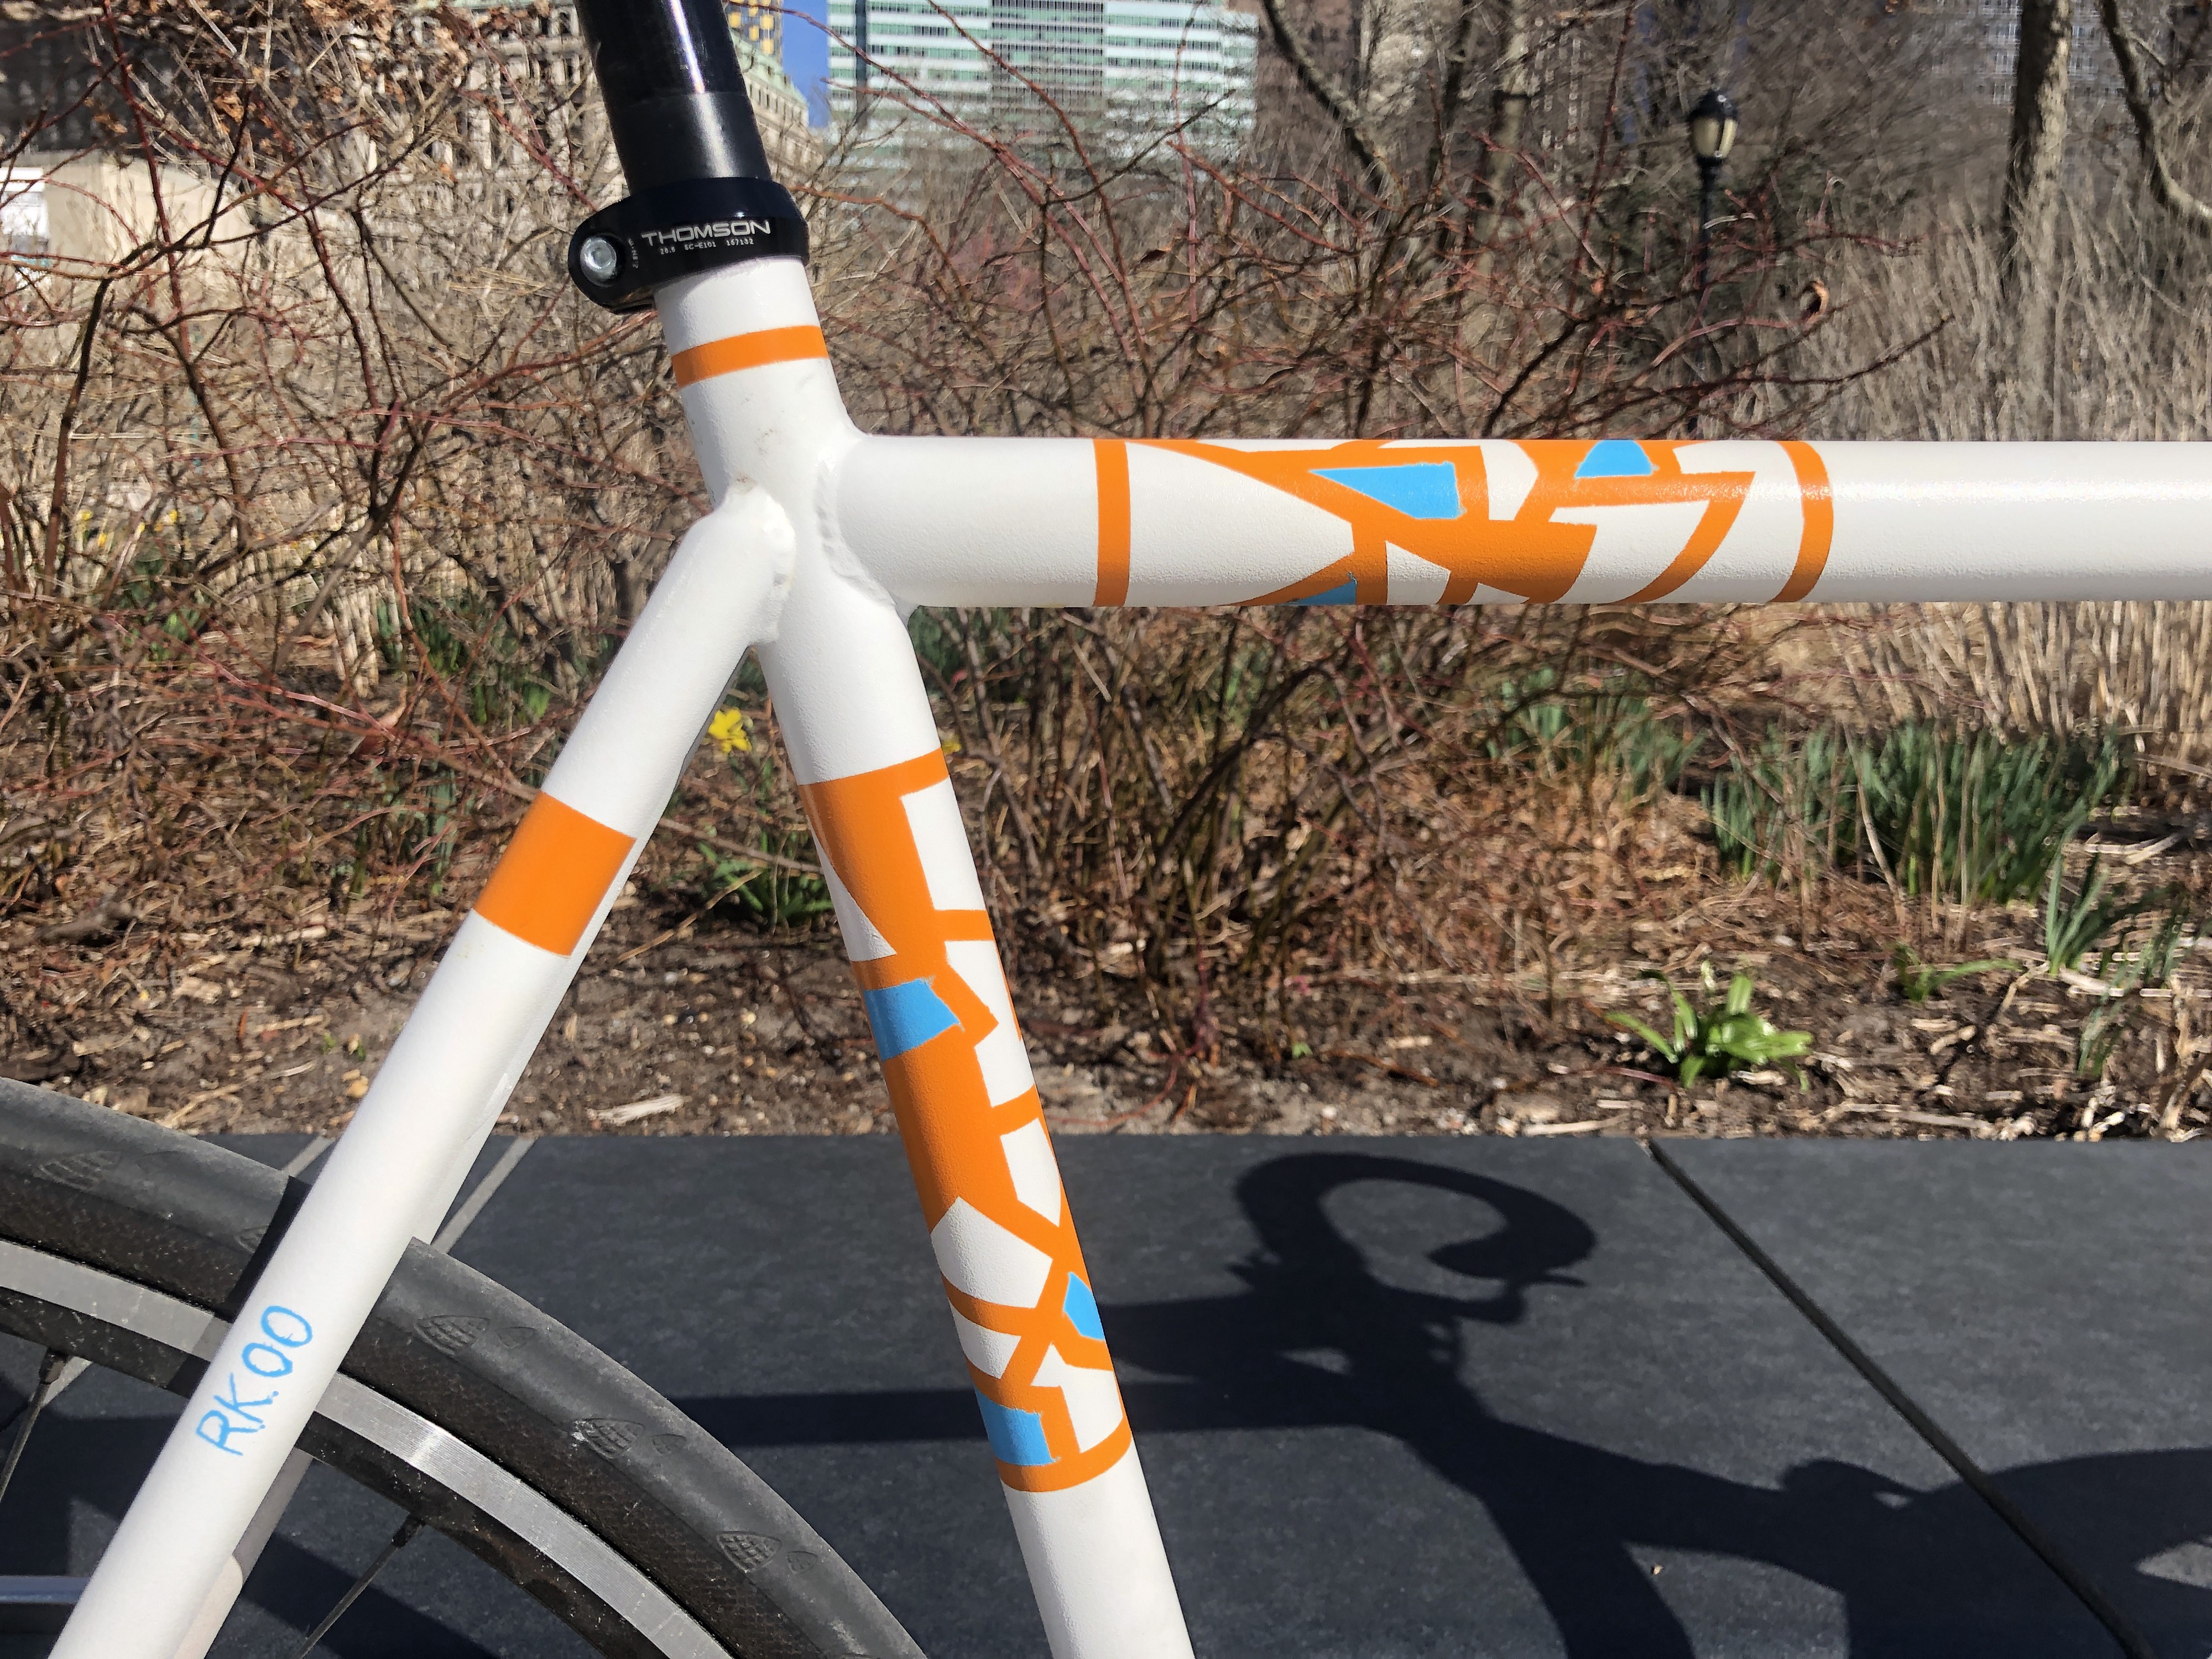
One key takeaway was the difference in how paint pens reacted with the masking tape versus the spray ? the paint from the paint pens leaks under the tape. So, no paint pens when masking.
 Sick rug, right?
Next I wanted to see how spraying the lines will be affected by coats of paint. One area I just went to town and sprayed a lot, and the other I sprayed lightly in coats. Although it?s not really noticeable, I feel like the area spraying in multiple light coats came out cleaner. Note that this took a lot longer (because waiting… If you too, struggle with this please reread the above bit about the importance of patience.)
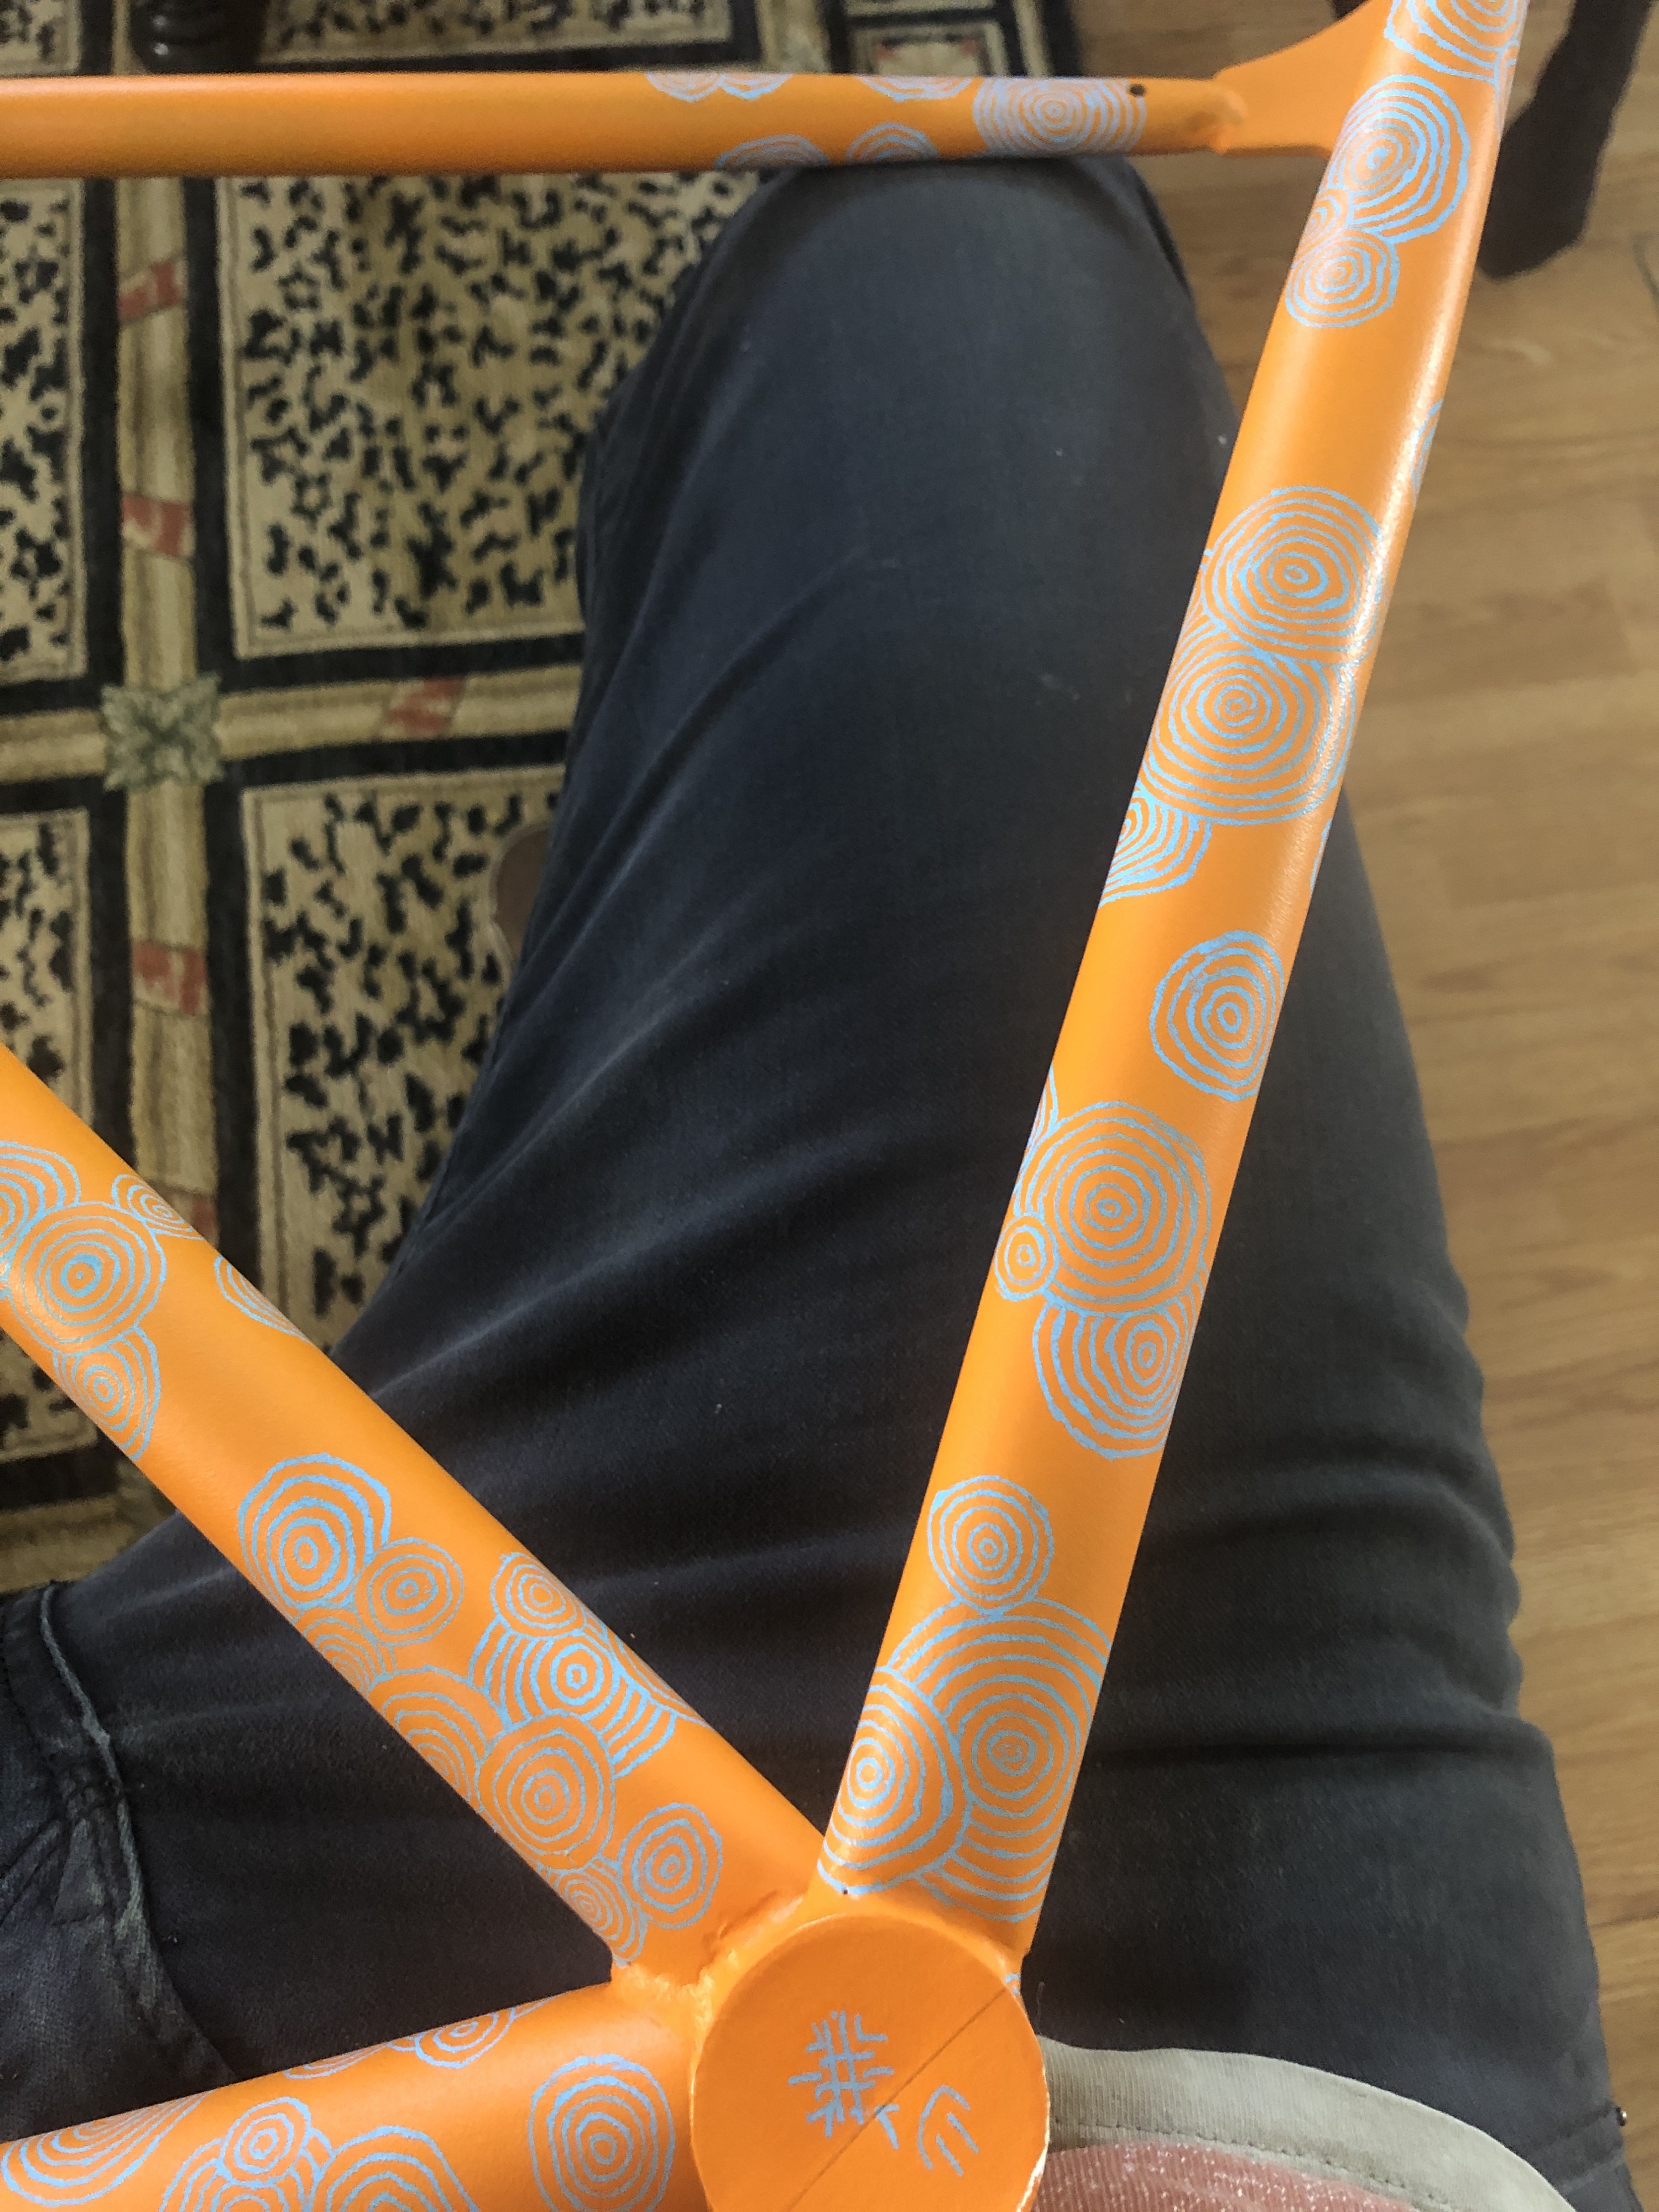
Freehanding on a frame
If you?re reading this you?re likely a creative type. As a lifelong doodler ? I never did anything much beyond pen & paper, and most of the time I struggle to do anything with color too. I?d go for the smallest point pen I could find and try to draw really fine lines. This notion definitely carried over onto the bike.
This was exciting for 2 reasons. First ? I was using colors! Second, I was used to paper, and not I was drawing onto a 3D object. The changes in shapes & angles made the drawing super dynamic and it often changed from what I was expecting/planning.
The detail on the frame is clear when up close to the bike, however any further away than a few steps and the fine lined circles quickly start transitioning into grey blobs. Partially because the colors chosen, but mostly because of the level of detail & distance between the circles.
Before starting to freehand anything, remember that this will likely require you to grab & handle the frame from a bunch of different angles. So make sure any paint that?s on the frame is super dry. I waited at least a few hours and feel like I should have waited longer.
 No animals were harmed in the making of this rug.
Put an extra coat of finish
Once everything sits for an appropriate amount of time ? it?s time to finish this project! (Kind of; there?s still a decent amount of work to do.)
Following the same steps above for straying the frame with primer & paint, start with the hard to reach areas first. The finish was one thing that I definitely underestimated. Next frame will receive an extra coat of finish ? it acts as a layer of protection and to give the frame more of a gloss.
I also want to play with combining matte and glossy finishes. This will likely be much more noticeable on darker frames that don?t have a lot of color.
Conclusion
As you?re reading this I?m likely online looking for more frames to paint, doodling ideas into Procreate for future frames, or already underway on the next frame! This hodgepodge of a paint job provided a lot of ideas and I?m excited to see if at least some of them look as cool in real life as they do in my head.
Again, this bike is a hodgepodge of different ideas and techniques, mostly because it?s an experiment. Just to see how the spray worked with the frame, pens, primer & finish, and ultimately how it stands up to daily wear of biking through the busy streets of NYC. I?d never masked a bike frame before, and I?d never tried to fade between colors before, and I?d never doodled on a 3D object before. It was awesome.
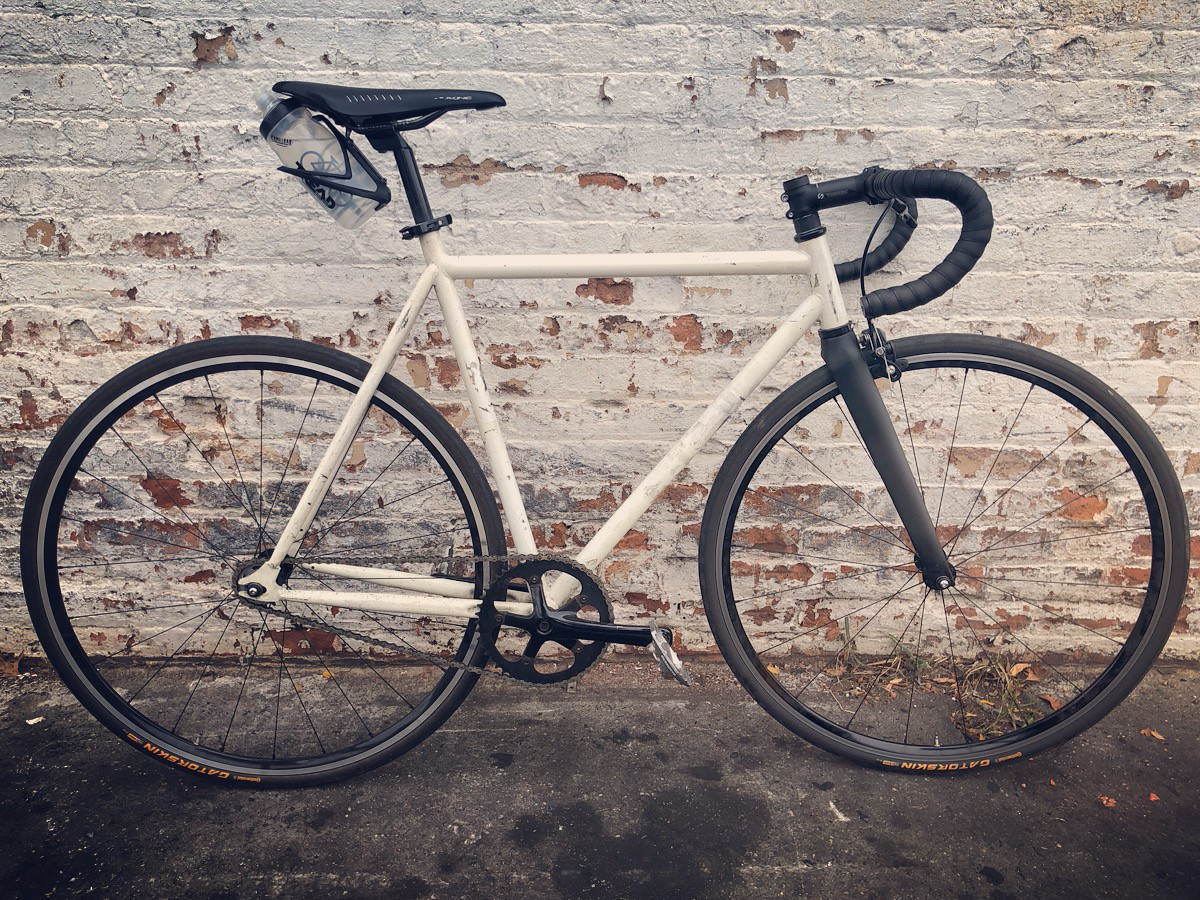
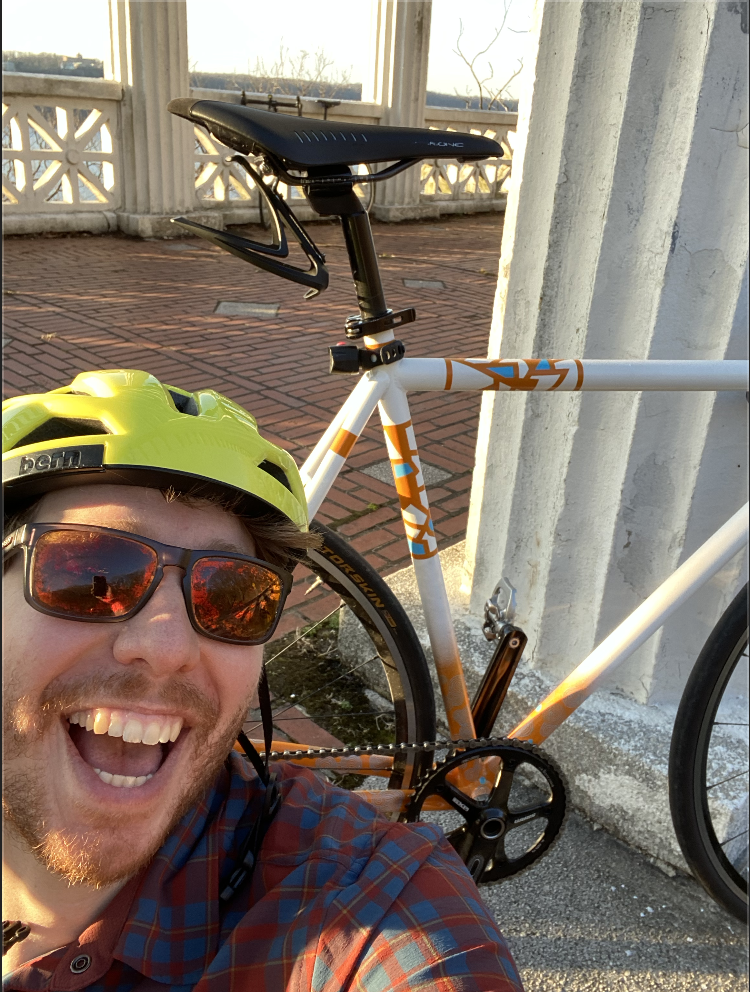 First post paint ride!
Extra notes & things to consider
- Temperature, of both the air and the paint play a huge role in the consistency of the paint coming out of the can. It was cold when I painted and I recommend looking up some tips for spray painting in colder temperatures.
- Having no experience with any of this, I wanted to ensure that the paint, primer, and finish played well with one another. So I opted to for Spray.Bike for all three. The paint showed up super quick and with a sticker, so you know it?s good. Having read a bunch of stuff about how regular spray paint can run ? I wanted to ensure that any mistake made was my hand and not because of paint running down a tube. The primer, paint, and finish were all great and I recommend checking them out along with the wealth of knowledge, tips, and tricks on their site and Instagram.
- I did not use any stickers or vinyl masking for logos in this project. So that?s next!
- Not that this frame will ever get hung up onto a wall, but I want it to look neat from any angle. There are circles, dots, a fade, and masked shapes; what else could you want?! (Kidding)
Lastly, it?s important to know that it?s okay to suck at something. Don?t go into painting your first frame expecting it to be absolutely perfect. I?m sure with enough sandpaper and paint it could be. But, know that it?ll come with a whole lotta aggravation. There was a lot on this frame that didn?t go according to plan ? oh well! Here?s Karen Rinaldi talking about it on Wild Ideas Worth Living. Thank you for reading folks! If this inspires you to paint your frame please let me know! I?d like to be a resource if you have any questions. (Instagram: @hi_raoul)
