Everything you need to know about basic soldering!
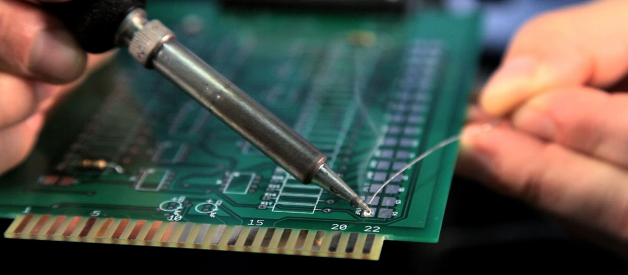
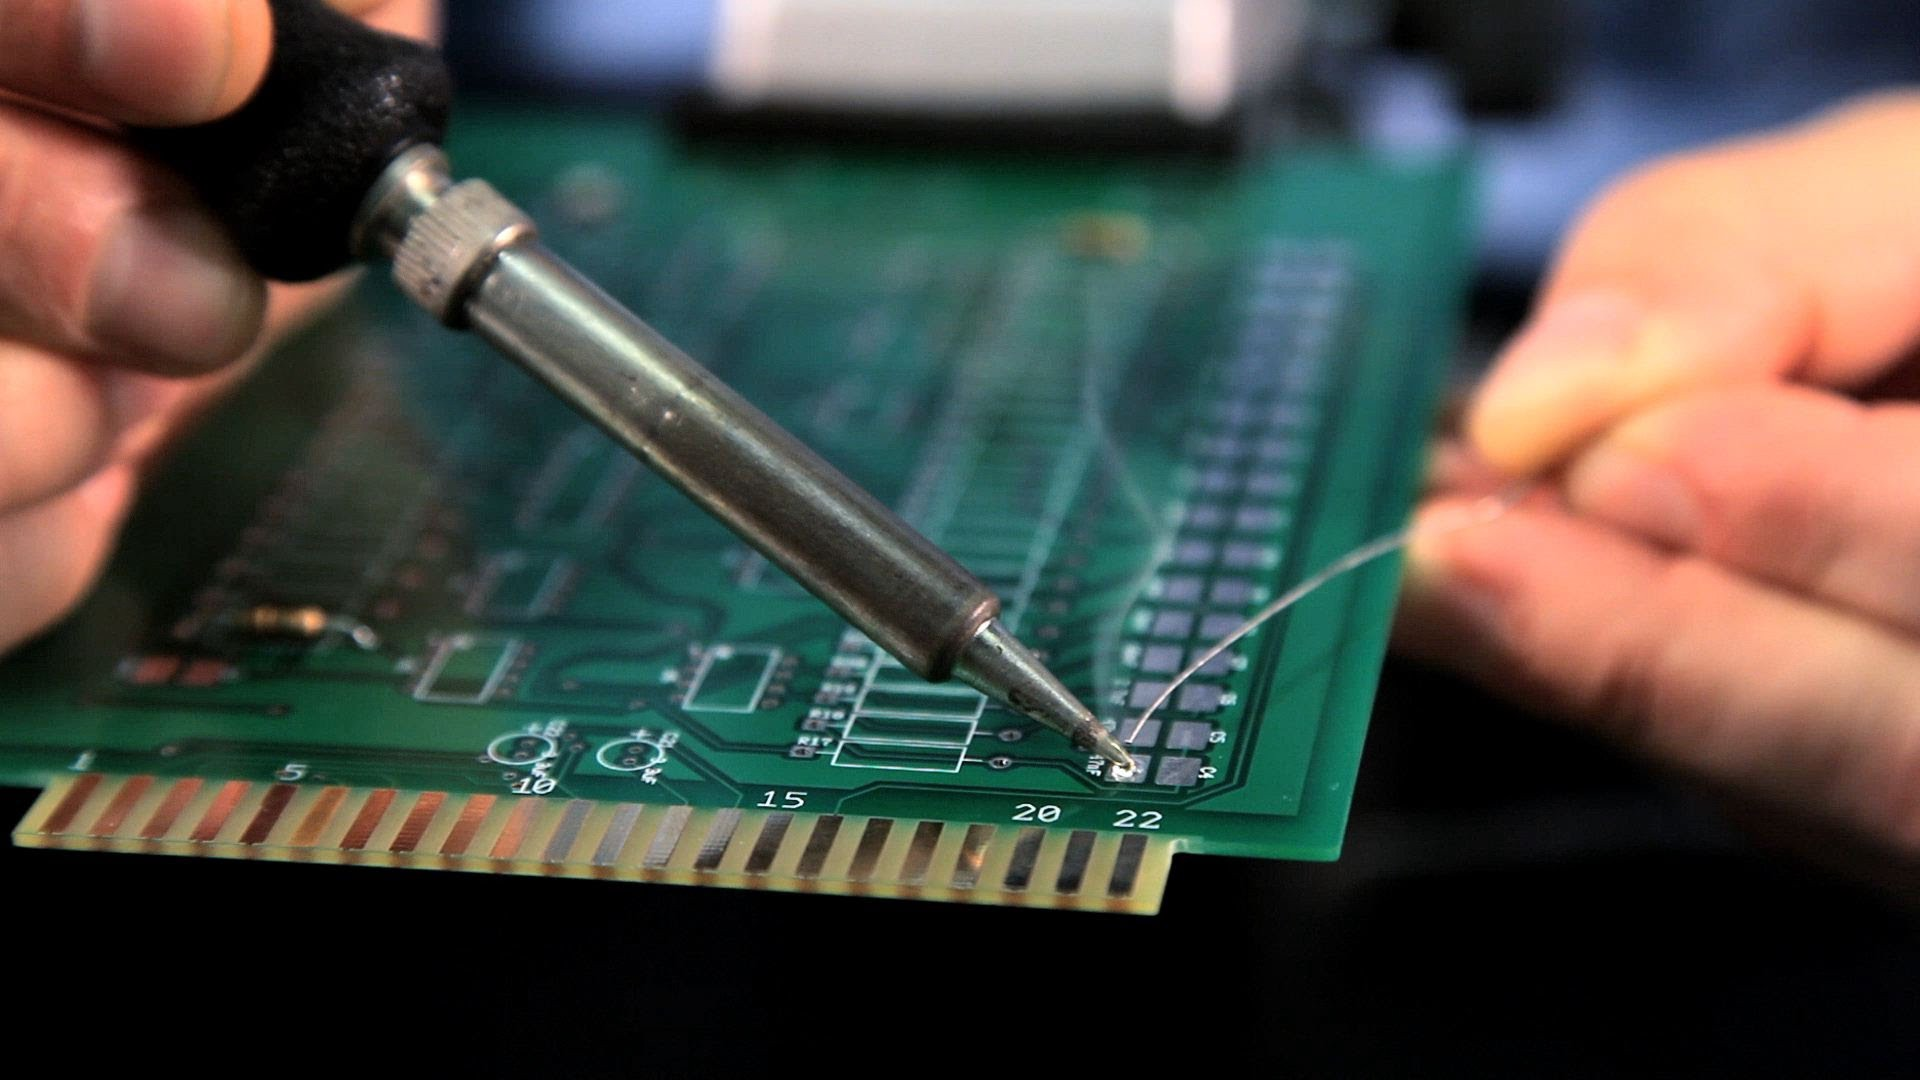 Soldering(Soldering iron tip and solder wire)
Soldering is one of the most vital skills needed to take part in the world of electronics.
Soldering and electronics go together like salt and pepper. And, although it is possible to learn about and build electronics without needing to pick up a soldering iron, you will soon discover that a whole new world is opened with this one simple skill.
- I believe that soldering should be a skill in everyone?s arsenal.
In this post, we will hover over the basics of through-hole soldering ? also known as plated through-hole soldering (PTH), discuss the tools needed, go over techniques for proper soldering and give you some tips and tricks that will make fixing any piece of electronics a breeze.
This post will be for both beginners and experts. Whether you?ve never touched a soldering iron before or are looking for a little refresher, this post has a little something for everyone.
- A good soldering technique is not hard, and it?s in fact incredibly easy. It doesn?t take years and years of practice to master the art of soldering. You just need the right tools and know very simple techniques. A good quality soldering is a piece of cake and anyone can master it within few attempts.In fact it?s very difficult to solder badly. 🙂
?Art is where work meets love.?
What is Solder?
Solder, as a word, can be used in two different ways.
- Solder as a noun refers to the alloy (a substance composed of two or more metals) that typically comes as a long, thin wire in spools or tubes.
- Solder, as a verb, means to join two pieces of metal.
So, we solder with solder!
Alloys of Lead and Tin were commonly used in the past and are still available. Lead-free solders have been increasing in use due to negative effects that are caused by lead to the health and environment.Solder wire is available in a range of thicknesses for hand-soldering, and with cores containing flux.
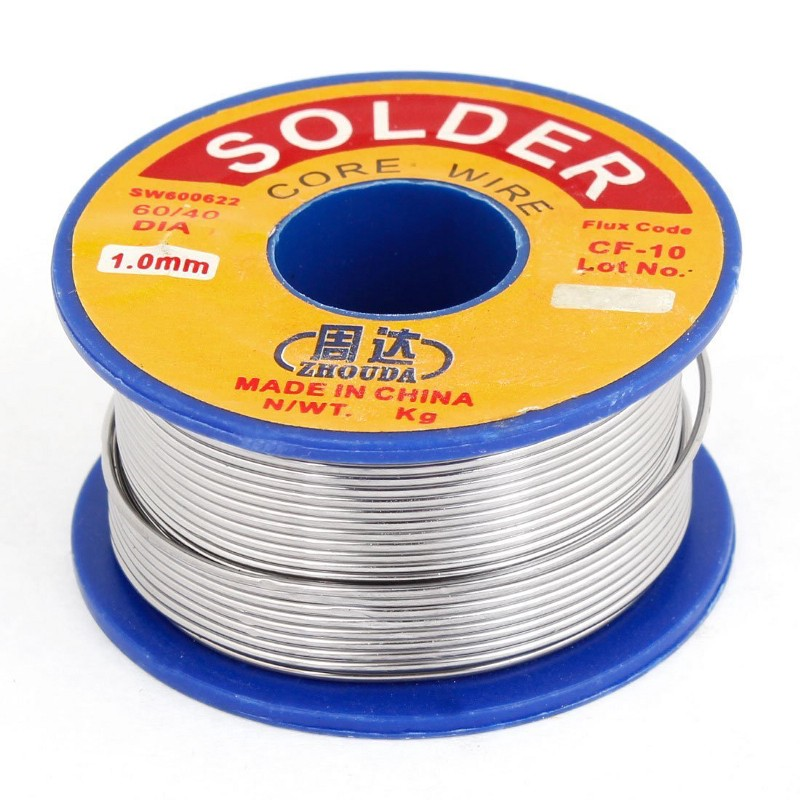 Soldering wire in a spool.
Lead vs. Lead-free Solder
Solder was composed of mostly lead (Pb), tin (Sn), and a few other trace metals. This solder is known as leaded solder. As it is known to all, lead is harmful to humans and can lead to lead poisoning when exposed to large amounts.
Unfortunately, lead is also a very useful metal because of its low melting point and ability to create great solder joints.? Lead-free solder is very similar to its leaded counterpart, except, as the name states, it contains no lead.? But a lead-free solder has a disadvantage, it has a crystalline finish and does not have a mirror-like finish, unlike leaded solder. So the leaded solder is still in existence to get a proper mirror-like finish and the melting point of the solder is better when there is the presence of lead.
Now that you know how to choose the best solder for the job, let?s move on to tools and more terminology.
Soldering Iron
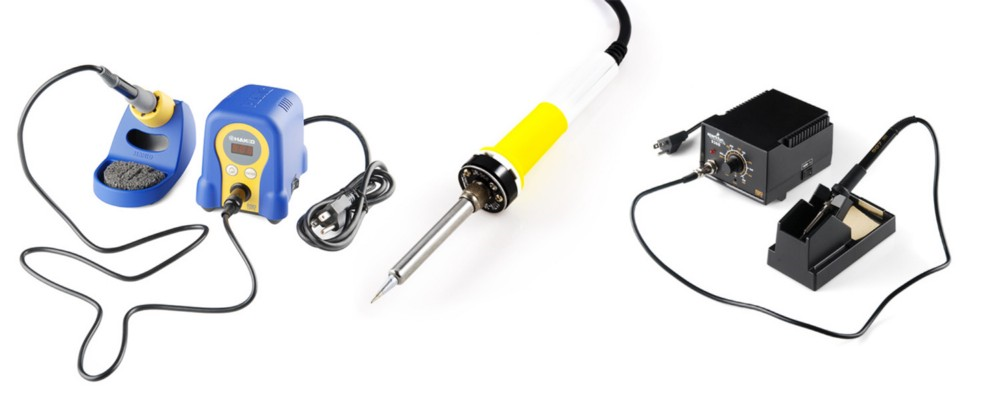 Soldering Station
Like you need a brush to make beautiful paintings, you will need a soldering iron to solder things together.
As the name suggests, soldering iron heats up to a particular temperature to melt the solder and adhere things together. Soldering irons come in a variety of form factors and range from simple to complex, but they all function roughly the same. Here, we?ll discuss the parts of an iron and the different types of irons.
Various Soldering stations
I highly recommend temperature controlled soldering irons as it is ease of use, but for amateurs, a branded soldering iron without temperature control will do the job. Best brands in the market: Hakko, Weller, Soldron.
Features You Should Look for in a Soldering Iron
What should you look for when you?re considering buying a soldering iron?
1. Wattage: You should pick up a soldering iron with at least 30 watts of power. Soldering irons with low wattage take longer to heat up and have difficulty in holding the temperature.
2.Temperature Control: This is a good feature as different soldering jobs may require a different iron?s temperature.
3. Tip compatibility: The iron?s tips should be replaceable and the iron should be compatible with a wide variety of tips. There are different tips of different sizes for different types of jobs.
4. Holding stand: This is important so that you have something where to place the hot iron while you work.
Soldering Iron Anatomy
Soldering Tips ? No iron is complete without an iron tip. The tip heats up and allows the solder to flow to the components being joined together.
- Although solder will stick to the tip when applied, a common misconception is that the tip transfers the solder. No, the tip actually transfers heat, raising the temperature of the metal components to the melting point of the solder, and the solder melts accordingly.
- Most irons give you the option to change your tip, should you need to replace an old tip or if you need to switch to a different style of tip. Tips come in a variety of sizes and shapes to accommodate any component.
- I am not a fan of conical tips, especially for beginners. Most people, when learning to solder, think that applying pressure will help the solder flow and end up damaging the board.
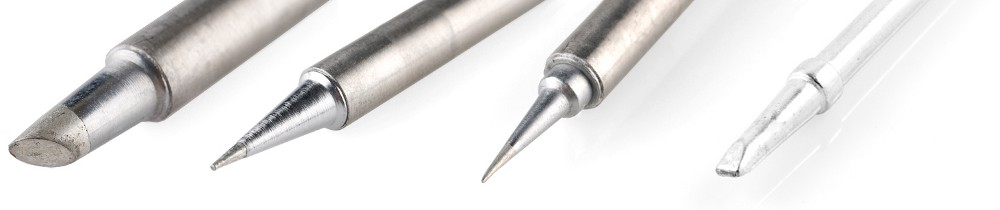 Widely used tips(From left: Bevel tip, Conical tip, I tip, Chisel tip)
- The idea is to have the tip be 60% the width of the contact pad, this will allow the soldering process to take place as quickly as possible with the least amount of thermal stress on the component. ? Wand ?
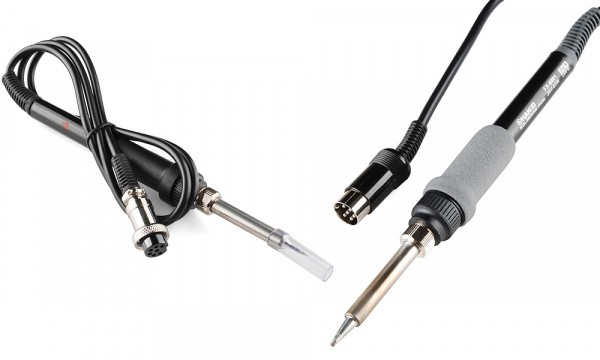 The wand is the part of the iron that holds the tip
This is the part that is handled by the user. Wands are usually to prevent the heat of the tip from transferring to the outside of the wand, they also help you to safely solder parts together. The better and comfortable the wand is, the better the soldering iron. ? Base ? The base of the soldering iron allows the user to adjust the temperature. There are analogue bases, which have a dial that controls the temperature, and there are digital bases, which have buttons to set the temperature and a display that tells you the current temperature.
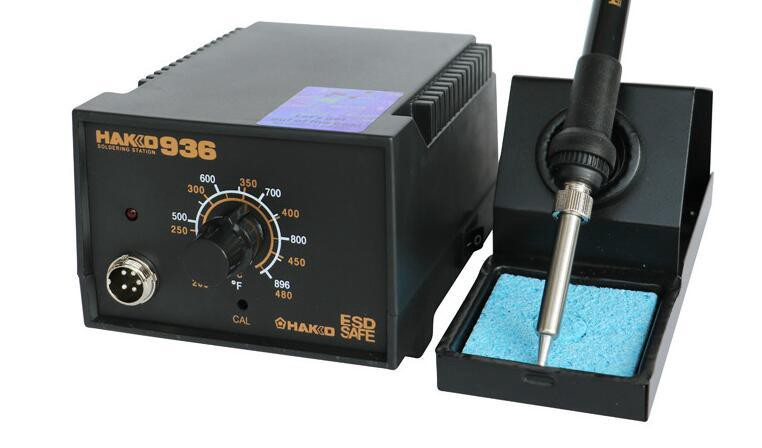 Soldering base with temperature knob(Analog base Hakko 936).
? Stand (Cradle) ? The iron stand is what houses the iron when it is not in use. The stand may seem trivial, but just leaving an unattended iron on your desk or workbench will be a potential hazard, it could burn you, or even worse, it could burn your desk and leave a mark forever.
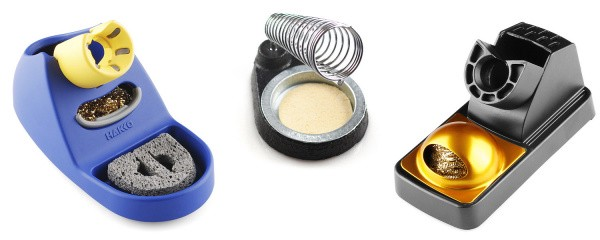 Stands for soldering iron.
A basic industrial spring will do the job, I mounted the spring on to a heat resistant board ? Brass Sponge ? As you solder, your tip will oxidize and turn golden brown. This is where the sponge comes into play. Every so often you should give your tip a good cleaning by wiping off this build-up.
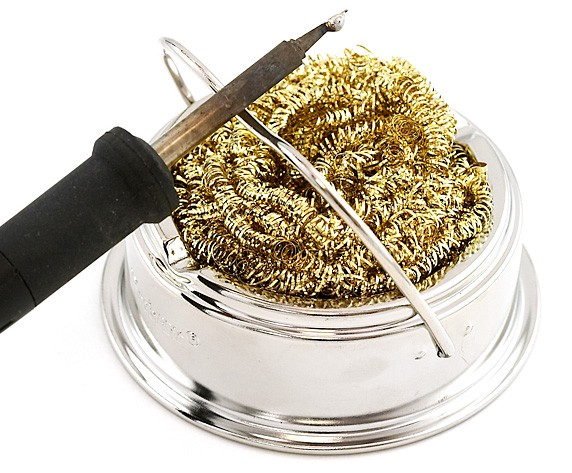 Brass sponge.
Traditionally, an actual wet sponge was used to accomplish this. Now brass sponges have become the standard for tip cleaning. Hack: I personally use a combination of wet sponge and steel sponge, I tin the tip, then clean it with a wet sponge and bring in a shiny finish with the steel sponge.
Soldering Accessories
If you?re just starting into soldering, you may consider getting some accessories:? Solder Wick ? is the eraser to soldering?s pencil. When dealing with issues such as jumpers or the removal of parts (desoldering), solder wick comes in very handy. Solder wick ? aka desoldering braid.
Solder is soaked (wicked) up by the copper allowing you to ?erase? extra globs of solder.
 Soldering wick
- Solder Vacuum is a great tool for removing solder left behind in through-holes when desoldering components. We?ll go over how to use this tool a little later in the tutorial.
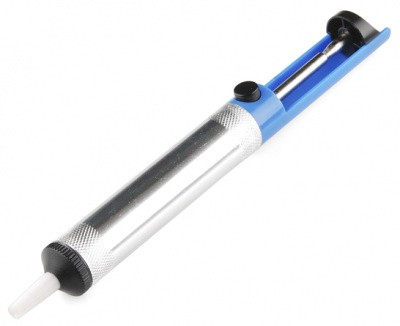 The Solder Sucker
- Flush cutting pliers: To trim off the excess leads of a component after soldering.
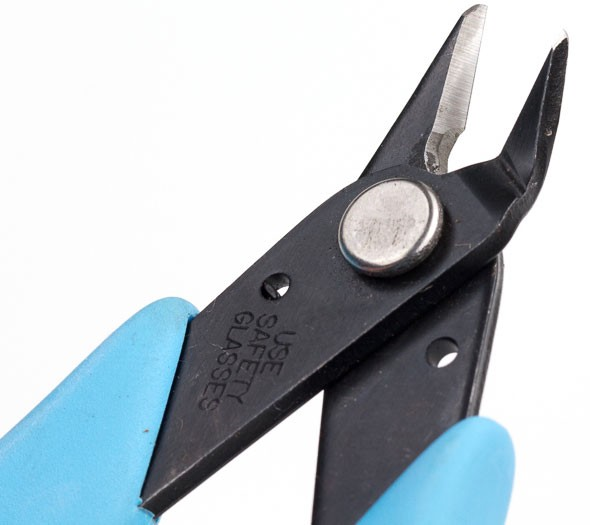 Flush cutter
- Helping hand: to hold your components together while you solder.
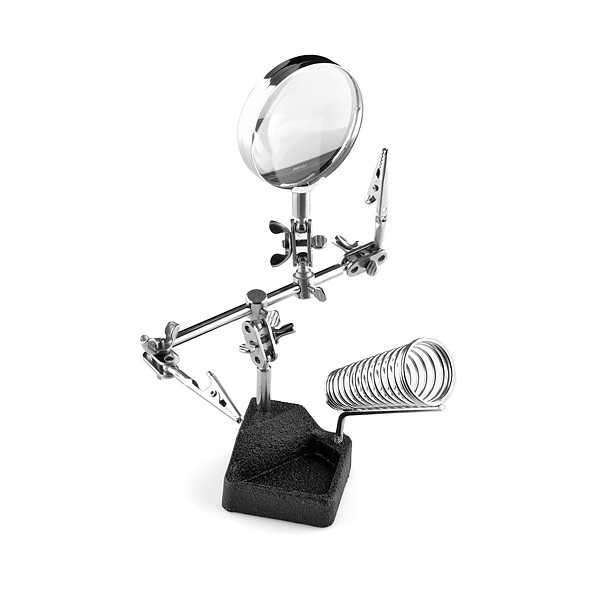 The Third hand
I use this personally and it?s required when soldering components onto a PCB while soldering it parallelly.
? Flux pen: the flux pen content aids the flowing of a lead-free solder.Flux pens are mostly used for SMD soldering.
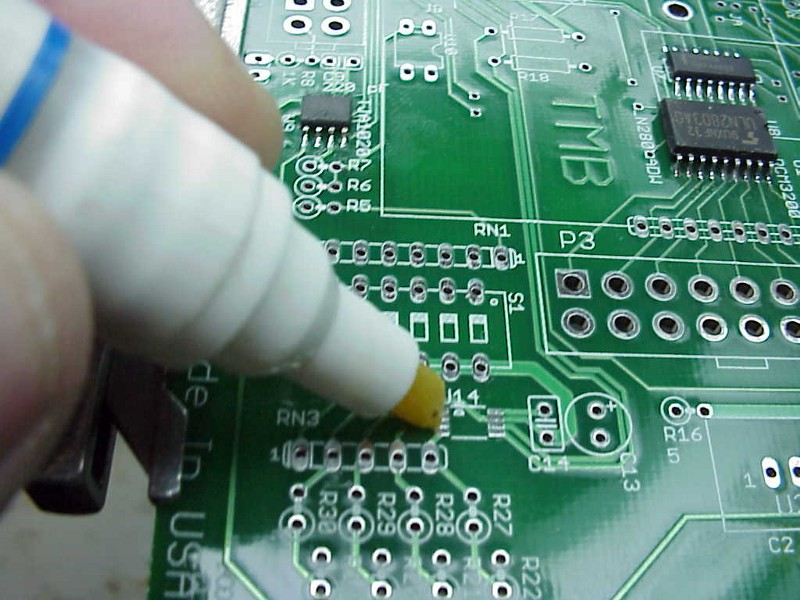 Flux pen in use.
Safety glasses ? just in case any clipped leads go flying.
Source ? Adafruit Industries.
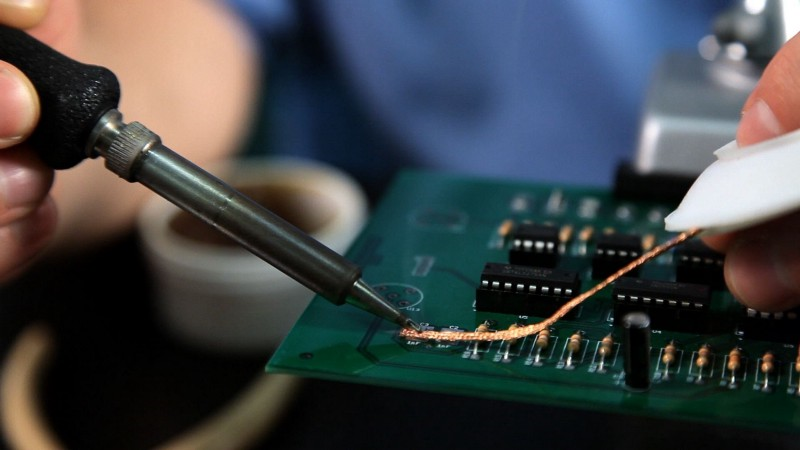
? Be cautious when handling hot irons? Use third hands or vices to hold boards while you solder? Set your iron at a good medium heat (325?375 degrees C)? If you see smoke coming from your solder, turn down the heat? Tin your tip with solder before each connection to help prep the joint? Use the side of the tip (aka the sweet spot), not the very tip of the iron? Heat both the pad and the part you want to solder evenly and at the same time? Pull the solder away, then the iron? A good solder joint should look like a volcano or Hersey kiss, not a ball or clump.
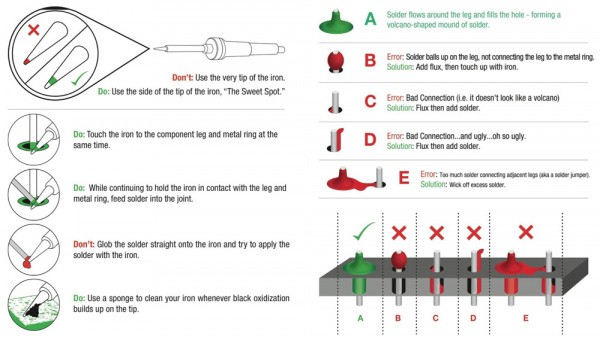 Tips to solder.
Here are some other tips for PTH soldering:? Desoldering can often be the best way to learn how to solder. There are many reasons to desolder a part: repair, upgrade, salvage, etc. ? There is another method of removing solder from through-holes that we refer to as the slap method.? If you?re ever unsure if the solder joint you created is making an electrical connection, you can use a multimeter to test for continuity.
I personally follow Adafruit, Sparkfun, EEVBLOG to learn more electronics.
Thanks to EEVBLOG?s Dave Jones,to helping me do the stuff I do.
I recommend all electronics enthusiasts to follow and appreciate their work.
SS
Thanks for reading.
Until next time.
Peace, Love and Gratitude.
Clap, Share and Follow.
