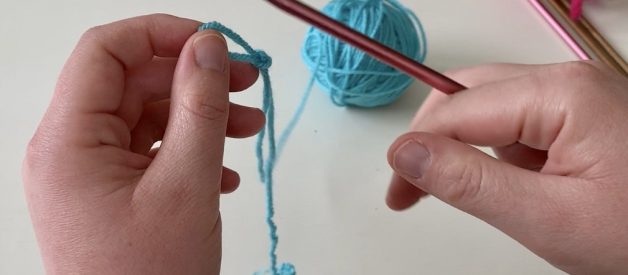
I figured that if I am going to write about knitting that I should have a few series on how to knit and crochet too. I said that I am going to be sharing tips and tricks that I learn along the way as I go through the Stitch and Bitch Challenge and so I think that it is important that you understand the basics of knitting so that you can follow along too.
The first thing that every beginner knitter learns how to do is how to cast on their stitches. Casting on is basically putting the stitches onto one needle. There are hundreds of ways to cast on, I am just going to show you 3. Each way of casting on has its strengths and weakness and there is no right or wrong way to cast on. Each way of casting on serves a different purpose. Most everyone casts on differently.
You will need :
A pair of knitting needles that feel most comfortable to you. I recommend using a U.S. Size 8 pair of needles. I usually use wood or bamboo knitting needles because they are lightweight compared to metal.
A ball of yarn. I would recommend buying the Red Heart Super Saver yarn.
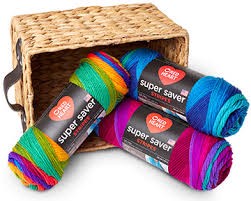
Red Heart Super Saver is really cheap and comes in really bright colors. With Red Heart, you get 364 yards of yarn. It is available at Micheals for $3.69. It is a great practice yarn. Don?t go buying the expensive stuff until you have had some practice because the expensive yarn can range from $10-$30 per skein.
LET’S GET STARTED
1. The Slip Stitch
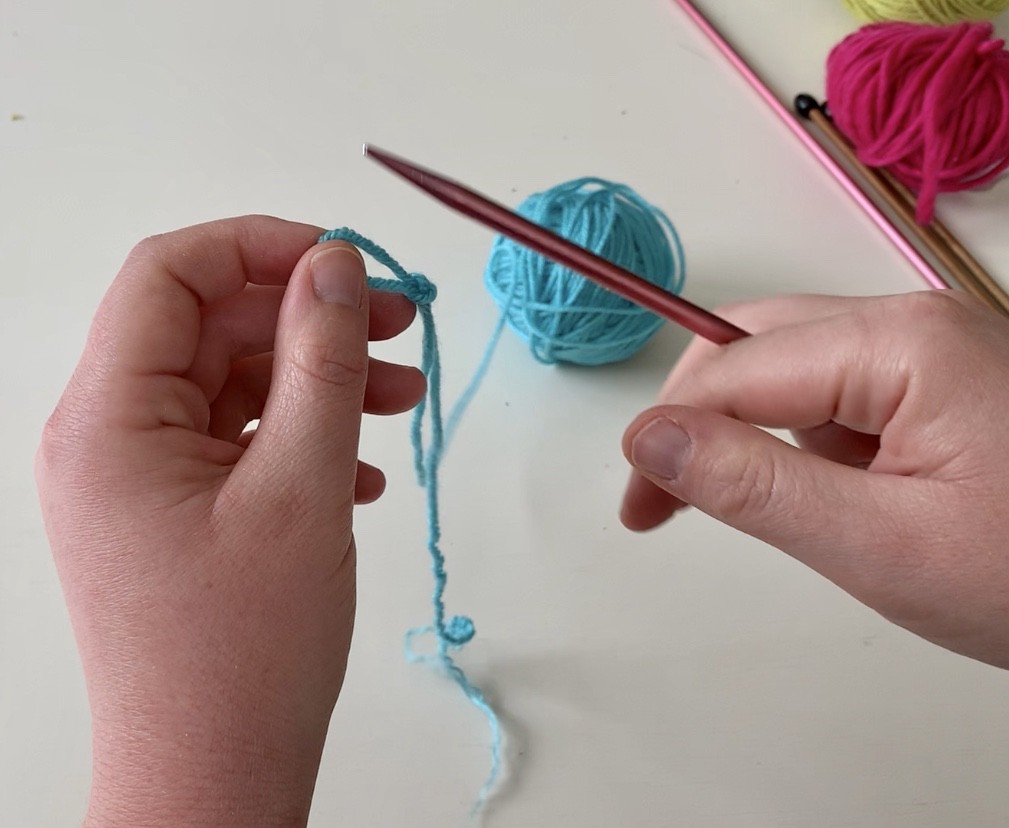
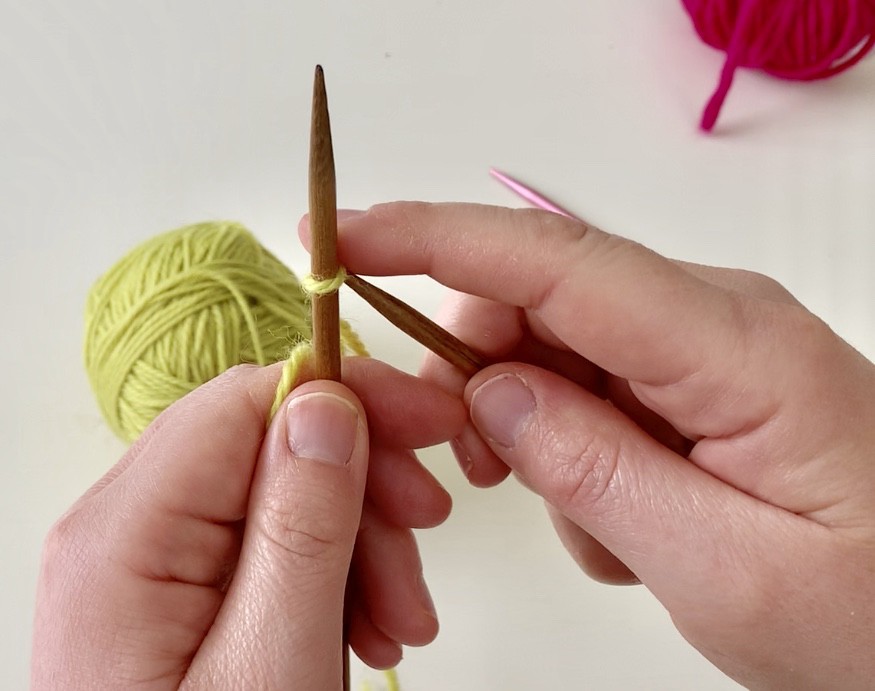
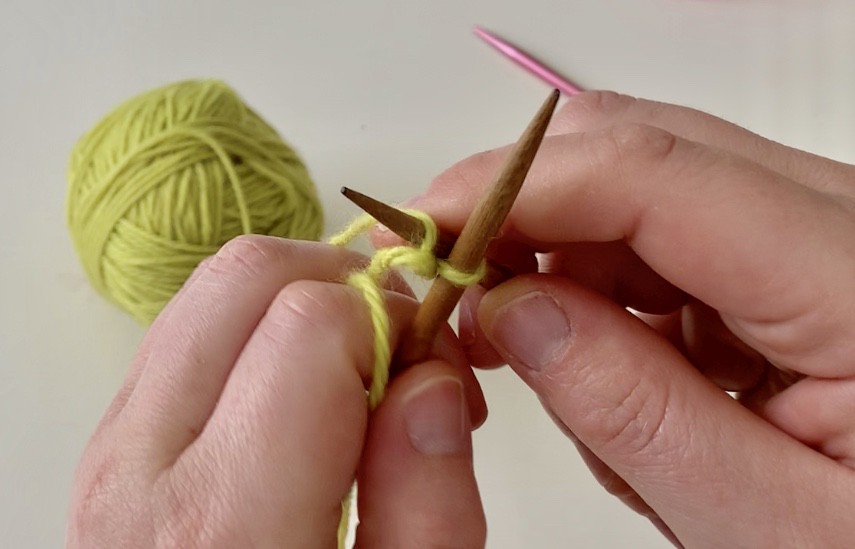
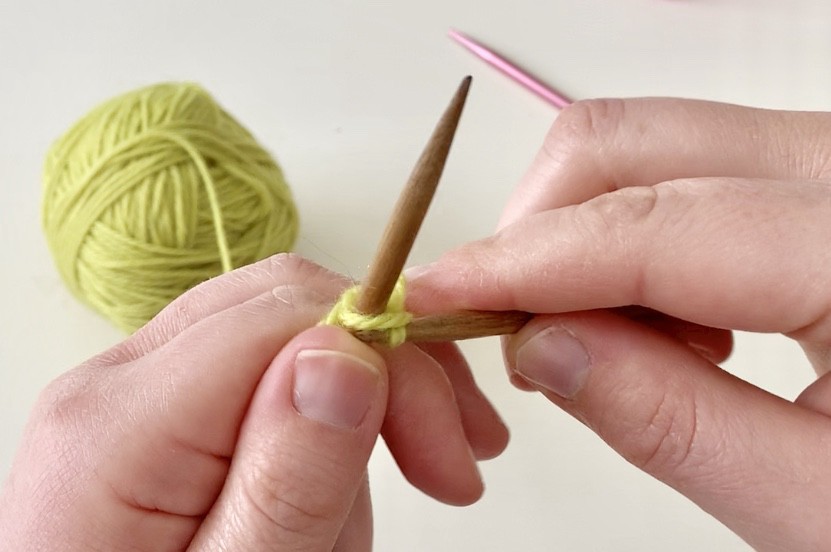
The first step to many of the methods of casting on is to create a slip stitch. It is the first step to casting on and it is the first step to every method that I am going to show you.
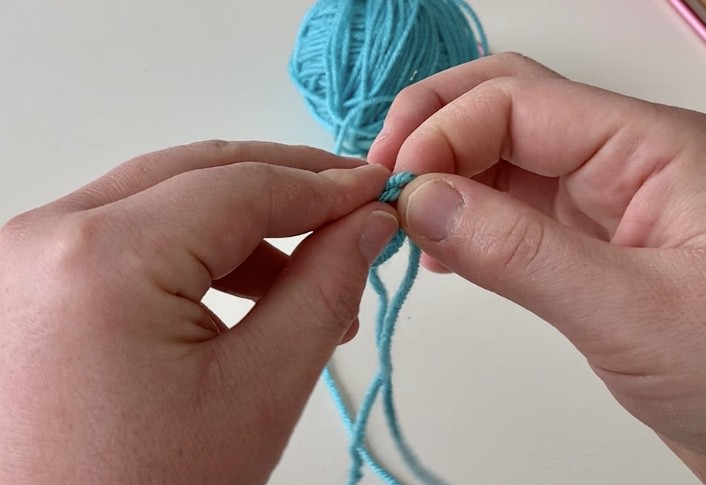
- Always leave yourself a nice 6-inch tail. Create a loop and pinch it with your fingers. Take your tail and wrap it around the base of your loop.
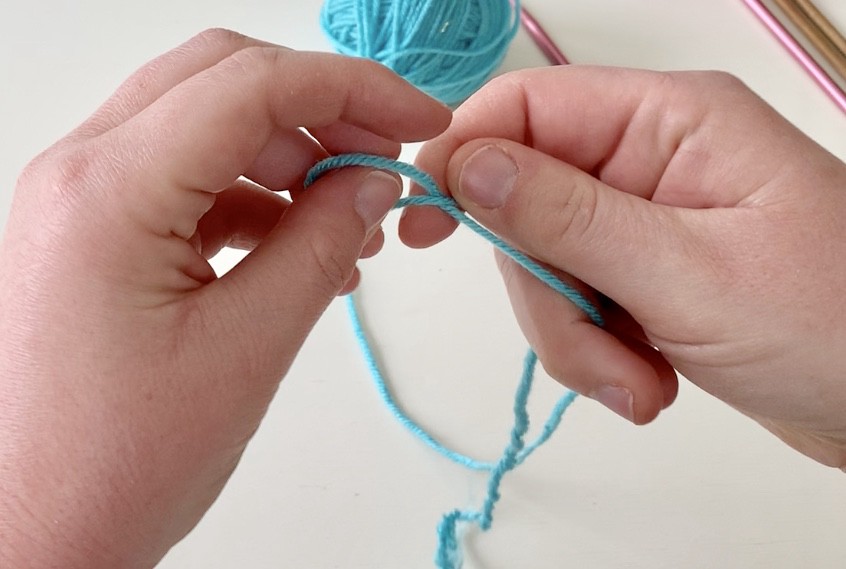
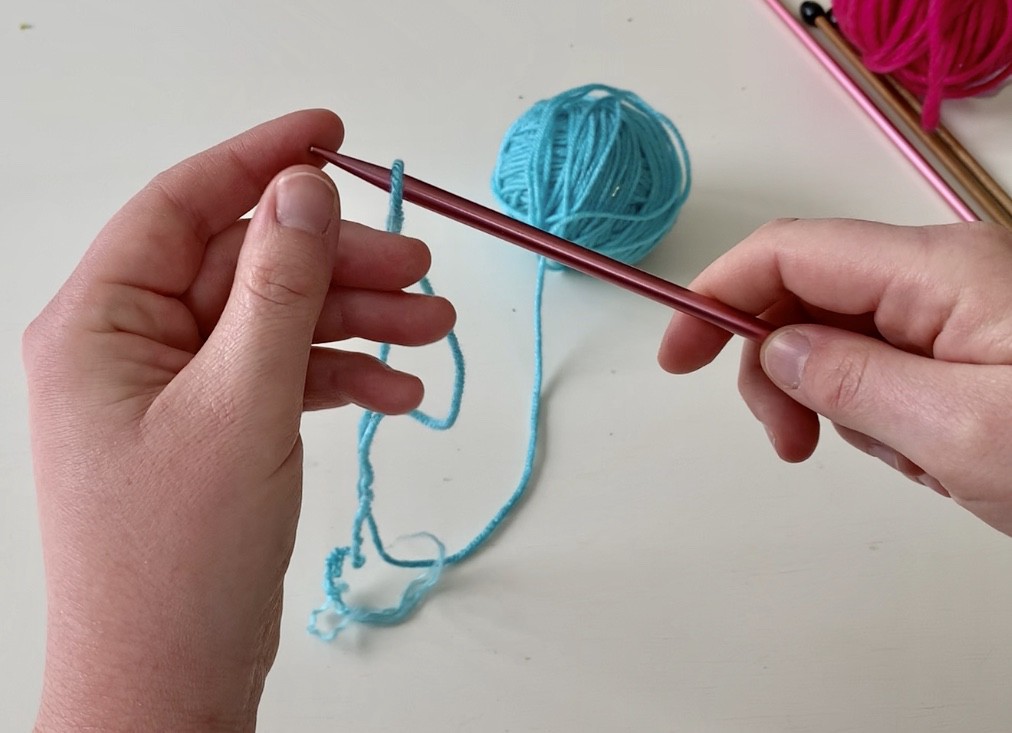
2. With your tail create another loop and pull it through the first loop. Pull the working yarn that is attached to your ball of yarn.
3. Put the new loop onto the needle and pull with your working yarn that is attached to your ball. You have just created your first slip knot and your first stitch.
If my explanation was to confusing watch this video from Howcast.
1. The Hold?em Up Partner Method
The first method is the Hold?em Up Partner Method. This was the first method that I learned when I was a camper back at camp and just learning how to knit. I call it the Hold?em Up Partner Method because we make the hand sign for a gun and cowboys and outlaws from the old west used guns. You will only need one needle for this cast on method.
This is one of the easiest ways that I know of to cast on. There are other similar ways to cast on.
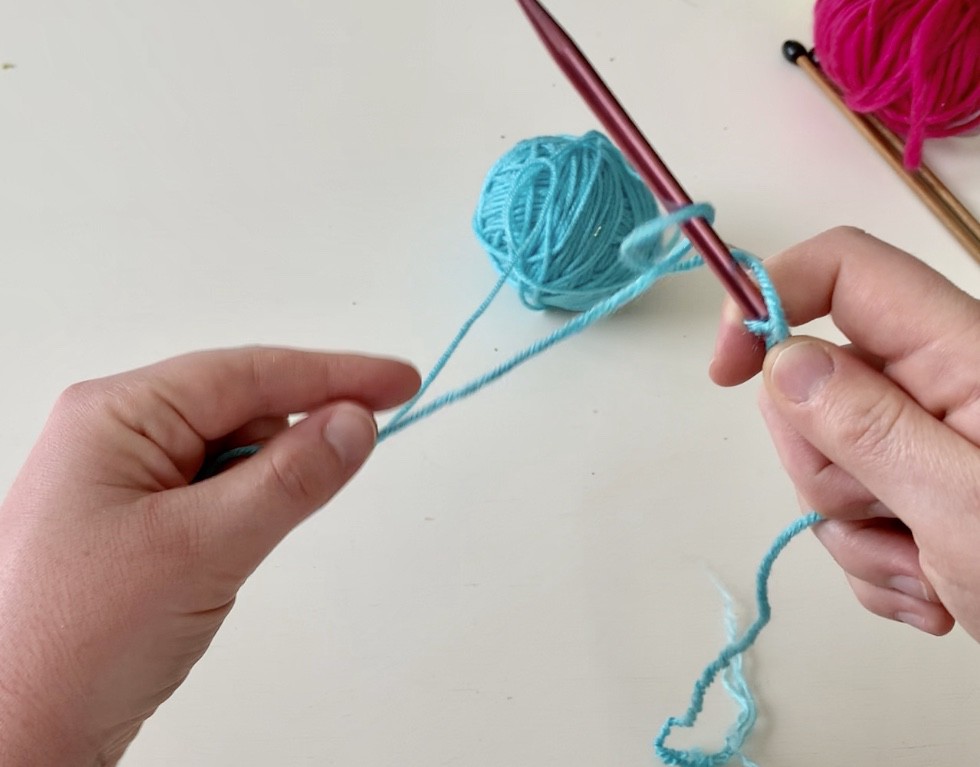
- With your one needle make a slip knot as shown above and leave a 6-inch tail.
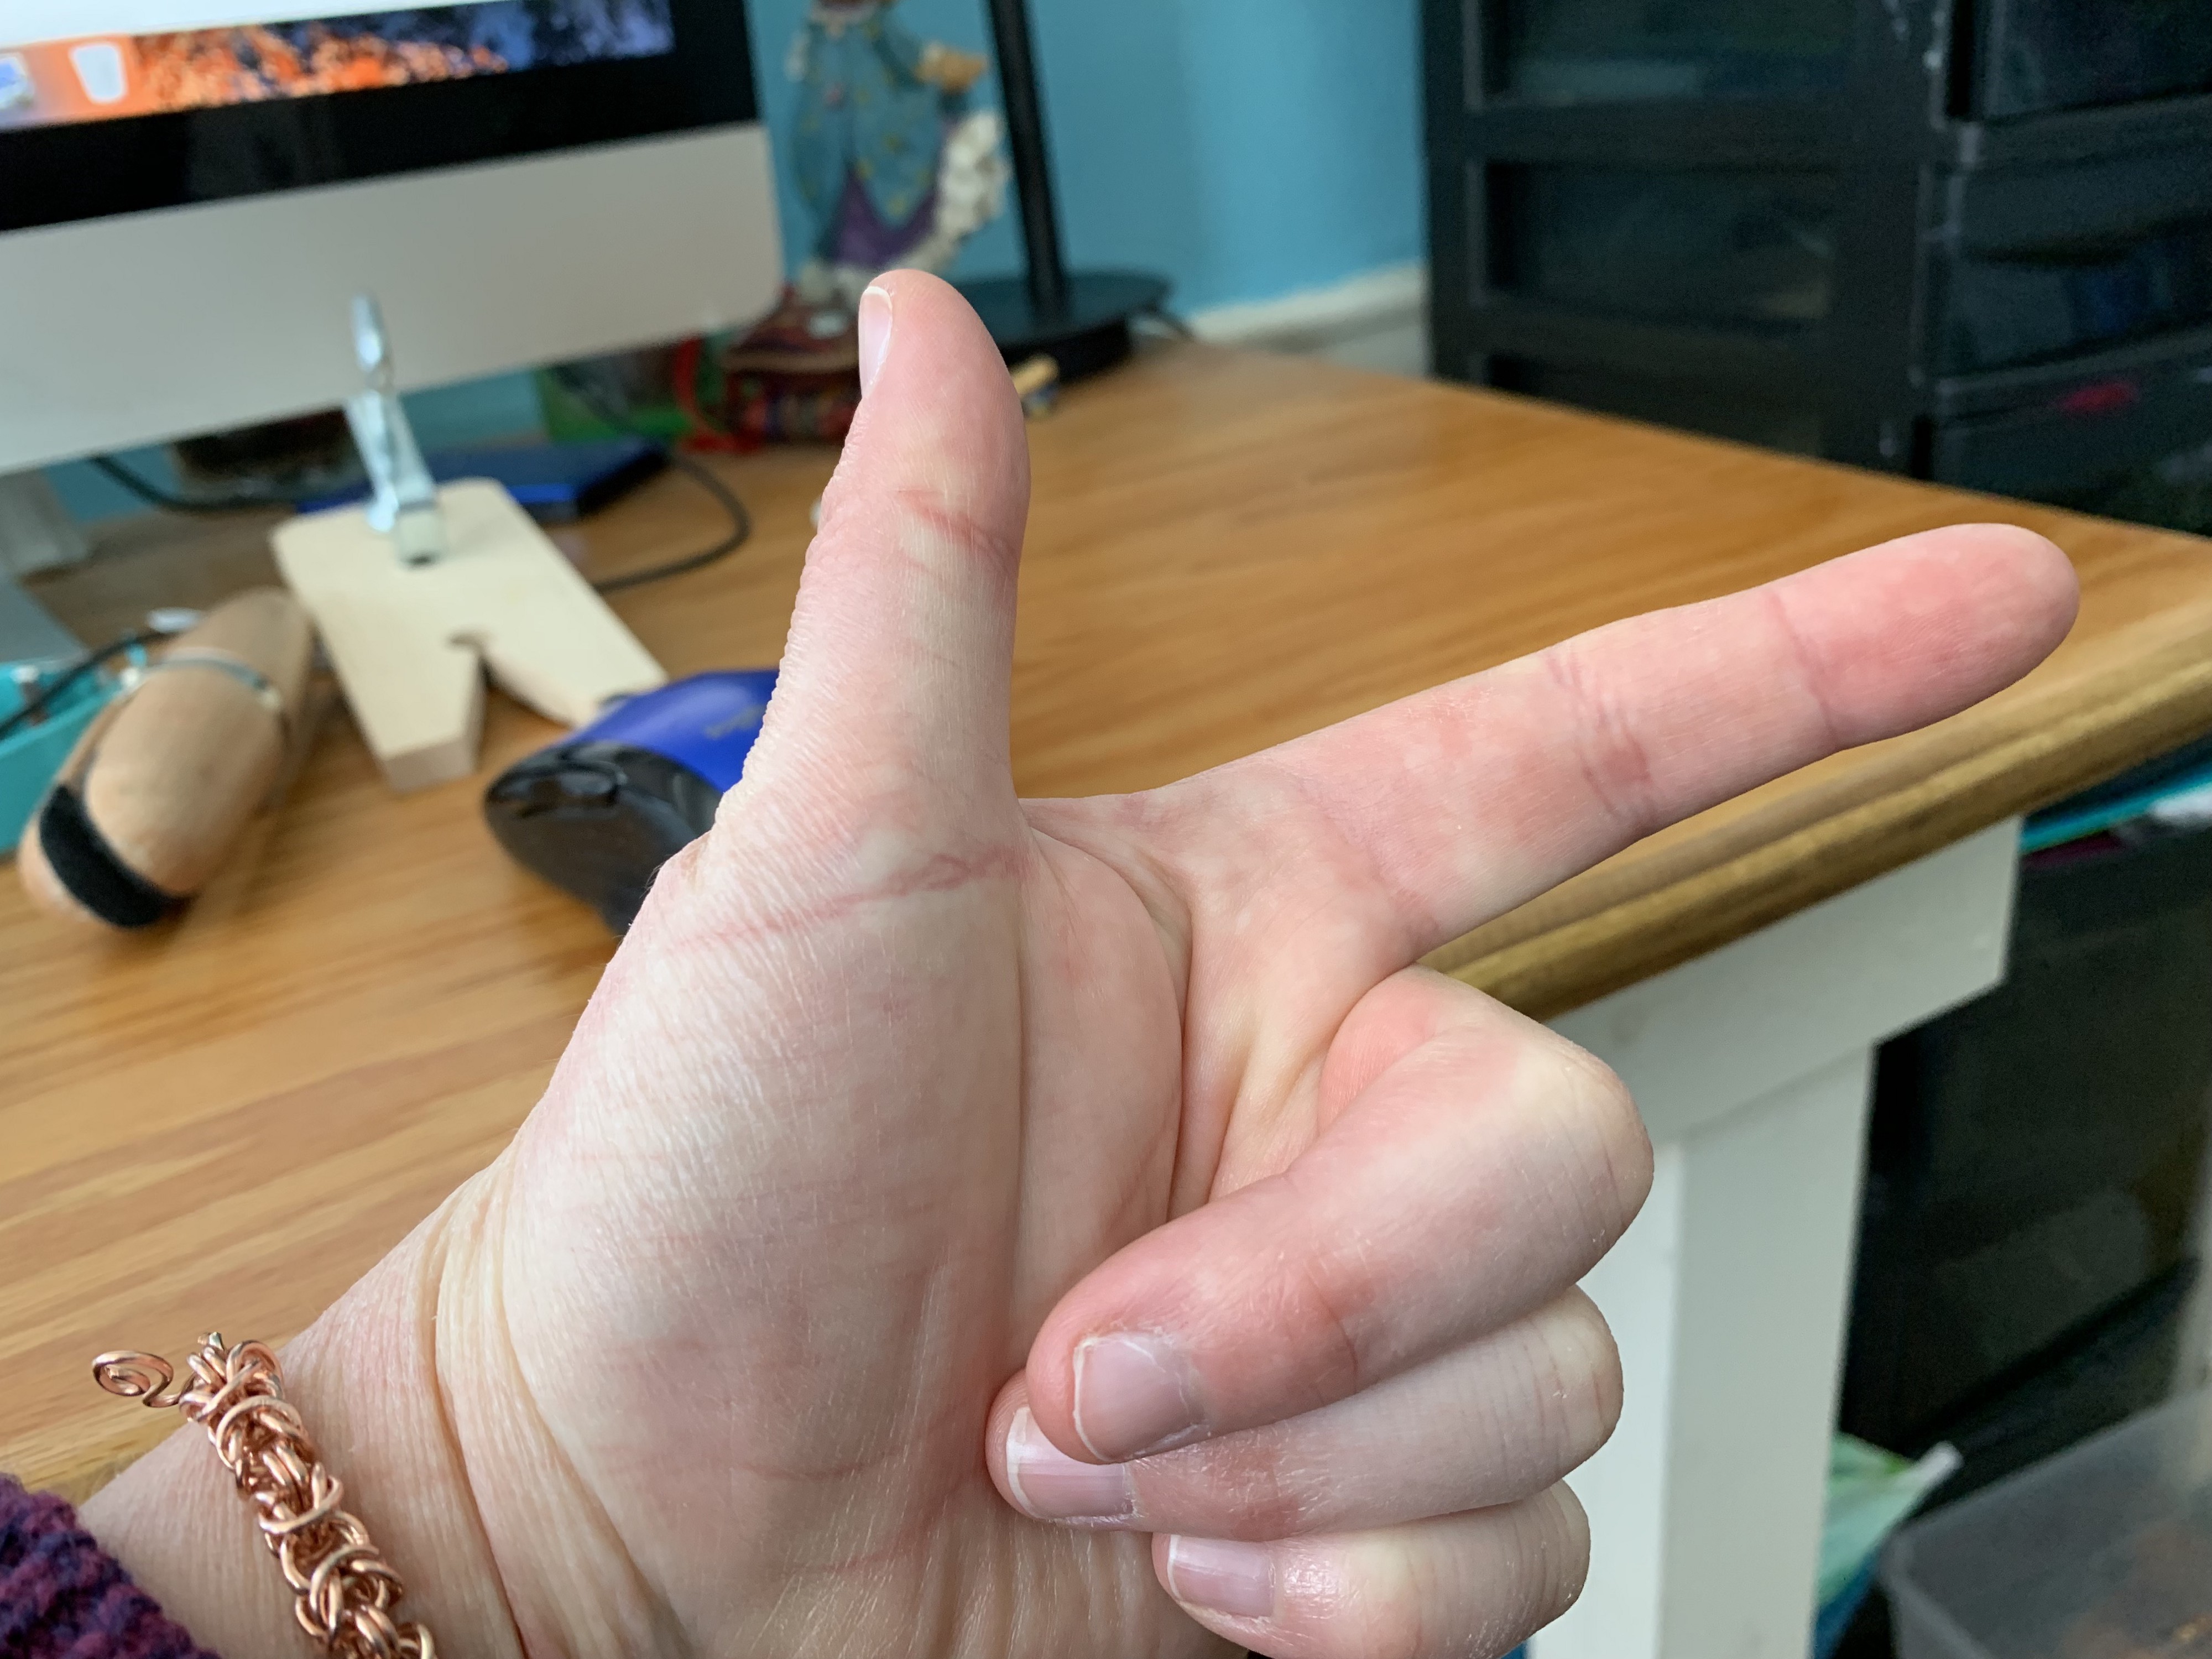
2. Put your hand in form of a pretend gun.
3. Now is the fun part. With your working yarn that is attached to the ball, you want to hold the yarn in your hand making the gun sign with the 3 remaining fingers.
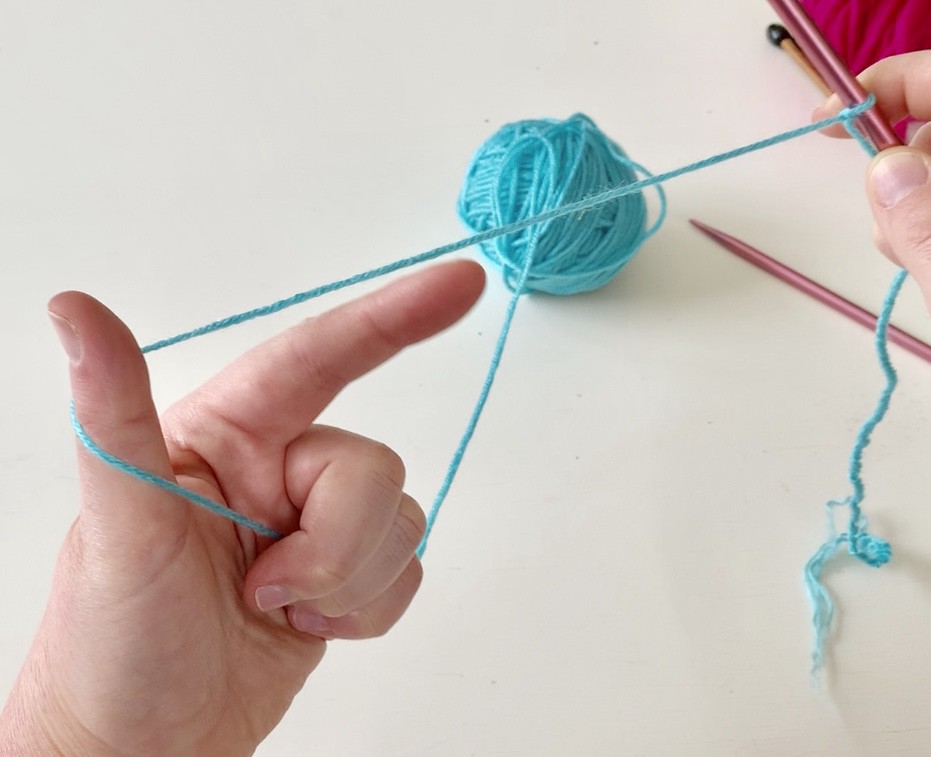
4. Wrap the yarn clockwise around your thumb and then back to front around your index finger and across your palm.
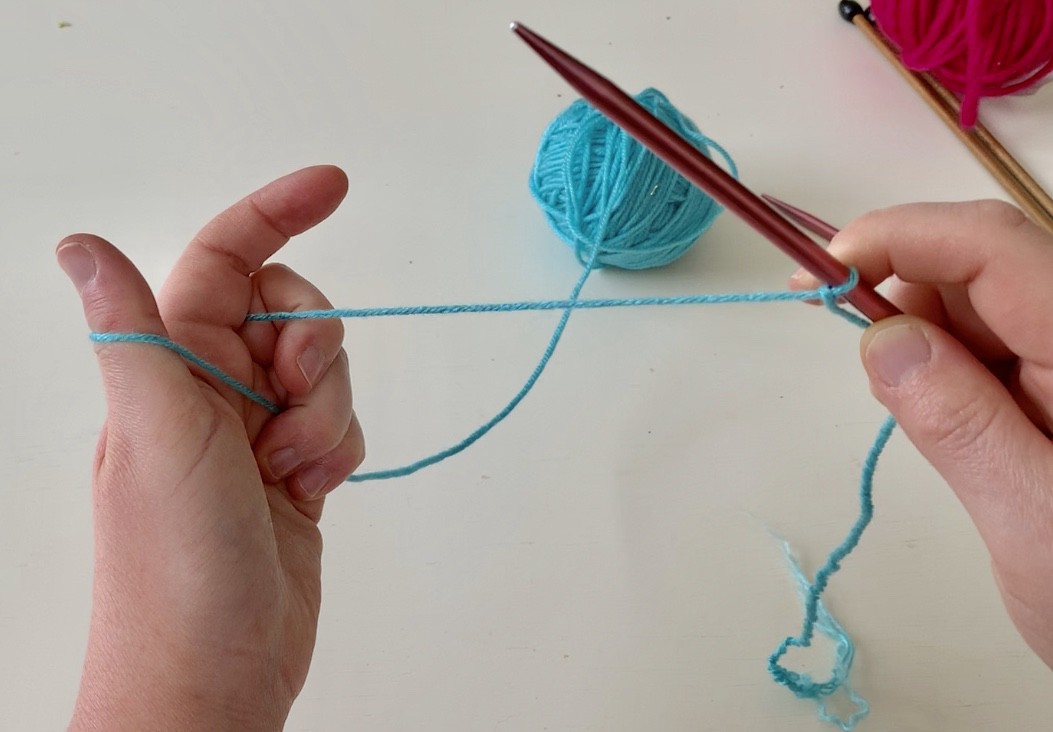
5. There will be an X made with the yarn in the middle of your palm. Take your needle and go under the X. Take your yarn off the needle and pull. Don?t pull to tight or you will not be able to get your needles into your stitches to knit. Repeat steps 3?5 until you have 10 or more stitches. Remember to leave your stitches loose but not too loose. You don?t want your stitches so tight that you can?t knit but you don?t want your stitches to be too loose either.
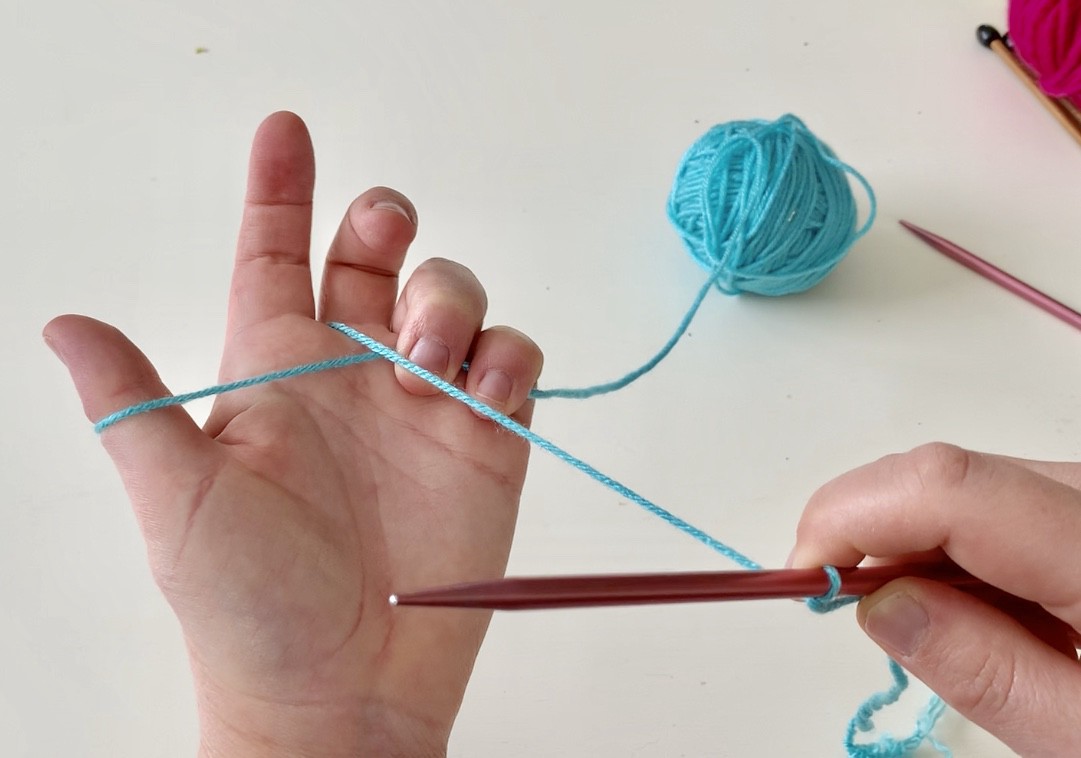
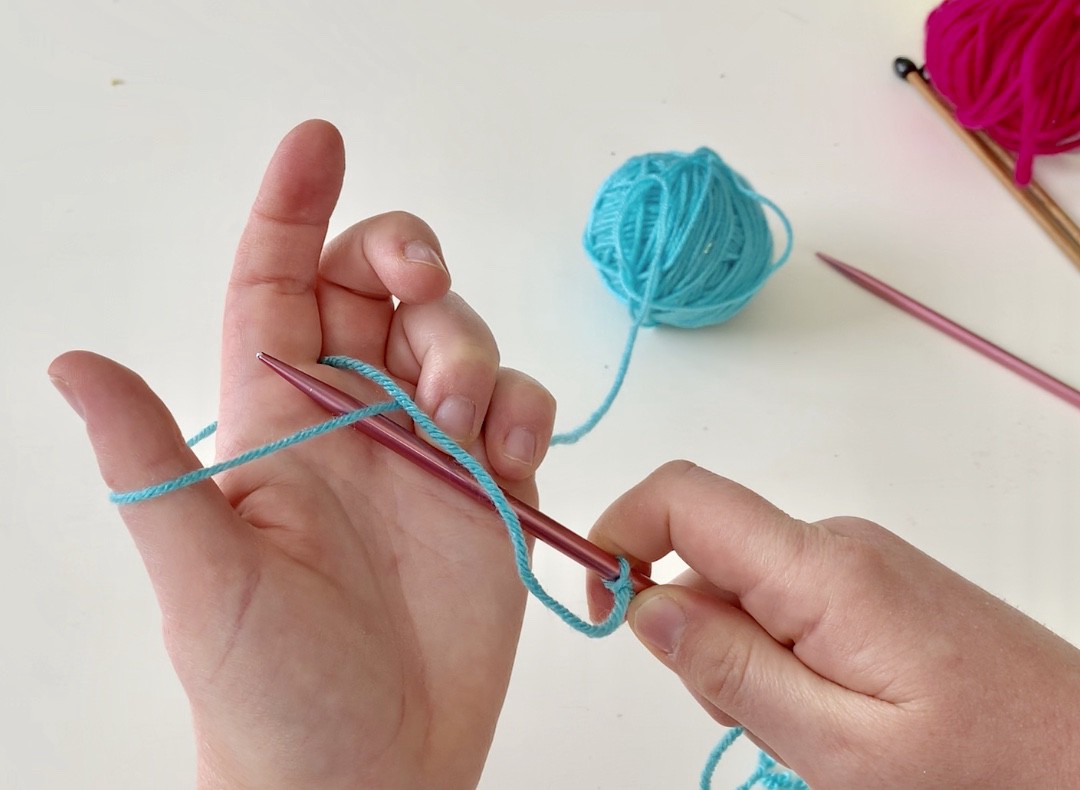
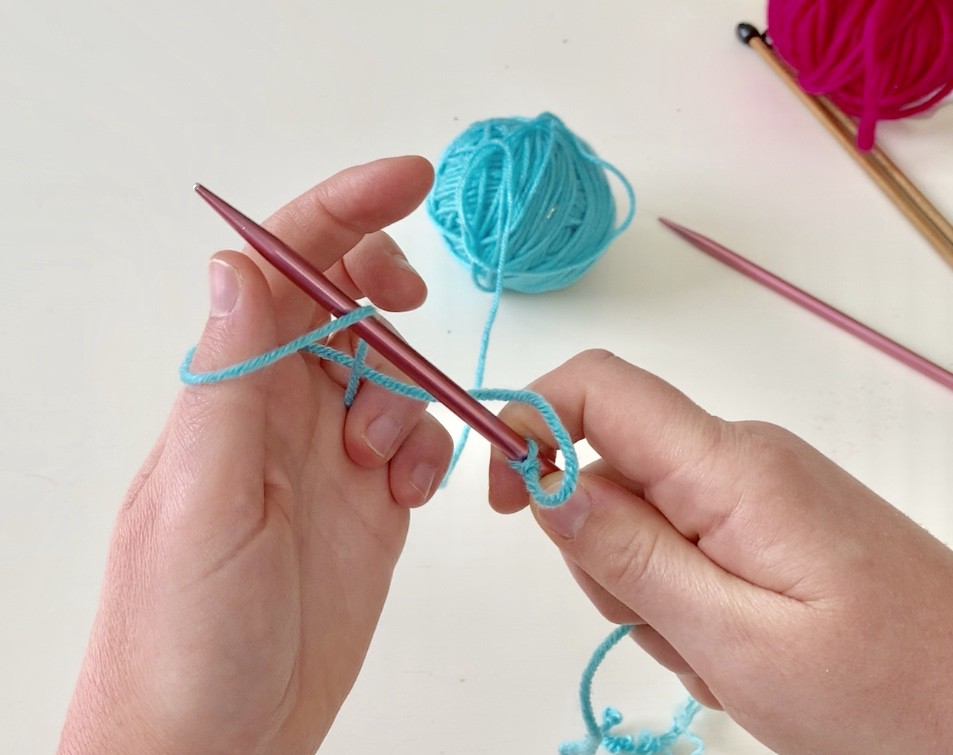
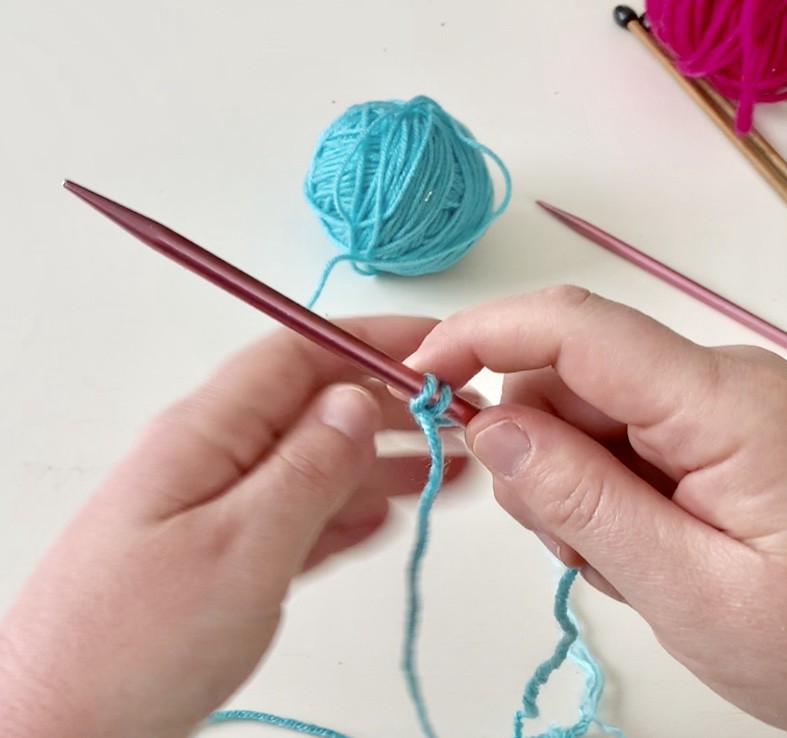
Pros of casting on this way are that it is easy for beginners to learn.
Cons of casting on this way are that when you start to knit your first row you get this long weird string in the middle of your knitting that gets longer as you knit your first row. I would recommend adding one extra stitch and then at the end you can slip it off your needle when you come to knit the last stitch and the long middle string will become part of your tail.
2. The Long Tail Cast On
The Long Tail Cast On is a slightly more advanced way to cast on. It is very widely used because it allows the knitter to create items that seem to have some stretch. You need just one needle for this method.
- As the name implies you want to start out with a long tail of about 3 feet of yarn depending on what you are working on. Don?t worry about having leftover yarn because even the most experienced knitters still have leftover yarn when using the Long Tail Cast On.
- Tie a slip knot around your needle as shown above.
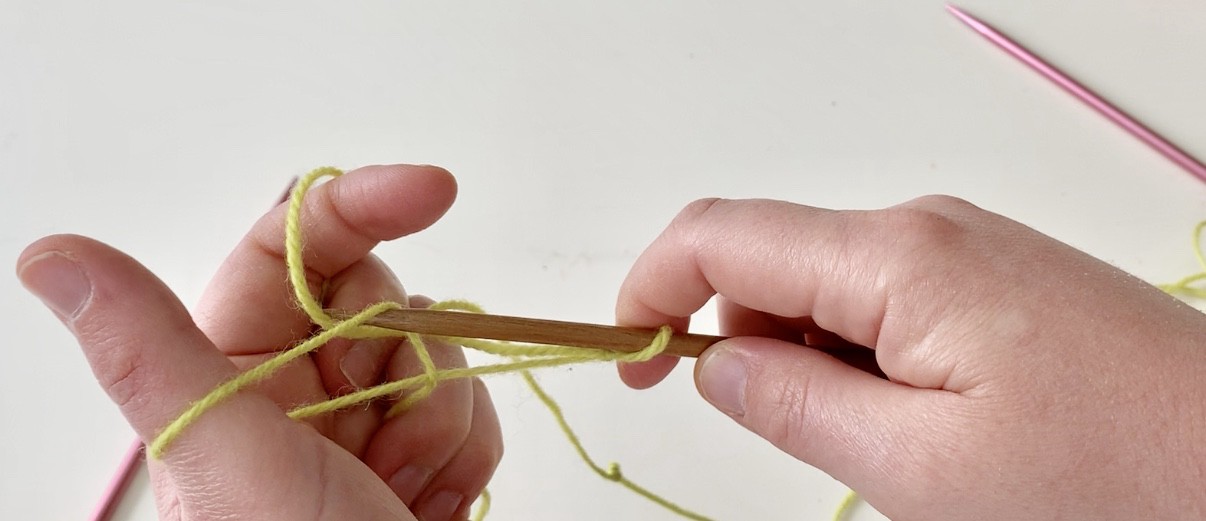
- Hold both your working yarn and your tail with your middle, pinky and ring finger.
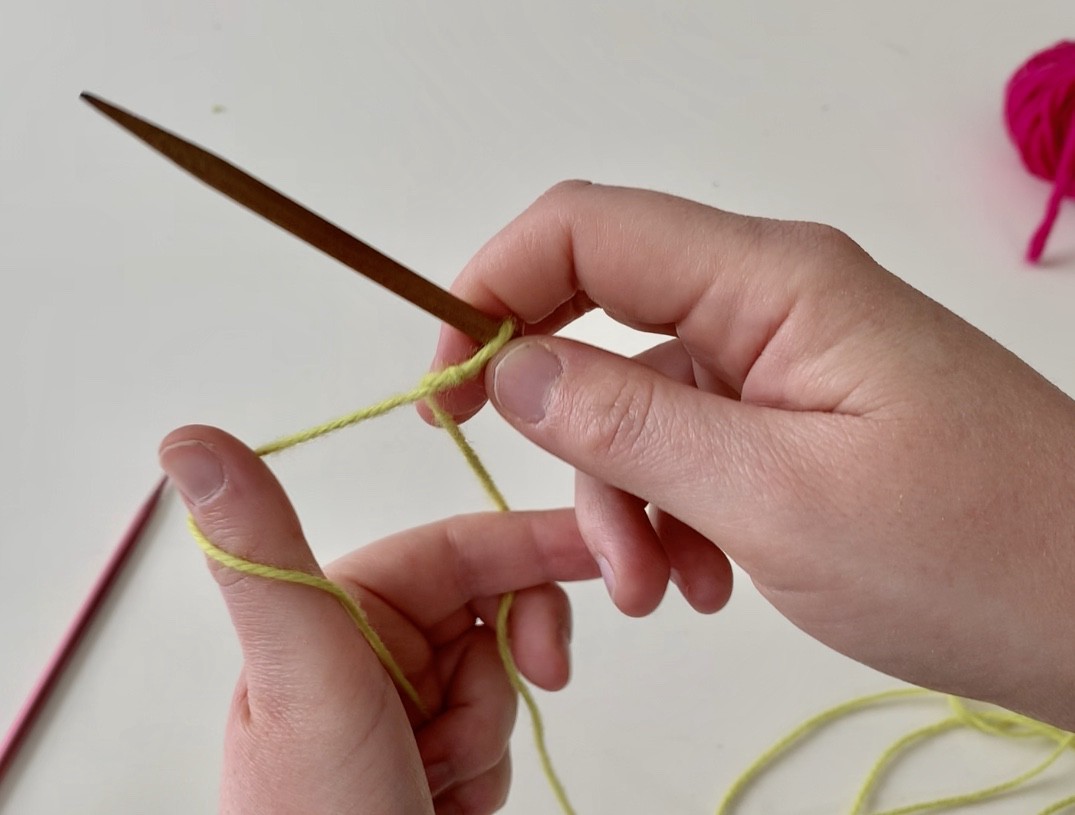
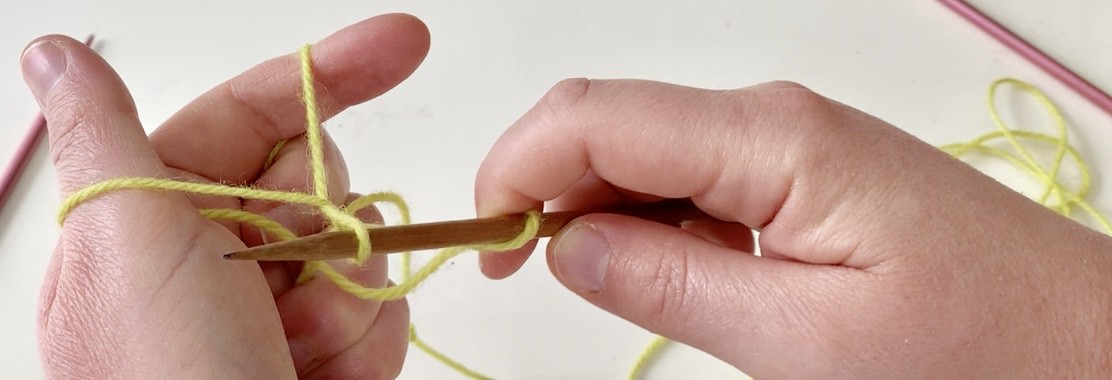
4. Wrap your tail all the way around your thumb clockwise and wrap your working yarn all the way around your index finger counter-clockwise. Your yarn should be making a V shape in the palm of your hand when pulled.
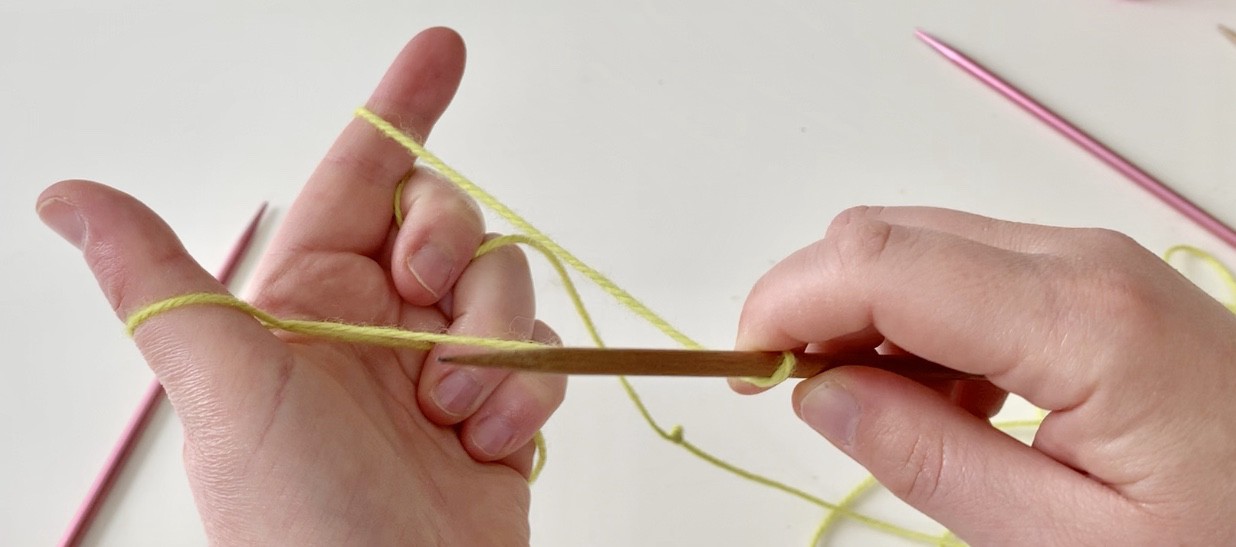
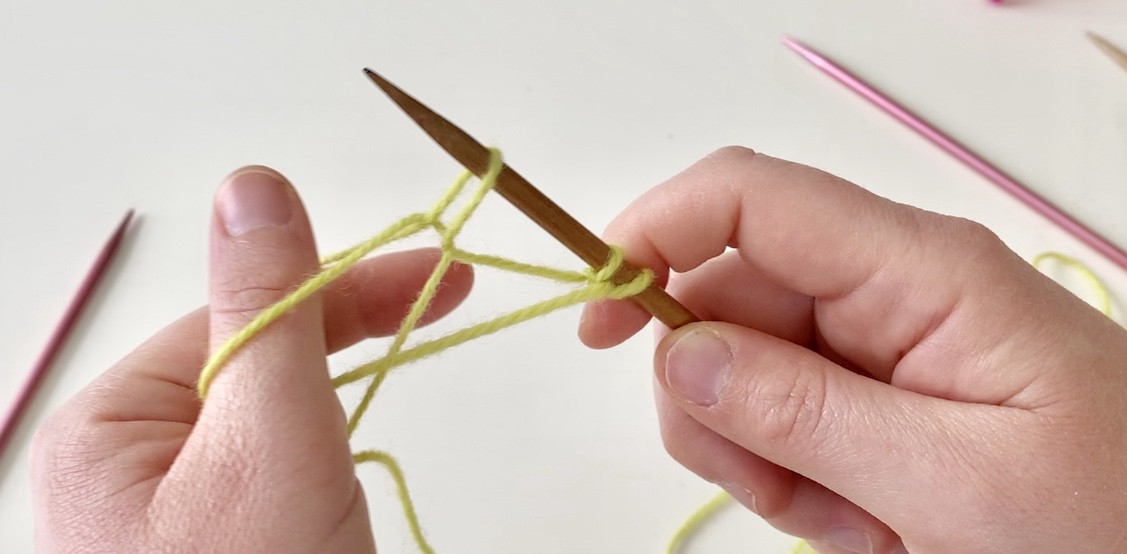
5. Take your needle and go under the yarn that is wrapped around your thumb. But don?t take the yarn off your thumb just yet. Go over to your index finger and instead of going under, go over and catch the yarn that is wrapped around the index finger. Pull the yarn through the thumb that is wrapped around your thumb and take it all off your fingers.

6. Repeat steps 3?5 until you feel comfortable with the Long Tail Cast On. Remember to leave your stitches loose but not too loose. You don?t want your stitches so tight that you can?t knit but you don?t want your stitches to be too loose either.
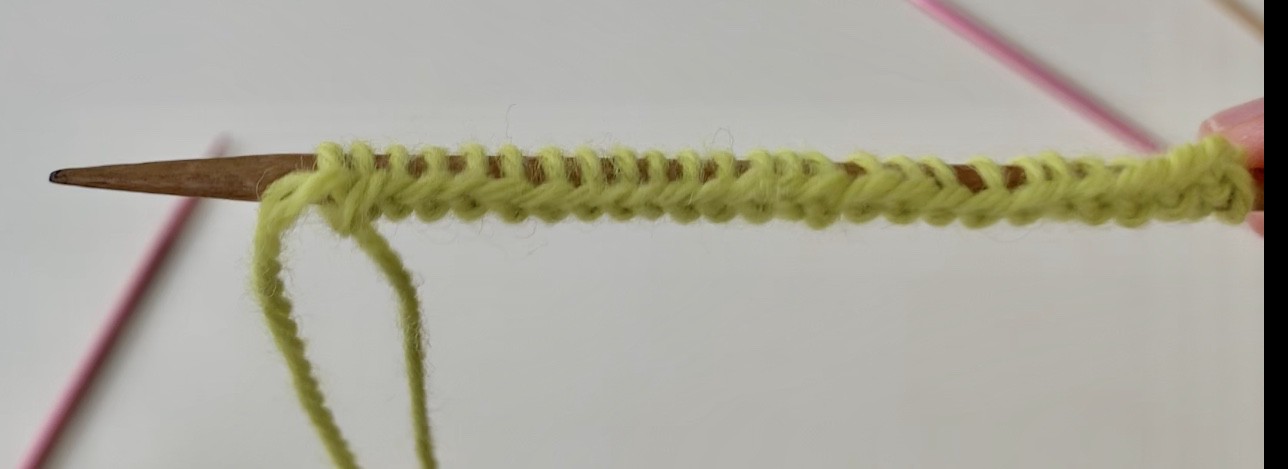
The Pros are that you get this nice stretchy fabric with no long piece of string in the middle of your first knitted row.
There are no cons to using this cast on method that I know of.
If you are totally confused here is a video on how to do the Long Tail Cast On
3. The Knitted Cast On
To be able to do the Knitted Cast On you need to know how to knit. I will not be teaching you how to knit in this article. If you would like to learn how to knit you can click here to read my article on how to knit. For this cast on method, you need 2 needles instead of one.
- Like the other two methods, you start out with a slip knot as shown above. Leave a 6-inch tail.
- You have just your slip knot on your needle. You take your second needle and you go to knit a stitch. But instead of finishing the stitch and taking the slip stitch off the needle, you take the newly formed loop and place it onto your needle next to the slip stitch. Continue this until you are comfortable with the Knitted Cast On Method.
3. Remember to leave your stitches loose but not too loose. You don?t want your stitches so tight that you can?t knit but you don?t want your stitches to be too loose either.
Pros of the Knitted Cast On Method is that once you learn how to knit this method is very easy to learn and master. It makes casting on so much easier.
The Con is that your first row is already knitted when you finished casting on and that is great if all you are doing is just knitting. But if you are purling then you will need to learn how to cast on purlwise. I will be sharing that in a later post.
These are three great ways to cast on. If you have any questions about casting on or knitting, in general, please leave all your questions and comments down below. I check my comments daily.
You can find me on
Instagram: https://www.instagram.com/carleyscorner/
Twitter: @carleyscorner
Ravelry: https://www.ravelry.com/people/Cmarston14
Pinterest: https://www.pinterest.com/carleyscornerst/boards/
