
 KitchenAid Stand Mixer Attachements
How did a 20-pound baking appliance become the centerpiece of every millennial?s wedding registry?
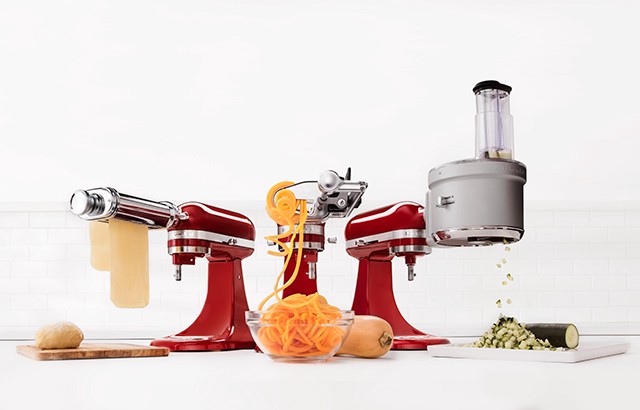
The KitchenAid stand mixer is a product (and marketing) home run. The secret is in the components: attachments and accessories that attach to the mixer and give it new functionality. Combine that with the individuality of dozens of color options, and you?ve got a hall of fame product.
It can be confusing and overwhelming to sort out which attachments and accessories are right for you. I poured over thousands of pages of product catalogs, reviews, and guides and spent more than 200 hours putting together this guide to every KitchenAid mixer attachment, accessory, and add-on available today.
Index of KitchenAid mixer attachments
Ice CreamWire whips, dough hooks, scrapers, and beatersPasta makersJuicers and strainersGrindersFood processorPeelers, spiralizers, slicers, and shreddersGrain millPrecise heat mixing bowlBowls, lids, and shieldsMixer coversAttachment combo packs
A word on compatibility: It can be confusing to keep track of all the different model numbers and product lines for KitchenAid mixers. ?Does this fit the Classic or the Classic plus? Do I have the Artisan Series??
I?ll keep it simple. Most of you likely have the Artisan series, and ? since it?s by far the most popular model ? most of these attachments fit that model.
In fact, most of these attachments will fit any model, despite differences in bowl size, power, and life mechanism.
This is especially true with any attachment the plugs into the power hub (the port covered by the silver cap at the top of your mixer). Any power hub attachment from any era will fit any mixer from any era, going all the way back to 1937. With other attachment, it might make sense to know how compatible your mixer is. You can pretty well narrow down any modern KitchenAid mixer (say anything made in the last 30 years) by knowing two things. First, what?s the bowl capacity (this will be between 3.5-qt and 8-qt.). And second, is it a tilt-head or bowl-lift. Tilt-head means unlocking and tilting the head back to remove the bowl.
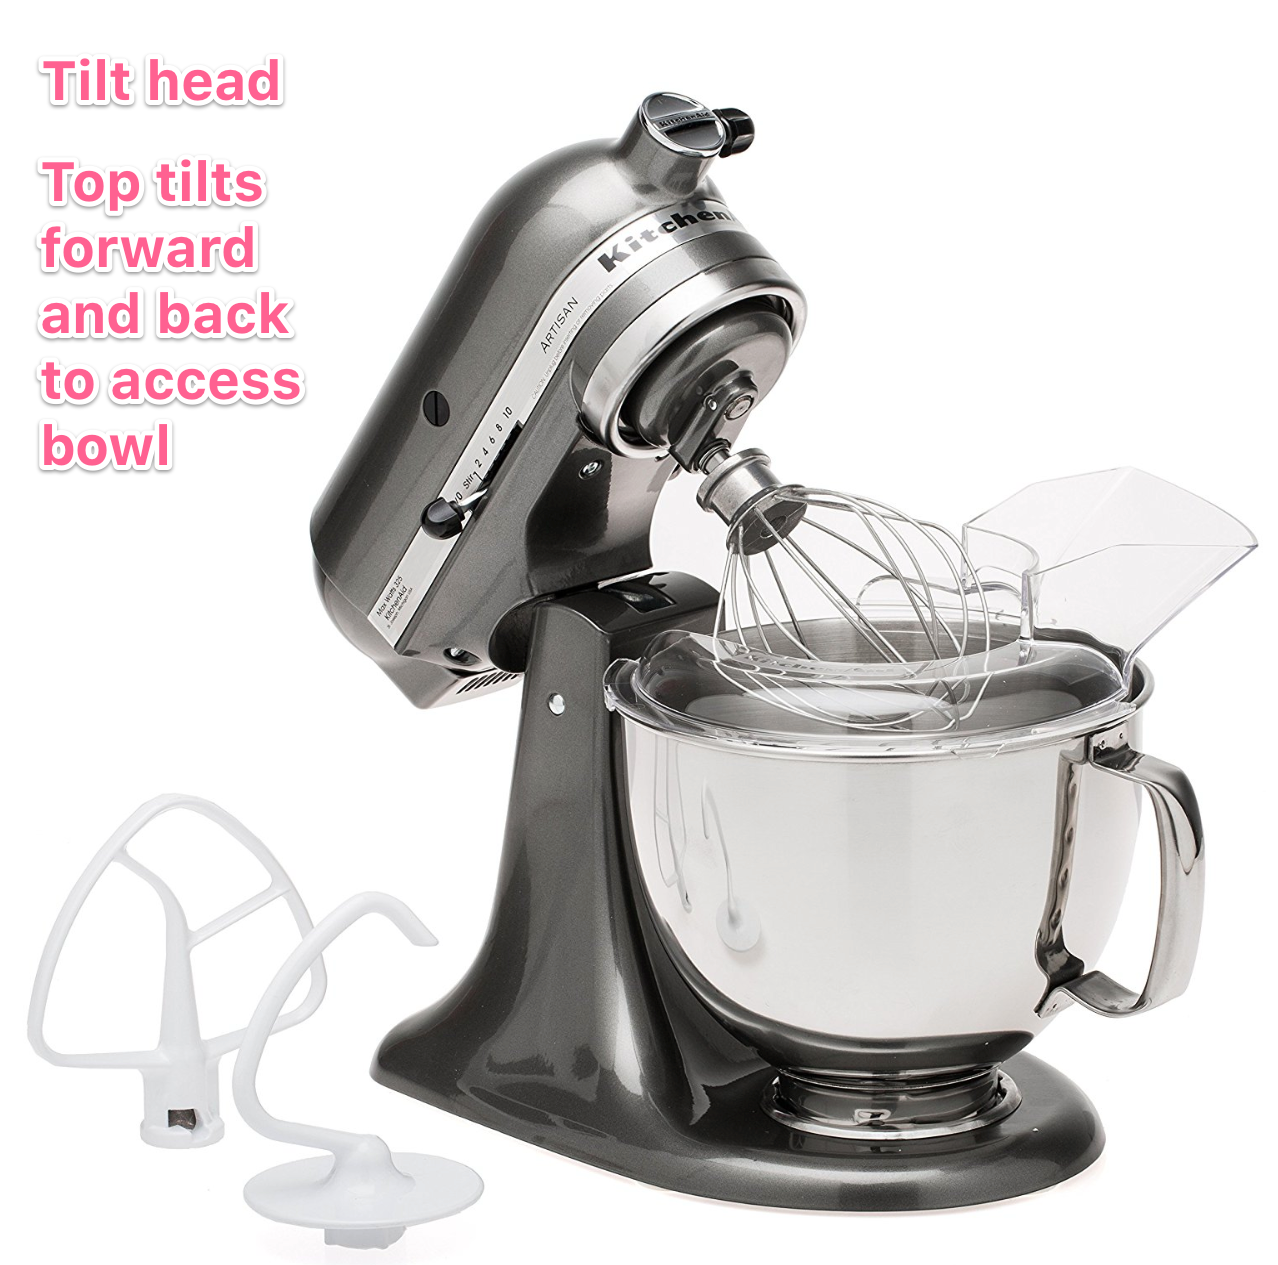 Tilt head stand mixer
Bowl lift models are larger and included a lever that lifts the top casing mechanism allowing room to remove the bowl.
 Bowl-lift stand mixer
For some cases, it can help to know your model number. Look for the sticker underneath the base of your mixer. The model number will start with a K and most likely start with KSM (for KitchenAid Stand mixer).
A note on third-party accessories and attachments: You?ll see all the attachments and accessories in this guide are made by KitchenAid. You?ll also notice there are a lot of other attachments available from other brands. KitchenAid has made it clear that they don?t recommend anyone use accessories or attachments made by another party, and that doing so can void the mixer?s warranty.
Ice cream
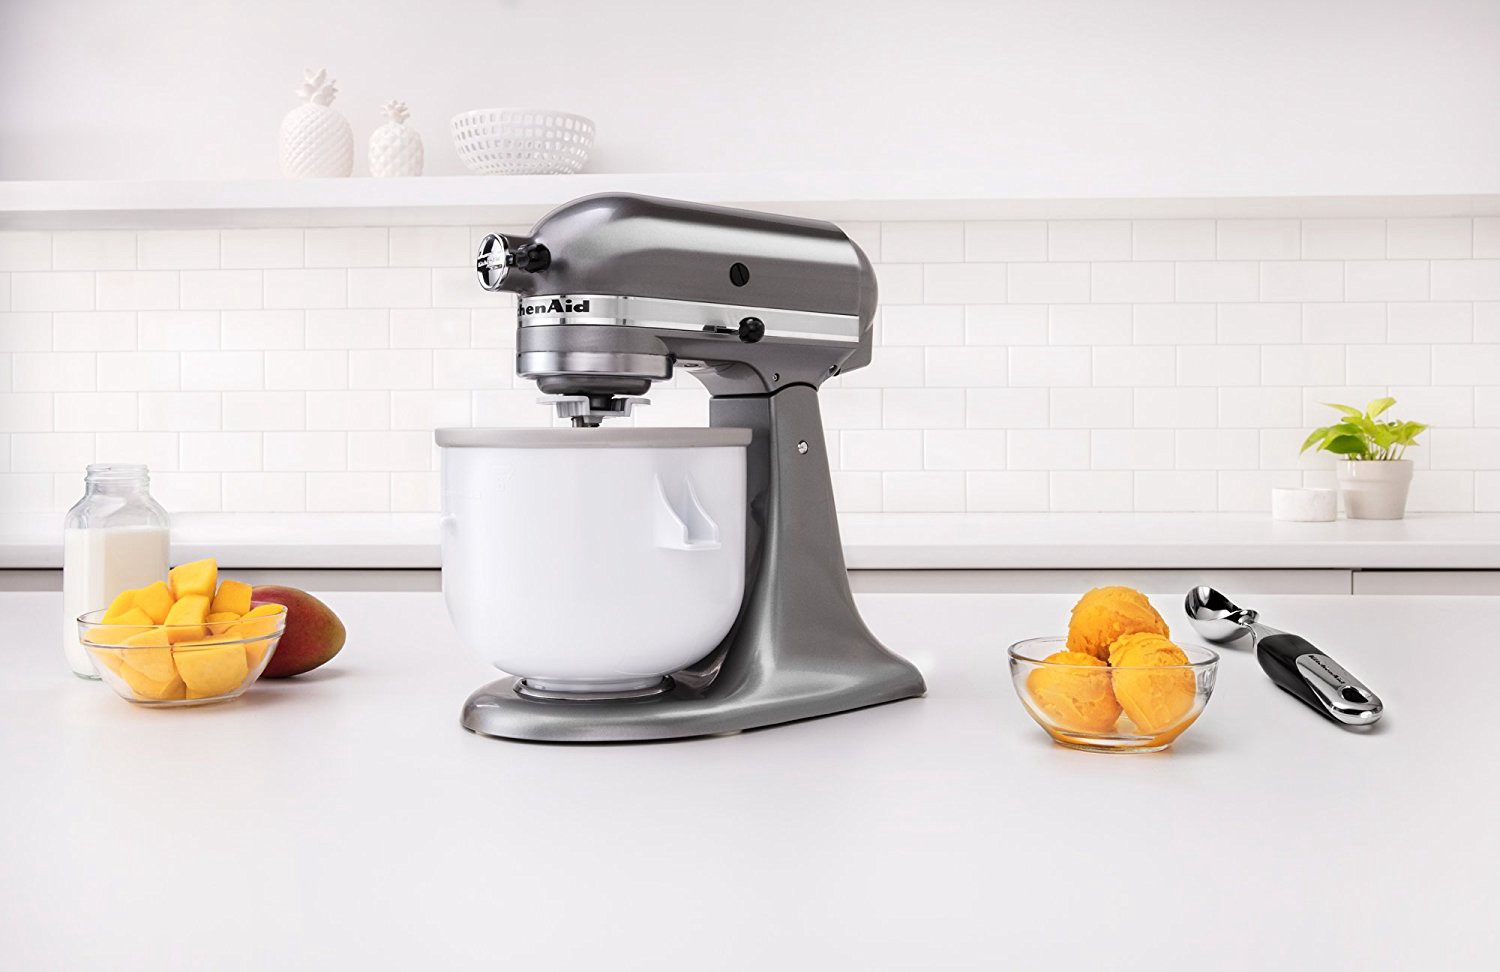 KitchenAid ice cream mixer attachment
Recommendation: If you make a ton of ice cream at home, skip this and get a dedicated ice cream machine. For most people homemade ice cream is more of a few-times-a-year summertime activity. If that sounds like you (and it really should be if it?s not, come on) definitely get this attachment. Life?s short, make some ice cream.
If you like ice cream and you like experimenting with different flavors, this is a great tool and a great price. You?d need to pay two or three times as much for comparable outcomes from an all-in-one ice cream machine.
The downside is you?ll need to do some planning ahead. The bowl needs to get really cold In your freezer for several hours. That also means putting the bowl back to refreeze after each batch, so it?s not really practical to make more than two quarts at a time.
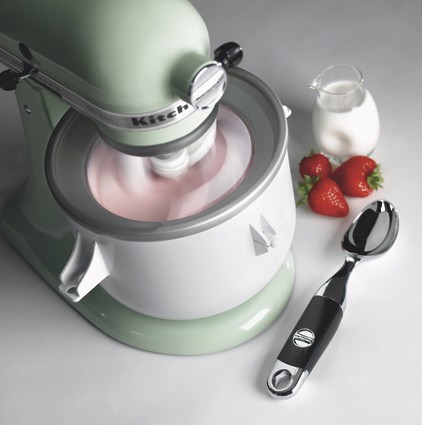
You?ll also notice a little different consistency to your ice cream. It will be more fluffy, light, and airy, because the lowest KitchenAid mixer setting churns faster than typical ice cream makers. This results in fewer ice crystals and less dense ice cream. It?s still good, it?s just a matter of personal preference. You can also make your finished ice cream harder by putting it in the freezer for a few hour
This is easy to clean and easy to store, which is another big advantage. Quality all-in-one ice cream machines are heavy and bulky because they need big motors and cooling units. For something that?s basically a seasonal and special occasion activity, this is a no-brainer. If you ever get an ice cream machine, this is the way to go.
Ice Cream Maker AttachmentCompatible: All 4.5 quart and larger models made after 1990Price: $99Buy: From Amazon
Wire whips, dough hooks, scrapers, and beaters
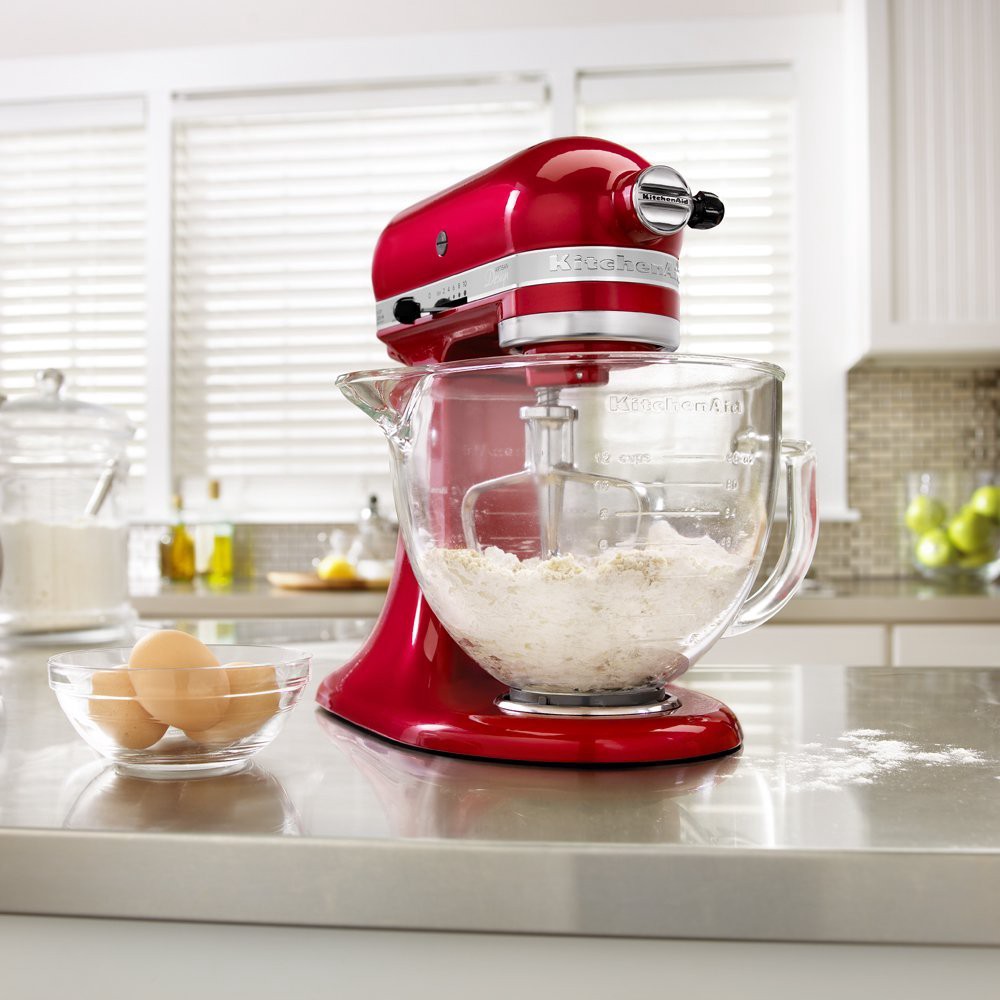 Stand mixer with flat beater
What comes in the box?
You?ll notice out of the box you?re ready with a few tools to start. These three tools are the bread and butter (no pun intended) of your stand mixer setup.
All KitchenAid mixers come with a flat beater, a dough hook, and a wire whip. Replacements can easily be found if you need ? typically there is no need to upgrade these core tools but I?ll list the exceptions below. Let?s quickly explain the purpose of each category:
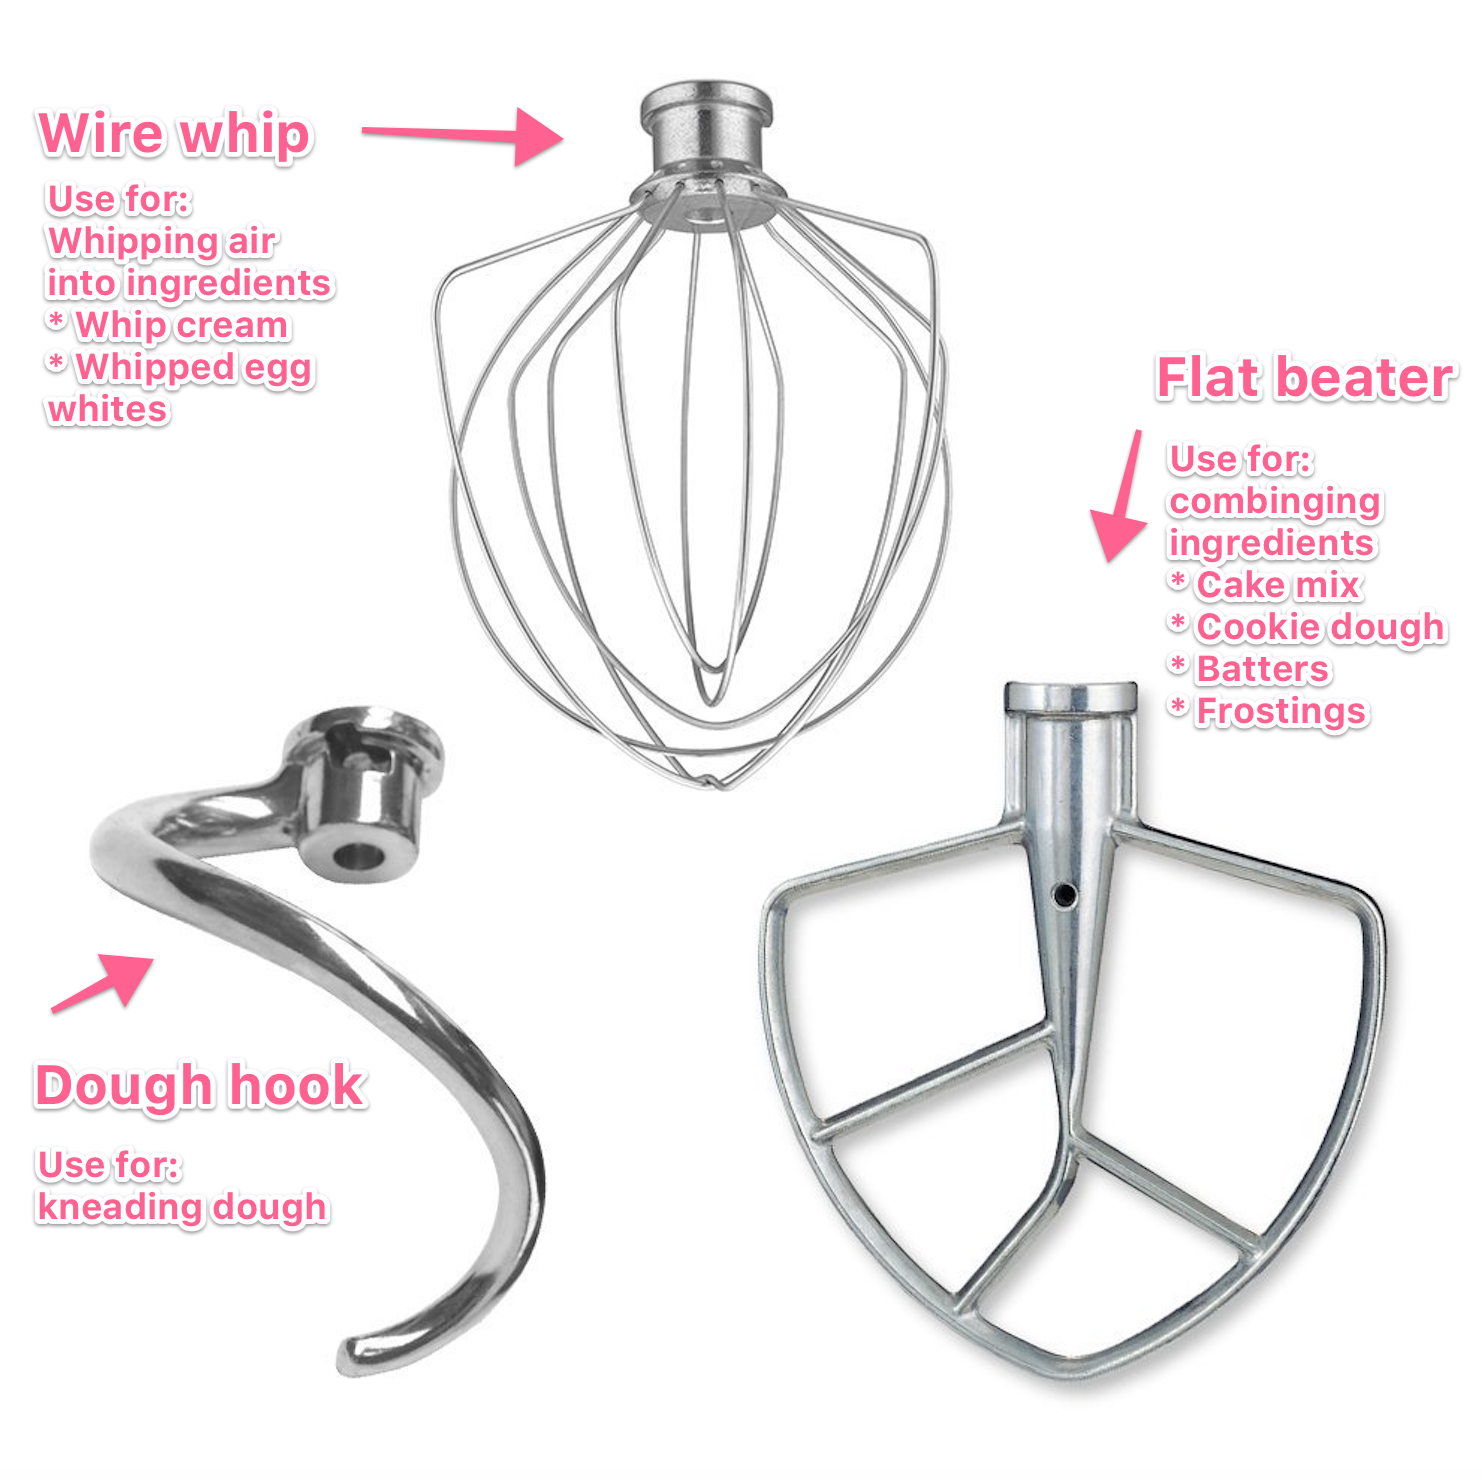
The flat beater is your go-to for most mixing needs. Cake mix, cookie dough, batters and frostings. This is your utility for everything that doesn?t fall into one of the other two categories. For example ?
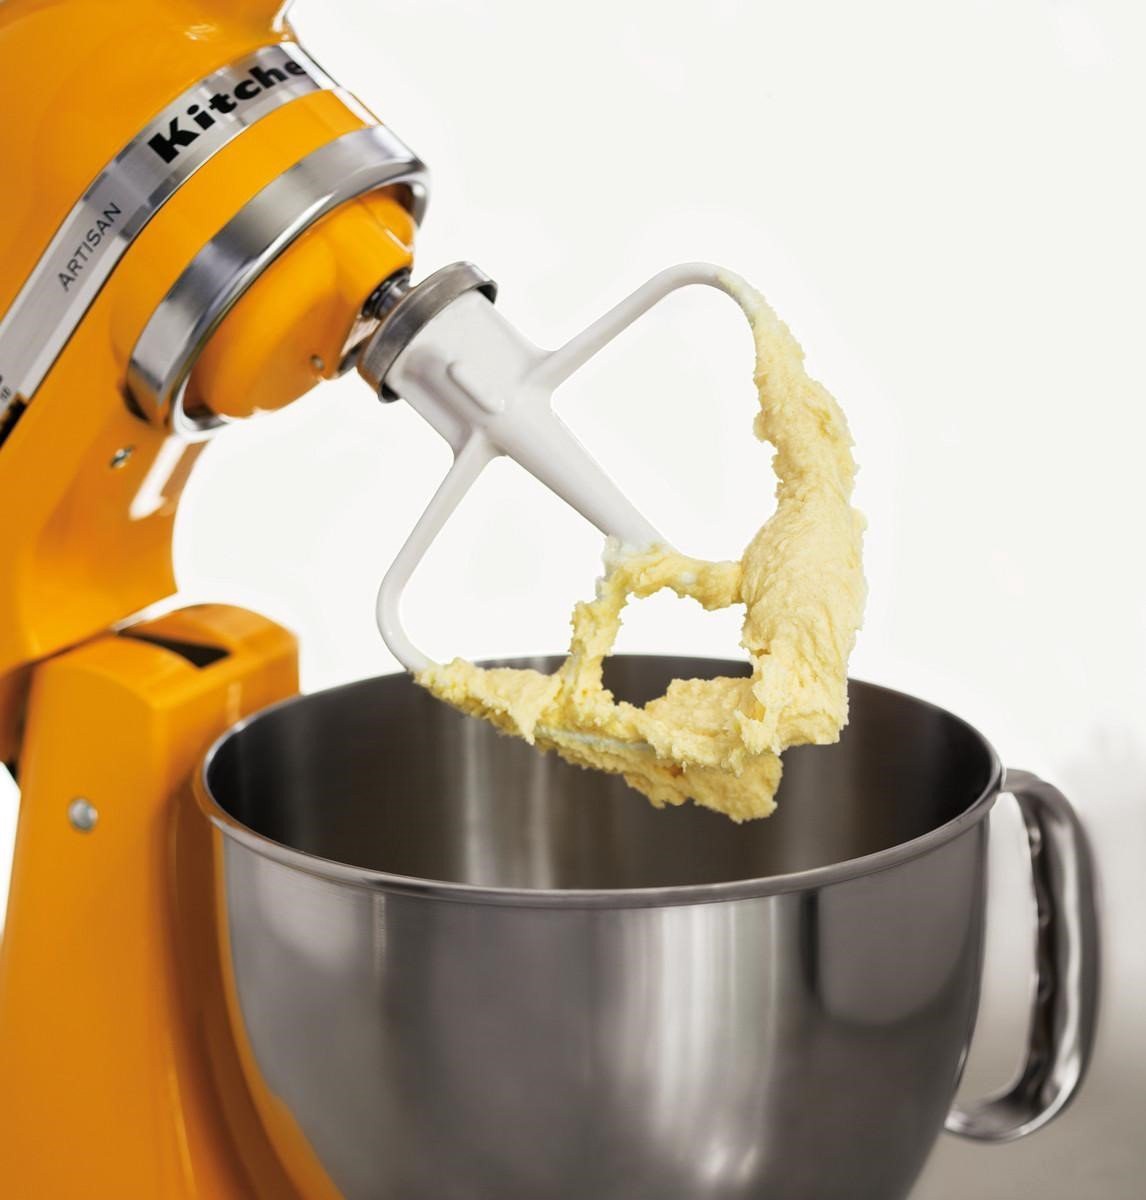 The flat beater
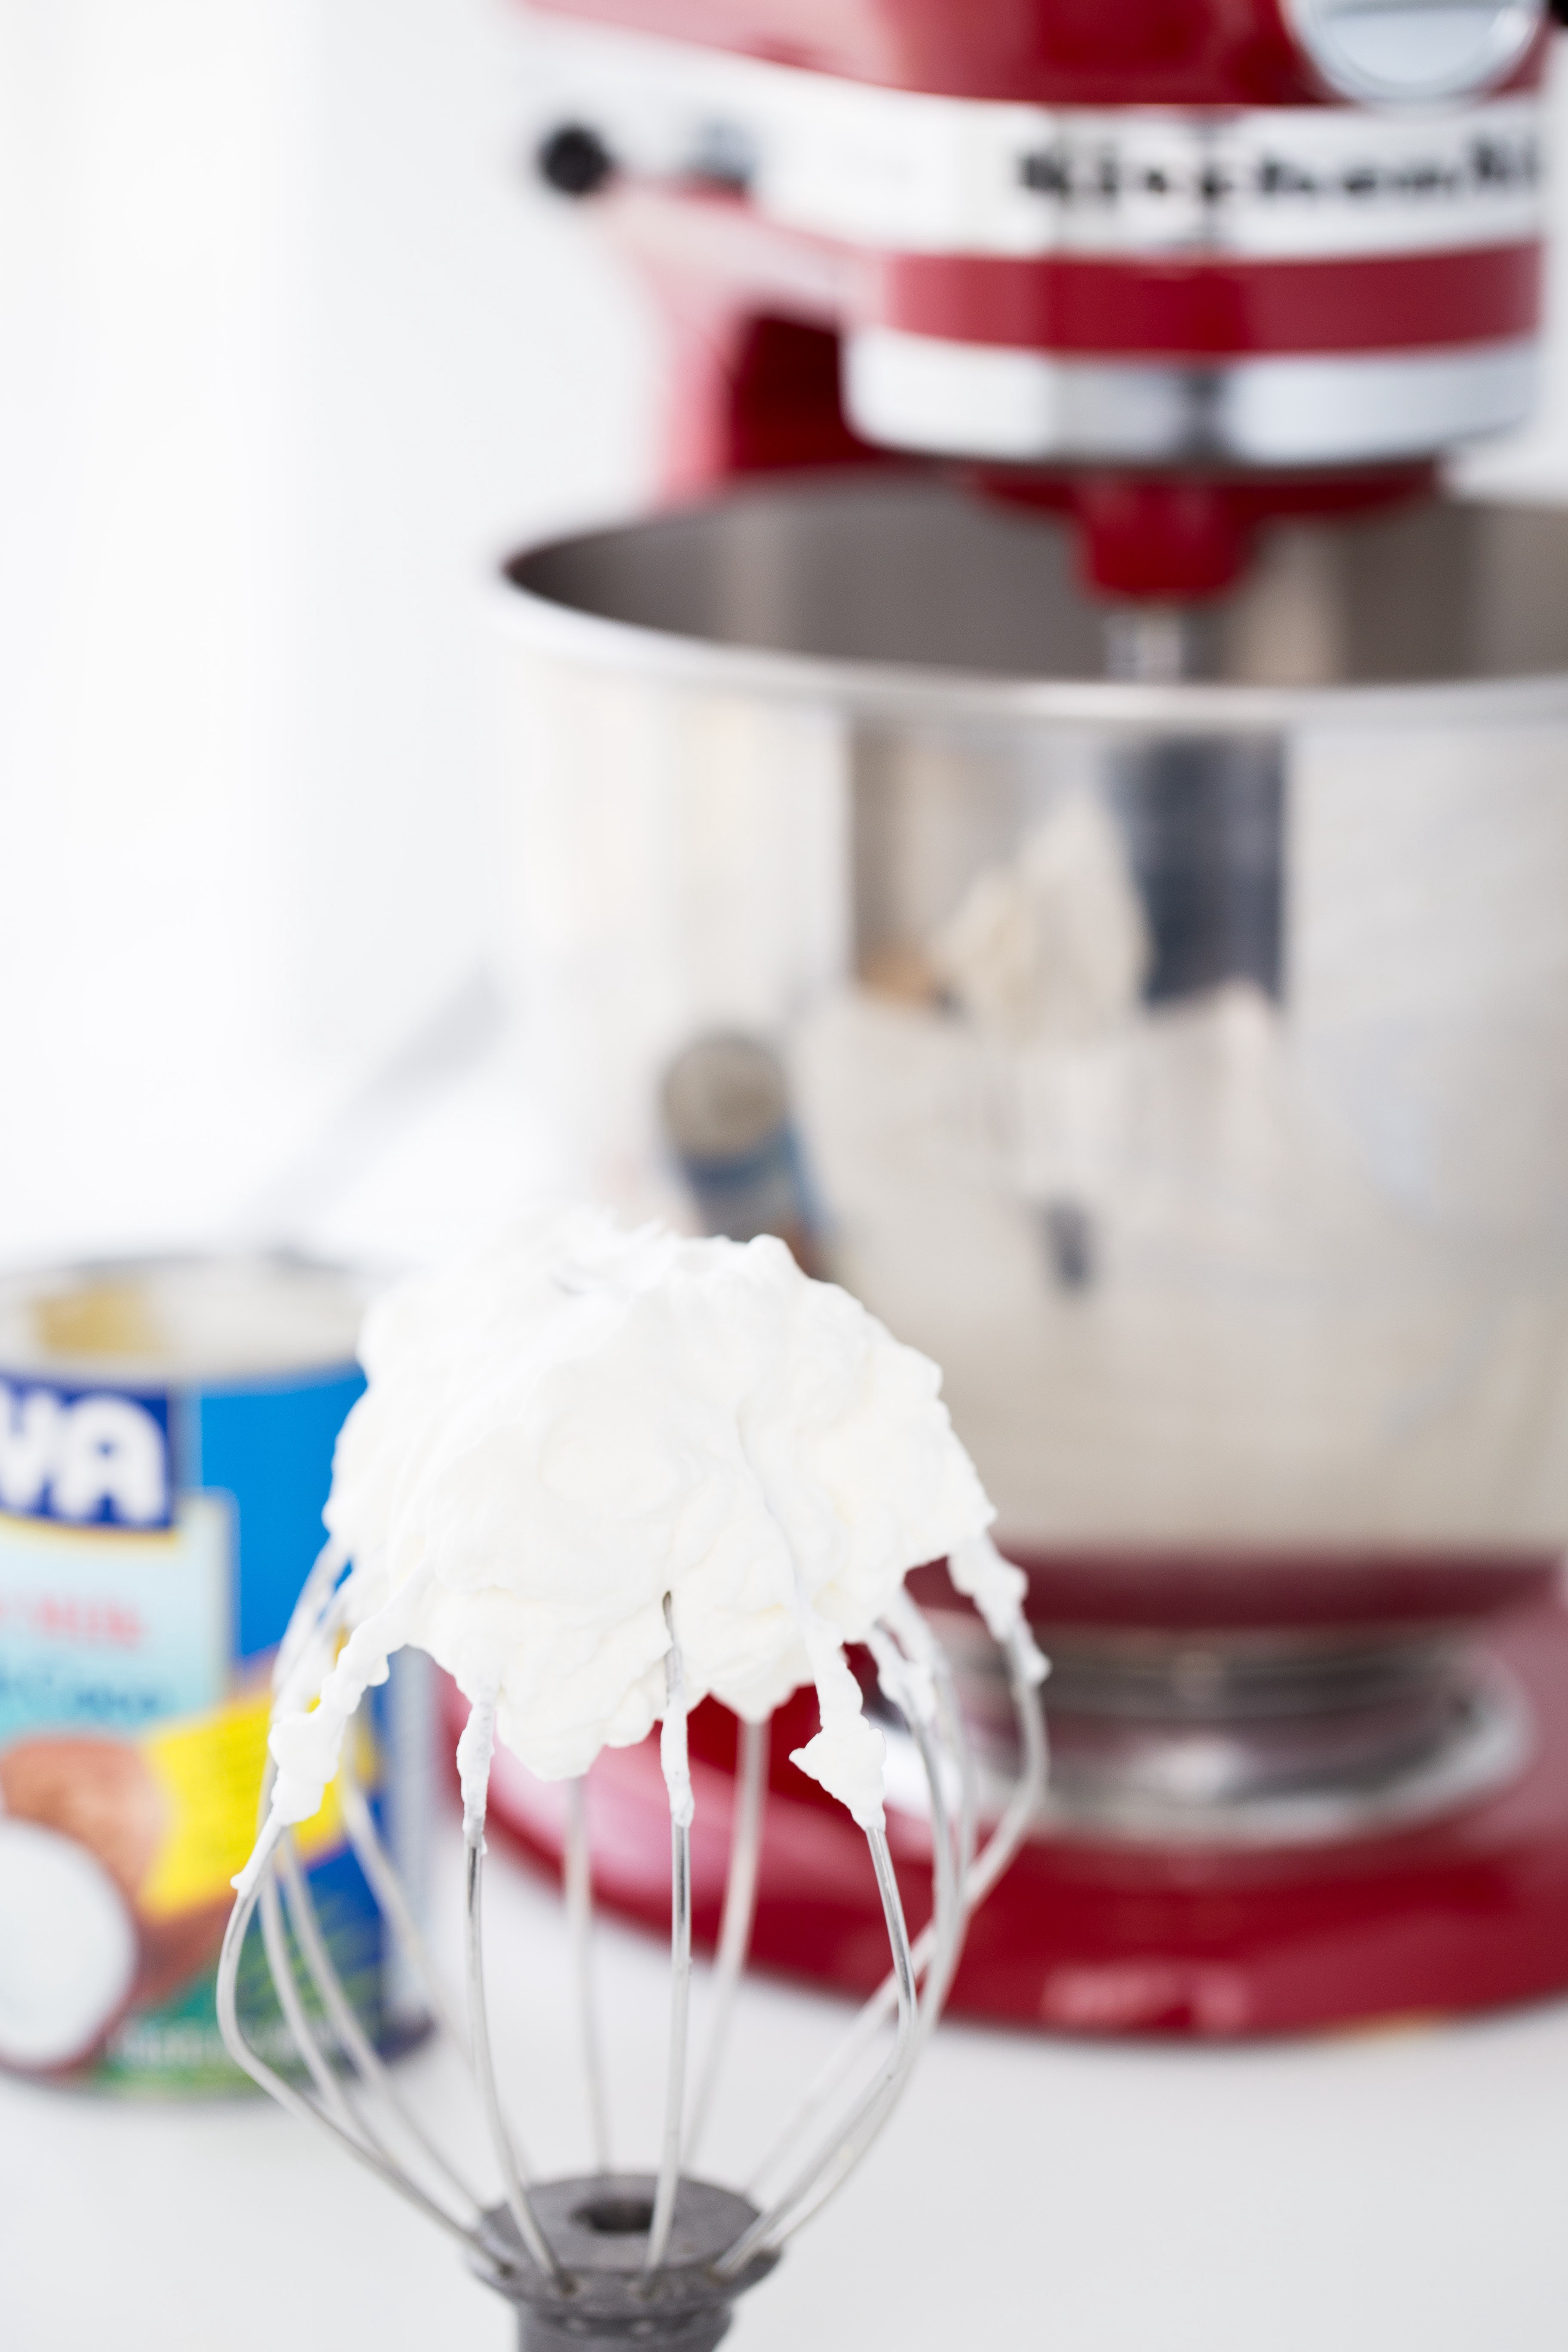
The wire whip is for whipping air into a mixture in order to increase its volume. Think fluffy egg whites or whipped cream. It?s also great for making butter and light frostings. Notice how the wires bend? You want lighter ingredients the wire can quickly cut through on fast speeds. Heavy, dense ingredients are bad news here.
The dough hook is a great tool for kneading yeast breads. It?s faster and easier than kneading by hand. Kneading strengthens gluten strands that give bread structure. This is what makes for bread that?s light and airy bread instead of dense and tough. It?s a great time saver. You can knead a batch of dough in the mixer in about 8 minutes, compared to 25 minutes of hard work doing it by hand. Always knead on a low setting, higher speeds can cause the motor to overheat.
Nylon coated or burnished metal?
Recommendation: Unless you really are doing a commercial-level volume of mixing, stick with the nylon coated. There?s a reason KitchenAid made this for its consumer models.
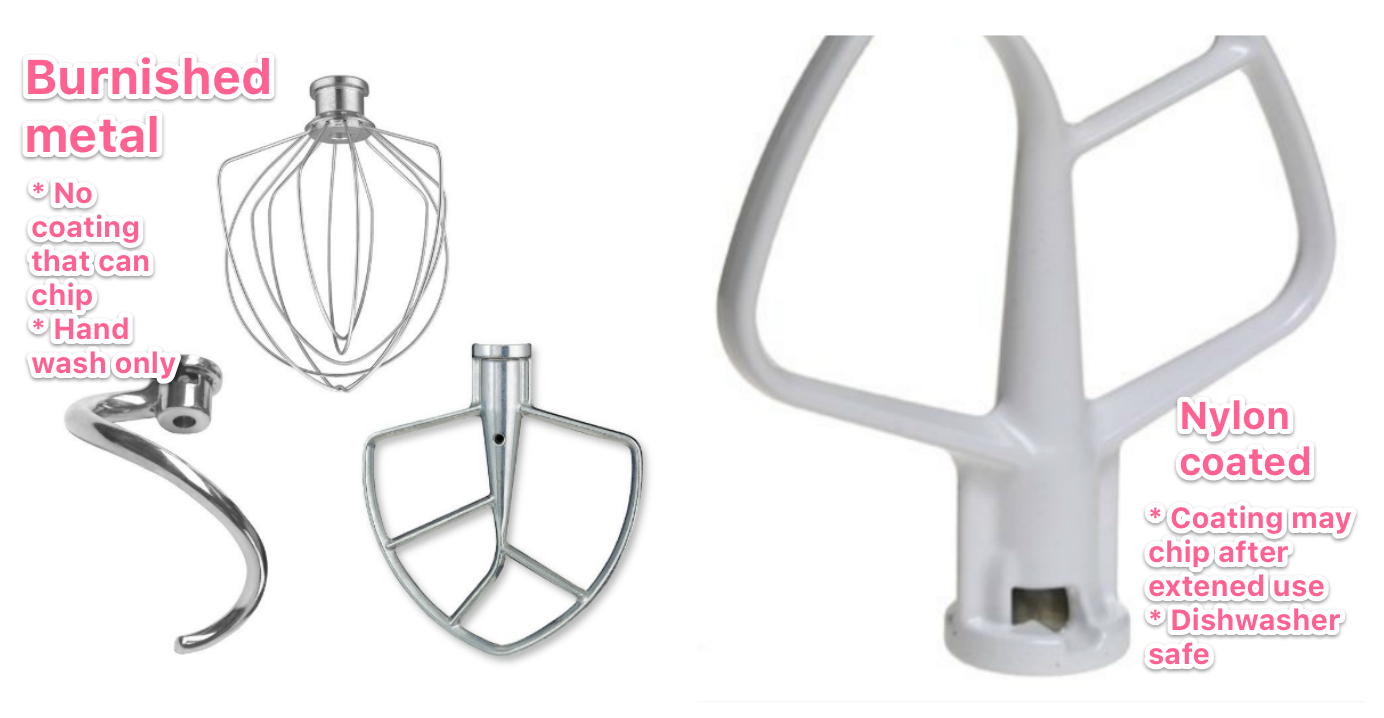 Burnished metal vs. Nylon coated
The beater and dough hooks that came with your mixer are likely white. This is a nylon coating over metal. This makes them dishwasher safe, and generally a little more forgiving for home use. You?ll notice you can buy replacements that are just burnished metal without the coating. And some of the larger, professional and commercial series come with the burnished metal out of the box. The downside is these are not dishwasher safe. They should be washed by hand and towel dried. And definitely not left soaking in water. Water exposure can eat off that shiny burnished coating pretty quickly, coming off in the form of a grayish residue. It?s totally harmless, but not ideal.
On the other hand, some reviewers have complained that the nylon coating may start to chip off as it gets older. I tend to like the burnished metal in this case. I figure there?s a reason KitchenAid made this the default for their professional grade machines. Just be aware that the cleaning can be a nuisance. If you have the white parts, I wouldn?t run out and replace them. You?re probably better off keeping them and spending your money on a new attachment. Besides, there?s a reason KitchenAid made the coated parts for home use. As much as you like to picture yourself carefully hand-washing and drying these parts, you won?t. Life gets in the way. Dishes sit in the sink. Don?t be so hard on yourself.
Flat beater
Recommendation: Keep the one you have.
The flat beater is your workhorse. It?s the all-purpose mixing and stirring tool for everything from cake batter to cookie dough to mashed potatoes.
The isn?t really an upgrade option here. Your only alternatives are to make the switch from nylon coated to burnished metal, or vice versa, if that?s your preference.
Coated Flat Beater for 4.5-Qt. Tilt-Head Stand MixersCompatible: All 4.5-quart tilt-head modelsPrice: $9Buy: From Amazon
Coated Flat Beater for 5-Qt. Tilt-HeadCompatible: All 5-quart and tilt-head modelsPrice: $9Buy: From Amazon
Burnished Metal Flat Beater for 5- and 6-quart bowl lift mixersCompatible: 5- and 6-quart bowl lift modelsPrice: $19Buy: From Amazon
Flex Edge Beater
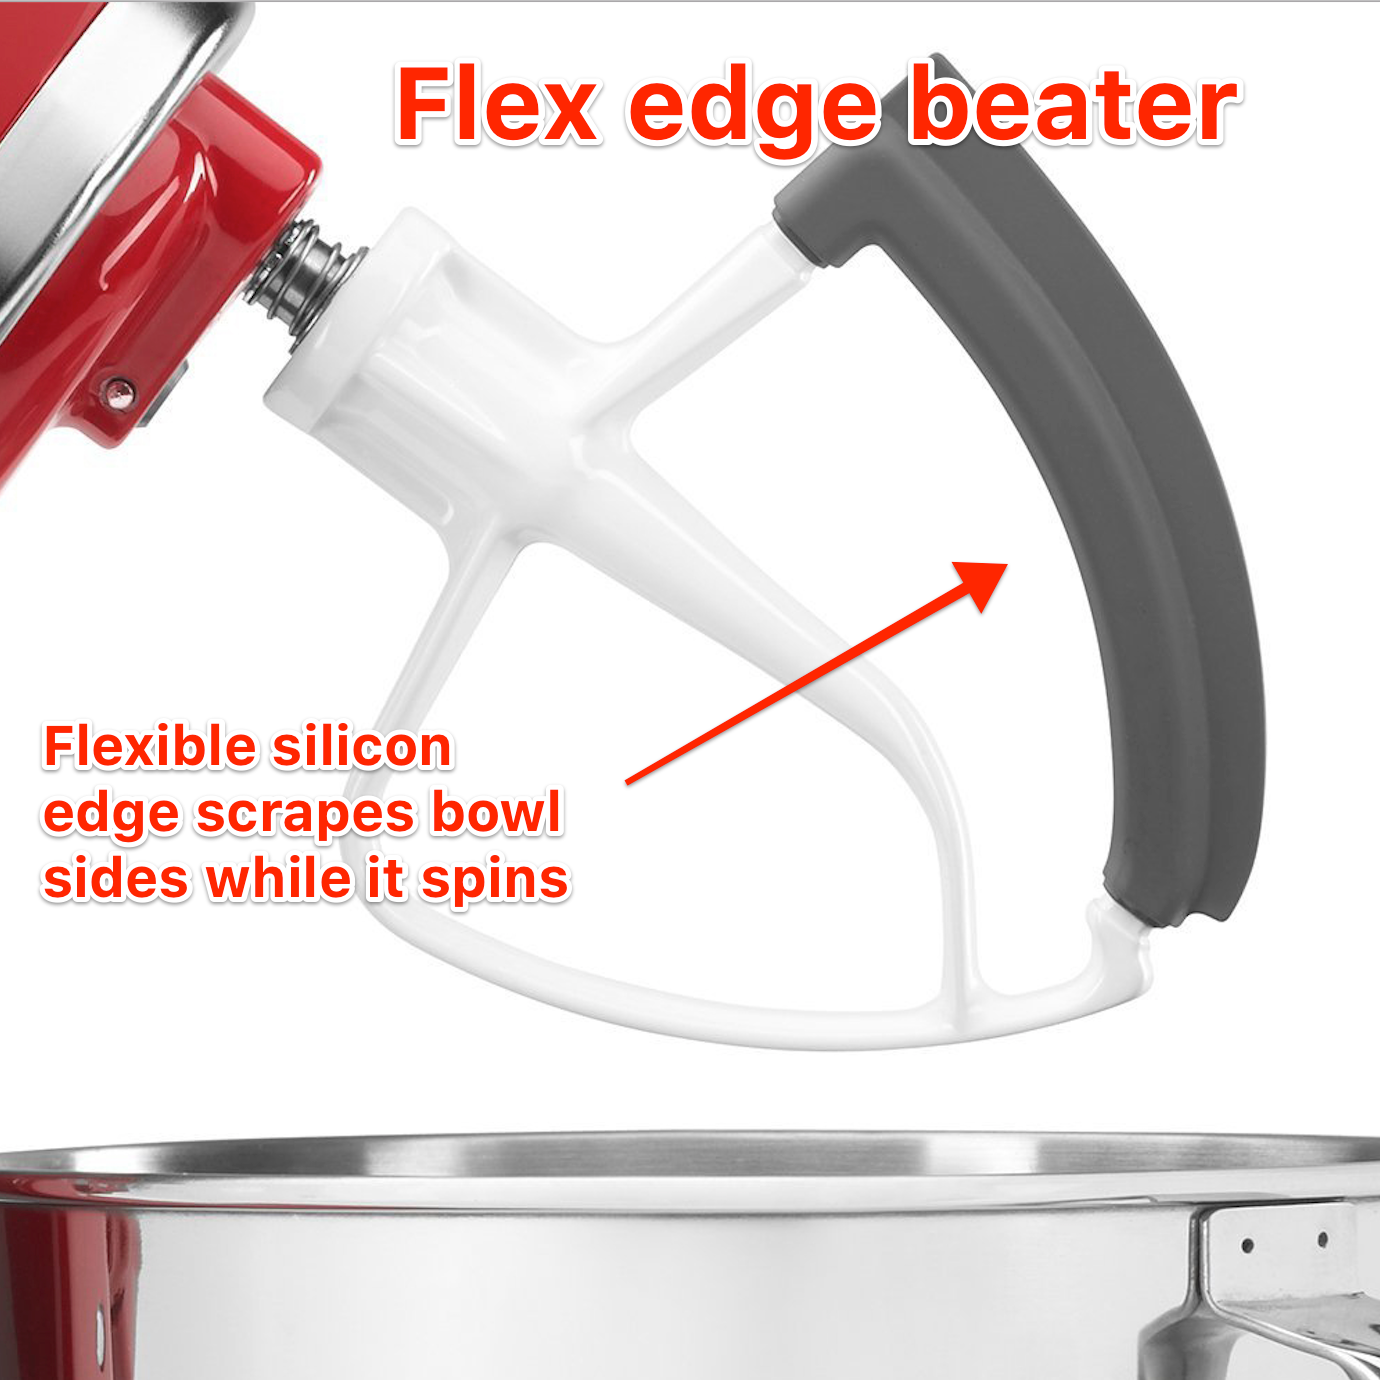
Recommendation: Get a flex edge beater if you like to mix stick-to-the-bowl things like butter and cream cheese. They?re affordable and save you time scraping the sides of your bowl by hand.
The most popular upgrade item in the beaters, whips, scrapers category is the Flex edge beater. This works just like the beater that comes on the box, but with a flexible silicon edge on one side. This serves to scrape the side of the bowl while mixing. You?ll mix items quicker and more thoroughly, and avoid scraping built up ingredients from the side of the bowl.
This is a great tool for recipes that call for you to ?stop and scrape the mixing bowl,? typically from sticky foods like nut butters, honey and cream cheese.
The flex edge is a great tool, With a flexible silicon edge it might not have the longevity of your flat beater. But for $20, it?s a good buy.
Note: It?s important to get the correct size for your bowl.
Here are the Edge Beaters I recommend:
3.5 Quart Flex Edge BeaterPrice: $19Buy: From Amazon
4.5 and 5 Quart Flex Edge BeaterPrice: $20Buy: From Amazon
6 Quart Flex Edge BeaterPrice: $27Buy: From Amazon
F-Series 6 Quart Flex Edge BeaterCompatibility: 6 quart glass bowl bowl-lift mixersPrice: #39Buy: From Amazon
7 and 8 Quart Flex Edge BeaterPrice: $49Buy: From Amazon
What about two-sided scraper beaters?You might notice some beaters that look like the have scraper edges on both sides. Not only is this probably not necessary, but these are third-party products. As for any third-party attachment, use at your own risk. You could wind up voiding your warranty.
From KitchenAid: Using a non-genuine KitchenAid silicone scraping beater could damage your mixer and void your warranty as to any damage caused by such a non-genuine part.
Wire Whip
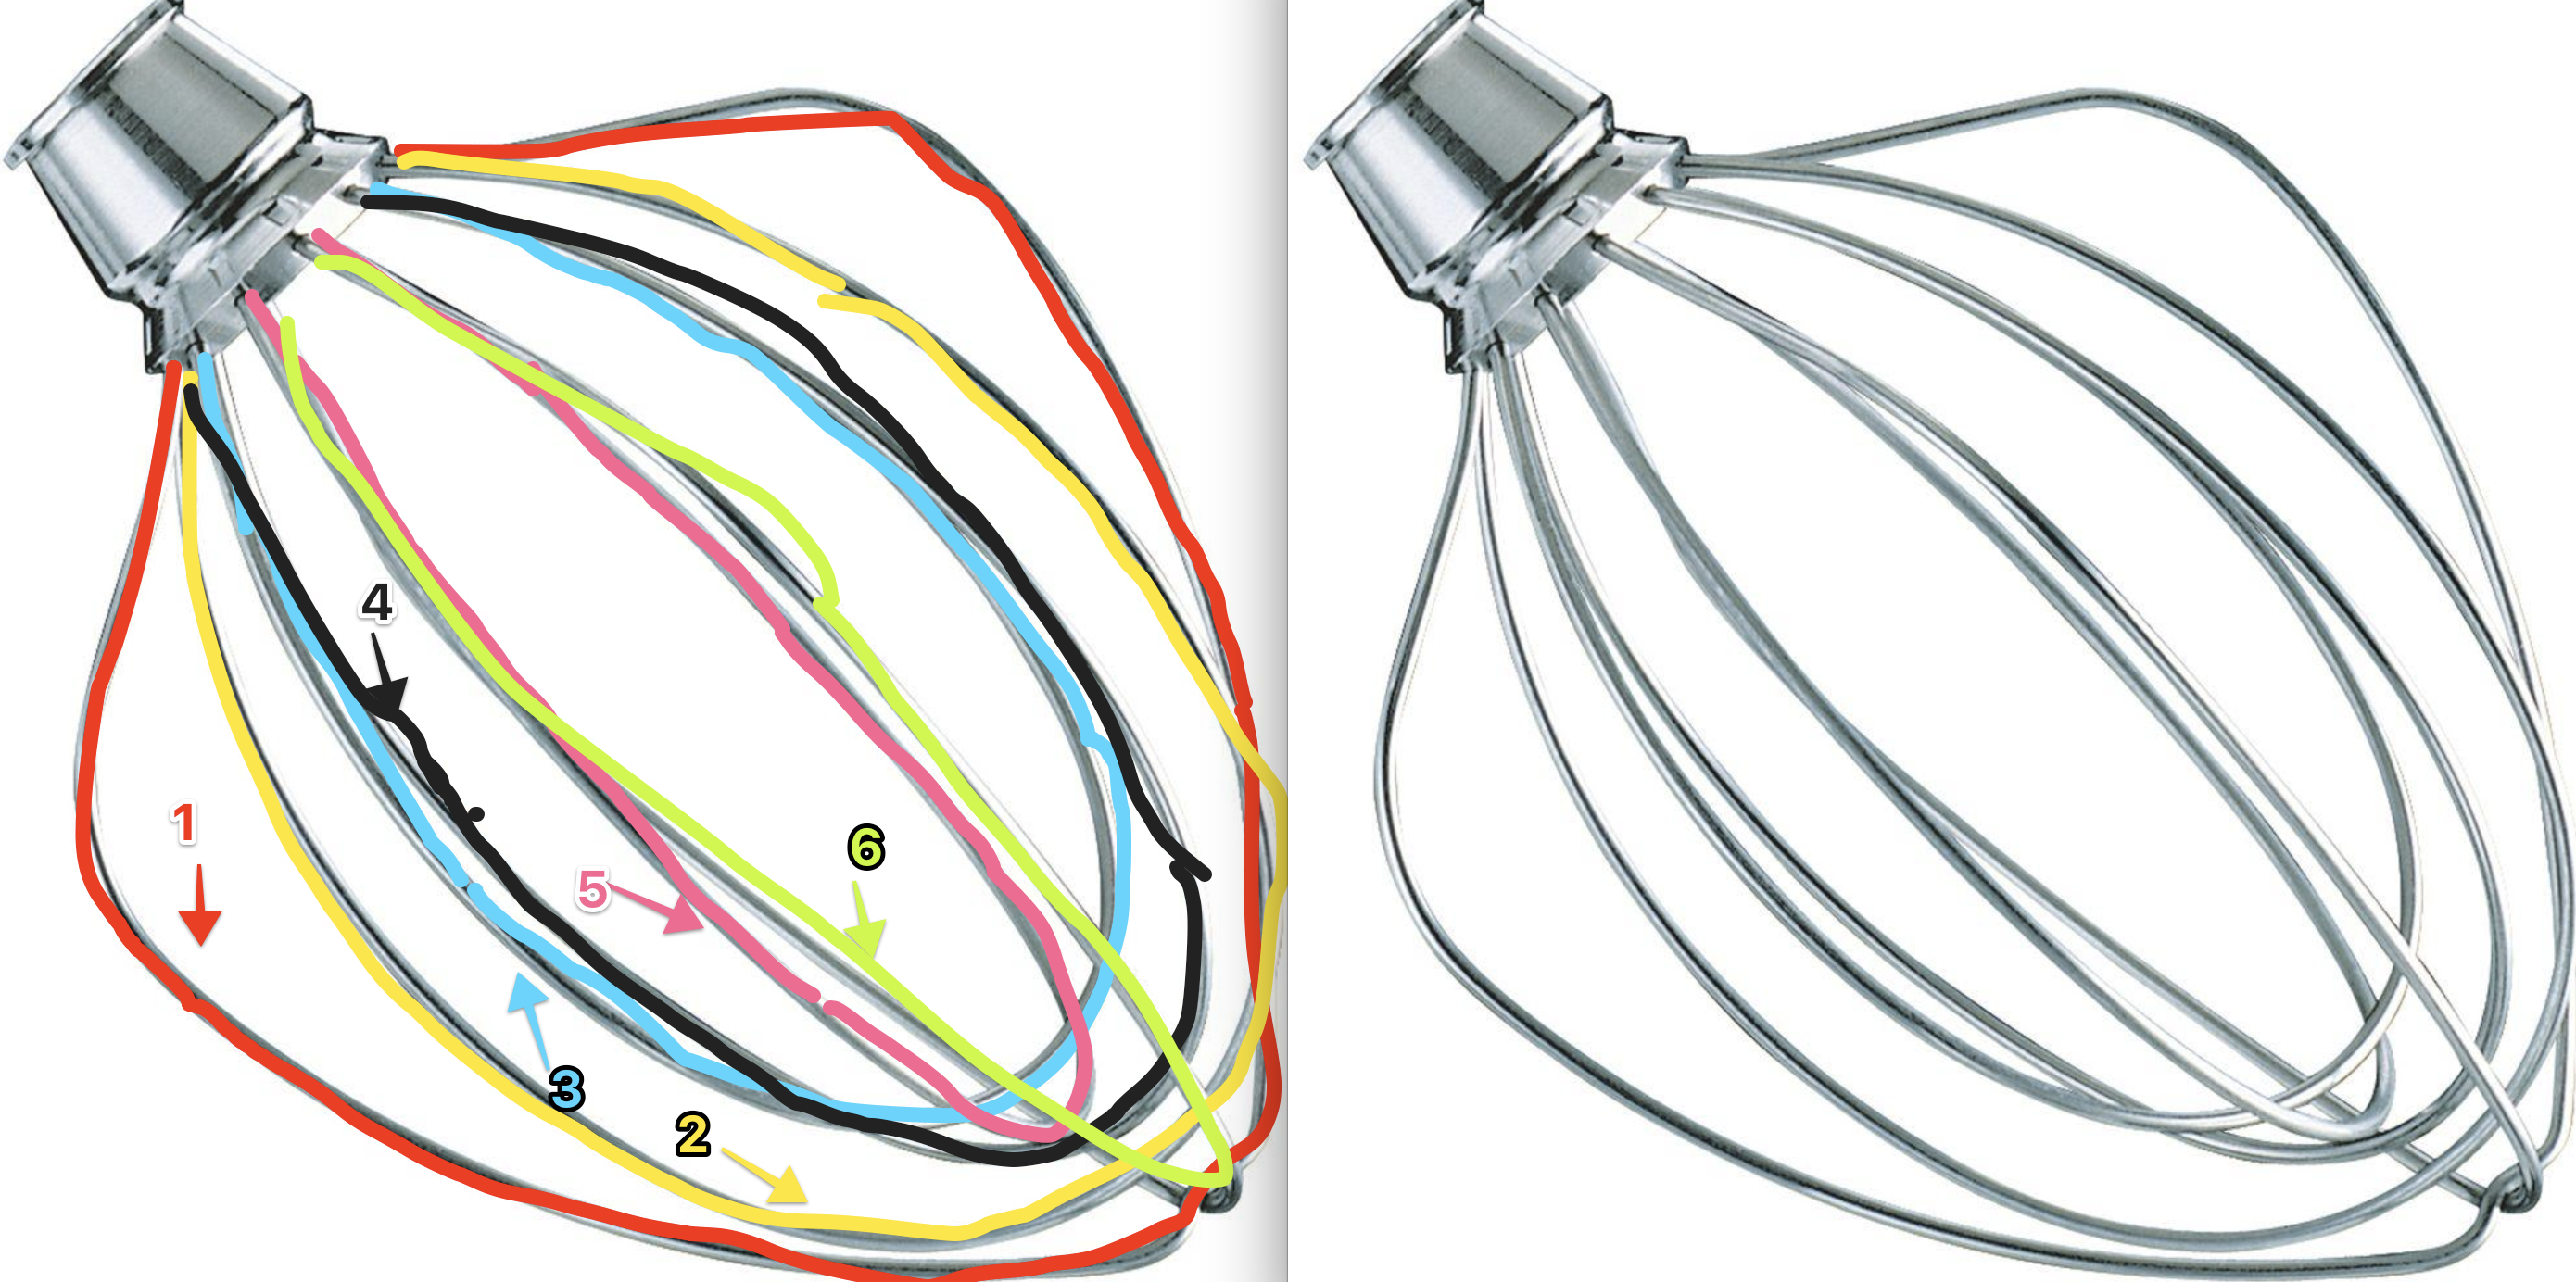 A 6-wire wire whip. Notice the six wires all bend and connect back to the hub.
Recommendation: Stick with the whip your mixer came with. Use it properly (not for thick stuff). Upgrade to an 11-wire whisk if yours breaks (it shouldn?t!) or goes missing and you have a 6- or 7-quart mixer.
You might as well call your wire whip an electric whisk. Whisking incorporates air into liquids, making them fluffy and light. Think the way heavy cream turns into whipped cream. Think how stirring a liquid can create bubbles, which are of course little pockets of air that you?ve pushed into the liquid. Well stir it enough (and with a whisk) and you create an emulsion ? that?s when those little pockets of air are suspended and held stable by fat. That?s also why liquids with high fat content (30% or more) will whip and other liquids (like water) will just get bubbly.
So of course the tool you use is going to have a big impact in how well you?re able to whisk. How many wires, how thick the wires, what shape the whisk. More wires means faster emulsion, because you have more streams of air getting pulled through the liquid.
From Cook?s Illustrated: ?The more wires a whisk has, the more streams of air it pulls through liquid, creating foam. Our top performers had at least 10 wires; whisks with seven or eight wires took up to 30 seconds longer to whip cream and egg whites into stiff peaks.?
It makes a difference. Professional bakers can get really specific and particular about their hand whisks. But for a stand mixer, I?m really not sure any of it matters. Maybe more wires are great when you?re whisking by hand and your arms getting tired. But with a machine, who cares if it takes a few seconds longer? Your main concern with stand mixer whipping isn?t taking too long, it?s taking your eye off of things and accidentally over-whipping.
Stick to the wire whip that comes with your mixer. If it needs replacing (some people complain that the wires break, I?m convinced these people are using them wrong) go ahead and get more wires if you want. But don?t bother upgrading.
Most models only support the 6-wire option. There are a few models that ship with a 6-wire but are compatible with an 11-wire whip. This includes the Professional 5 Plus Model as well as most 6-quart models. If you have one of these with a 6-wire whip, upgrading to an 11-wire could be a good choice. Or at least a good alternative if you eventually need to replace your wire whip.
The commercial 7- and 8-qt. Models come with 11-wire whips in the box. So does the 6-qt. Professional 610 Series and the 11-Quart Pro Line Series.
6 Quart 11-Wire Elliptical WhipPrice: $33Buy: From Amazon
7 and 8 Quart 11-Wire Whip Price: $30Buy: From Amazon
Dough hook
Recommendation: Only bowl-lift mixers are compatible with spiral dough hooks. If you have a bowl-lift and for some reason need a new dough hook, get a spiral. For the tilt-lifters, you?ll be fine with the C-hook. Or just have fun kneading by hand.
Bread dough requires kneading. At least if they?re made with yeast, which most are. Kneading warms and expands the gluten strands, which is what makes the dough stretchy. For some people, kneading by hand is therapeutic and the thought of letting a machine help with their precious analog bread ritual is blasphemous.
Kneading by hand can be fun, all bread making hobbyists should try it. It can also be a total hassle. It can take up to 25 minutes for just one batch. It can be messy and tiring. And you can ruin your finished product by adding too much flower during kneading.
Dough hooks, as you may have gathered, do this job for you. Kneading by hand might seem like a purist art form. But the fact is, some of the world?s best bread is made with a mixer and dough hook. It?s why bread ? even in fancy craft bakeries ? isn?t $100 a loaf.
Spiral vs. C-Shaped vs. J-Shaped

KitchenAid makes two types of hook: the spiral hook and the C-shaped hook (you?ll hear people online use C-shaped and J-shaped interchangeably, but I can?t find any reference to the company referring to a J-shaped hook).
There?s a pretty wide agreement online and among pro bakers that spiral hooks are more effective. Some people complain of dough on the the C-hooks climbing up over the top of the hook. Whereas the spiral hook pushes the dough downward with a spiral motion, keeping it flat on the surface of the bowl (not unlike the countertop hand knead process. The spiral hooks are also primarily what you find in serious commercial mixers (think 60-quart Hobart mixers).
Even KitchenAid seems to admit that the spiral hook is superior: ?You can make bread in any size stand mixer, but if you make large quantities, you may prefer a model with a spiral knead dough hook, which comes with select models of bowl lift stand mixers.?
Most bowl-lift models ship with the spiral hook, tilt-heads with the C-hook. It looks like like spiral hooks aren?t compatible with any tilt-head model.
Spiral Coated Dough HookCompatible: 5-Quart Professional Series Bowl-Lift, 6-Quart Pro 600 Series Bowl-LiftPrice: $14Buy: From Amazon
Stainless Steel 7 Quart Dough Hook Compatible: 6- and 7-Quart Bowl-Lift modelsPrice: $44Buy: From Amazon
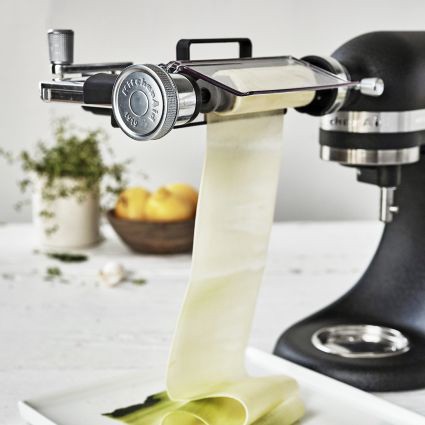
Pasta makers
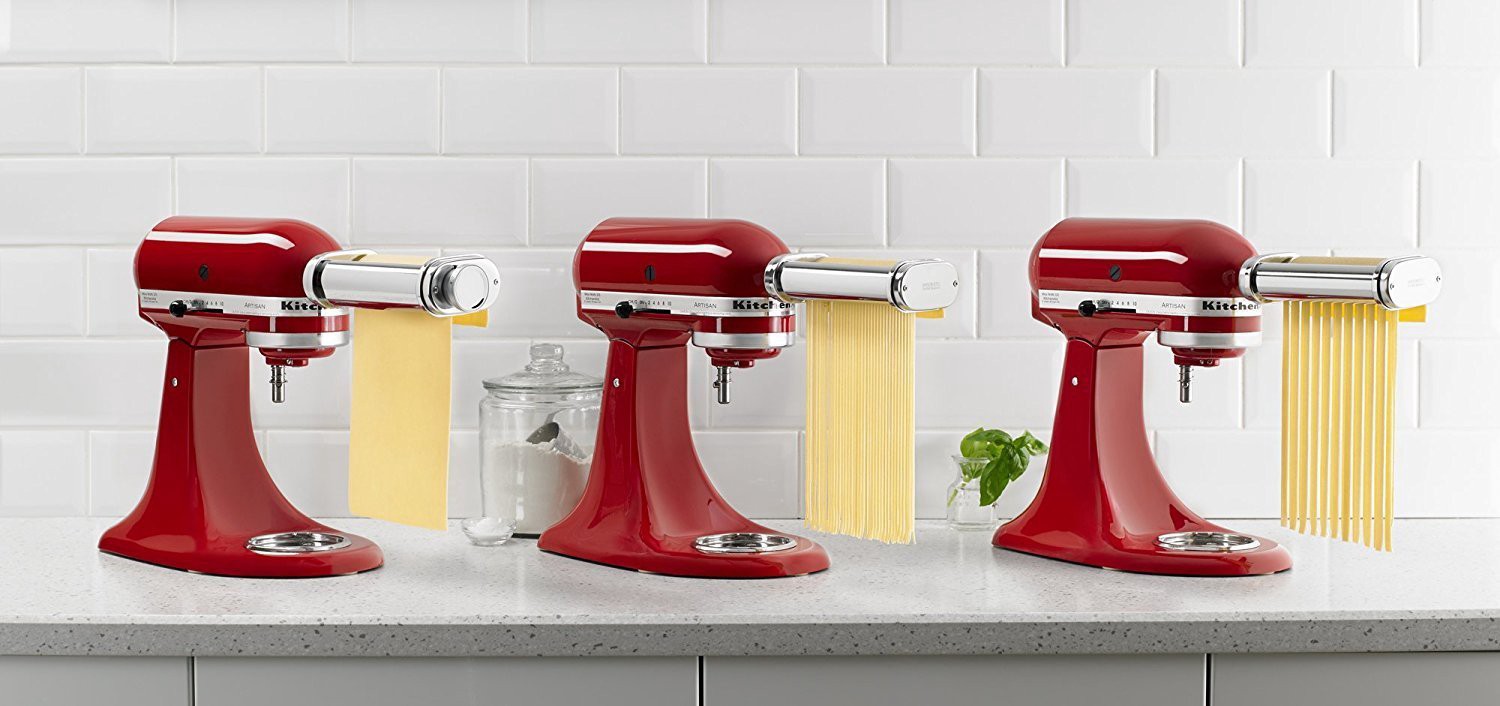 Pasta rollers and cutters
Recommendation: I couldn?t settle on just one. See my three suggestions below.
I?m convinced pasta making photos move more units of these stand mixers than anything else. People fall head over heels for the pasta pitch.
I can?t blame them. The whole vibe feels fun. Who doesn?t want to pour a bottle of red, put on some cool music, and whip together long strands of pappardelle under the adoring gaze of friends and family? I sure do.
You should too. Homemade pasta is fun. It?s a little work and a lotta messy. But it?s an occasion food. It?s a family activity. It?s cheaper than taking everyone to the movies.
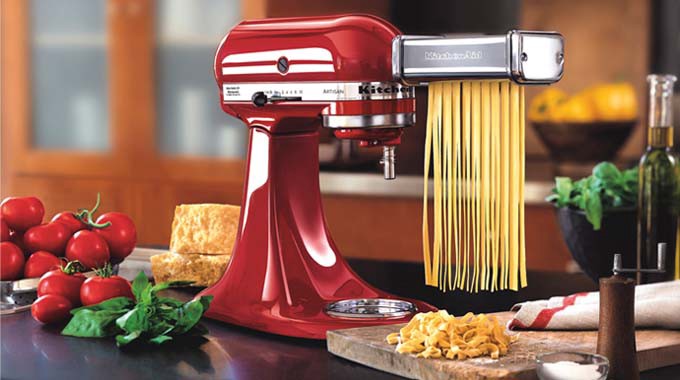
There are two categories of pasta attachment: the roller and the cutter. The roller flattens out pasta dough into long, thin sheets. Good rollers let you dial in the exact thickness you want. Then you cut that sheet into whatever size or shape you?re looking for.
That?s where cutters come in. Roll the sheet through the cutter and it slices up nicely even strips of flat pasta. Linguine, lasagna, spaghetti.
There are a few different ways you could approach this. I love rolling and cutting with the KitchenAid pasta makers. At the same time, they are pricy and you can have a great (and actually more authentic) experience at home for about half the price.
So I?m going to leave three recommendations instead of one here.
- If you?re on a budget, or you just want a really authentic experience and don?t mind some extra work, get this hand crank roller, made in Italy roller and cutter. It?s less than $70 and it will roll and cut just as well as any electric machine. I got one of these (made in Italy) at an estate sale for $3. It works great. (Sorry, KitchenAid). Expand your kit with some cheap, fun and authentic pasta cutting tools like this, this, and this.
- If you want to save some money (and some arm soreness), but still want to use a mixer attachment, get the roller and skip the cutting attachments. You can cut noodles manually with a steady hand. It?s fun and a more authentic way to make pasta (which is why you?re making it at home in the first place, right?).
- If you want to make a lot of pasta or just get the most out of your mixer, get a roller and cutter set.
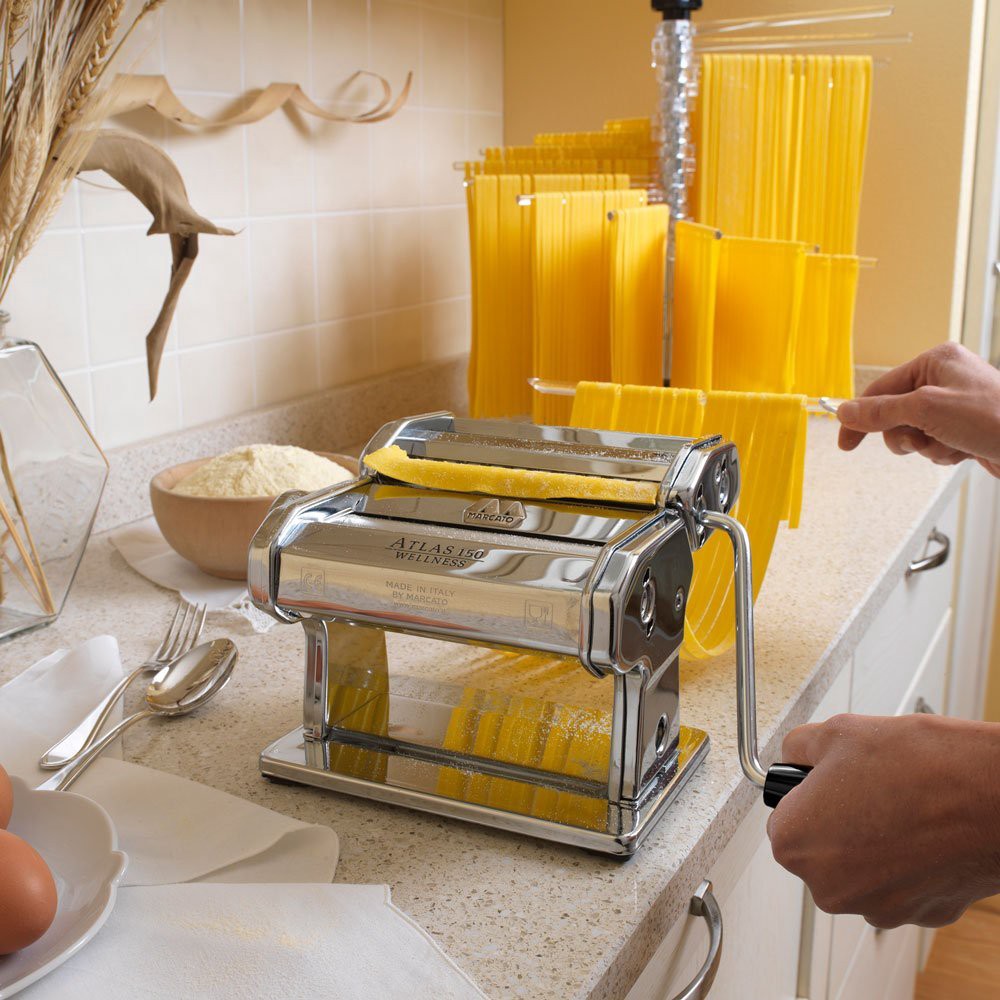 A hand-powered alternative
If you do decide that the attachments are right for you, here?s a rundown of every KitchenAid pasta attachment and set on the market. These are all compatible with any modern KitchenAid stand mixer, anything with an attachment hub.
Pasta RollerPrice: $59Buy: From Amazon
Thick Noodle Cutter AttachmentPrice: $50Buy: From KitchenAid
Ravioli Maker AttachmentPrice: $109Buy: From Amazon
2-Piece Pasta Cutter Attachment SetPrice: $99Buy: From Amazon
Pasta Roller and Fettuccini Cutter AttachmentPrice: $150Buy: From Amazon
3-Piece Pasta Roller & Cutter SetPrice: $120Buy: From Amazon
Gourmet Pasta Press Attachment with 6 Interchangeable Pasta PlatesPrice: $126Buy: From Amazon
5-Piece Pasta Deluxe SetPrice: $250Buy: From Amazon
Pasta Drying RackPrice: $39 Buy: From Amazon
Juicers and strainers

Recommendation: If you?ve been considering getting your own juicer but uneasy about the big cost, give the Masticating Juicer and Sauce Attachment a try. It?s an incredible opportunity to get your hands on a masticating juicer for less than $150. If you like fresh squeezed citrus juice ? think Orange Juice and Lemonade ? pick up the citrus juicer.
Home juicers have two major downsides: they cost a lot and they take up a lot of space. By plugging into the power source you already have (your mixer) we get a recipe for dramatically reducing both of those downsides.
Before we go on, it?s helpful to know the two types of juicers.
Masticating: A masticating juicer is one of the preferred methods for cold pressed juice. Masticate means ?to chew,? and that?s what these juicers do. Food is fed into a tube where a single auger slowly squeezes and crushes it to remove the juice. This means no air is whipped into the juice and no enzymes or nutrients are removed by introducing heat. These are high-end machines, you?d typically expect to spend more than $300 for a dedicated masticating juicer.
Centrifugal: The affordable alternative to masticating juicers is centrifugal. These can be found in department stores for about $50. These spin pul at high speeds, like a blender. They can introduce heat and air into the juice, and they?re not great at juicing leafy vegetables like kale.
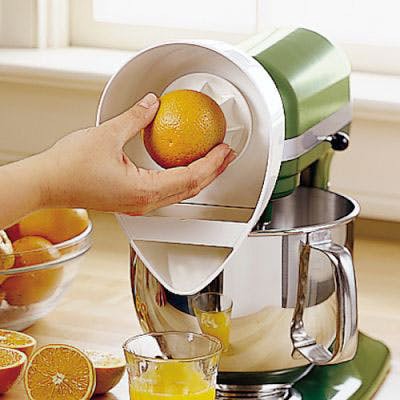 The citrus juicer
So the fact that KitchenAid offers a masticating juicer for less than $150 is really quite amazing. They can do this because they don?t have to built a bulky, powerful motor in their juicer, which keeps the cost down. If you?re at all interested in juicing, this is a great opportunity.
Masticating Juicer and Sauce AttachmentPrice: $123Buy: From Amazon
Citrus Juicer AttachmentPrice: $19Buy: From Amazon
Grinders
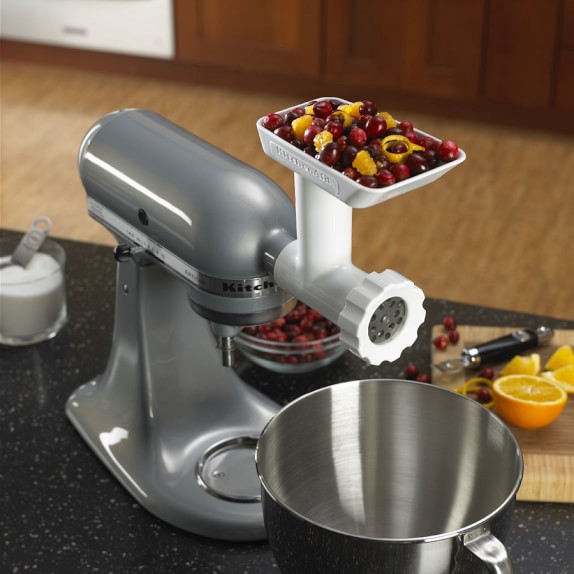 Food grinder attachment ? not just for meats
Recommendation: For the price, the meat grinder (aka ?food grinder?) is one of the best deals in the mixer attachment lineup. Dedicated powered meat grinders will run 5X the cost. And it?s a great opportunity to get a tool you probably don?t have but should. Unless your a house full of vegetarians, you?ll be glad to invest in a meat grinder.
It?s perplexing. People think of meat grinders as some specialty tool for hobbyists, yet ground meat is one of the most affordable and common proteins in modern homes. A plastic-wrapped package of ground beef has become the flexible workhorse in most American kitchens, anchoring mom dinner staples like spaghetti, chili, tacos, and meatloaf.
Yet most homes don?t have a meat grinder. But grinding at home is safer, better tasting, and usually more affordable than the pre-ground stuff. Not only do you know where the meat is coming from, you can adjust the flavor and fat content.
Still not convinced? How about the fact that just two simple tools ? a meat grinder and a cast iron pan ? can get you making In-N-Out quality burgers in your home. Even if you use it for nothing else, your summer burgers on the grill will be the talk of the neighborhood.
Dedicated meat grinders can run $200 or more, and make sense if you?re a hunter or routinely breaking down a lot of meat. Well-made hand crank grinders are priced nicely (starting around $30), but require a lot of manual effort.
Also in this lineup are sausage stuffers, which is more of a niche hobby than meat grinding, but if that?s your interest, I hear good things. And the food tray add-on, which gives you a little more real estate to hold the bits your grinding.
Update: In 2018 KitchenAid released an all metal version of this attachment. I strongly recommend going the metal route if you can. I plan to upgrade this year.
Metal Food Grinder AttachmentPrice: $75Buy: From Amazon
Food Grinder AttachmentPrice: $39Buy: From Amazon
Sausage Stuffer Kit AttachmentPrice: $6Buy: From Amazon
Food Tray AttachmentPrice: $10Buy: From Amazon
Fruit & Vegetable Strainer Set with Food Grinder AttachmentPrice: $73Buy: From Amazon
Food processor

Recommendation: It?s a nice attachment, but it has some limitations compared to conventional units. For the price, you?ll get a lot more value and utility out of a dedicated food processor. This Cuisinart 14-Cup processor is an excellent choice.
I give a lot of credit to KitchenAid for attempting a food processor attachment. It?s a great idea, unfortunately I just don?t think the stand mixer motor is right for this particular purpose. The motor on the mixer tops out at about 280 RPM (speed setting 10). Most food processors start at 2,000 and run up to 10,000 RPM.
Side note: I?m convinced this is why they haven?t released a blender attachment. Unlike food processors, blenders have dull blades. But they get the job done by spinning extremely fast ? typically topping out around 18,000 RPM. I?m sure the KA team would love to do a blender attachment and would make a killing off beautiful product photography showing icy, colorful margaritas). But some engineer in Benton Harbor put his foot down.
It can?t be done, guys, the physics just don?t work.Come on, Jeff! Don?t be such a nerd. We?ll all be rich!
Anyway, the food processor attachment is nice, and it works OK. Some reviewers love it, actually. The slower speeds won?t be an issue with slicing softer foods like cheese. And one possible advantage over typical processors is that there?s no hopper to fill up and empty out. You just feed the ingredients into the top and it comes out the bottom onto a bowl or whatever you put under it. It means you can?t do some things like knead pie dough that you could in a typical processor (but I guess you can argue you can use the bowl and dough hook for that). This no-bowl approach is kind of handy if you want to do a ton of ingredients and not be always emptying and refilling a processor container. If I owned a pizza place and shredded tons of cheese every day, I?d get it for this reason.
Food Processor AttachmentPrice: $109Buy: From Amazon
Food Processor Attachment with Commercial Style Dicing KitPrice: $140Buy: From Amazon
Food Processor Accessory KitPrice: $48Buy: From Amazon
Peelers, spiralizers, slicers, and shredders
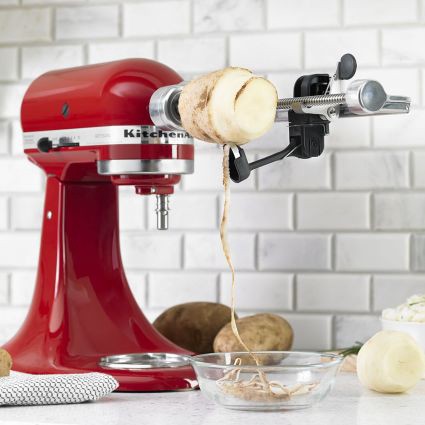 The spiralizer attachment, showing potatoes who?s boss
Recommendation: For most people, the slicer and shredder attachment is a great pick and the most function in this category. If you?re big into spiralizing vegetables or living a low carb lifestyle, pick up the spiralizer.
You really shouldn?t buy pre-shredded cheese. That junk is loaded with potato starch ? and in some case wood pulp ? to keep it from clumping. Shredding your own also taste better and is about half as expensive and pre-shredded.
The slicer/shredder attachment is one of a few sub-$100 attachments that are really handy and attractive. There?s the slicer/shredder, the vegetable sheet cutter, and the spiralizer.
 The vegetable sheet cutter
Spiraling vegetables has become really popular lately with so many people looking for lower-carb alternatives in their diets. The vegetable sheet cutter is a similar approach and can turn foods like zucchini into long, lasagna noodle alternatives. For almost $80, this might be a little too specialty for most folks, but that?s totally up to you.
Vegetable Sheet CutterPrice: $69Buy: From Amazon
Slicer & Shredder AttachmentPrice: $46Buy: From Amazon
5 Blade Spiralizer with Peel, Core and SlicePrice: $75Buy: From Amazon
7 Blade Spiralizer Plus with Peel, Core and SlicePrice: $90Buy: From Amazon
3 mm Slicing Blade for Fresh Prep Slicer/ShredderPrice: $15Buy: From KitchenAid
4 mm Medium Shredding Blade for Fresh Prep Slicer/ShredderPrice: $15Buy: From KitchenAid
6 mm Coarse Shredding Blade for Fresh Prep Slicer/ShredderPrice: $15Buy: From KitchenAid
Grain mill
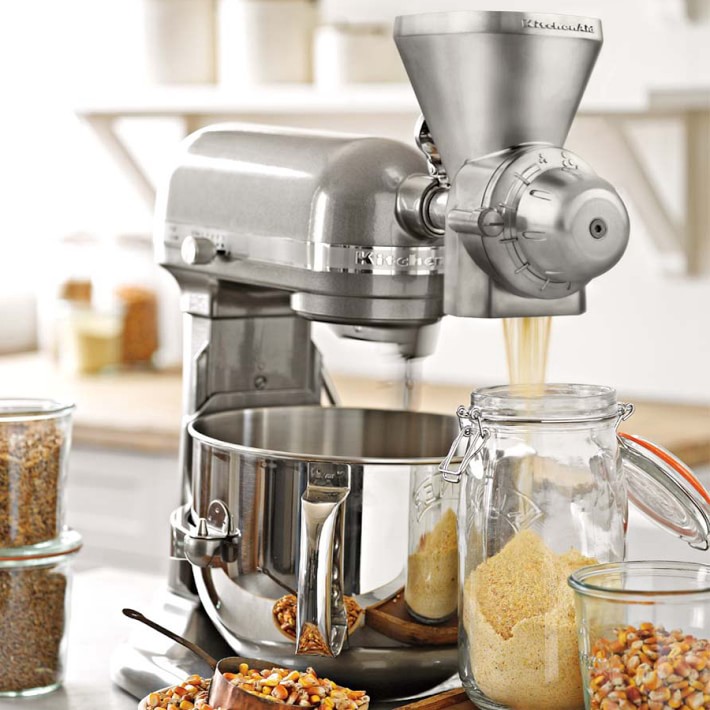 The KitchenAid grain mill attachment
Recommendation: You can get a great hand crank grain mill for cheaper than this. But if you want electric grinding, this is two or three times cheaper than anything on the market and an all-metal construction.
Grain mills are not for the shallow side of the bread making habit hole. This is for the deep slide. When you?ve fully committed to the XYZ and the overpriced leather aprons. Jokes aside, grain mills are a great option and can save you money on buying too much expensive grains in the long run.
And who knows. A few years ago the amount of people who grind their own coffee every morning would have sounded impossible.
Hand crank mills can take as much as five minutes to grind a cup of flour. This attractive all-metal operation still takes a few minutes to churn out grain, but it?s minutes you aren?t spending spinning a crank. So that?s nice.
All Metal Grain MillPrice: $87Buy: From Amazon
Precise heat mixing bowl
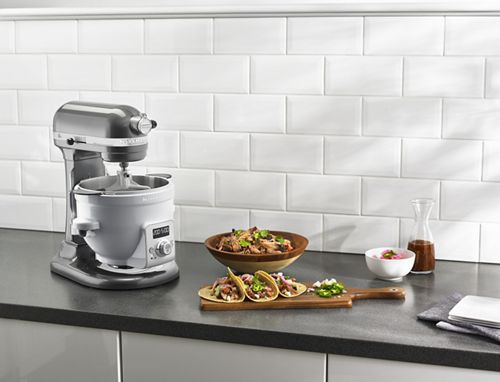
Recommendation: You?ll likely pay as much for this device as you did for your stand mixer. There really isn?t a need unless you?re a serious chocolatier.
Tempering chocolate is a method of melting and stirring chocolate at a specific temperature to line up the fats in an ideal way. The end result is glossy, shiny texture that snaps when you break it and doesn?t melt in your hands.
A few years ago KitchenAid released a new bowl that can be set to an exact temperature when in use. The primary use case seems to be tempering chocolate.
You?ll hear other pitches for this product (it can make fondue! Hot mulled wine!) All things you can do with a $9 pot on your stove). Sorry, KitchenAid. I love you, but this is the most confusing accessory you?ve ever made. Just one fan?s opinion.
Precise Heat Mixing Bowl (tilt head)Price: $165Buy: From Amazon
Precise Heat Mixing Bowl (bowl lift)Price: $190Buy: From Amazon
Bowls, lids, and shields
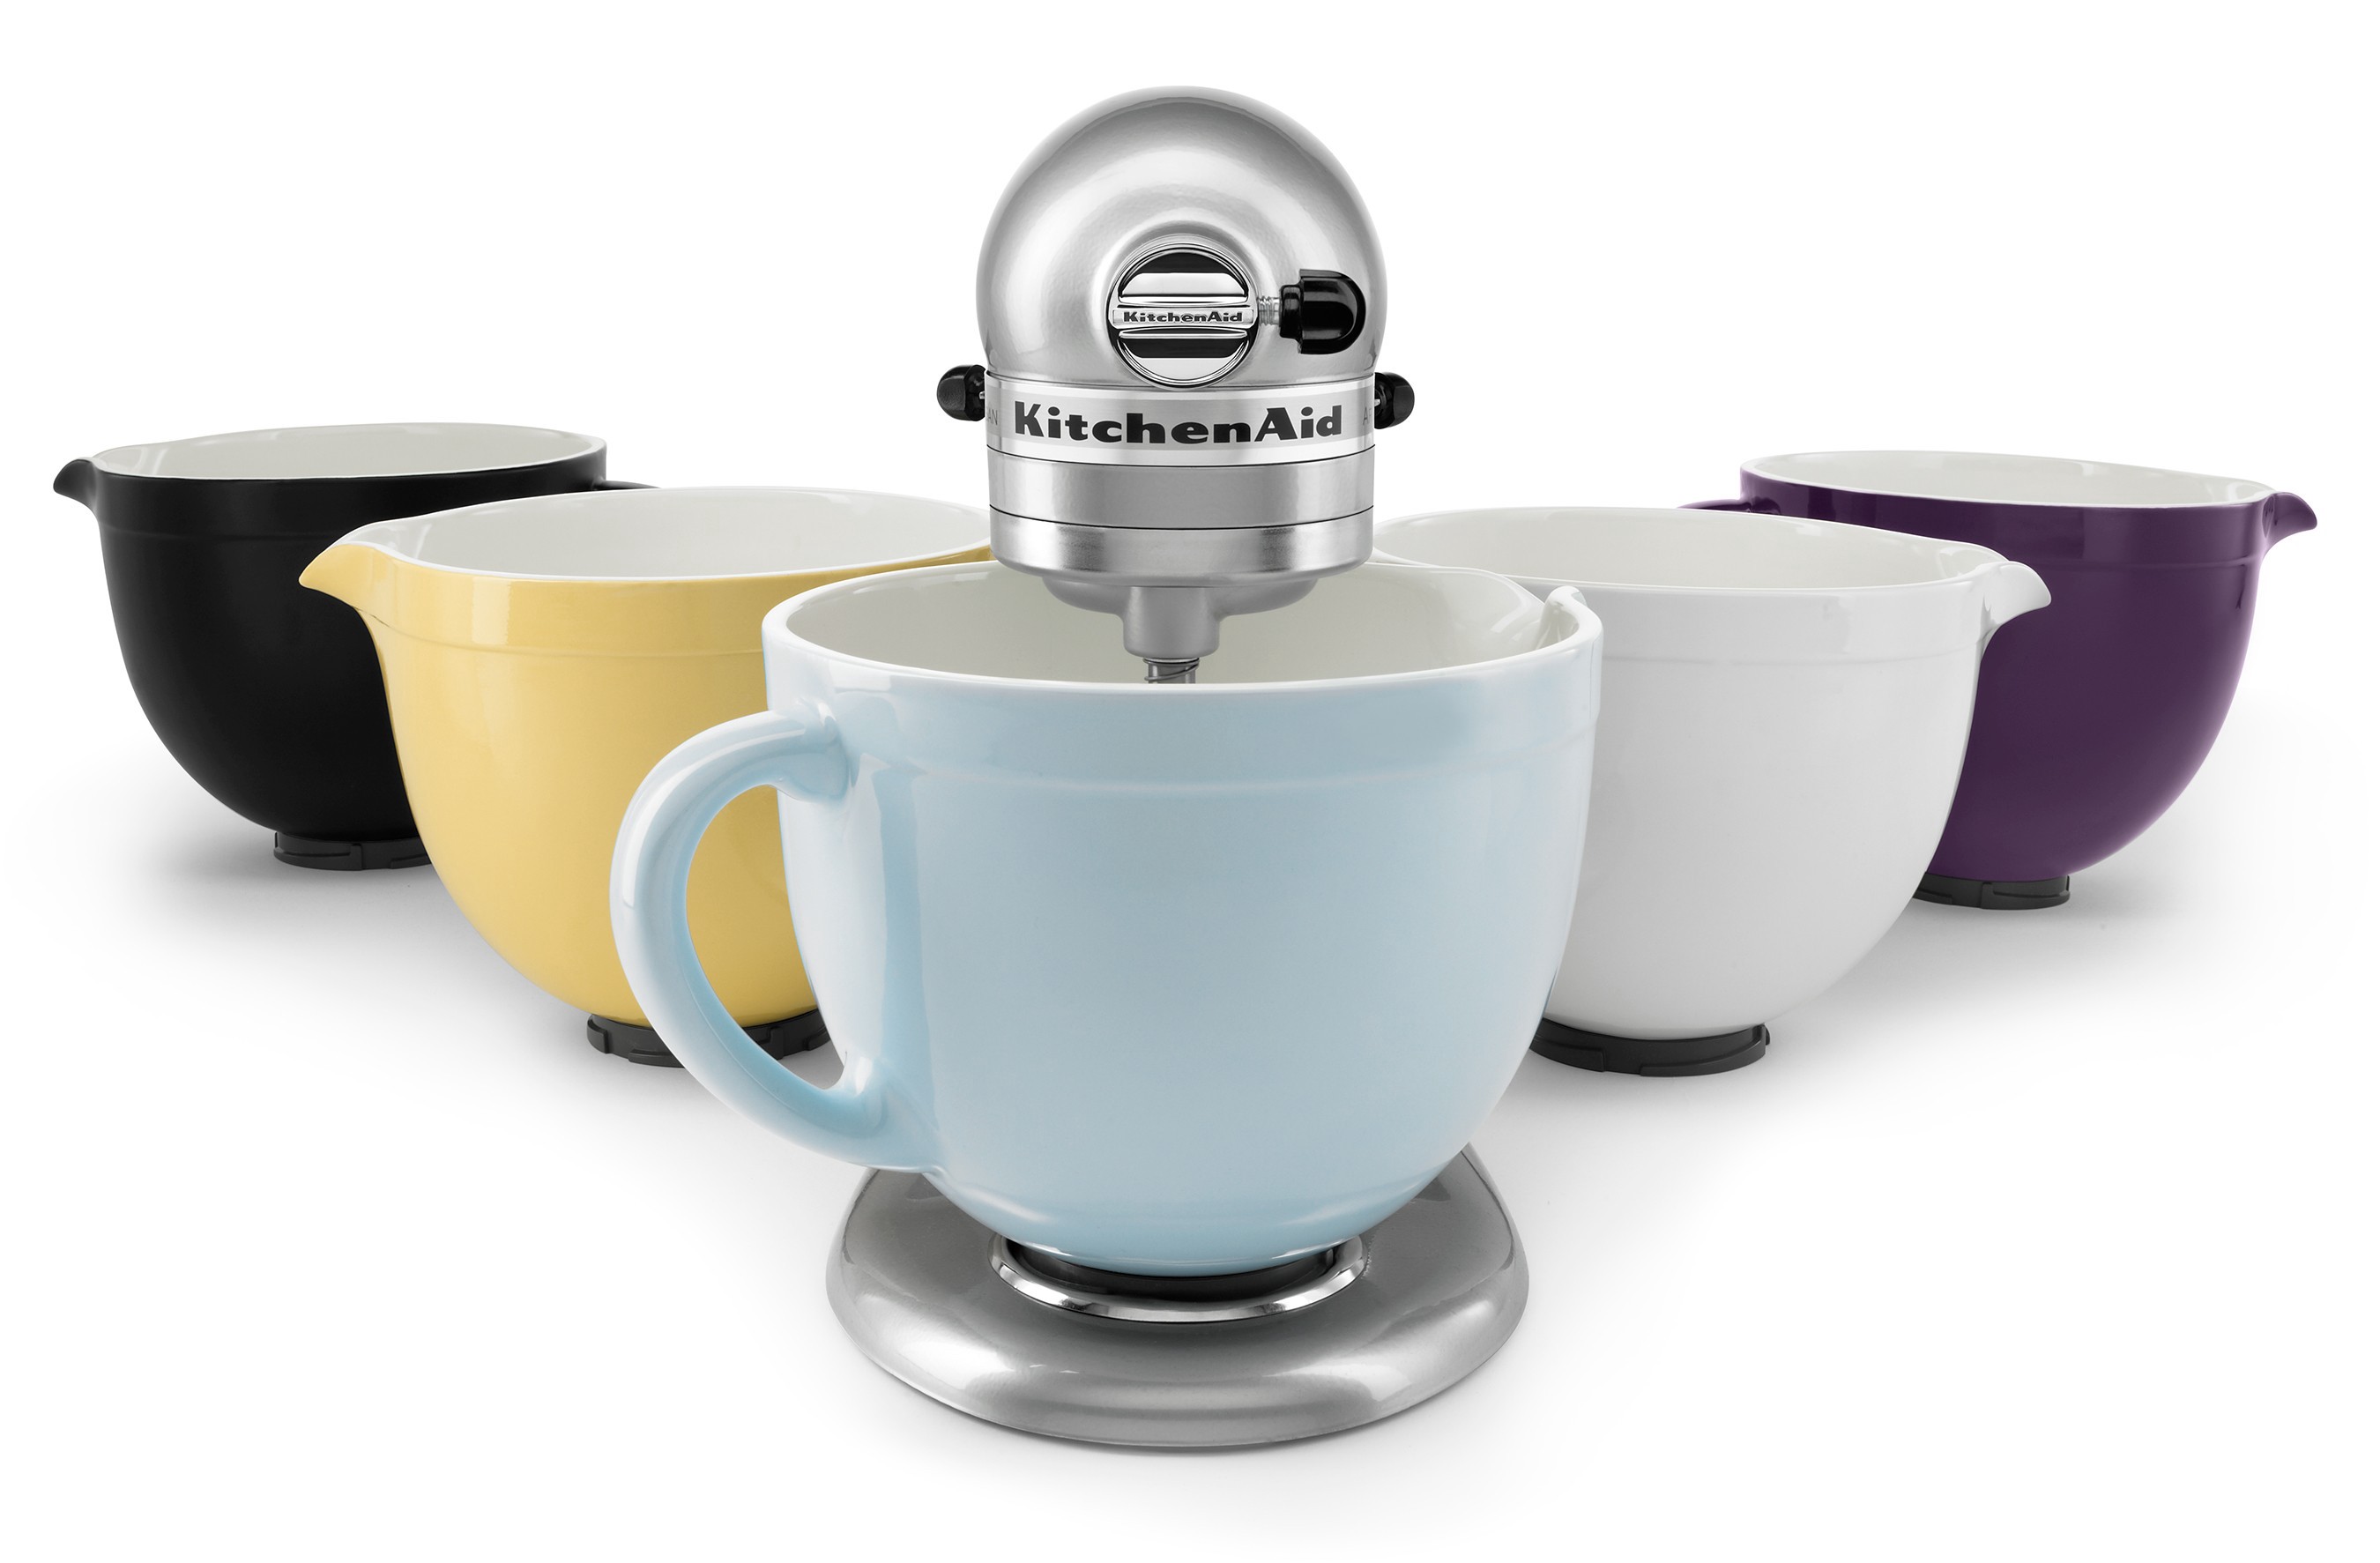 Decorative bowls, pretty enough to serve out of
Recommendation: A replacement bowl might feel like a splurge. But consider it one less thing to wash after the table?s cleared at Thanksgiving. A decorative bowl can dress up a table and look presentable enough to serve out of. The glass bowls are also quite nice.
Bowls
3-Qt. Stainless Steel Bowl & Combi-WhipPrice: $45Buy: From Amazon
Tilt-Head Mixer Bowl with Handle, Polished Stainless Steel, Polished Stainless Steel, 5-QuartPrice: $45Buy: From Amazon
5-Qt. Tilt-Head Glass Bowl with Measurement Markings & LidPrice: $49Buy: From Amazon
5-Qt. Tilt-Head Ceramic Bowl Black MattePrice: $56Buy: From Amazon
5-Qt. Tilt-Head Ceramic Bowl Glacier BluePrice: $69Buy: From Amazon
5-Qt. Design Series Embossed Ceramic Bowl White ChocolatePrice: $71Buy: From Amazon
5-Qt. Tilt-Head Ceramic Bowl White ChocolatePrice: $55Buy: From Amazon
5-Qt. Tilt-Head Ceramic Bowl Majestic YellowPrice: $56Buy: From Amazon
5-Qt. Tilt-Head Ceramic Bowl Regal PurplePrice: $55Buy: From Amazon
3-Qt. Polished Stainless Steel BowlPrice: $23Buy: From Amazon
3.5 Quart Brushed Stainless Steel BowlPrice: $32Buy: From Amazon
4.5-Qt. Polished Stainless Steel Bowl with HandlePrice: $40Buy: From Amazon
6-Qt. Bowl-Lift Polished Stainless Steel Bowl with Comfort HandlePrice: $58Buy: From Amazon
5-Qt.Brushed Stainless Steel Mixing BowlPrice: $59Buy: From Amazon
5-Qt. Bowl-Lift Polished Stainless Steel Bowl with Flat HandlePrice: $50Buy: From Amazon
5-Qt. Bowl-Lift Polished Stainless Steel Bowl with Flat HandlePrice: $45Buy: From Amazon
3.5 Quart Polished Stainless Steel Bowl with HandlePrice: $50Buy: From Amazon
5-Qt. Tilt-Head Polished Stainless Steel Bowl with Comfortable HandlePrice: $45Buy: From Amazon
3-Qt. Stainless Steel Bowl & Combi-WhipPrice: $45Buy: From Amazon
5-Qt. NSF Certified Brushed Stainless Steel Mixing BowlPrice: $62Buy: From Amazon
5-Qt. Tilt-Head Hammered Glass Bowl with LidPrice: $55Buy: From Amazon
5-Qt. Tilt-Head Glass Bowl with Measurement Markings & LidPrice: $50Buy: From Amazon
5-Qt. Tilt-Head Frosted Glass Bowl with Measurement Markings & LidPrice: $55Buy: From Amazon
5-Qt. NSF Certified Polished Stainless Steel Bowl with J Hook HandlePrice: $70Buy: From Amazon
7-Qt. NSF Certified Polished Stainless Steel Bowl with J Hook HandlePrice: $58Buy: From Amazon
8-Qt. NSF Certified Polished Stainless Steel Bowl with J Hook HandlePrice: $72Buy: From Amazon
Tropical Floral 5 Quart Patterned Ceramic BowlPrice: $109Buy: From KitchenAid
F-Series 6-Quart Glass Bowl Accessory BundlePrice: $119Buy: From Amazon
Lids, shields, liners, and bowl covers
5-Qt. Pouring ShieldPrice: $14Buy: From Amazon
Lid for 5 Quart Tilt Head Stand Mixer Glass BowlsPrice: $15Buy: From Amazon
2-Pack Stand Mixer Bowl LinersPrice: $18Buy: From Amazon
KBC90N 2-Pack Bowl CoversPrice: $Buy: From Amazon
2-Pack Bowl CoversPrice: $8Buy: From Amazon
3.5 Quart 1-Piece Pouring ShieldPrice: $12Buy: From Amazon
1-Piece Pouring Shield with Wide ChutePrice: $25Buy: From Amazon
Mixer covers
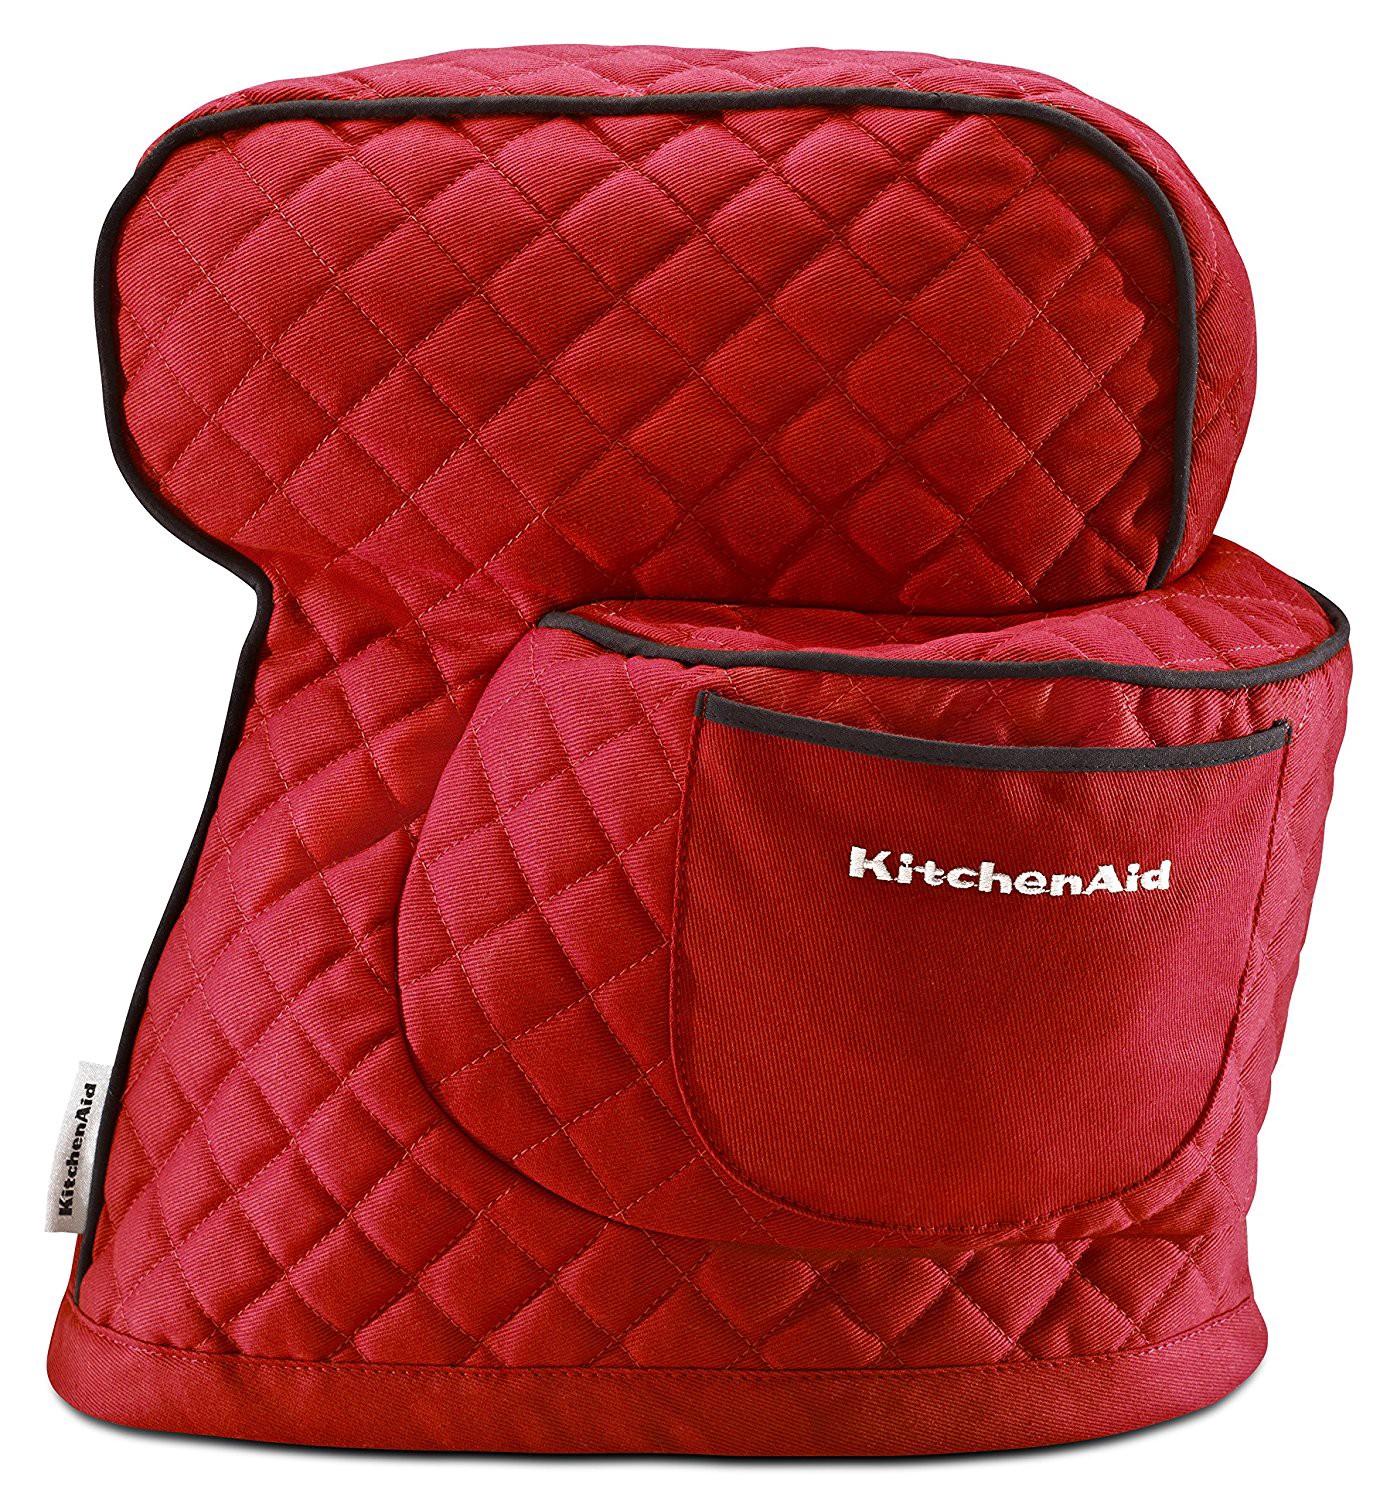 Stand mixer cover
Recommendation: If you travel around with your mixer, grab a cover. You paid for that nice paint finish, don?t let it get scratched up. Even if you just store your mixer somewhere like a basement or pantry when not in use, a cover can keep it protected when going to and from the kitchen.
White Quilted Cloth CoverPrice: $22Buy: From Amazon
Red Quilted Cloth CoverPrice: $17Buy: From Amazon
Black Fitted Stand Mixer CoverPrice: $26Buy: From Amazon
Red Fitted Stand Mixer CoverPrice: $23Buy: From Amazon
Attachment combo packs
Recommendation: If a few of these attachments look interesting to you, there are a few combo packs you can check out. These make for nice gifts, too.
Slicer/Shredder + Grinder/Strainer Attachment PackPrice: $86Buy: From Amazon
Attachment Pack 2 with Food Grinder, Rotor Slicer & Shredder, and Sausage StufferPrice: $122Buy: From Amazon
Attachment Pack 3 with Food Grinder, Citrus Juicer and Sausage StufferPrice: $80Buy: From Amazon
Read next: 10 KitchenAid predictions for 2019
