This is updated video of a previous tutorial,
Anaconda is a package manager, an environment manager, and Python distribution that contains a collection of many open source packages (numpy, scikit-learn, scipy, pandas to name a few). If you need additional packages after installing Anaconda, you can use Anaconda?s package manager, conda or pip to install those packages. This is highly advantageous as you don?t have to manage dependencies between multiple packages yourself. Conda even makes it easy to switch between Python 2 and 3 (you can learn more about it here). In fact, an installation of Anaconda is also a common way to install Jupyter Notebooks.
This tutorial includes:
- How to download and install Anaconda on Windows
- How to test your installation
- How to fix common installation issues
- What to do after installing Anaconda.
As always, feel free to ask questions either here or on the YouTube video page. With that, let?s get started!
Download and Install Anaconda
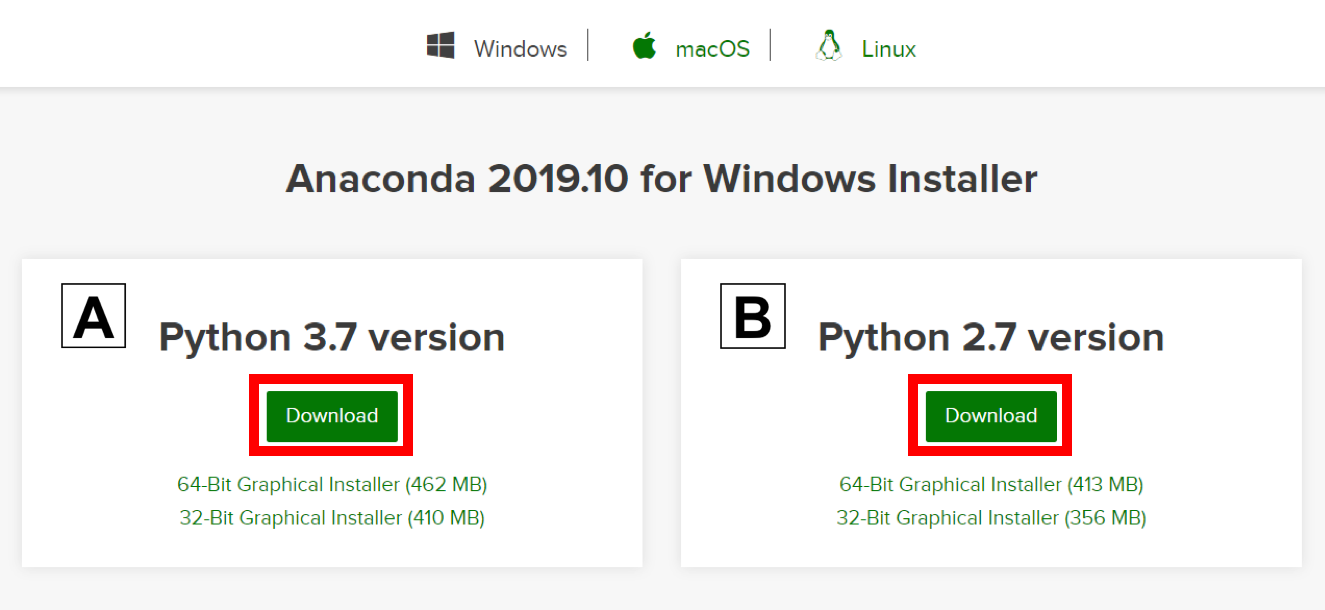
1.) Go to the Anaconda Website and choose either a Python 3.x graphical installer (A) or a Python 2.x graphical installer (B). If you aren?t sure which Python version you want to install, choose Python 3. Do not choose both.
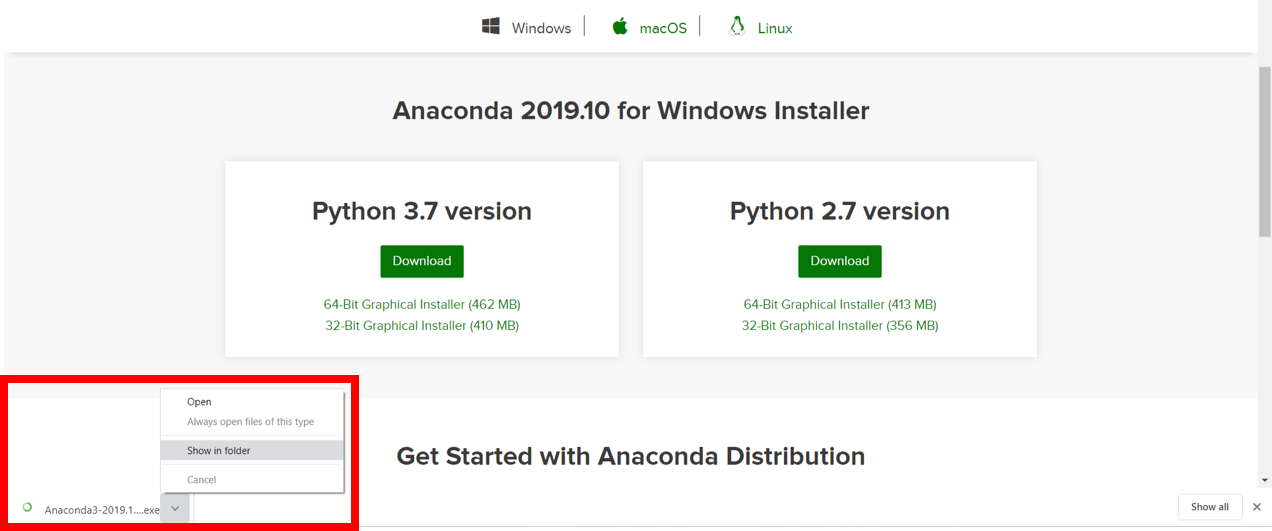
2. Locate your download.
Ideally, you open/run the file as administrator.
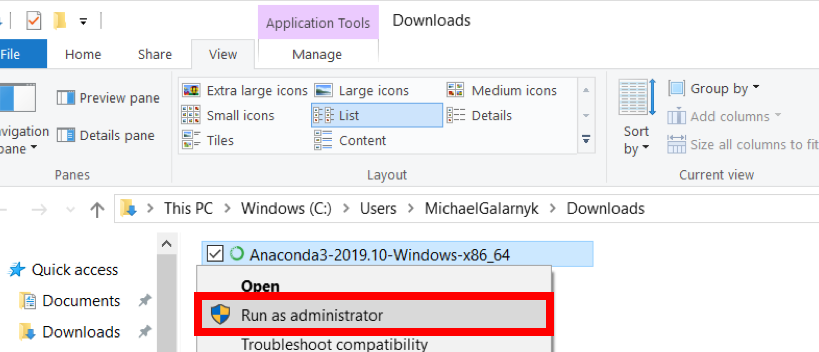 Installing as administrator is for the case you don?t have permission install anaconda in the location you want or to add anaconda to your path.
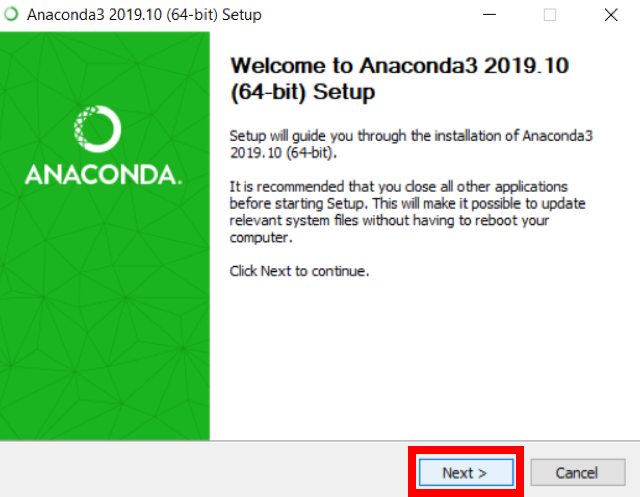
When the screen below appears, click on Next.
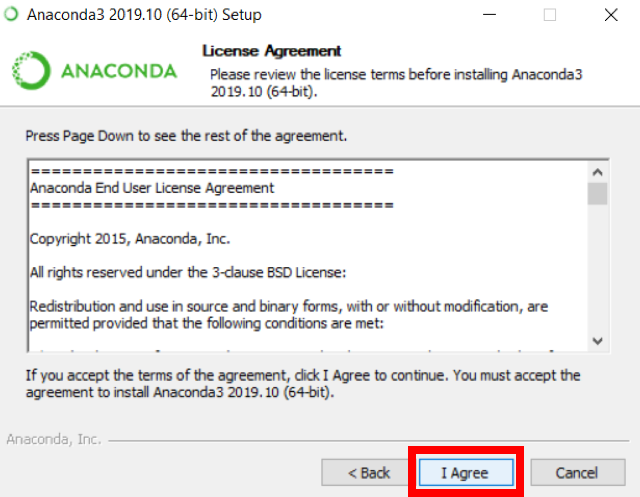
3. Read the License Agreement and click on I Agree.
4. Choose either Just Me (recommended) or All Users.
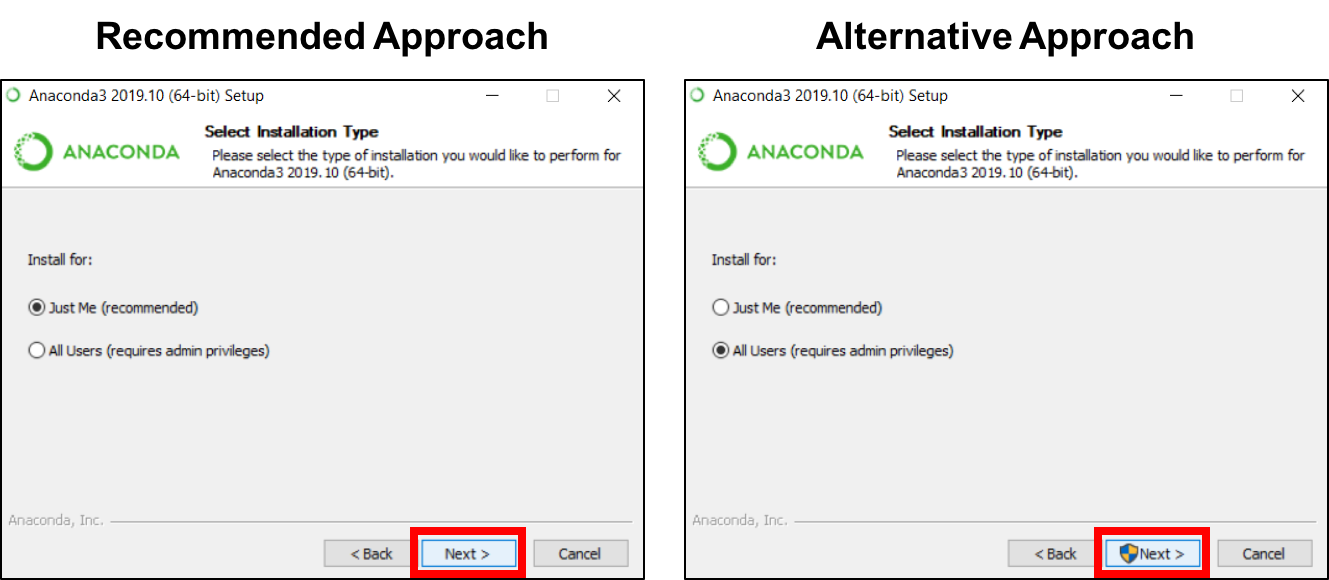 If you aren?t sure which to select, choose Just Me as this can mitigate potential issues if you don?t have administrator privileges.
5. Please make a note of your installation location (1) and then click Next (2).
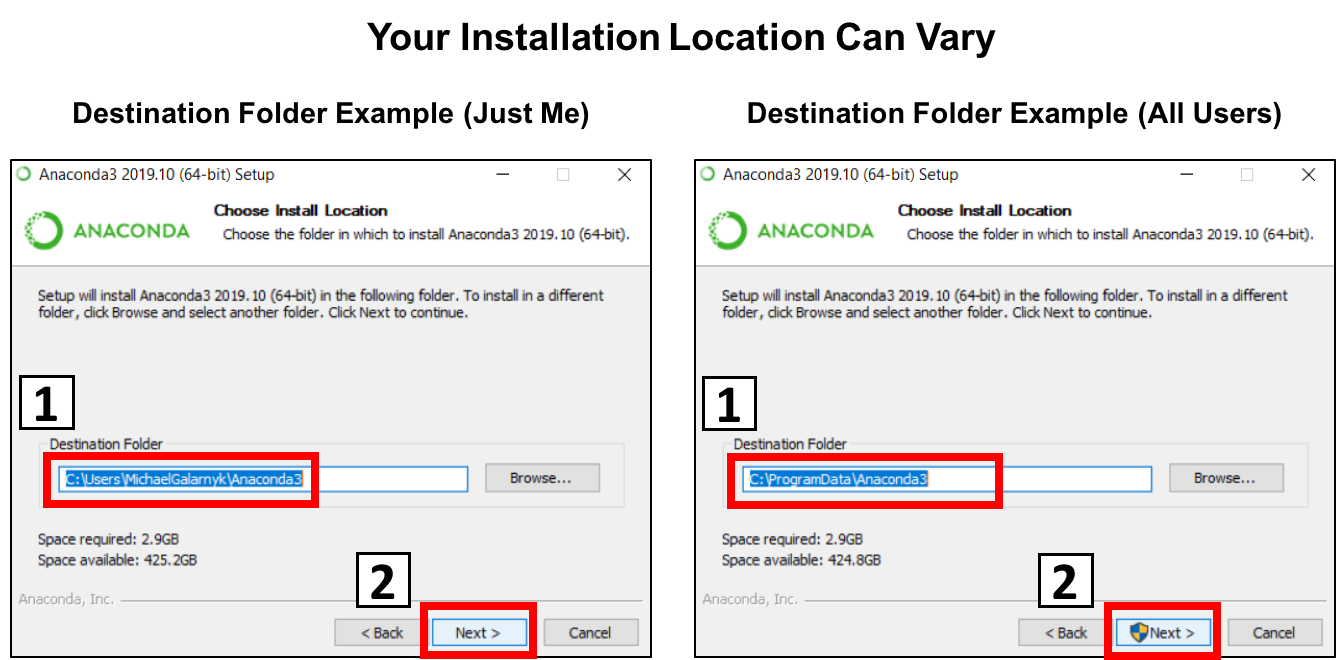 Your installation location can vary so keep note of where you installed anaconda. In the example image on the left, the path is similar to if you selected ?Just Me? for step 4. In the example image on the right, the path is similar to if you selected ?All Users? for step 4.
6. This is an important part of the installation process. The recommended approach is to not check the box (1) to add Anaconda to your path. This means you will have to use Anaconda Navigator or the Anaconda Command Prompt (located in the Start Menu under ?Anaconda?) when you wish to use Anaconda (you can always add Anaconda to your PATH later if you don?t check the box). If you want to be able to use Anaconda in your command prompt, please use the alternative approach and check the box. Click on Install (2).
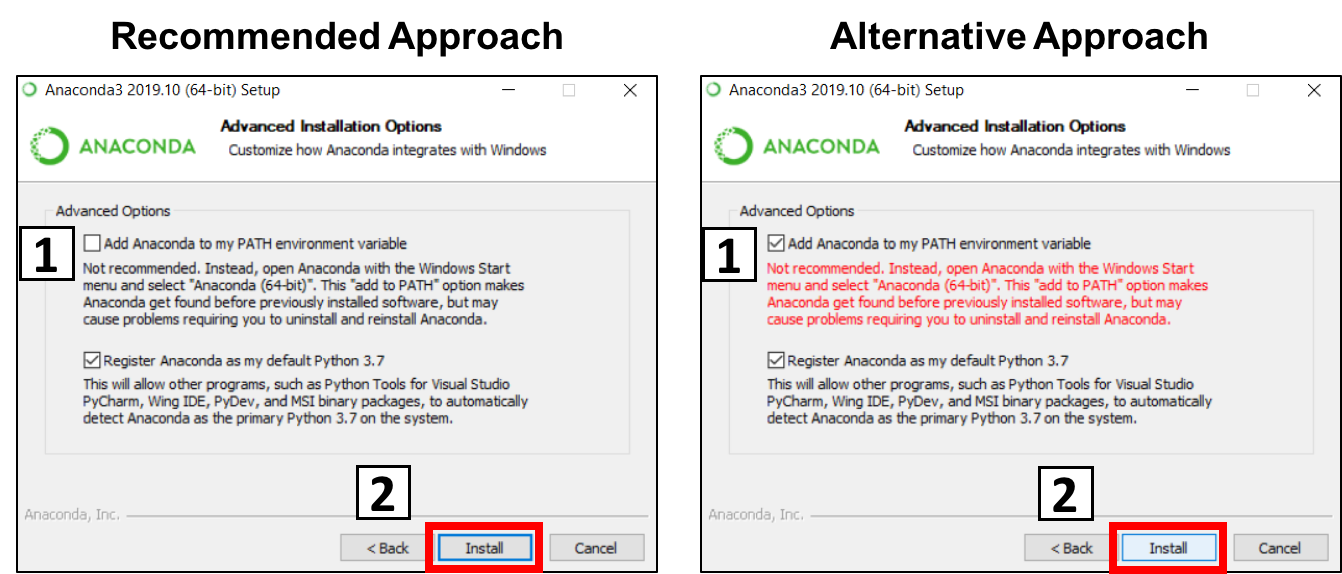 This is important. Consider what you are doing in this step.
7. Click on Next.
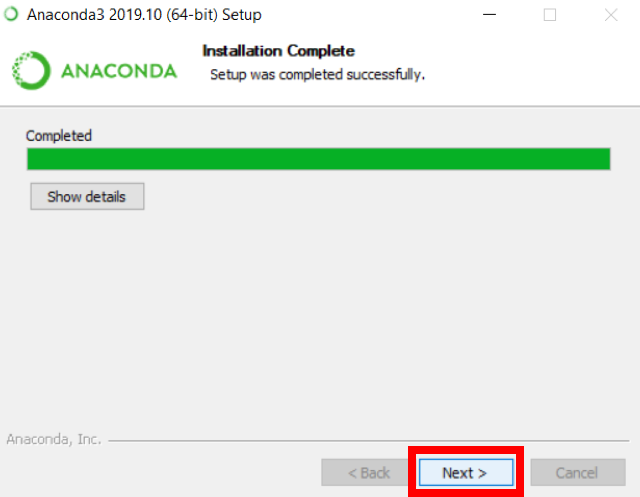
8. You can install PyCharm if you like, but it is optional. Click on Next.
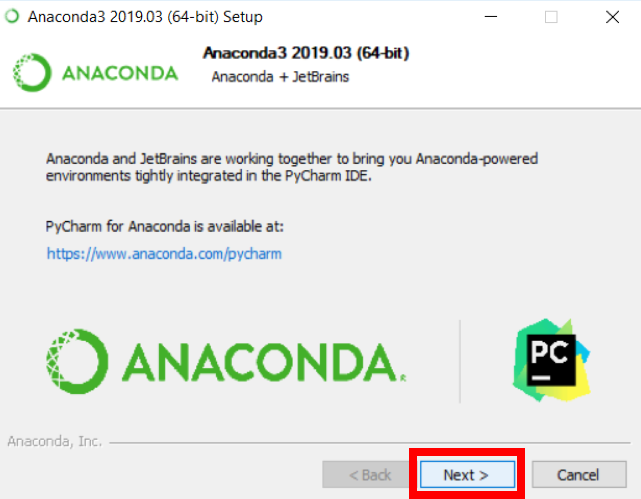 If you want to learn about how to use PyCharm with Anaconda, I have an older tutorial on it here.
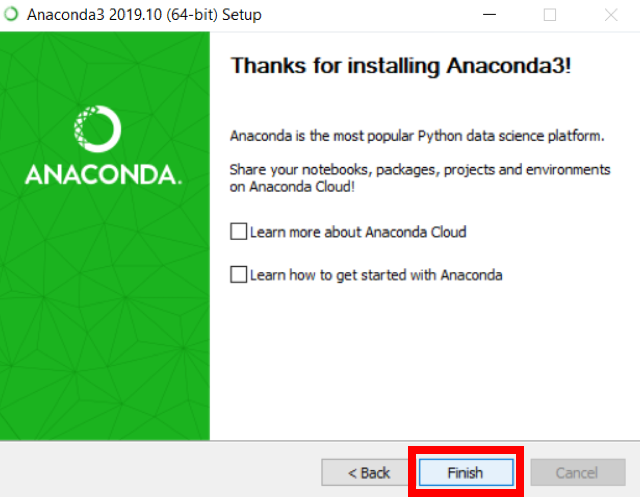
9. Click on Finish.
How to Test Your installation
A good way to test your installation is to open a Jupyter Notebook. You can do this through either Anaconda Prompt or Anaconda Navigator. If you get lost, I recommend opening the video below in a separate tab.
Anaconda Navigator
- Locate Anaconda Navigator and Click on Anaconda Navigator.
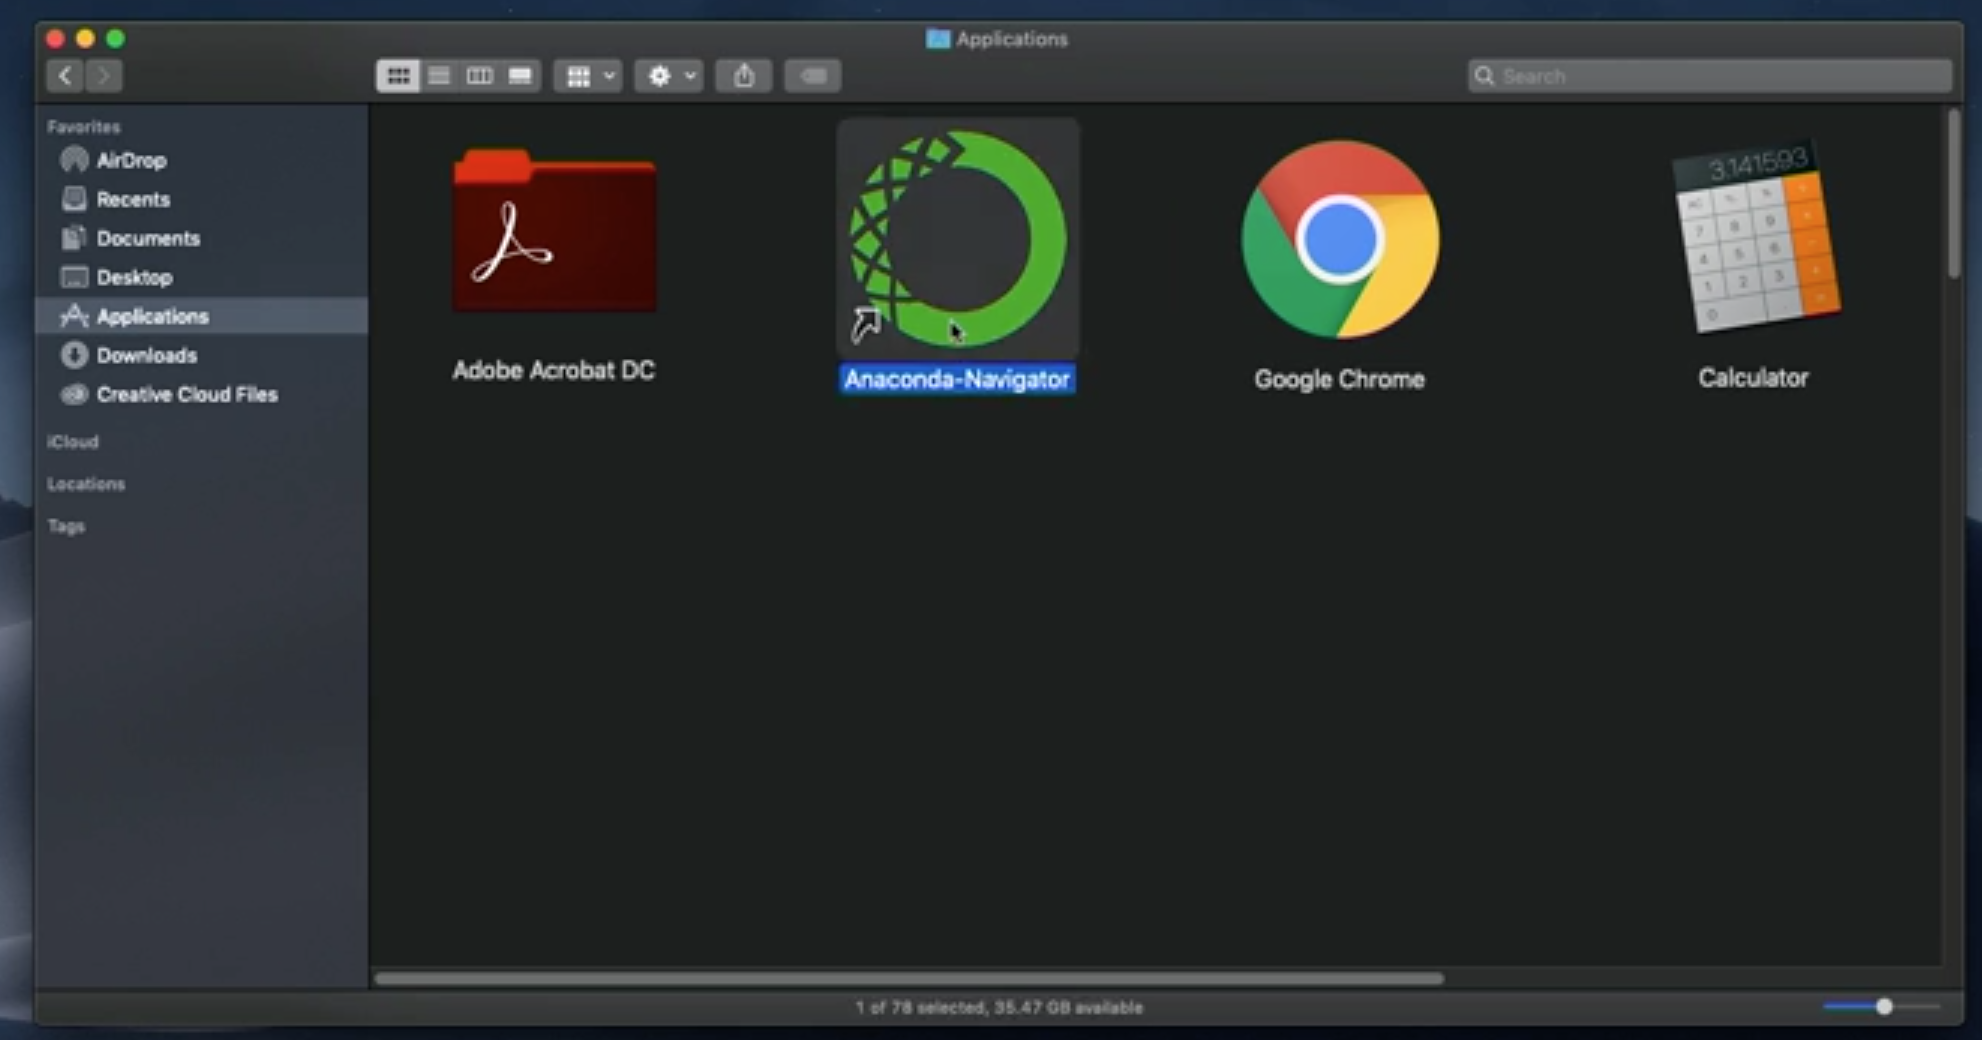 Image Source: https://www.linkedin.com/learning/python-for-data-visualization
2. Under Jupyter Notebook, click on Launch.
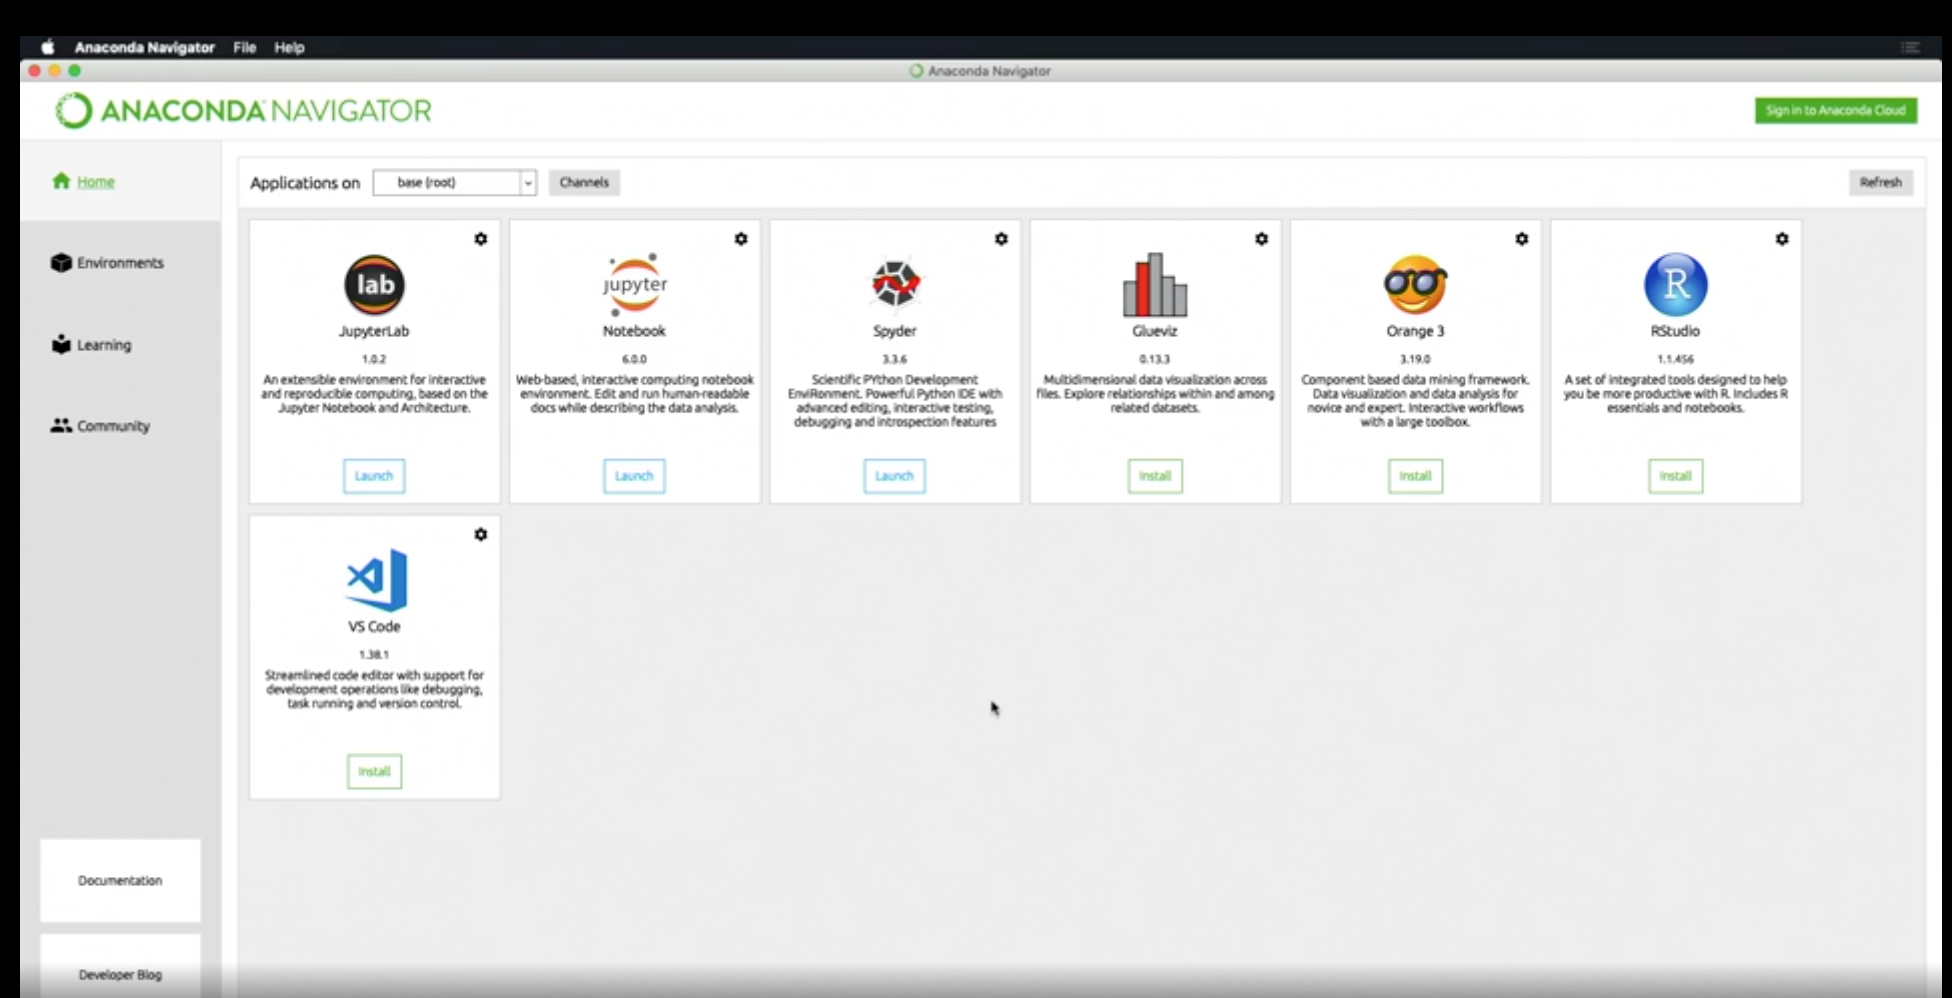 Image Source: https://www.linkedin.com/learning/python-for-data-visualization
Anaconda Prompt
- Locate Anaconda Prompt.
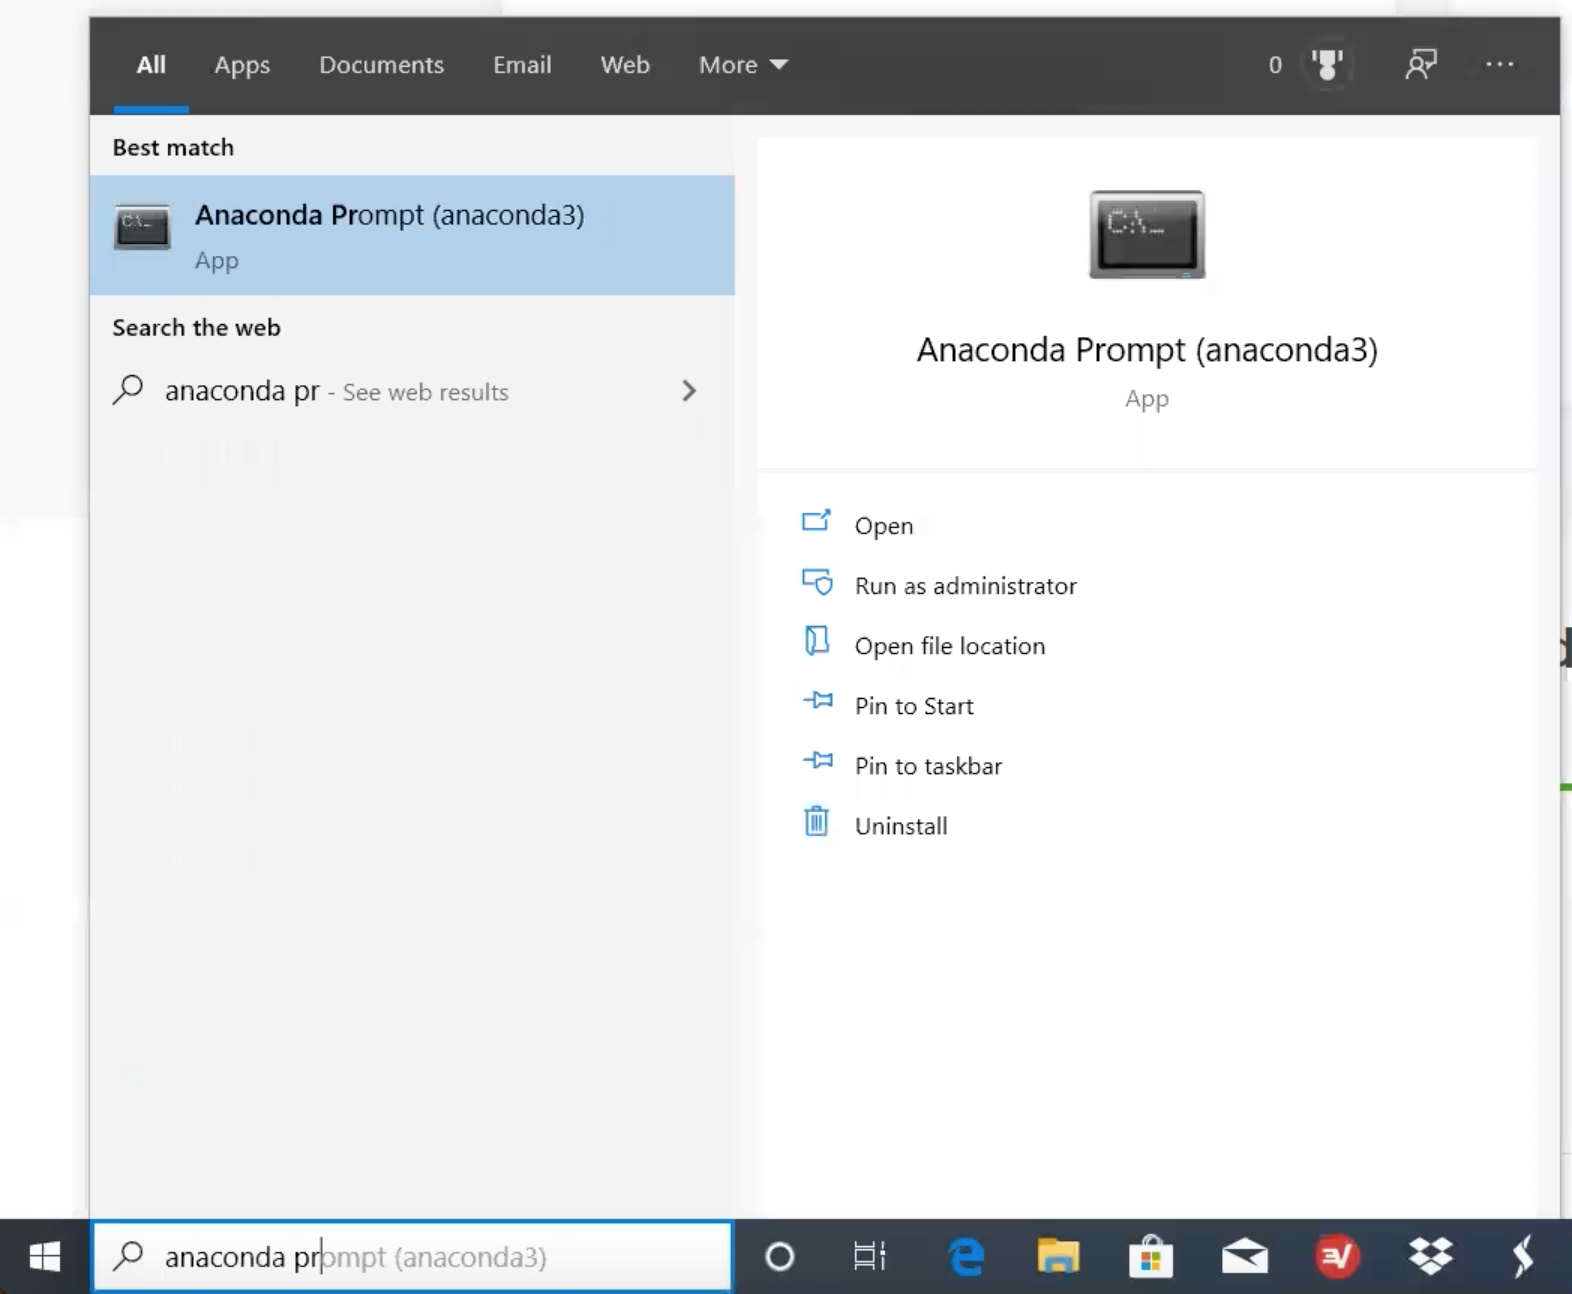
2. Type the command below to see that you can start a Jupyter (IPython) Notebook.
jupyter notebook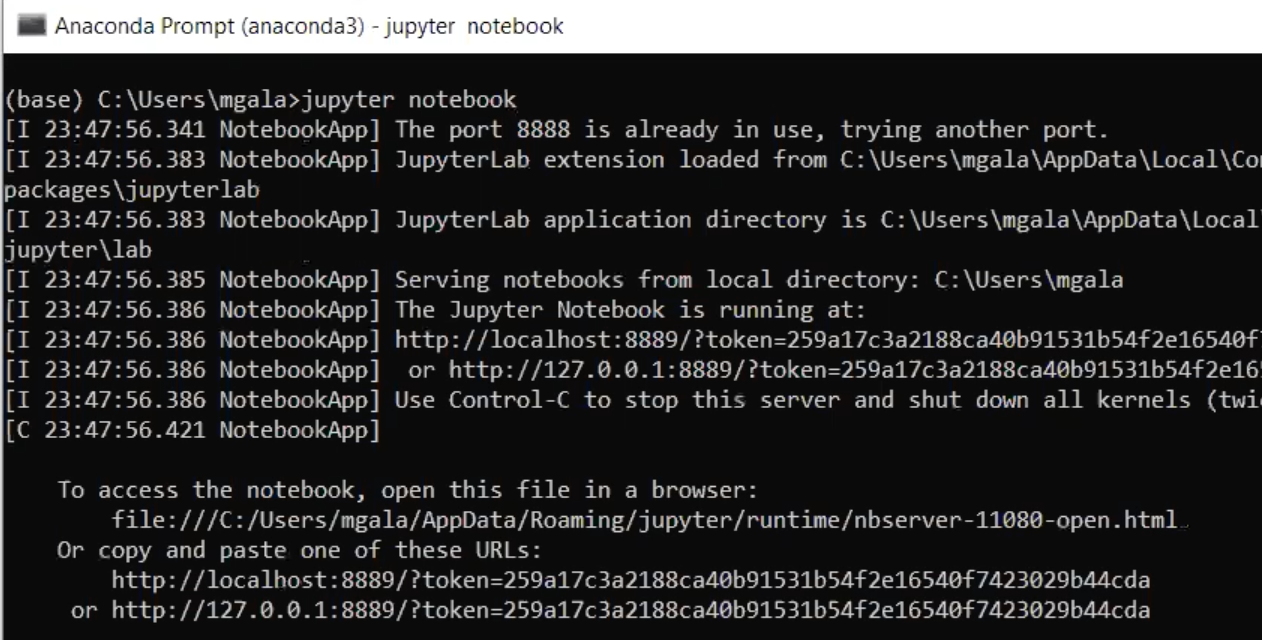
Add Anaconda to Path (Optional)
This is an optional step. This is for the case where you didn?t check the box in step 6 and now want to add Anaconda to your PATH. The advantage of this is that you will be able to use Anaconda in your Command Prompt.
- Open a Command Prompt.
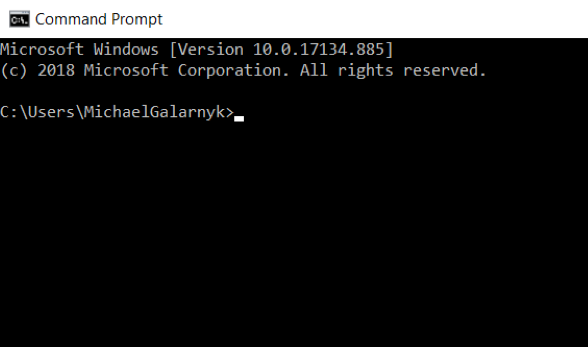
2. Check if you already have Anaconda added to your path. Enter the commands below into your Command Prompt. This is checking if you already have Anaconda added to your path. If you get a command not recognized error like in the left side of the image below, proceed to step 3. If you get an output similar to the right side of the image below, you have already added Anaconda to your path.
jupyter notebook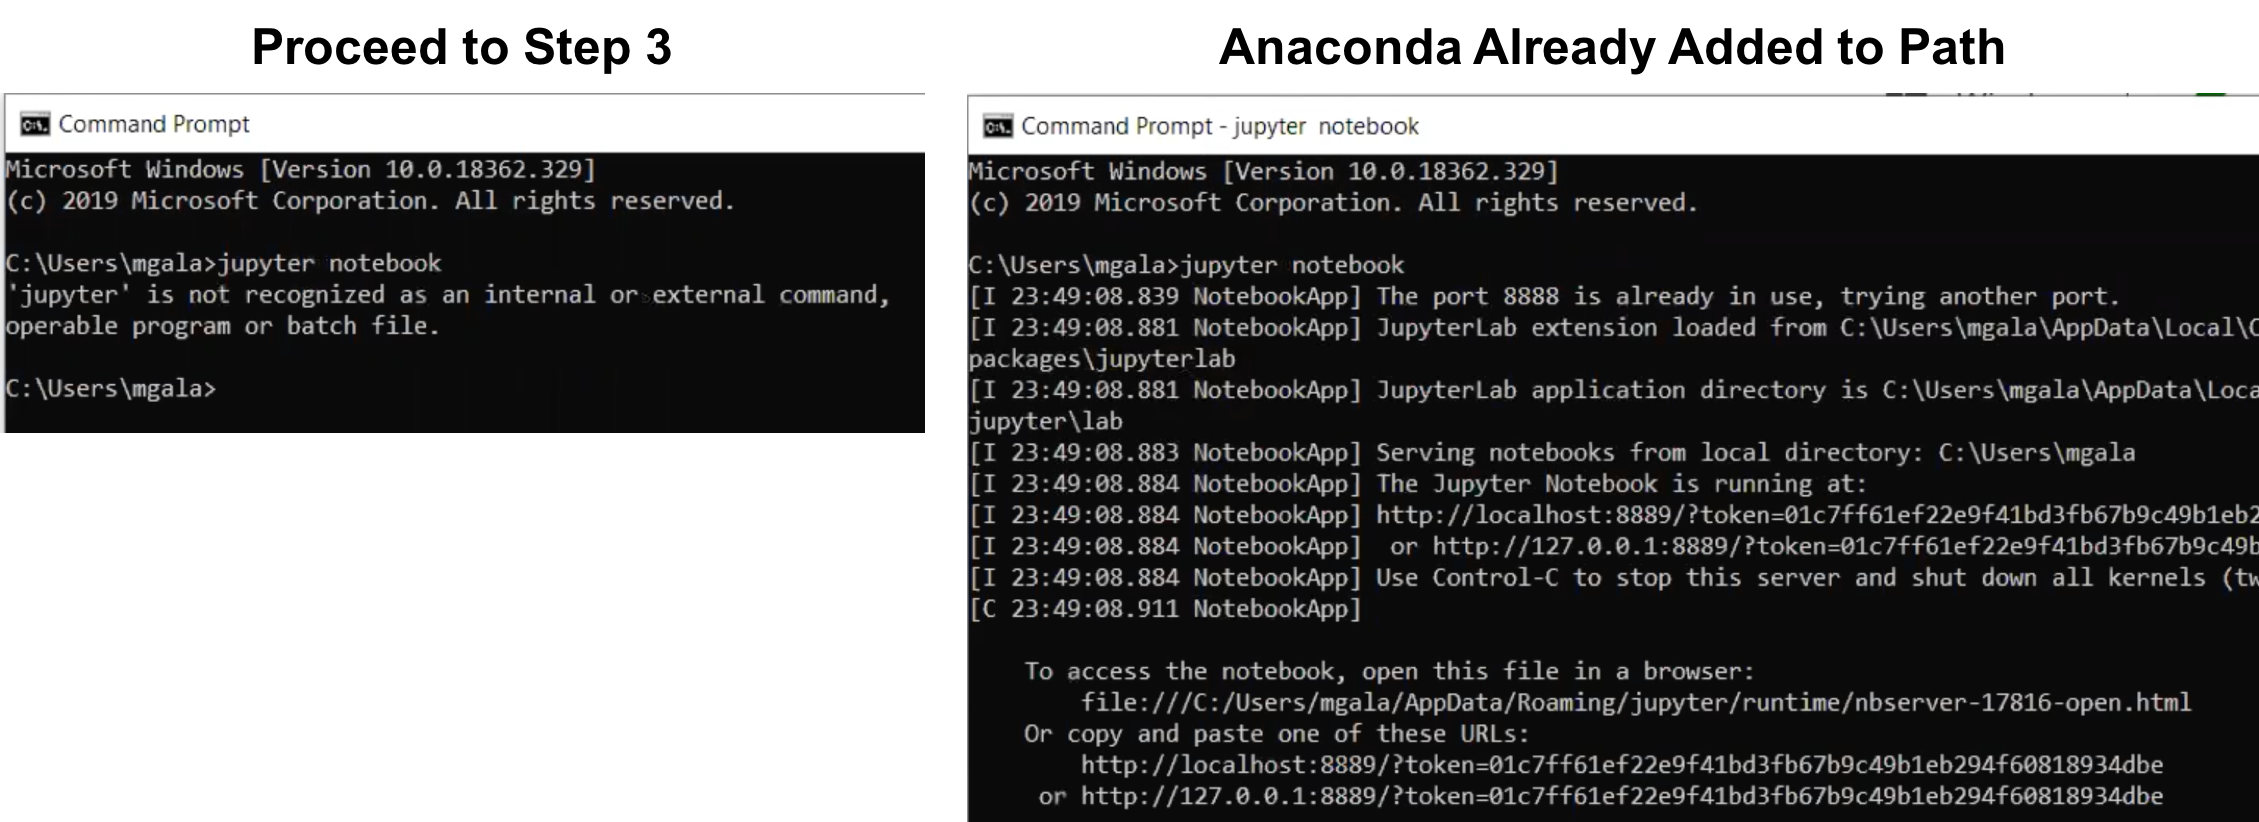
3. If you don?t know where your conda and/or python is, open an Anaconda Prompt and type in the following commands. This is telling you where conda and python are located on your computer.
where condawhere python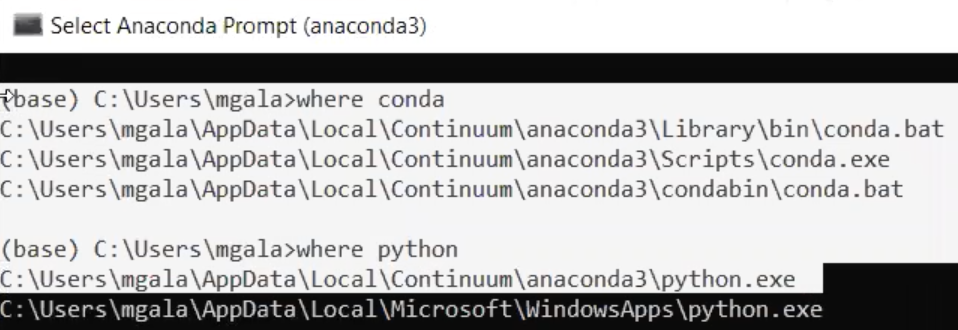
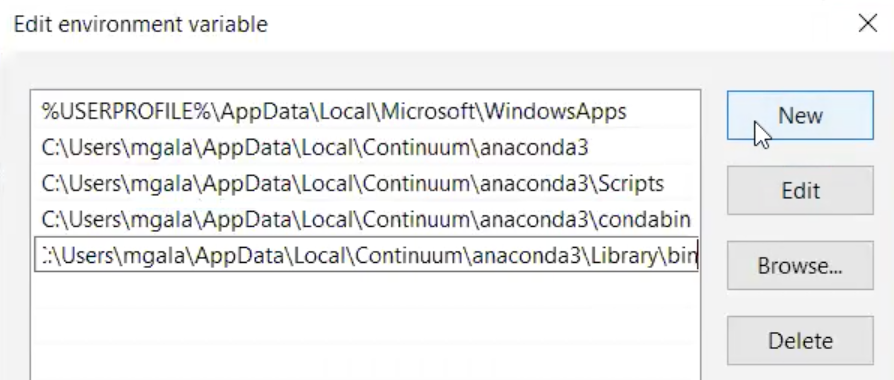
4. Add conda and python to your PATH. You can do this by going to your System or Environment Variables and adding the output of step 3 to your PATH. Please see the video while you do this (keep in mind this might vary some depending on your Windows).
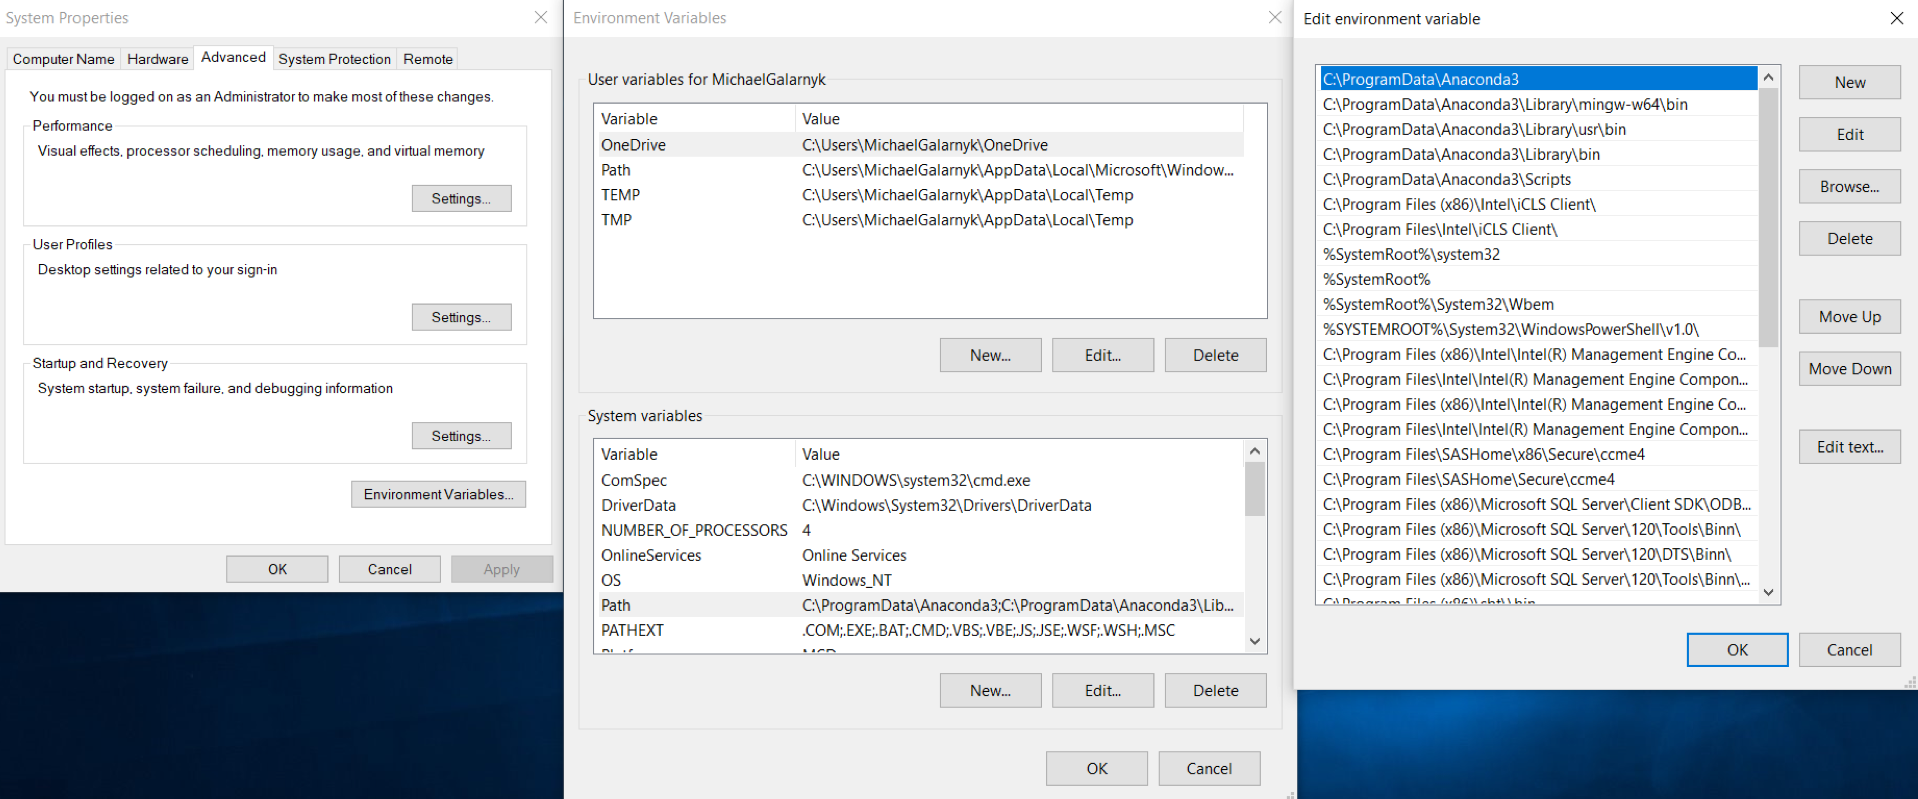 Your screen may look different depending on what version of Windows you are using.
5. Open a new Command Prompt. Try typing conda –version and python –version into the Command Prompt to check to see if everything went well. You can also try to open a Jupyter Notebook to check.
Other Common Issues
I have done my best to duplicate, address, and solve a couple common issues. Here are a couple issues and some solutions I have found.
Jupyter is not recognized
If you get a jupyter is not recognized, python is not recognized, or similar, then you most likely have a path issue. Please see the Add Anaconda to Path (Optional) section.

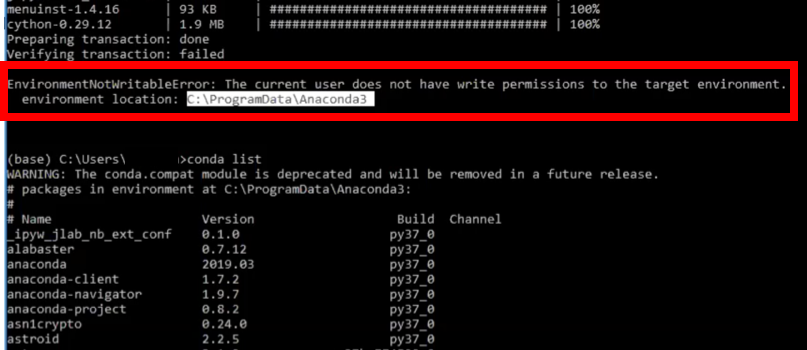
EnvironmentNotWritableError: The current user does not have write permissions to the target environment. environment location: C:ProgramDataAnaconda3
While the error in the image occurred when installing a library after installing anaconda, keep in mind it is possible to have this sort of error when installing anaconda (particularly if you clicked All Users for Step 4 in the Download and Install Anaconda). If you had this error and you want to install libraries, please open your command prompt/anaconda prompt or anaconda navigator as administrator to install your packages.
DLL load failed: The specified module could not be found
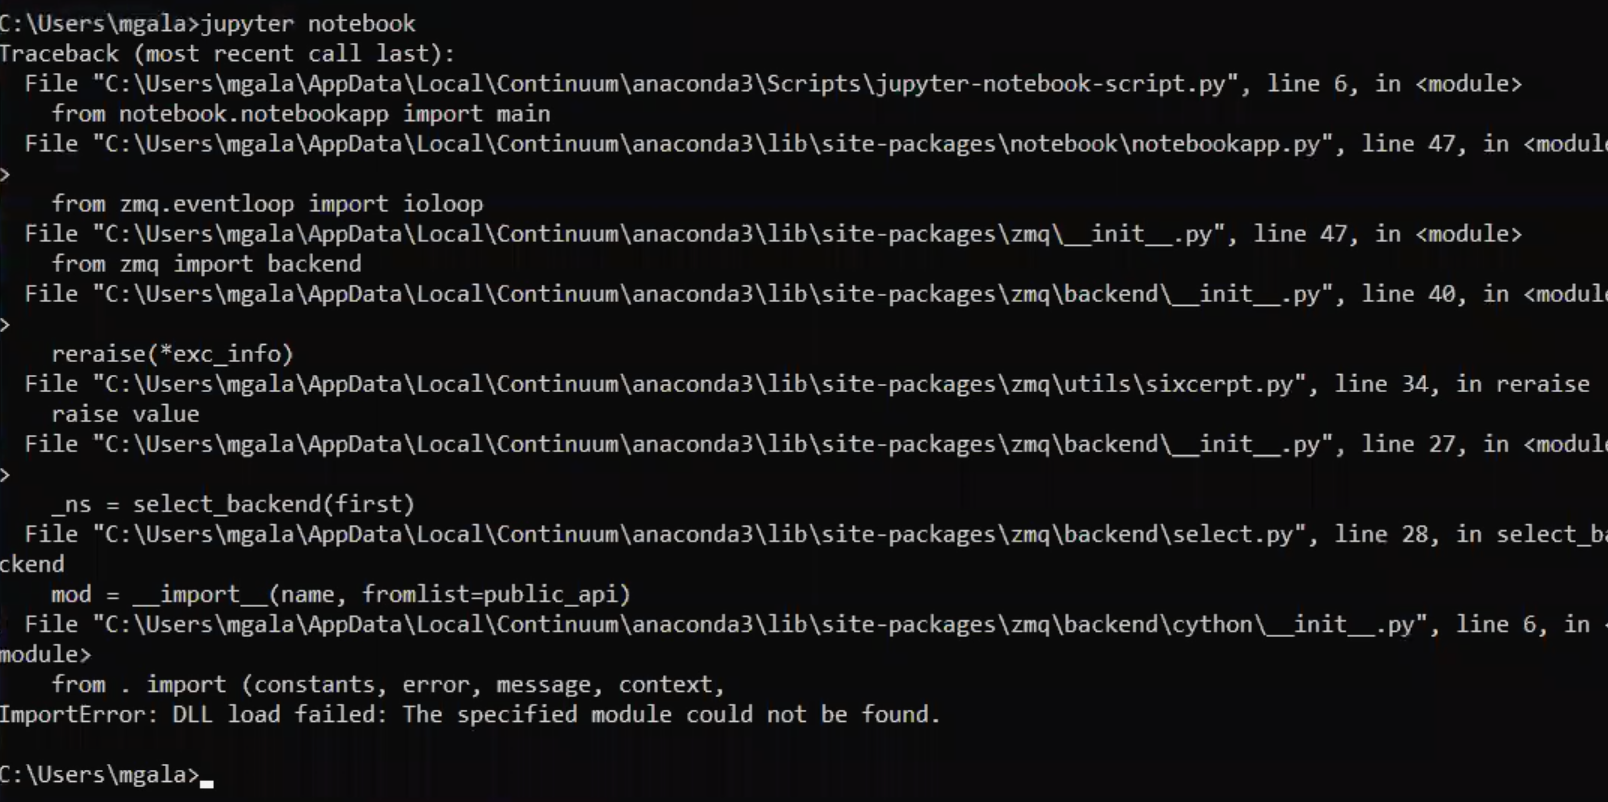
This is due to not adding everything to the path environment variable. I am guessing most likely you haven?t added condabin or bin to your path.
Conclusion
This tutorial provided a quick guide on how to install Anaconda on Windows as well as how to deal with common installation issues. If you would like to learn more about Anaconda, you can learn more about it here. If you aren?t sure what to do to start coding on your computer, here are a couple resources:
- Strings, Lists, Tuples, Dictionaries
- Data Visualization using Python Course (Pandas, Matplotlib, Seaborn)
If you any questions or thoughts on the tutorial, feel free to reach out in the comments below or through Twitter.
