Block ads for all devices inside your network with the Raspberry Pi
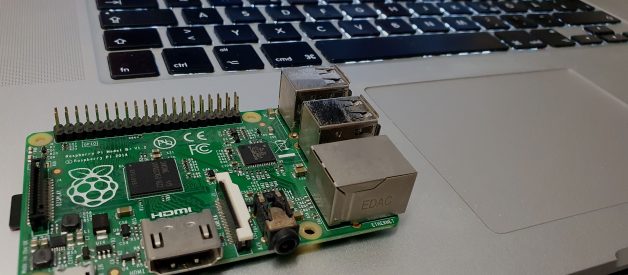
 Raspberry Pi Model B+ sitting on top of my MacBook
Introduction
If you are looking for a little toy project to pass some time during these days or if you are searching for a new purpose for your old Raspberry Pi, then this project may be for you.
In this tutorial, we will install Pi-hole on a Raspberry Pi to get rid of all the annoying advertisements (ads) you encounter on the internet. If everything goes according to plan, then all devices inside your network (Mobile phone, Laptop, Desktop?) will never be bothered by ads again without additional configuration for each device.
What is Pi-hole?
 Official Pi-hole logo
Pi-hole is acting as your preferred Domain Name System (DNS) server which associates various information with domain names and filters out ads before they are reaching your device.
Instead of seeing ads about some business gurus trying to sell you their bullet-proof marketing strategies, you will just see? nothing.
Pi-hole offers several advantages, such as
- Network-wide protection
- Block in-app advertisements
- Improve network performance
- Monitor statistics
What components do I need?
All you need is
- a Raspberry Pi (I used my old Raspberry Pi 1 b+)
- Micro-USB power supply
- microSD card (32GB is sufficient)
- Network cable (optional if you use Wi-Fi)
- Keyboard for the initial phase
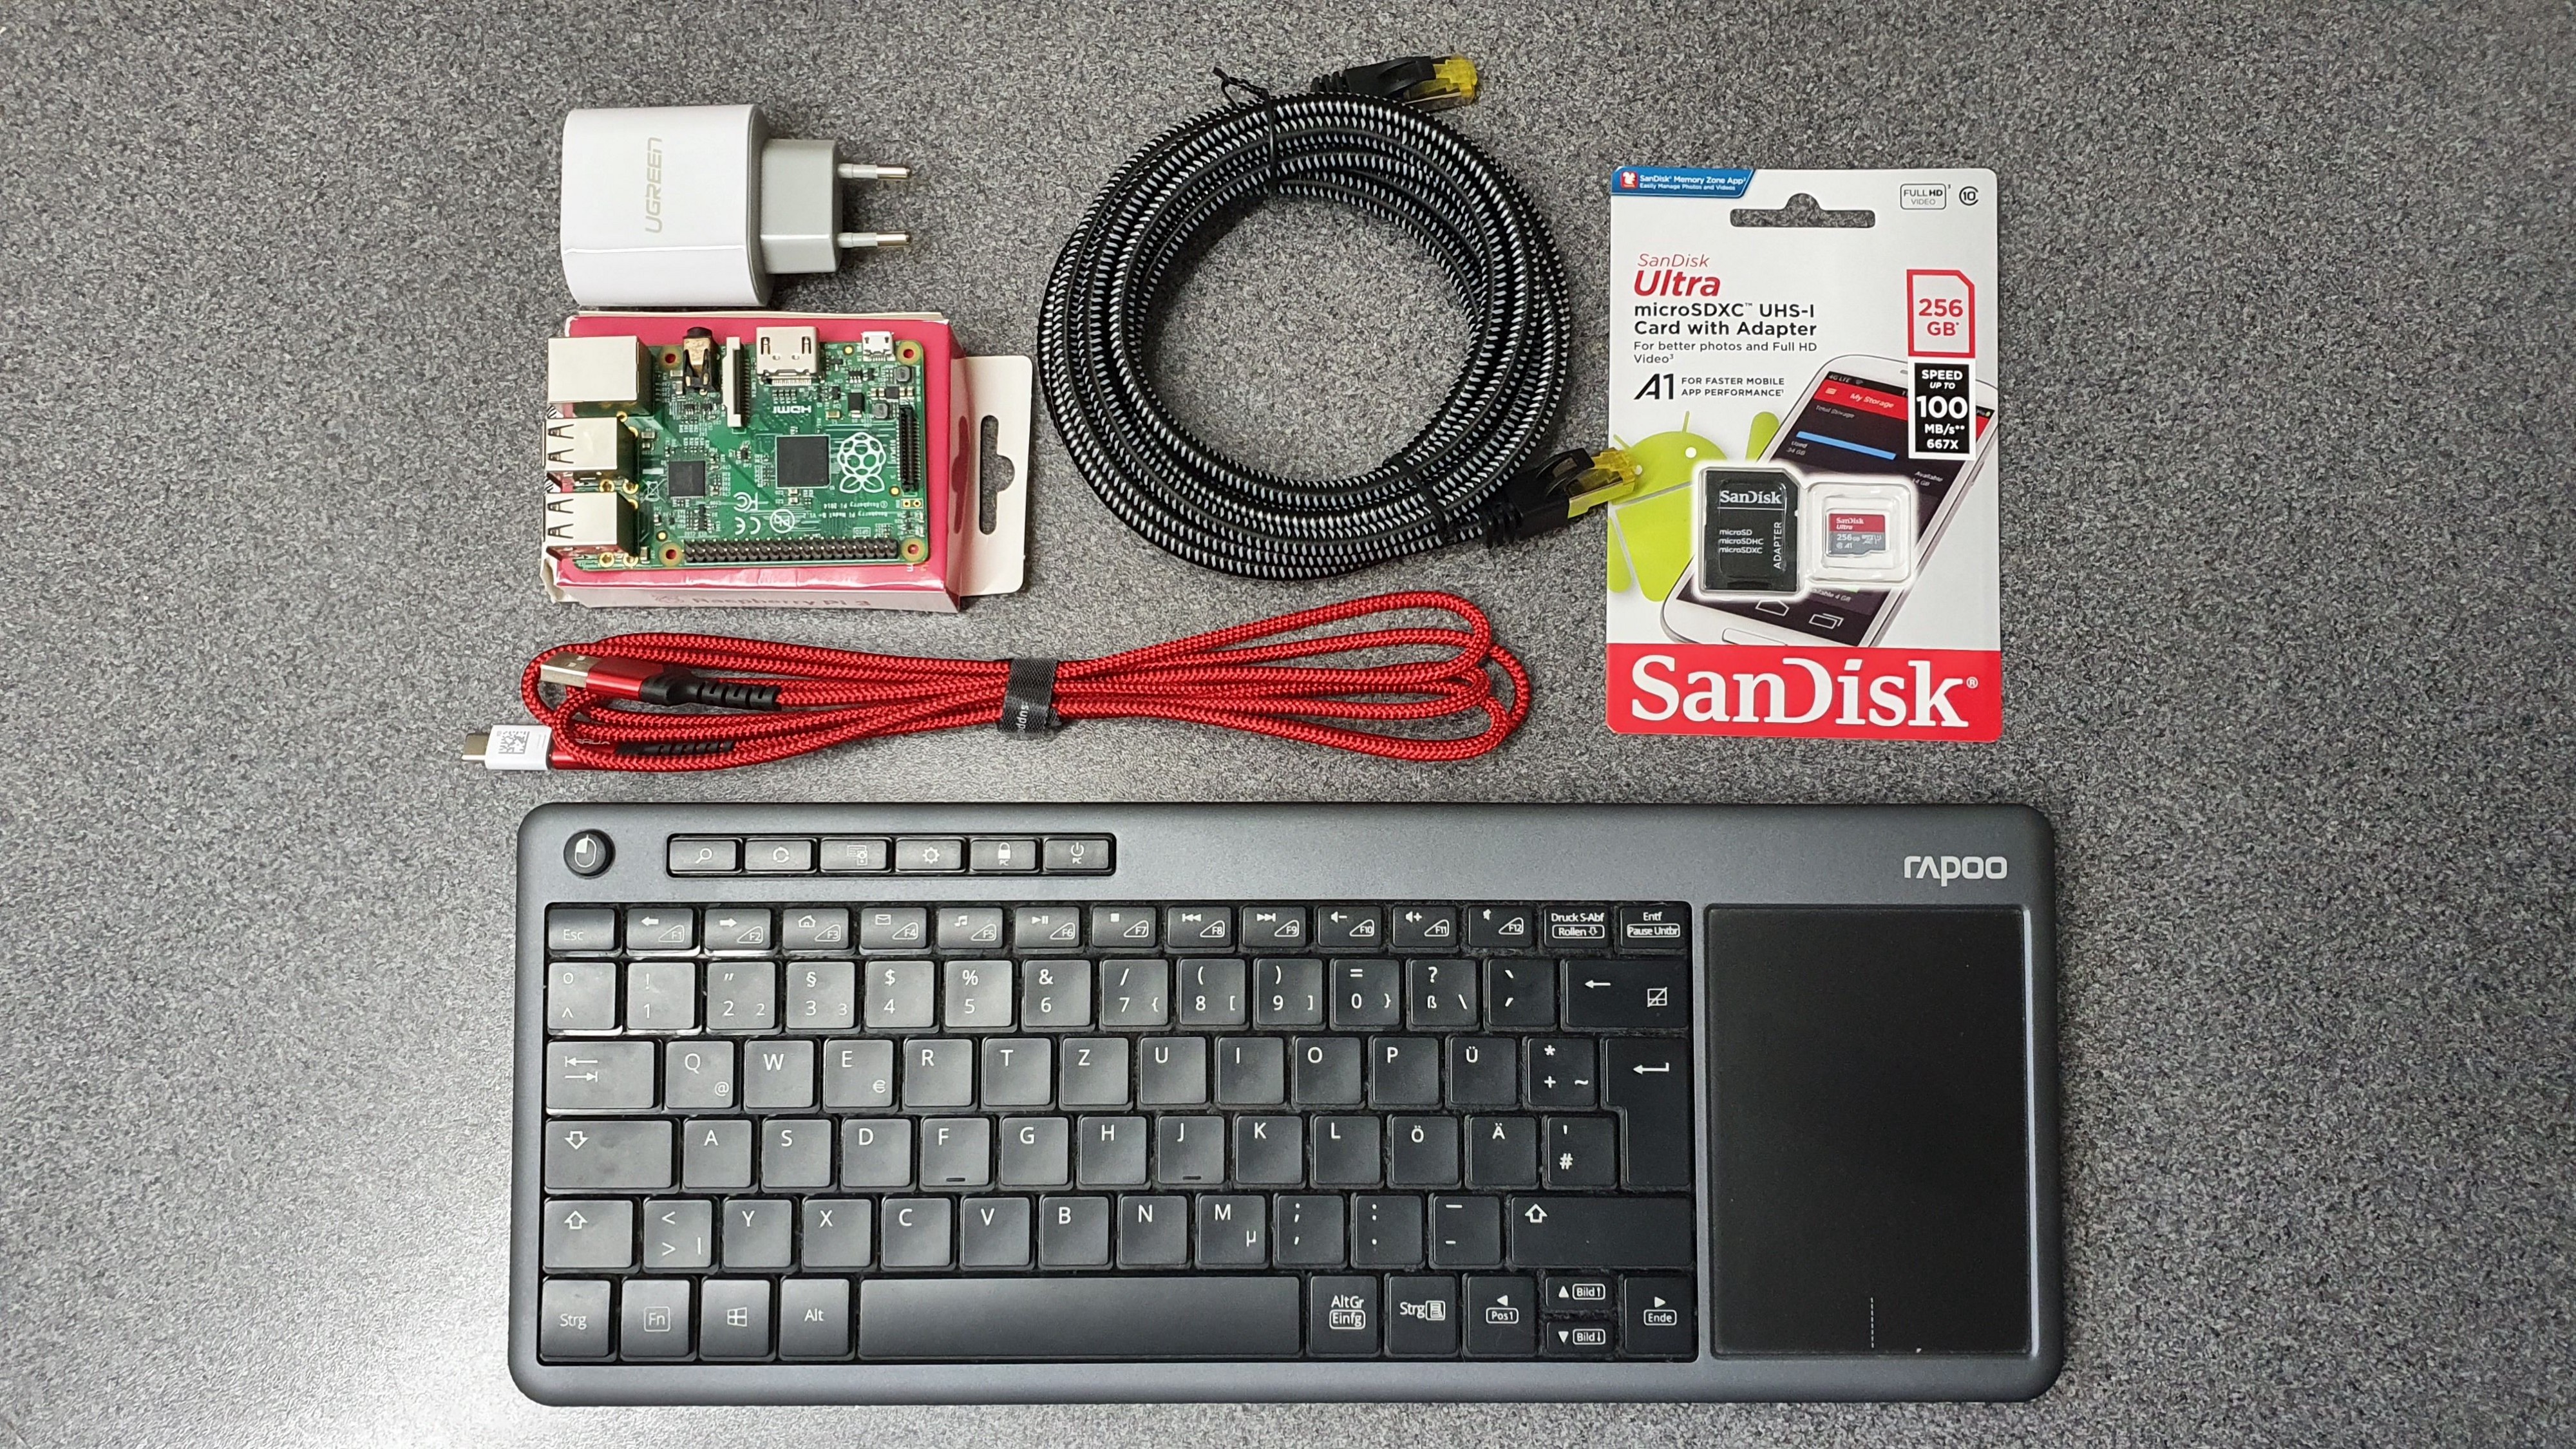 Components you need
Quick Outline
These are the steps we will be doing:
- Step 1: Flashing the SD card
- Step 2: Start the Raspberry Pi and log in
- Step 3: Basic configuration
- Step 4: Installing Pi-hole
- Step 5: Configuring DNS
- Step 6: Enter the dashboard
- Step 7: Have fun!
Step 1: Flashing the SD card
Download Raspbian. Since we do not need a full graphical desktop or the recommended software, we can go with the Raspbian Buster Lite image (434MB). This leads us to a zip file which contains the actual image file:
2020?02?13-raspbian-buster-lite.img // The current version as of the time of this writing
A 32GB microSD card like the one you see in the image below is sufficient for an installation of Raspbian + Pi-Hole.
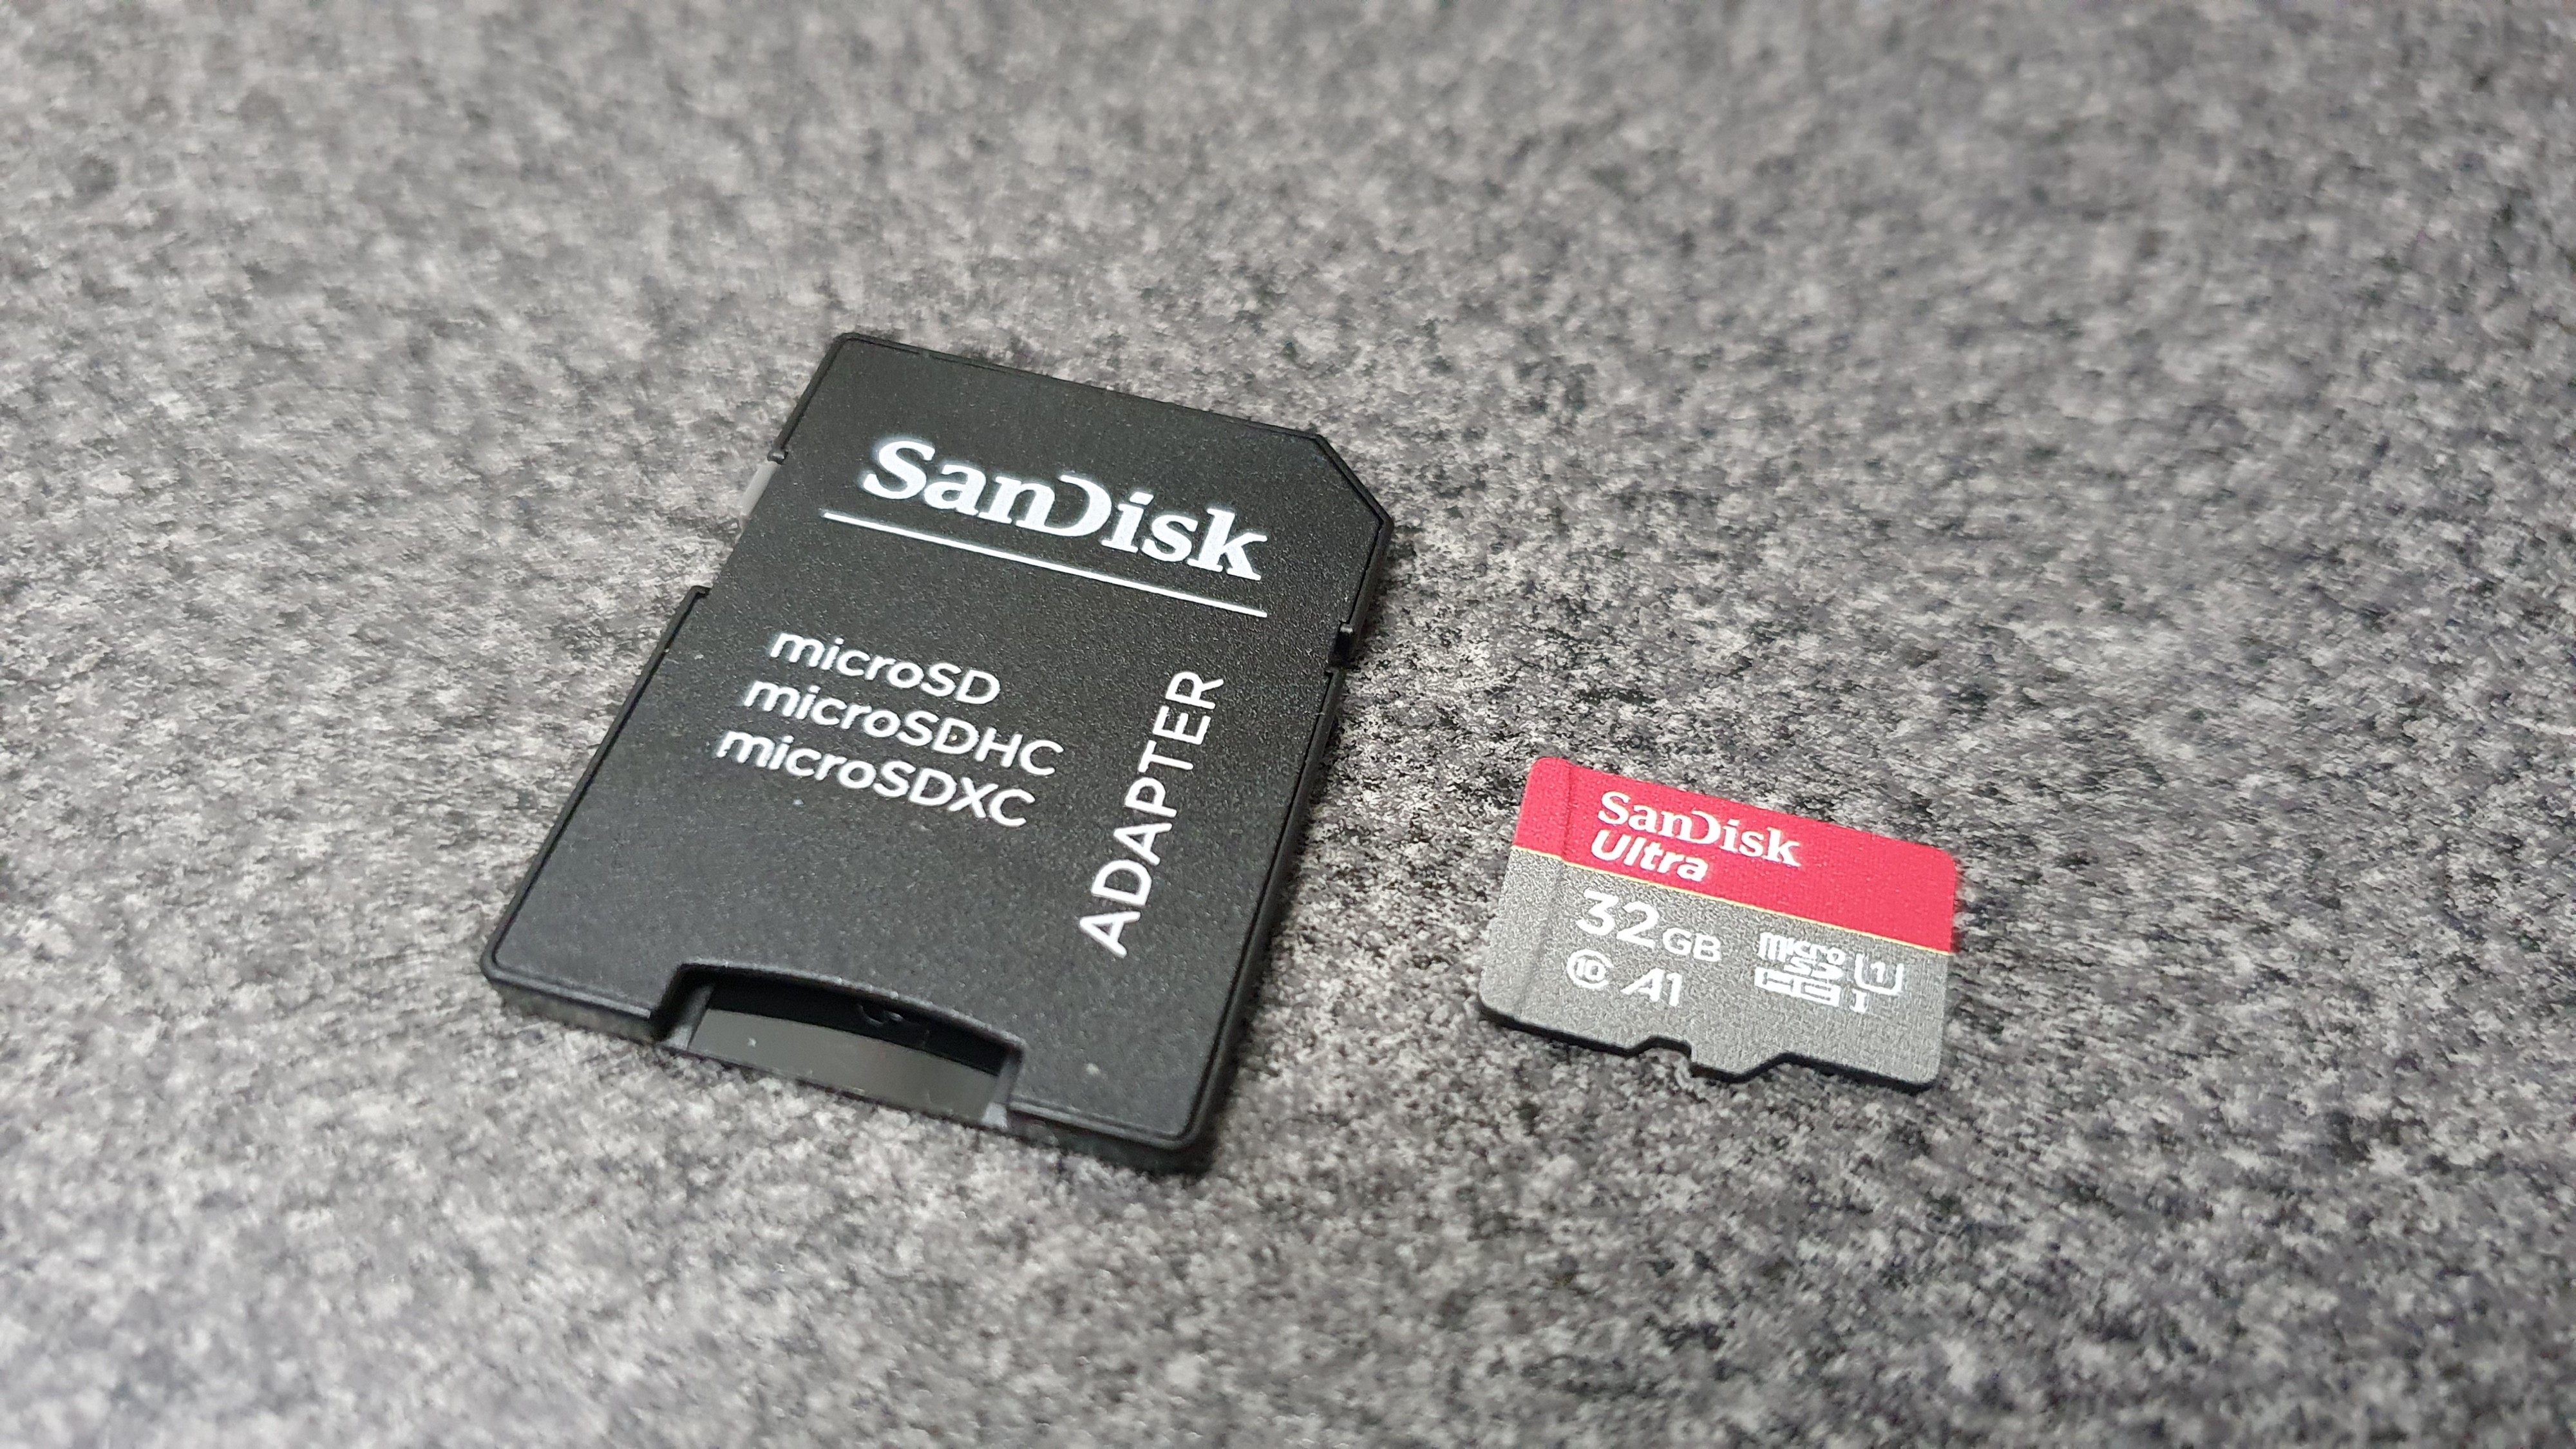 SanDisk Ultra 32GB microSDHC with SD-adapter
Most microSD cards come with an SD card adapter, so you can plug it into one of those bigger SD card slots. I?m using the one which comes with my MacBook Pro from 2015. If it so happens that you don?t have one then you can buy a cheap USB SD card reader from Amazon. You can usually get them for around 10$.
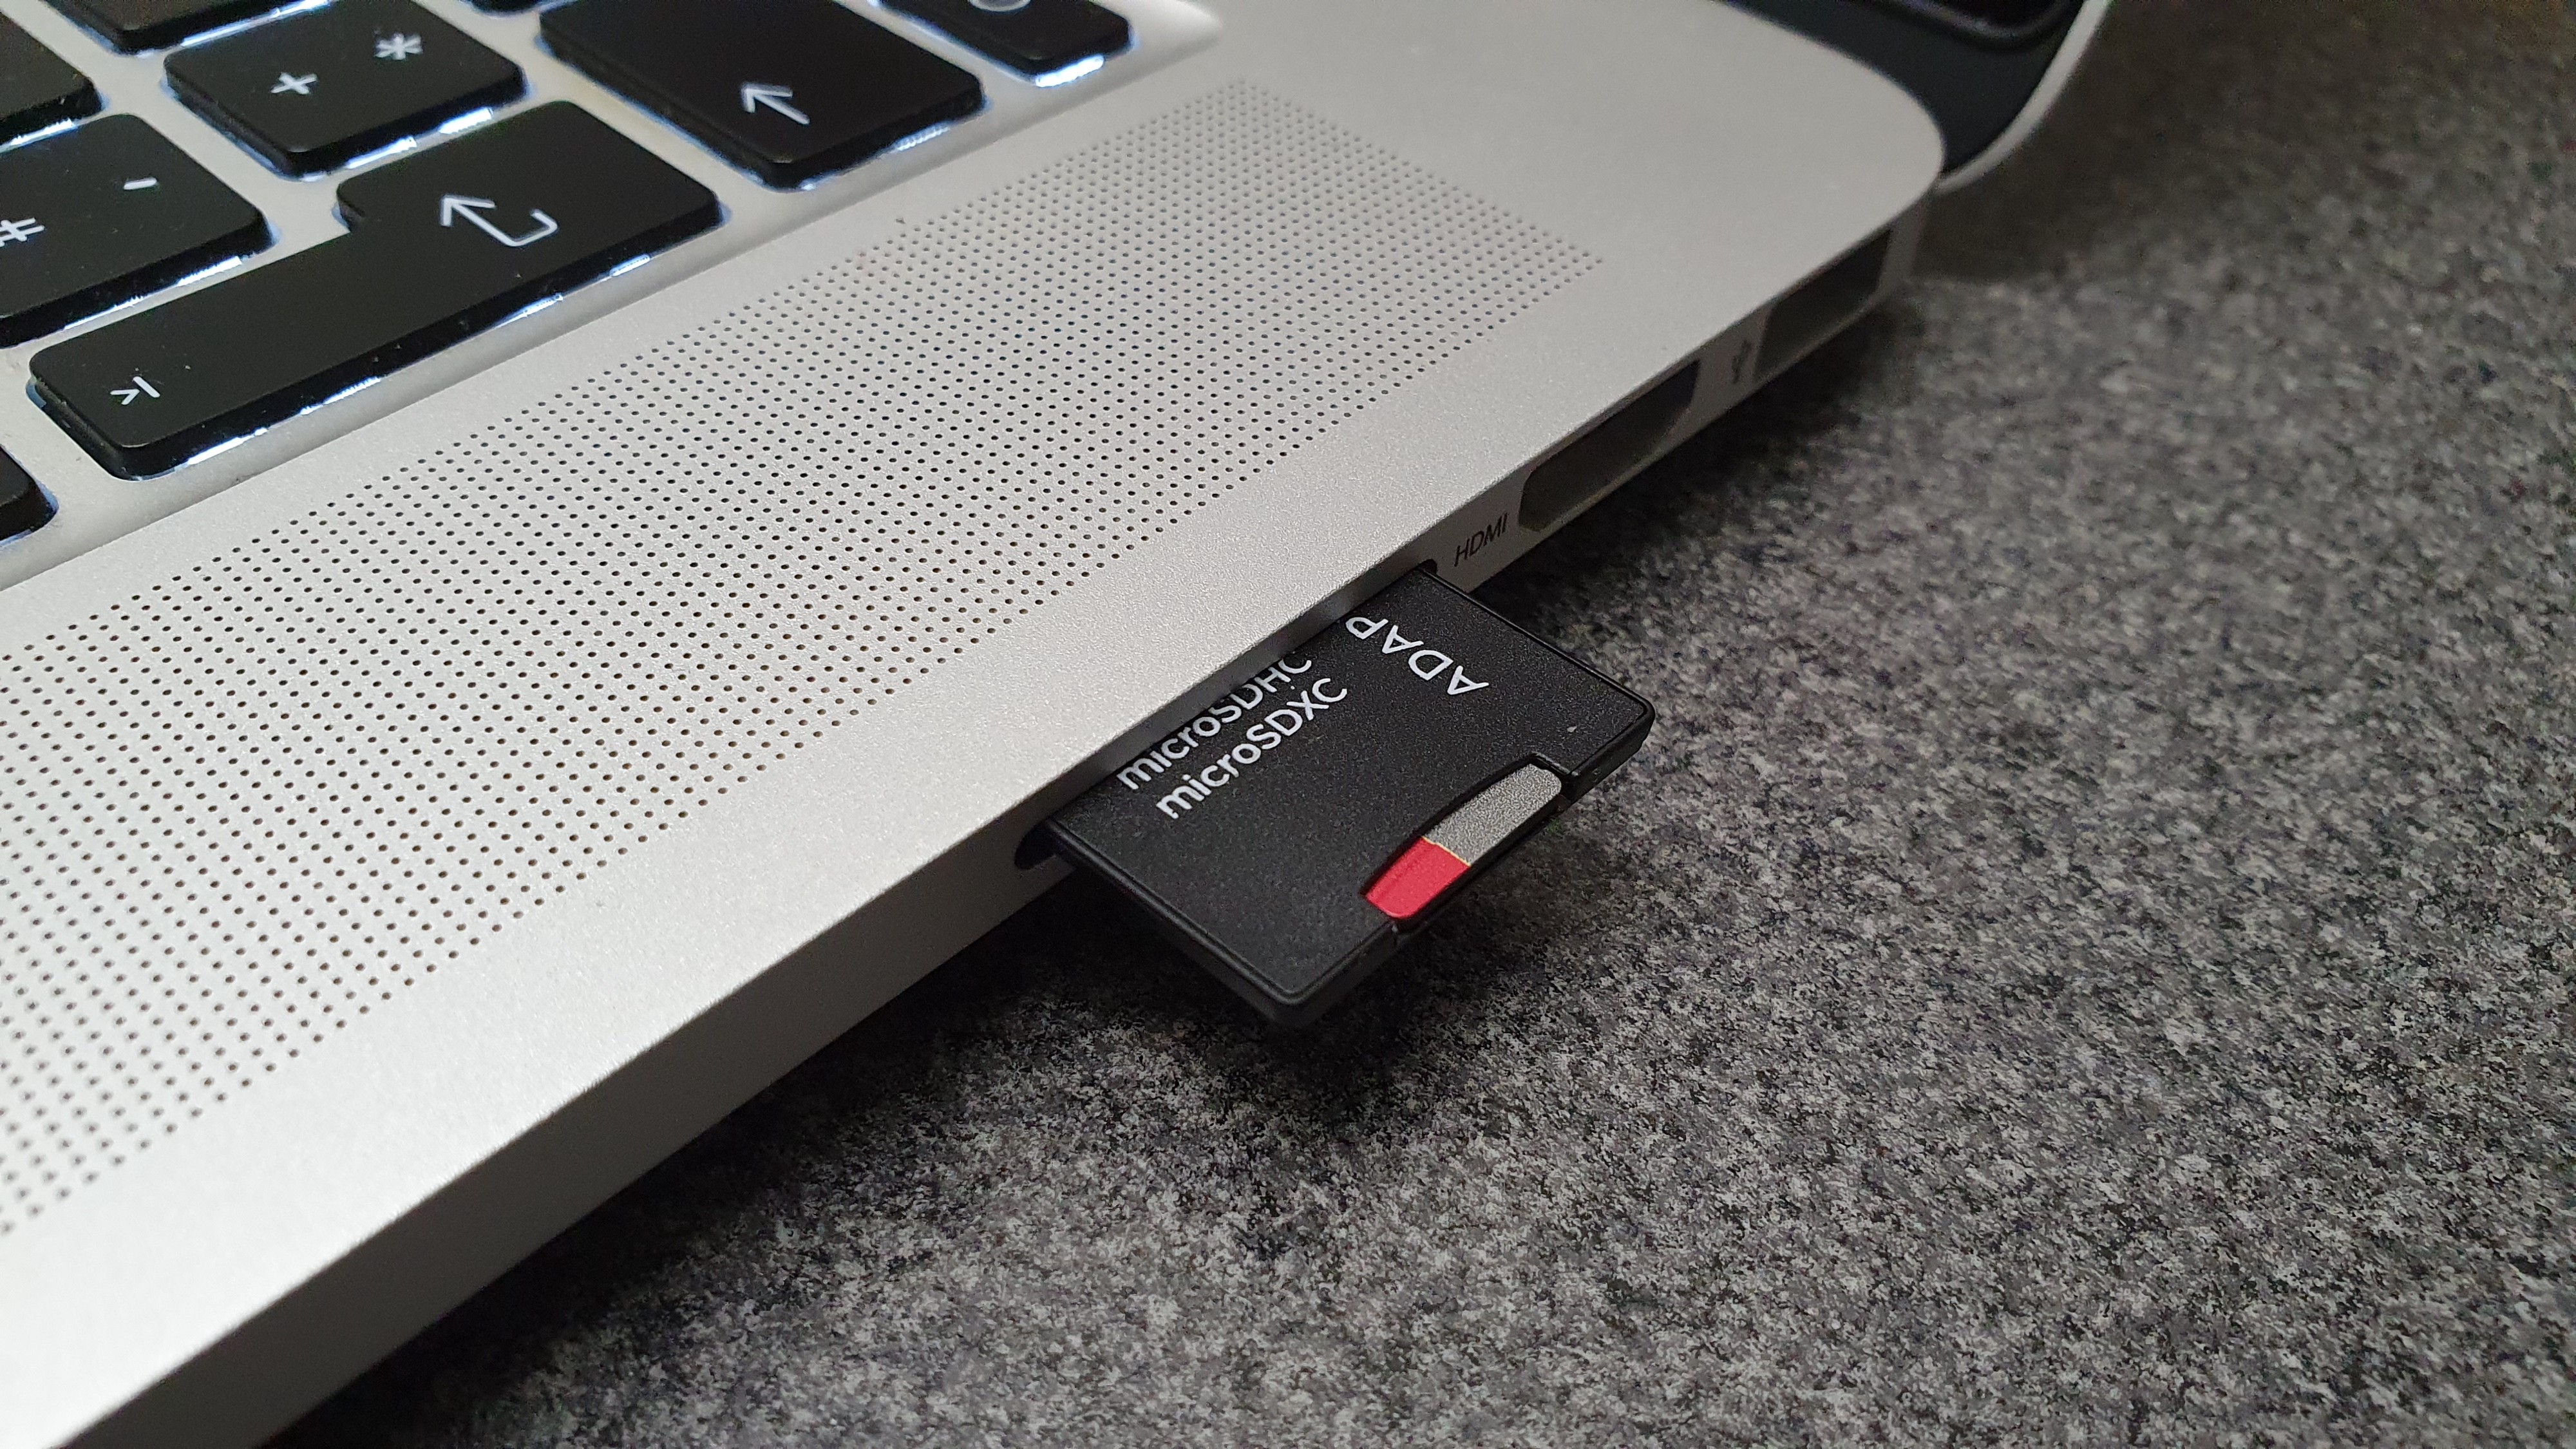 SD card slot on a MacBook Pro
It is up to you how you want to flash your SD card. If you are more comfortable with a graphical environment that is easy to use, then Etcher is a good choice.
balenaEtcher ? Flash OS images to SD cards & USB drives
Electron is based on Gtk2, which can?t run natively on Wayland. Fortunately, the XWayland Server provides backwards?
www.balena.io
Using Etcher to flash the SD card
After downloading and installing Etcher, start Etcher with the SD card plugged into your computer.
The first screen you will encounter is the following where you can select the image that you want to flash onto your SD card.
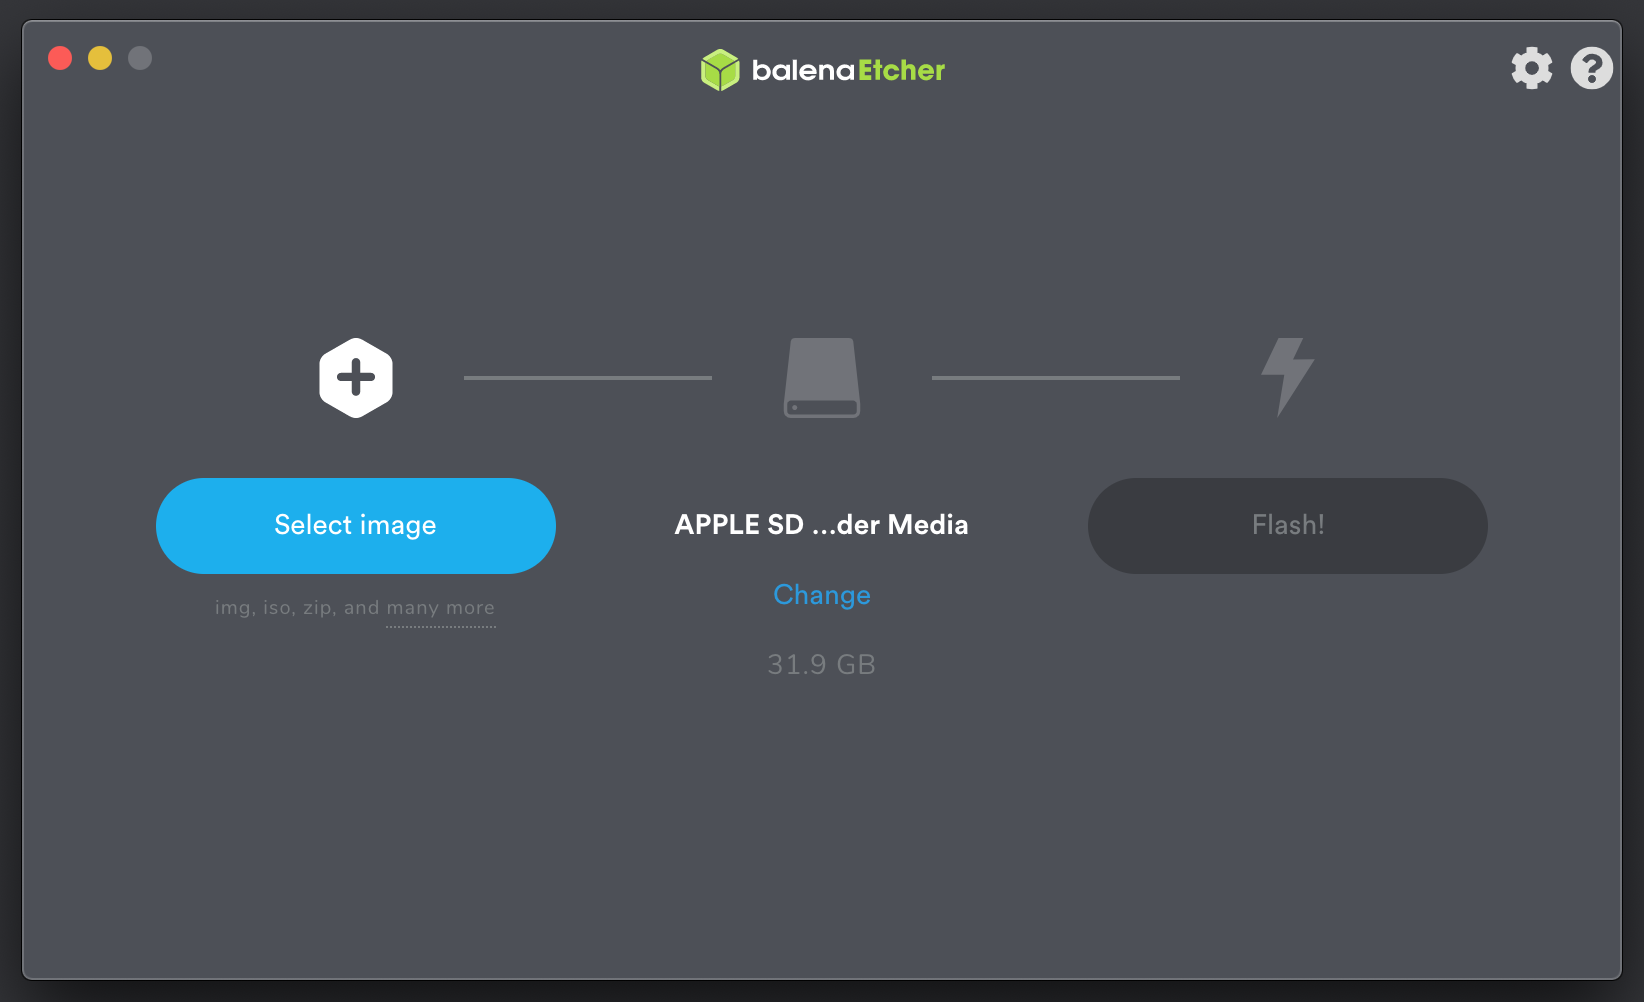 Etcher ? Select image
Pressing the ?Select image? button on the left will open up your file browser where you can select your image. Entschuldigung for the german locale!
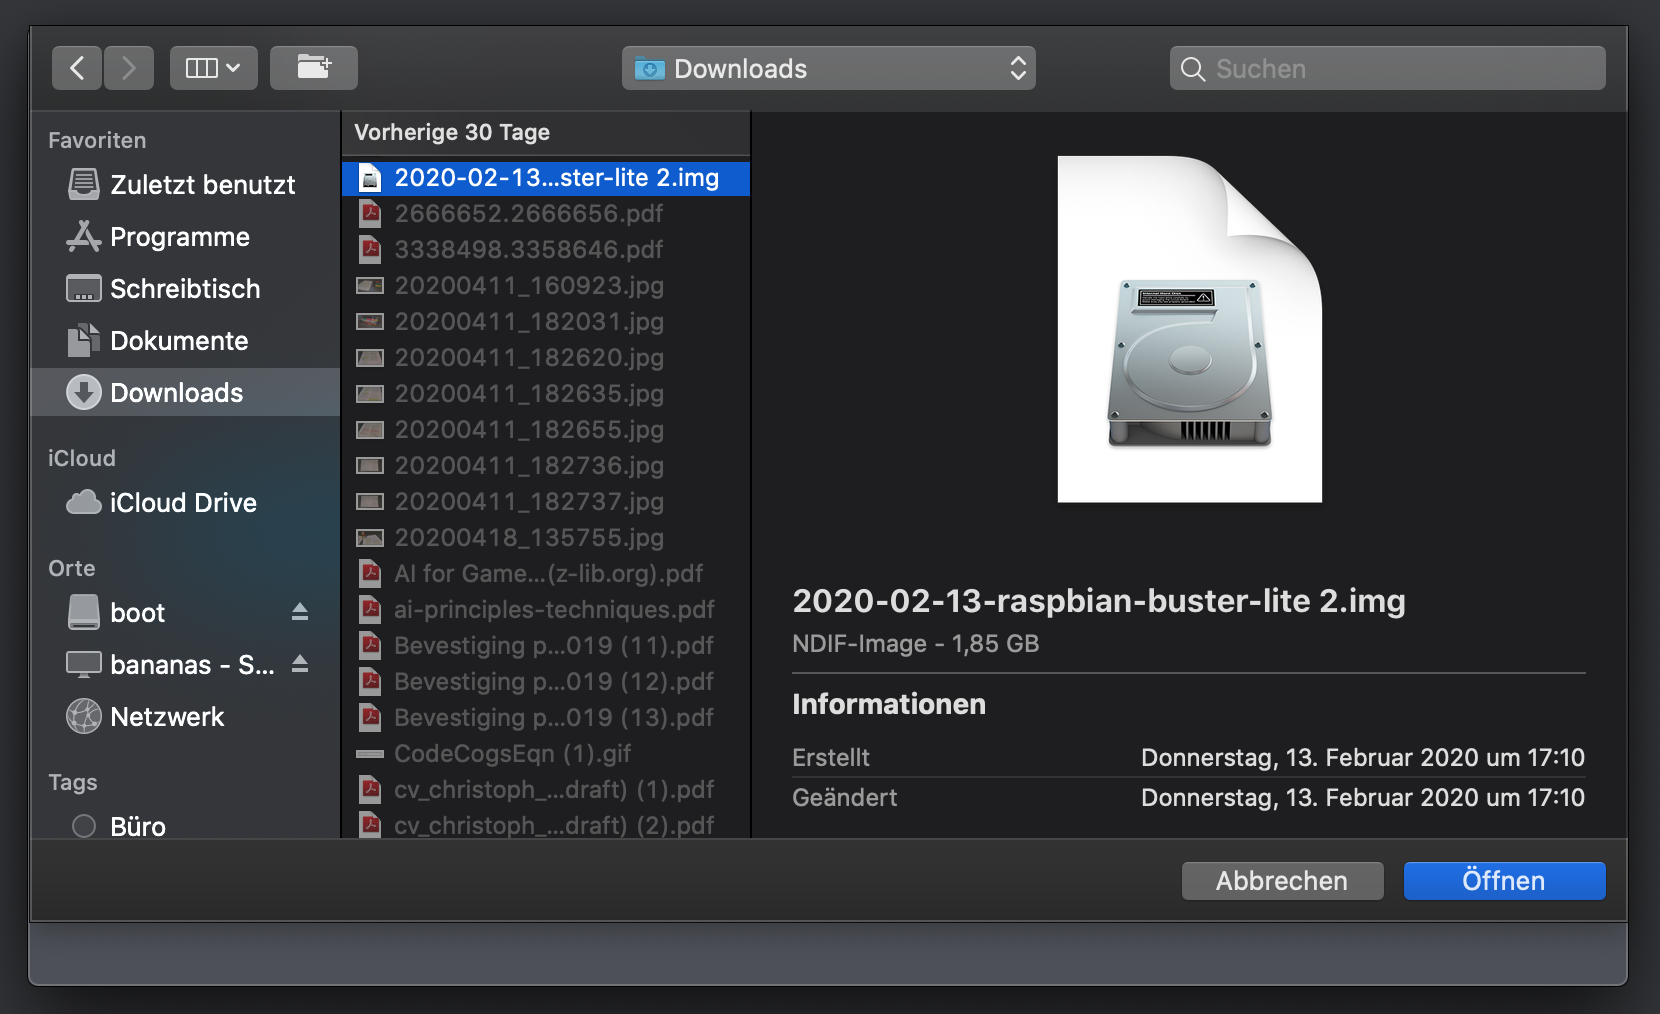 Etcher ? Browse through your files to select the image
As soon as you selected your image and confirmed to use it, Etcher will automatically select the SD card for you in the middle of the screen. A size of 31.9 GB is a good indicator that you don?t accidentally flash your harddrive.
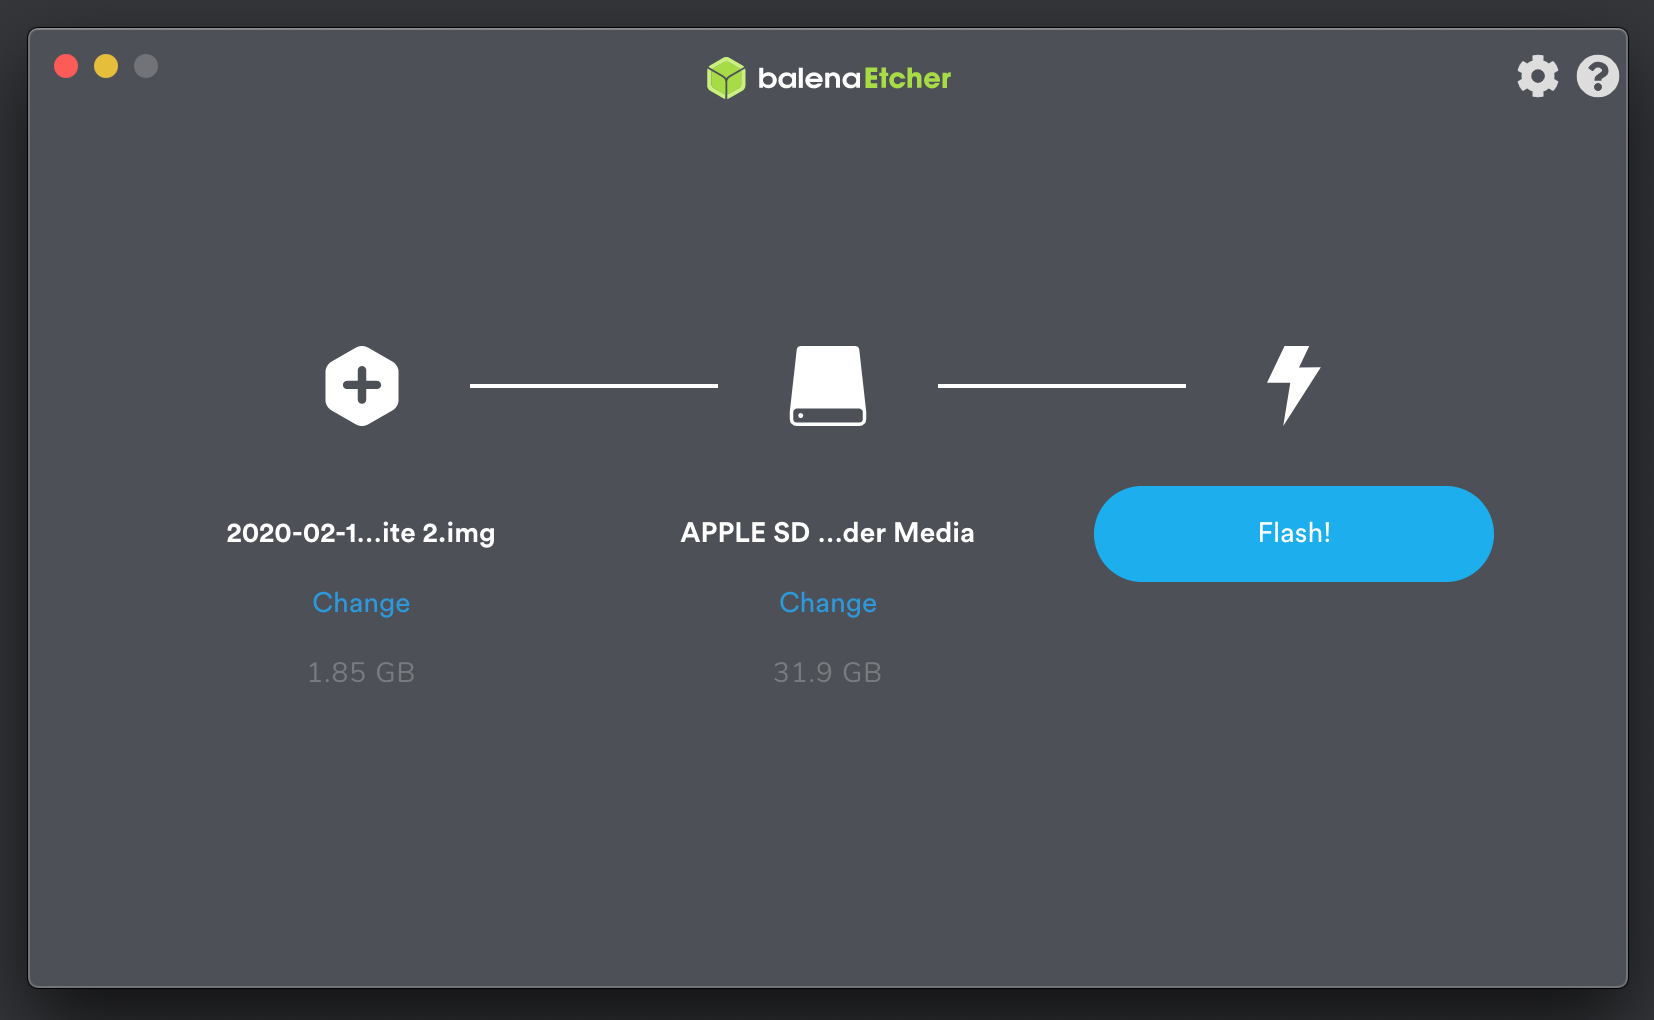 Etcher ? Automatically selected the SD card
If you have other SD cards plugged into your computer, it is also possible to select another one by clicking on the ?Change? link in the middle.
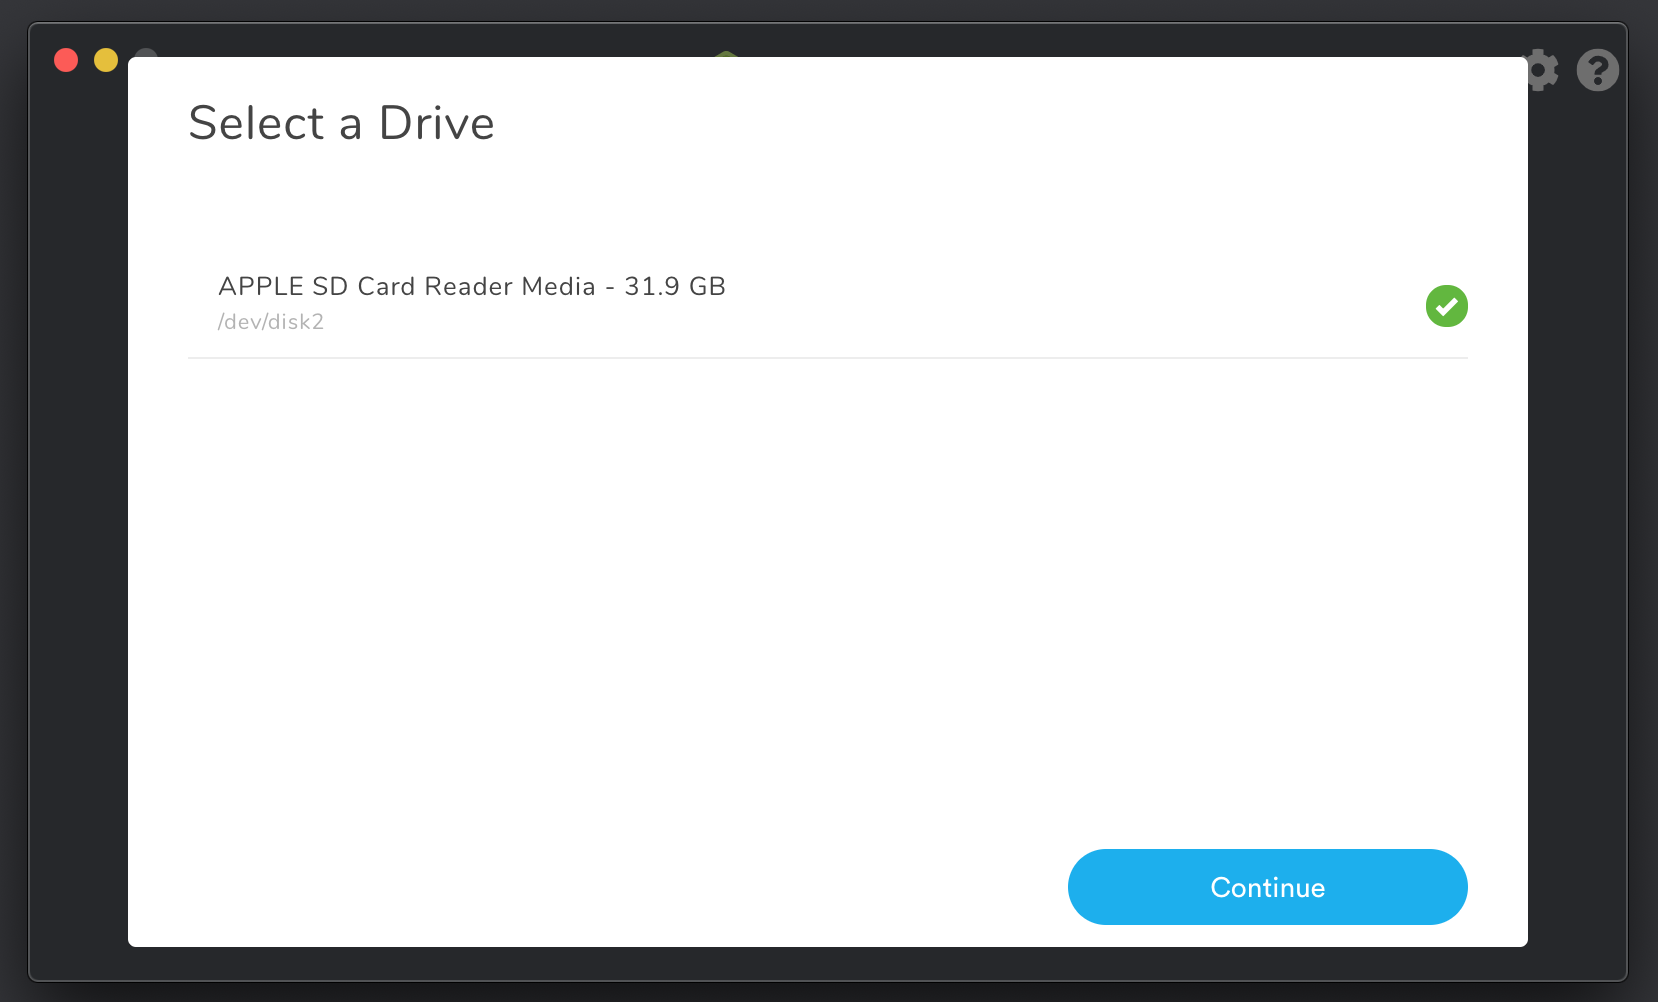
Since I only have one SD card plugged into my Mac, Etcher only gives me one choice here.
When you are all set, press the ?Flash!? button on the right. Etcher will ask for your root/administrator password before it actually flashes your card.
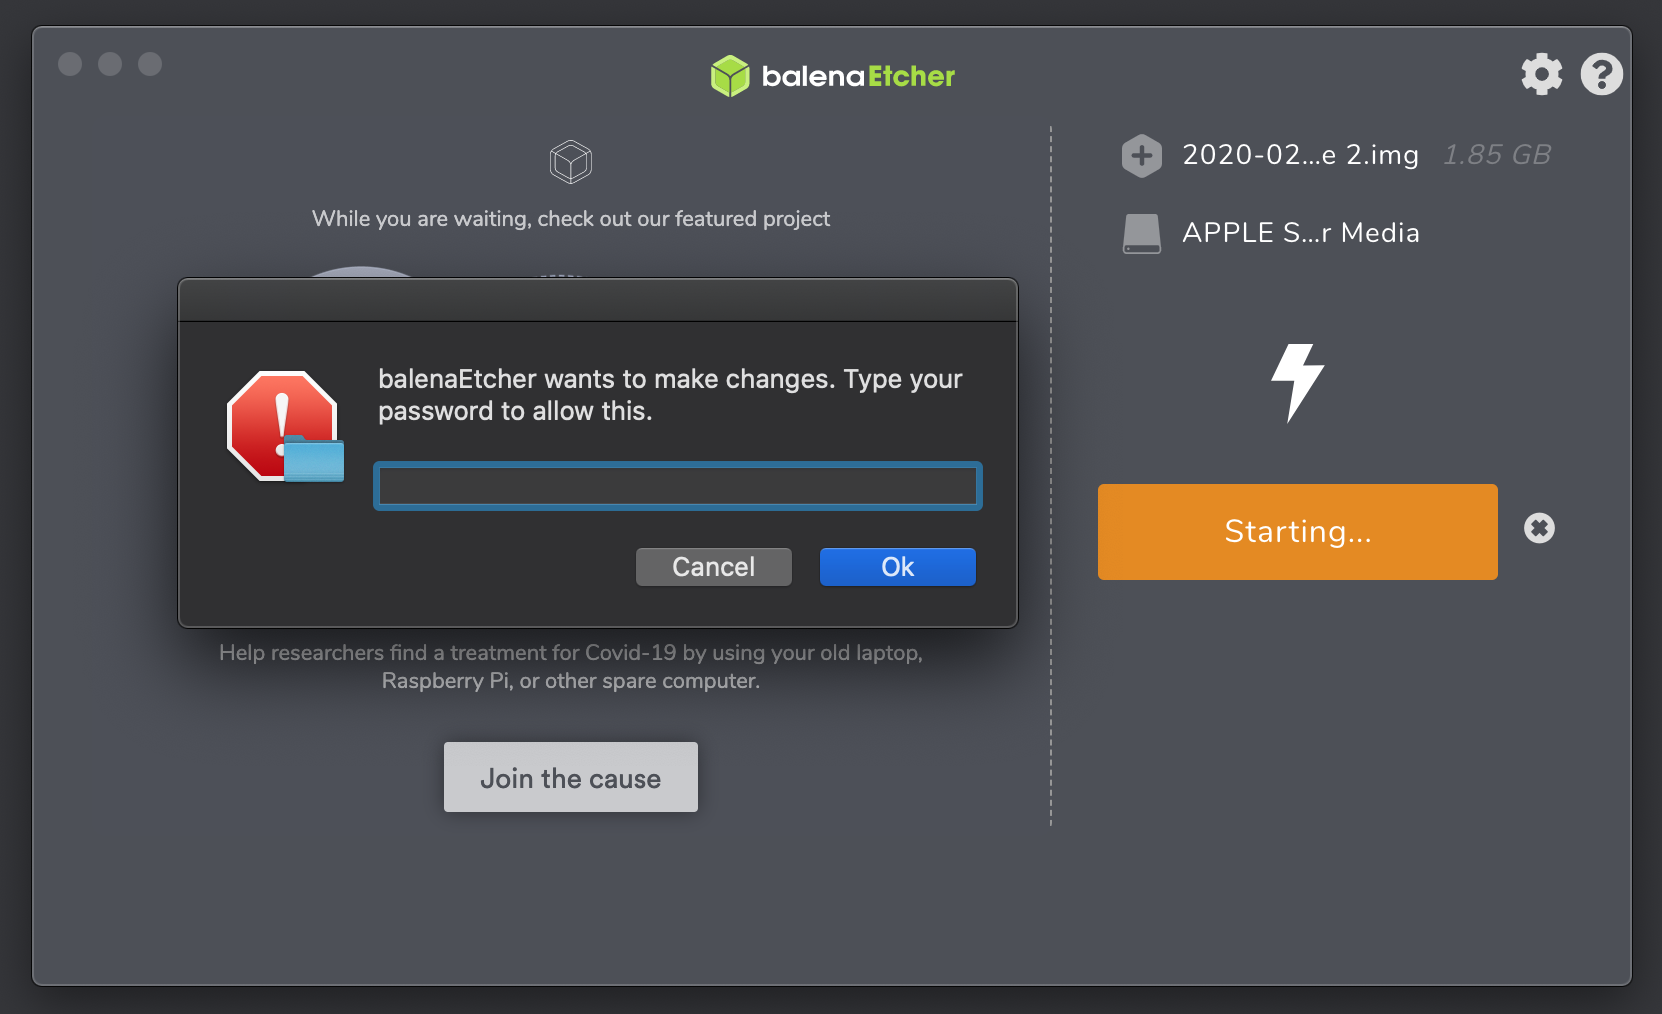 Etcher ? Asking for root/administrator password
Etcher starts flashing your card after confirming the prompt with your password.
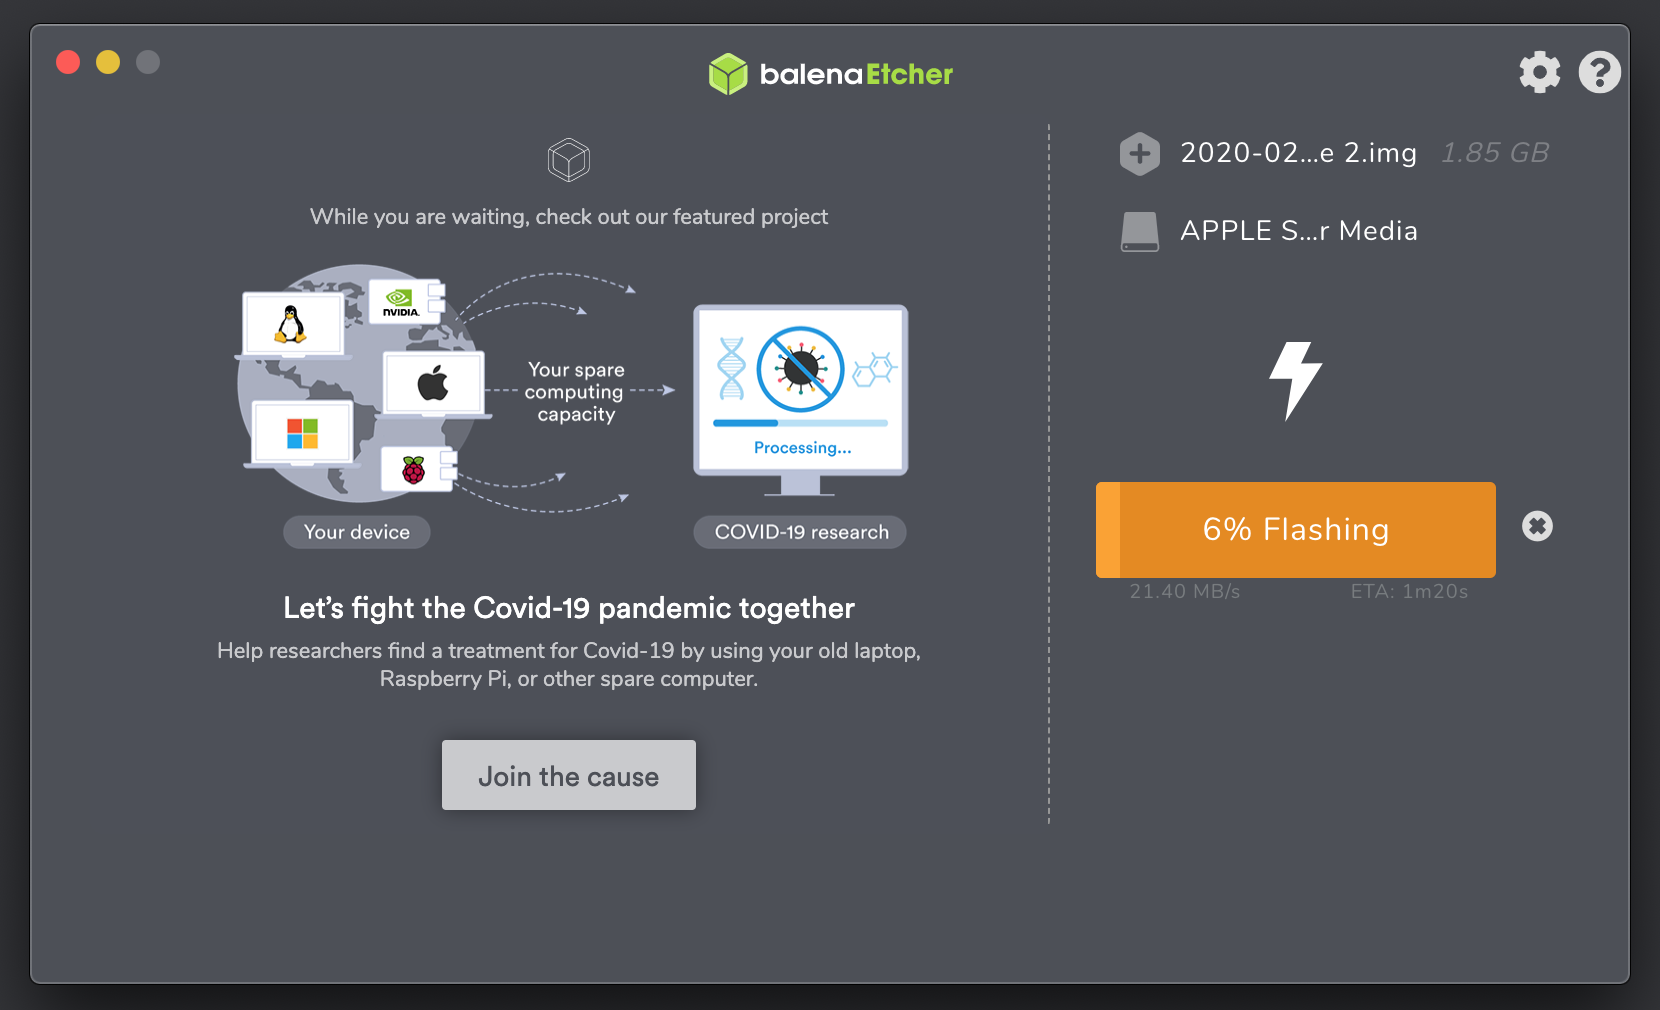 Etcher ? Flashing the SD card
The last step involves a validation process to check if the image on the SD card is still in a valid state.
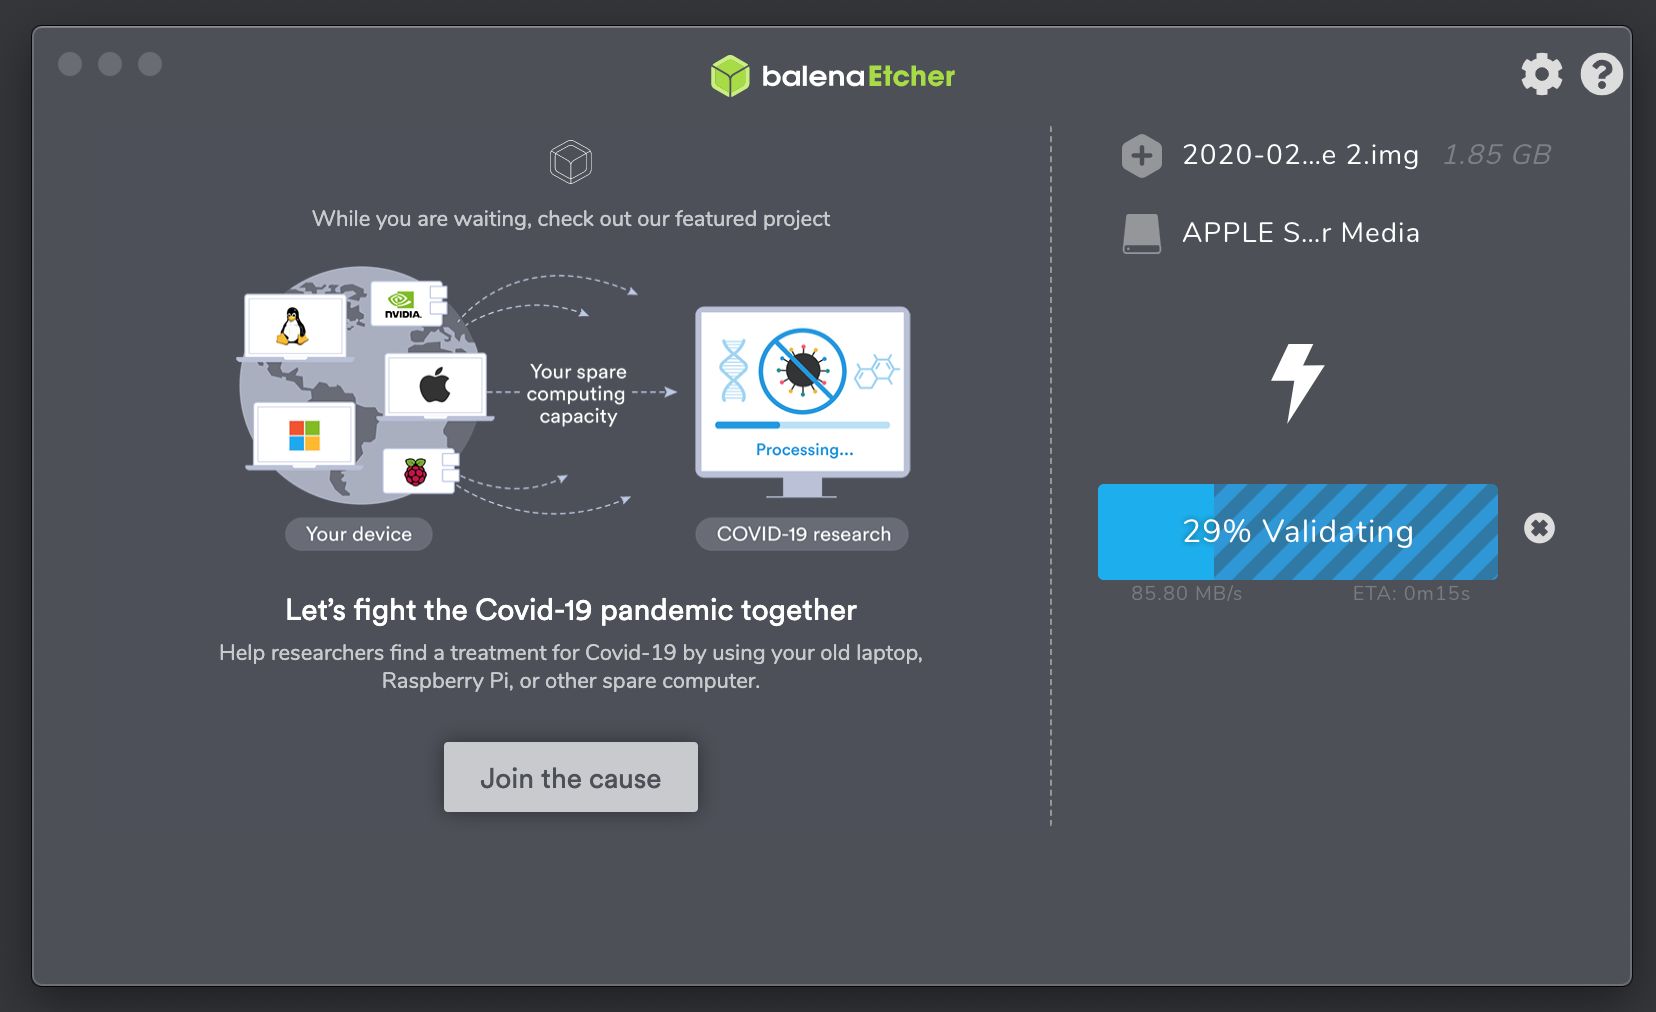 Etcher ? Validation process
Congratulations! You just flashed your SD card with Etcher! You can now remove your SD card and put it into your Raspberry Pi.
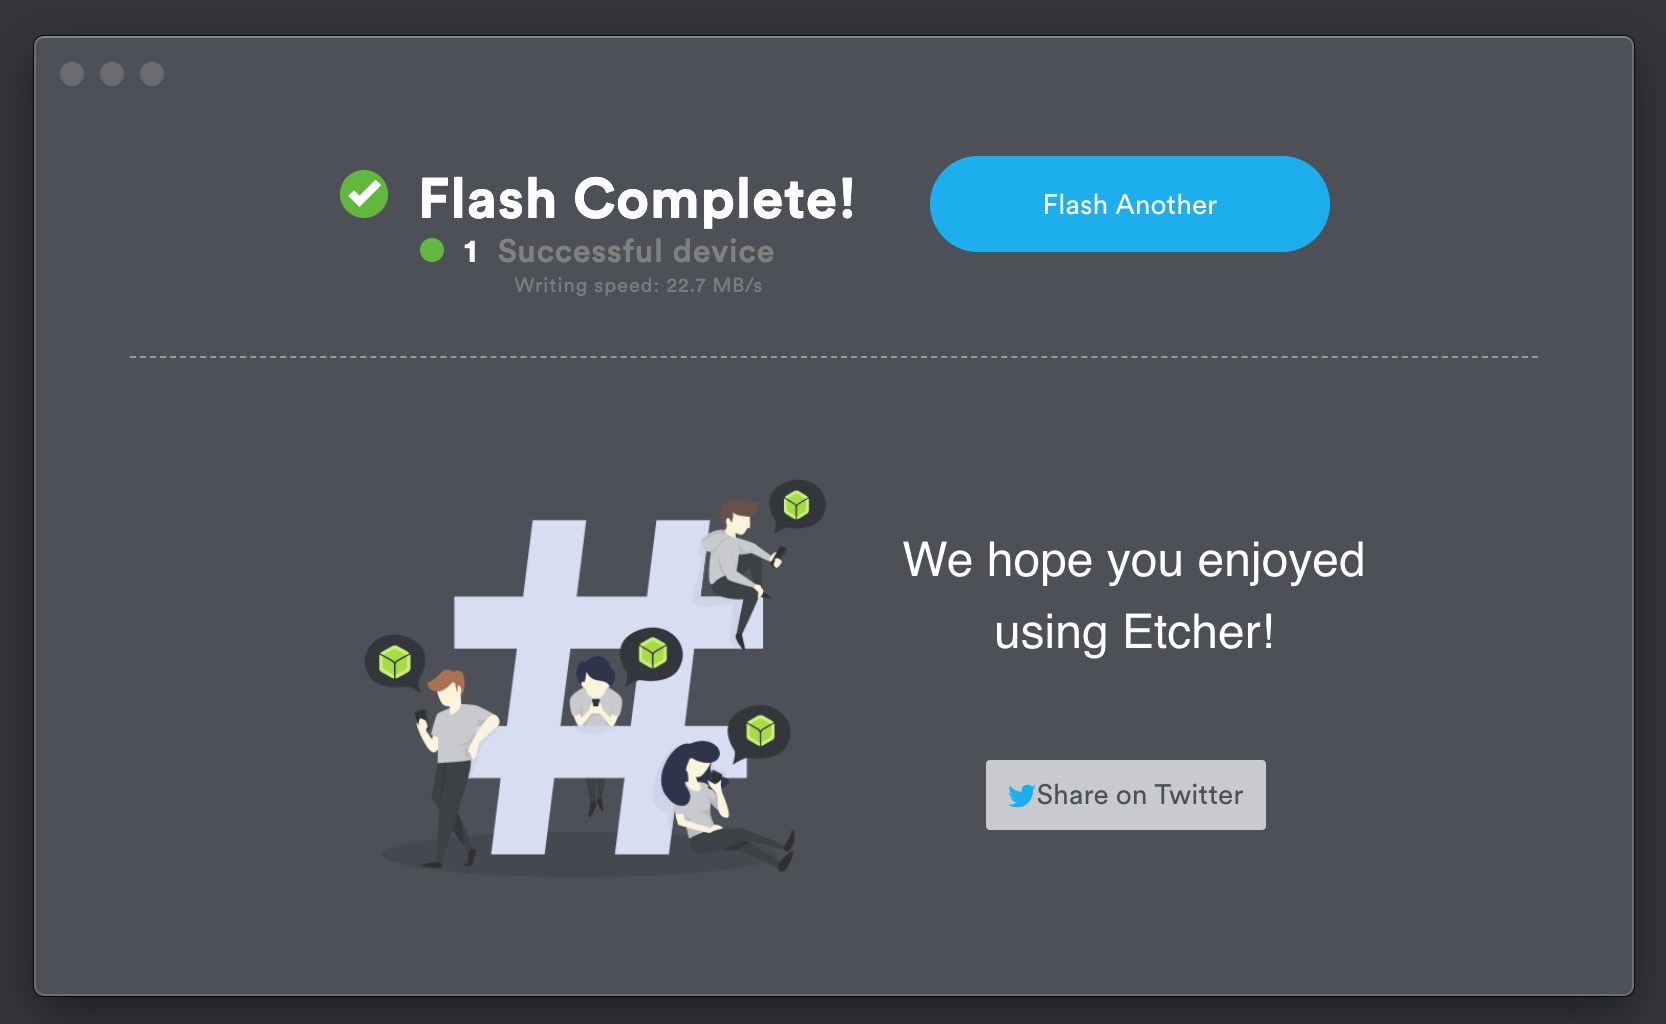 Etcher ? Flash Complete!
Using the dd command to flash the SD card
Feel free to skip this step if you want to use Etcher instead!
Since I don?t like to install additional software when I can already get the job done via terminal, I will resort to the old-school dd command on my Mac.
Typing in the following commands should produce output like you can see in the terminal session below.
 dd ? Fast version with /dev/rdiskX (81 seconds)
Now it?s your turn! Open up your terminal and browse to the directory where you saved your Raspbian image. It?s probably located in your Downloads folder.
Type in:
diskutil list
This will show all disks on your machine. Look for your SD card by inspecting the different sizes of your disks. Your SD card is probably listed under /dev/disk2.
diskutil unmountdisk /dev/disk2
This will unmount the disk so you can actually flash it.
For the next step you have to be absolutely certain that /dev/disk2 is actually your SD card because otherwise you will just overwrite your hard drive. Point of no return!
Navigate to the location where you stored your image and type (with your values):
sudo dd bs=1m if=2020?02?13-raspbian-buster-lite.img of=/dev/rdisk2
When the dd command is done flashing the SD card, you can remove the card and put it into your Raspberry Pi. Be patient. The dd command can take some time.
By the way, if you wonder why I use ?of=/dev/rdisk2? instead of ?of=/dev/disk2?, then the following link might be of interest to you.
Why is ?/dev/rdisk? about 20 times faster than ?/dev/disk? in Mac OS X
The accepted answer is right, but it doesn?t go into much detail. One of the key differences between /dev/disk and?
superuser.com
Step 2: Start the Raspberry Pi and log in
When you assembled everything, it is time to start your Raspberry Pi. Plug in all the necessary cables and the power supply. After an initial boot sequence and seeing cryptic messages flowing through the screen, you should see a prompt asking for a username and password at the very end.
- Username: pi
- Password: raspberry
Type in the default username/password combination as above and you should be able to see something similar like the screenshot below.
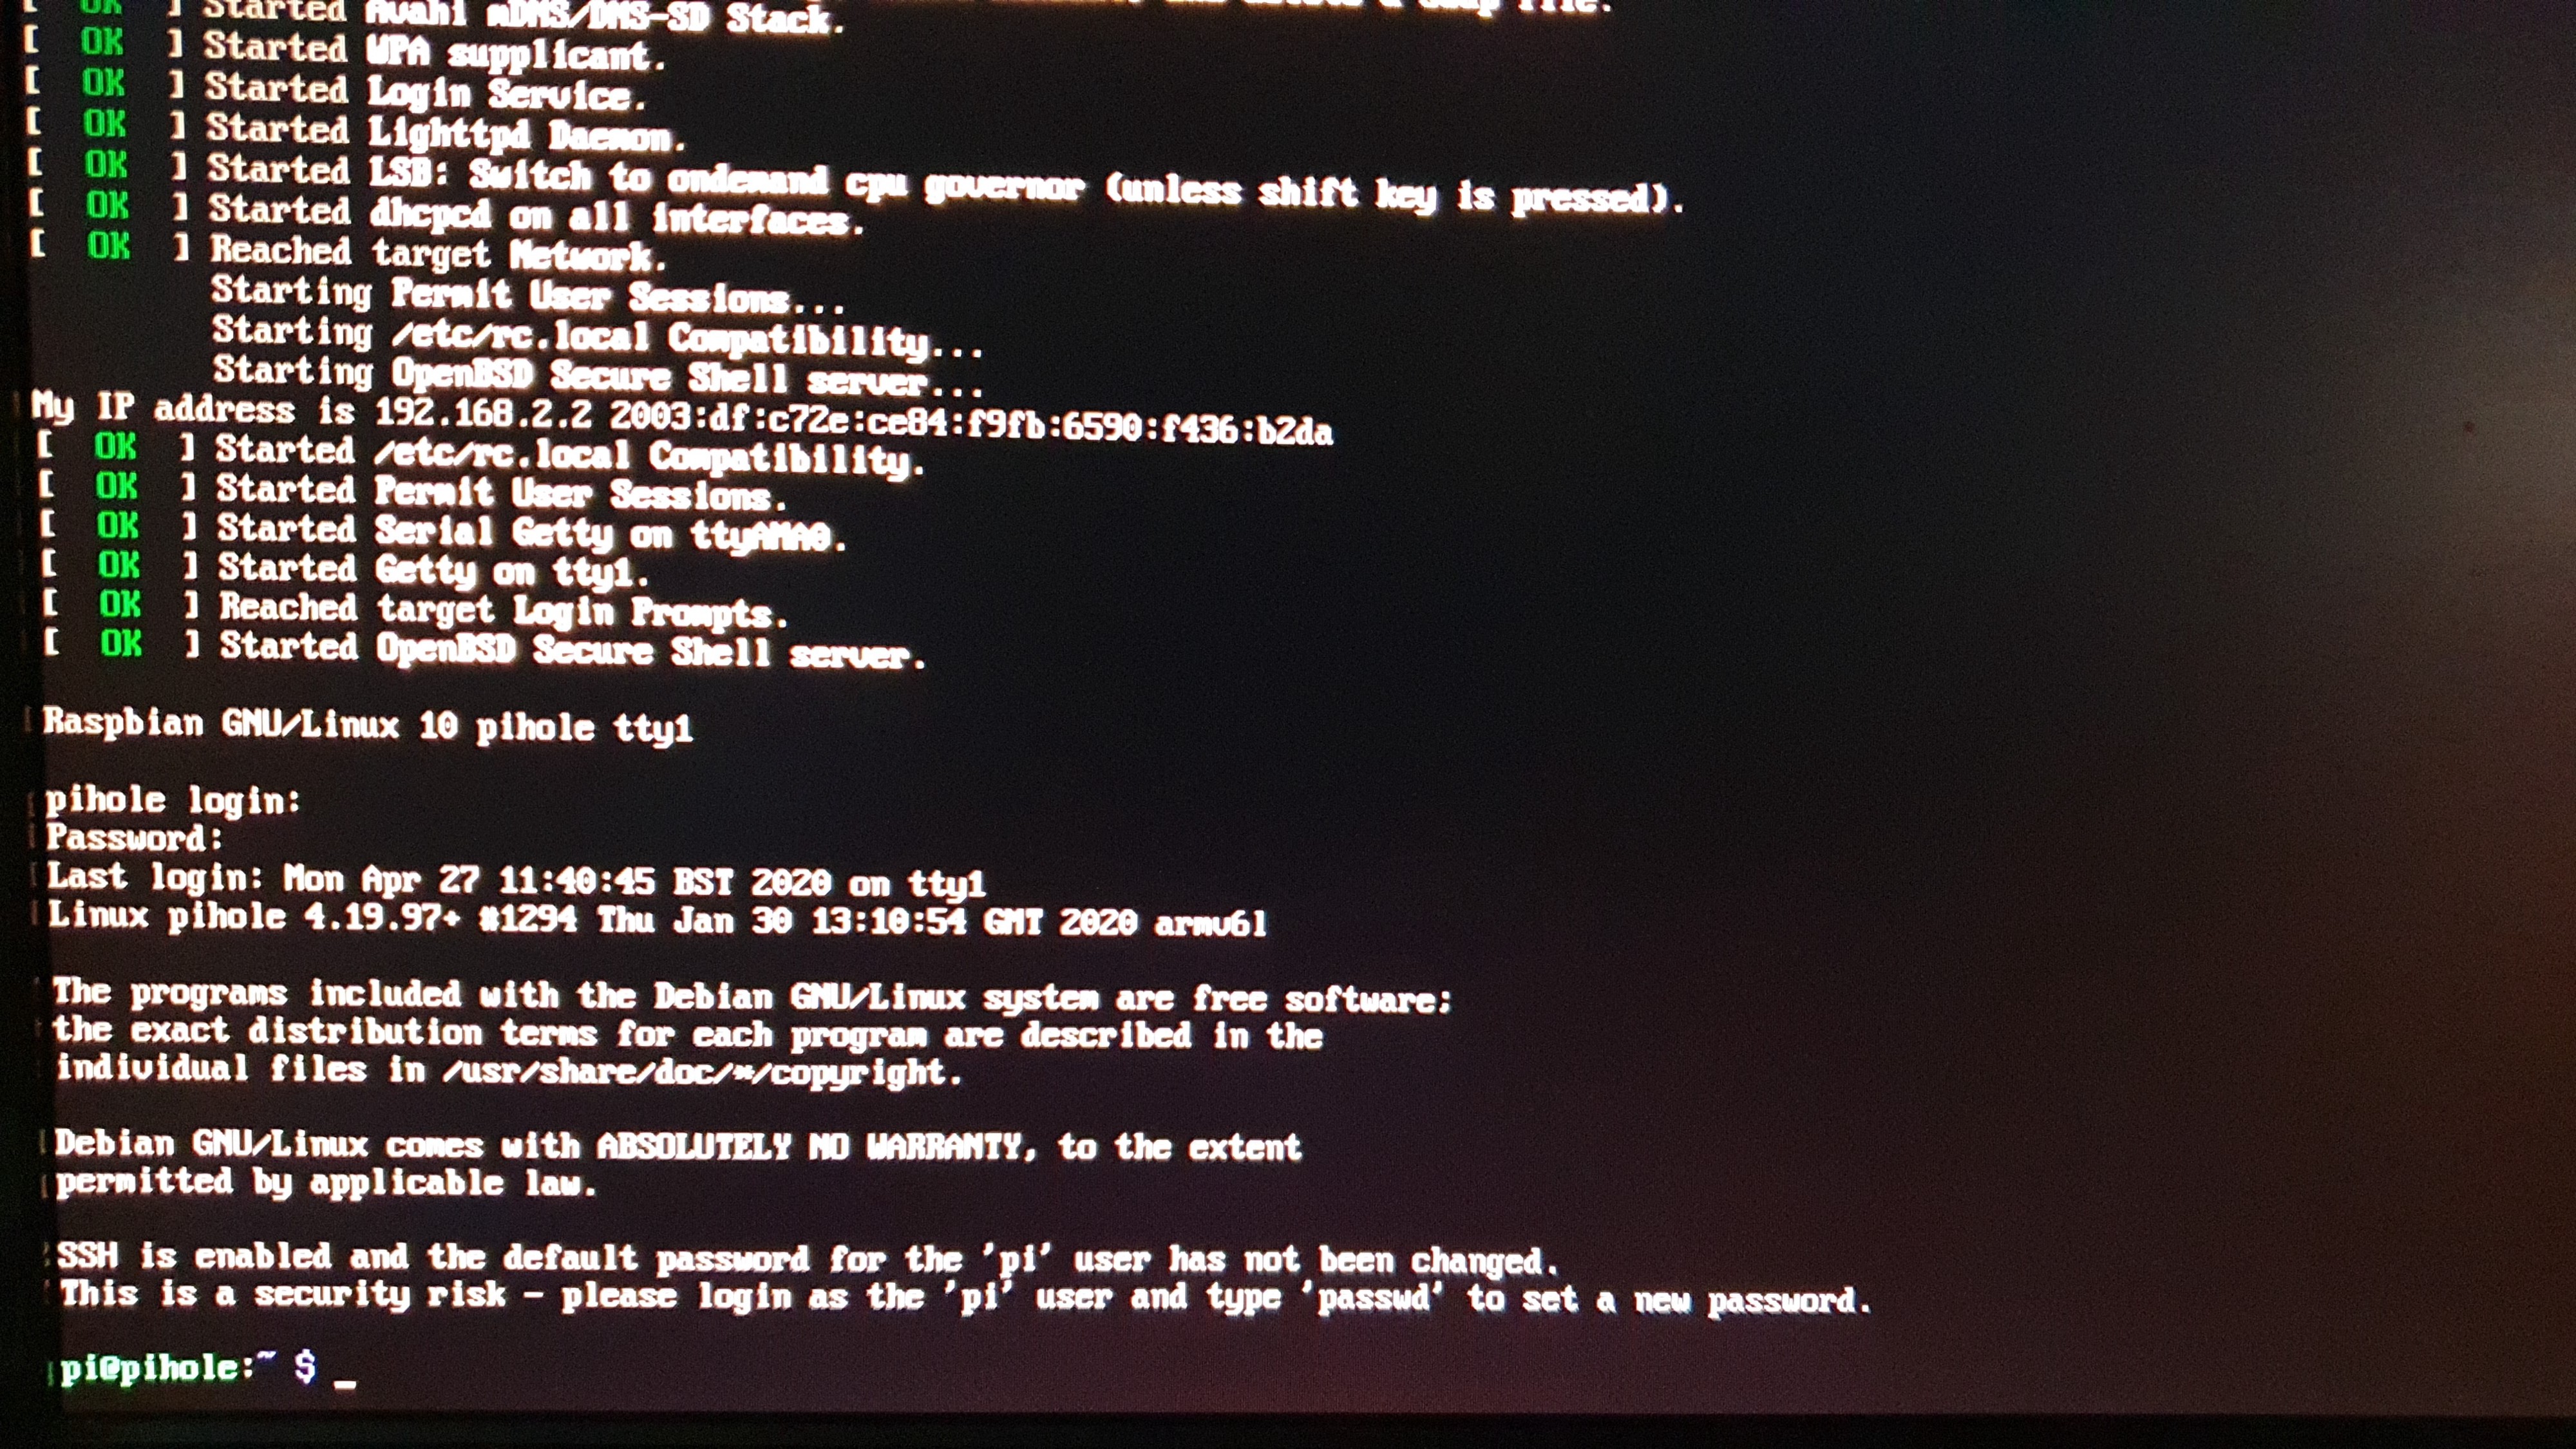 Successfully logged-in.
You successfully logged-in! Now it?s time to make some configurations to your Raspberry Pi.
Step 3: Basic configuration
We will do most of our configurations using a handy tool called ?raspi-config?.
sudo raspi-config
By executing this command, you can change all kinds of things in a very comfortable way. You can change the locale, keyboard layout, default password, and many more. By the way, changing the default password first is a good practice but I will leave this step to you.
Changing the hostname
We will start by changing the hostname of the Raspberry Pi. By default, the hostname is set to ?raspberrypi?. This is usually not a problem but because I have four different Raspberry Pi?s running on my network, I would like to be able to differentiate between them through their hostnames.
Therefore, execute ?sudo raspi-config? and follow the steps below.
 Change hostname
Set a static IP address
After successfully changing the hostname to ?pihole?, we will now give it a static IP address. We need this static IP in order to set Pi-Hole as a DNS server later on. A dynamic IP would be cumbersome because then we would have to change our DNS server IP every time Pi-Hole gets a new IP by the router?s DHCP server.
To avoid any IP address conflicts, we will scan our network for IP addresses already used by other devices and then decide which IP we want to use for our Pi-Hole.
We can scan our network by using the arp command or using the nmap tool as shown below.
After we?ve chosen a suitable IP address for our Raspberry Pi (I use 192.168.2.2), we will be using nano to edit the DHCP client configuration file:
sudo nano /etc/dhcpcd.conf
Unfortunately, raspi-config is not intelligent enough to also adjust our hostname in this file. Therefore, we have to adjust the hostname at the top of the file to ?pihole? manually.
# Inform the DHCP server of our hostname for DDNS.pihole
Scroll to the end of the file and change the following lines according to your network setup for a static IP.
# Example static IP configuration:interface eth0static ip_address=192.168.2.2/24#static ip6_address=fd51:42f8:caae:d92e::ff/64static routers=192.168.2.1static domain_name_servers=192.168.2.1
Enable SSH server
Since I don?t want to walk all the way down to the basement every time I make a little change to the Raspberry Pi, I enable the SSH server to log in remotely. We will be using our handy ?raspi-config? tool again as shown below.
 Enable SSH server
After the change has been made and a reboot has been executed as a precaution, we should be able to log in remotely. Open up your terminal and type in:
ssh [email protected] // change IP address according to your setup
If your operating system does not include the ssh command, then you can use another SSH client like PuTTY.
 Login via SSH
Done! Now you can log in remotely and comfortably from your couch using your Laptop.
Step 4: Installing Pi-Hole
After the basic configuration has been done, it is now time to actually install the Pi-hole software. The installation process is rather simple. All you have to do is to execute the following command to download the Pi-hole installation script and start the installation procedure.
curl -sSL https://install.pi-hole.net | bash
Executing this line should produce a similar result as below.
At some point during the installation, you will be confronted with some blue screens which are asking for your input. We will go through each screen step by step. Usually, you can use the default choices for each screen.
Here it says that it needs a static IP address. Luckily, we already configured that.
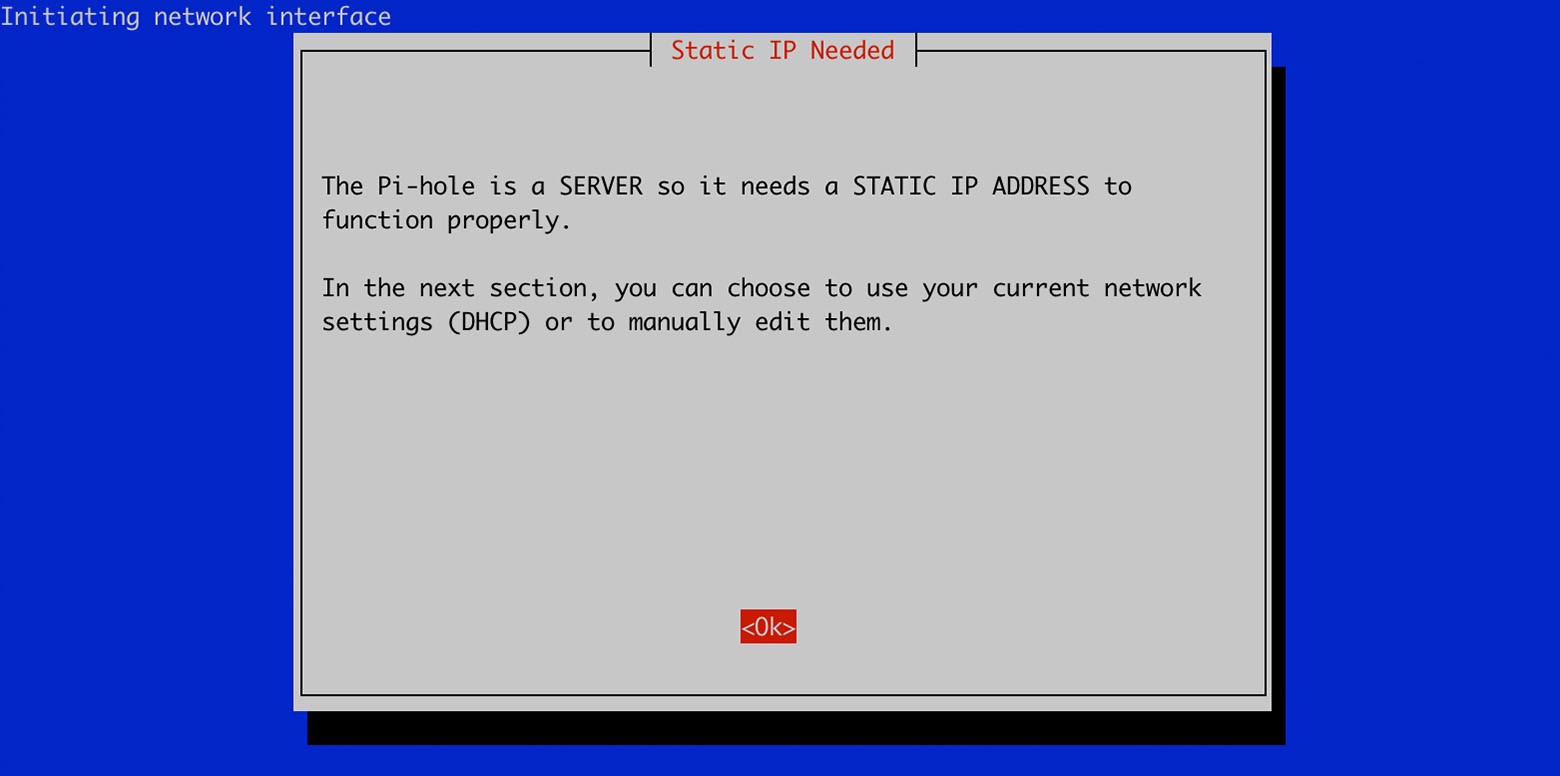 Static IP address
Here it is asking you which DNS server Pi-hole should use to resolve IPs/domains. Google is a solid choice.
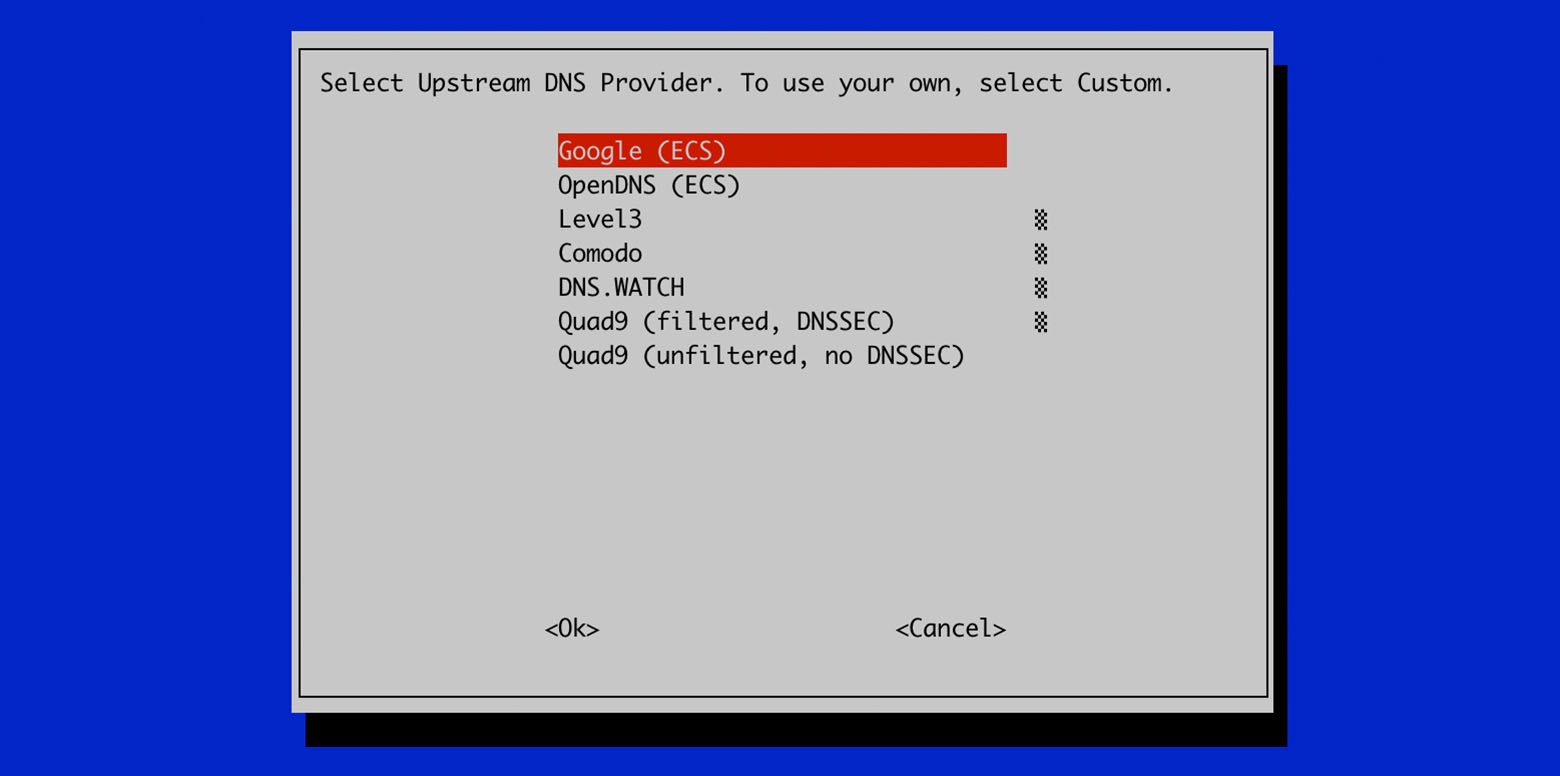 DNS provider
Since Pi-hole relies on lists with unwanted ad domains, we have to use some repositories from third parties that maintain these lists. By default, all repositories are activated and we can leave it like that.
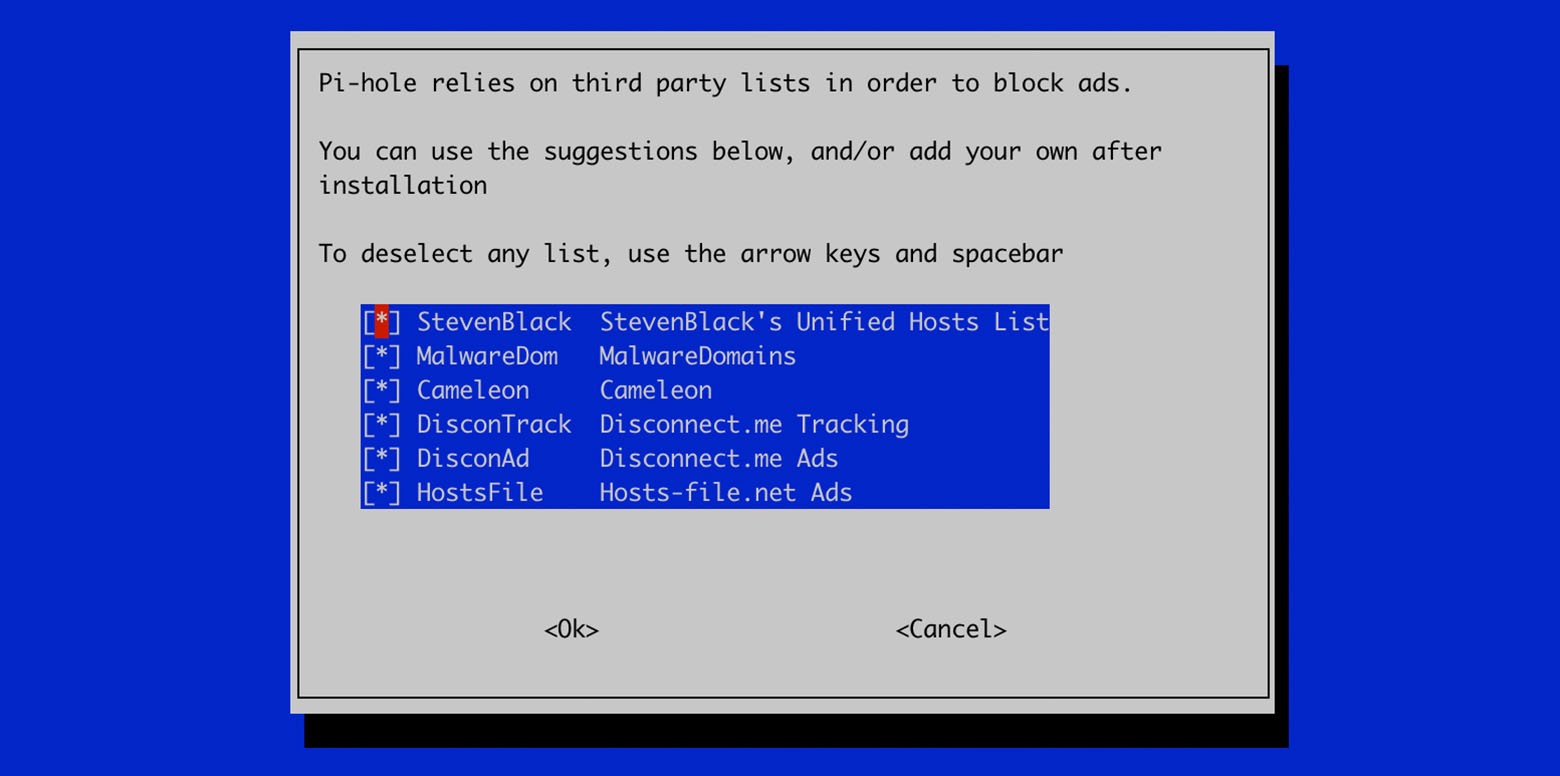 Blacklist repositories
Since we want to block unwanted ads regardless of the IP protocol version, we can leave it to both protocols activated by default.
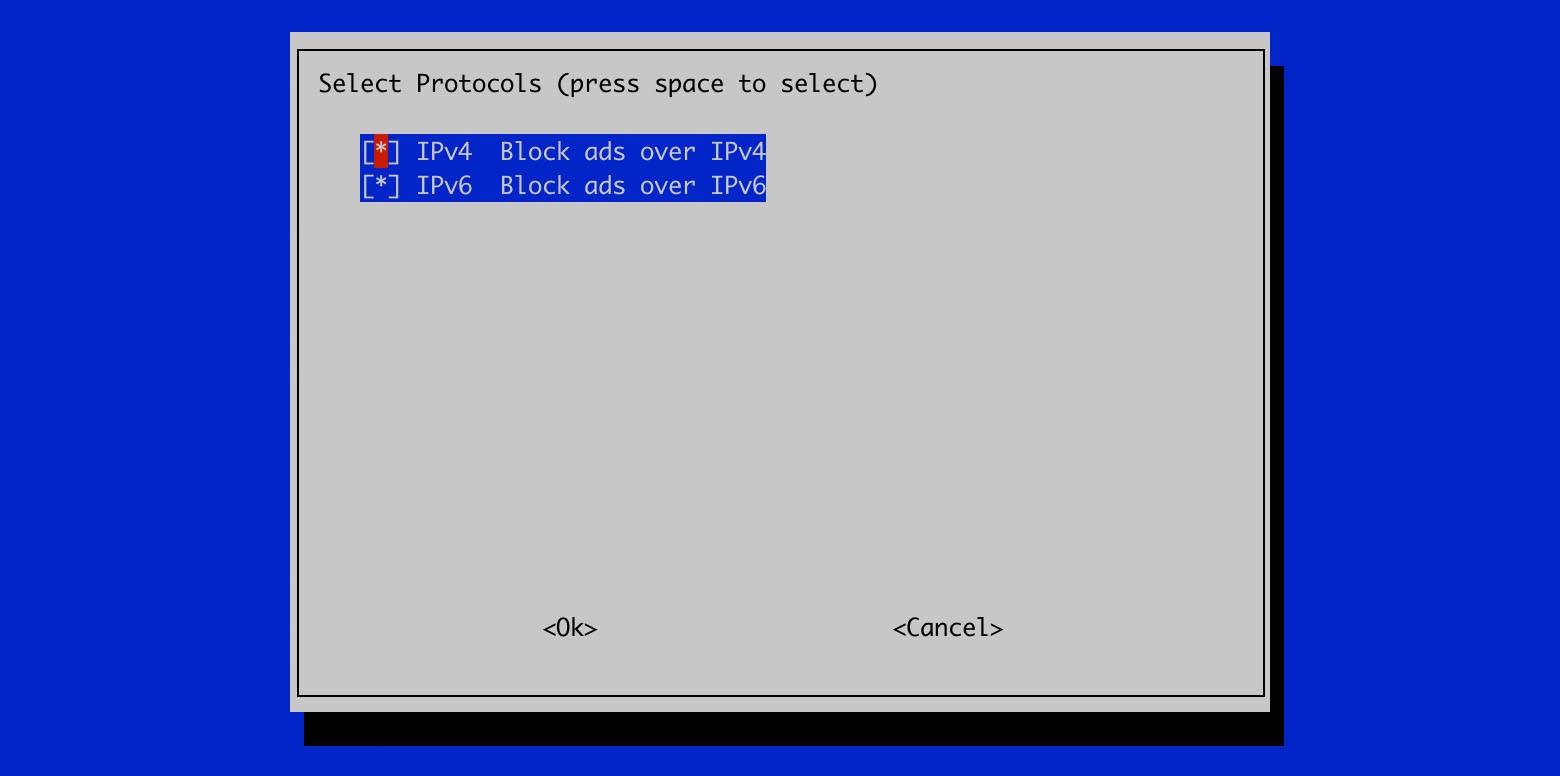 IP protocols
The IP address should be the static one you configured before for the Raspberry Pi. The Gateway is usually the IP of your router.
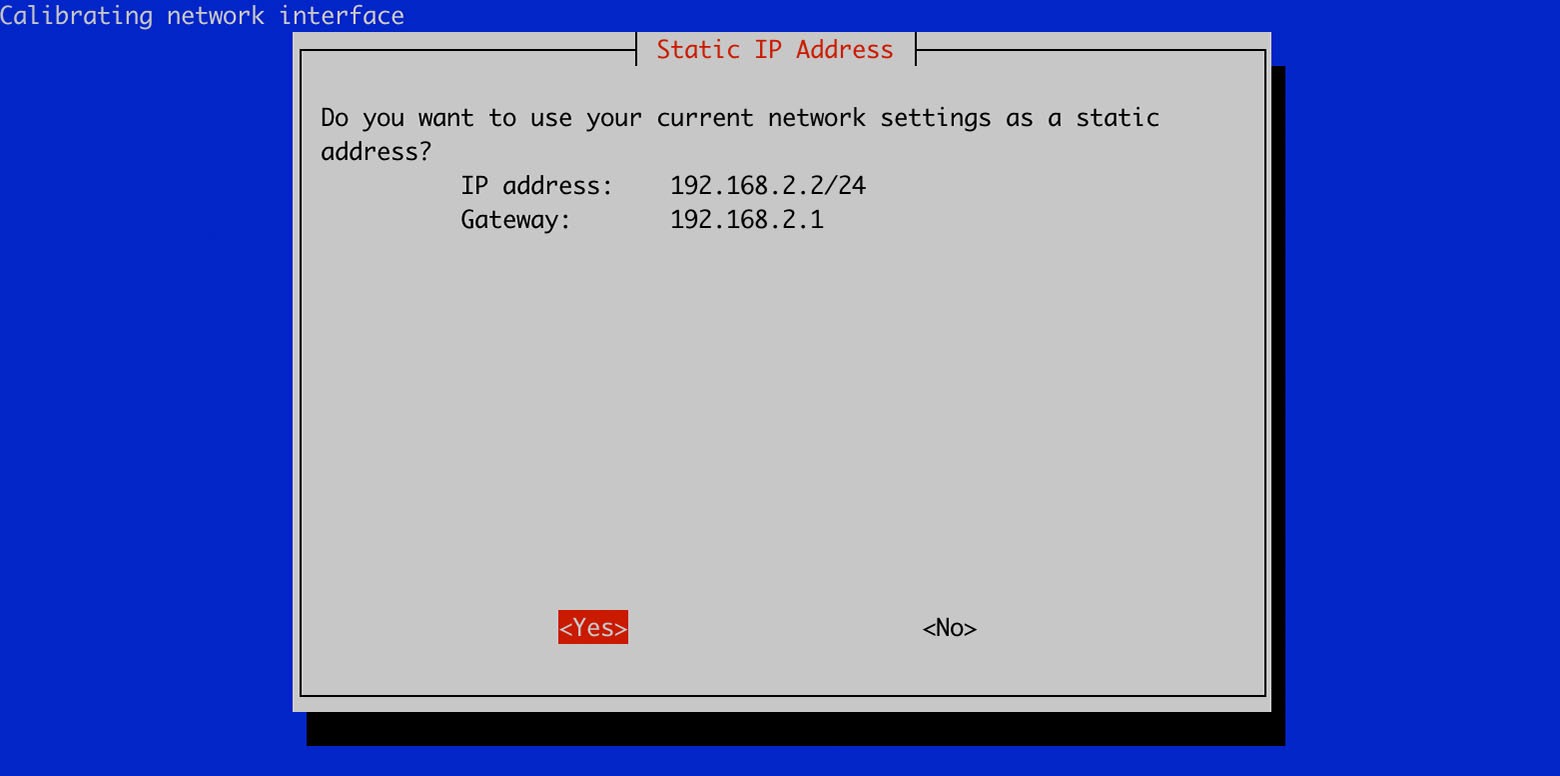 Static IP address. We already configured that before.
Yes, we want to install the web admin interface because we want to use the handy Dashboard later on.
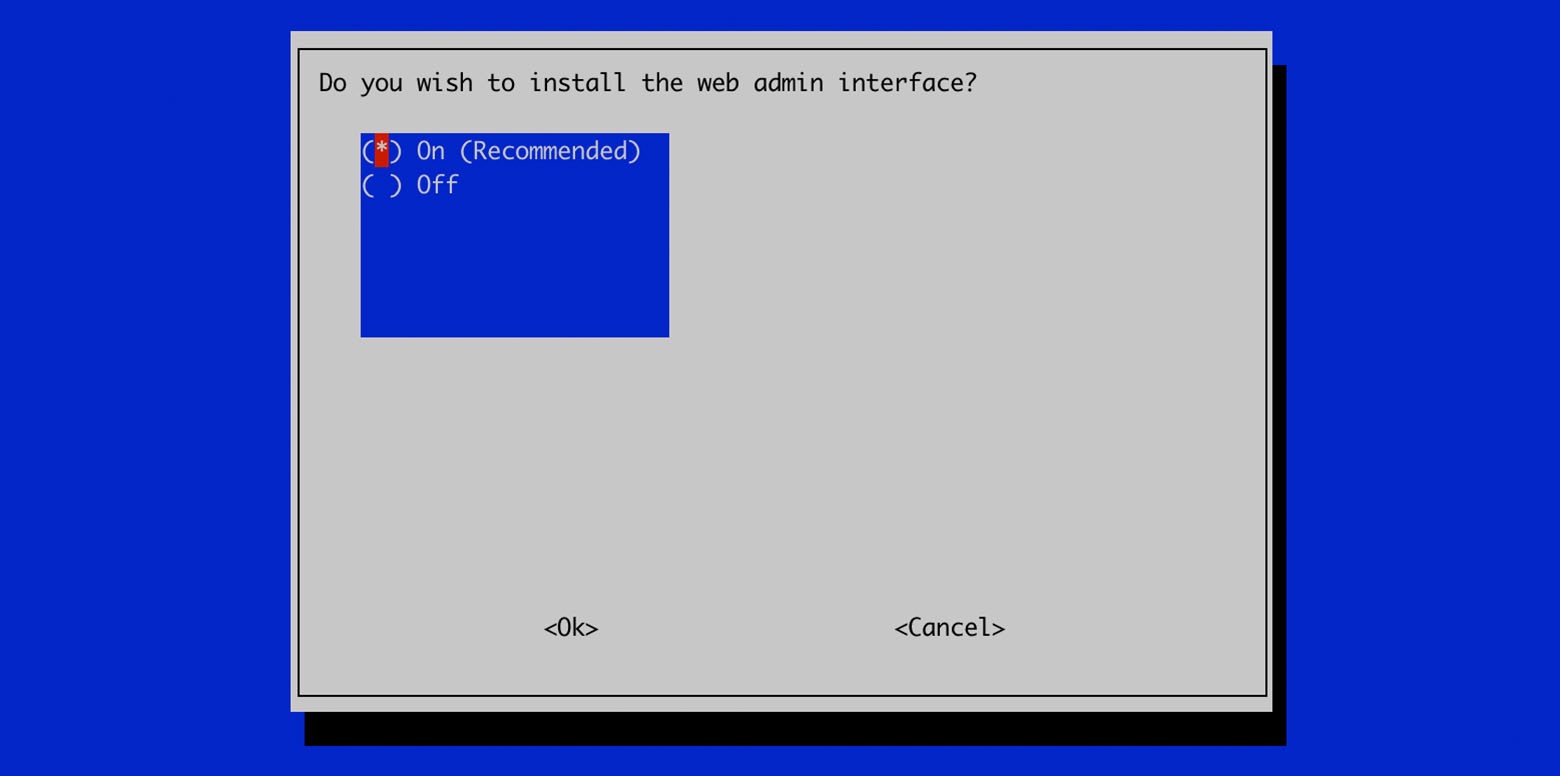 Web admin interface
Yes, we also want to install the web server. Otherwise we won?t be able to use the Dashboard.
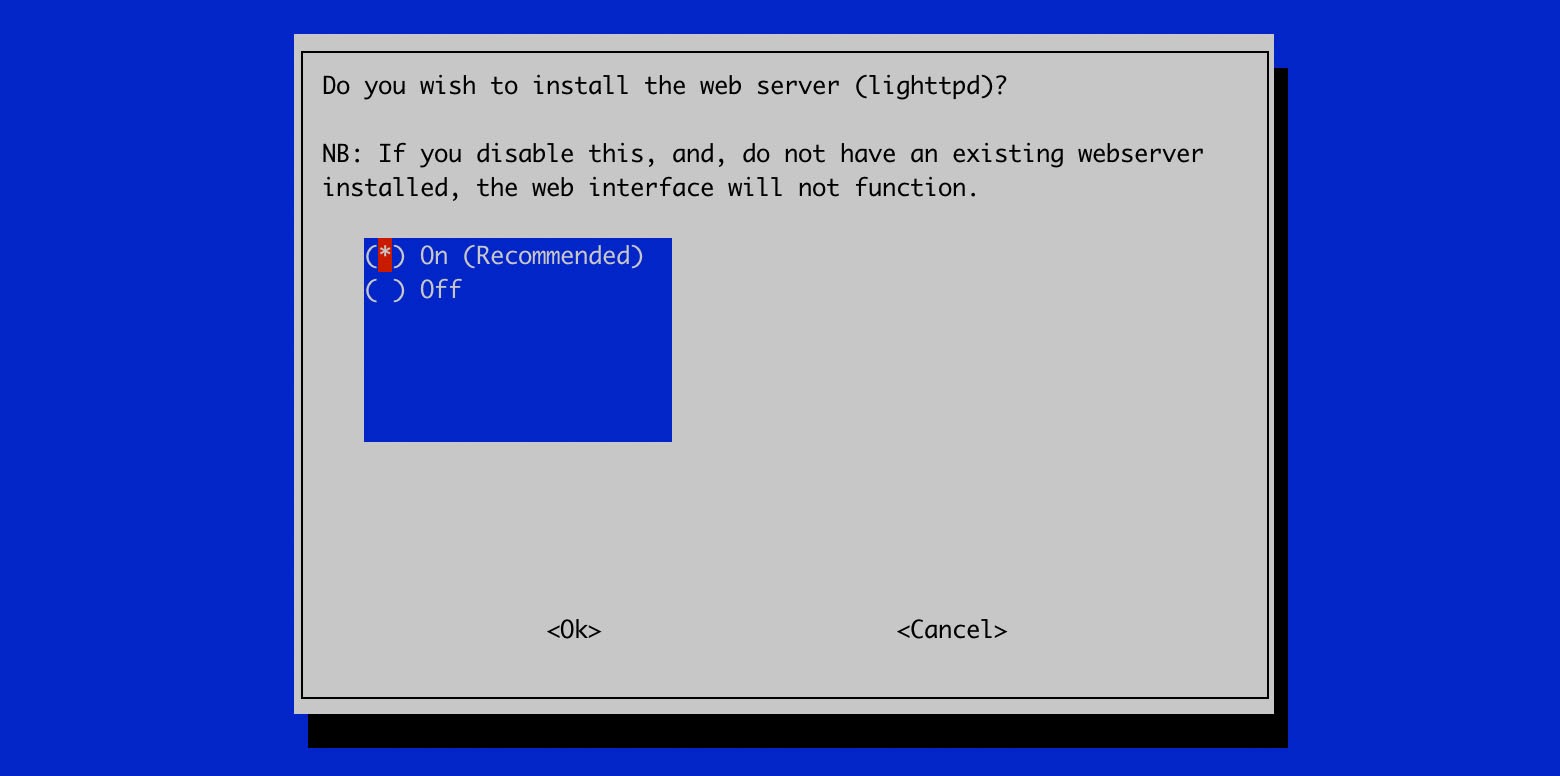 Web server
Logging queries is never a bad idea and we will set it to ?On?. If something goes wrong, we want to able to inspect the logs.
 Log queries
For the privacy mode, we also can use the default option because we want to see everything that Pi-Hole blocks inside the Dashboard.
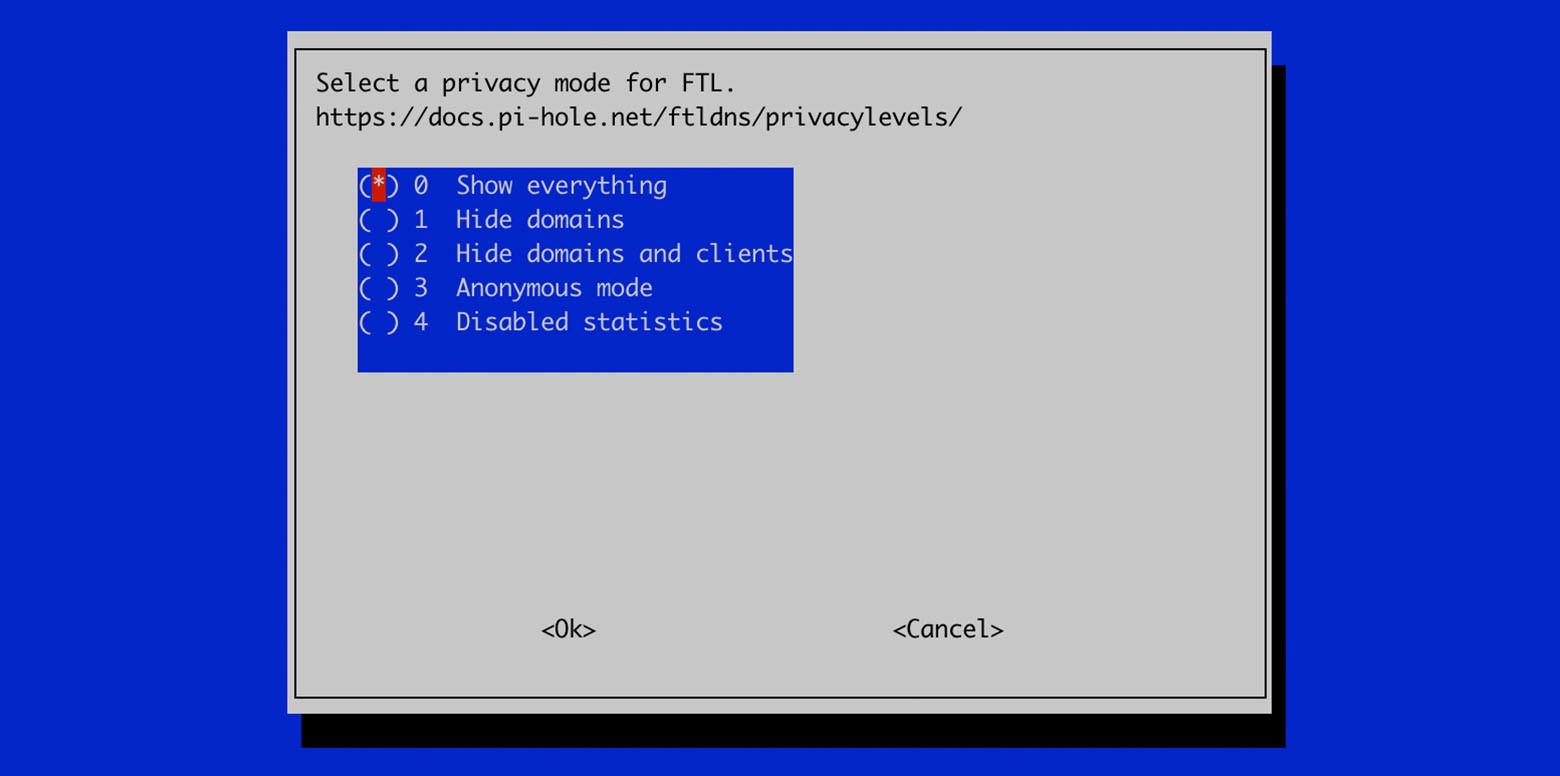 Privacy mode
This is the most important screen! Make a picture of it or write it down because this screen also contains the password that we need later on to log into the Dashboard.
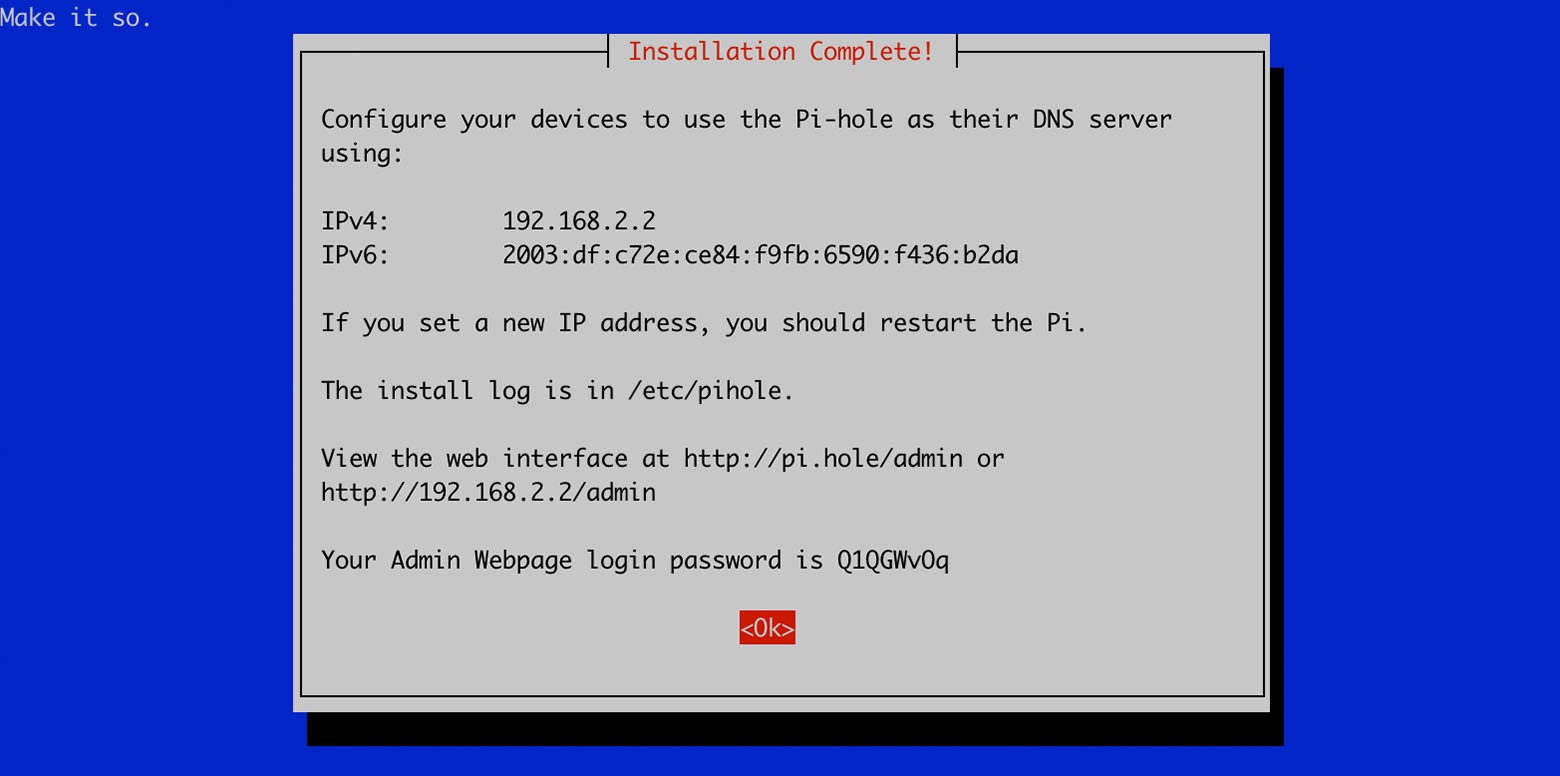 URL to the dashboard and the login password. Write it down!
After confirming the last screen, we are now done installing Pi-hole and the installation should be complete as shown below.
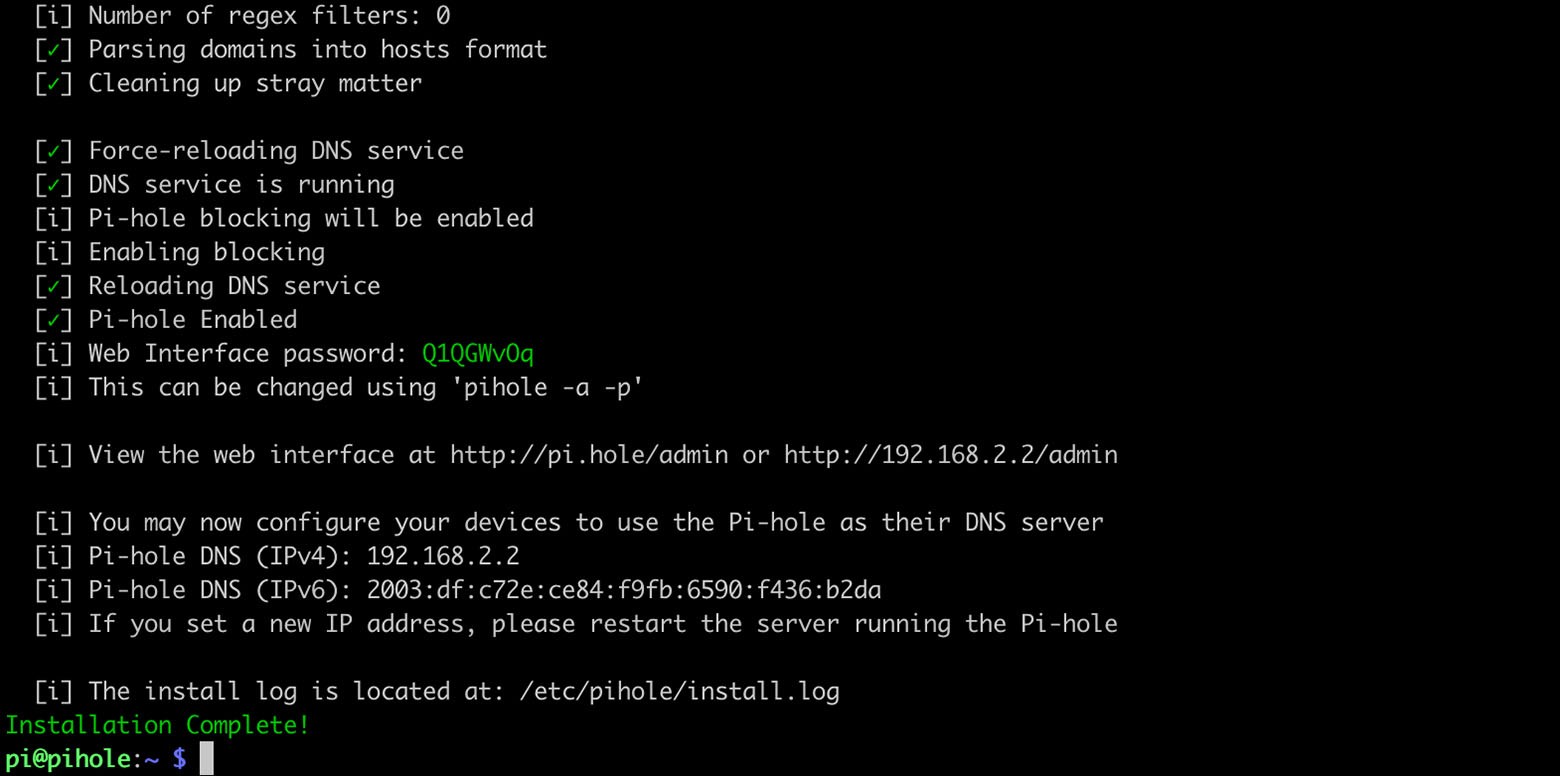 Done!
Done!
We are now ready to go over to our freshly installed Pi-hole Dashboard. You can access it inside your browser by typing ?http://192.128.2.2/admin? or ?http://pi.hole/admin?. Change the IP address according to your setup.
Hint: The domain ?http://pi.hole/admin? only works after setting Pi-hole as your DNS server which we will do in the following step.
Step 5: Configuring DNS
There are two methods on how to use Pi-Hole as your DNS server.
First method (preferred): You can set Pi-hole?s IP address as the default DNS server inside your router. This is the preferred method because this will automatically block ads for all devices inside your network which are connected to that router.
Second method: You can set Pi-hole?s IP address as the default DNS server for your machine only. It is sometimes not possible to change the DNS server for your router, so you are left with this option.
I linked detailed instructions for each method below.
First method: Changing the DNS server on your router
Since I do not know which router you have, I linked a tutorial on how to change the DNS server for the most popular ones.
How to Change DNS Servers on Most Popular Routers
Changing the DNS server settings on a router isn?t tricky, but every manufacturer uses a custom interface, meaning the?
www.lifewire.com
Second method: Changing the DNS server locally
If the first method does not work, you can still change the DNS server on your machine. I linked instructions for Mac, Windows, and Linux below.
Mac
Macinstruct
Last updated: 05/15/2012 Your Mac uses something called the Domain Name System (DNS) to access websites. It?s a system?
www.macinstruct.com
Windows
Changing Your DNS Settings on Windows 10
If you?ve never changed your DNS address, you?re probably still using the one given to you by your ISP. It?s really?
www.privateinternetaccess.com
Linux
Changing DNS Settings in Linux ? Knowledgebase ? TorGuard
Manually configuring your Linux computer with other DNS server addresses can help you access blocked sites and enjoy?
torguard.net
Step 6: Enter the dashboard
When everything worked, you should be able to access the Dashboard by using ?http://pi.hole/admin?.
When you first access the Dashboard as a guest, it should look like the screenshot below. Not much to see. Yet.
 Dashboard view as guest
Go over to the login page and log in with your password that you hopefully wrote down during the installation process.
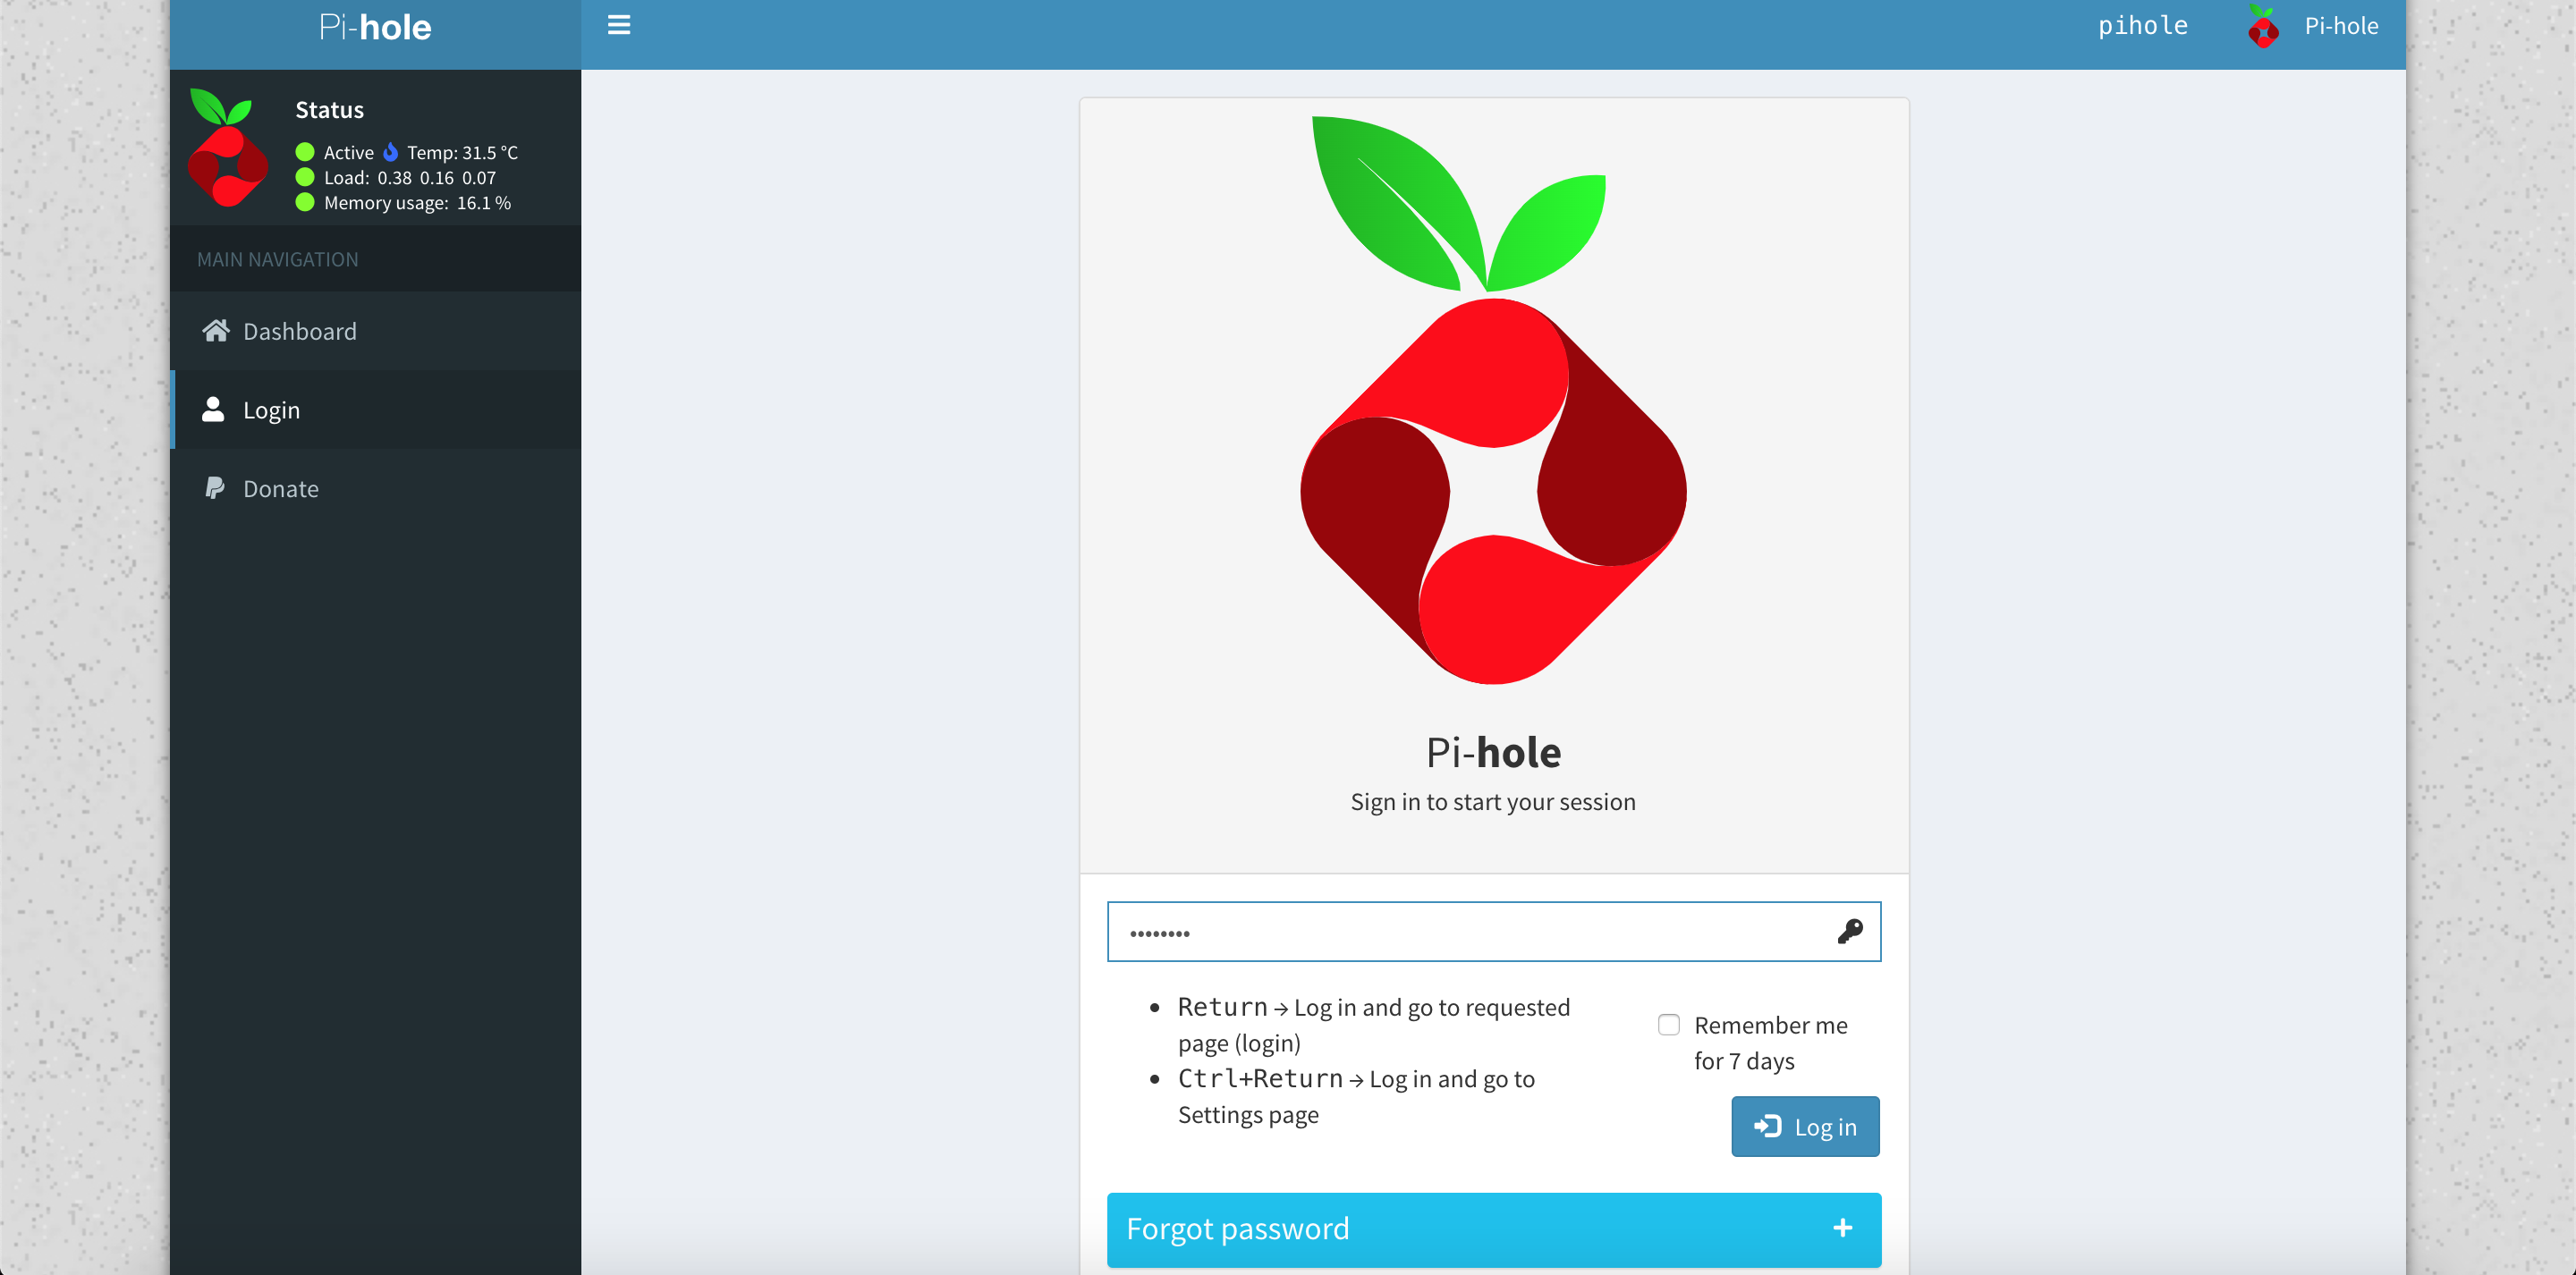 Login page
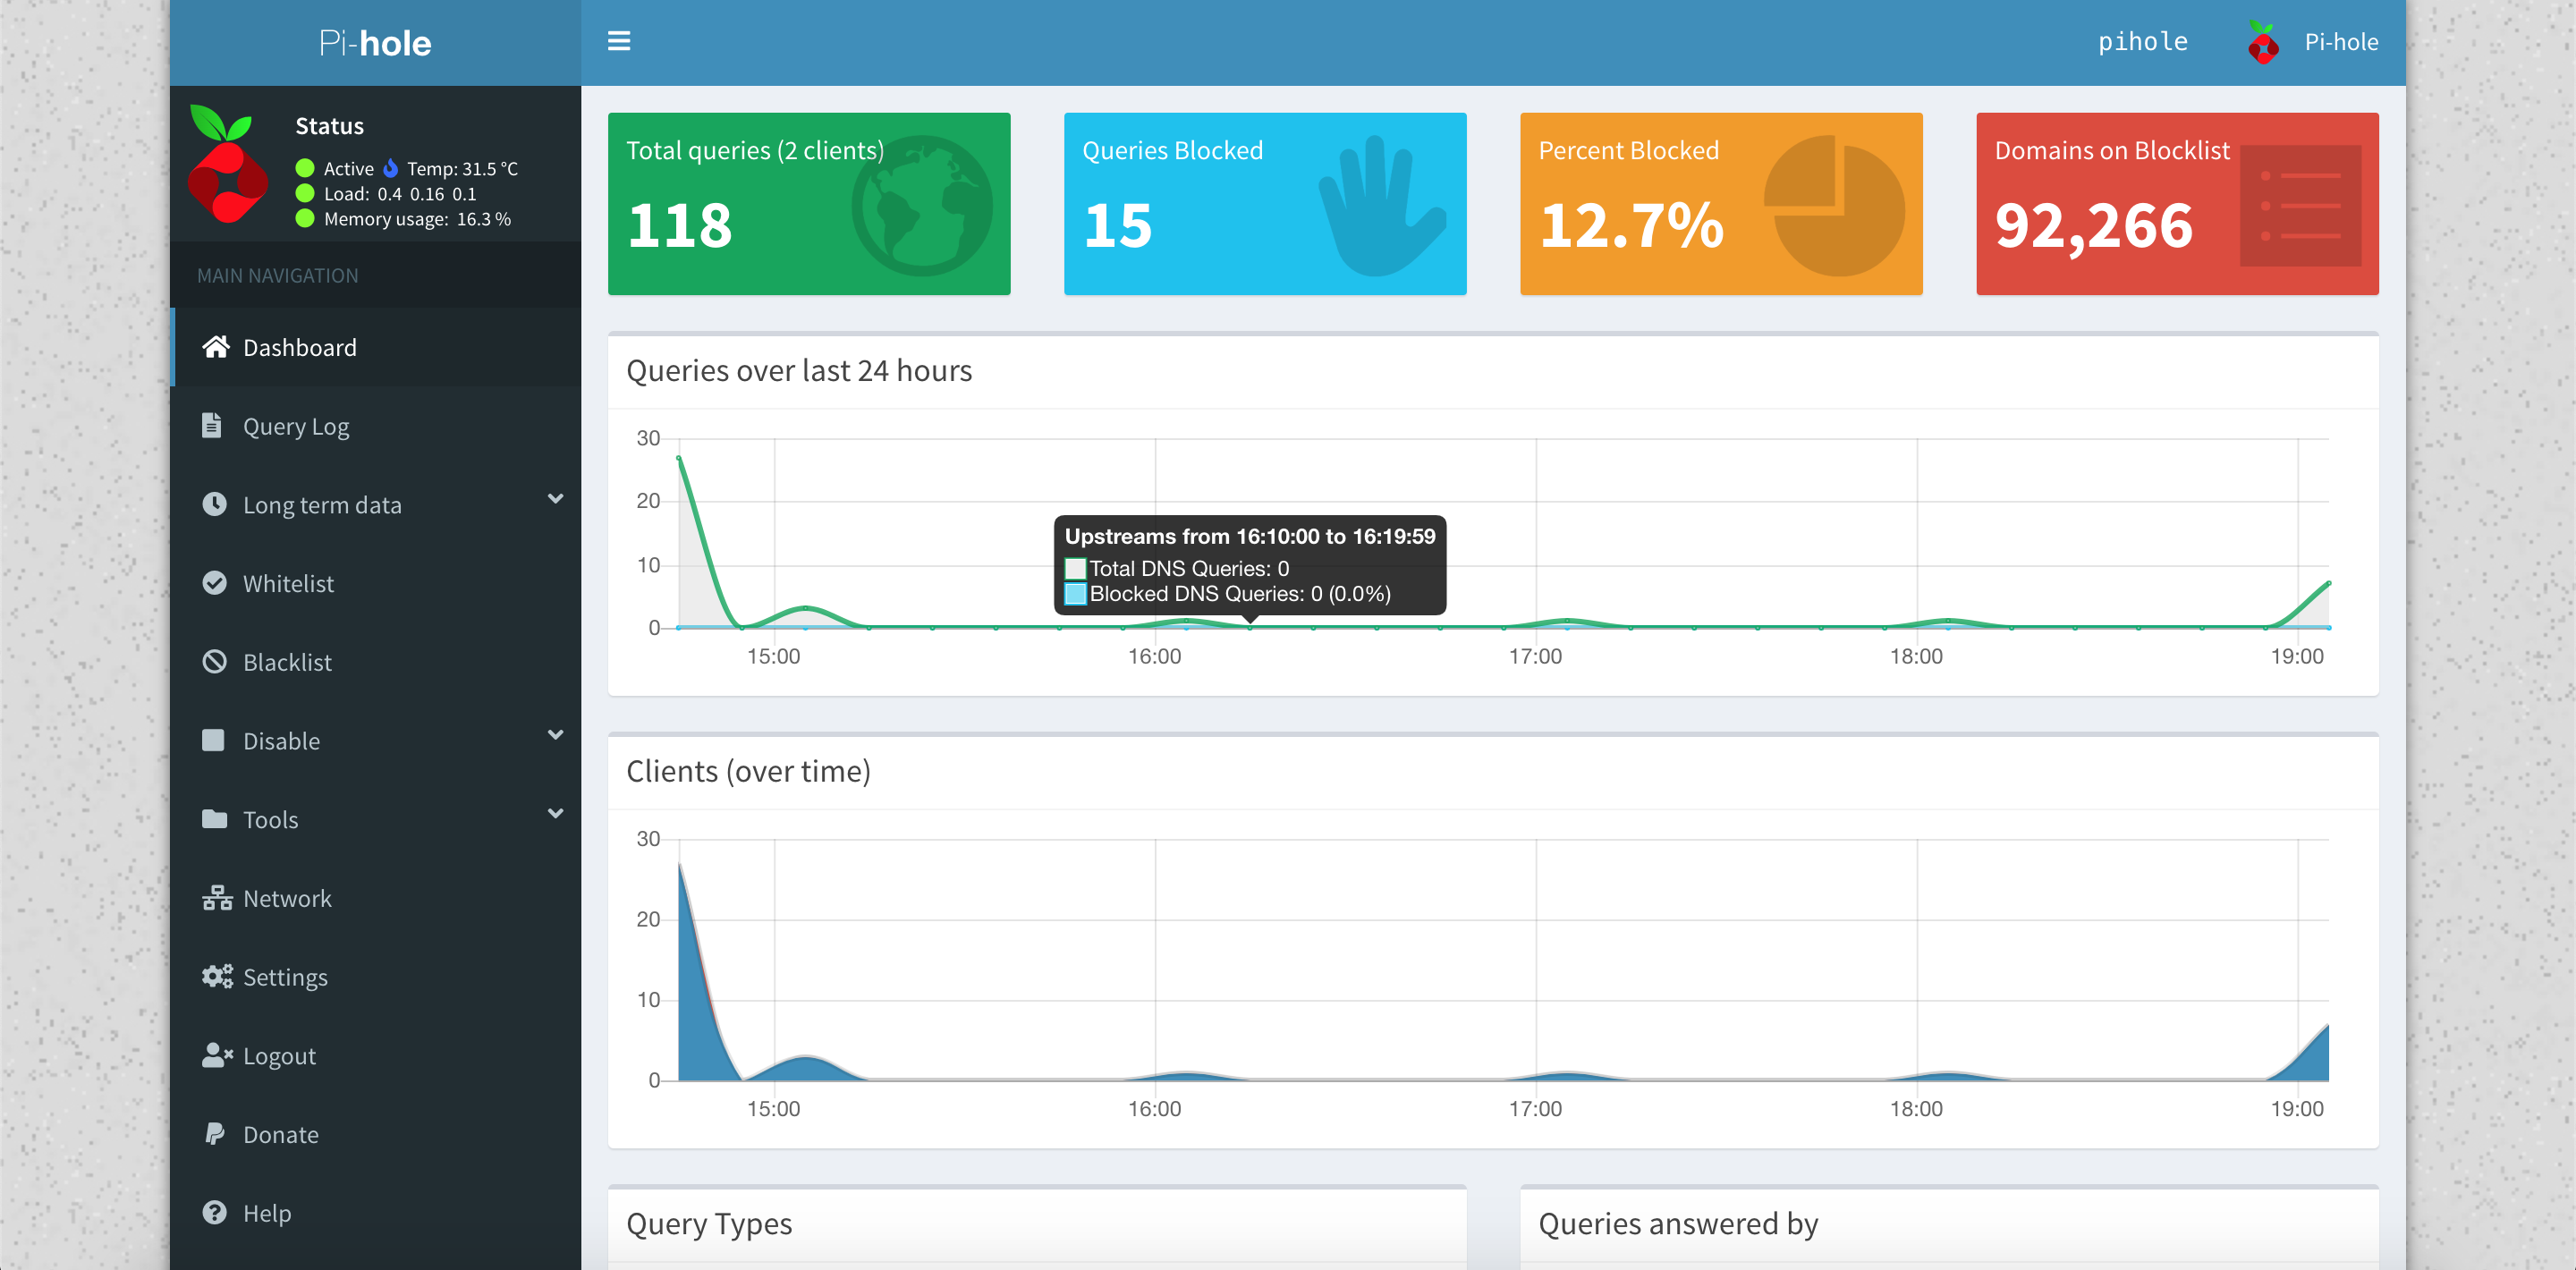
After you logged in, you can see the whole variety of functions that the Dashboard has to offer.
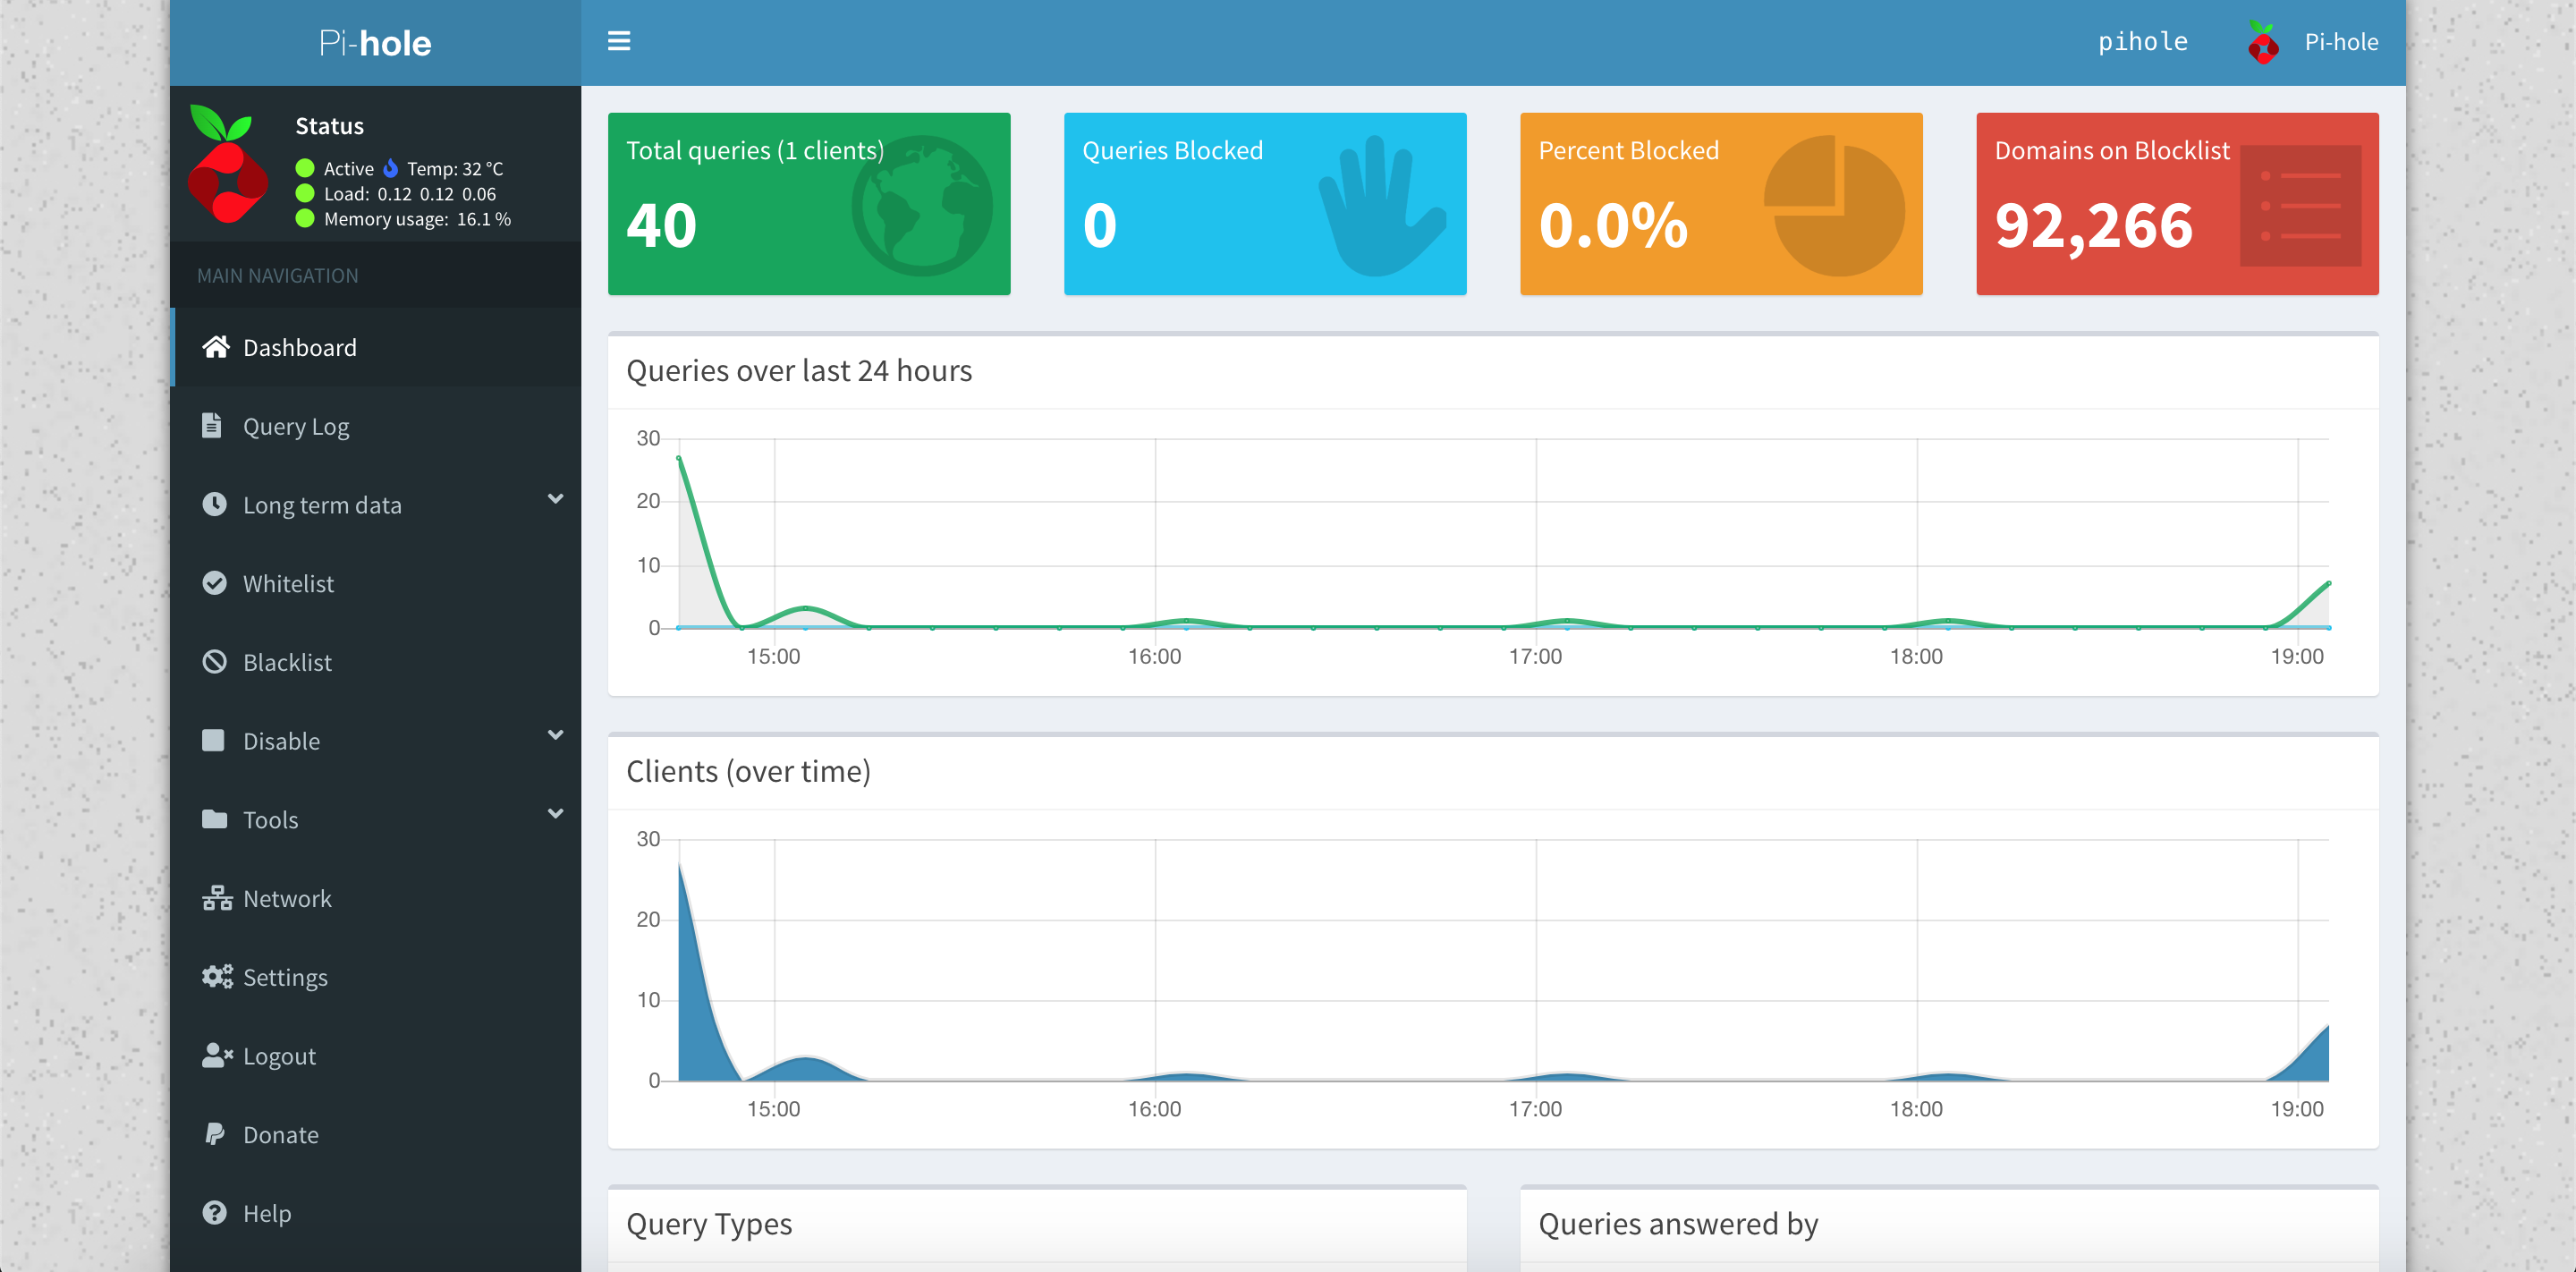 Dashboard as logged-in user
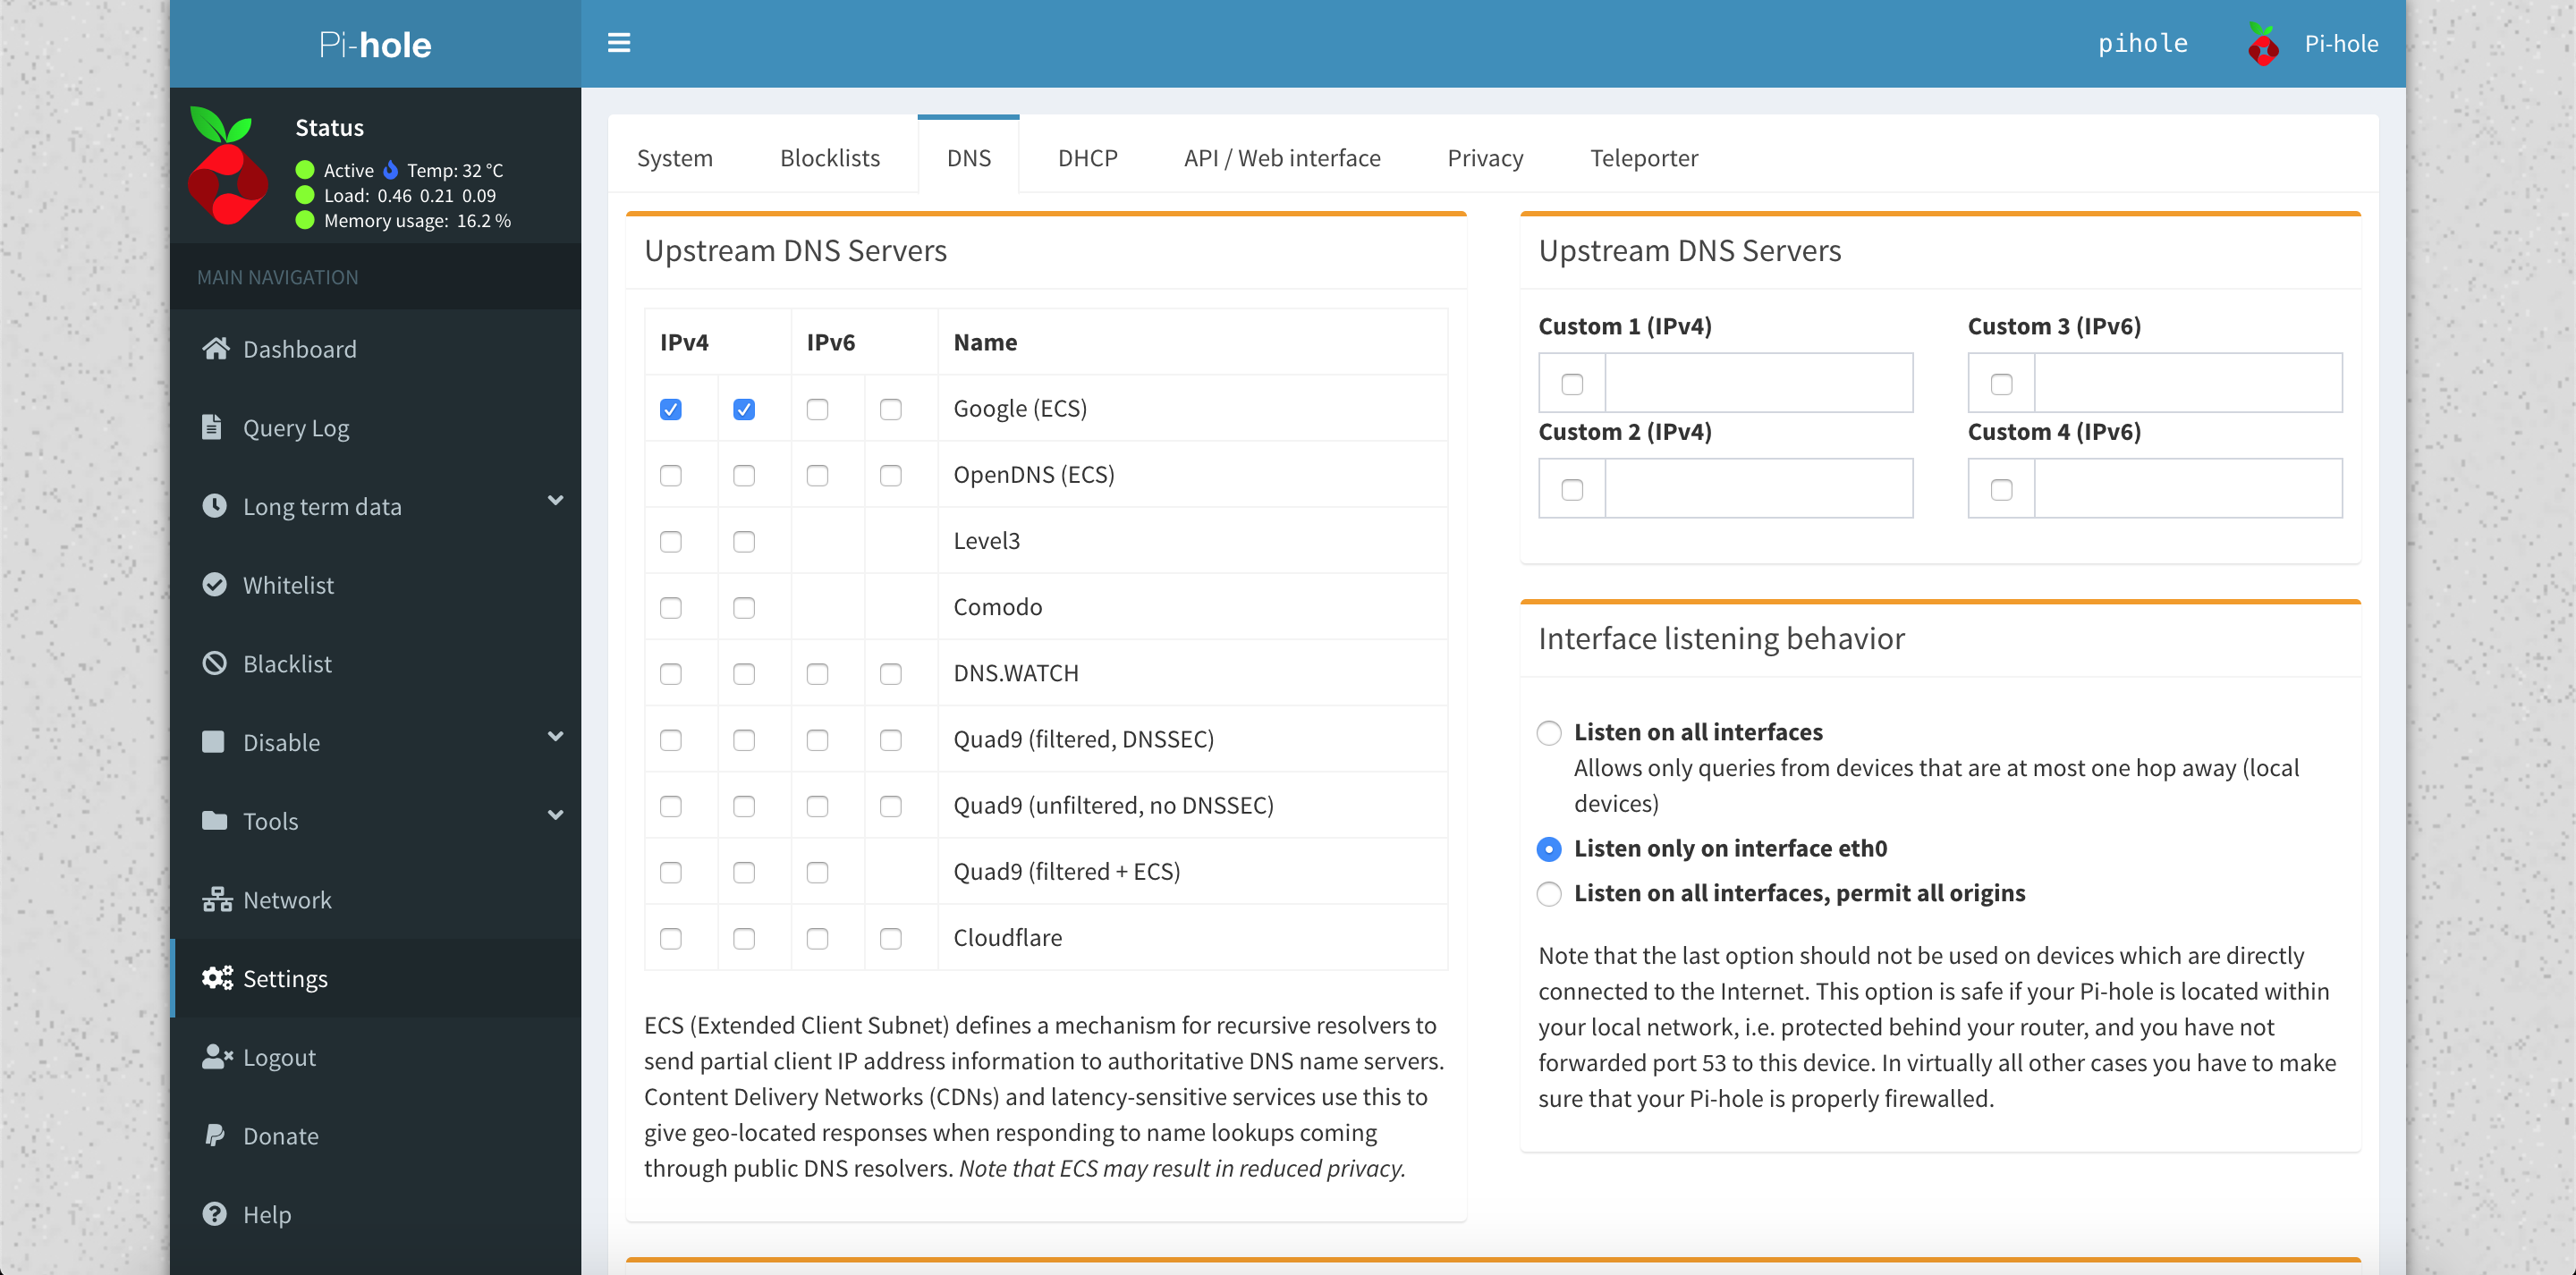
There is one last bit we have to configure and that is more a configuration out of convenience. Go over to settings and choose the ?DNS? tab.
When you scroll down to the end of the DNS configuration, you can see a section about ?Conditional Forwarding?. Often routers offer a unique domain which makes them accessible a bit easier than typing their IP address into the browser. In my case, the domain ?speedport.ip? translates to 192.168.2.1.
When you changed your DNS configuration, this domain is probably not accessible anymore and you have to activate ?Use Conditional Forwarding? and type in the domain with the corresponding IP.
Conditional forwarding makes your router accessible again through a simple, local domain.
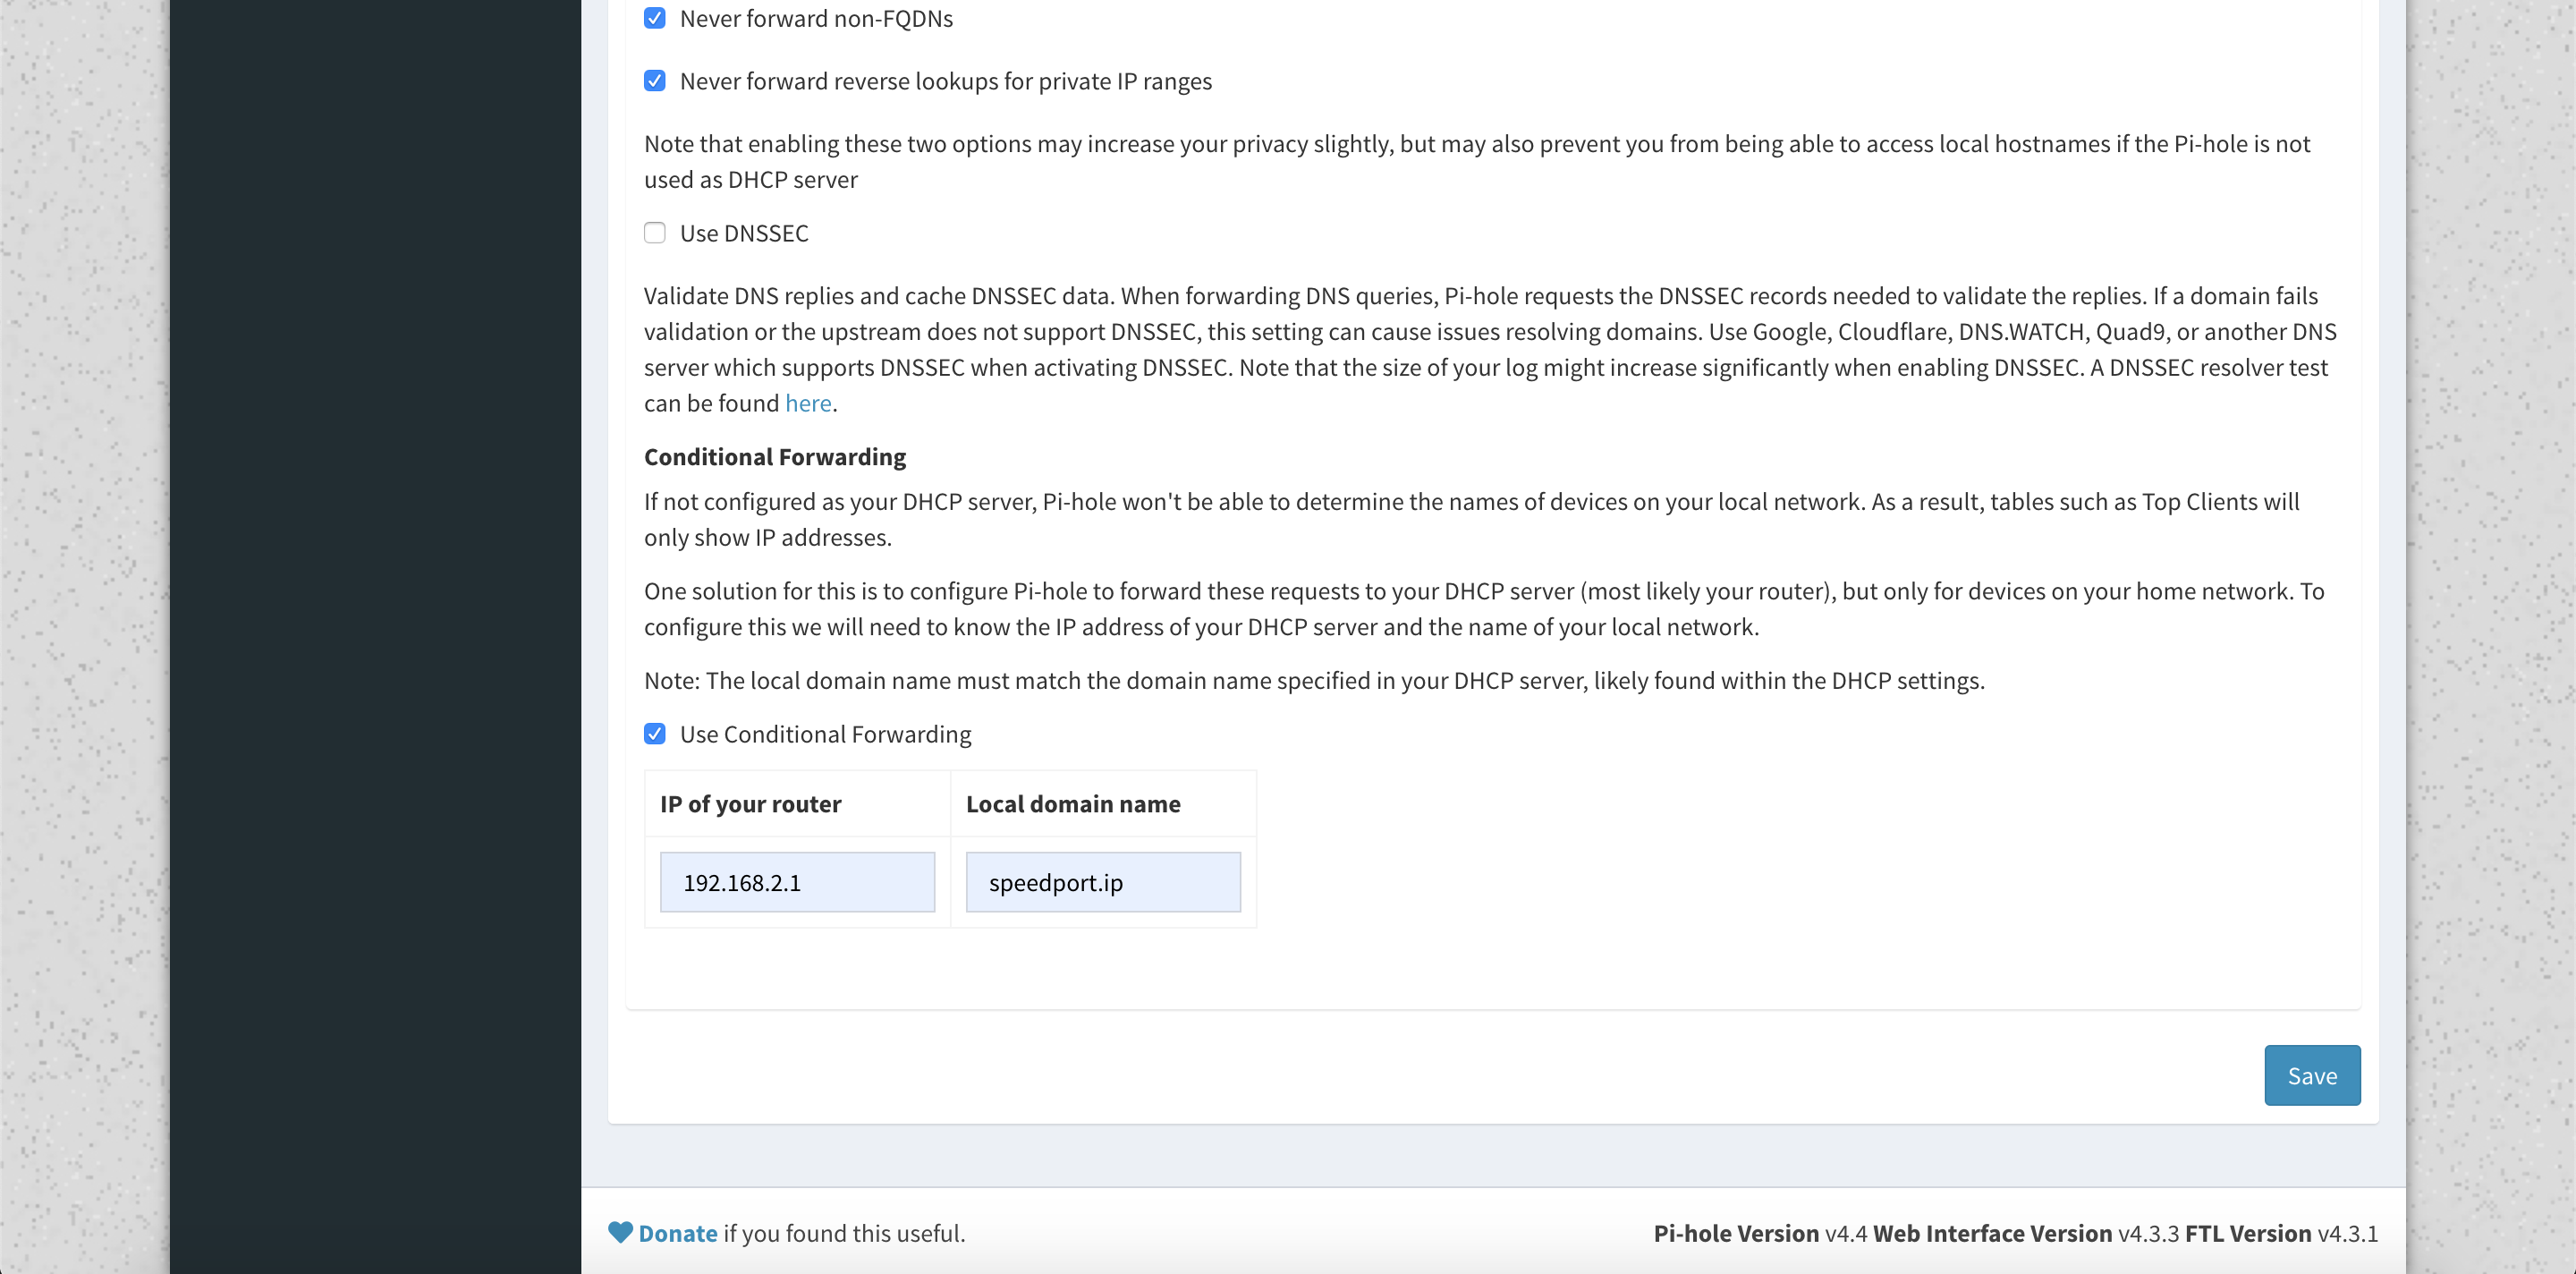 Conditional Forwarding to access your router via domain name
If you followed every step until now and you already tried out some domains on your machine to check if ads are actually getting blocked, you can go over to the Dashboard tab again. The Dashboard should show you that it already blocked domains that contained ads.
Step 7: Have fun!
Congratulations! You now have a working Pi-hole installation on your Raspberry Pi and you can enjoy the depths of the Internet without being bothered by ads.
I hope you enjoyed this article. If you have any questions regarding this Pi-hole installation, feel free to leave a comment below.
Are you interested in upcoming updates about my articles or projects? My newsletter keeps you up-to-date once per month!

