
For the last three years, I?ve been an avid DnD player. Looking forward to the next session is what gets me through a long week.
But with recent events forcing everyone to stay home, the campaign I run has been put on hiatus indefinitely.
So, I decided it?s the perfect time to try running a session using Discord.
The Steps
- Sign up for Discord
- Create a New Server
- Add Categories and Channels
- Invite A Dice Bot
- (Optional) Add Custom Member Roles
- Send Out Invites
Sign Up for Discord
If you don?t already have a Discord account signing up is pretty straightforward. You can create an account on their website or download the desktop app.
Create a New Server
Once you?re signed into the app, you can click the new server + icon.
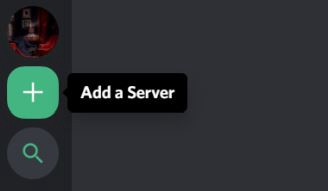 Add a server icon located on the left side panel of the app interface.
From here, you?ll be asked to pick a server name, a cover image and to invite some friends. BOOM. You now have your own Discord server.
Add Categories and Channels
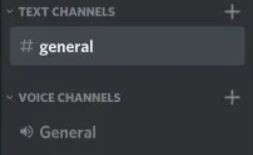
When you first create your server, it comes with two default categories: TEXT CHANNELS and VOICE CHANNELS.
Tip: Text channels are denoted by a # symbol while Voice channels have a little Speaker icon.
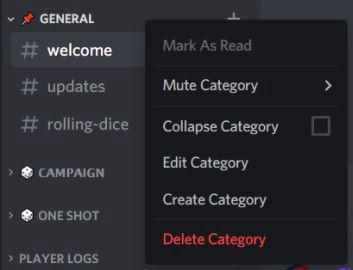
To delete, right-click the unwanted category or channel in the left panel. From here a new menu will pop up with the option to delete the selected item.
Organization Tips and Tricks
When using Discord, custom categories and channels are an important part of building a user-friendly server.
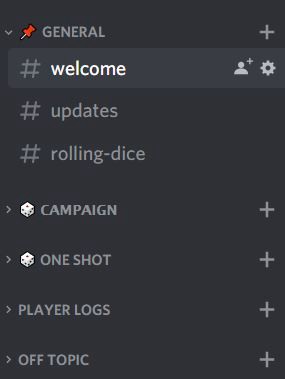
After some tweaking, I settled on five main categories that cover everything I need in a server.
- General – A place to sort out scheduling, provide bot commands (more on this later), and post announcements.
- Campaign – A place to play long term campaign settings.
- One-Shot – A place for players to take turns running one-shots and experimenting with new character concepts.
- Player Logs – Private channels where players can store notes, stats and acquired items.
- Off Topic – A catch-all for memes, Youtube videos and off-topic discussions players might want to have outside of role-playing sessions.
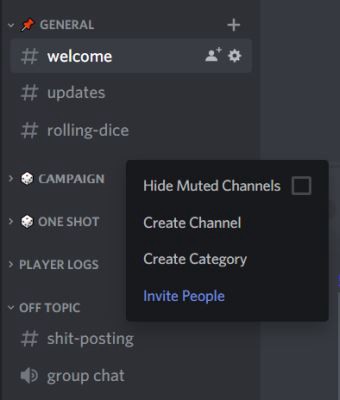
Creating a new category or channel is pretty straight forward. Just right-click the left panel and a new menu will appear. From here you can select Create Channel or Create Category.
A Note On Player Logs
If you want to include Player Logs on your server you will need to create private channels for each player. This can be done by toggling on Private Channel in the Create Text Channel menu.
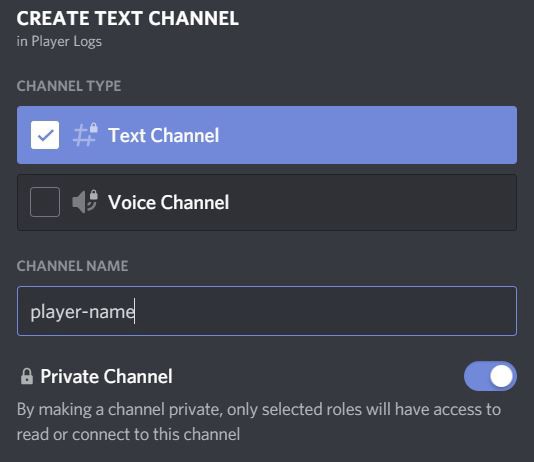
From here you can decide who has access to the channel. For a more thorough explanation on creating private channels, there is a great tutorial on the subject here.
Invite a Dice Bot
Discord bots are a great way to add some extra features or functions to a server. And yes, there are bots built just for DnD!
If you want a bot that can roll dice, look up spells and build character sheets, I?ve heard a lot of good things about Avrae.
Unfortunately, I found the commands a little too complicated and wanted to keep things simple for my players.
This is why I ended up going with Sidekick. This sophisticated little bot by ArtemGR is designed for one thing and one thing only, rolling dice.
To get the most out of Sidekick, I did two things. I created a dice tray channel under the Campaign category where players can try out the commands and keep track of their roles.
 Dice Tray Channel created under the Campaign category.
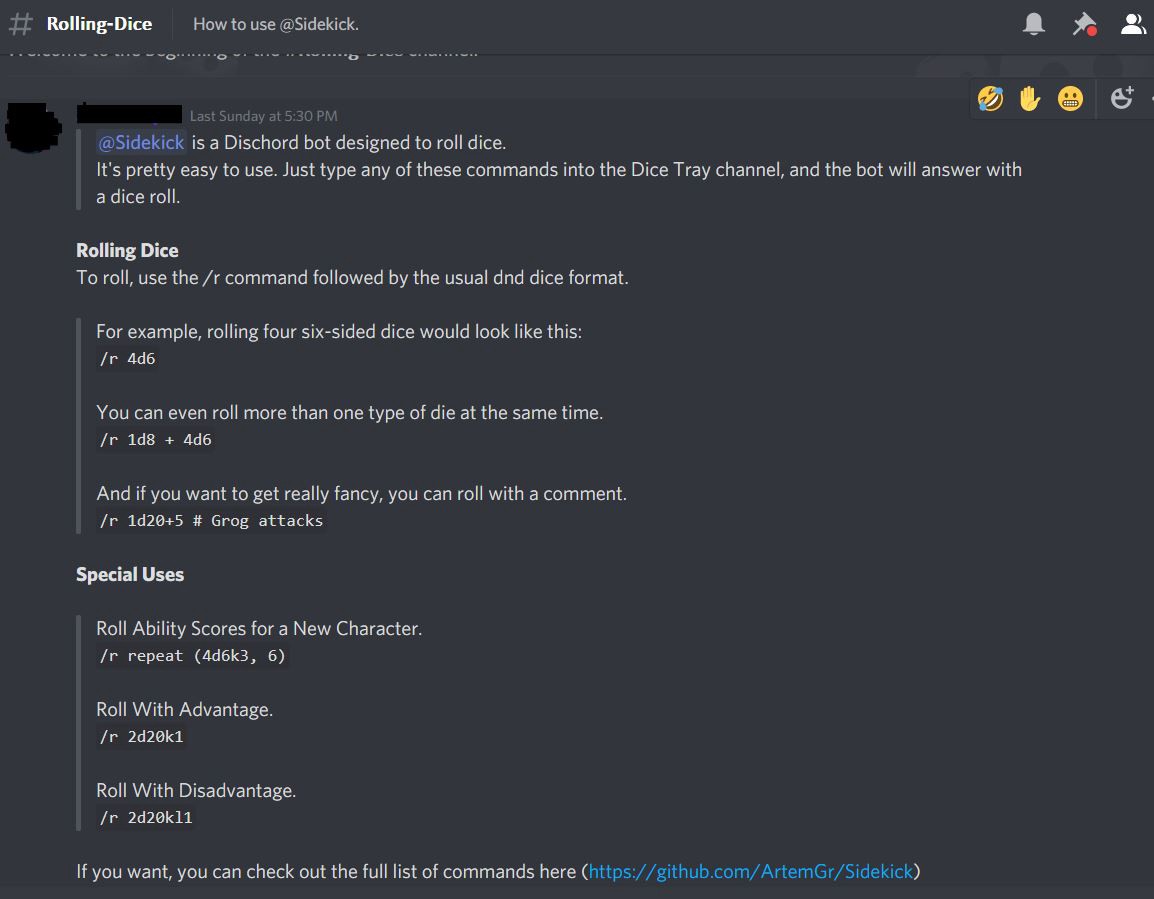
I then created a channel under the General category called Rolling Dice. After setting channel permissions to read-only for players, I posted instructions on how to use Sidekick.
(Optional) Add Custom Member Roles
Custom member roles allow you to specify permissions for several members at once and send push notifications to those specific groups with relative ease.
For my server, I went with three main roles.
- Admin – Full permissions.
- DM – The ability to manage custom Campaign or One-shot channels.
- Player – This role has limited permissions and cannot make changes to category, channel or server settings.
The DM role won?t be necessary if you are the only person running a game on your server. But, if you have players that would like to try it out or rotate on a weekly basis, additional permissions will make it easier to run their sessions on the server.
For a detailed guide on how to create and manage user roles, check out the official guide from Discord support here.
Send Out Invites
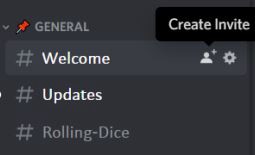 Create Invite icon
If you skipped sending out invites in step two, no problem. You can always select the channel you want your players to land in, (in my case the Welcome channel), and click the Create Invite icon.
There you have it. That?s everything you need to set up a Dungeons and Dragons Discord server. Potentially, this setup could also work for something like Pathfinder.
