Hi there! If you ever was wondering how to make simple routergatewayfirewall from you Ubuntu server to isolate sub network, but provide the network connectivity here is a simply guide how to do that.
Step 0. Get an idea about your network setup.
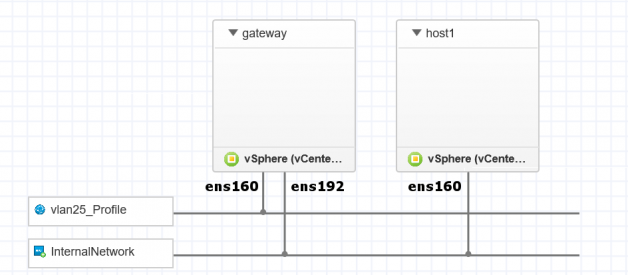
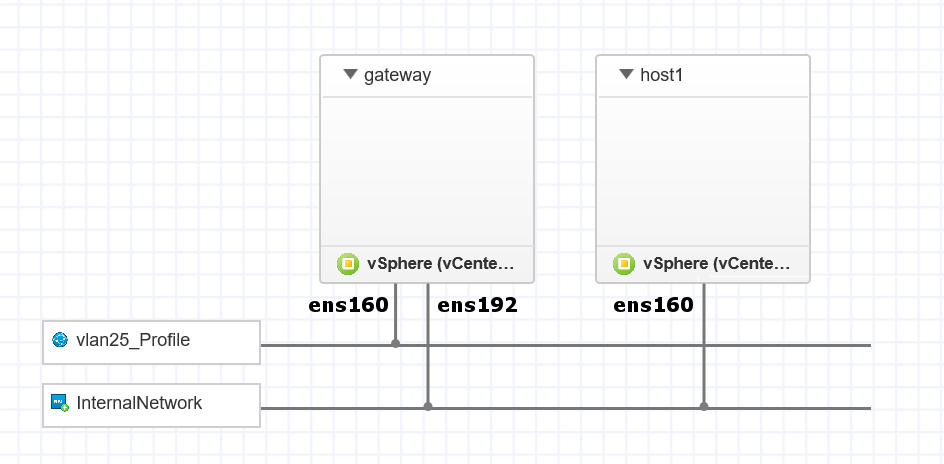
To succeed we will need to have two NIC?s (no matter physical or virtual) on our Ubuntu server. Lets assume we are all good here and our NIC1 could be seen as ens160 and has internet connectivity. Our NIC2 is ens192 and will be a gateway IP for the isolated network. To sum-up network configuration:
NIC1 | WAN | 192.168.1.254/24 (could be also dhcp)|internet connection
NIC2 |LAN|192.168.2.1/24 (must be static)|gateway for isolated network
Step 1. NICs configuration.
List you interfaces by running the command and adjust the NICs naming from this manual to the one you will find.
ls /sys/class/net/
Open with vim (or nano) netplan configuration file:
sudo vim /etc/netplan/50-cloud-init.yaml
and make it look similar to that:
network: ethernets: ens160: addresses: – 192.168.1.254/24 gateway4: 192.168.1.1 nameservers: addresses: – 192.168.1.1 ens36: addresses: – 192.168.2.1/24 dhcp4: false nameservers: addresses: – 8.8.8.8 – 8.8.4.4 version: 2
Save the configuration by running:
sudo netplan generatesudo netplan apply
Step 2. DHCP server installation.
On the next step we need to install DHCP server and make it run on NIC2
Start with the installation.
sudo apt updatesudo apt install isc-dhcp-server
Next edit the configuration file:
sudo vim /etc/default/isc-dhcp-server
Find the line INTERFACES=”ens192″ and add the value for NIC2. Save and exit.
After that lets edit the configuration file by opening the file:
sudo vim /etc/dhcp/dhcpd.conf
Please remove ?option domain-name example.org;? and append the following to the configuration file:
option domain-name-servers 8.8.8.8, 8.8.8.4;option subnet-mask 255.255.255.0;option broadcast-address 192.168.2.255;subnet 192.168.2.0 netmask 255.255.255.0 {range 192.168.2.20 192.168.2.250;option routers 192.168.2.1;}
Please leave all the rest as it was. Now restart the service.
sudo service isc-dhcp-server restart
Step 3. Configure IP forwarding.
Please open the configuration file:
sudo vim /etc/sysctl.conf
Find and uncomment the following line:
net.ipv4.ip_forward=1
Save and exit. Please reboot your server on that step and after it is again on confirm the setting by running:
sysctl net.ipv4.ip_forward
Step 4. Iptables configuration.
Add a NAT forwarding rule to iptables:
sudo iptables -t nat -A POSTROUTING -o ens160 -j MASQUERADE
Optional: block traffic from isolated network to the main.
sudo iptables -A FORWARD -m state –state ESTABLISHED -j ACCEPTsudo iptables -A FORWARD -m state –state RELATED -j ACCEPTsudo iptables -A FORWARD -s 192.168.1.0/24 -d 192.168.2.0/24 -j DROPsudo iptables -A FORWARD -s 192.168.2.0/24 -d 192.168.1.0/24 -j DROP
Save settings to iptables by installing iptables-persistent:
sudo apt-get install iptables-persistent
Or if it was already installed please update setting by running:
sudo dpkg-reconfigure iptables-persistent
And you are all set now!

