S.M.A.R.T. ID 198 (0xC6) Uncorrectable Pending Sector Count is a critical S.M.A.R.T. parameter that indicates a number of uncorrectable errors while reading/writing a sector on the hard drive. The error can cause drive corruption and permanent disk failure leading to data loss.
Briefly, the Offline Uncorrectable Pending Sector Count warning indicates imminent disk failure and requires urgent backup and drive replacement.
Self-Monitoring Analysis and Reporting Technology (S.M.A.R.T.) is a disk-monitoring feature that comes embedded within all modern hard drives, SSDs, and eMMC storages. The monitoring system keeps the user updated about current disk health, temperature, and performance condition so that they can take active measures towards data protection and against data loss due to a failing or ageing drive.
 Figure 1: SMART Parameters and their Attributes
These warnings appear when a user tries to access the SMART information of a disk by using tools such as Drive Monitor (Available as an add-on utility with Stellar Data Recovery Premium software), CrystalDiskInfo, HDSentinel, etc. Therefore, active monitoring of disk SMART parameter is highly recommended to prevent data loss due to impending drive. You may use tools such as Drive Monitor for the purpose.
Following are some critical steps that you can follow in sequence to fix the Uncorrectable Sector Count Warning with minimum data loss:
WARNING: Immediately stop using or minimize the use of your affected hard drive. Never perform hit-and-trial methods on a failing drive, as it may further damage the storage drive, lead to early failure, and data loss. Carefully follow the detailed steps in this post to backup files (recover inaccessible data) and fix the current pending sector count warning with minimum data loss.
Step 1: Backup and Recover
If you can access the drive, back up your files immediately. You may simply copy and paste important files to an external drive or on the cloud storage.
In case the drive has turned RAW (corrupt) or inaccessible, which is quite normal in case of a failing drive, use Stellar Data recovery Premium software to clone the drive and recover data.
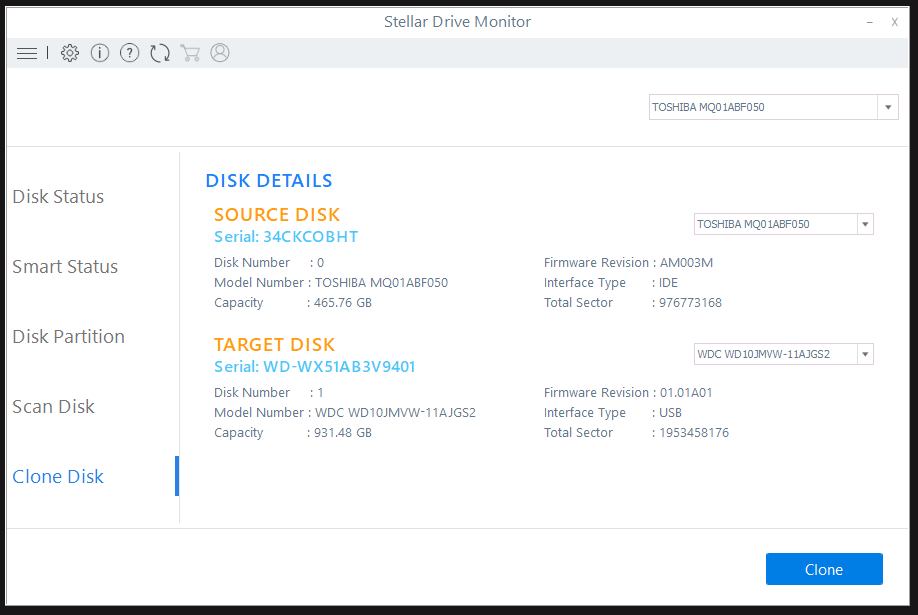 Figure 2: Disk Clone feature
TIP: Disk cloning keeps your Windows system intact as all the data and settings are safely copied to a new healthy hard drive or SSD along with partitions and disk signatures. You can then replace the affected drive with this cloned drive in your PC or laptop to use your system normally ? no need to install Windows, copy personal files or re-install and configure software, or change PC settings.
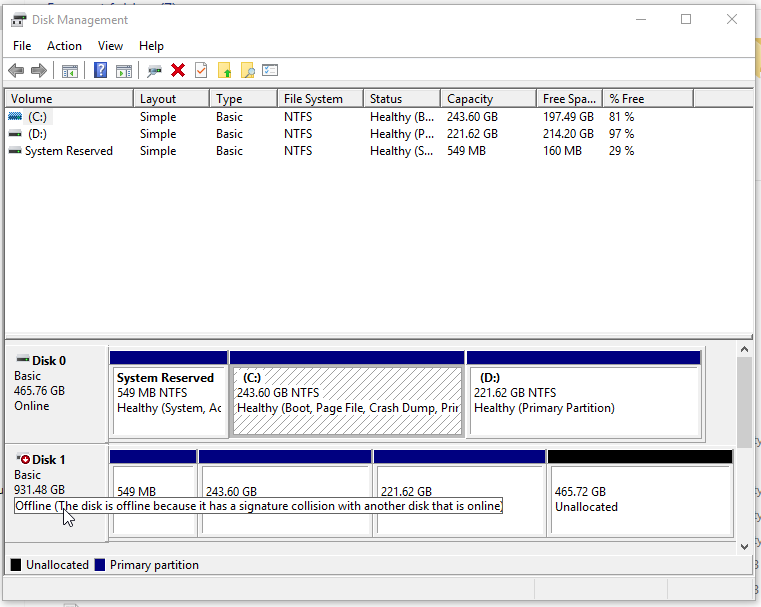 Figure 3: Failing system hard drive and its clone
Follow these steps to clone and recover inaccessible data from your affected hard drive.
- Download, Install and launch Stellar Data Recovery Premium Software
- Click ?Monitor Drive? on the main screen
- Then click ?Clone Disk?
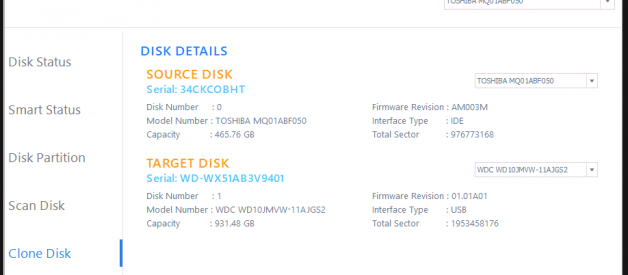
- Now select the Source Disk ? the affected hard drive
- Then select the Target Disk ? a new hard drive or SSD of same or larger size than the Source Disk. Connect via USB enclosure or SATA connector
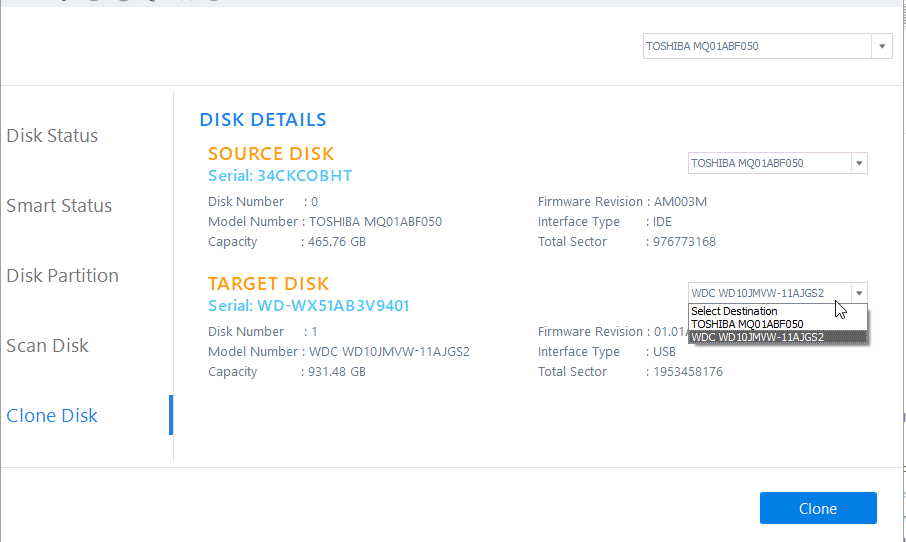 Figure 3: Choose Source and Target disk carefully for cloning
6. Check that you have selected correct disk in both Source and Target. Once confirmed, click ?Clone? and accept the Warning message.
 Figure 4: Disk Cloning with Estimated Time
7. Disk Cloning will take a while depending on the disk type, volume size, and the interface that is used to connect both drives8. After cloning, turn off the system, replace the failing drive in your PC with the cloned drive
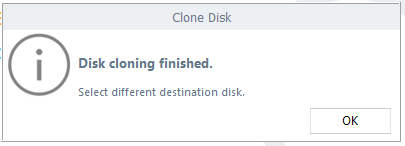 Figure 5: Clone Process finished
9. Now turn on the system. You will notice everything is intact and there is no Current Pending Sector Count warning as the drive is new
In case the drive was RAW, close the ?Drive Monitor? utility. This will take you to the main screen of Stellar Data Recovery Premium.
Click ?Recover Data? and then follow the software on screen instructions to run data recovery on the failing drive and get back your inaccessible files from a failing RAW drive volume.
The software natively recognizes a RAW (corrupt) drive volume, and recovers lost files from a RAW volume based on file-signatures with its ?Deep Scan? option enabled. The deep scan thoroughly scans each drive sector and recovers every bit of recoverable data.
IMPORTANT TIP: You may also run data recovery on your cloned drive to get back lost files. Cloned drive is a sector-by-sector copy of your failing drive and contains both existing and lost data.
Once you have recovered required files, go ahead, and follow the fixes given below to get rid of ?Uncorrectable Sector Count? Warning without worrying about data loss.
Step 2: Run Surface Test
In the surface test, you test each drive sector or memory block for the read/write response. You can do that by following these steps:
1. Run Stellar Data Recovery Premium software and click ?Monitor Drive. ?
2. Click ?Scan Disk?
3. Choose the hard drive from the top drop-down
4. Click ?Scan?
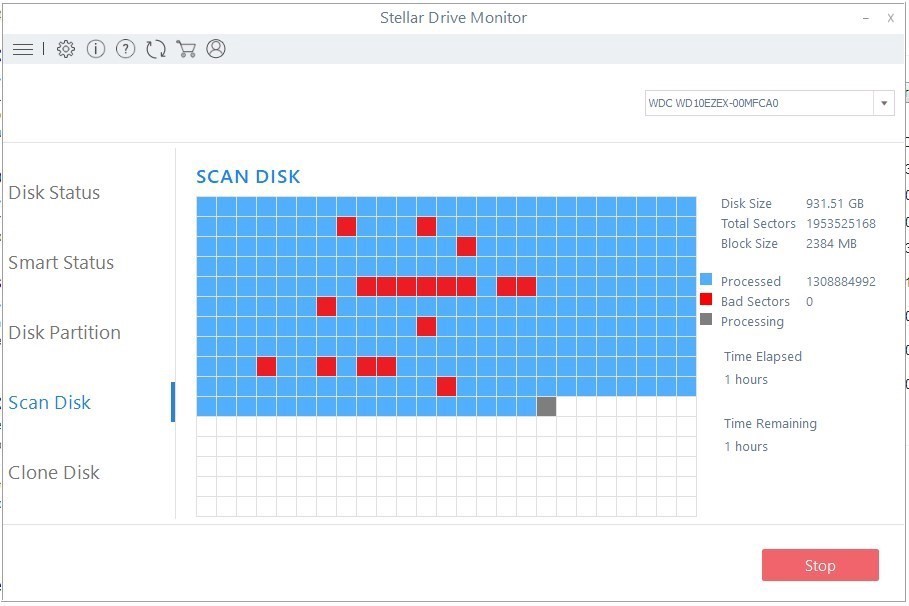 Figure 6: Disk Surface Test
This scan reads each sector and lists the sectors that don?t respond to the requests made during the scan in red colour. These sectors are referred to as bad sectors that need to be reallocated/corrected.
Step 3: Run CHKDSK Scan
Now that you have visually inspected the drive by doing a surface test, you can run CHKDSK scan to fix or reallocate the bad sectors. As the CHKDSK reallocates bad sectors, the Uncorrectable Sector Count attribute may also go back to normal.
To run a CHKDSK scan, follow these steps:
- Press Window+S and then type command prompt
- Right-click on the Command Prompt and click Run as administrator
- Now type the following command in the command prompt windows followed by an ?Enter? key presschkdsk /r /f X: where X is the affected drive volume letter
- If the disk has multiple volumes, run the command on each volume
TIP: Since you have data backed up (or drive cloned); you may also format the entire drive into a single volume. Then run the scan to fix the SMART Uncorrectable Sector Count warning
Step 4: Full Format or Secure Erase Drive
If you still see the Uncorrectable Sector Count warning in SMART info of your disk, you can use a secure eraser software such as BitRaser for File. Alternatively, you can also full-format your affected drive.
Both full format and secure eraser overwrite each sector on the drive. This forces the drive into reading the SMART parameters and attributes including Uncorrectable Sector Count.
Follow these steps to overwrite the drive blocks and fix the SMART disk warning:
CAUTION: Before you start, make sure you have backed up all data or cloned the affected drive with a new hard drive.
Full Format:
- Open ?File Explorer? and right-click on the affected drive volume
- Choose ?Format? and then uncheck ?Quick Format.?
- Click the ?Format? button and wait for it to finish
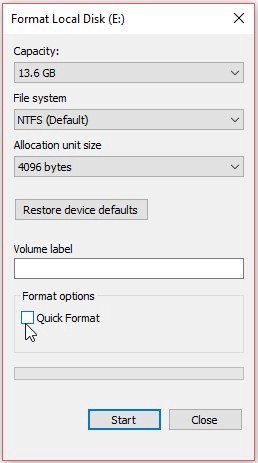 Figure 5: Disable? Quick Format? checkbox to ?Full Format? Disk
Full formatting will take a while, so be patient. You may also use secure erase software, which is highly recommended as it runs multiple passes that helps in a correct recounting of bad sectors or blocks. Following are the steps you can follow to securely erase your drive:
- Download and install ?BitRaser for File.?
- Make sure the drive is connected to the system
- Run the software
- Go to ?Tools?, select erasure algorithm and click ?Apply.?
- Click ?Home?, click ?Erase Now? and select the drive volume(s)
- Click the ?Erase Now? button at the bottom right and click ?OK? when the prompt appears
- Let the software erase (overwrite) everything from your drive
After eraser, the system will reboot. When the system turns ON, open the Drive Monitor or any other SMART disk monitoring utility to check the refreshed SMART status.
PLEASE NOTE: Even if the drive gets fixed after secure erase or format, you should not use the drive for storing any critical file. You may use it for other purpose and storing not so important data. Replace the repaired hard drive with new immediately.
Conclusion
When it comes to protect data from loss, a user must follow best practices for data safety. And active disk monitoring is one of them.
Besides backup, which is the most crucial step towards data protection, you must actively monitor vital disk parameters.
Parameters and their key attributes indicate if a drive is healthy or failing, and afford you enough time (sometimes) to back up the data or at least get back what?s left with the help of tools such as Stellar Data Recovery Premium before these SMART errors lead to drive corruption or failure.
Stellar Data Recovery Premium is a complete data care utility that recovers lost data, repairs corrupt files, and prevents future data loss. Plus, the SMART disk monitoring tool embedded within the software actively monitors the SMART status of your drive. The tool displays the drive health condition, performance rate, and current temperature based on the SMART parameter inputs.
The software not only gives an overview of the drive status but you can also get in-depth details about the drive?s other SMART parameters. Also, you can always scan the drive for bad sectors as it gives you a much clearer view of your disk health visually. Above all, it warns you before anything goes wrong so that you can back up or recover data.

