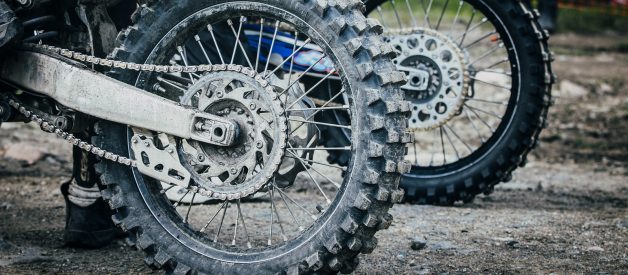
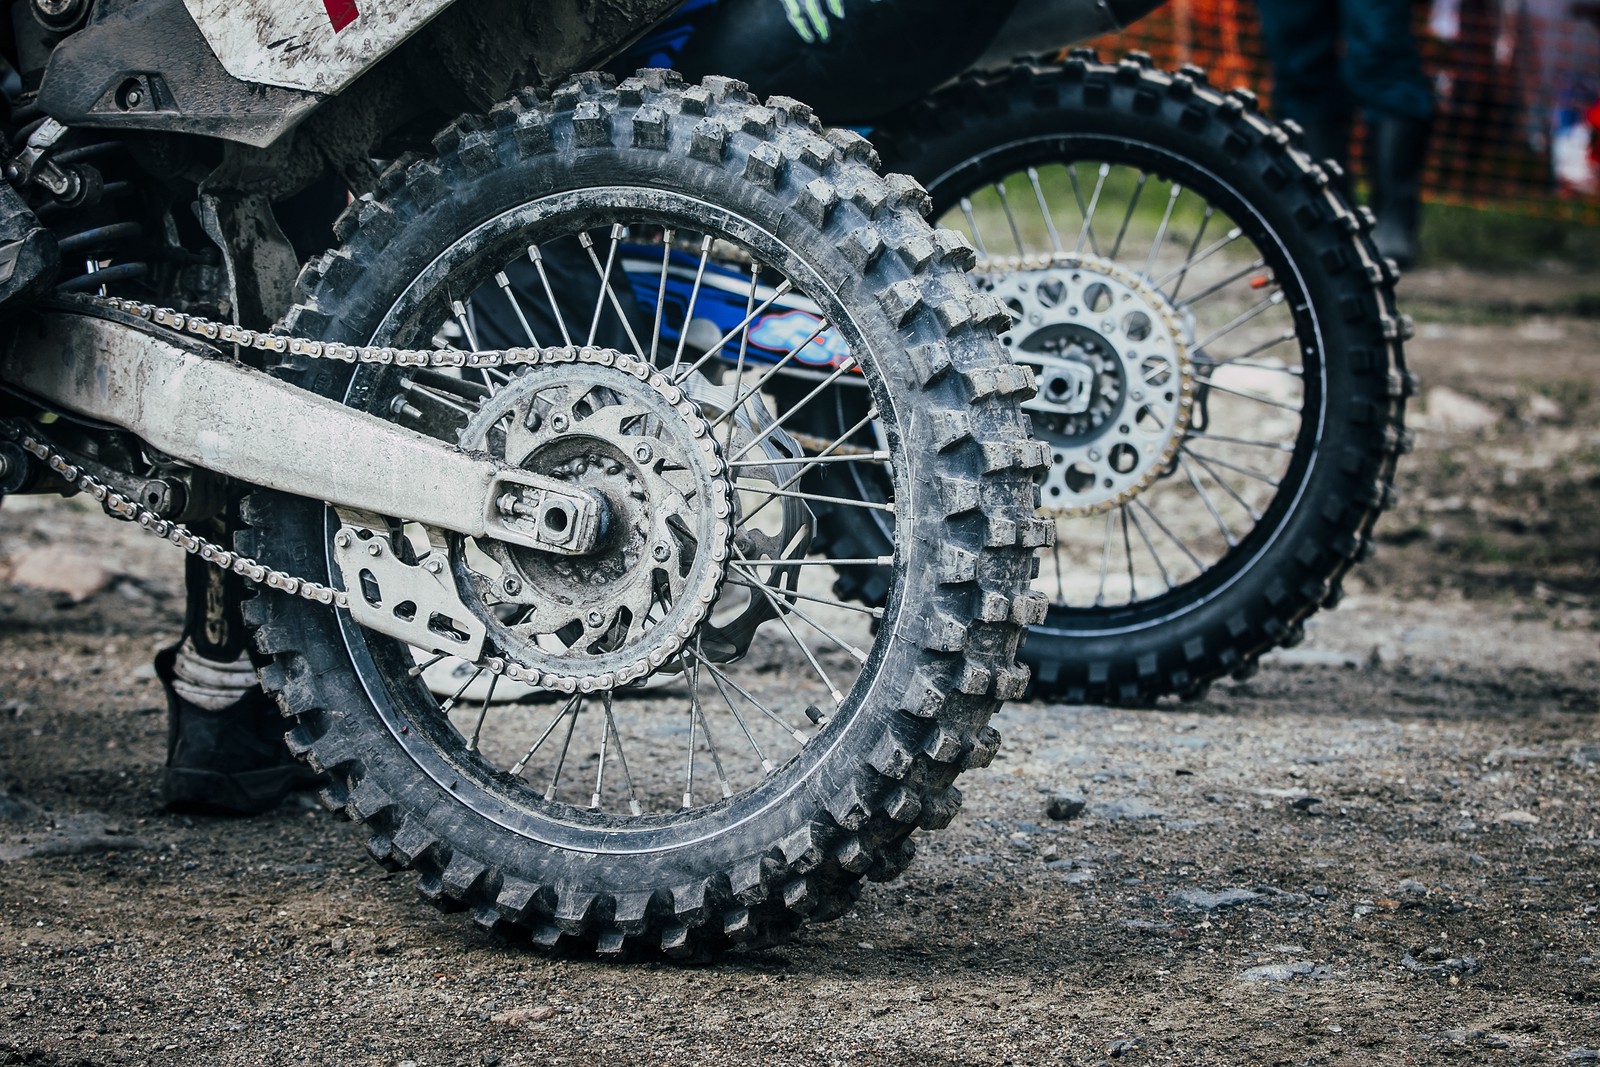
 The cause and effect of the front and rear sprocket
If you?re wondering how to gear your bike to run better, you?re not alone. Gearing your dirt bike is a compromise ratio and as soon as you change your conditions, you might need a new compromise. Here are our best guidelines for this process.
Sprocket size and final drive
Gearing up and gearing down are just not the same; make sure you know the end results of both. You can gear up by using a smaller rear sprocket or a larger countershaft/front sprocket. Gearing up adds more speed and decreases the final drive ratio. You can gear down by using a larger rear sprocket or a smaller front sprocket. Gearing down reduces speed and increases the final drive ratio.
So, what?s the final drive ratio? It just means how many turns the countershaft has to make in order to turn the rear wheel around once (Acceleration). A higher drive ratio corresponds to a lower gearing and more turns of the countershaft for every rotation of the wheel, and a smaller drive ratio corresponds to higher gearing and fewer turns of the countershaft for every rotation of the wheel. Which setup means your engine is working slower? The answer is a higher gear ratio because it turns your wheel with fewer turns of the countershaft.
So, the bottom line is, what are you trying to achieve?
For more bottom end and faster acceleration, use a small countershaft/front sprocket or large rear sprocket. For every 1 tooth that you change on the front sprocket is like changing 3 to 4 teeth on the rear (and that?s true for higher gearing ratios, too). This configuration creates that smaller gearing ratio that works best for tracks with lots of turns, few long straightaways, like Arenacross, and tight trail riding.
For more top end and faster top speed, use a large countershaft/front sprocket or smaller rear sprocket. This creates a taller gearing ratio that?s best for high speed situations without many tight turns like wide open desert racing. Since you get more action from changes to the countershaft, adjust the rear sprocket by just 1 or 2 teeth for a subtle change.
Gearing changes based on conditions
So, what kind of changes in riding conditions might merit a gearing change? Quite a few actually. Here are some of the principles to keep in mind:
- Never adjust your gearing by more than one tooth at a time.
- If you?re changing your tires for a certain track, realize that your traction might be different. An increase in traction might call for a gearing change.
- If you?re riding through conditions that make you build revs slowly and labor more ? like hauling through sticky conditions ? your motor might be getting yanked down too much and your gearing might be too tall.
- If you?re riding at a higher altitude than normal, you might need to gear down to allow for free revving.
- On the other hand, if you?re too low with your gearing, you?ll be shifting constantly and your wheel will just spin on terrain that?s dry.
- Riders with engines that are geared low at an optimal level will need to shift less and enjoy more free and responsive performance.
- Riders with engines that are geared more on the tall side will enjoy more control, but may rely on the clutch more.
- Taller gearing is most useful for off-road courses.
- In general, lower gearing means moving through the gearbox?s spread faster and shifting more ? and vice versa.
- Always remember that you?ll need to adjust your chain based on the manufacturer recommendations to compensate for any larger or smaller sprockets.
- Keep one-tooth and two-teeth larger rear sprockets and a one-tooth lower countershaft with you so you can change gearing on the go without changing your chain length.
- Don?t bother to swap out a used sprocket for a fresh one if your drive system is shot; you?ll just be wearing out your new sprocket fast.
- Always remember that your gearing goal for speed and performance is to rev freely, stay hooked up, and remain just responsive enough to get through a rhythm section cleanly.
Maintenance, drive chain components, and gearing
With experience, you?ll soon be able to see the signs of drive parts that need to be replaced ? and no one needs to lose a chain right as they pin it up a hill. Before each ride, do a visual check.
You can physically check whether your chain is worn by measuring how far apart the pins holding the chain together are spaced. This works because there is a ?service limit? for how much the chain should stretch; your owner?s manual will tell you what the service limit is.
It?s also time to replace your chain if you see any of these signs:
- chain links with a wear pattern that?s flat looking on the bottom and top;
- the chain fails to cycle through smoothly;
- loose, easy side to side play
- rust or corrosion on the chain.
Next look over the sprockets. It?s time to replace them if you see any of these signs:
- cupping at the base of any tooth;
- teeth leaning
- worn teeth.
Finally, look over the drive chain components, including the guide, rollers, and slide. Make sure you have the right drive train tools to fix the drive parts that need to be replaced if you see any of these signs:
- chain cutting into the slider;
- exposed metal; or
- sprocket bolts that are loose.
If you find that any of these drive parts need replacing, it?s a good idea to replace them all. That?s because they have to work together and the parts that touch each other tend to create wear patterns on each other. If you put a new part in next to a worn part, the new part will wear down faster than it should thanks to the existing wear pattern on the older part next to it.
The bottom line
No matter where you?re riding, as an experienced racer you?ve probably felt the difference between gearing that was just so-so and gearing that was completely dialed for your track. Fortunately, learning how to decide on gearing gets a lot easier with experience. Understanding the cause and effect of the front and rear sprocket is the most important part; once you?ve got that down, it?s all trial and error.

