Creating custom resolutions has always been so easy on Windows 7 and 8.1 version. Users used to change the resolution of the screen with a right-click on the desktop and change the resolution in the properties tab. Besides this, Microsoft has modified the process with its Windows 10 software version. Several Windows 10 users do not know how they can create custom resolutions on their Windows 10 computer screen, and if you are amongst those users, then you have come to the right place. Here are some of the best and effective methods by which you can create custom resolutions on your Windows 10 system in no time.
Here?s how you can change the custom resolution on Windows 10
Using the Nvidia Control Panel
? Right-click on the desktop screen and select NVIDIA control panel.
? Click on Change Resolution available under the Display panel.
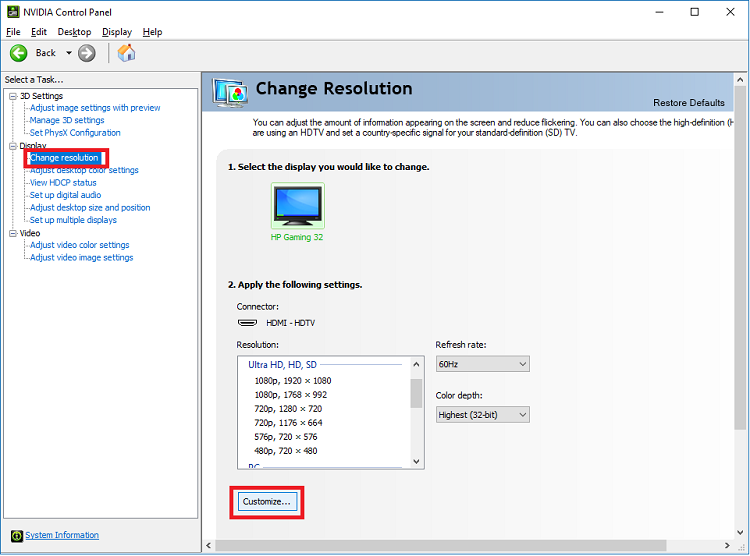
? Scroll a little at the right side of the screen and click on the Customize button under Choose the Resolution tab.
? Now, click on Create Custom Resolution by checking Enable resolutions not exposed by the Display.
? Fill in the desired numbers of resolution you want on the desktop and click on the Test button to have a preview of that resolution.
? Then click on OK if you want to apply the resolution permanently.
By Using The AMD Catalyst Control Center
To change the resolution of your Windows 10 PC screen by using the AMD catalyst control center, follow the steps listed below:
? Right-click on your desktop and select AMD catalyst control panel from the available options.
? Now, go to the information in the software section.
? Choose Copy The 2D driver file path in it.
? Press Windows key + R to open up the Run dialog box.
? Type ?Regedit? and press Enter.
? Now, navigate to the 2D path file and Double-click on the 0000 folder.
? Find the DALNonStanddardModesBCD1 registry key select Edit by Right-click on it,
? After that, fill in your desired resolution values in the box and click on the OK button available at the bottom left corner of the box.
? Restart your PC, and you are good to go.
By Using Custom Resolutions & Modes for Intel Graphics Driver
It is another way to change the resolution of your Windows 10 Pc and to do so, follow the steps listed below:
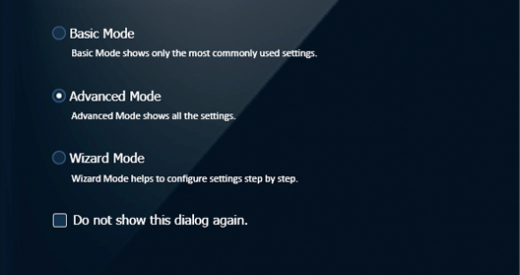
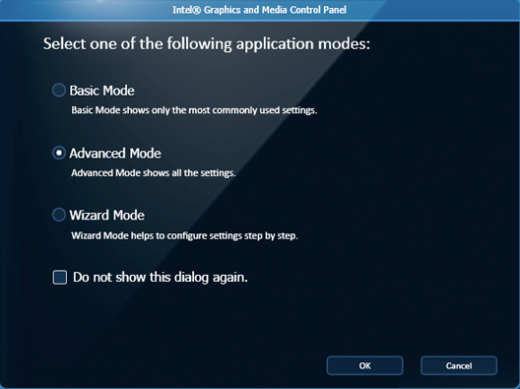
? Right-click on the main desktop to open up the Graphics Properties from the available options.
? Choose Advanced mode to select the Application mode.
? Check Custom Resolution & Modes under the Display tab.
? Click OK on it if it?s available there or alternatively type C:>Windows>System32>CustomModeApp.exe to run the app.
? Now type the value in basic settings to apply your desired resolution on the screen.
? After typing the values, click on the Add button available under the box.
? Click on OK after the resolution has been applied successfully,
? Restart the system and you are done.
Using Custom Resolution Utility (CRU)
CRU is another option you have to create a custom resolution on your Windows 10 system. It is an application that supports NVIDIA, AMD, and Intel graphic cards too. CRU supports almost every utility and changes the resolution of the desktop of your Windows 10 system in no time.
Scarelett Thomas, writer of this blog loves to write about troubleshooting tips, beginner?s guides and other varied topics. Major topics of her interest are printer support like hp printer support, Brother Printer Support, Canon Printer Support etc.

