A few months ago, I started looking into different Augmented Reality frameworks and used Unity & Vuforia to create AR posters, like this one:
I spent some time putting together a step by step tutorial on how to make your own and here it is!
This tutorial is currently working for MacOS High Sierra v10.13.2 with Unity 2017.3.
Initial setup
? –
If you don?t already have it, start by downloading Unity 2017.3.
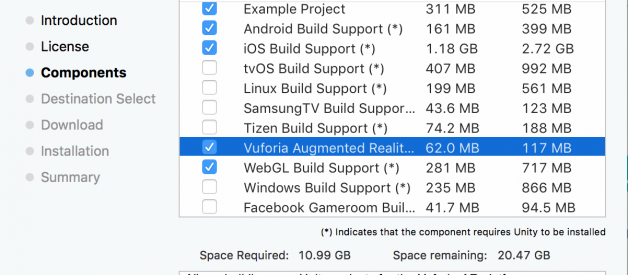
When you see the ?Unity component selection? window, make sure to tick the ?Vuforia Augmented Reality? box to automatically install the extension (previous versions of Unity require to install Vuforia separately).
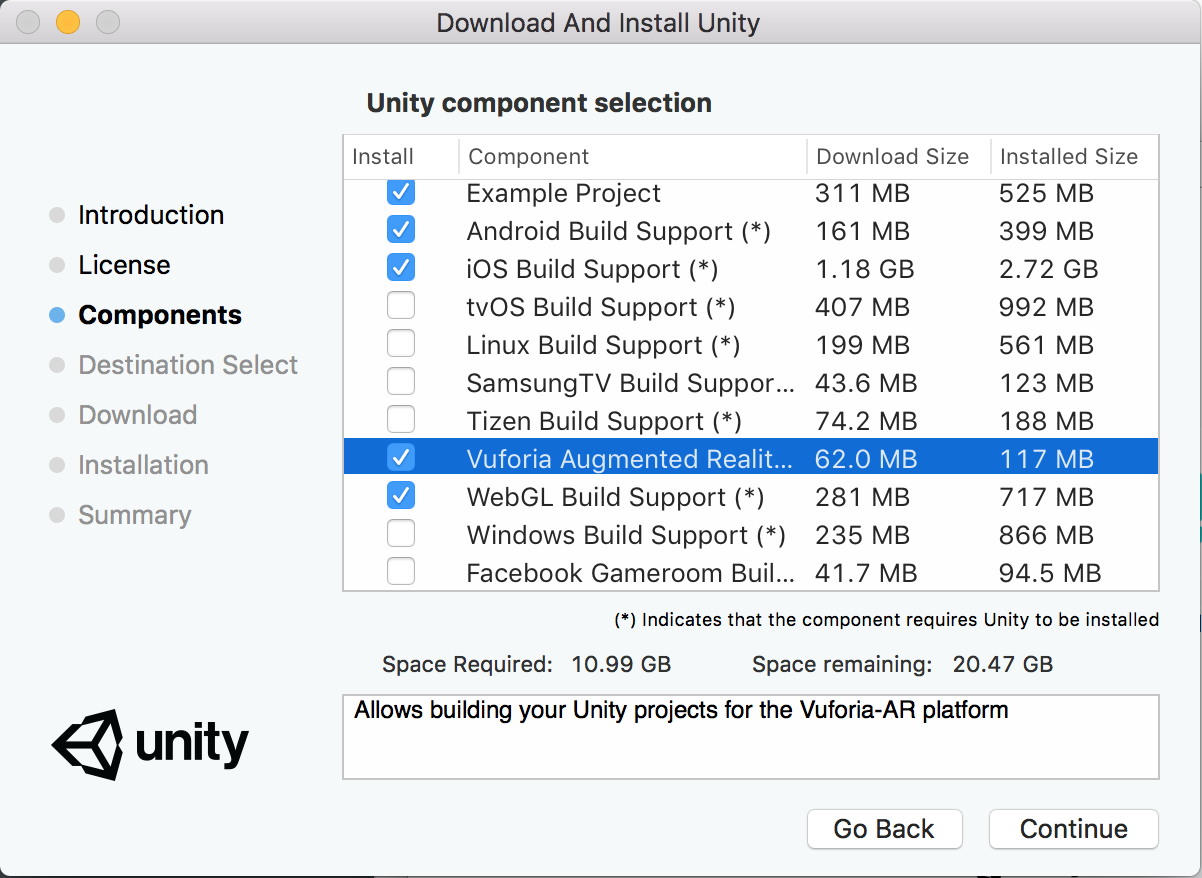 Select the ?Vuforia Augmented Reality? option to install the extension automatically.
Create a new project
? –
After installing, launch Unity, sign in or create a new account and click on ?New? to create a new project.
Change the default project name if you want but most importantly, click on 3D and then click on ?Create project?.
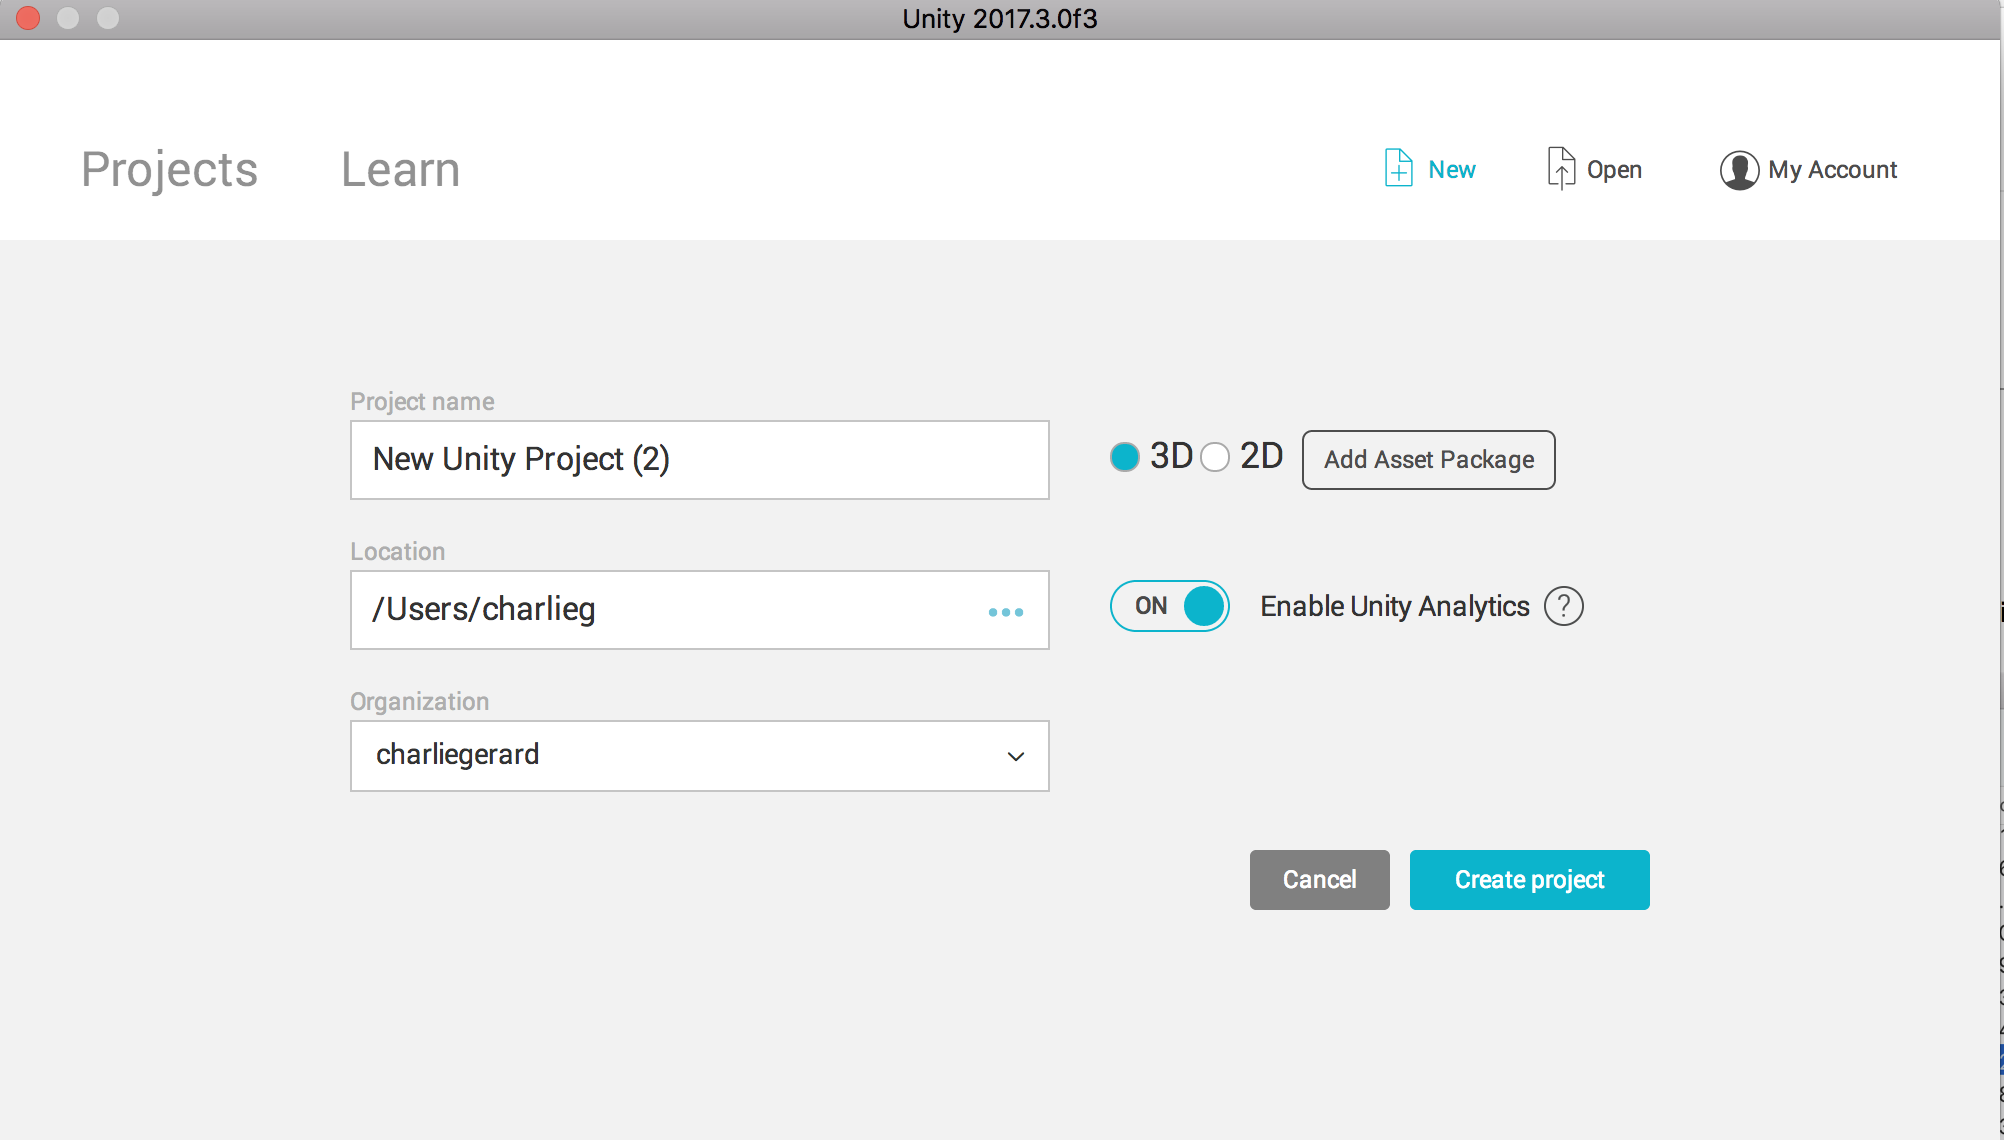 Create a new project and select the ?3D? option.
A Unity window should open, like below:
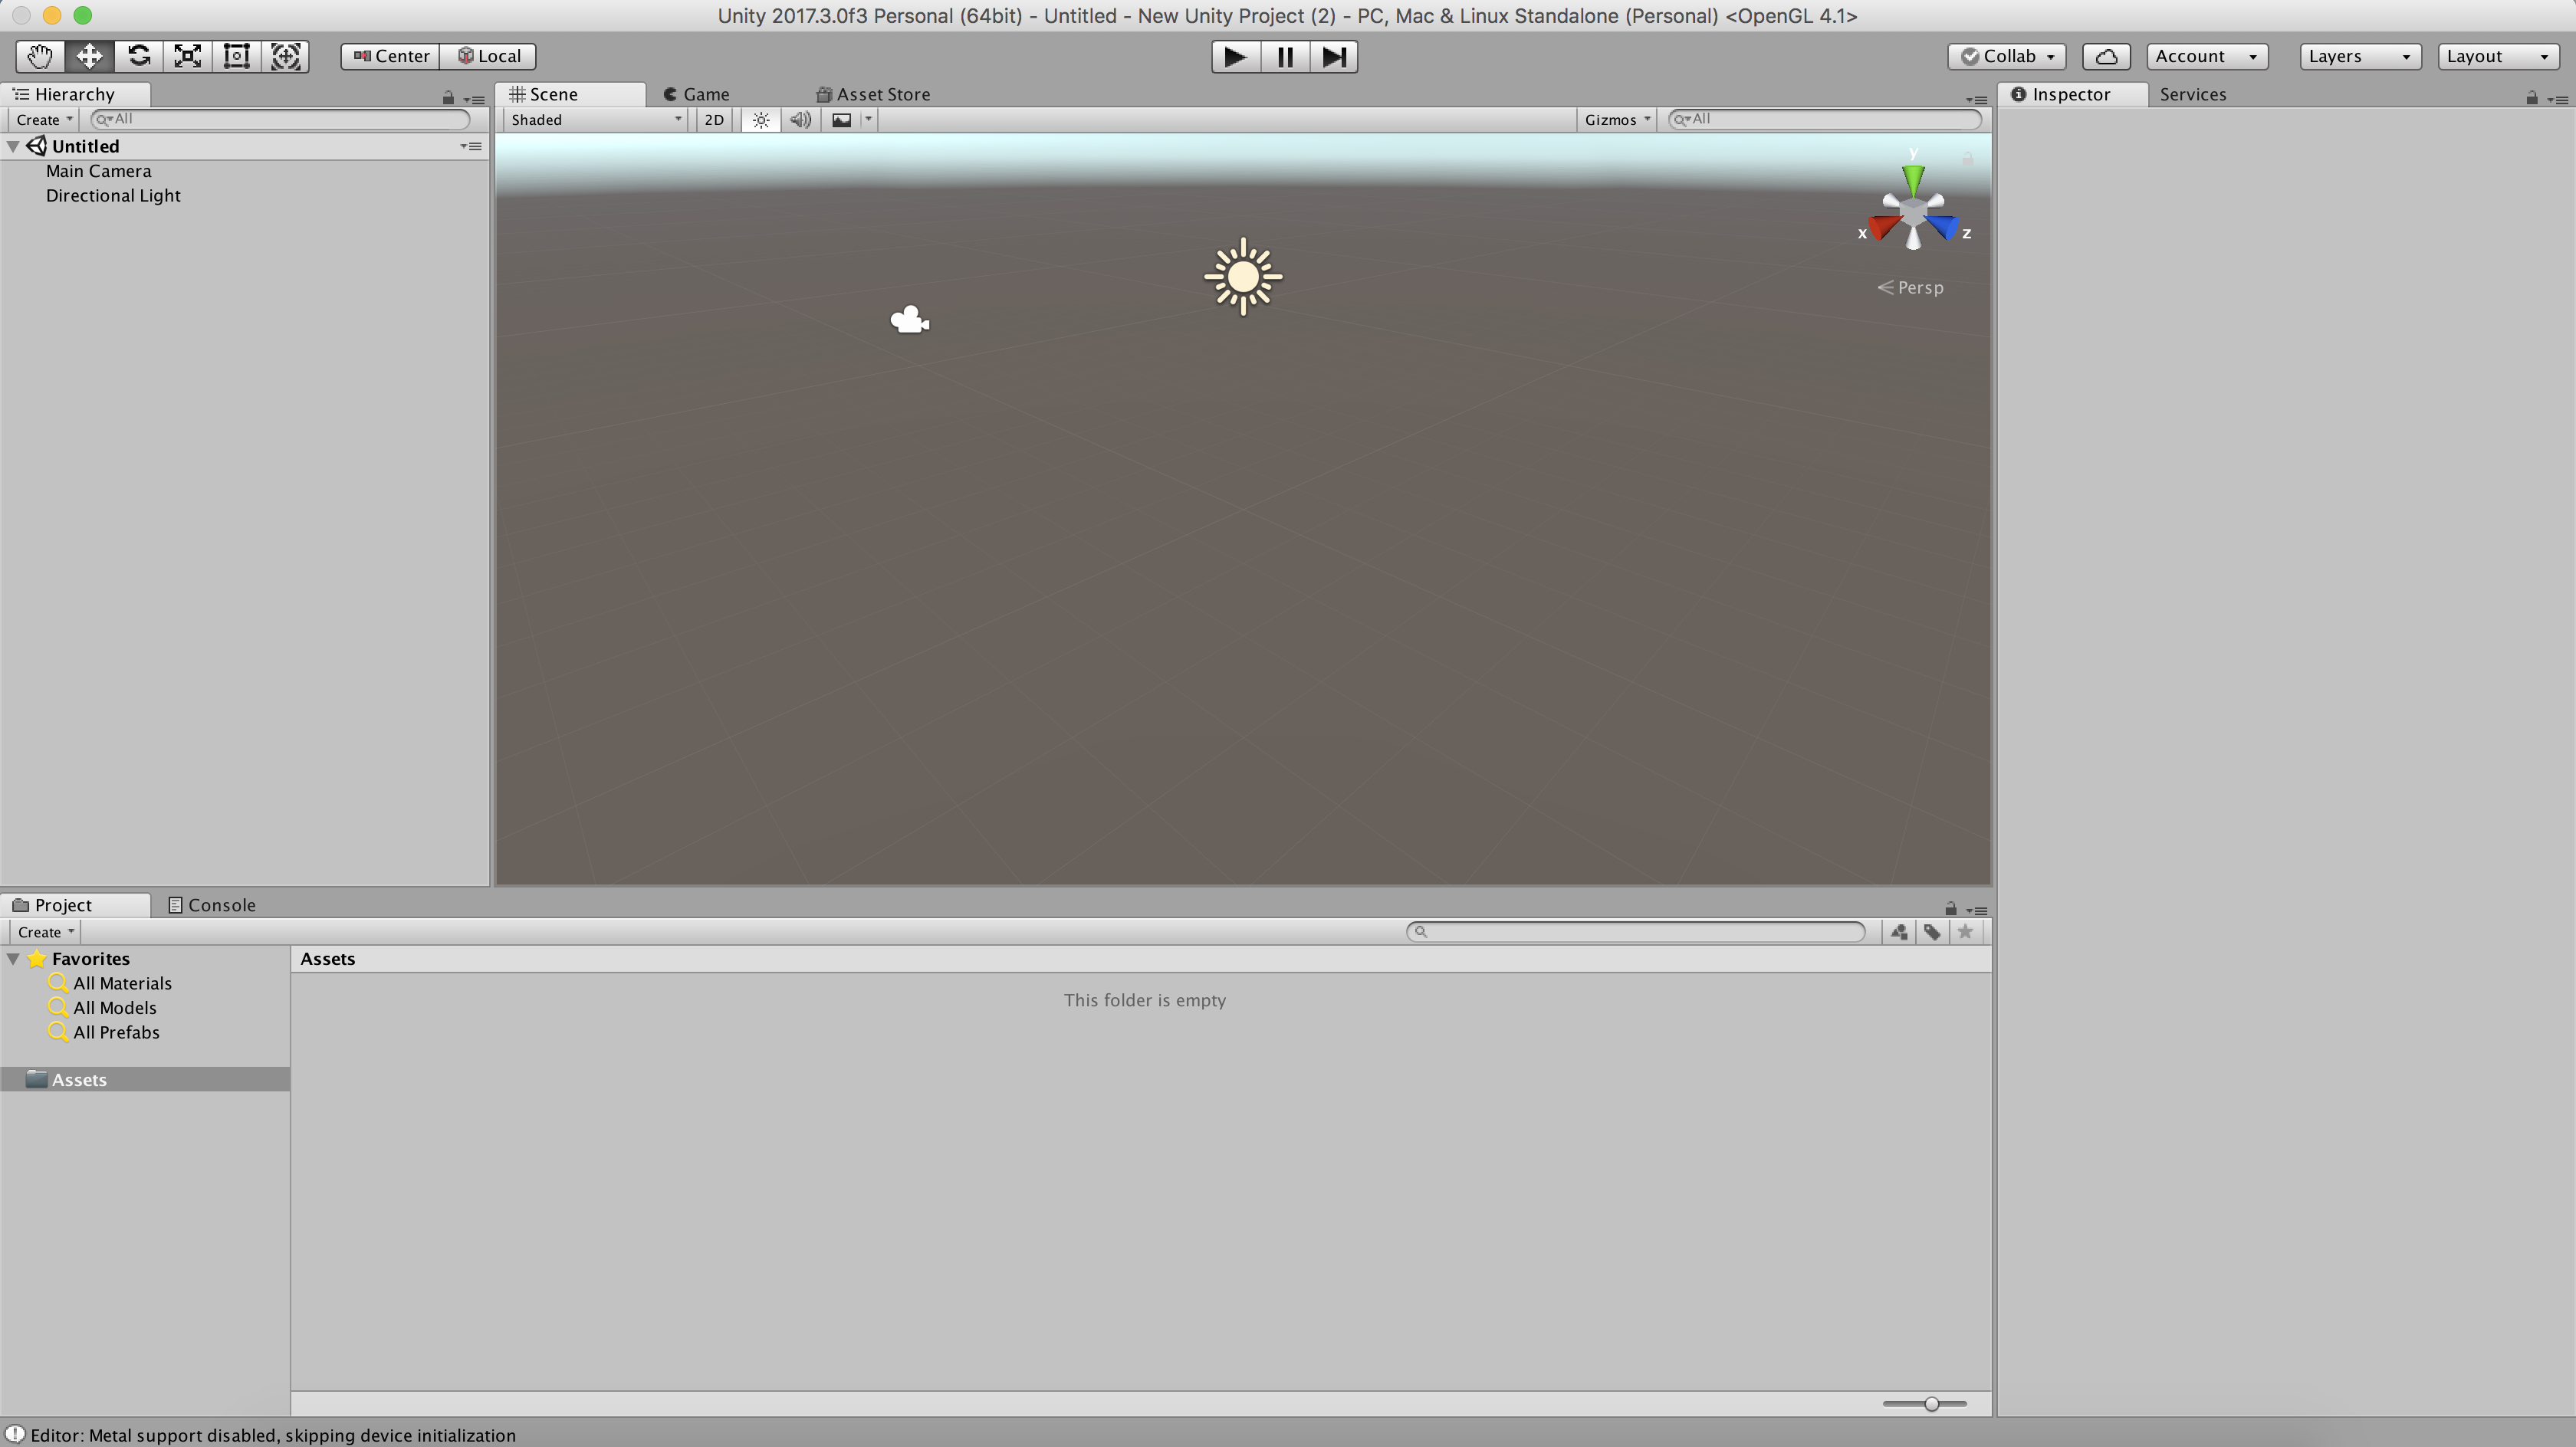 Default Unity project window.
In the left panel (Hierarchy), delete the default ?Main Camera? and ?Directional light? objects. To do so, right-click on each object and select ?delete?.
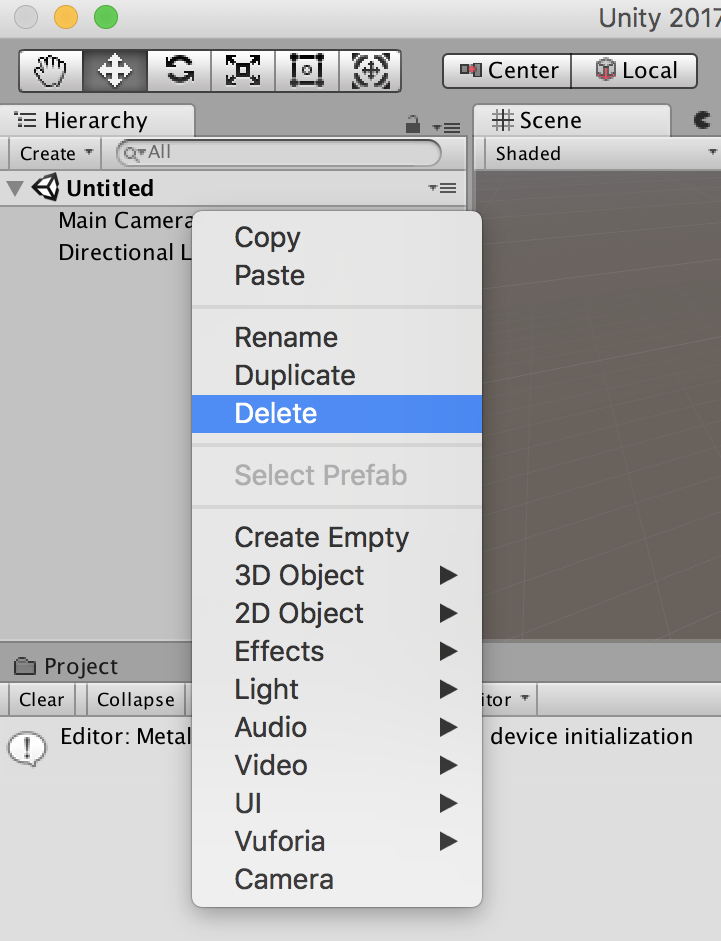 Start by deleting the Main camera and Directional light.
Import the Vuforia assets
? –
To test that our initial setup is working, let?s use some default Vuforia assets.
In the middle panel, click on the ?Asset store? tab and wait for the asset store to load.
Search for ?Vuforia Core Samples? and download/import the package.
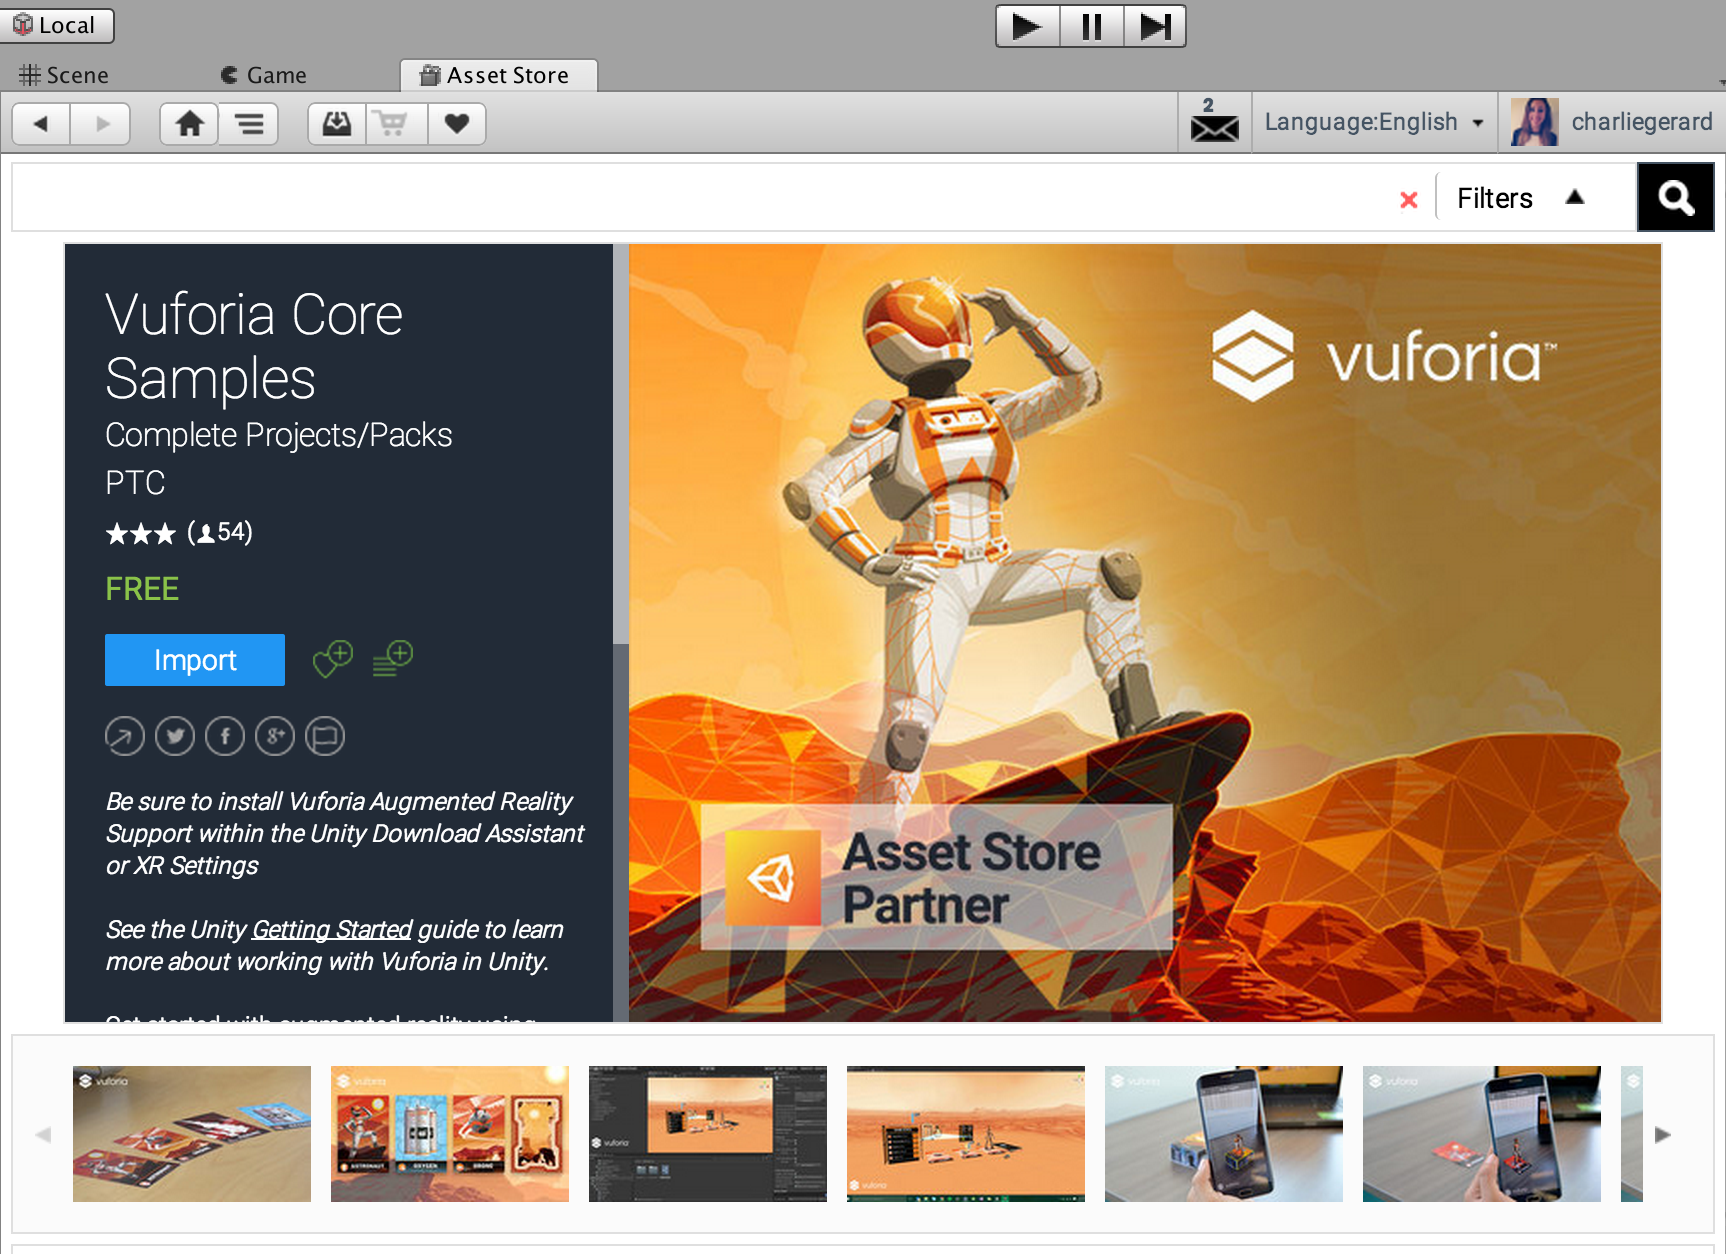 Download/import the Vuforia core samples from the asset store.
Once the assets are imported, let?s add an ARCamera to our project by clicking on GameObject > Vuforia > AR Camera.
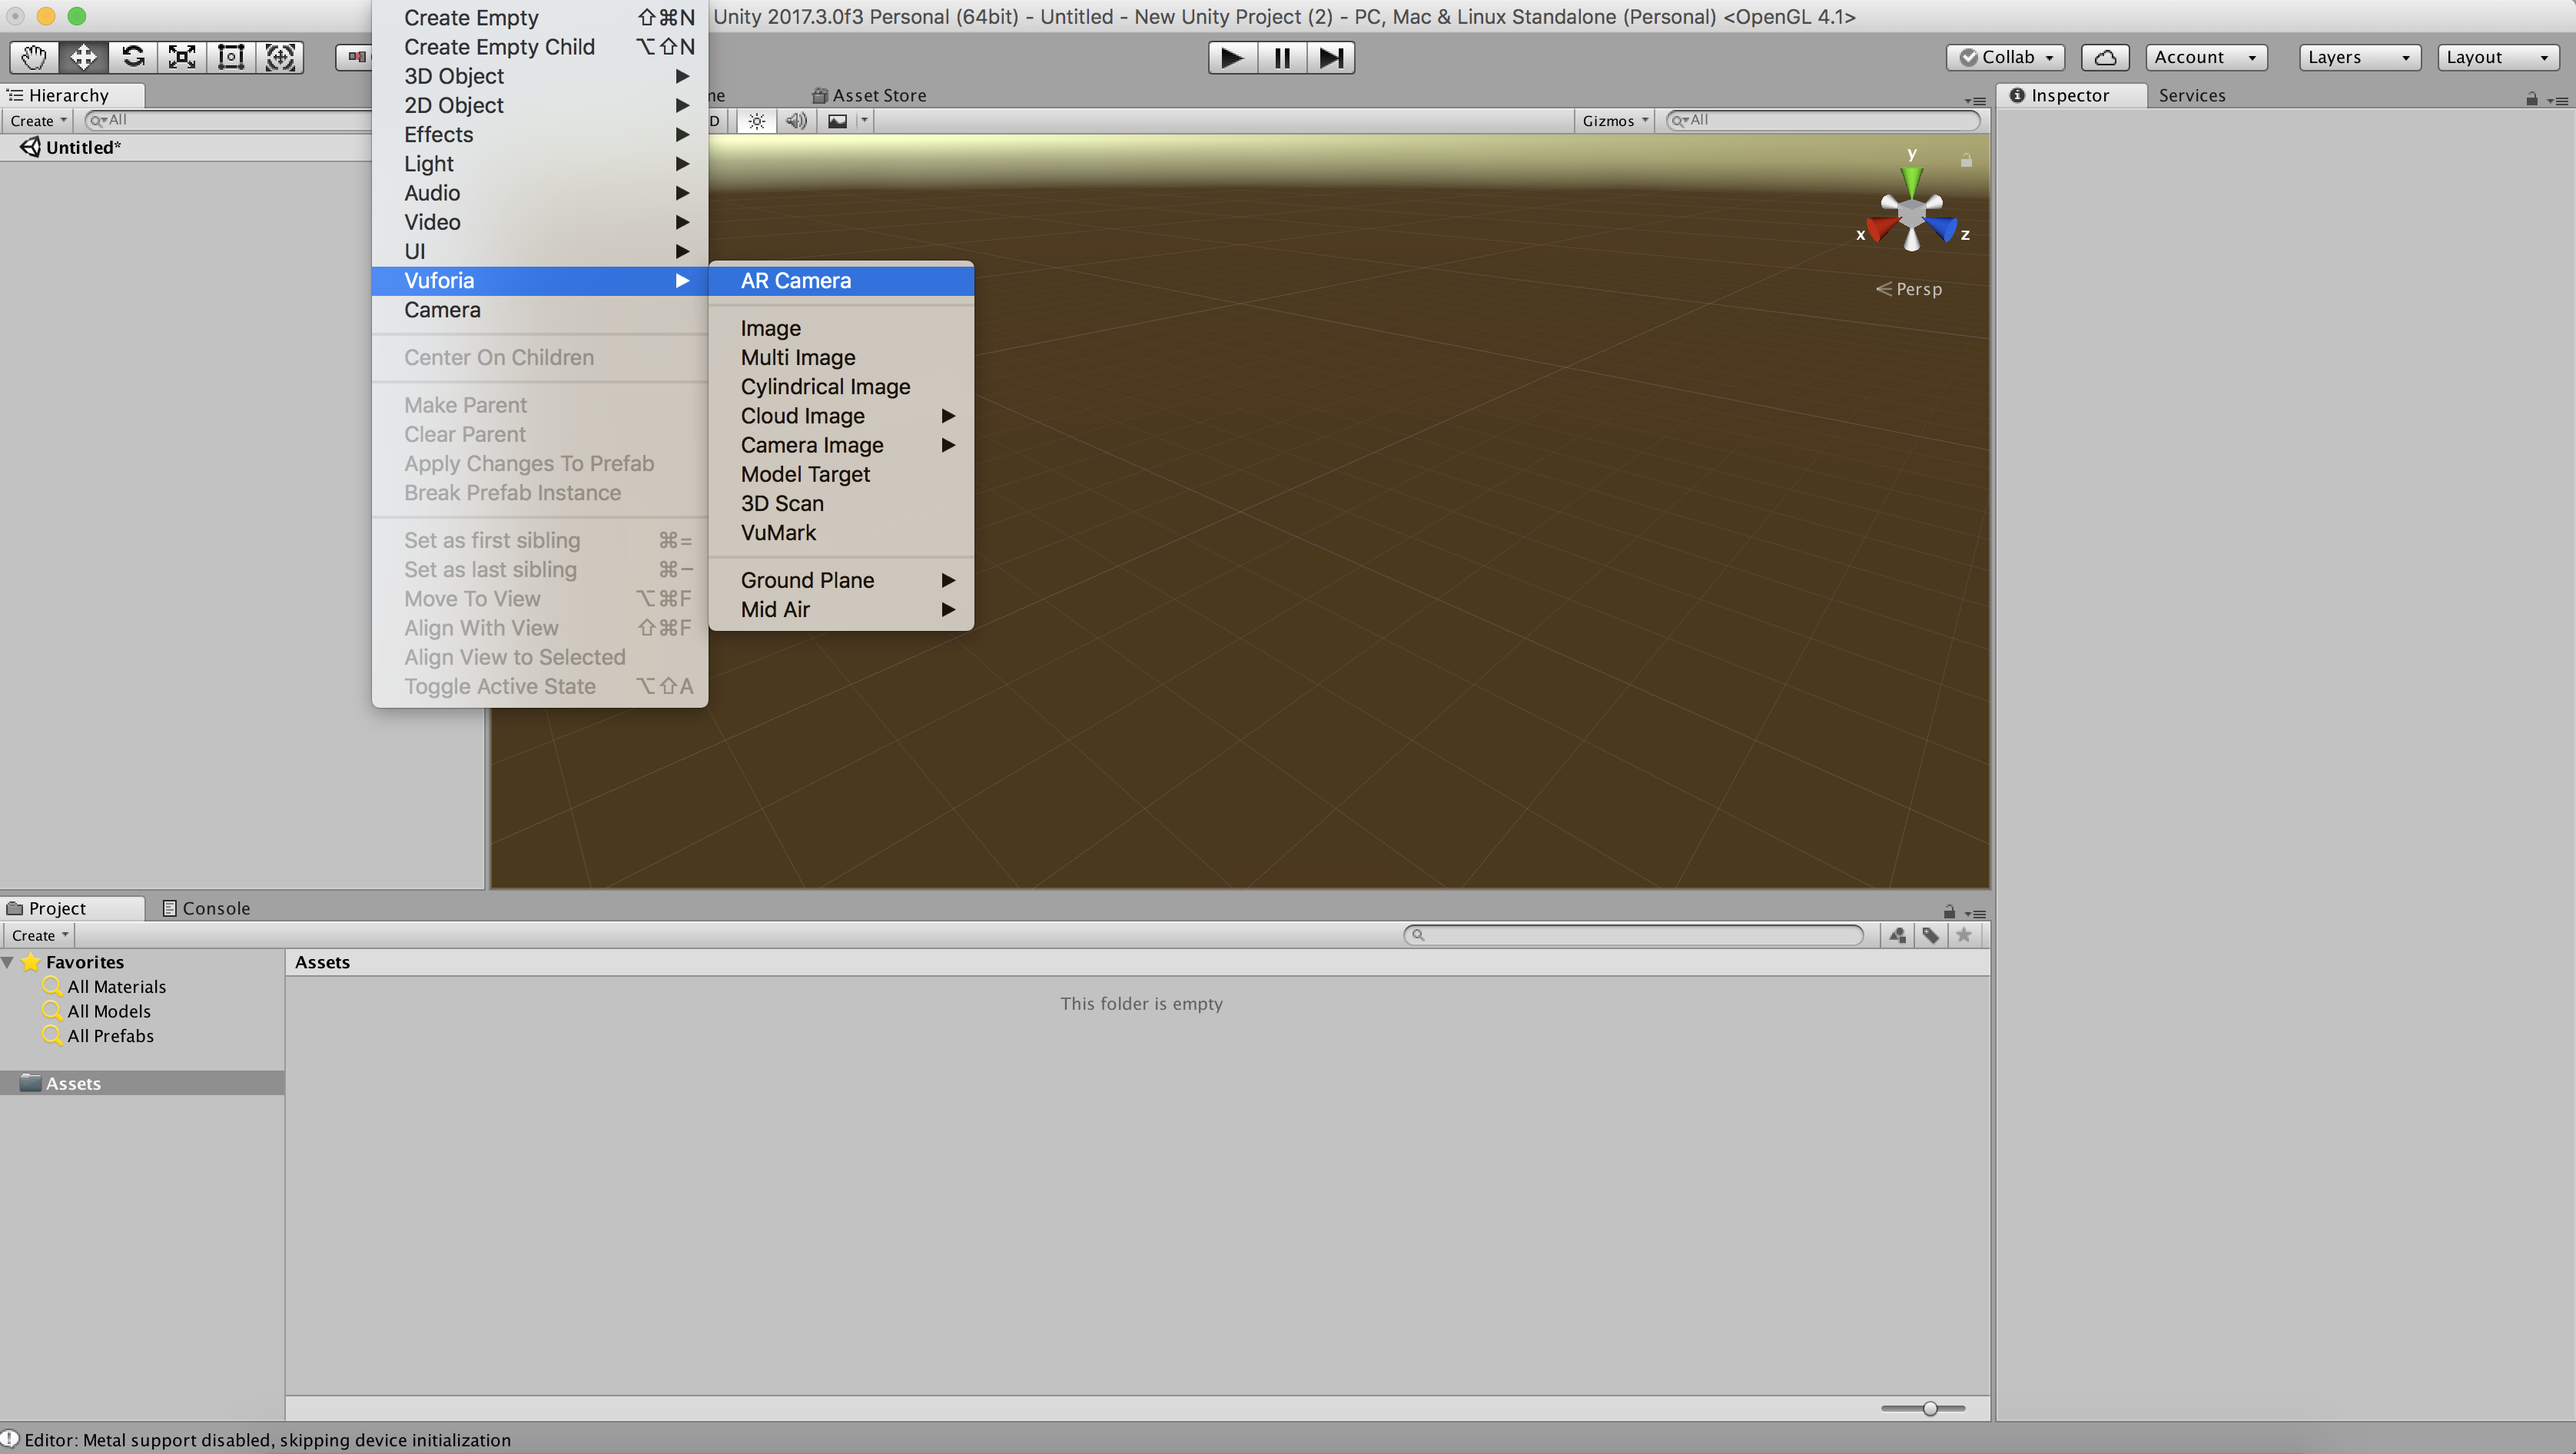 Add an AR Camera to your project
You should see an AR Camera object added to the Hierarchy panel. Click on it and in the right panel, click on the ?Inspector? tab to see the configurations of the object.
Towards the bottom of that section, you should see a button ?Open Vuforia Configuration? that is disabled by default. To enable it, go to File > Build Settings and click on the ?Player Settings? button.
Scroll down and in the XR Settings section, select the option ?Vuforia Augmented Reality Supported?. You can then close the Build Settings window and go back to the AR Camera configurations window.
The ?Open Vuforia Configurations? button should now be enabled.
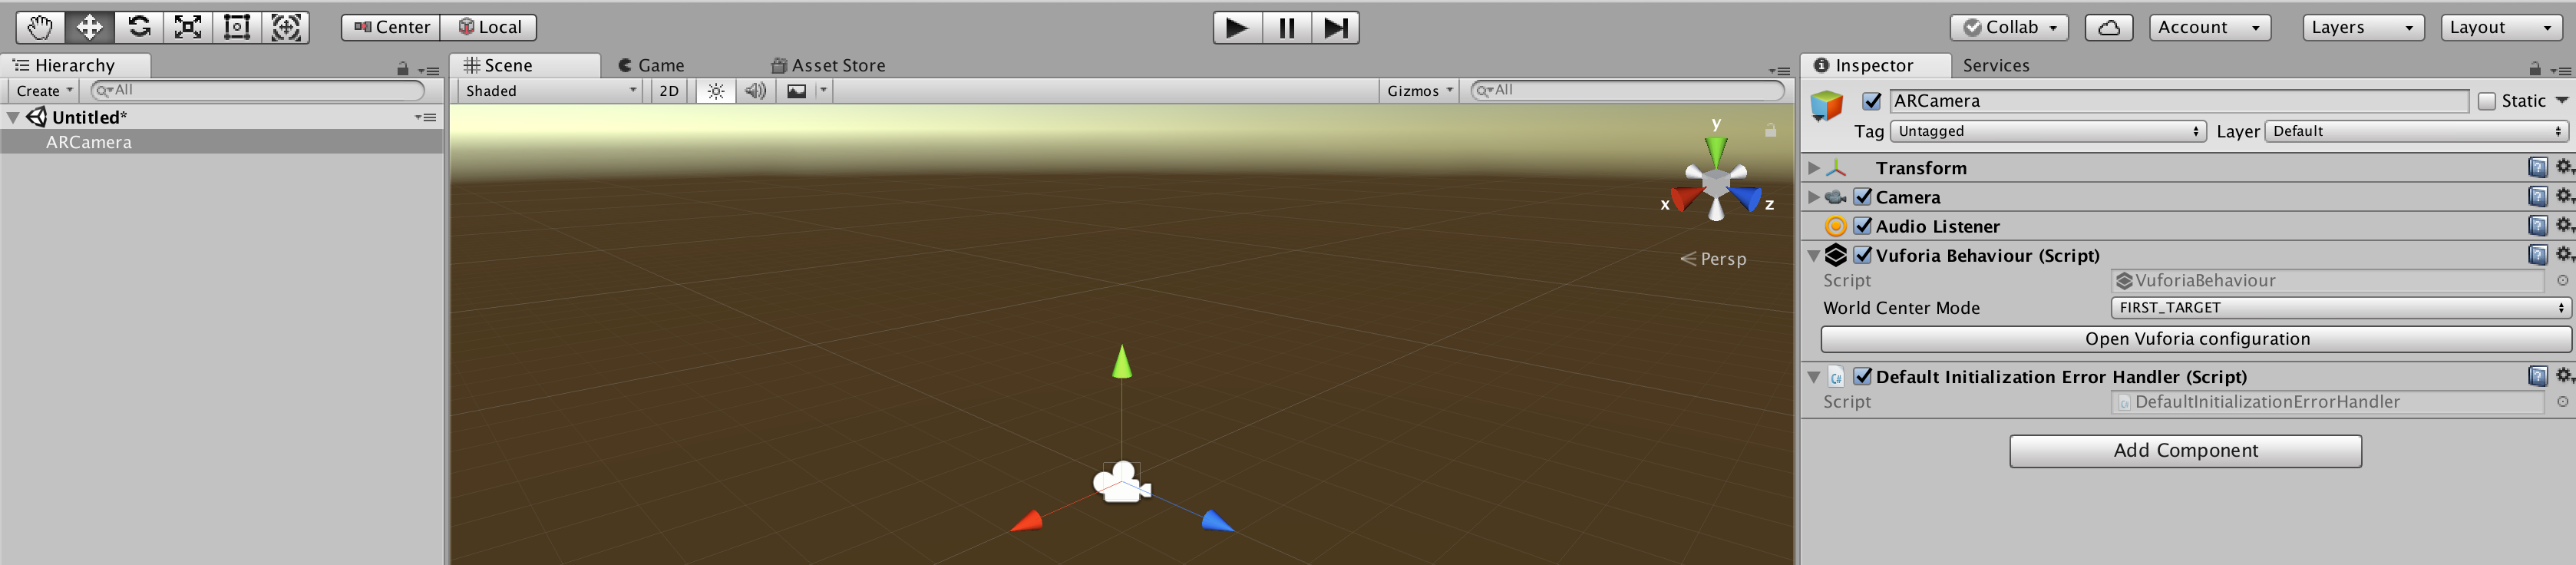 Start configuring the ARCamera.
As we imported the Vuforia core samples assets, we need to activate them so they can be used and recognised by the AR Camera game object.
To do so, after opening the Vuforia configuration panel, activate the databases:
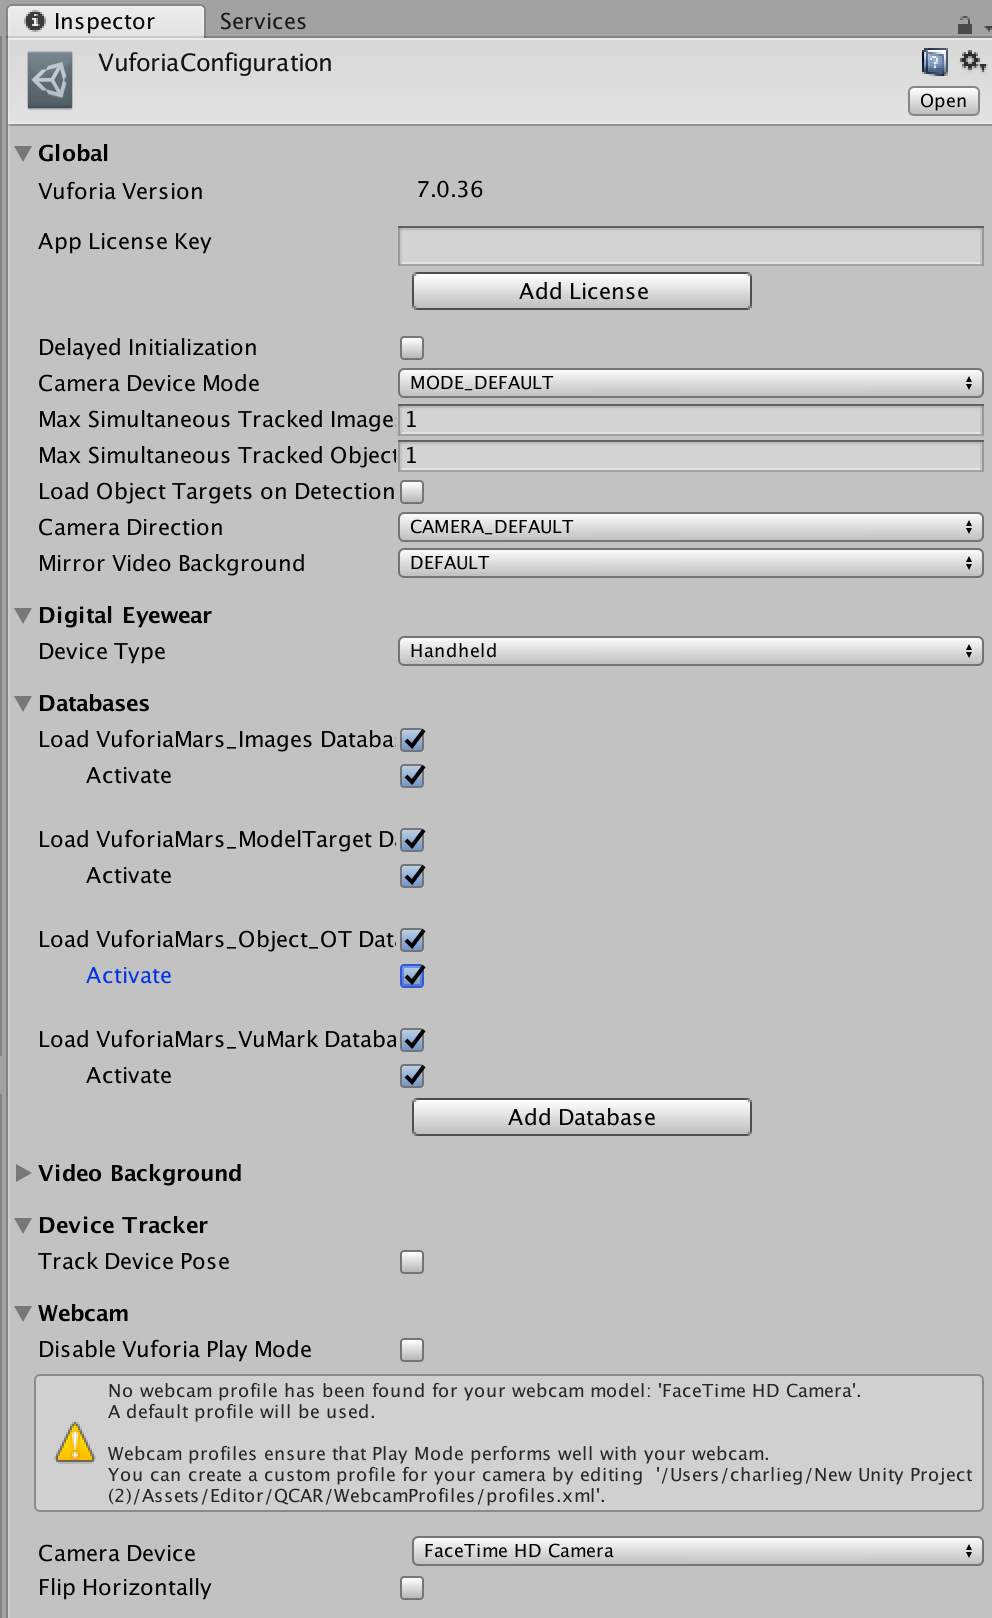 Activate the Vuforia core sample databases
Now that the databases are activated, we are able to use the assets and have them recognised and trackable.
Let?s add what is called a ?target image?. A target image is a specific image that you will want your camera to recognise to start your AR animation.
To add a target image to our project, go to GameObject > Vuforia > Image.
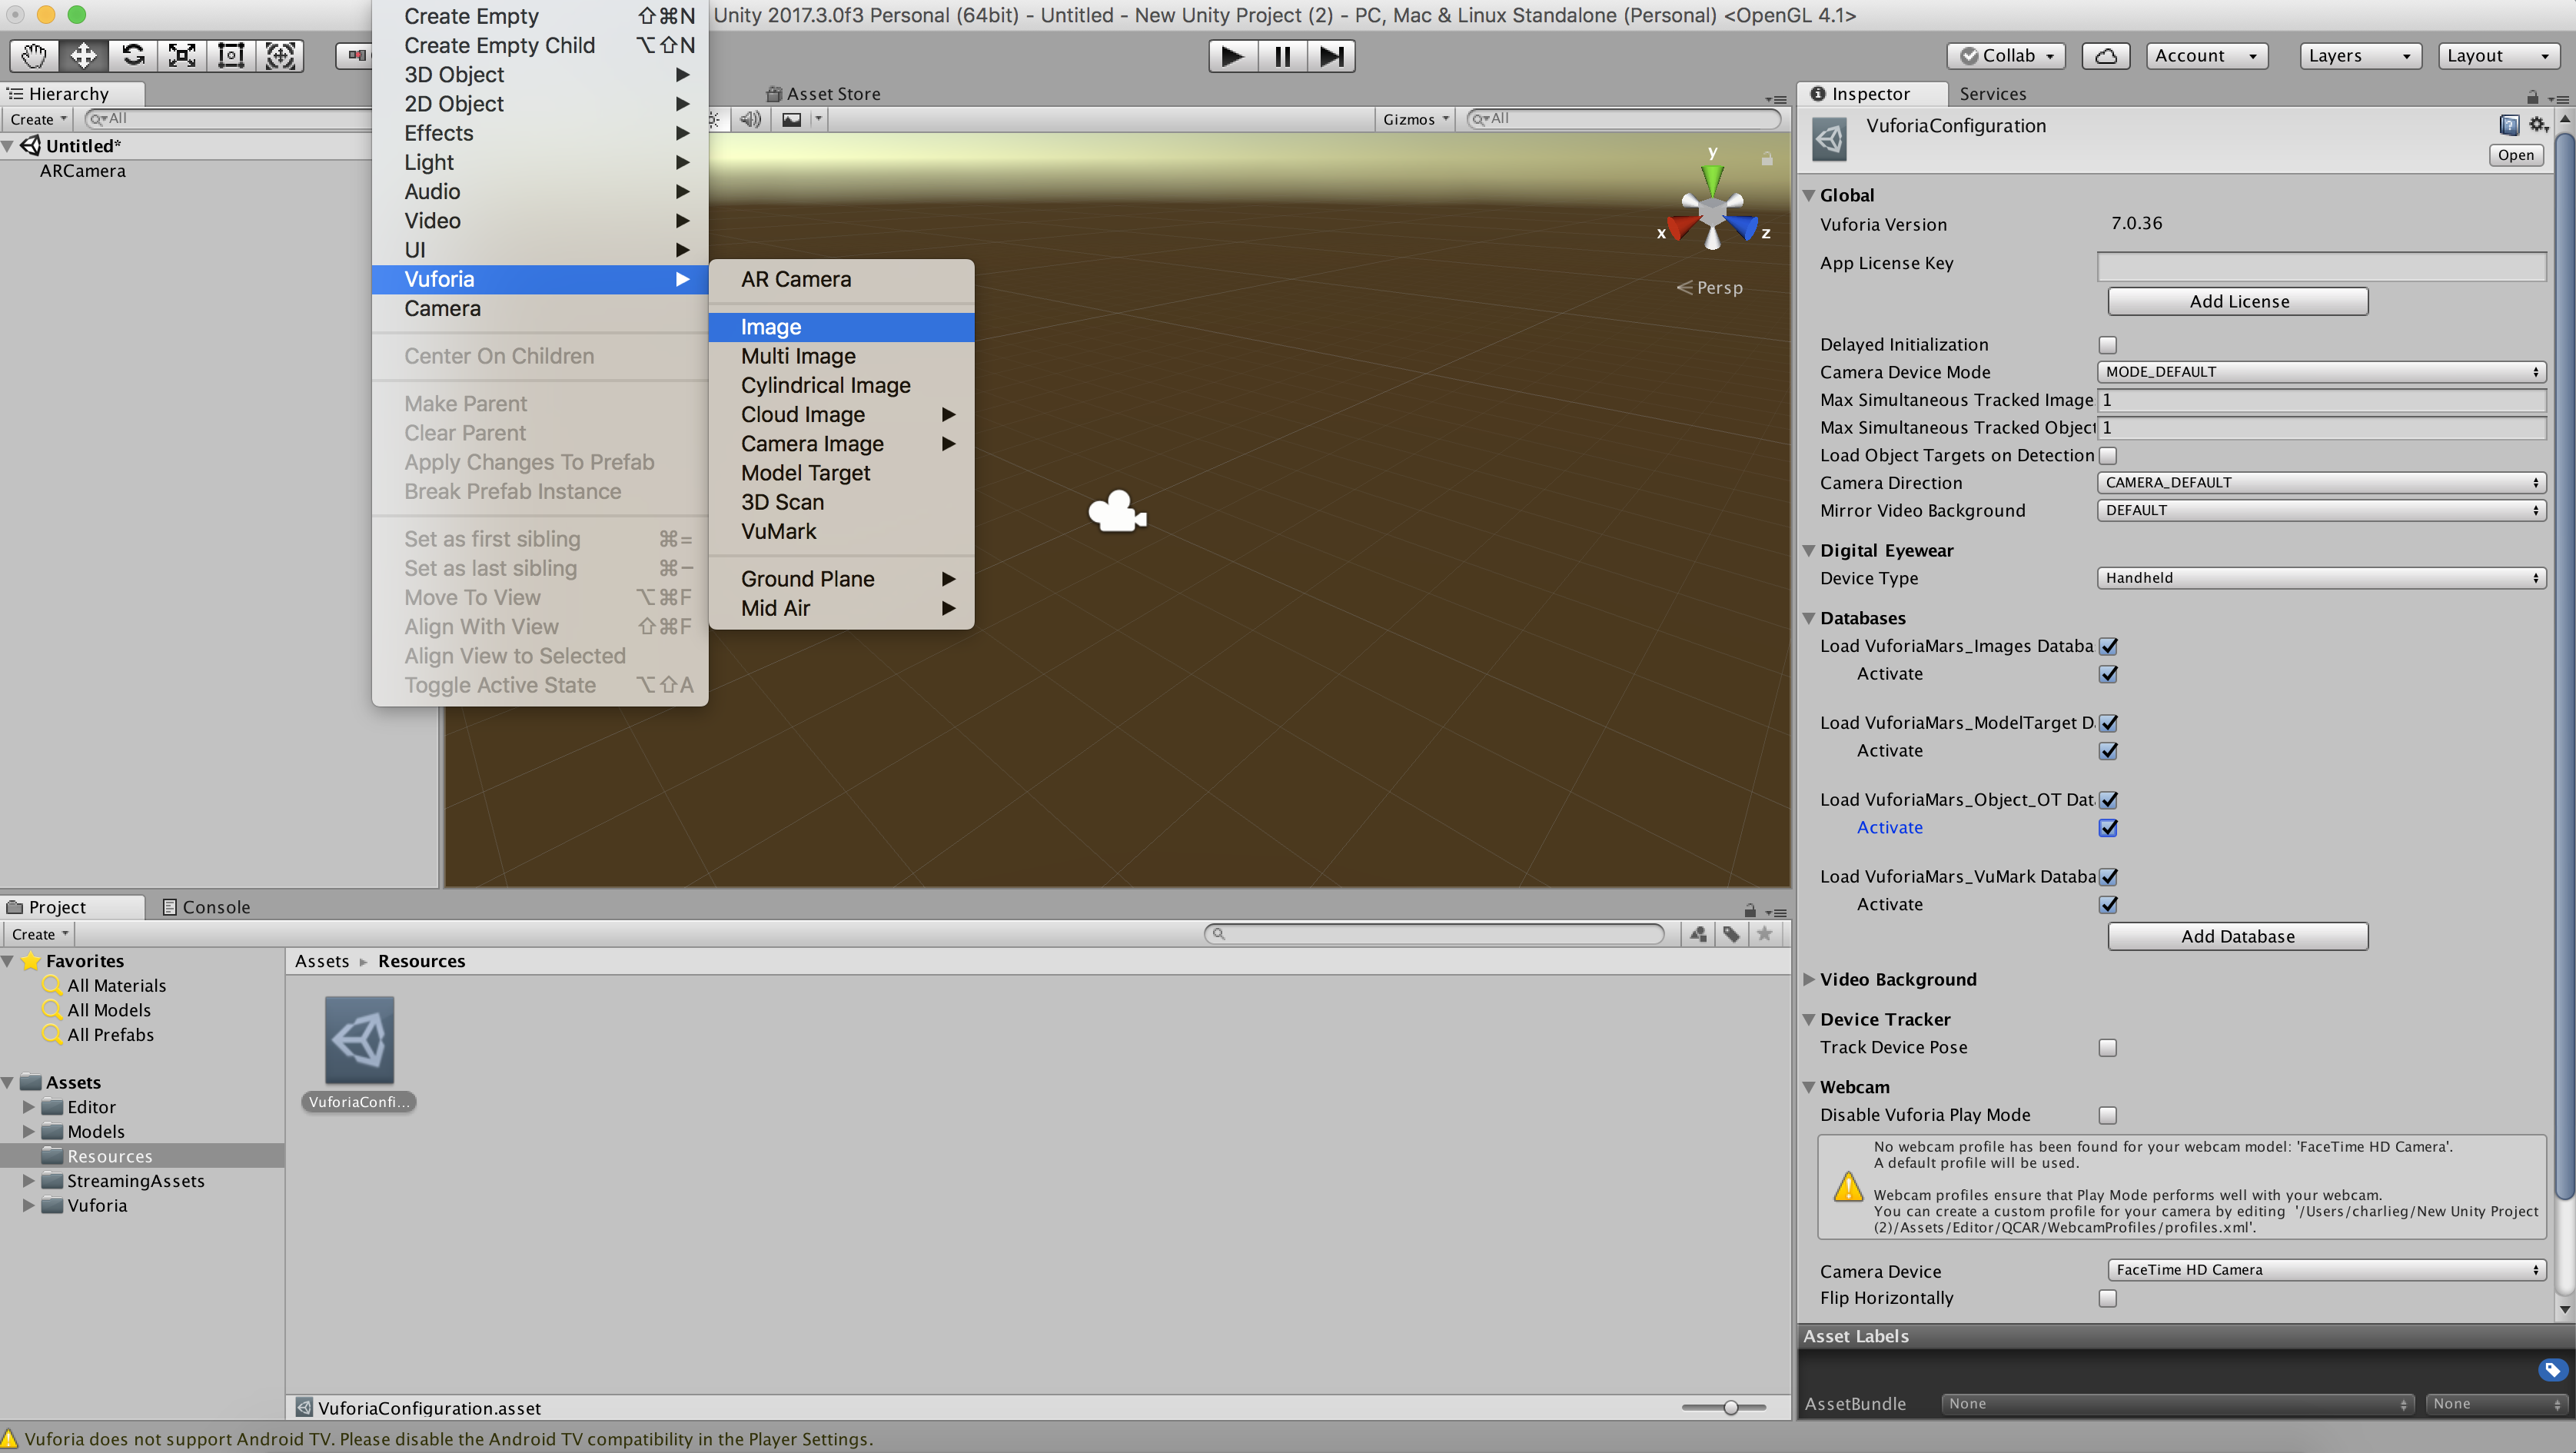 Add a target image to your project.
You may have to zoom in a little bit inside your scene to see the image but the result should look like this:
 Target image added.
The default image comes from the Vuforia core samples we imported earlier. It can be replaced later to use your custom image but for now, we just want to check that our setup is working.
When our camera recognises this image, we want to overlay a 3D object over it. For this, right-click on the image target in the left panel and select Vuforia > Model target.
 Add a 3D object over your image target.
By default, the 3D model is quite big so we need to scale it down.
Click on the model target object in the left panel and update its scale in the right panel. A scale X, Y and Z of 0.5 should work well.
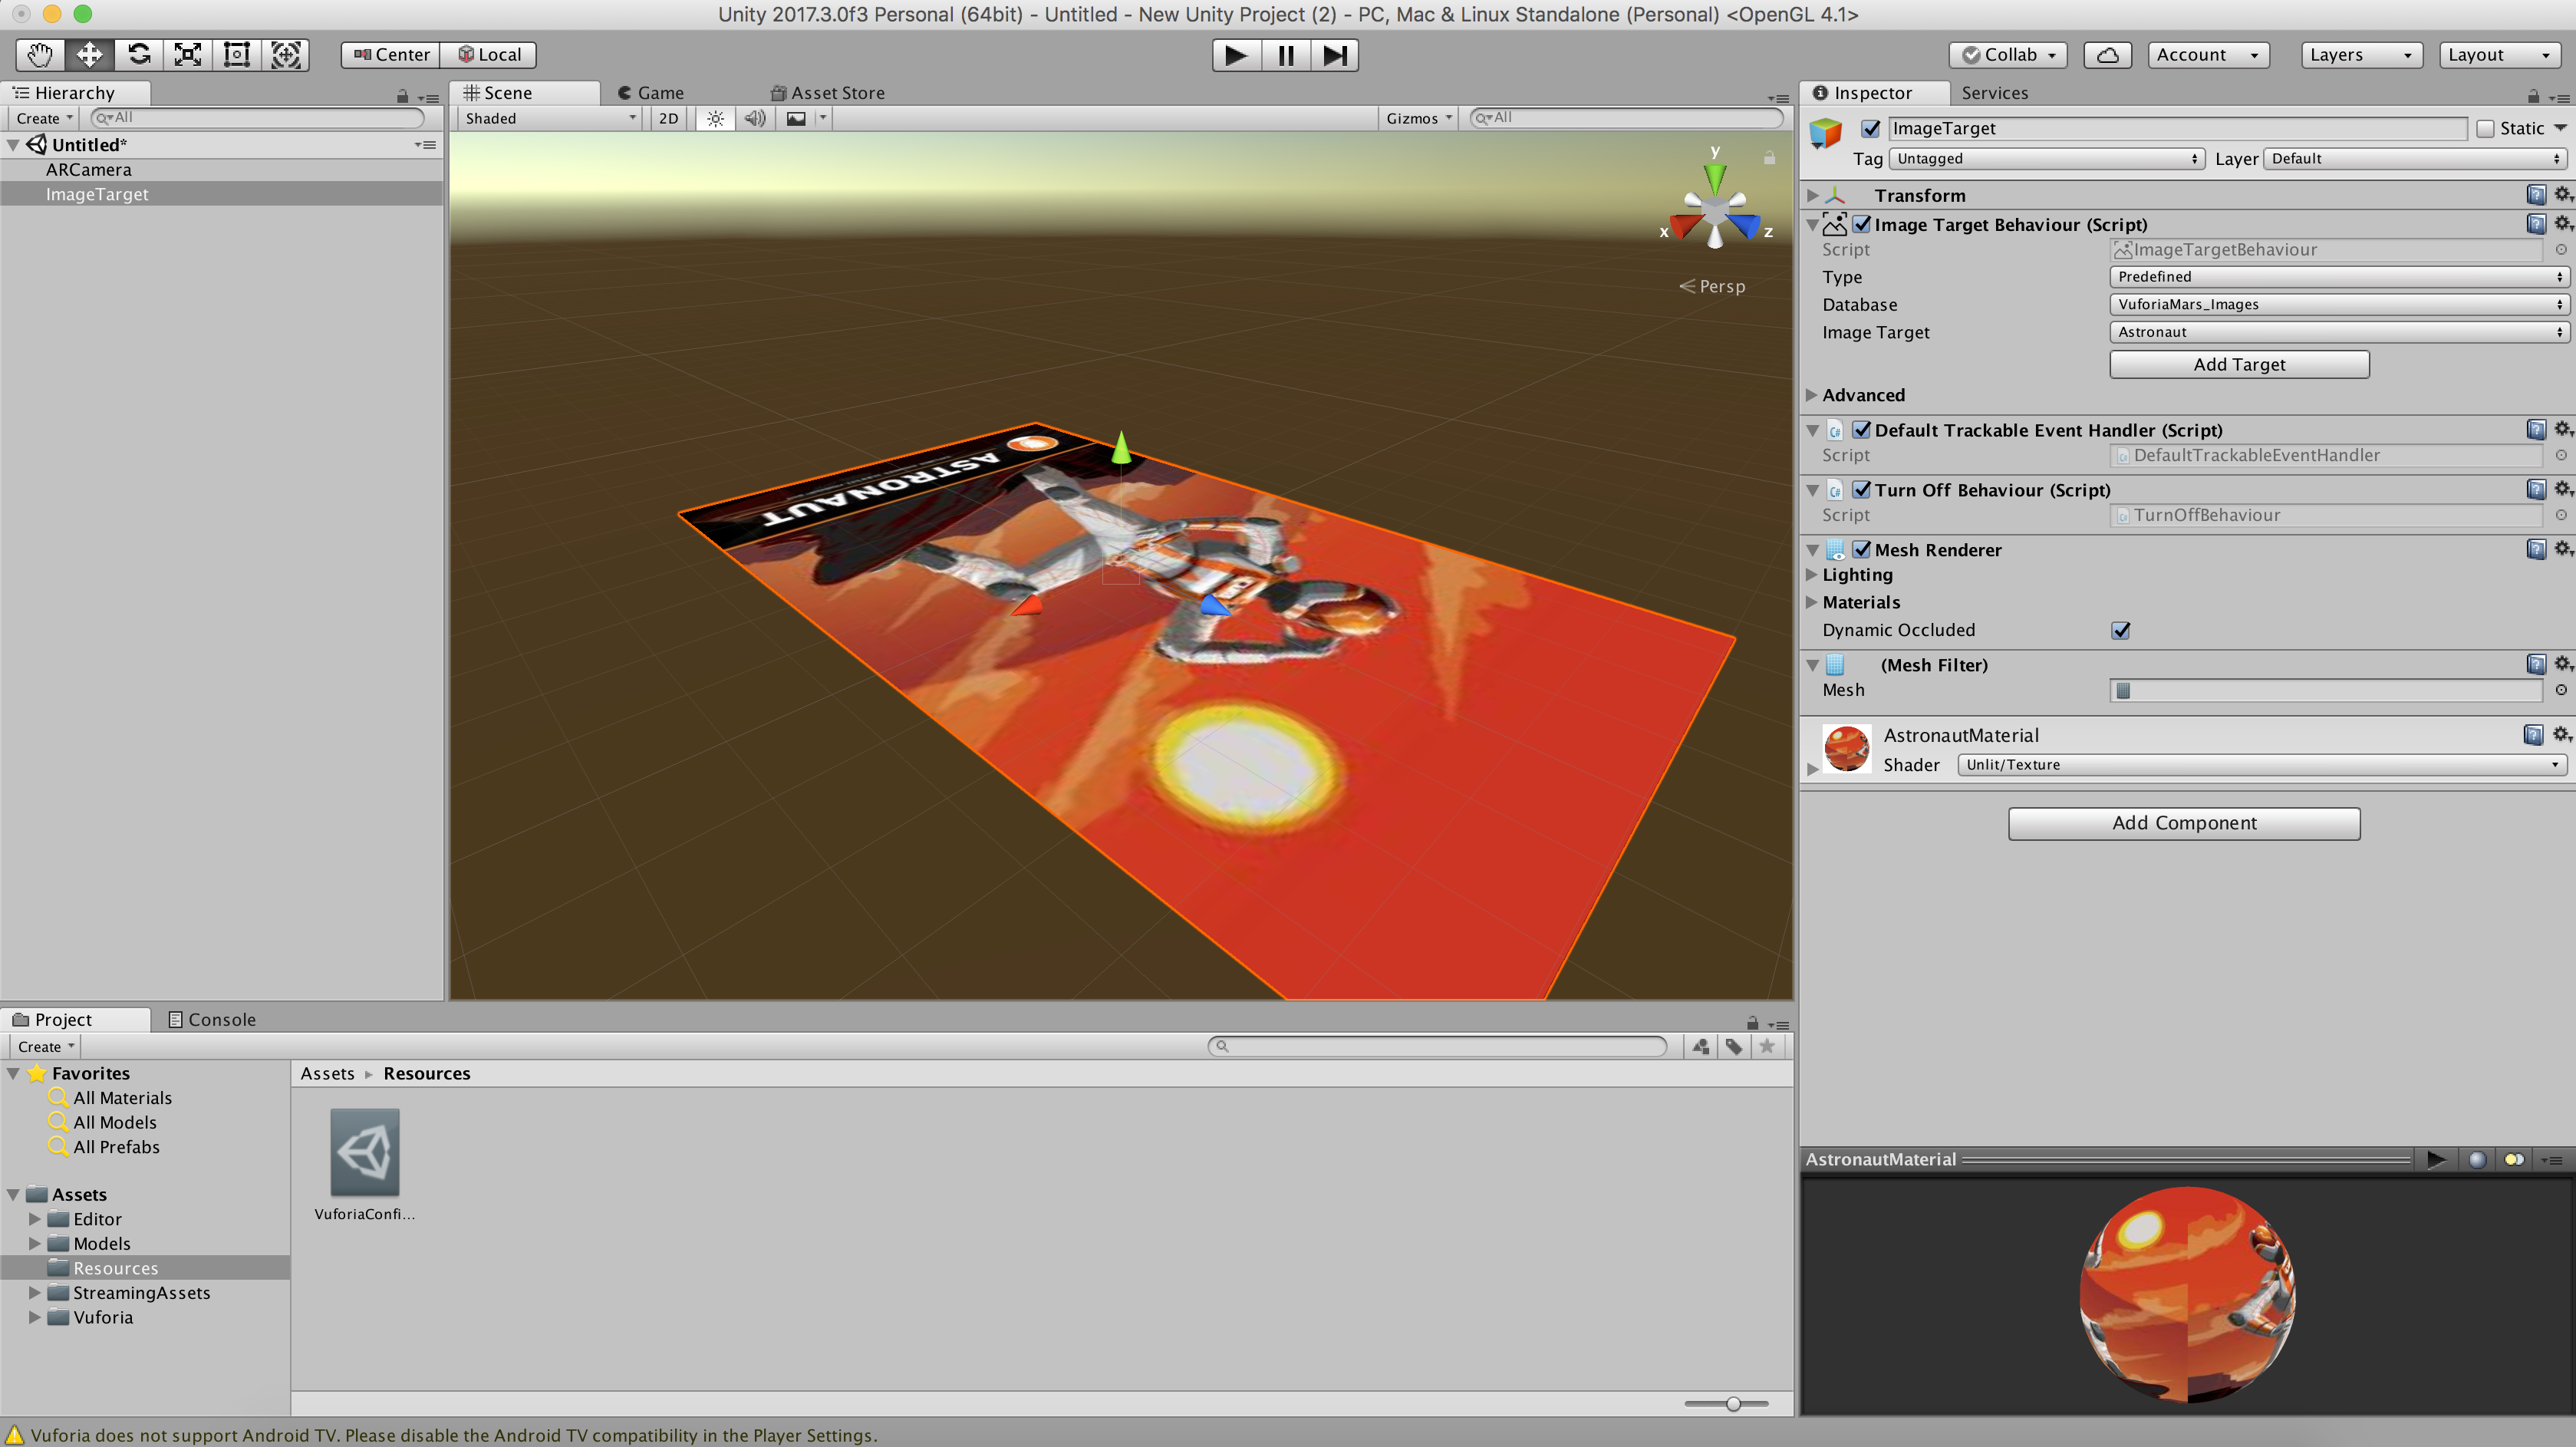
After scaling it down, it should look something like this:
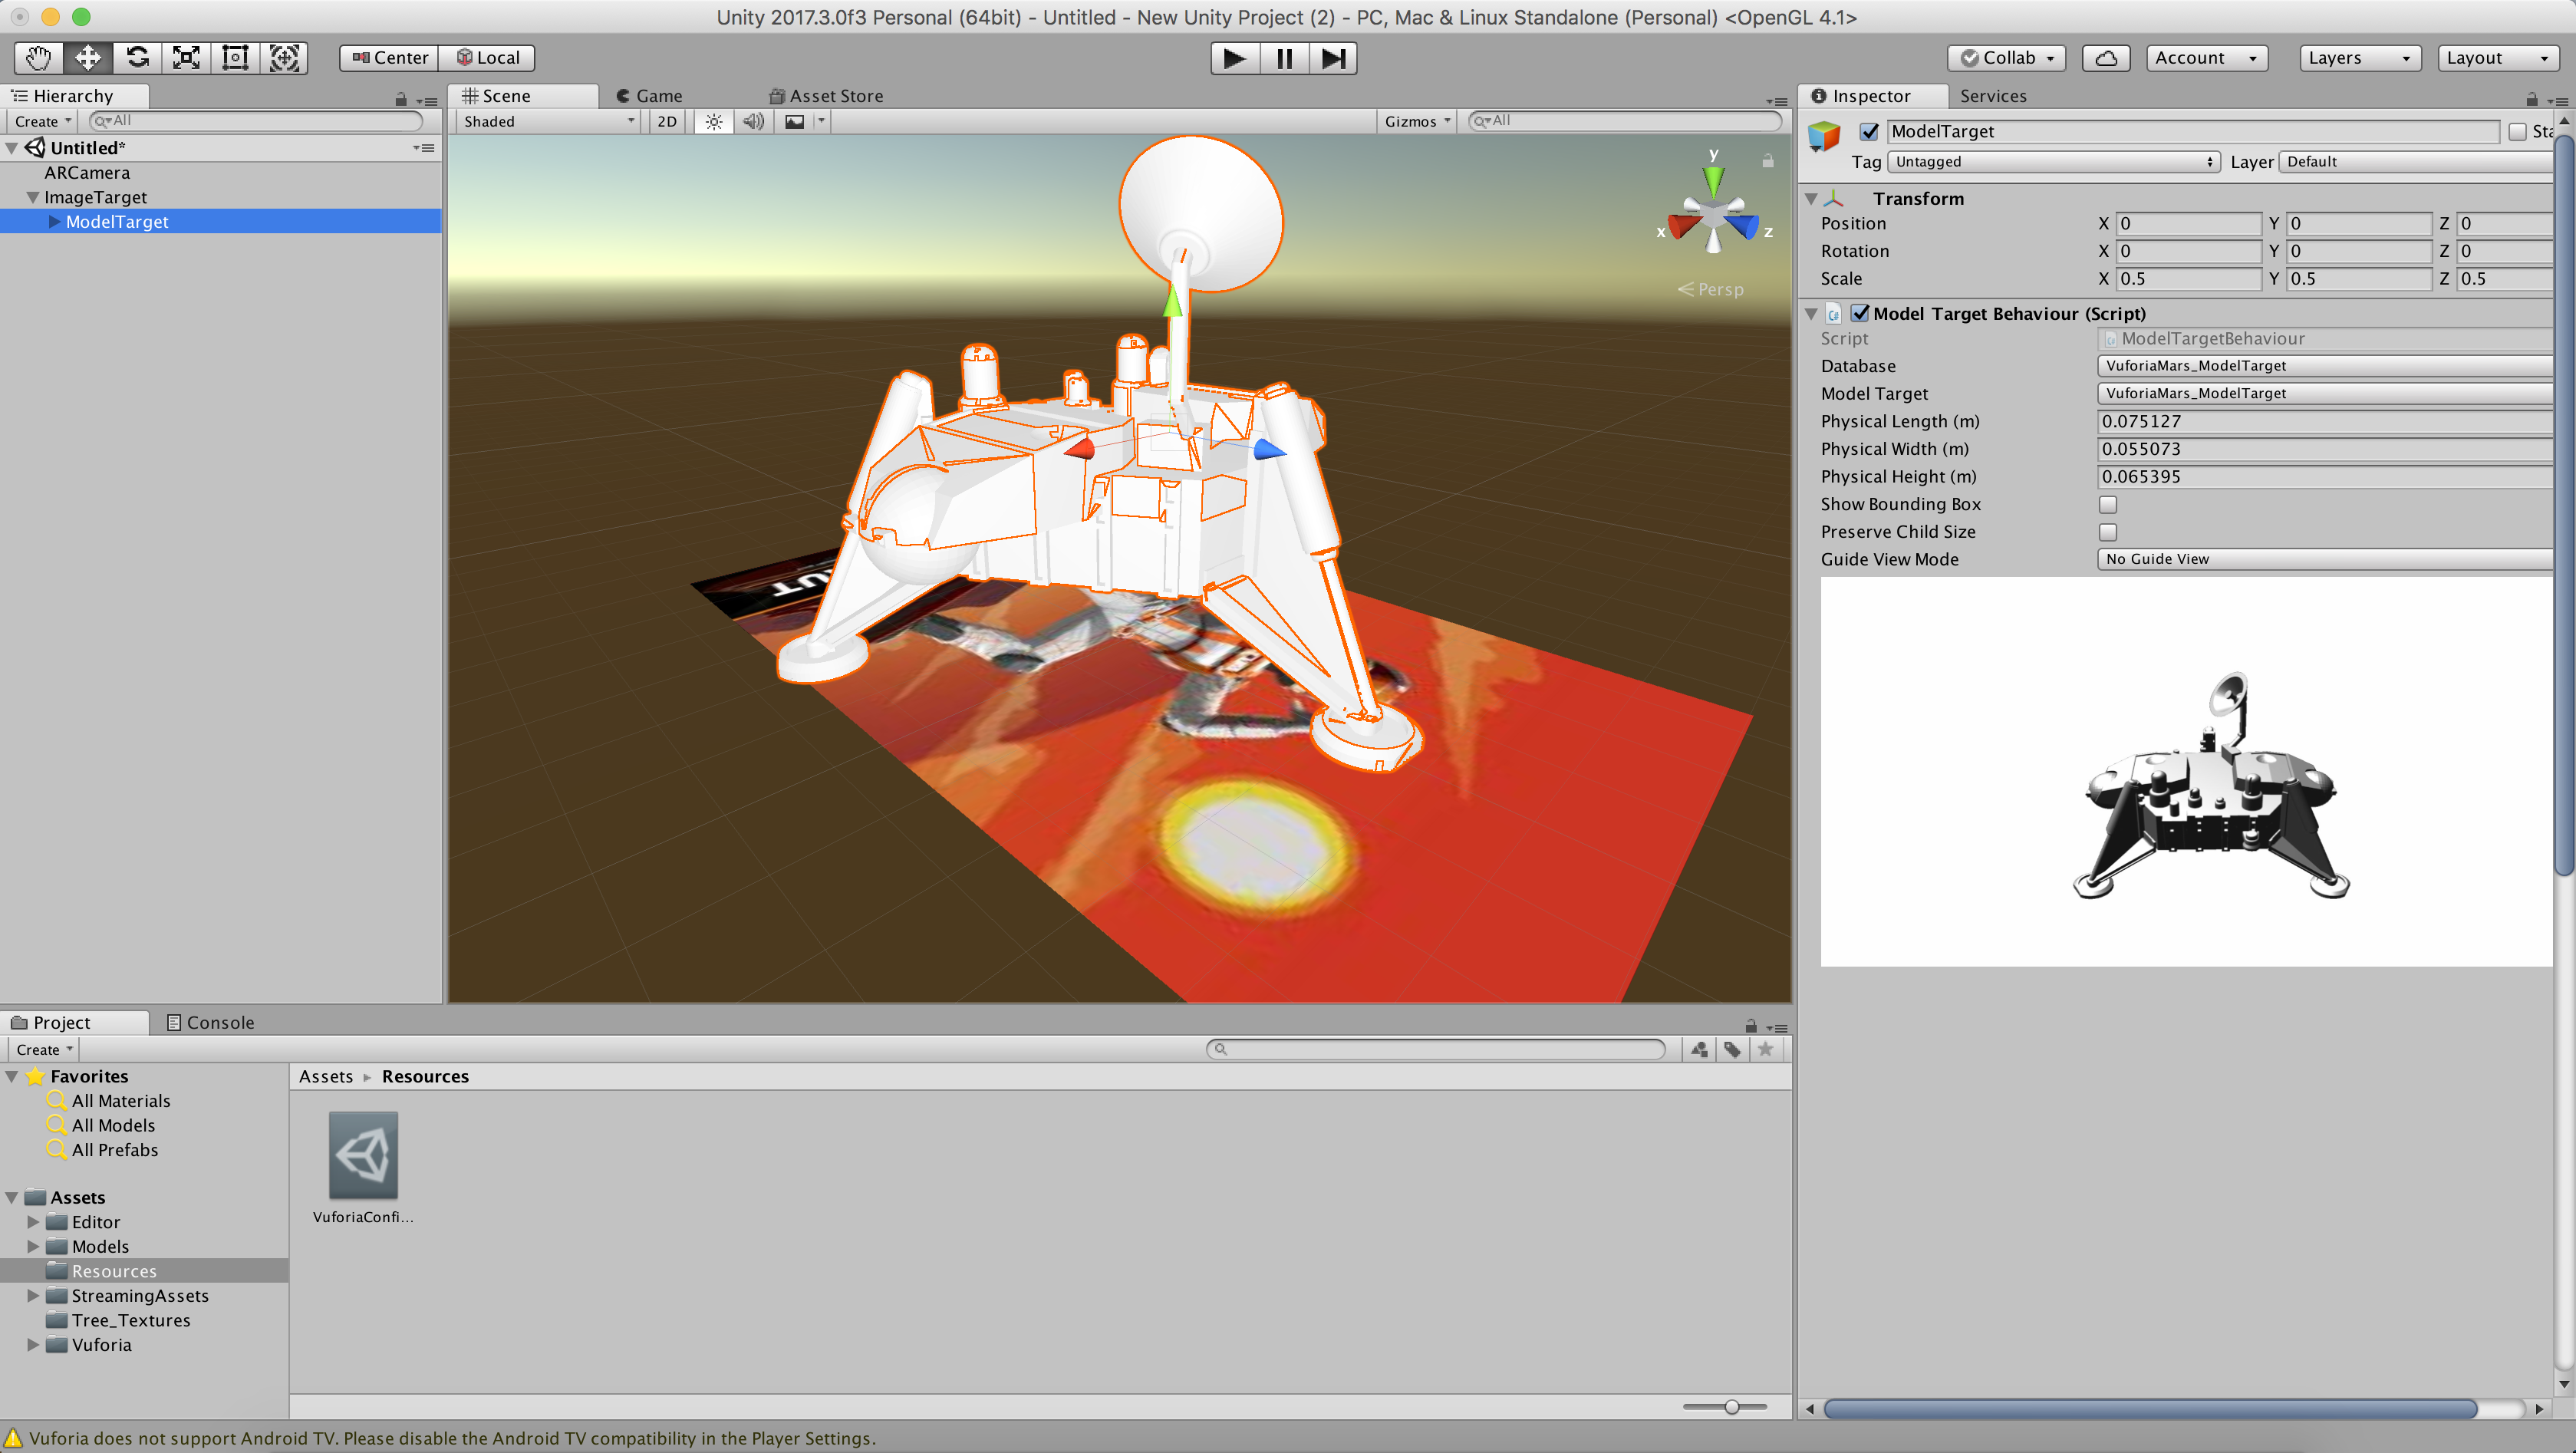 3D model added on top of our image target.
At this stage, we should test that our setup is working properly before starting to add our own assets. To launch our project, click on the play button a the top of the window.
If everything is setup properly, a 3D model should appear when you point the image target to the laptop?s camera. You can either print the image target or just take a picture of it on your phone and point your phone to your computer?s camera.

To stop running the project, click again on the play button.
Using your own assets
? –
To start using your own assets, register / log in on the Vuforia developer portal.
Once logged in, go to the ?Develop? tab and get a development key.
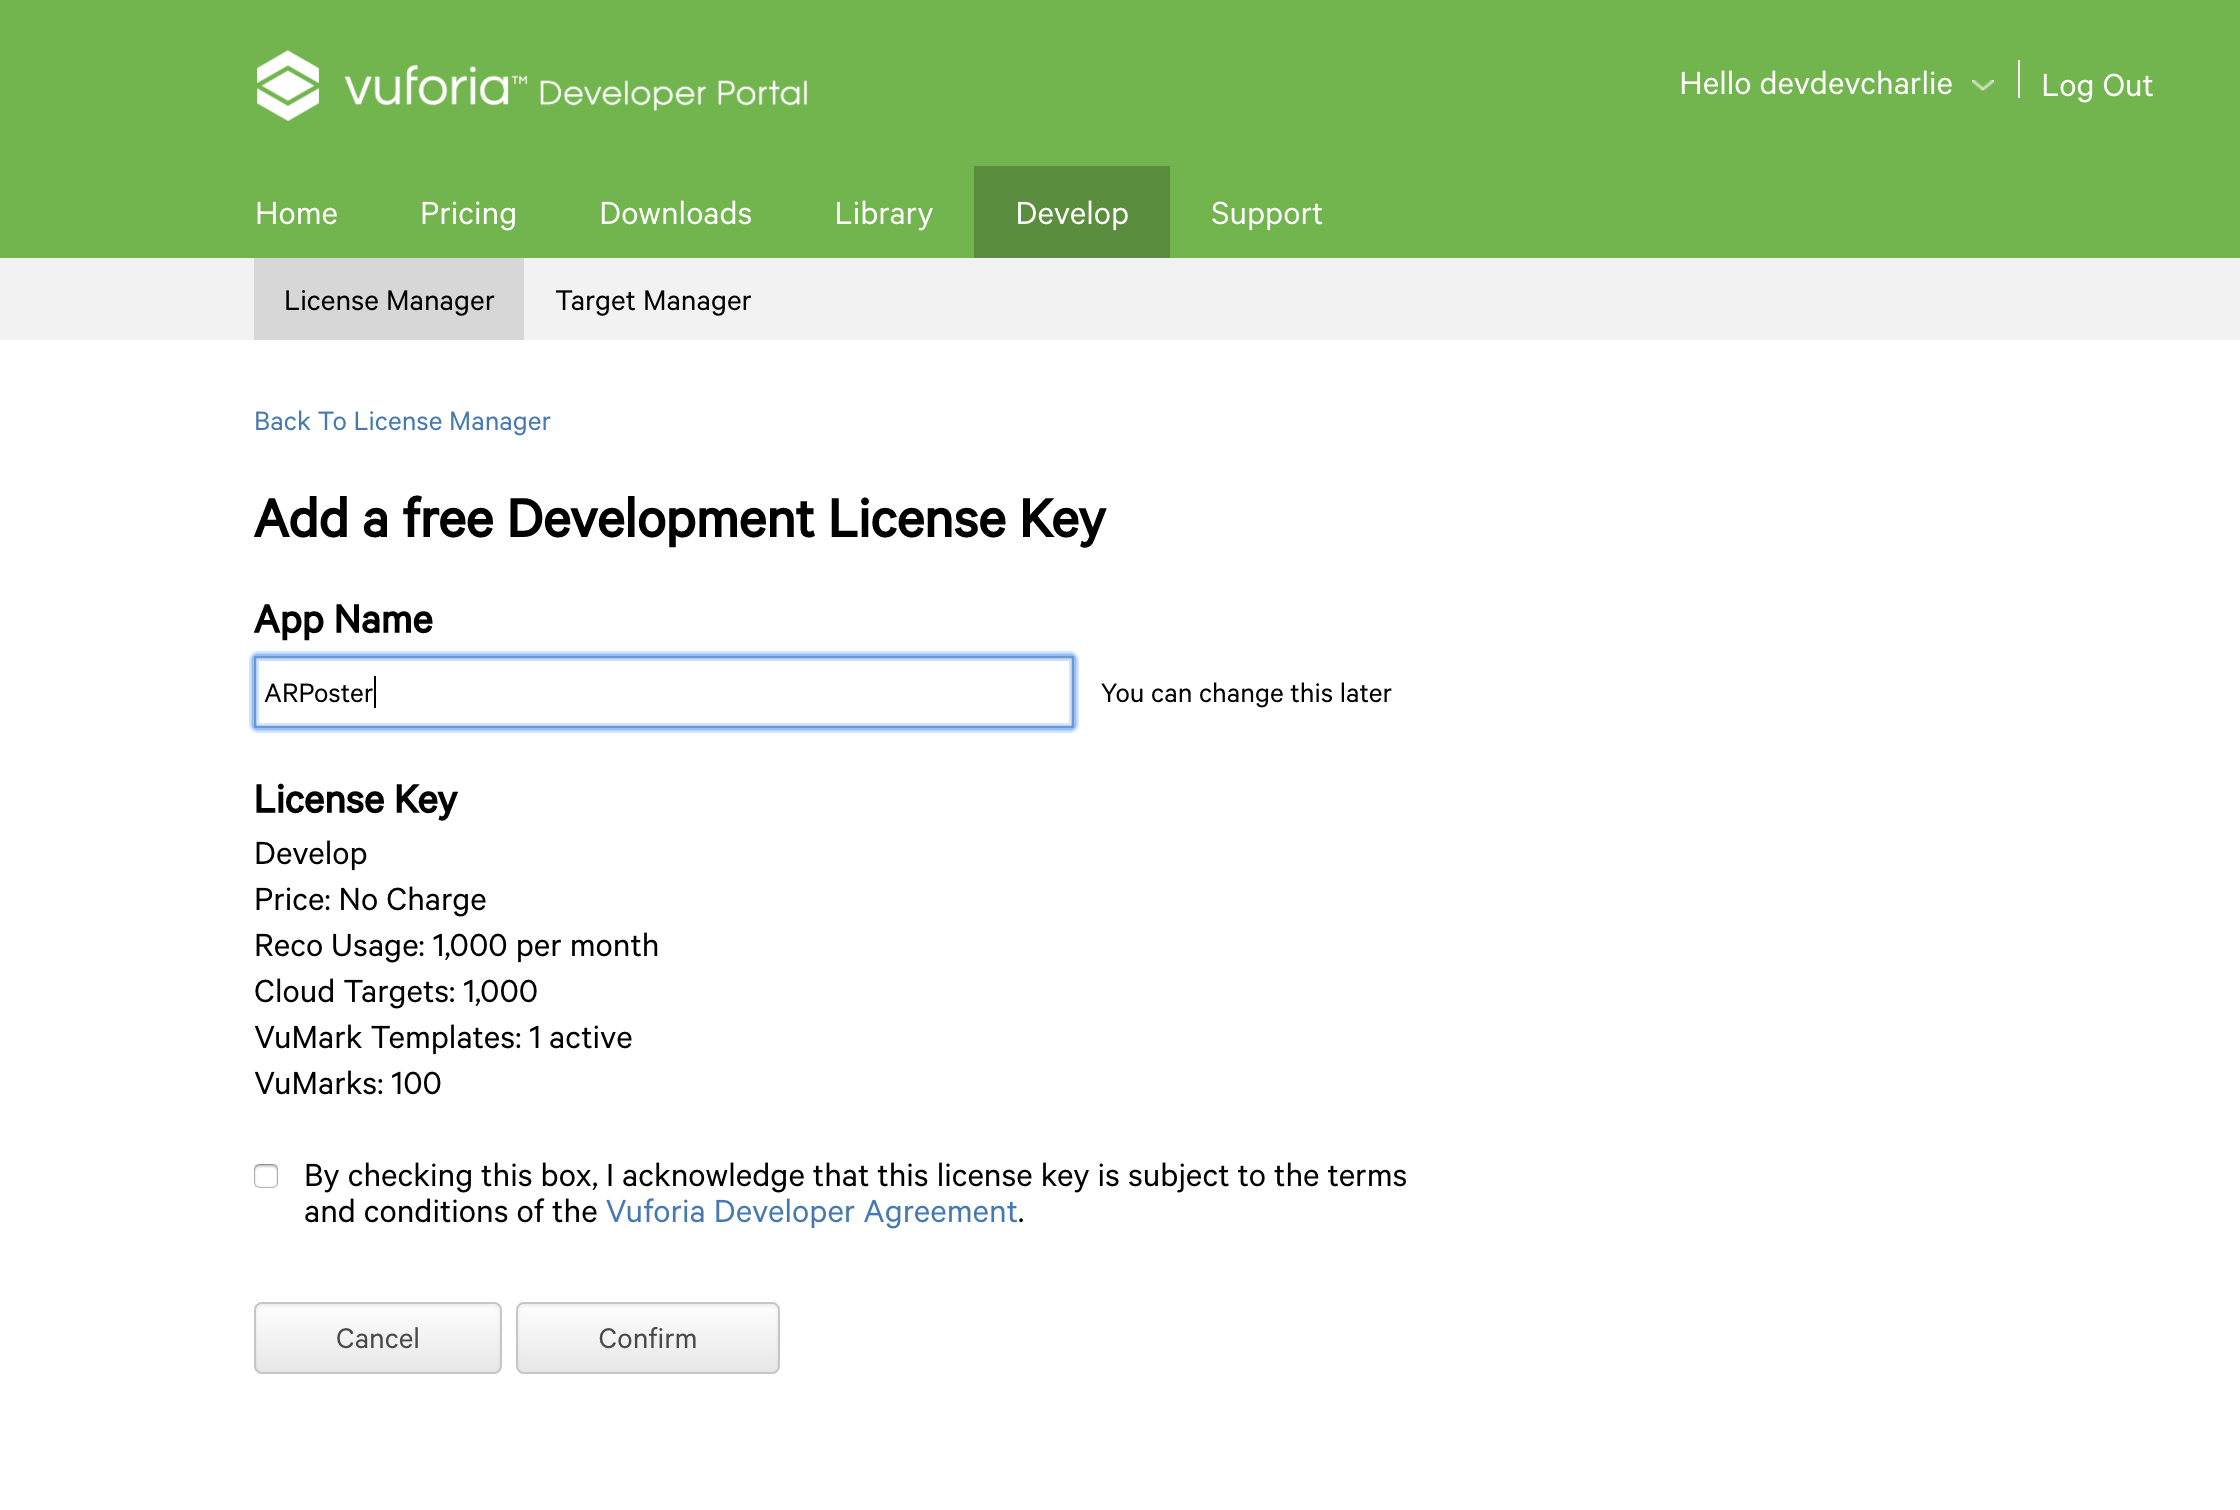 Get a Vuforia development key
Once you confirm, you will have access to a License key you will need to use later in Unity.
Now, click on the ?Target Manager? tab and click on ?Add database? to start uploading your own assets.
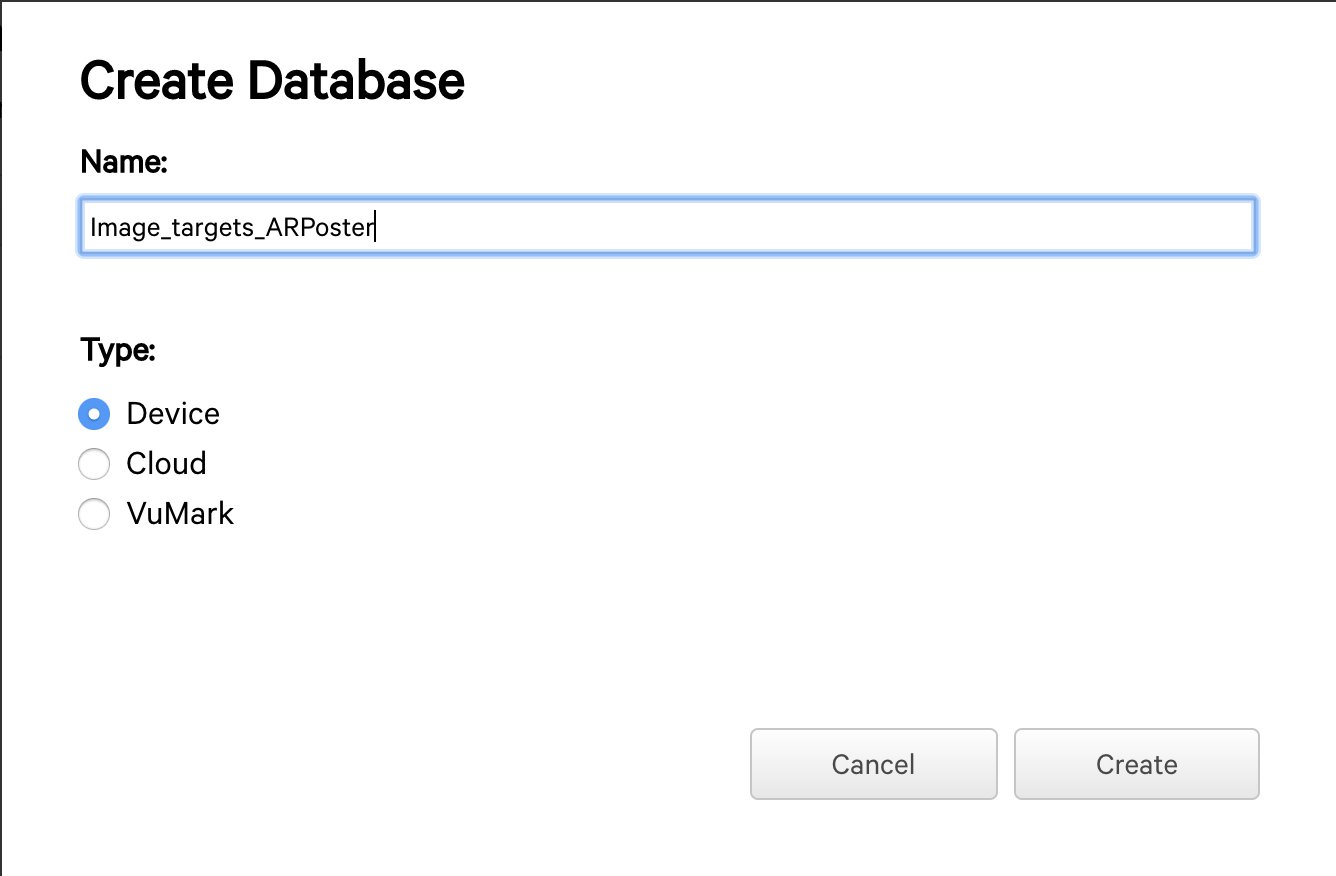 Create a database to start using your own assets.
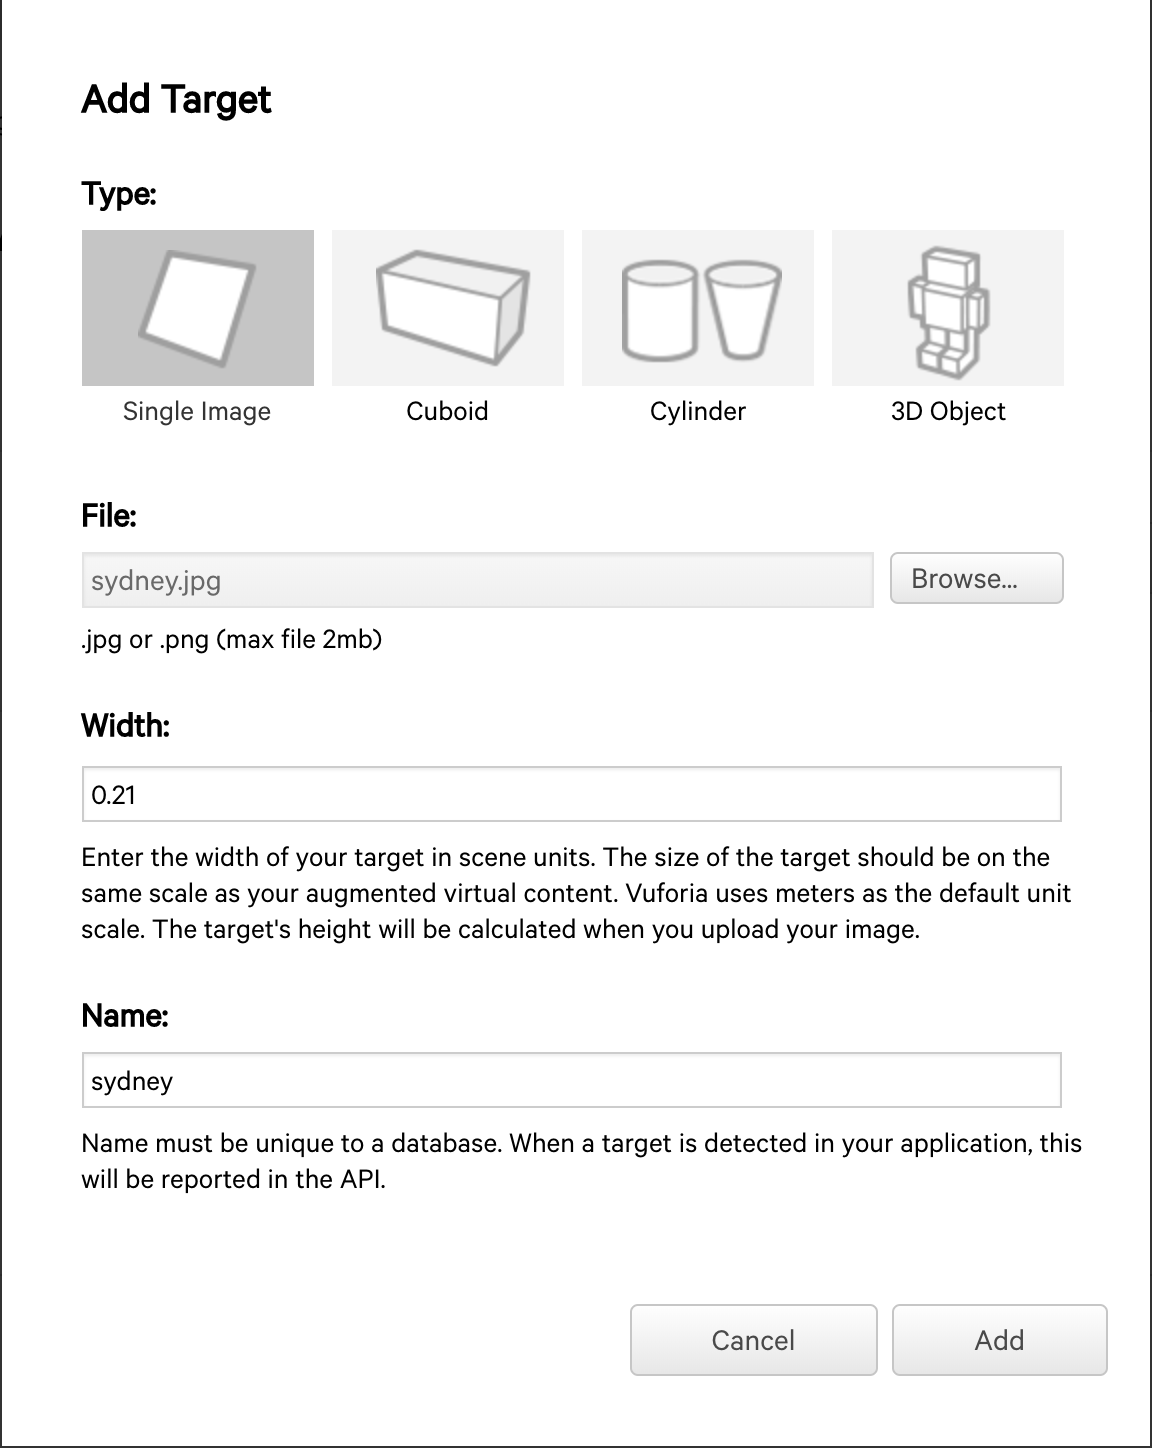
Once your database is created, click on ?Add target? and select the type of file your target is, as well as the path to find it, width and how you?d like to call it.
For the width, Vuforia uses meters as the default unit scale. As my demo poster is an A4 sheet which is 21cm (0.21m) large, 0.21 should be fine.
Once added, your Target Manager page should look something like this:
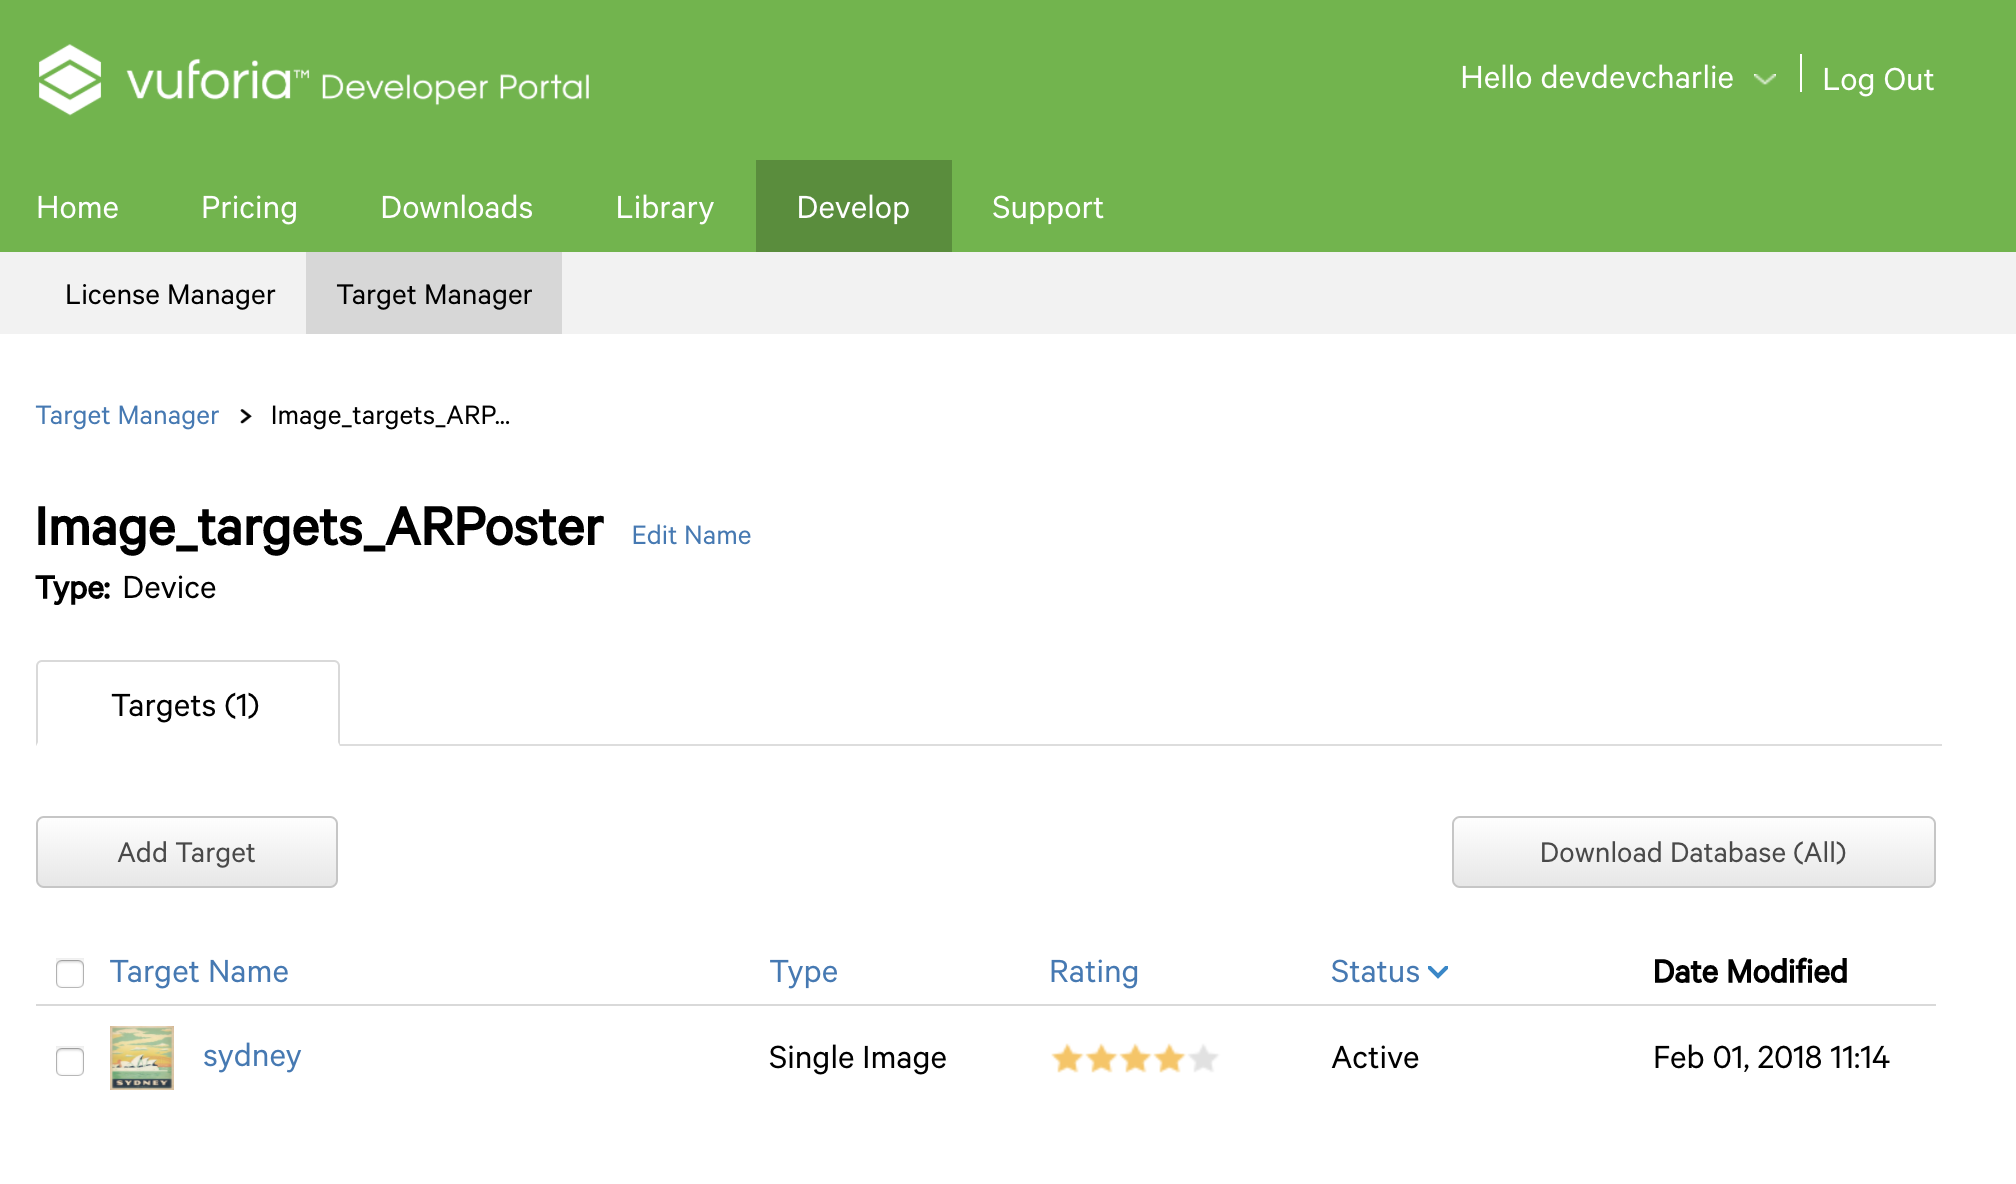
The rating is really important as it defines how well Vuforia is going to be able to track the target image.
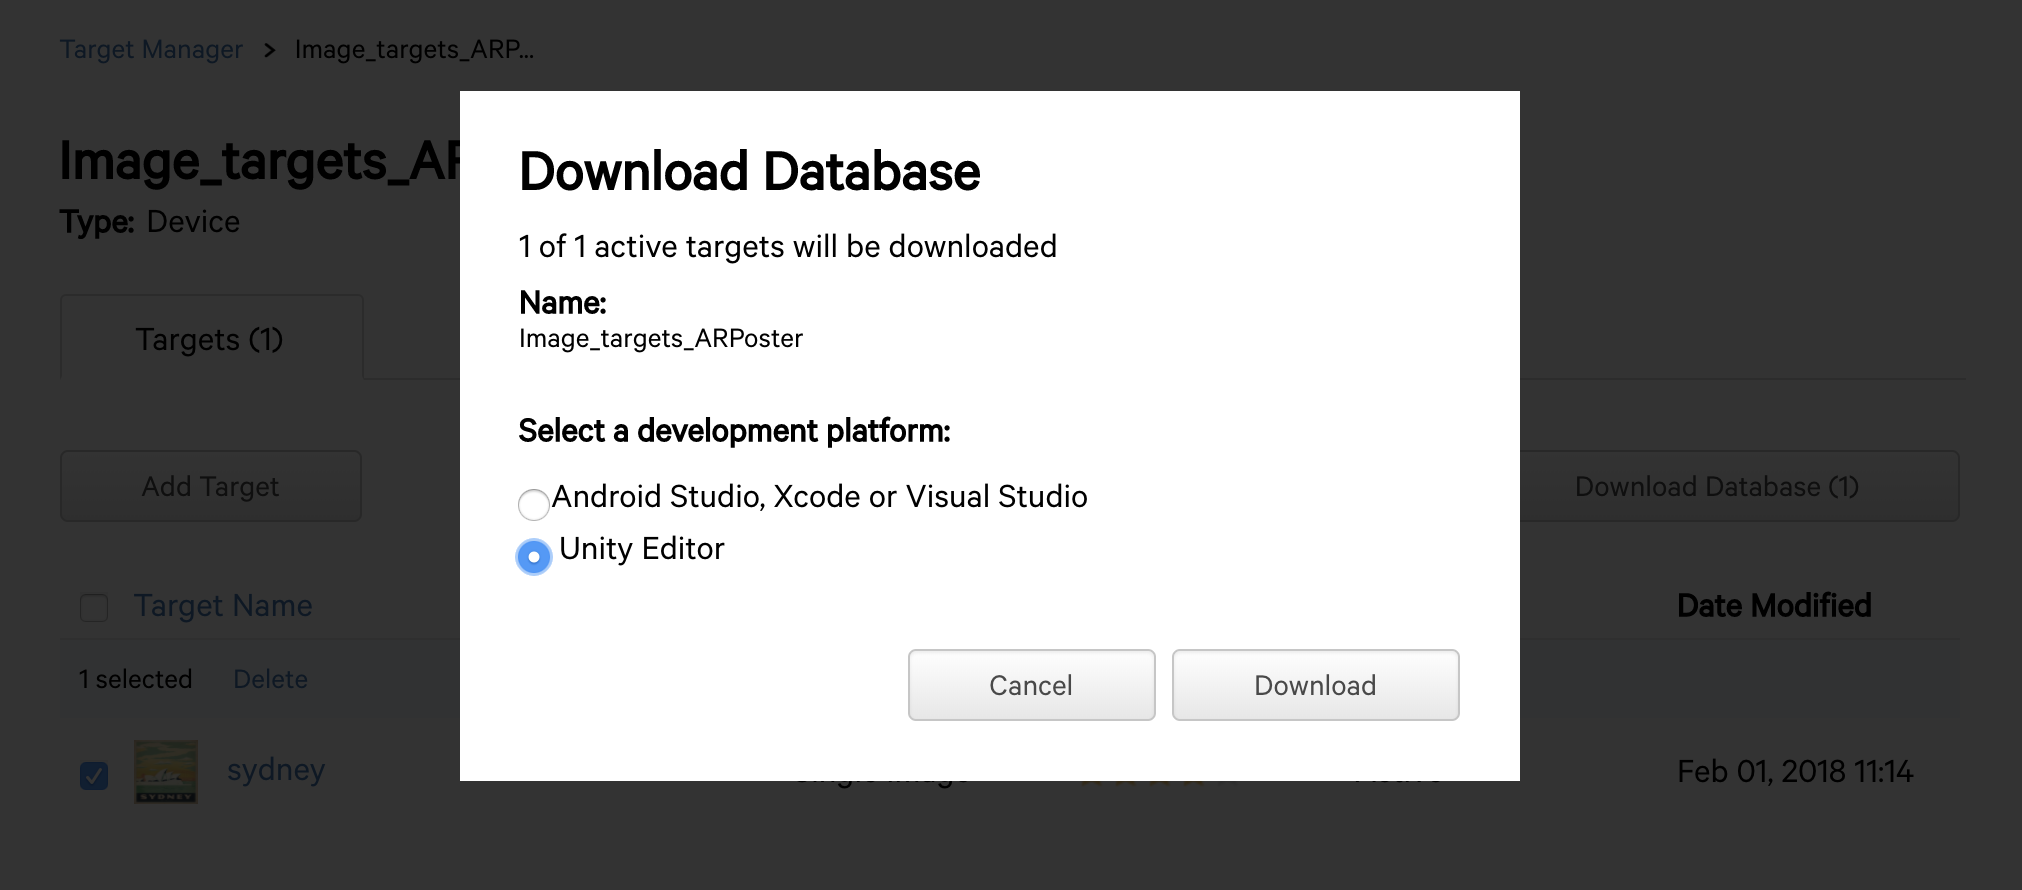
Select the target you would like to download (the image we just uploaded), and click on ?Download Database?. This will download a file we will need to import later in Unity.
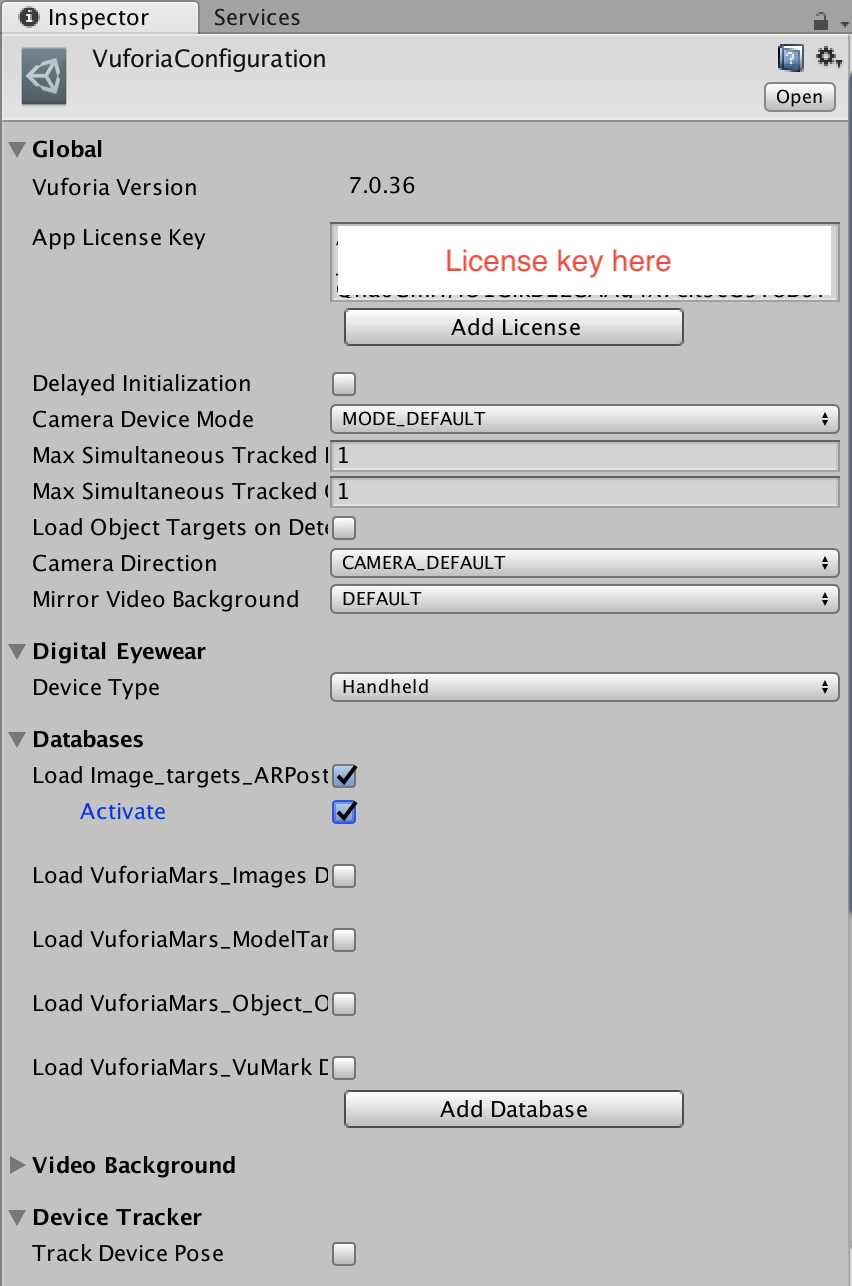
Back to Unity, click on the ARCamera game object, open the Vuforia configutation and add the license key you just created.
To import the assets you just uploaded to Vuforia, go to Assets > Import package > Custom package? and select the database file we just downloaded.
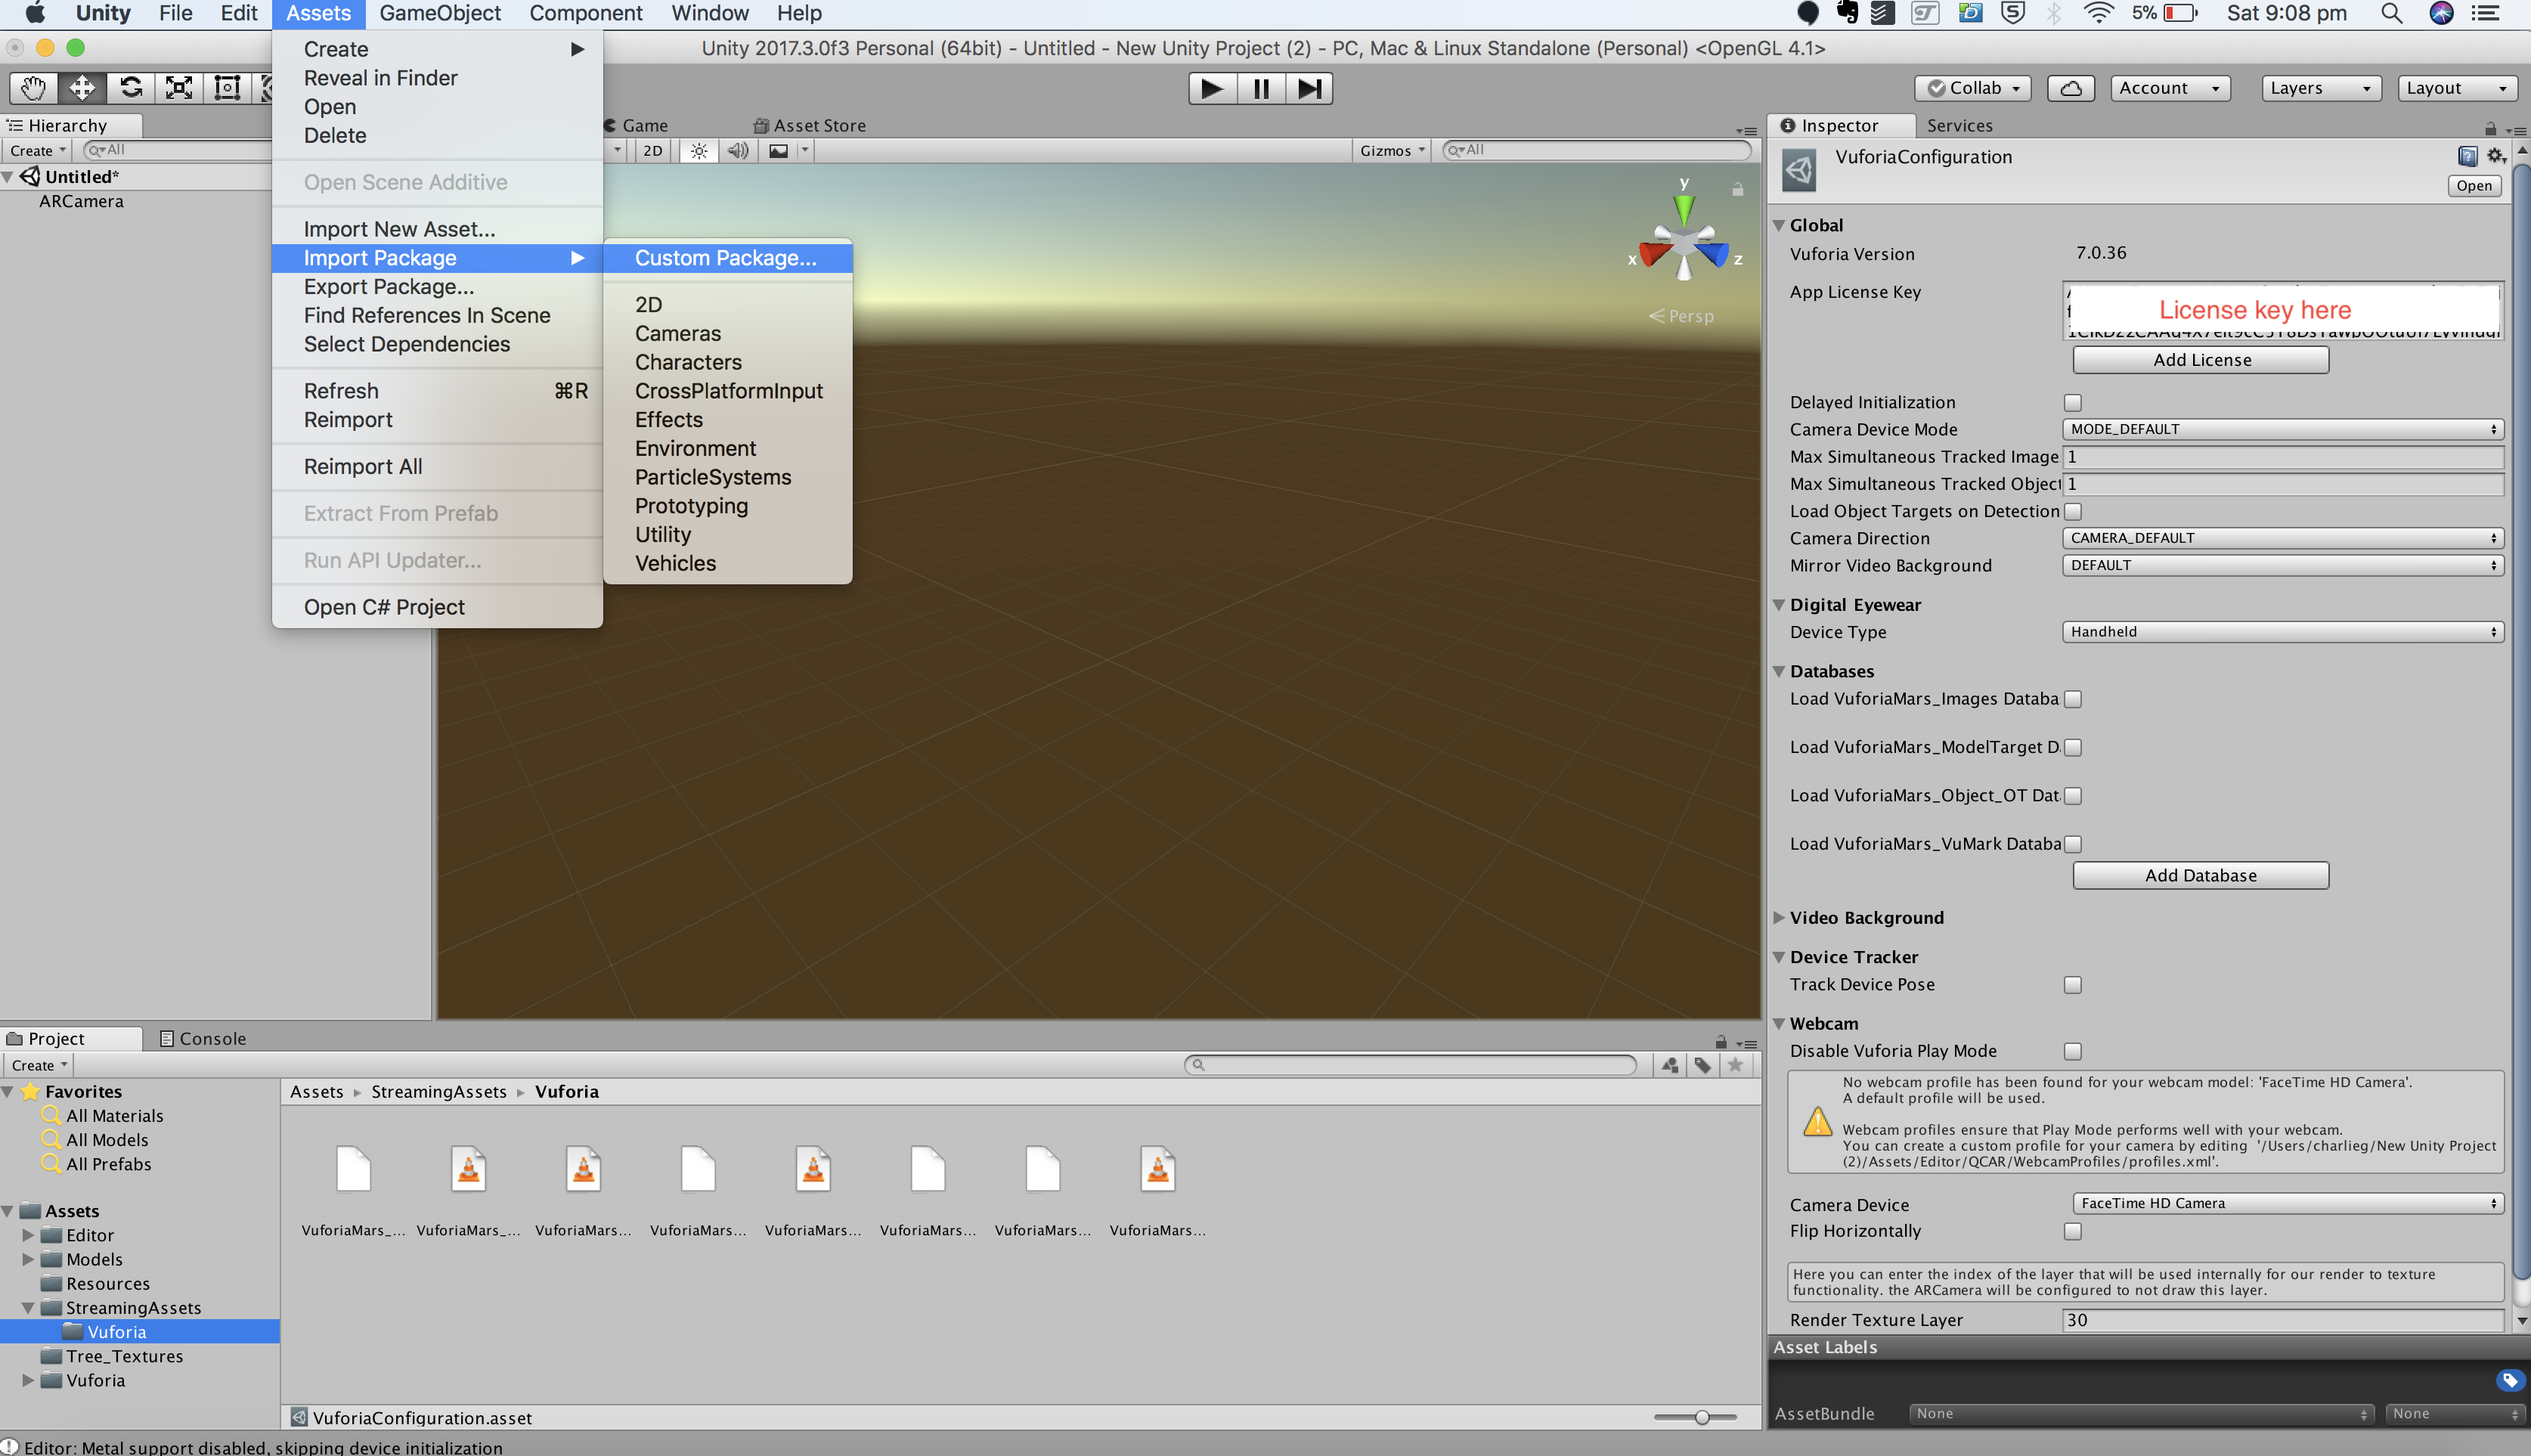
A window will appear with the different files that are going to be imported; just click ?import?.
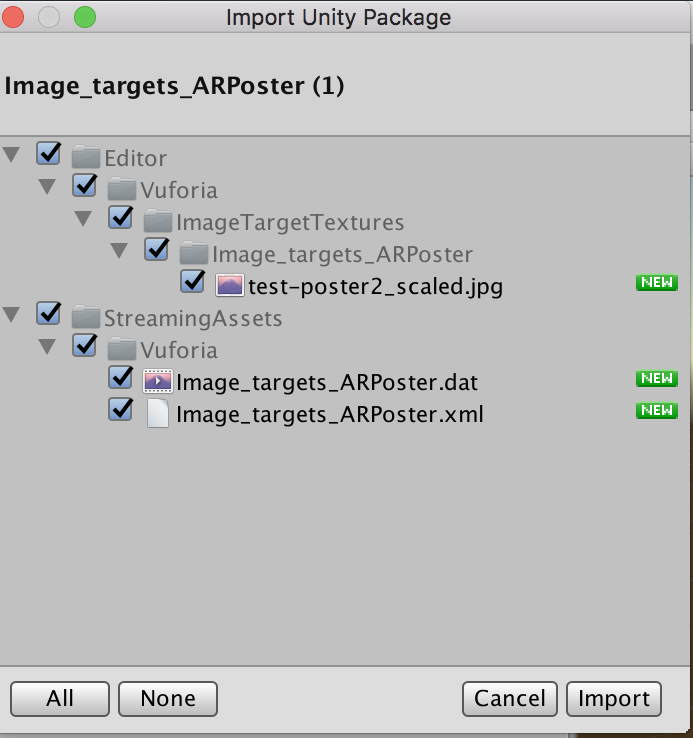 Import custom assets
Once your assets are imported, click on the ARCamera again and in the Vuforia configuration, you should see your database added to the list of databases. Click on ?load? and ?activate? to be able to use the assets.
Then, click on the image target in the left panel, and, in the right panel, change the database dropdown from ?VuforiaMars_Image? to the name of your custom database.
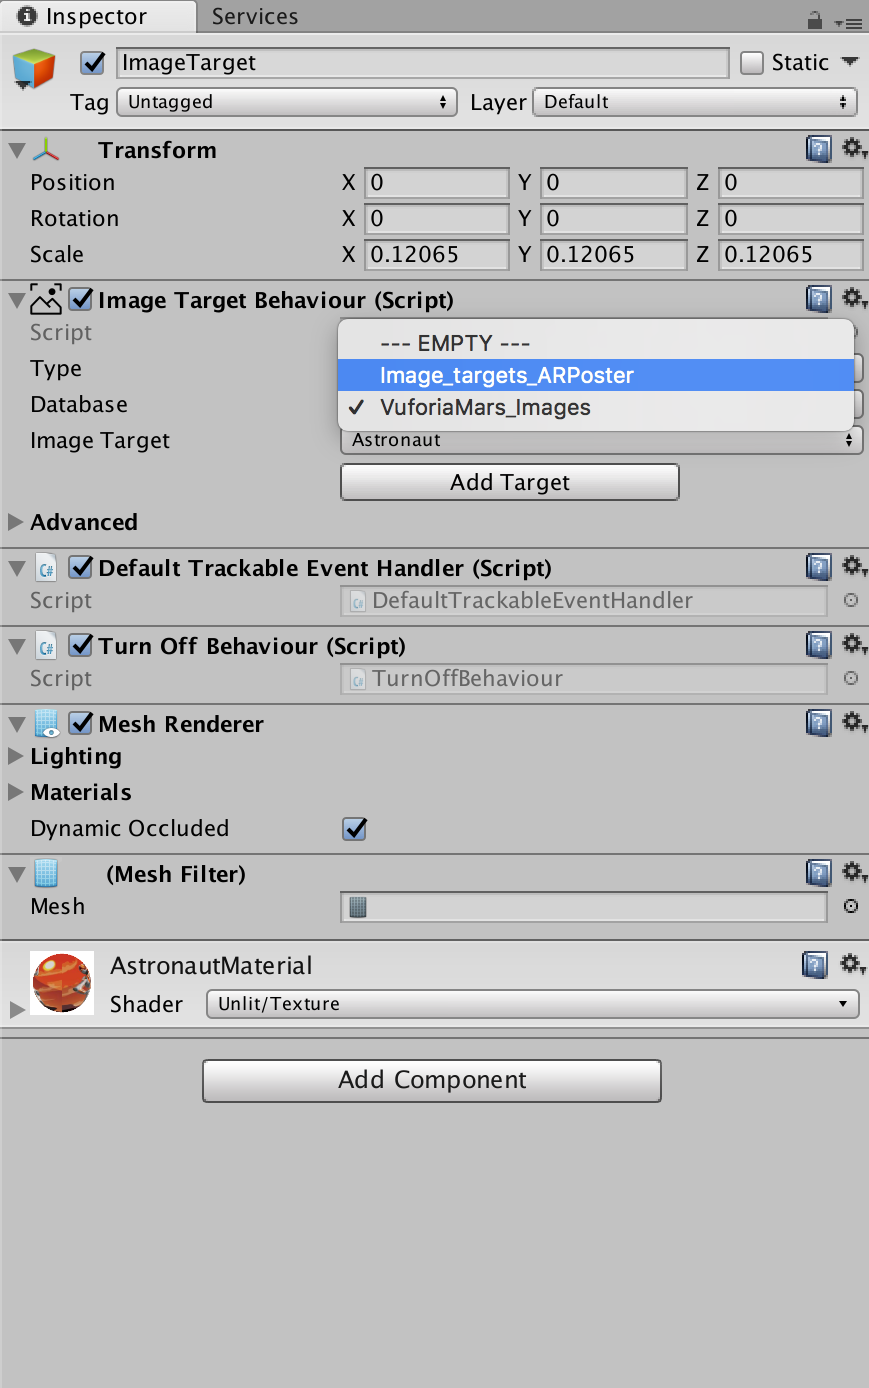 Change the image target database to your custom one.
Selecting your custom database should have changed the target image used in the ?Scene? window.
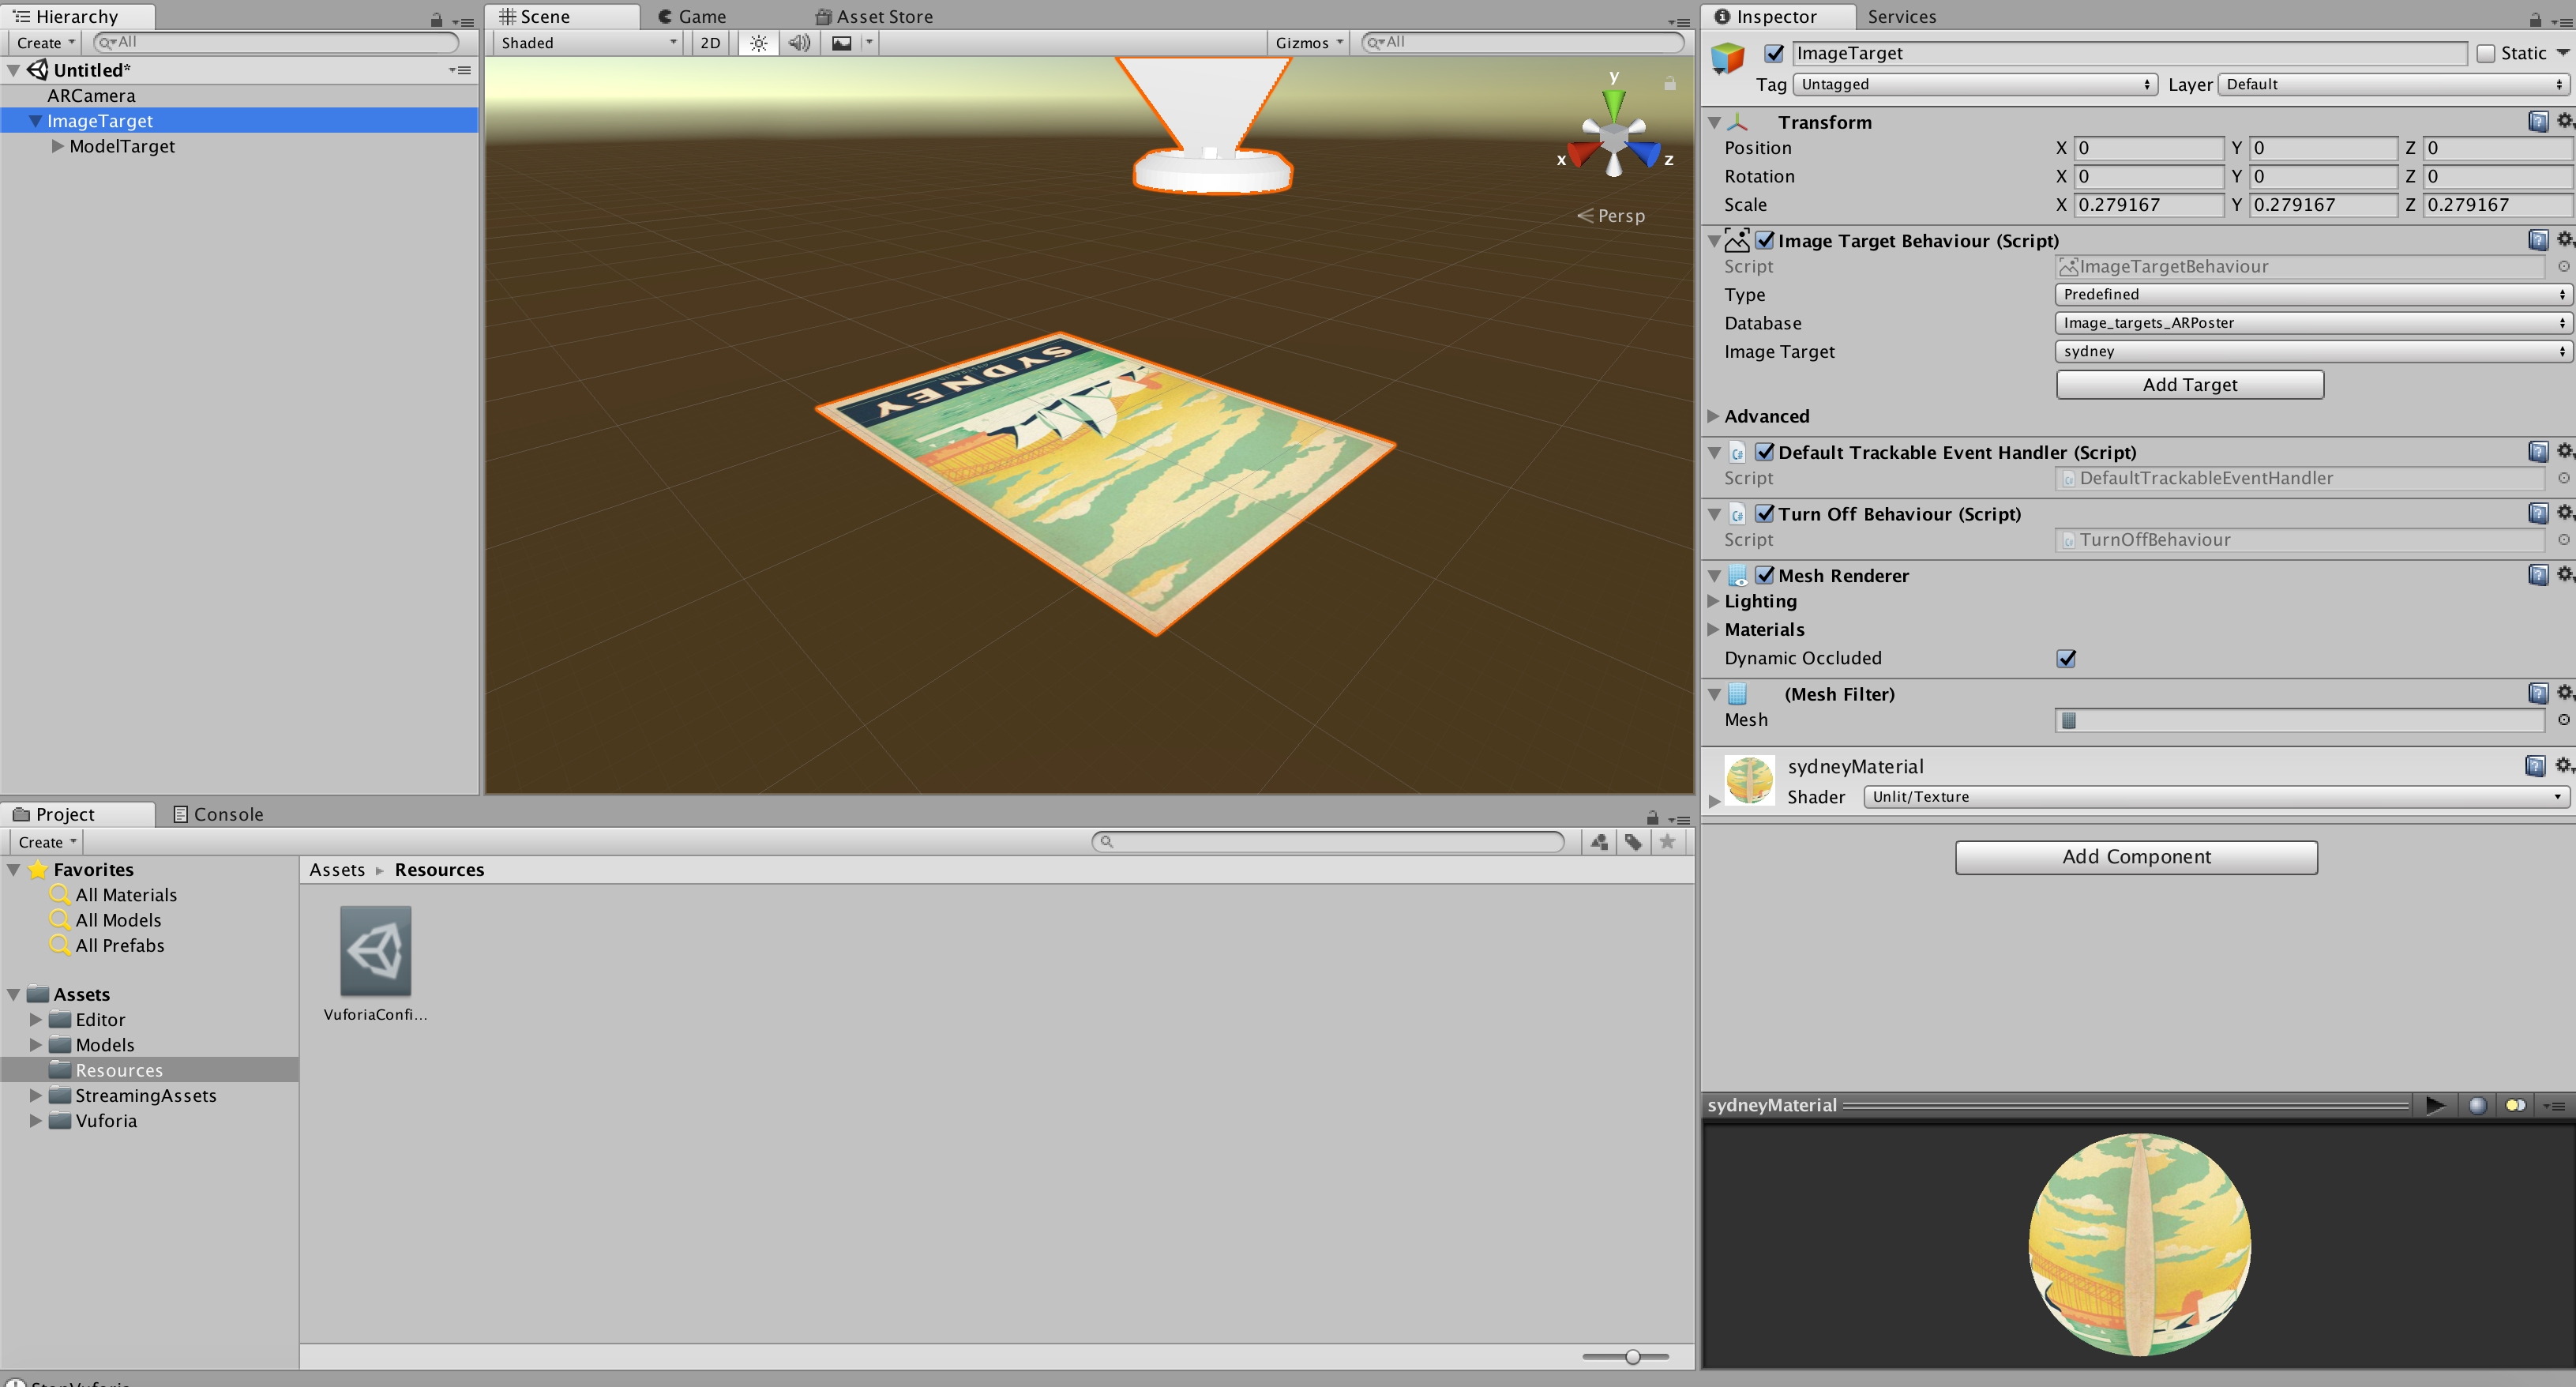 The target image should have changed to your custom assets. (Image source).
If you click on the play button now, you should be able to show your custom image target in front of your computer?s camera and see the 3D object appear!
To change the 3D object displayed, drag and drop your 3d model in the ?Models? folder inside the ?Project? tab at the bottom left of the Unity window.
Then, drag that model inside the ?Model target? folder in the hierarchy panel. Your new model should appear in the scene window.
You will probably have to change the scale of your model and its position to be placed over your image target, but in the end it should look something like this:
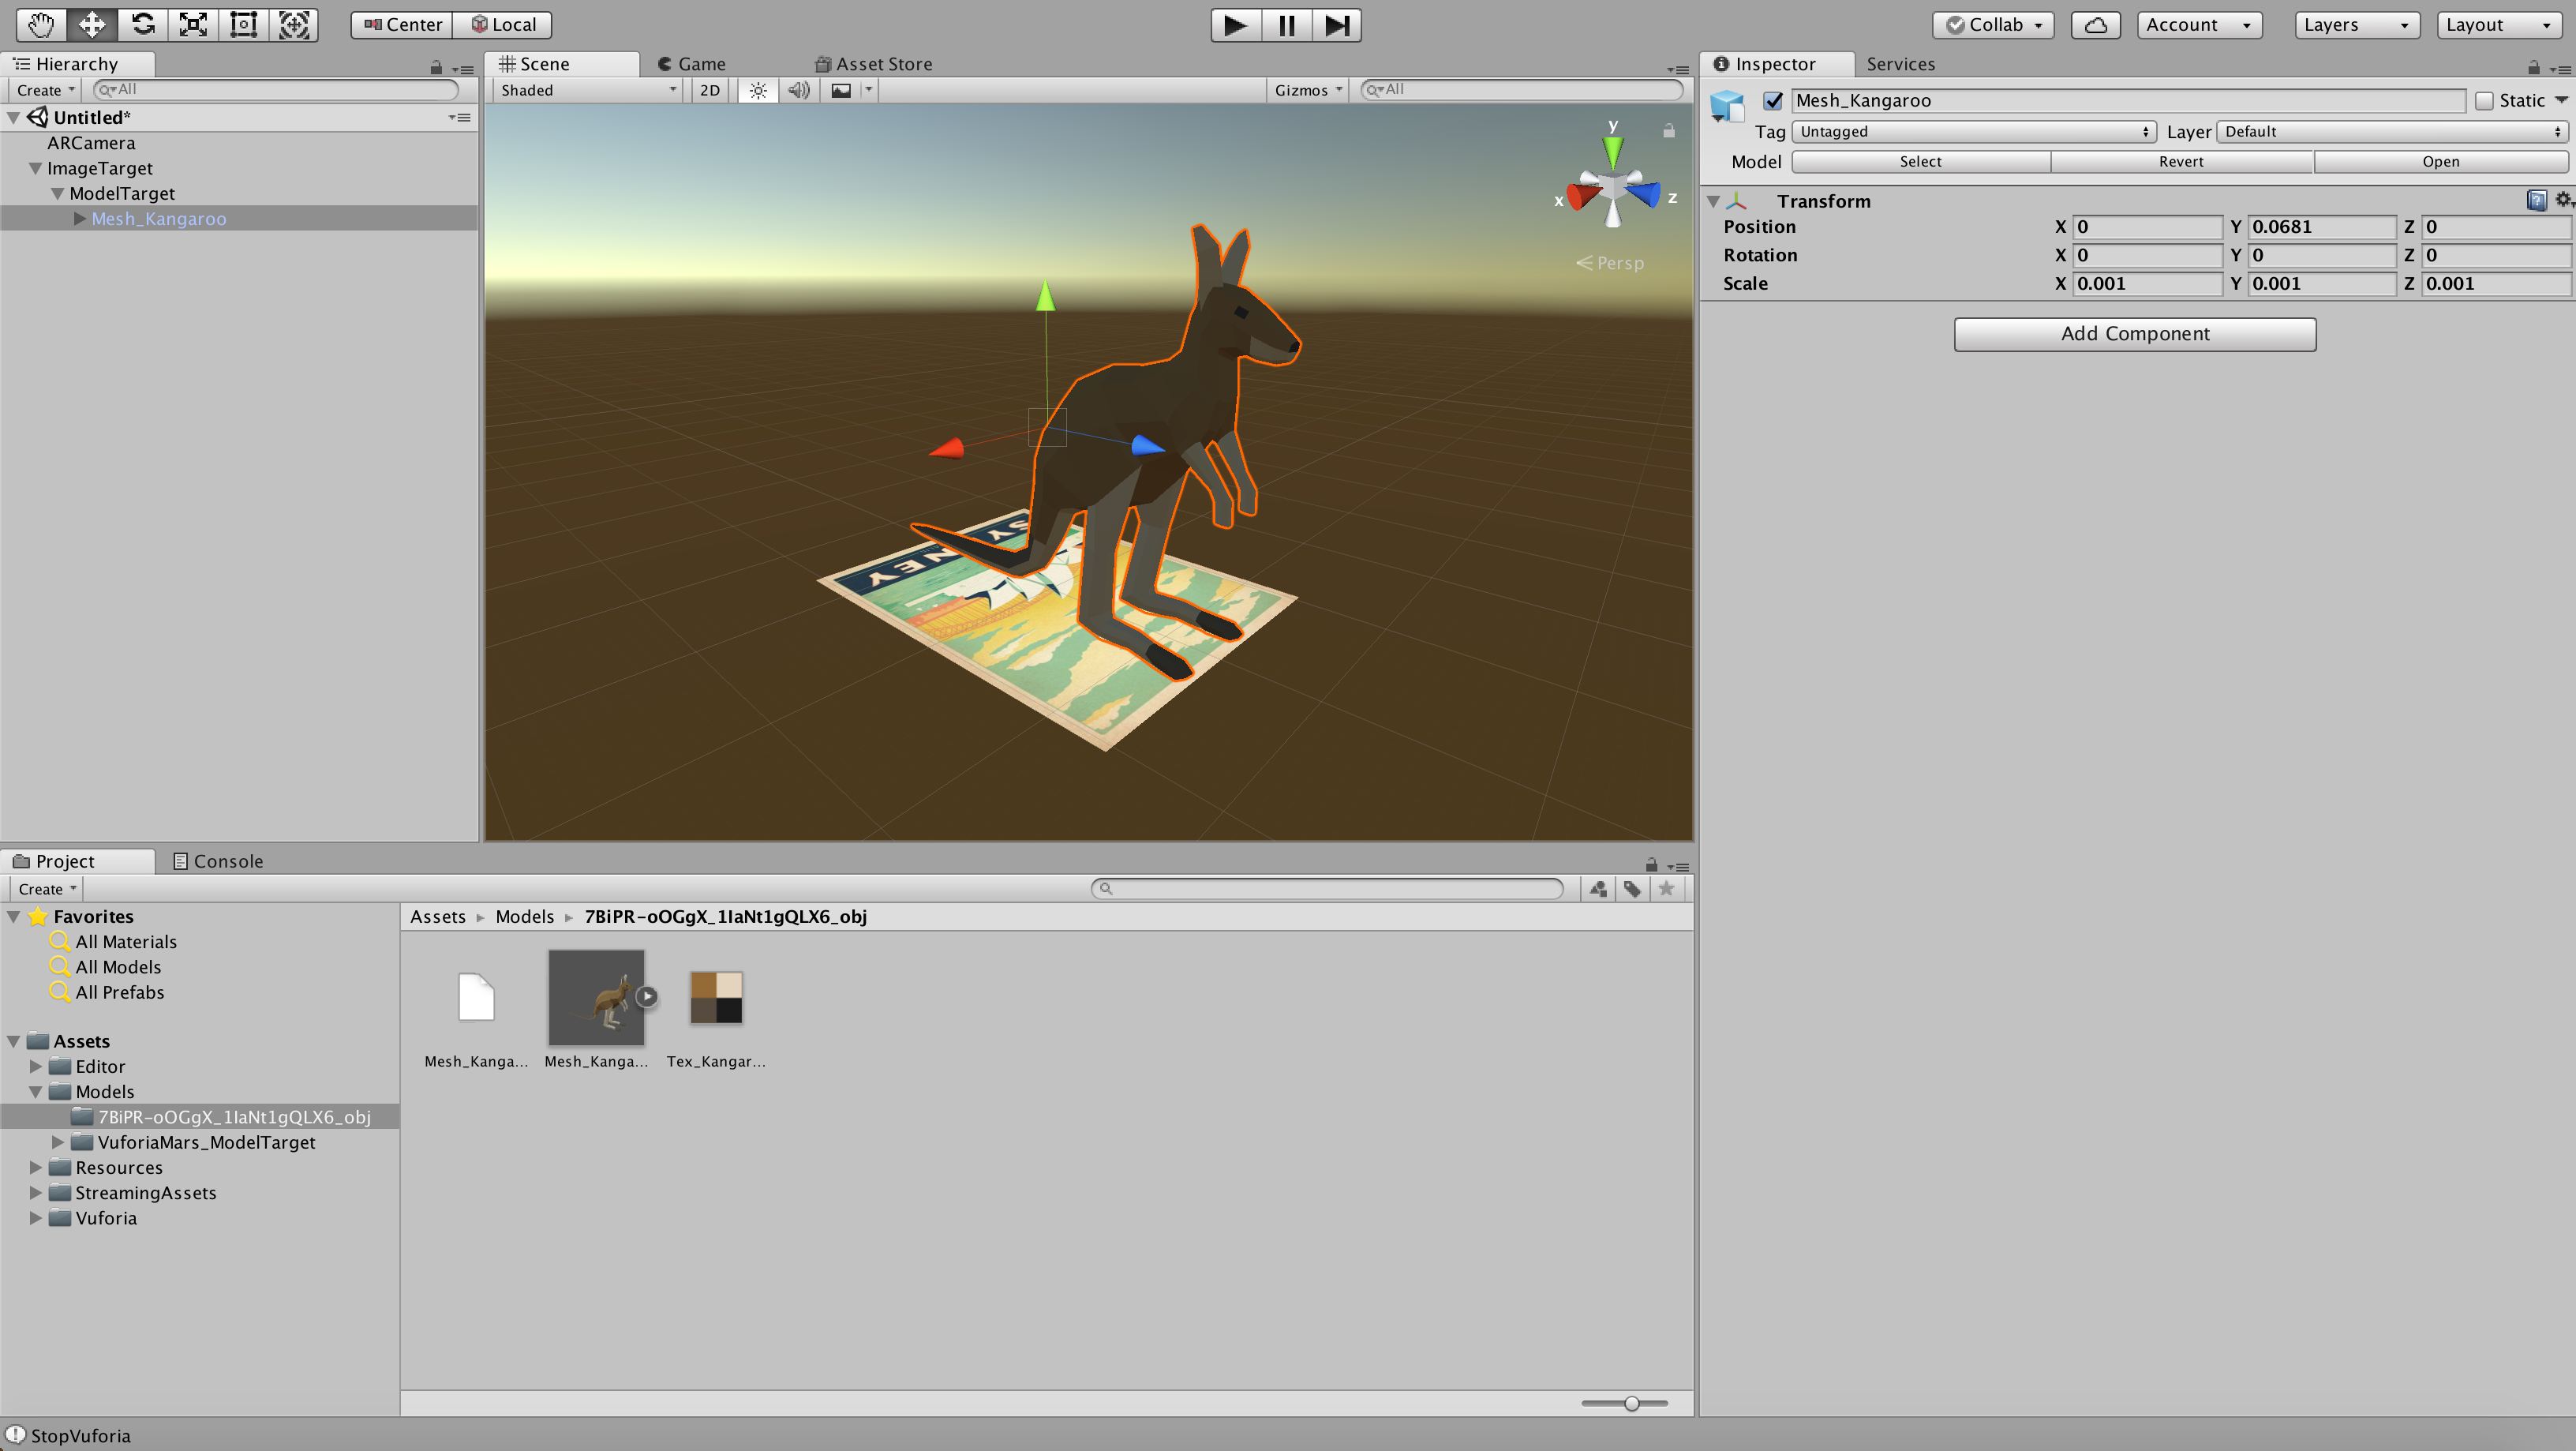 Custom 3d model and new image target. (Source for 3d model).
When pressing play, you should be able to have your custom image tracked and see the 3d model appear above it.
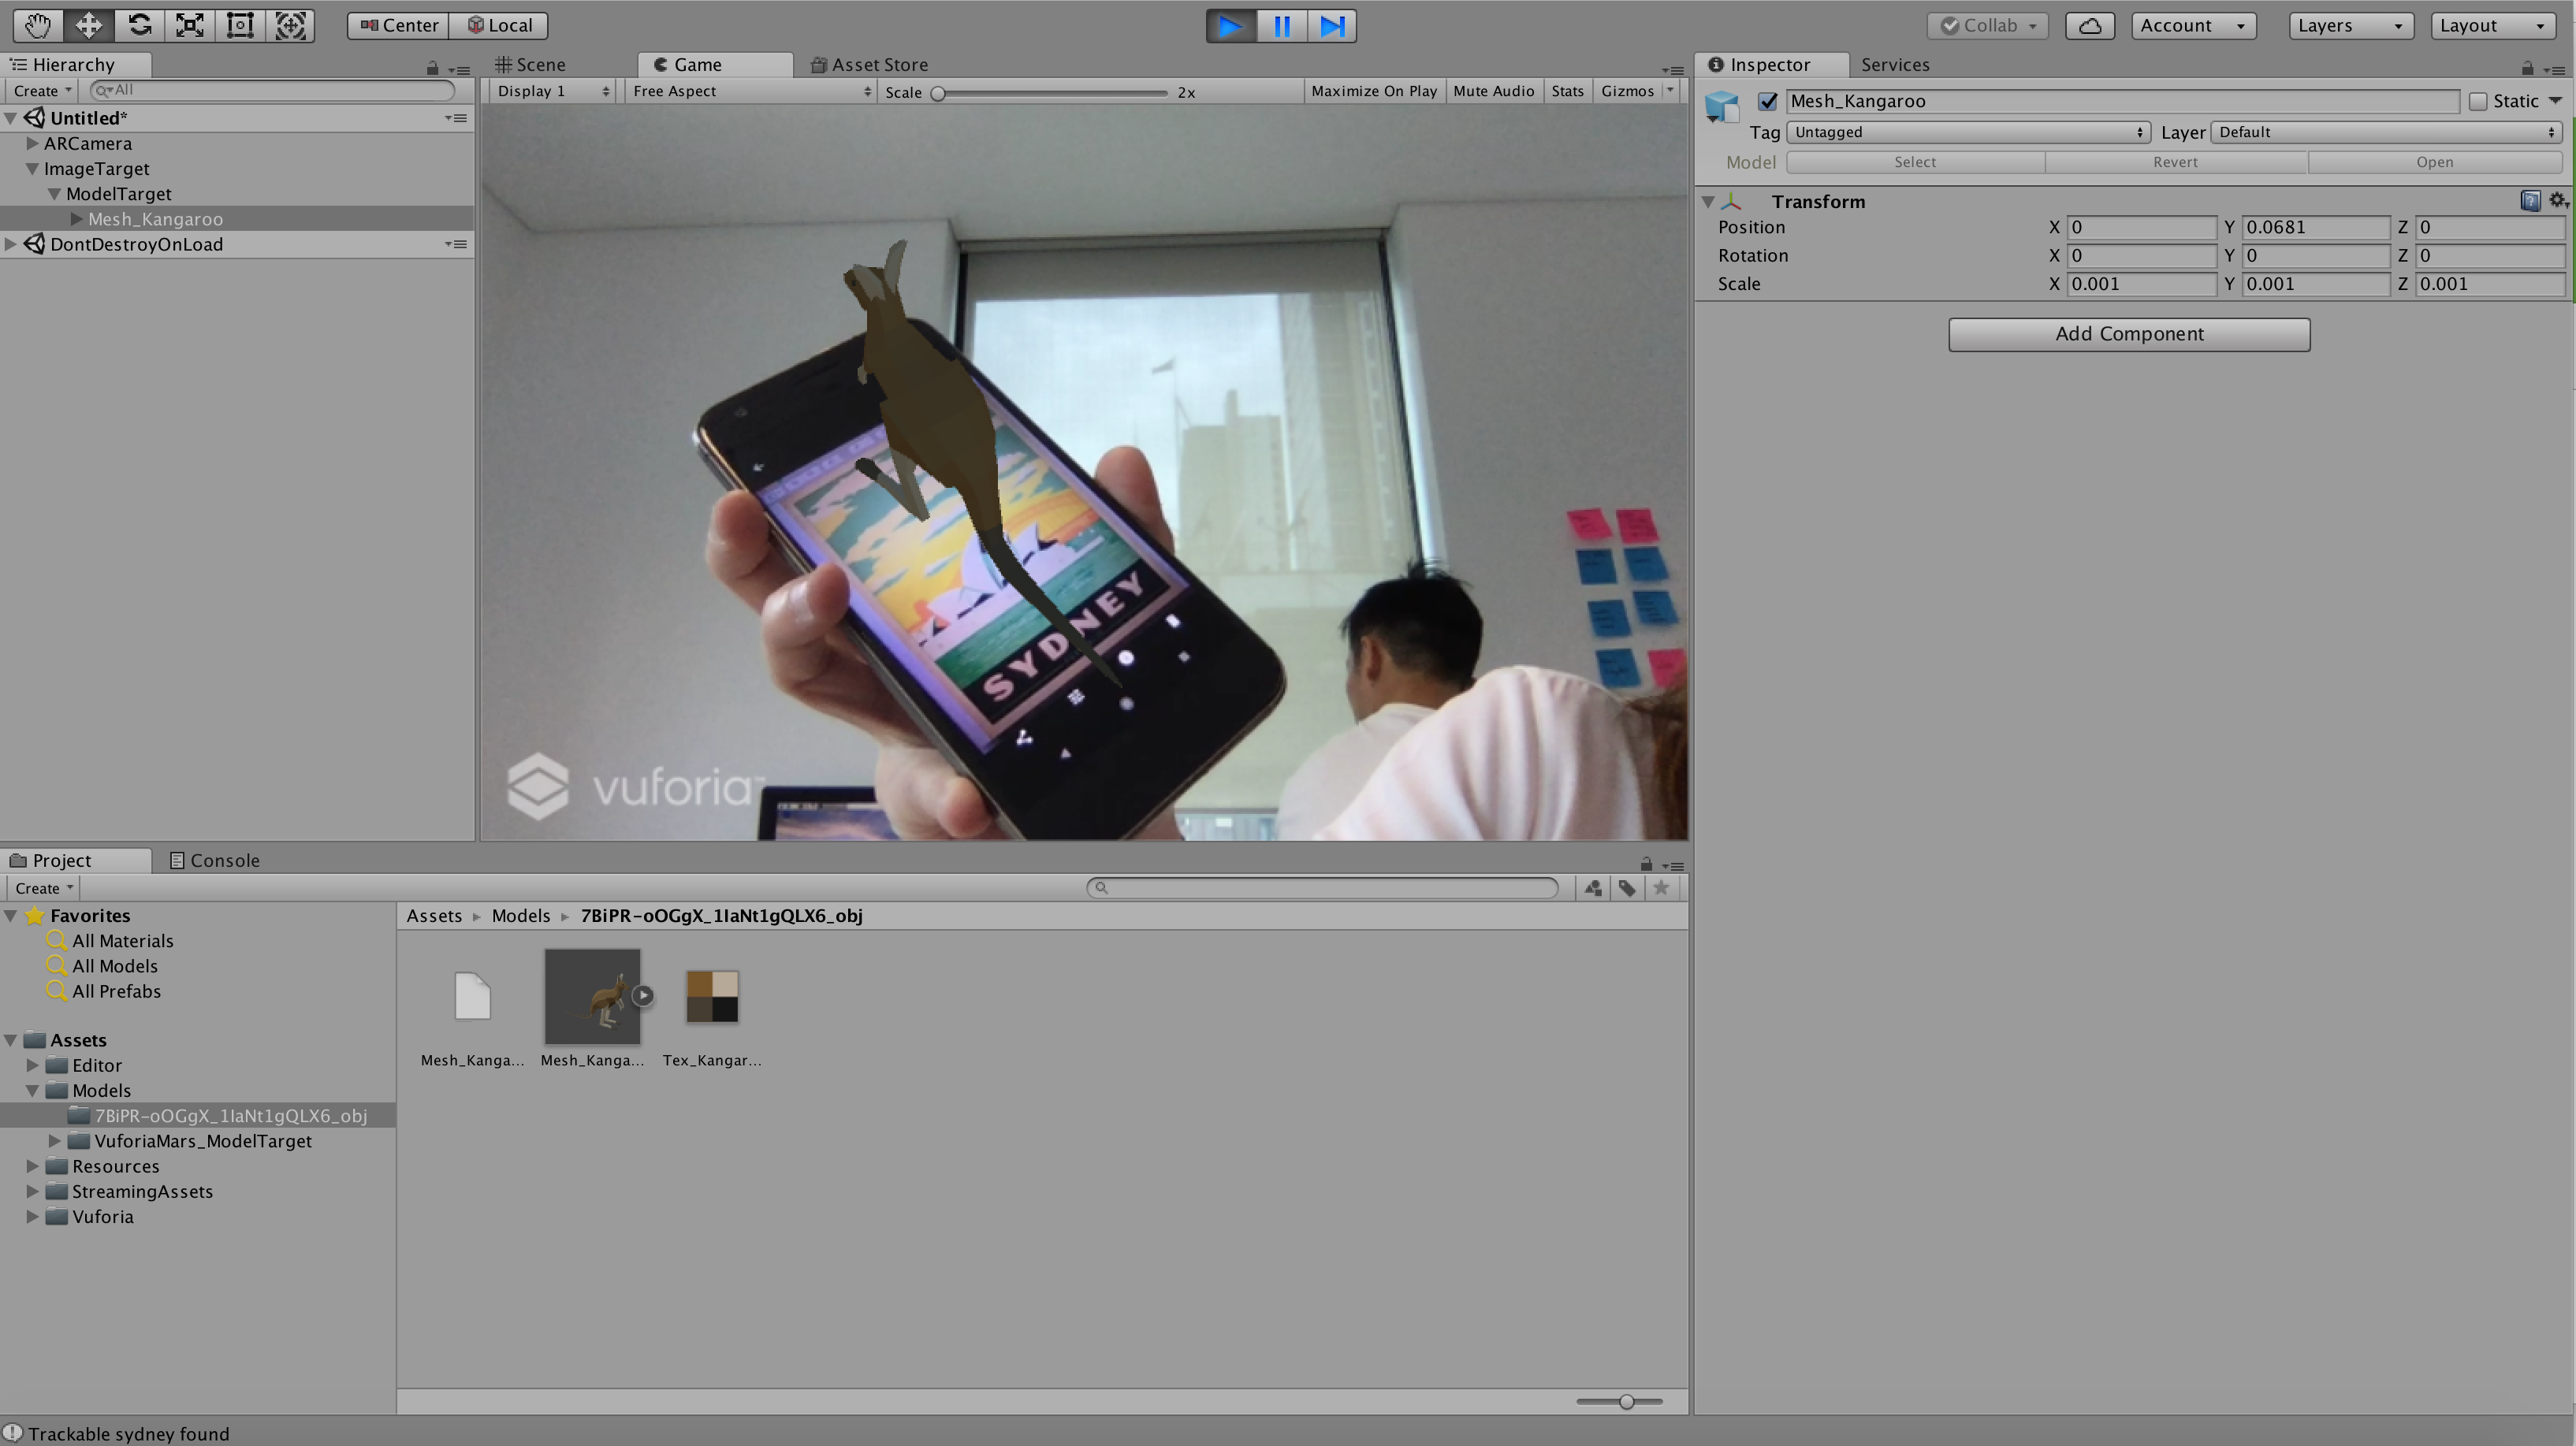 Testing that the new assets are working.
Testing on your iOS / Android device
? –
Now that we know our AR app is working fine with our laptop?s camera, let?s test it on our mobile phones or tablet.
Testing on Android devices
For Android, you will need to download Android Studio. Once downloaded, you will have to replace the ?tools? folder located in /Users/<your username>/Library/Android/sdk to the one you can download here. This is because the latest version does not seem to work at the moment, but v25 works.
Once this is done, you need to setup the path to the SDK in Unity. Go to Unity > Preferences and in the ?External tools? tab, scroll down and enter the path to the Android SDK. On Mac, it should be something like: /Users/<your username>/Library/Android/sdk.
You might also need to install the JDK. To do so, visit this page and download the JDK for your platform.
Once downloaded, you also need to enter the path in the Unity preferences. For the JDK, it should be /Library/Java/JavaVirtualMachines/jdk1.8.0_161.jdk/Contents/H??ome/.
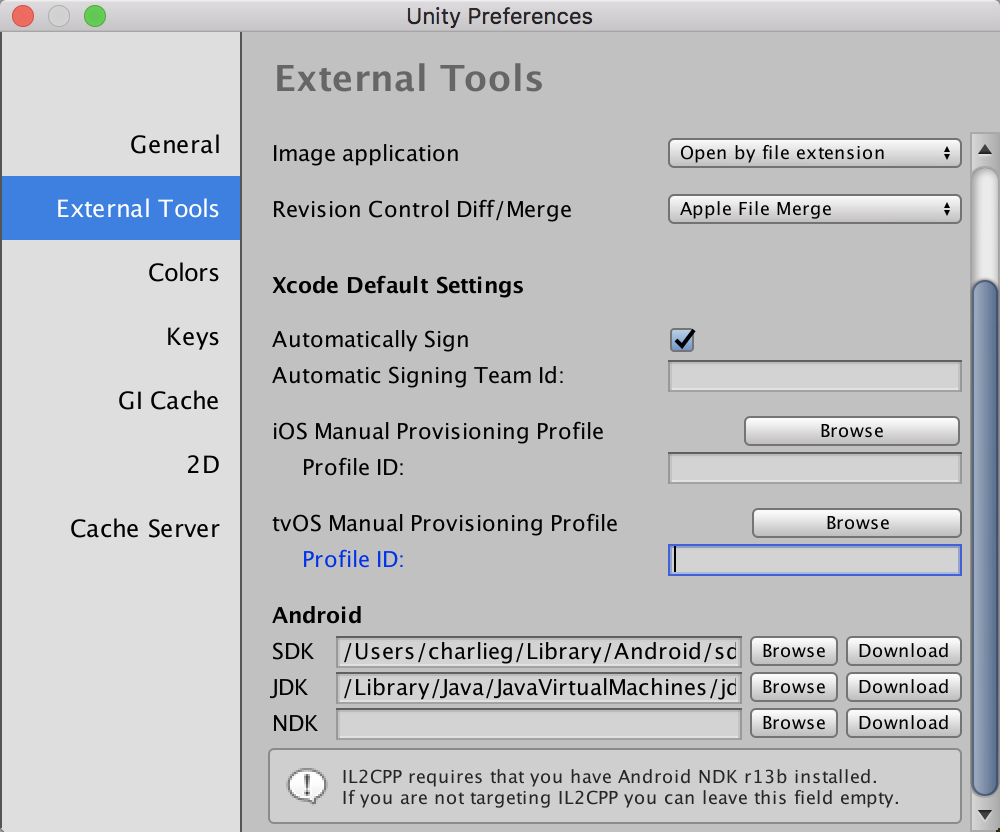 Path to Android SDK and JDK in Unity.
Then, to build your project, go to File > Build Settings.
Select Android and click on the ?Player Settings? where you have to double check that the ?Vuforia Augmented Reality Supported? option is checked.
You may also have to unselect the Android TV compatibility in the ?Other Settings? dropdown that seems to be checked by default.
Finally, you have to change the default package name.

After this, you can go back to the Build Settings window and click ?Build And Run?.
Your project should build successfully!

Testing on iOS devices
? –
To build for iOS, you need to start by adding your AppleID to Xcode. To do so, open XCode, from the menu bar at the top of the screen choose Xcode > Preferences. Choose Accounts at the top of the window to display information about the Apple IDs that have been added to Xcode.
To add your Apple ID, click the plus sign at the bottom left corner and choose Add Apple ID. Add in your username and password and you should be good to go back to Unity.
In Unity, go to File > Build Settings > Player Settings.
You need to enter a description next to ?Camera Usage Description?. For example: ?Camera access required for target detection.?.
Then, find the ?Target iOS minimum version? field and change the value to 9.0.
Finally, change the ?Bundle Identifier? field value.
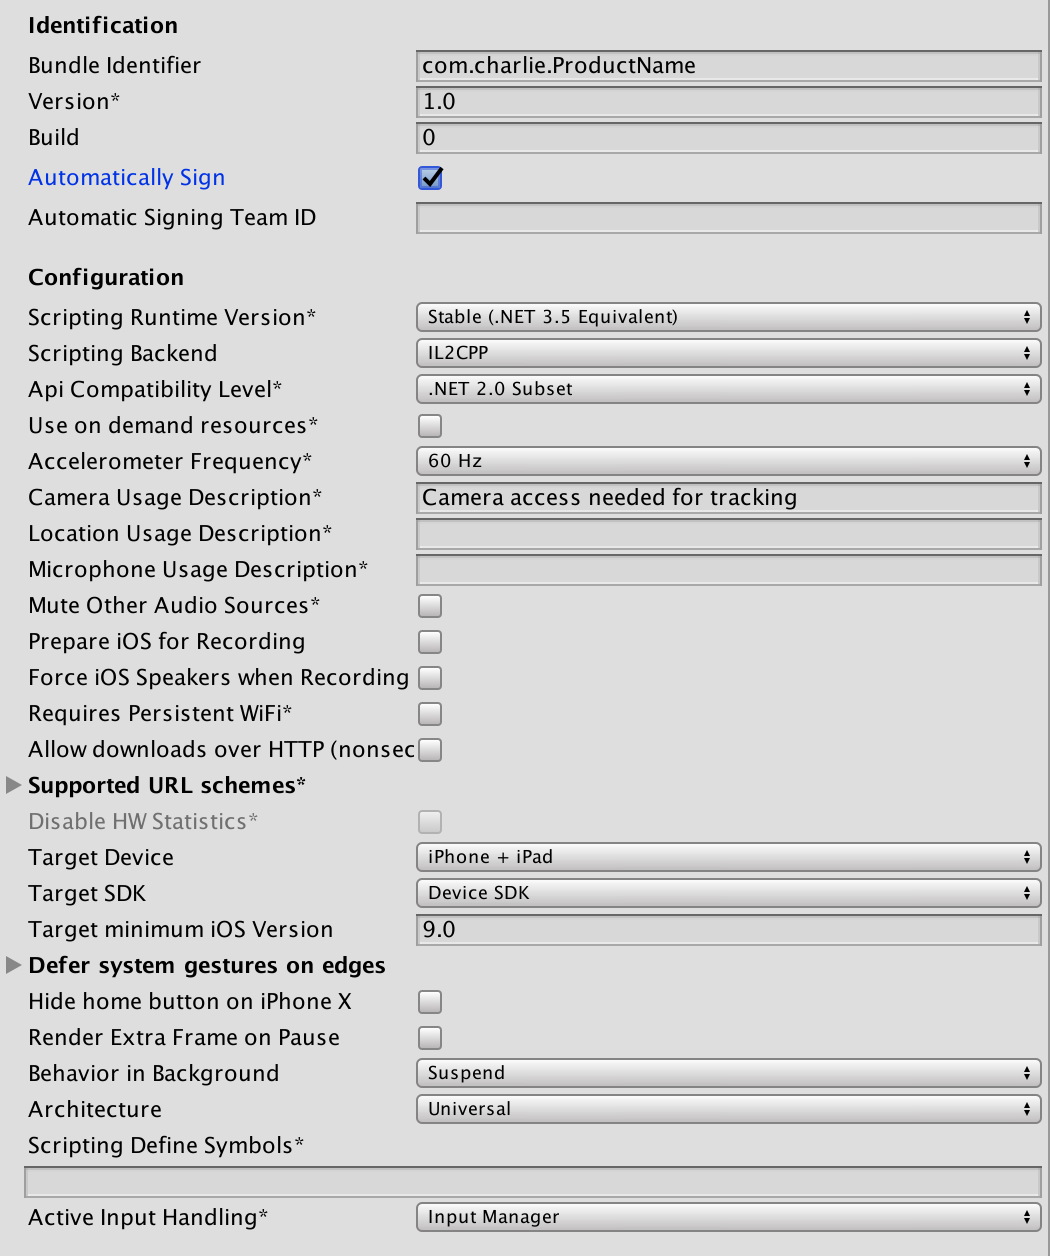
Make sure you scroll down to the XR Settings and activate ?Vuforia Augmented Reality?.
Once this is done, you should be able to click on ?Build and run?. This may launch XCode and you may be prompted to select a ?team? and change the name of the Bundle identifier.
On your iOS device, make sure to have your AppleID ?trusted? in the Settings.
That should be it! If you try to run the project again, it should build successfully and launch on your iOS device!
Going further
? –
If you went through all these steps and you can test this basic app successfully on your device, you?re all set! You can now upload your own assets and build your own AR posters!
In this tutorial, we?ve only played with tracking images and displaying a 3D model over it but you can also tracking small 3D models and overlay images, videos, etc..!
? –
Hopefully this was helpful and don?t hesitate to let me know if any of those steps don?t work anymore or if anything doesn?t make sense!

