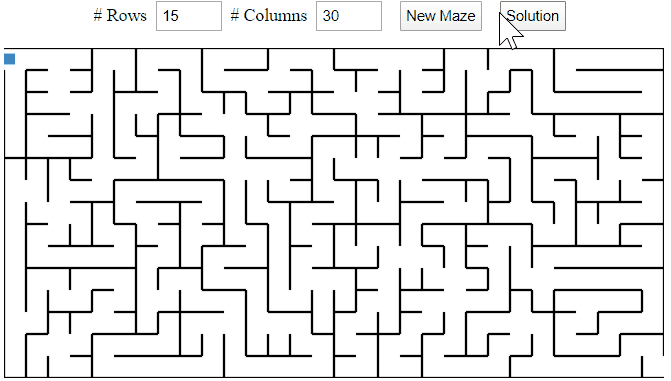
Today, we will create a maze puzzle application. The application can generate rectangle mazes with arbitrary rows and columns, and find their paths from entrances to exits. To add some fun, the final application allows us to traverse mazes using keyboard navigation or mouse clicks.
We will use the hunt-and-kill algorithm to generate mazes and use the depth-first search algorithm to solve them. We use HTML canvas APIs to draw the generated maze on the web page, and we can draw our own paths on the HTML canvas too.
The application is written in Angular/TypeScript. You can find the source code in my GitHub repository, and play maze puzzles on the demo site. The following screen-recording illustrates how the final application works.
Maze and Models
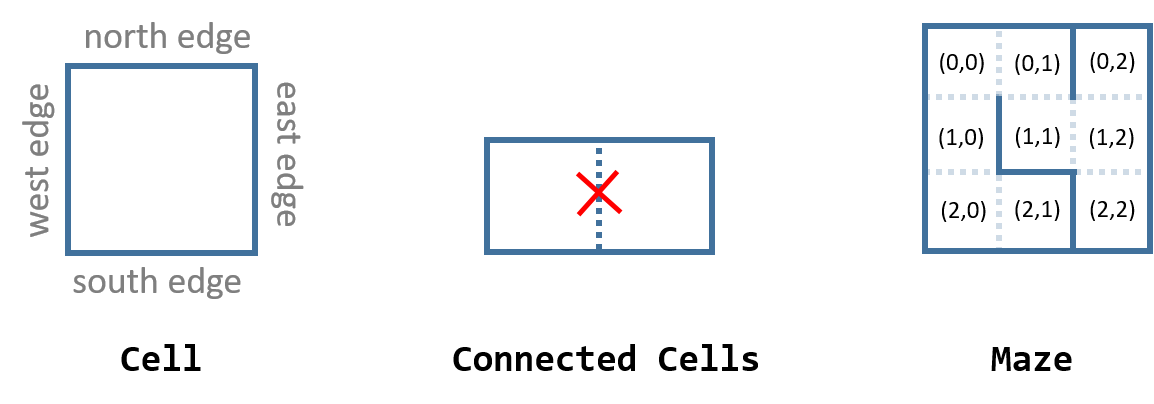
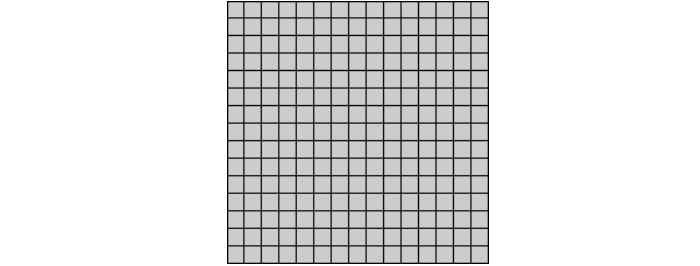
A maze can be considered as a grid of cells. In a two-dimensional rectangle maze, each cell has up to four edges representing walls that could block a path from reaching another cell. If a cell is connected to another cell, then each cell has one edge dropped. The following sketch illustrates the models of cells and a maze.
The mazes we are going to create belong to the category of ?perfect mazes?. A perfect maze is a maze with no loop areas and no unreachable areas. In a perfect maze, every cell is connected to another cell, and there is always one unique path between any two cells. In this article, the unique path for a perfect maze is called the solution.
In this application, a maze is modelled as a Maze class which includes a grid of cells. The Maze class needs the values for the number of rows and columns to construct a two-dimensional array of cells. The array indices of a cell indicate its row number and column number in the grid. A cell is modelled as a Cell class, which has four Boolean properties standing for its four edges, respectively. If an edge is dropped, then the cell will set that edge property to false.
The following code snippets show the model definitions of the Cell class and Maze class.
In the code above, the constructor for the Maze class first initializes the cells with their row IDs and column IDs, then produces the maze structure.
Maze Generator
Now we are ready to generate the maze with its grid of cells predetermined by the row and column number parameters. Among the many maze generation algorithms (listed here), I find that the hunt-and-kill algorithm is very easy to understand and implement. The psuedo-algorithm is as follows.
- Choose a random starting cell.
- Enter the ?kill? mode.Randomly select an unvisited neighbour from the current cell. Remove the edges between the current cell and the selected neighbour, and the selected neighbour becomes the current cell. Repeat until the current cell has no unvisited neighbours.
- Enter the ?hunt? mode. Scan the grid to look for an unvisited cell that is adjacent to a visited cell. If found, then connect the two cells by removing their adjacent edges, and let the formerly unvisited cell be the new starting cell.
- Repeat steps 2 and 3 until the ?hunt? mode scans the entire grid and finds no unvisited cells.
In his blog ?Maze Generation: Hunt-and-Kill algorithm?, Jamis Buck uses a JavaScript widget to demonstrate the hunt-and-kill algorithm. I have recorded the widget running process so that we can visualize the maze generation process in the following animated image.
 Visualization of the Hunt-and-Kill Algorithm. This animation is a screen recording of a JavaScript widget from the Buckblog by Jamis Buck (link)
The hunt-and-kill algorithm is pretty straightforward to implement. However, if the hunt mode always scans the grid from top-left to bottom-right, then there is a good chance that the generated mazes will end up with solutions favouring top rows, like the following, because top rows are connected at an earlier time in the hunt-and-kill recursions.
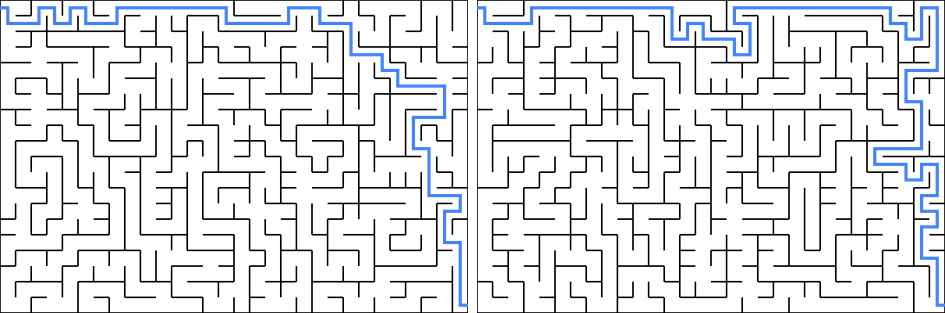 Two mazes that have solutions (in blue) favour top rows.
These types of mazes are not so challenging because they lack randomness. To reduce the possibility of top-rows solutions, we can randomize the scanning directions during the hunt mode. The final implementation of the hunt-and-kill algorithm is shown below.
Maze generation using the hunt-and-kill algorithm (gist link)
In the code above, we have an array of shuffled row IDs and an array of shuffled column IDs for the huntAndKill() method to scan the maze. In this way, the Maze class is able to generate a strongly randomized maze given the numbers of rows and columns.
There could be some optimization to the huntAndKill() method, but the current implementation is sufficient for generating mazes to be rendered in a browser window.
Maze Solver
If we have a perfect maze with unknown structure, then we can use the wall follower algorithm (link), also known as either the left-hand rule or the right-hand rule, to solve the maze. On the other hand, if we know the details of the maze structure, then we can use the depth-first search algorithm (link) to traverse the maze between any two cells.
Here, our application already knows the whole structure of the generated maze, so we will adopt the depth-first search algorithm, which simply loops through the cells that have not been traversed until the goal is reached. The following code snippet shows an example implementation.
Maze solver using depth-first search (gist link)
The findPath() method implements the search starting from the first cell and ending with the last cell, and returns an array of cells representing the solution to the maze, i.e., the path from the first cell to the last cell.
Draw the Maze on Canvas
With all the models being established, we are ready to draw a maze on an HTML canvas. We first add a canvas element in the HTML template, like the following.
Then we set the canvas width and height based on the size of the desired maze, and draw all the cells on the canvas. The following code snippet is an example implementation in an Angular component. Since the HTML canvas drawing APIs are framework-agnostic, you should be able to transfer the code to applications using other JavaScript frameworks.
Maze component which draws the maze on canvas (gist link)
The method for drawing the maze path should be very similar to the code above, so I won?t expand the drawings here.
To add some entertainment value, the demo application responds to keyboard events, so that users can navigate around the maze using arrow keys. You can try it out on this demo website.
The maze puzzle is a fun game and an easy side project to learn something about canvas. To summarize our journey in this article, we have covered topics about building maze models, generating mazes using the hunt-and-kill algorithm, solving mazes using the depth-first search algorithm, and drawing the mazes on HTML canvas.
That?s all for today. Again, you can check out the source code from my GitHub repository. Thanks for reading.
