 Learn how to build this
For nearly four years, I?d stopped playing drums. There were two main reasons. While I had an electronic drum kit, it was dreadful ? the Roland HD1 entry level kit. Great for beginners, but it just didn?t offer a good experience for seasoned drummers with it?s small rubber pads, poor built-in pedals and woefully out of date drum sounds. The other reason was noise. While not nearly as loud as an acoustic kit, electronic drums transmit a lot of noise downwards thanks to the pedals, and living in an apartment made this a bit inconsiderate to my downstairs neighbours.
That all changed last year when I moved into a house, and I finally decided to upgrade my kit and get back into drumming properly as the noise factor would be less of an issue. Having traded in my HD1 and my beloved Zidjian A Customs (a sad, sad day) to raise some funds, I picked up a Roland TD-11 KV Special Edition, which sits halfway between the standard TD-11 KV and the TD-25 in the Roland range, with a ?proper? looking hi-hat mounted on a stand, an extra cymbal and a larger rack than the standard TD-11 kits.
The playing experience was far superior than my old HD1, but I was still playing on small drum pads, and I wanted something a bit more authentic.
Apart from simply looks, I found that playability wasn?t ideal with the small pads. It?s too easy to accidentally trigger rimshot sounds on the minuscule 10″ snare.
I began looking into other options. Inspired by a few YouTube drummers who had built DIY edrum kits, I began painstakingly researching and planning my dream electronic kit.
Surprisingly, putting this thing together and setting it up with my drum module wasn?t nearly as hard as I had expected, and also much cheaper than a high-end Roland TD-30 or 50, which has comparably sized drum pads. Granted, my set up doesn?t support advanced features like positional sensing currently, but this can quite easily be added later by changing the module and getting a centre mounted trigger for the snare.
In this post I?ll show you how to build your own, including:
- What to look for in a base electronic drum kit
- What acoustic kits are suitable for conversion
- What additional components you need
- How to set up your module
- What drum software you can use to get better drum sounds
So if you?re looking to build your own DIY kit that looks better than a top of the range Roland or Yamaha kit, plays just as well, and can even sound as good, if not better, then read on!
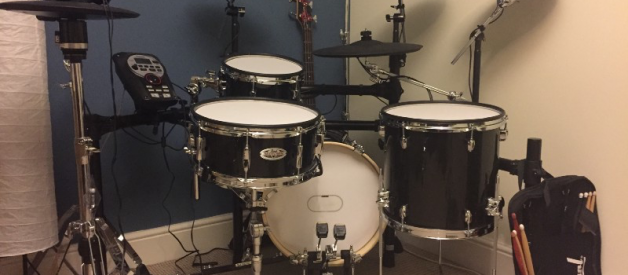
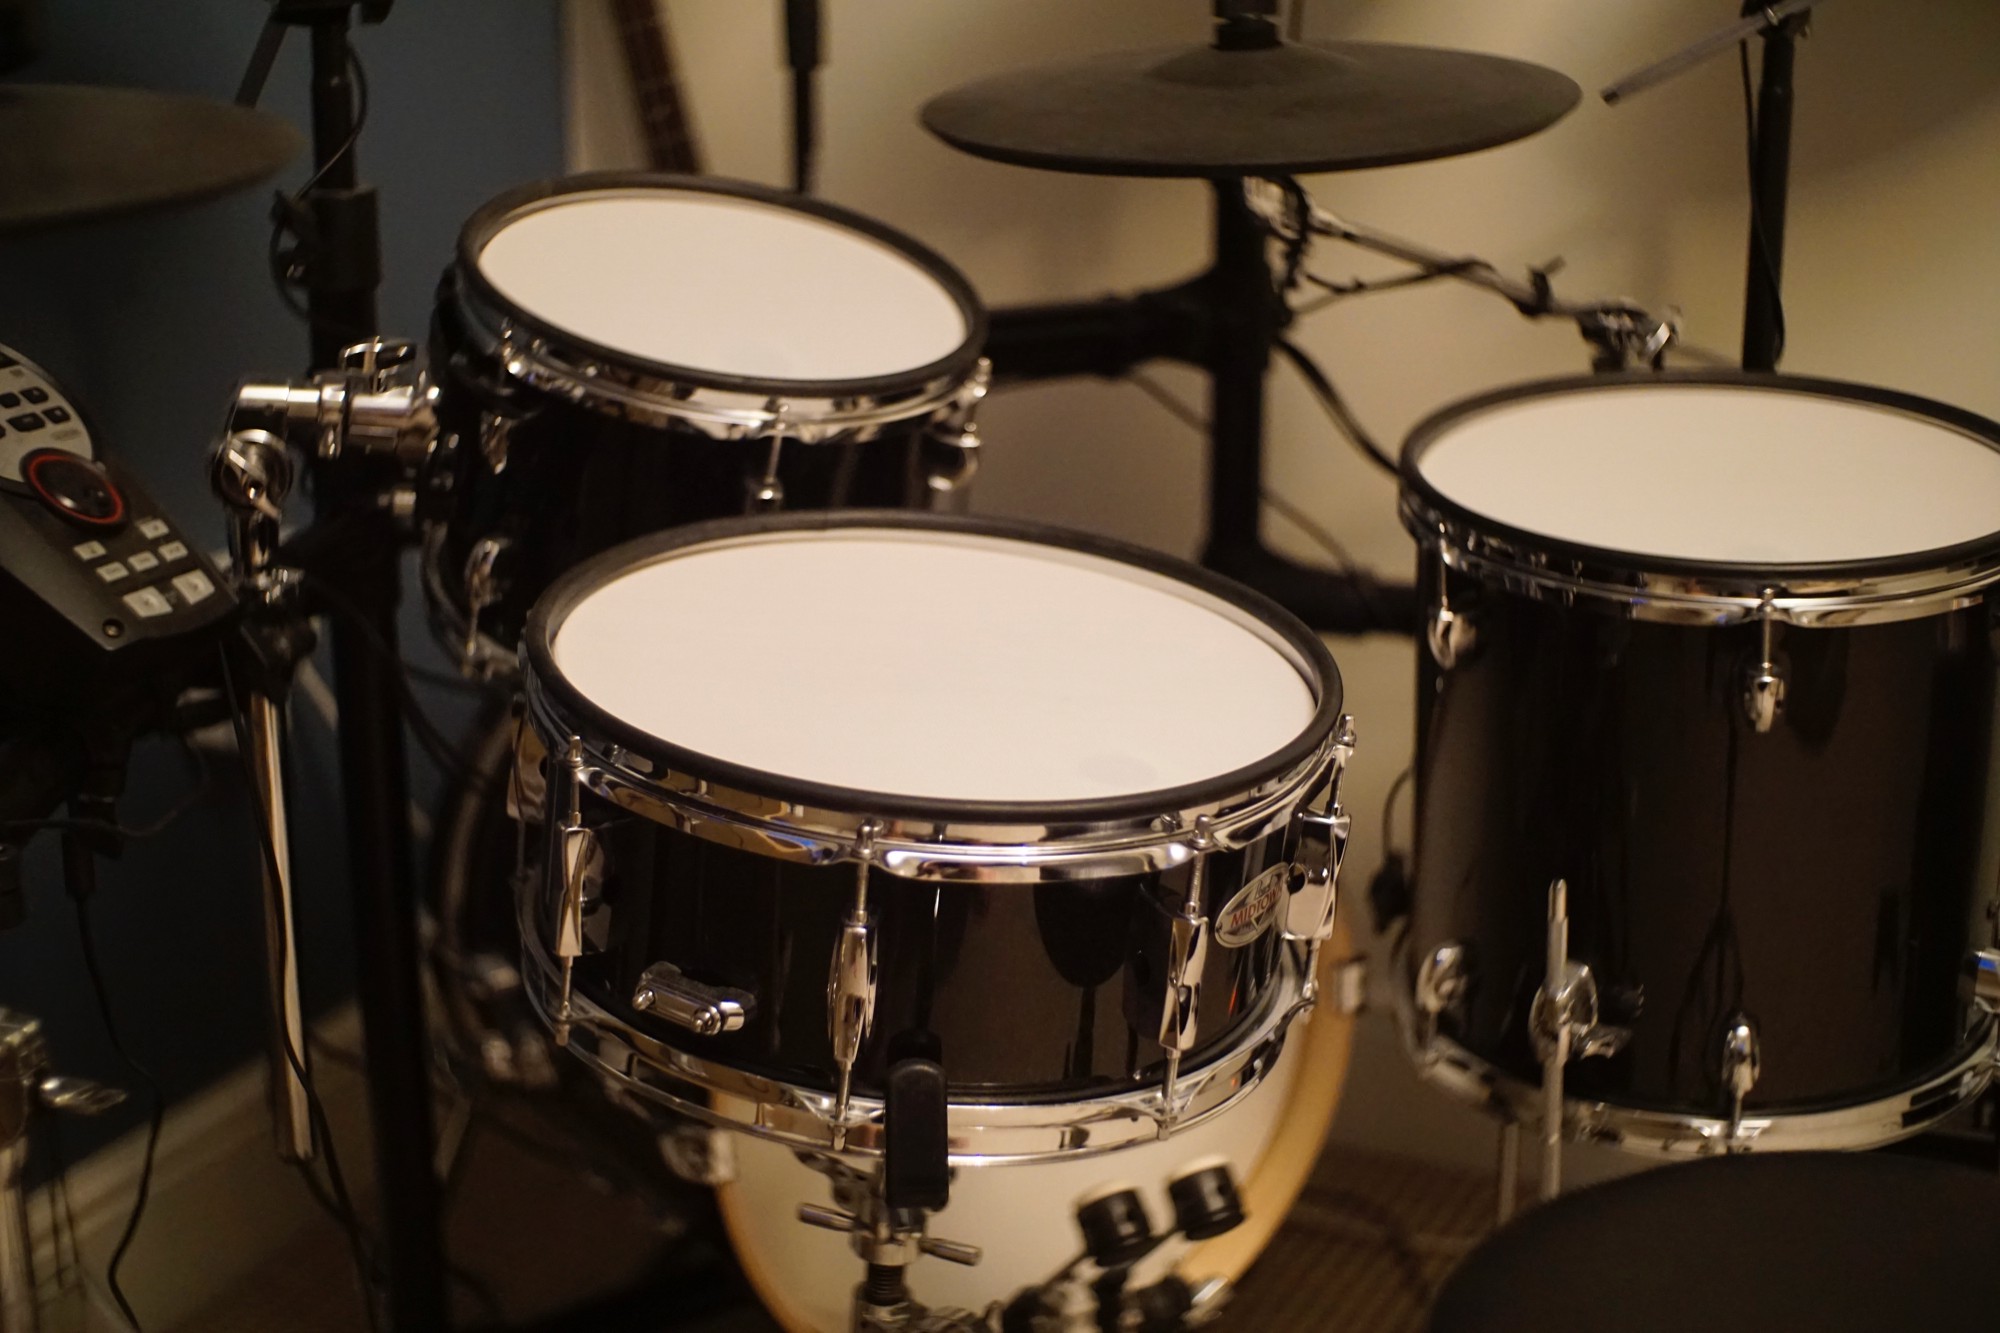
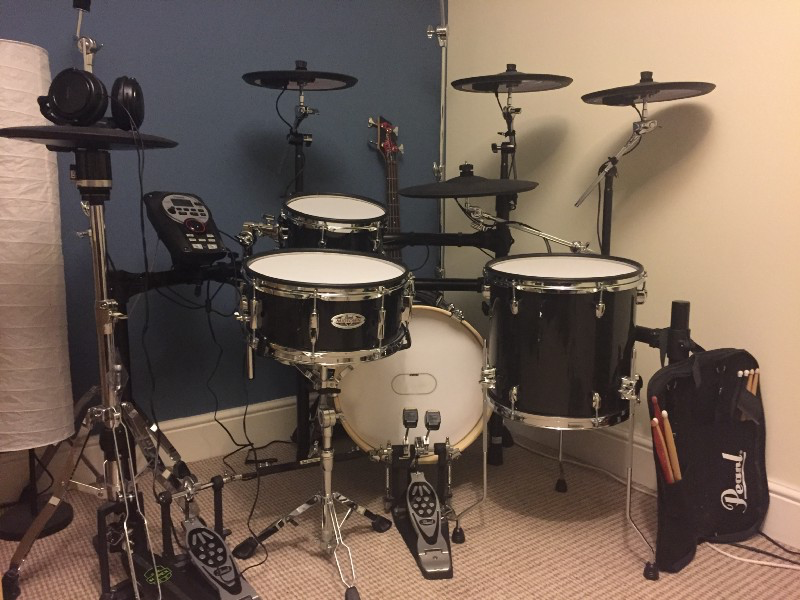 The finished article
The components
There?s a few main things you?ll need to get started ? you can also find links to all products at the bottom of this post:
A base electronic drum kit
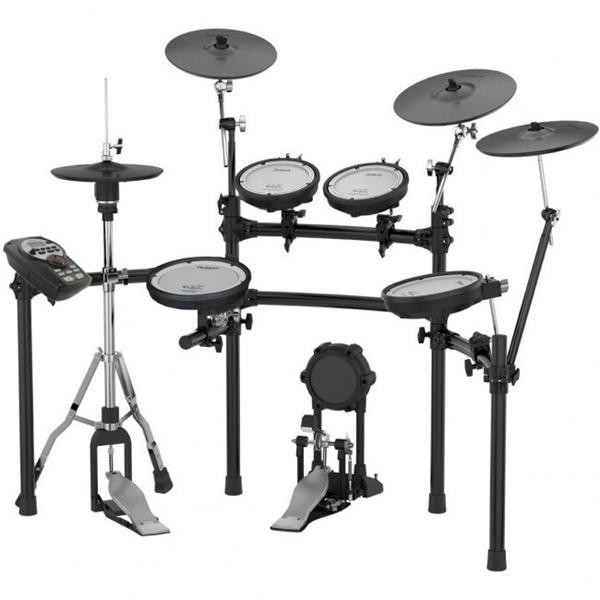
The TD-11 KV Special Edition was a good starting point for me, as it packed in the VH-11 hihat and an extra crash cymbal, which are surprisingly expensive when purchased separately. It is definitely worthwhile paying extra for this kit just for the VH-11 for that reason. On top of that, the TD-11 special edition comes with the rack from the TD-25, without which this conversion wouldn?t have worked. The standard TD-11 rack is simply too small!
Even though I?d have no use for the included mesh pads and kick tower after the conversion, it was actually cheaper over all to buy the full kit rather than buy the individual components.
Without selling these pads, the whole kit cost around 2,200 ? the same as a Roland TD-25 KV and a fraction of the price of a TD-50 or TD-30 KV, which are they only stock electronic kits in the range that offer realistic-sized drum pads. Despite their high price tags, I think mine looks much cooler!
While it is possible to buy all the components except the drum pads separately, it?s not worth it as Roland?s bundled kits are much better value. Pricing it up separately, the price would have been the same for me, so I?ve kept the pads in case I want to use these in future.
- January 2018 Update: It looks as though the TD-11 KVSE has been discontinued (1,470 at the time), and the TD-25 K has reduced in price to around 1599 to fill the gap, so this would be the kit to use. Unfortunately the TD-25 only comes with one crash, however it has one more trigger input than the TD-11, so there?s extra room for expandability.
- November 2018 Update: The TD-17 has been out for a few months, however the top of the line KVX version still includes the smaller rack. If you need the rack, it may be worth getting the TD-25K, however if you?ve got a few spare cymbal stands then I?d go for the TD-17KVX for the extra crash.
I have been asked about whether this is possible with a Yamaha drum module, but honestly, I hadn?t considered Yamaha as an option, mainly due to having used Roland products before and being aware of their reputation for accurate triggering. The majority of A to E drum conversions I?ve seen online seem to be Roland, which may be due to the fact that Roland modules are designed to use mesh heads, so your A to E drums will end up being quite similar to stock Roland pads in their operation. Yamaha kits don?t use mesh heads, and so I expect setting them up for accurate triggering may be more difficult, if at all possible.
An acoustic kit

Electronic drums are scaled down compared to their acoustic counter parts. While standard cymbals can be as large as 24 inches, the biggest e-cymbals from Roland max out at 15 inches (excluding the new 18? ride which only works with a TD-50). With this in mind, I wanted a small kit to match the dimensions of the cymbals, as well as fitting into the Roland rack. Visuals are important too!
Fortunately, there?s a wide range of so-called ?bop? or ?jungle? kits out there that fit the bill. I specifically looked ones with the smallest diameter shells, ruling out a number from Ludwig and Sonor which came with 12 and 14 inch toms. I eventually narrowed my search to the PDP New Yorker featuring 18, 13, 13, and 10 inch shells, and the Pearl Midtown with the 16, 13, 13 and 10 inch shells. I went ahead and bought the Pearl kit for a few reasons:
- The 3/4″ tube on the Tom holder is compatible with the Roland rack
- I?d read that larger shells result in bouncier mesh heads, so the 16″ bass should work better
- I couldn?t find a readily available triple ply 18″ mesh head anyway
- It comes in a black sparkle finish which looks great and matches the black rack
- It was 40 cheaper than the PDP
While the bass drum was on a riser, it just fit under the bottom of the Roland rack with less than a centimetre to spare. A match made in heaven?
- April 2018 Update: Natal have recently launched the Arcadia Birch kit which has the same shell sizes as the Pearl Midtown, so another viable option. Check out the review here. It also comes in at 349, undercutting the Midtown which has gone up in price from 339 to 359 some time in the last year.
Triggers
Researching what triggers to use also took a considerable amount of time. I?d ruled out centre mounted triggers, as I?d heard about the issues of hotspots that you get on pads set up like this ? even with Roland?s own pads. Plus, the TD-11 doesn?t support positional sensing, so paying extra for this seemed like a waste. It can always be upgraded later!
This limited my search to side mounted internal triggers, where I found two models: the Triggera Intrigg and Jobeky Drums side mounted internal triggers. I went with Jobeky as they were cheaper and I?d heard good things about them in the drumming community.
Mesh heads
Getting suitable mesh heads was the next step. Jobeky do triple ply heads which I went for as I?d seen some good reviews for triple ply heads on YouTube (find these below in the resources section). It seems like they might all come from the same factory, as the ones I received look the same as ones from other manufacturers.
There was also the option of Remo silent stroke and Roland?s own range of twin ply mesh heads, but these were way more expensive and didn?t seem to offer any additional benefits. The triple ply heads allegedly have more realistic rebound too, though they are still more bouncy than standard heads.
- November 2018 update: There?s plenty of options on the market for mesh heads these days to choose from. Here?s a brilliant comparison video from V-Drum Tips on what heads are better, depending on your preference on price, noise and realism.
Rubber rims
Finally, I also got a set of rubber rims from Jobeky to keep noise down and protect my sticks when doing rim shots, as well as to keep a small part of the electric kit look and feel. Jobeky seem to be the only place that stock these in the U.K.!
An extra ride cymbal
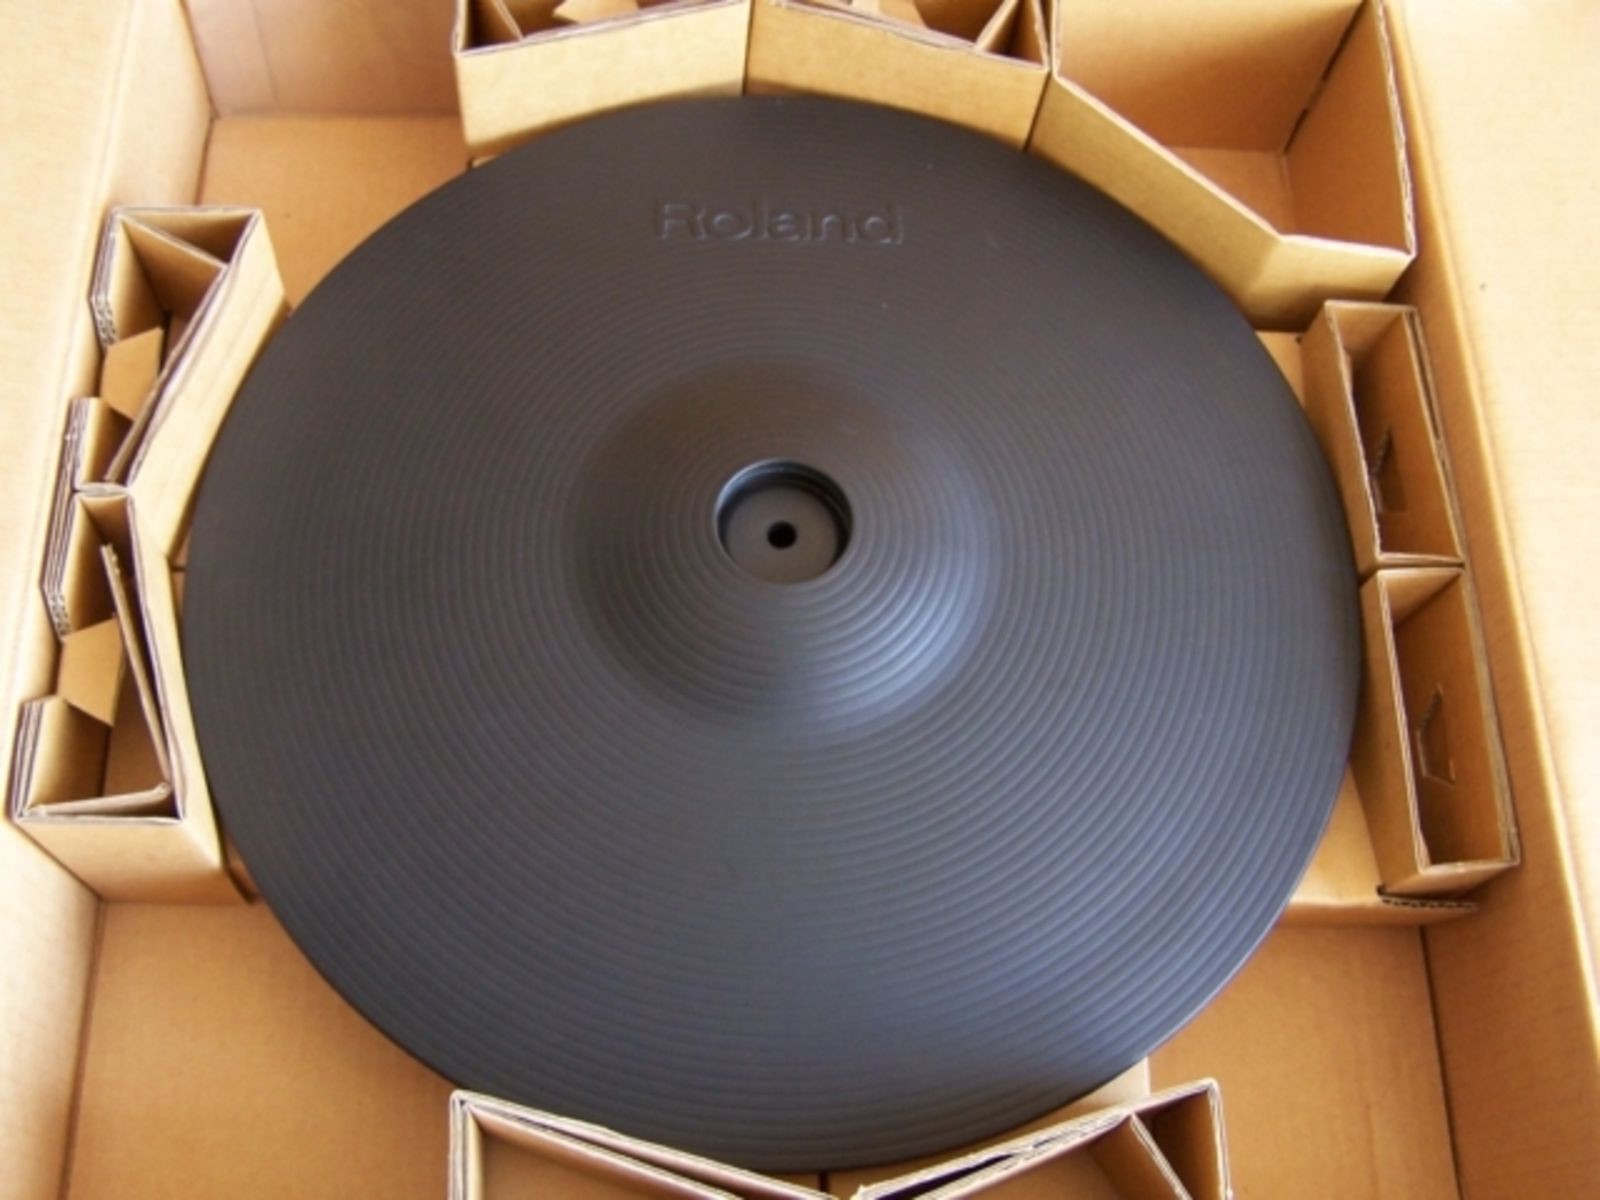
Because there are no 5 piece jungle kits out there, I decided I?d want to get an extra cymbal to make use of the last input on my module. The Roland CY-15R was ideal as it has realistic dimensions, rather than the 12?13″ ecymbals I already had. This would help balance the look of the kit, instead of having a laughably small ride, as well as a more realistic swinging motion.
These usually cost 250 but I spotted one for sale at PMT for just 150 ? you can?t even buy them used for that price! I think it may have been a pricing error, but either way I snapped it up alongside a 30 pearl boom mount and attached to my rack.
This meant I could use the old 13″ ride as a crash, while the second 12″ crash could be assigned as a china.
Triggering software
The stock TD-11 sounds aren?t anything to write home about, nor are the TD-25?s for that matter, so I?d always planned to get a VST sound library to trigger via midi. The TD-11 therefore made sense over the more expensive modules, where I?d be paying for ?better? kit samples that I wouldn?t even use.
I?d previously used Superior Drummer years ago with my HD1 kit however I didn?t have the authorisation key anymore, but fortunately was able to snap up a copy with 70% off RRP in their 2016 Black Friday sale. I then added the Metal Foundry pack for just 50 in the January sale. The kit now sounds even better than Roland?s flagship range!
A great feature of the TD-11is that it can trigger midi over USB while also acting as a sound card, meaning I could route the triggered sounds back through the module?s own headphone jack. I now have it permanently plugged in to a USB hub behind my desk, so it takes just one button press and four mouse clicks to get set up and jamming.
- November 2018 update: I?ve now upgraded to Superior Drummer 3 and would definitely recommend all SD2 users do so ASAP as the upgrade pricing ends on the 1st January 2019. There?s lots of useful features for e-drummers that make it so easy to use!
Putting it all together
 The kit build in progress
Eventually after months of planning I?d collected up all the components and it was ready to put it together. Here?s what you?ll need to do:
Install the triggers and mesh heads
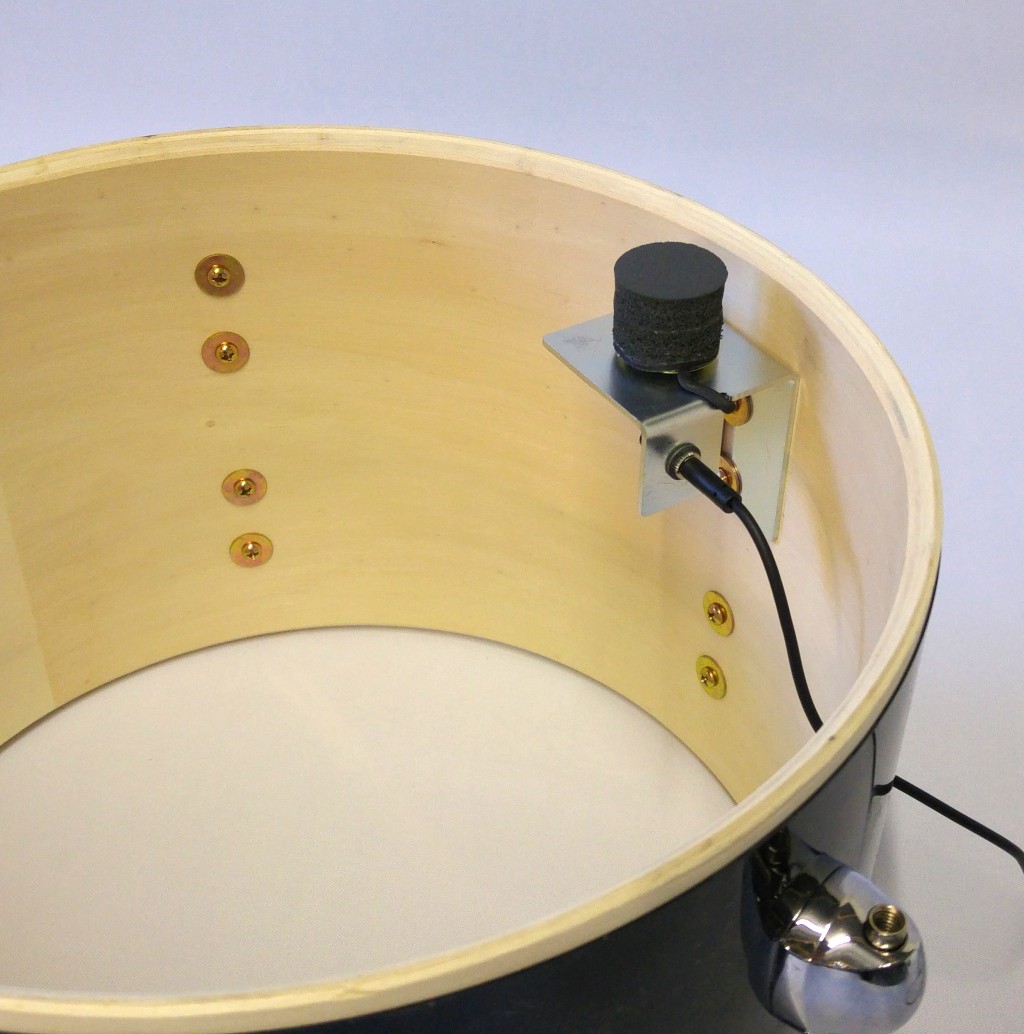
Start by preparing your new drum shells. Side mounted triggers are easy to install, simply take off your batter head and unscrew one of the lugs, put the trigger in place and put the screw back in. The only fiddly bit is when it comes to screwing it back together. Because the trigger is flat and the drum shell is round, there is a bit of a gap between the rim and the centre of the trigger where the screw will need to go through. On top of that, the screws that hold the lugs to the shells are pretty short, so it can be a bit of a delicate process getting it together.
I found an easy way of doing it was to unscrew the lug so the screw was still in place but held on with just a few millimetres of thread, so there was just enough room to slip the trigger down into place, then tightening the lugs so the triggers were held in place.
Triggera recommend raising the pad of the trigger 3mm above the bearing edge of the drum shell, which I noticed Roland do too on their pads that use side triggers, so I did this too ? it worked a treat!
Another good tip is to mount the trigger near the bottom of the drum head, i.e. closest to you. That means you can?t accidentally hit the drum directly above the trigger pad, acting like a hotspot where all you?ll get is a maximum volume input.
Before you put the heads on, make sure you plug in the cable and run it through the air vent hole. My triggers were sent with some handy clips to secure the connector to the nearest bottom lug, but it?s also possible to get connectors that sit rigidly inside the air vent hole, though this would require taking off the metal grommet in the air vent, which isn?t always possible. I stuck with the safe option so I could convert the kit back to acoustic if needed in future.
While the hoop was off, I put the rim guards on, though in hindsight this made it a bit harder to screw the heads back in place. I then put in the mesh heads and tightened them until they were nice and tight.
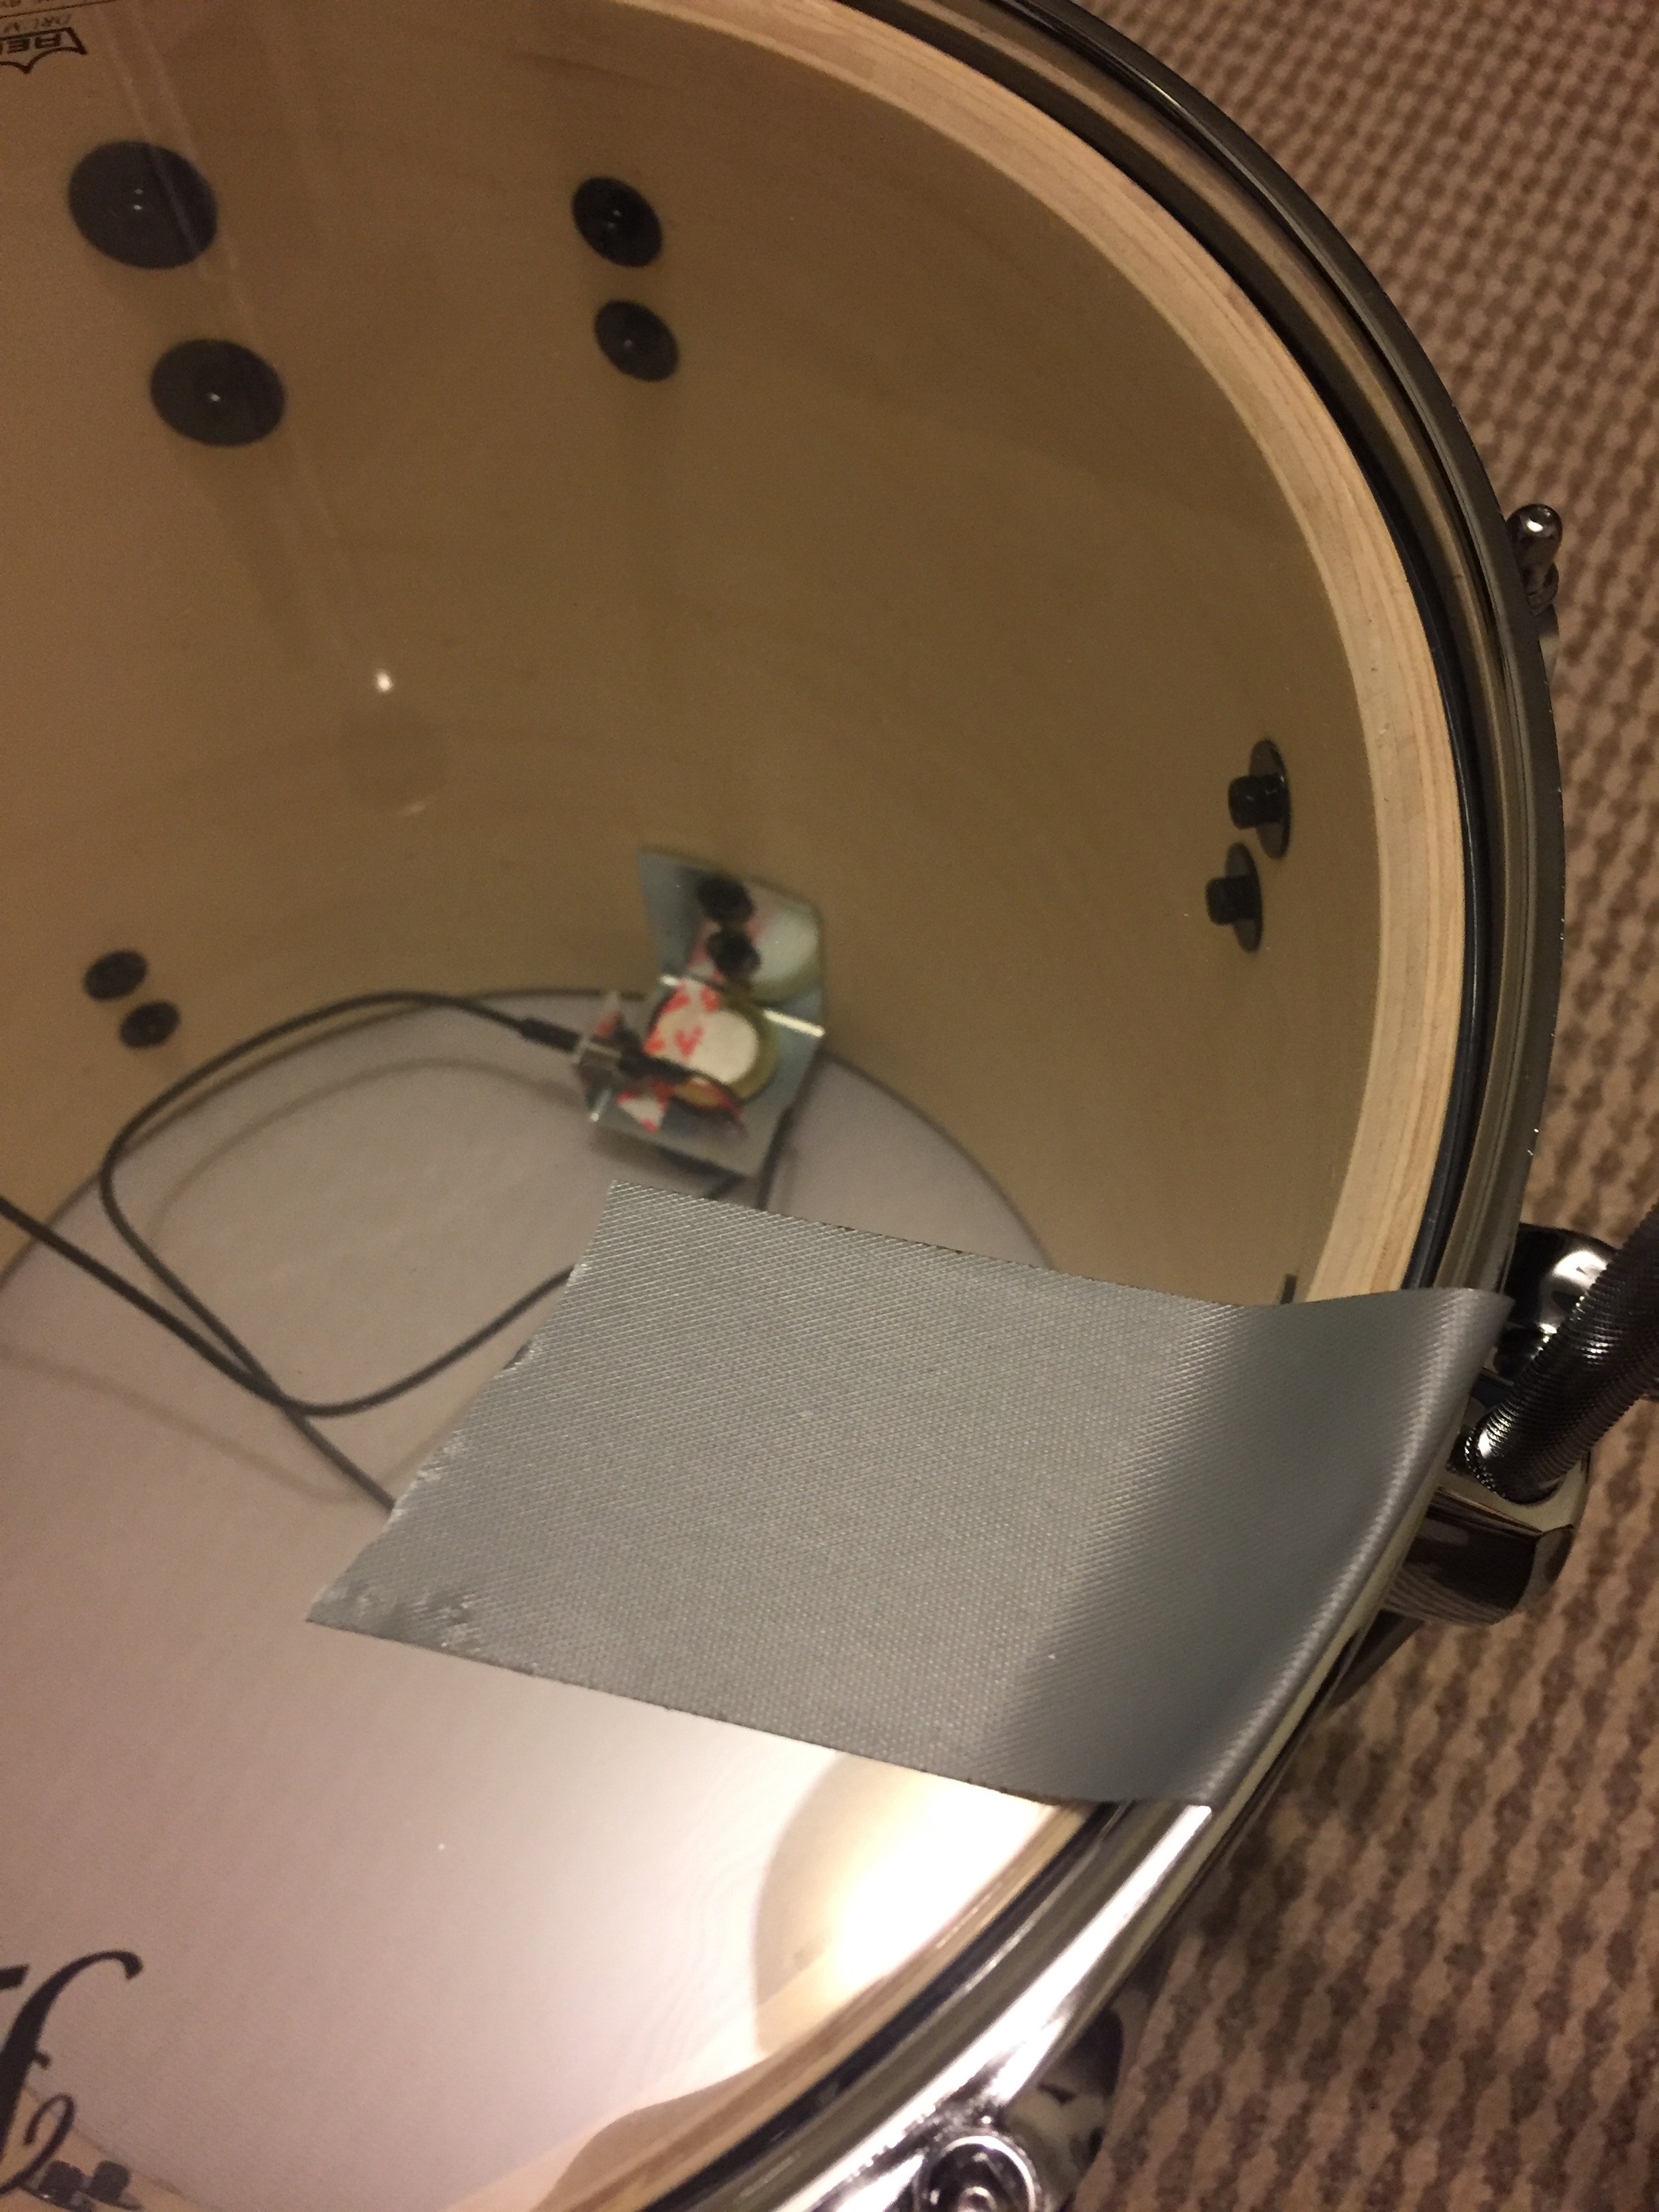 muffling the floor tom?s bottom head
At this stage you can test the drums. the snare and rack tom were really quiet, despite leaving the stock resonant heads on. Only the floor tom?s resonant head rung out when hit, but adding some tape muffled this sound a bit.
I later tuned the head lower so it wouldn?t resonate so much without needing the tape.
Meanwhile, after installing the bass drum head I found it was really bouncy and unrealistic. This was solved with a quick visit to Argos to pick up a pair of value range pillows, which once stuffed inside the bass drum eliminated this problem all together, as well as muffling the sound so all you hear now is the impact sound of hitting the plastic patch I stuck on to protect the mesh head from the beater.
The bass drum feels so realistic now, with the right level of rebound while allowing for movement so the beater can be ?buried? into the bass drum. I?ve also put on a Evans kick drum patch to protect the mesh head and it?s already quieter than the stock KD-9 kick drum tower.
Prepare your drum rack
the first thing to do here is to remove the snare holder, which wouldn?t be needed ? and is too short anyway. This slips off easily by pulling off one of the rack?s feet. The also rack comes with a complete set of plastic adaptors that work with Pearl?s standard 3/4 inch tubing. Simply loosen one of the drum pad mounts and you?ll be able to remove the L-rod to reveal a 3/4 inch hole. I ended up relocating a few of these mounting points to get everything in an ergonomic position, for example the rack tom is now mounted on the left hand side instead of at the back.
Next, put your bass drum in place and drop the rack over the top ? you should find it will just fit. Then go ahead and build up your kit around it!
- January 2018 Update: Over time the bass drum would move slightly and end up with the tom mount touching the rack, adding noise when playing the drum. I realised the solution is to move the lower horizontal tube to the very bottom of the rack and putting the bass drum between them. Problem solved!
Tuning the module
After researching this online, it seemed like the most daunting part of the process. In practice, it really wasn?t too difficult.
Starting with the bass drum, I set the module to register the bass drum as a KD-140, which is Roland?s largest mesh head kick drum tower ? as close in design to my DIY bass drum as I could get. This produced some great results, and all I had to do was dial up the re-trigger setting a bit to cancel out the slight amount of double triggering I was getting.
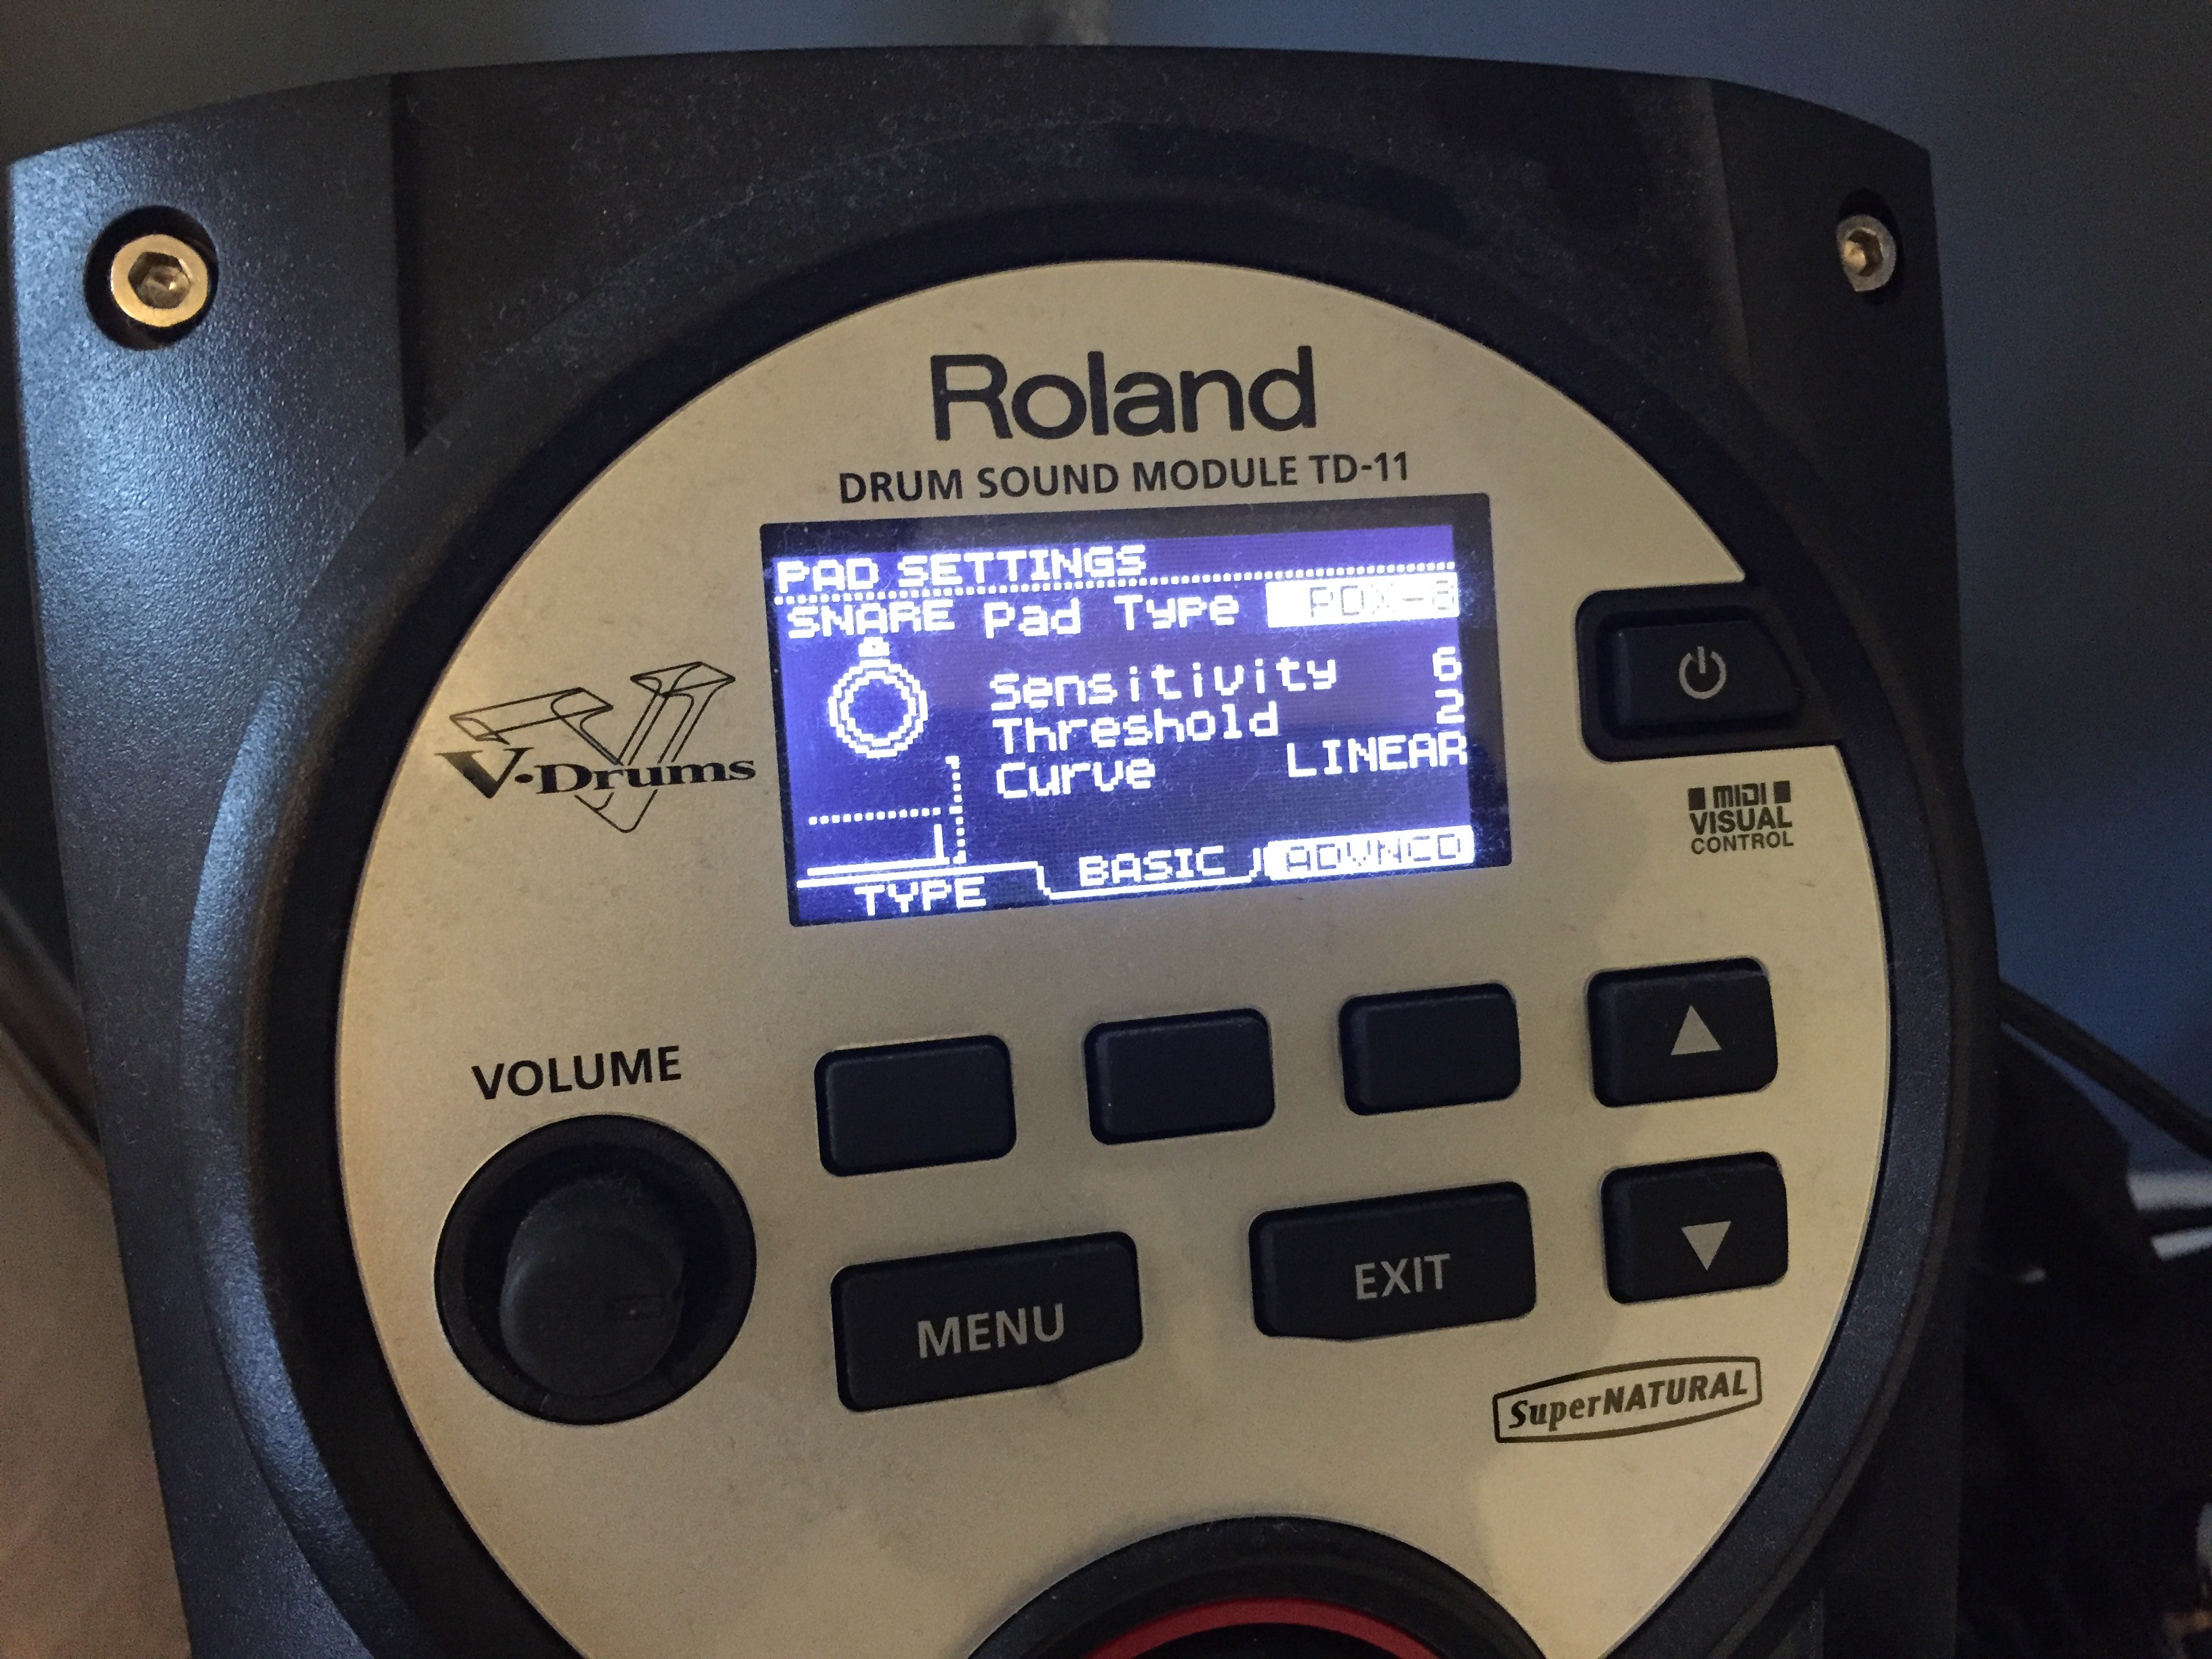 setting up the pad settings was surprisingly easy
Next, for the remaining pads, I set them to the next closest official Roland pad ? the PDX-8, which also has a side trigger, albeit with a much smaller pad. This pretty much picked up the dynamics of the drum head almost perfectly. Using the input meter on the module, you can adjust the sensitivity to suit you, picking up a wide dynamic range. Fortunately the module shows a small input meter on the screen so you can track what your changes are doing to the pad?s sensitivity, both for head and rim sounds.
I then found that the rim sensitivity needed to be dialled up on each drum, which can be done with the rim gain setting. I moved these from about 1 to 2.5?3 for each pad. Everything else could be left as standard, making for a relatively quick and easy set up. All in all, it only took about 20?30 minutes to get the inputs set up as I wanted!
Wrapping up
Researching and building this kit was not only a lot of fun, it was also much easier than I expected. Things like installing the triggers and tuning the module were not nearly as difficult as I?d envisioned.
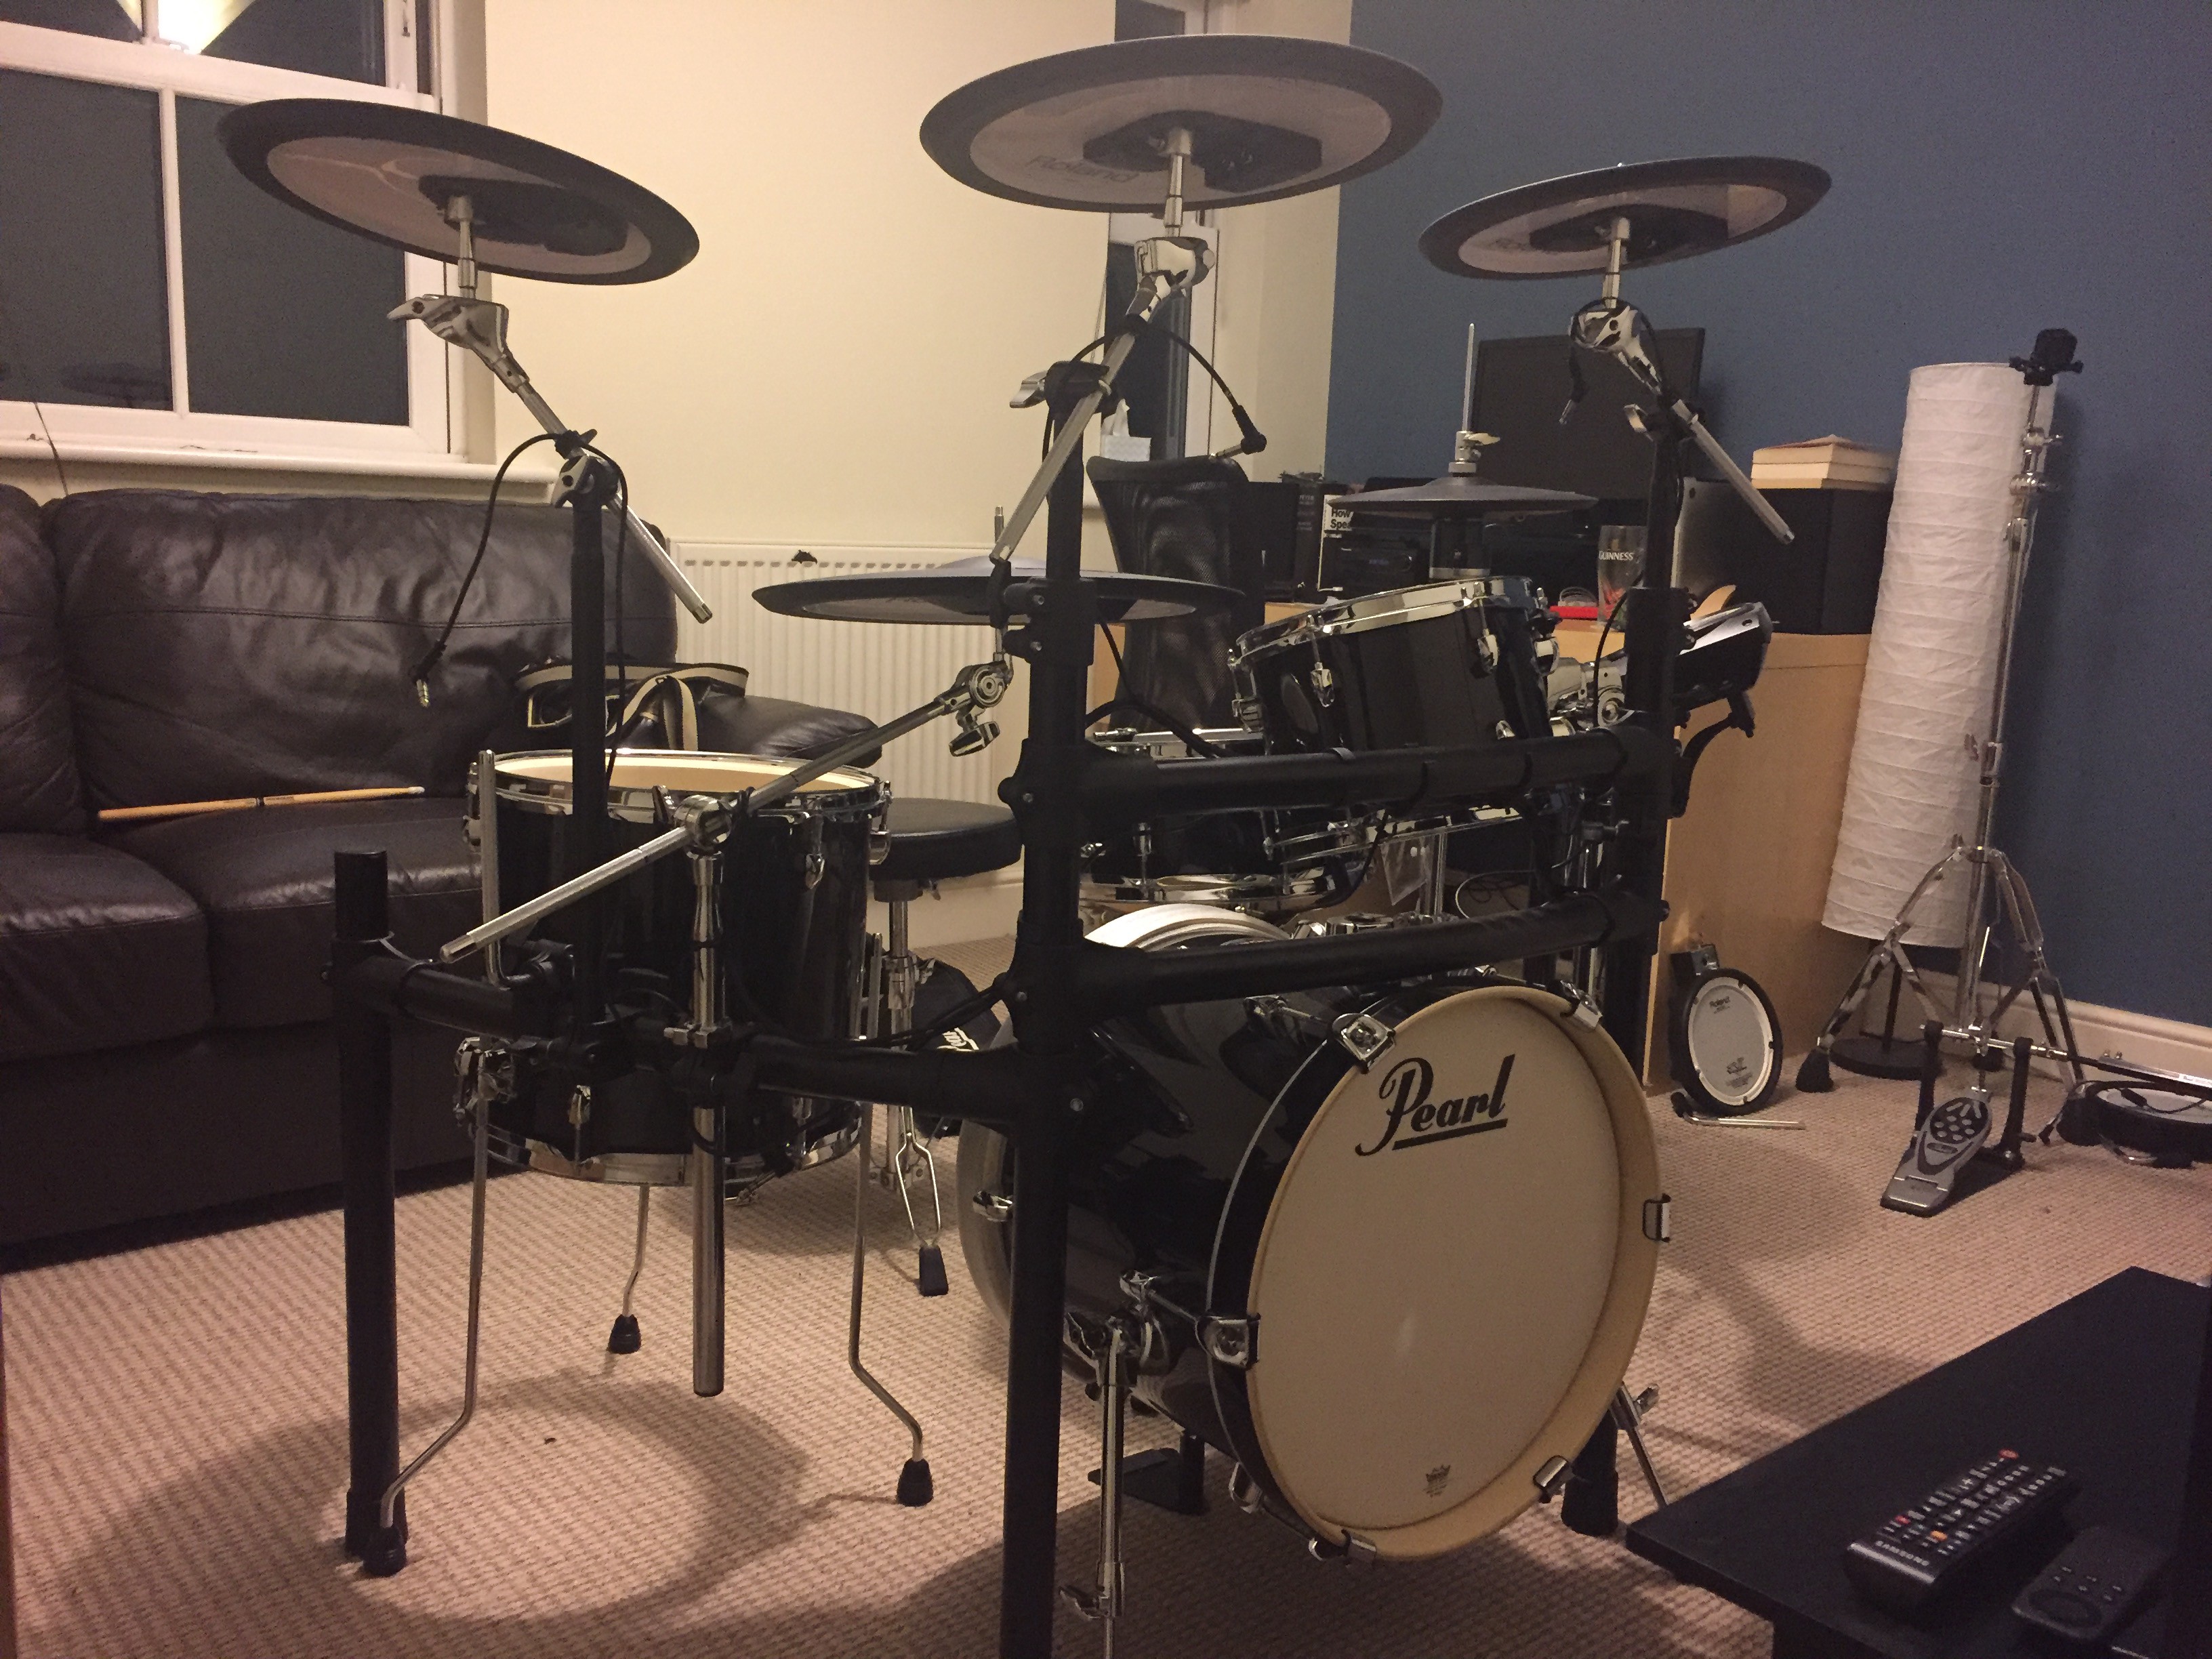
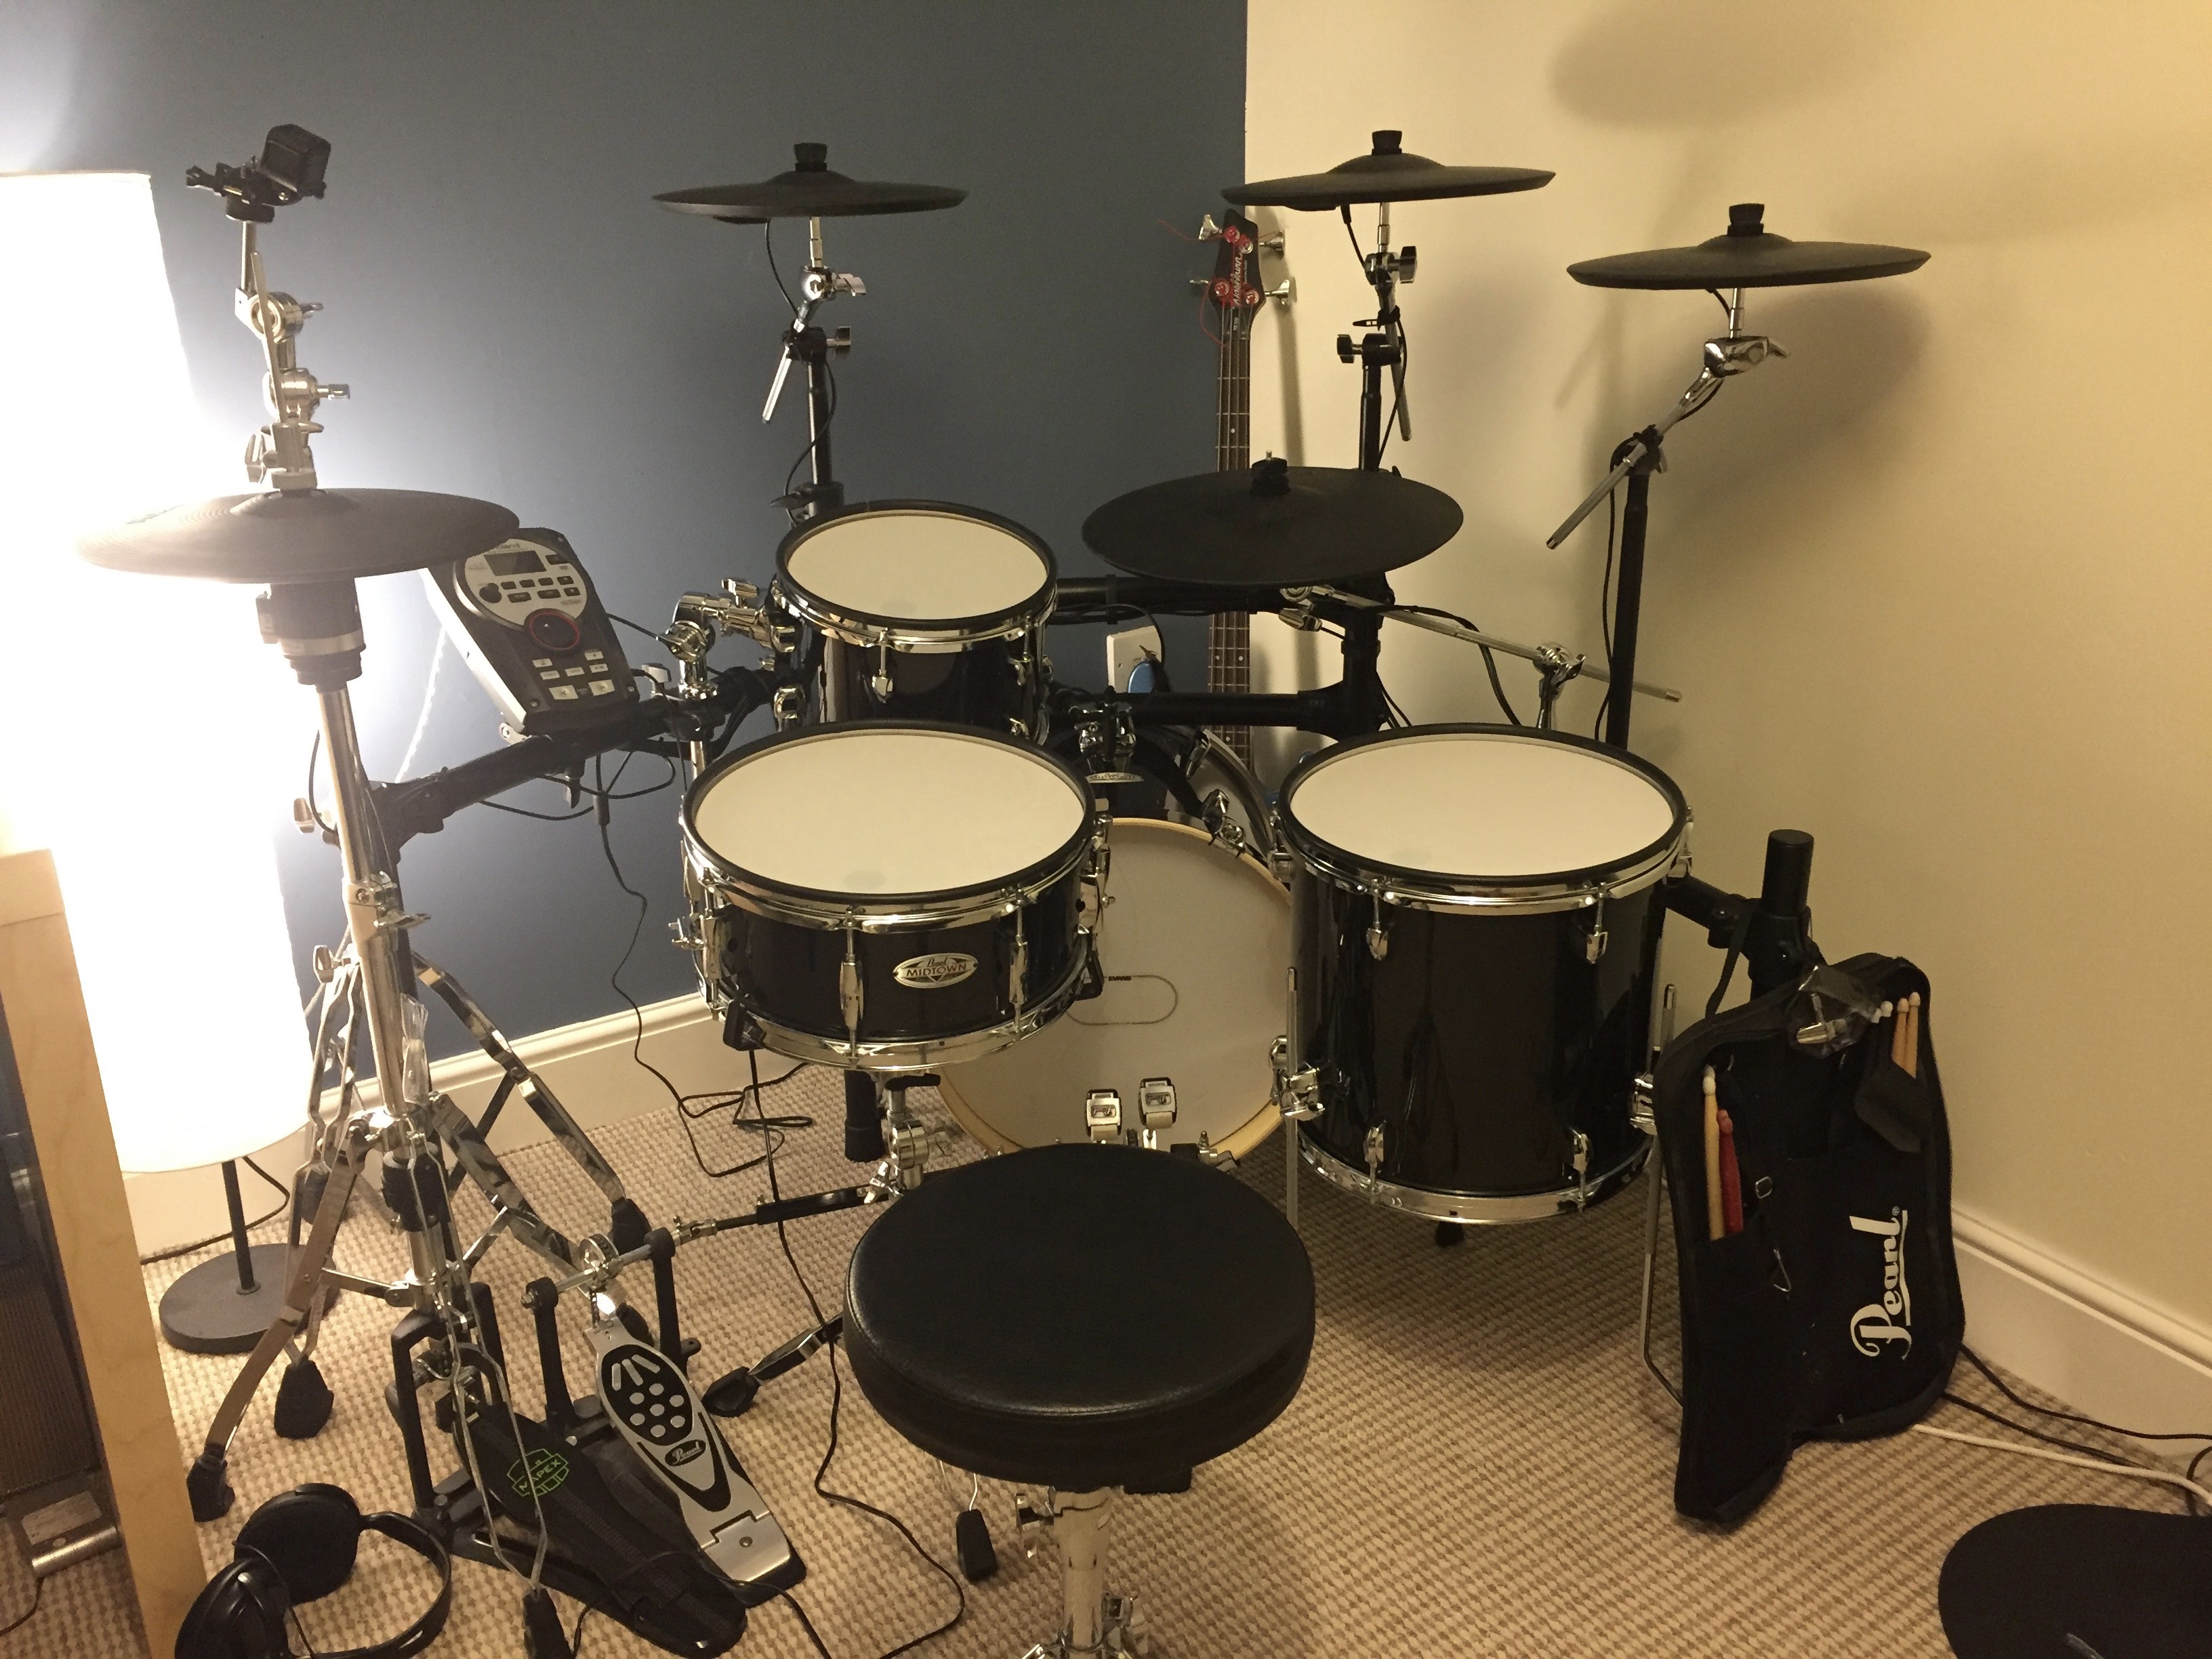 The finished article
The result is a kit that looks much more like a real drum kit than anything in Roland or Yamaha?s range. Yes, the new TD-50 can be used with a proper bass drum shell and has a realistic sized snare drum and ride, but the rest of the pads are standard 10 and 12 inch with shallow depths, plus the whole thing costs over 7,000.
Obviously on my kit, the drum module now is the limiting factor, despite it simply being used to trigger Superior Drummer to replace the dreadful built in sounds. All the inputs are currently in use, but one potential future upgrade is to get a drum splitter cable and an extra cymbal. This converts each cymbal into a single zone pad, allowing me to assign an extra crash, splash or china to one of these.
With deeper pockets, a potential upgrade would be to get a TD-25 module, used TD-9, TD-20 or even a TD-30 along with a centre mounted trigger to unlock positional sensing on the snare. Depending on reviews when it launches, the drum module could also be swapped out for the upcoming Pearl Mimic Pro, which builds in Steven Slate Drums right into the module itself, along with 16 inputs. Think about the monster kit that could be built with that, using two Pearl Midtowns for an awesome double bass drum set up!
Resources
Hopefully this post will have inspired you to build your own DIY kit. Below are a number of articles, products, Youtube videos and forum threads that helped me with this project, and would be ideal for further reading.
Liked this guide? Please scroll down and hit the clap button! Got any questions about my project? Feel free to write a response in the comments below! You can also buy some of the components through Amazon using the links below. If you do, I may receive a small commission.
Components
Roland TD-11 drums ? Buy on Amazon US and Amazon UK
Roland CY-15R Ride Cymbal Pad ? Buy on Amazon US and Amazon UK
Pearl Midtown Drum kit ? Buy on Amazon US and Amazon UK
Jobekey Side Triggers
Triggera Intrigg
Triple Ply Mesh Heads
Rubber Rims and other accessories
Other Useful Guides and Tutorials
Roland Module Tuning
Tweaking For Touch: The Electronic Trigger
How I converted my custom E-Drums ? Trigger, Prices and Links
Mesh heads (3ply Vs 2ply Vs 1ply)
Jobeky Mesh Head Review
E-Drum conversion tutorial
Gear Reviews
Pearl Midtown Review
Roland TD-11 KV SE Review
