No, it?s coming from humans
?Volumetric Light Scattering? is a 3D effect we generally call ?God Rays?. This effect has a big place in 3D graphics development, like it is one of the more kick-ass features we must have to decorate our scenes!
This article is LARGELY inspired by the following article of Nvidia because it?s clean and simple. Here, I?ll try to teach you how to create a ?God Rays? effect as a post-process (I mean image-based shading) in both languages GLSL & HLSL by making you free of mathematical equations!
To use image-based shaders, a good method is to use ?Screen Quads?. Take a look here, it is commented and shader-safe for better understanding of what is a ?Screen Quad?.
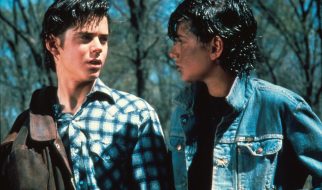
?Volumetric Light Scattering? in real life
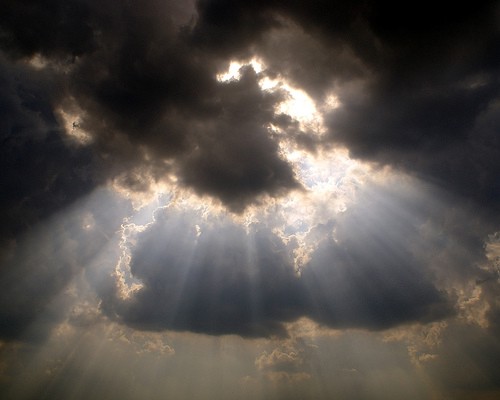 ?God Rays? in real life
Just a sun and some clouds. The sun?s rays you can see on this photography are what we want to find in our 3D renders, and why not, in real-time.
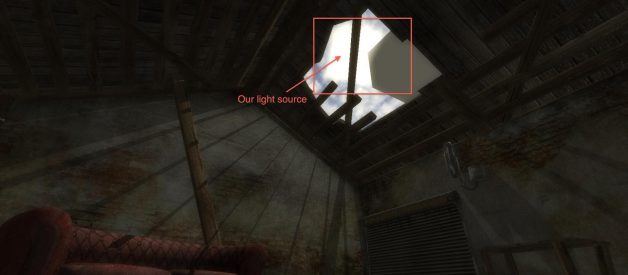
The method consists on a ?Light Scattering? pass to make us able to find where and how is the light source on the screen.
Then, because it?s a post-process way, just apply a shader to our ?Screen Quad? that will use this pass and combine the real render with the shader?s output.
The Light Scattering Pass
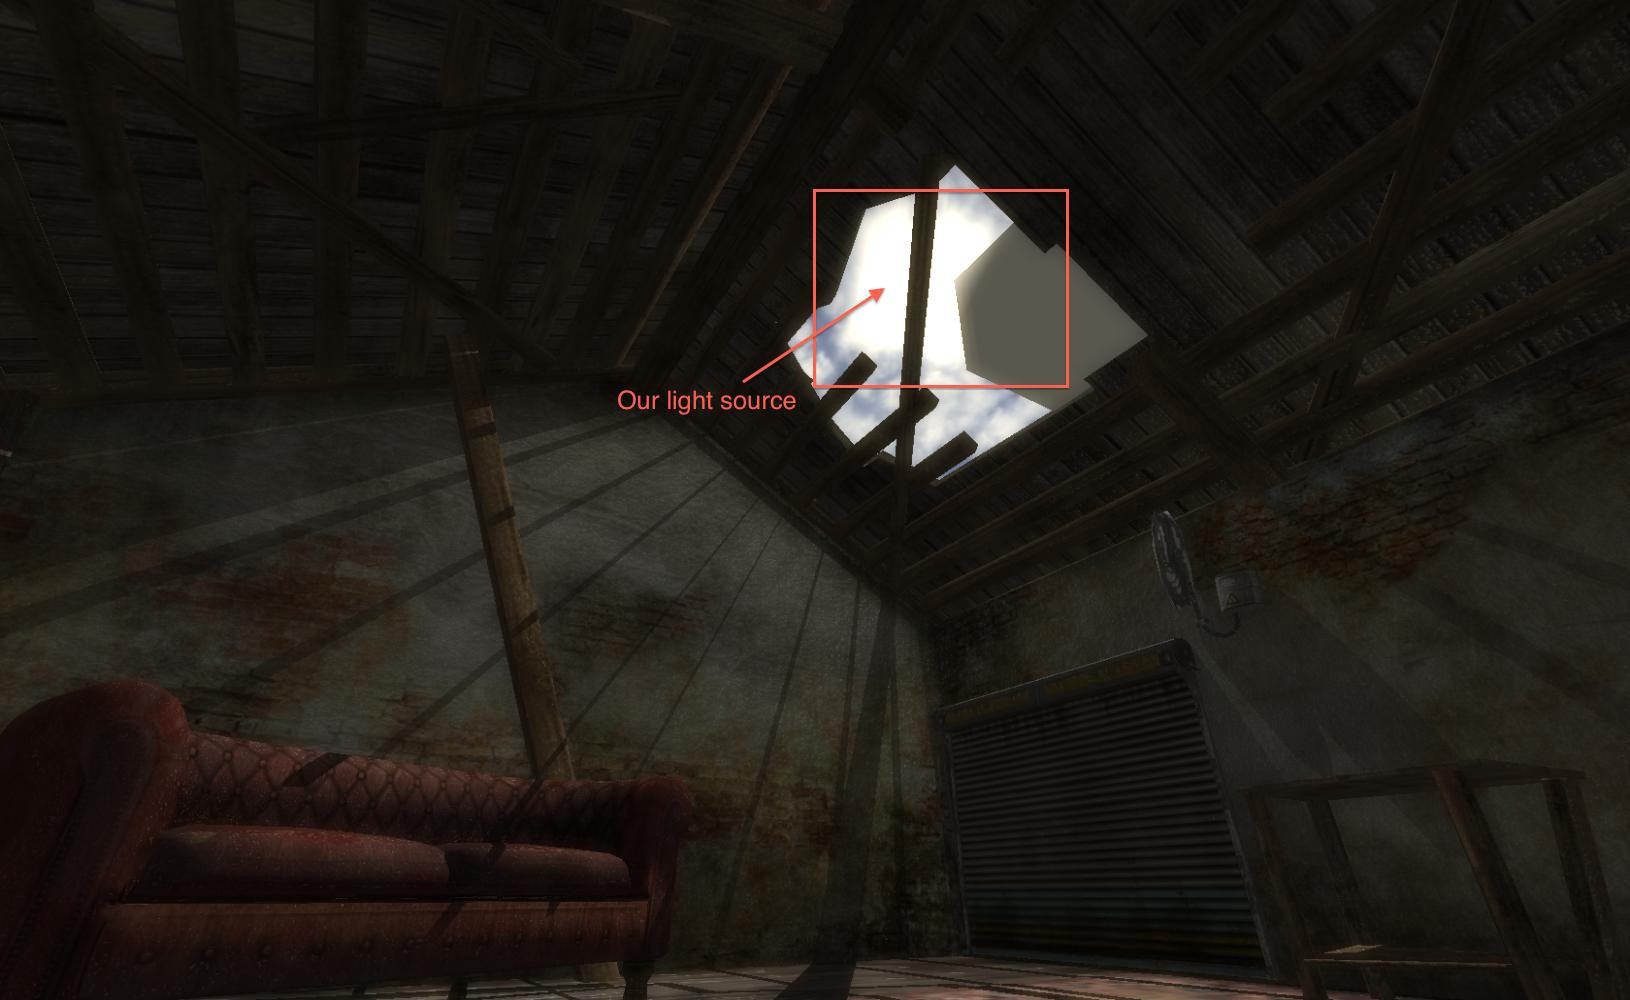 Initial render
Start with this render. Here, a light source represented by a ?Bill Board? scene node and a cube in front of it to create more scattering. A very simple method to get the light scattering pass consists on selecting what we want to draw normally and what we want to render as an obstacle for light rays. To simulate obstacles, we?ll draw them totally black.
To render objects black, the method that will run on all 3D engines is to:
– Save scene nodes configurations- Set all black scene nodes materials to the standard SOLID material- Set all scene nodes materials lighting – Set all scene nodes materials emissive color to black.- Render the scene nodes- Reset scene nodes configurations to previous configurations
Using this method it?ll work on, I think, all the 3D engines. Be conscious it is not necessarily an optimized method and is able to create a non-negligeable fall in your FPS.
Algorithm steps:- Take an array of scene nodes in your scene manager that will be rendered in the pass- Create a RTT (render-to-texture) texture- Take an array of scene nodes configurations and save their configurations- Set current RTT to the previous you created- Configure scene nodes like above (black or normally rendered)- For all scene nodes in the array, draw them- Reset scene nodes configuration using the configurations array
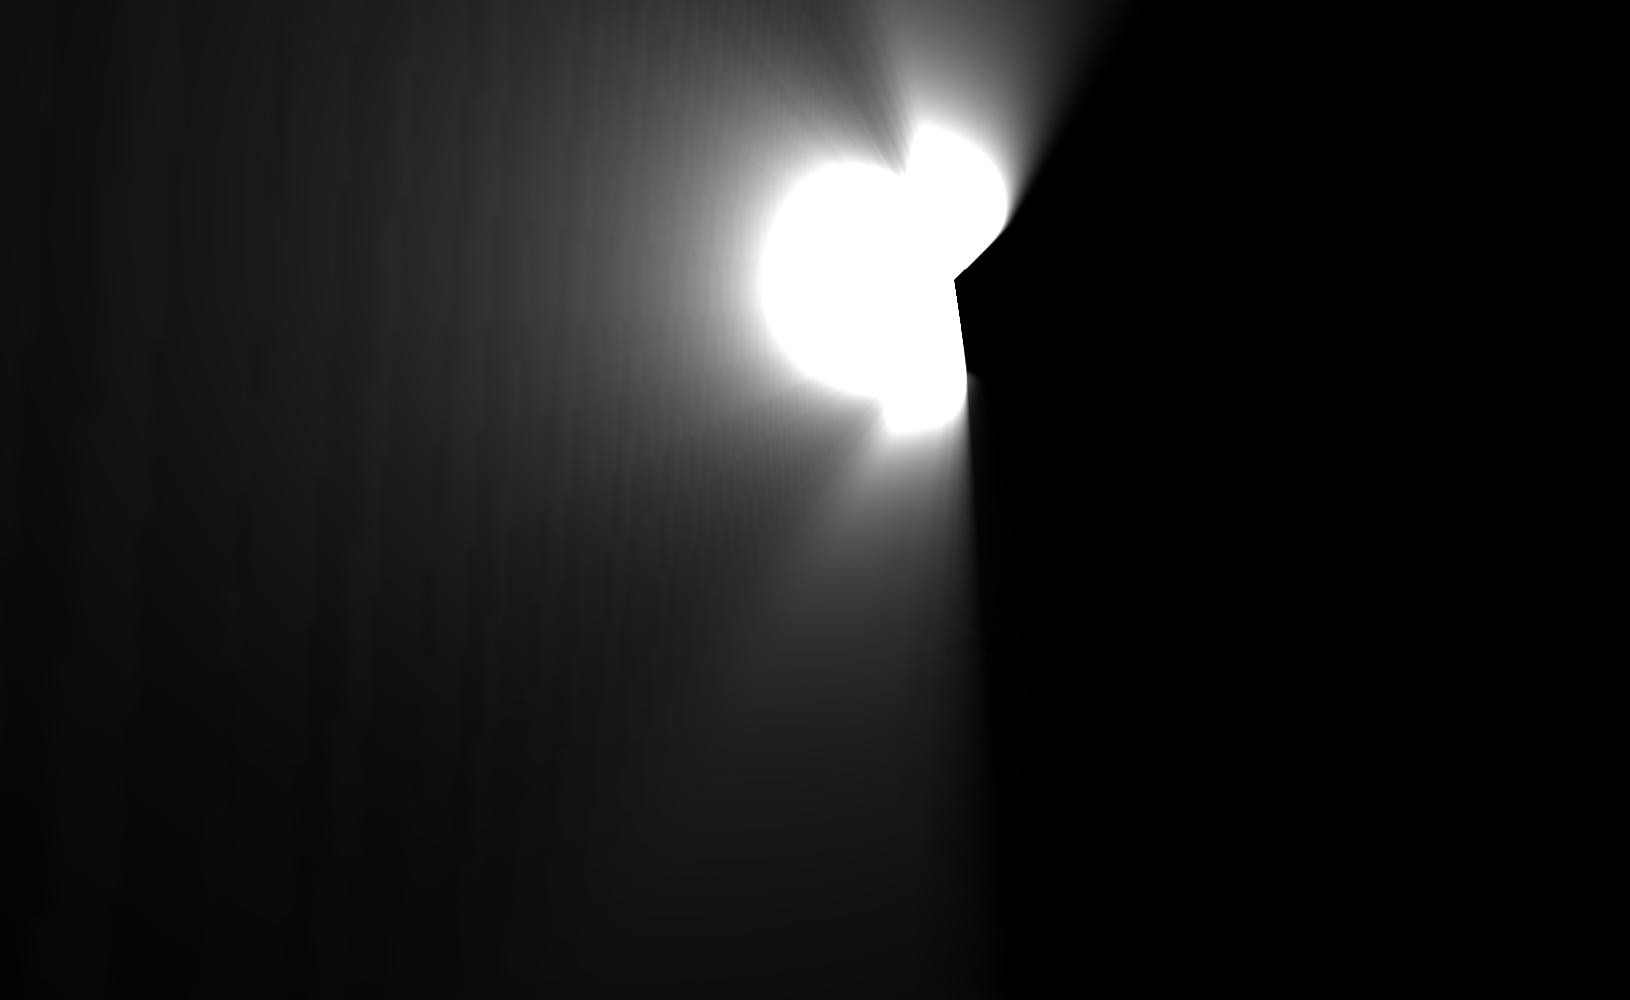
The result of the pass:
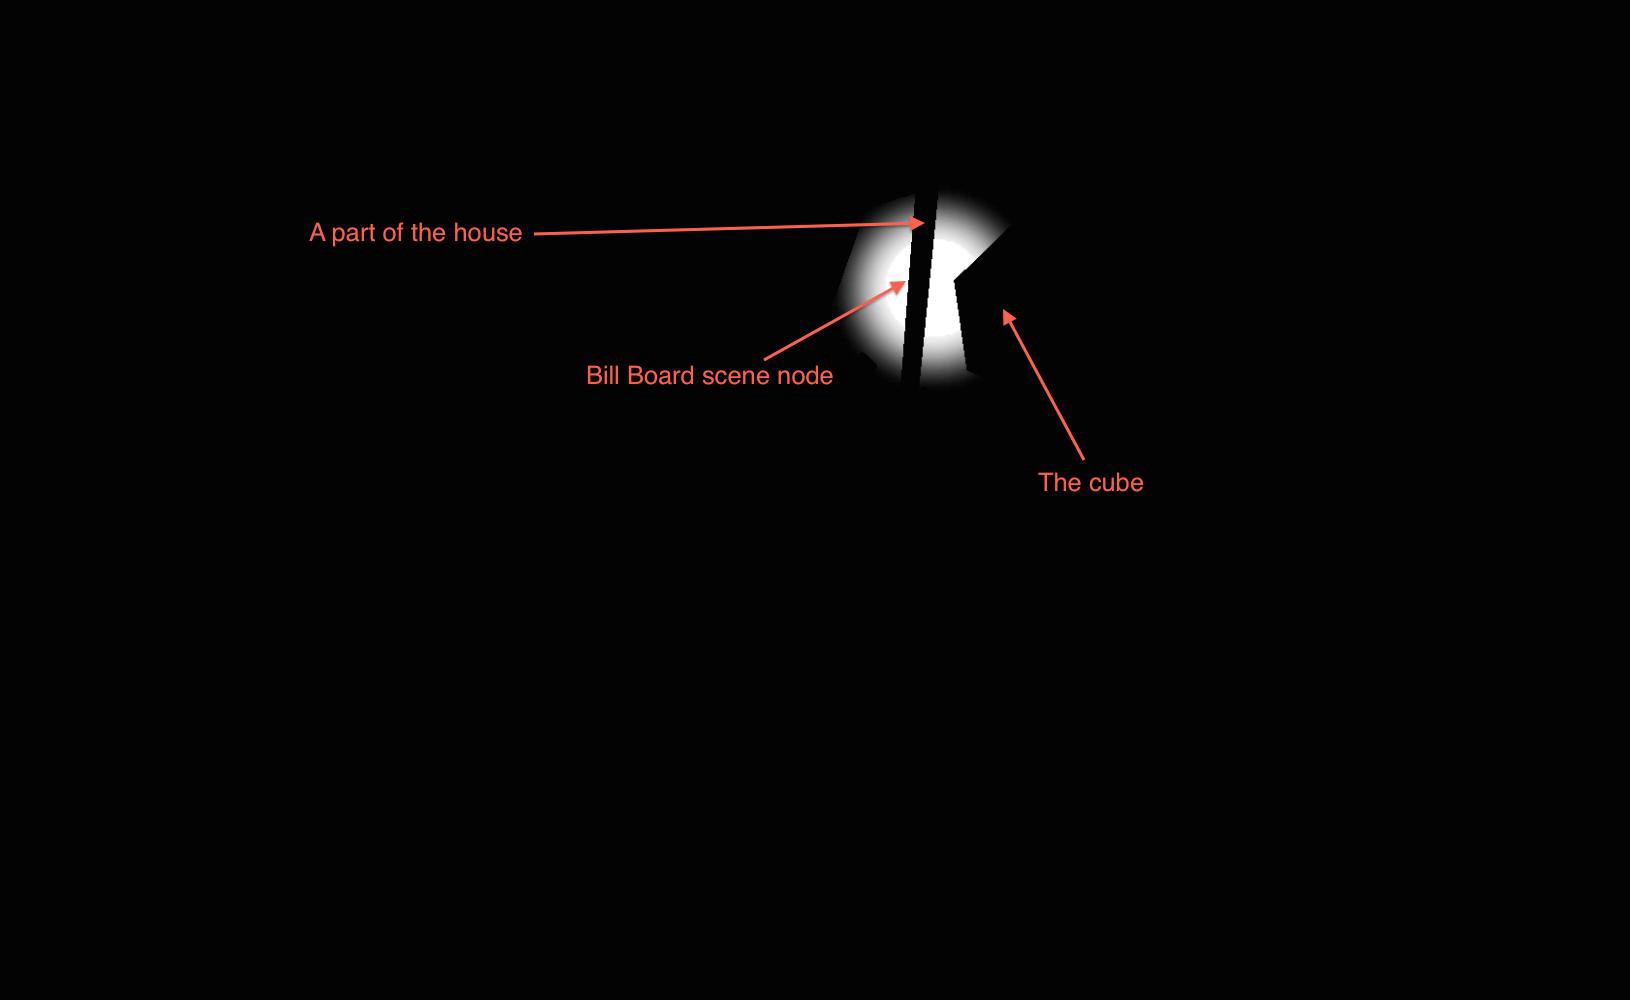 ?Bill Board? rendered normally, where other objects are obstacles for the light rays, so we draw them totally black
The algorithm using Irrlicht as the 3D engine (in XCode):
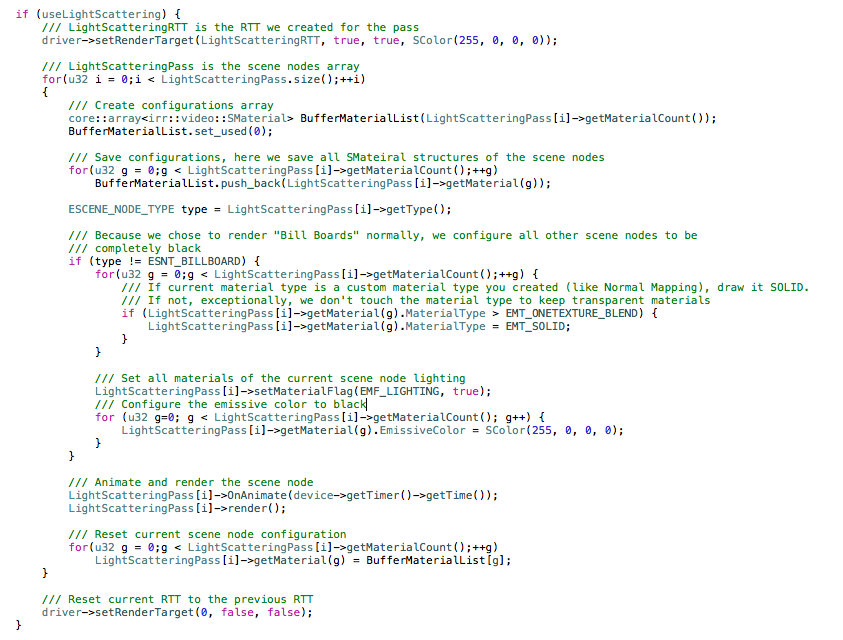 Pass code using the Irrlicht 3D Engine.
Well, we have our light scattering pass stored in a texture!
The ?God Rays? shader
The ?God Rays? shader in GLSL (version <= 1.40) language is the following:
/// Our light scattering pass textureuniform sampler2D UserMapSampler;/// Indicate where is the light source on the screen (2D position)uniform vec2 lightPositionOnScreen;void main(){ float decay=0.96815; float exposure=0.2; float density=0.926; float weight=0.58767; /// NUM_SAMPLES will describe the rays quality, you can play with int NUM_SAMPLES = 100; vec2 tc = gl_TexCoord[0].xy; vec2 deltaTexCoord = (tc???lightPositionOnScreen.xy); deltaTexCoord *= 1.0 / float(NUM_SAMPLES) * density; float illuminationDecay = 1.0; vec4 color =texture2D(UserMapSampler, tc.xy)*0.4; for(int i=0; i < NUM_SAMPLES ; i++) { tc -= deltaTexCoord; vec4 sample = texture2D(UserMapSampler, tc)*0.4; sample *= illuminationDecay * weight; color += sample; illuminationDecay *= decay; } gl_FragColor = color;}
Once we have this pixel (fragment) shader, we apply it on our ?Screen Quad?, send the UserMapSampler texture to the shader and render our ?Screen Quad?.
The result:
 Light scattering shader output
Okay, but it?s boring! Where is the rest of my scene?? Let adjust the shader?s code.
We need an other sampler2D. Why not our base render?s sampler? Well, declare our base render sampler2D in the shaders?s code:
/// Our light scattering pass sampleruniform sampler2D UserMapSampler;/// Our base render sampleruniform sampler2D ColorMapSampler;
Now, in the shader?s code, we?ll replace the output color (gl_FragColor) to add the base render?s color to it:
/// realcolor is the base render’s colorvec4 realColor = texture2D(ColorMapSampler, gl_TexCoord[0].xy);gl_FragColor = realColor + color;
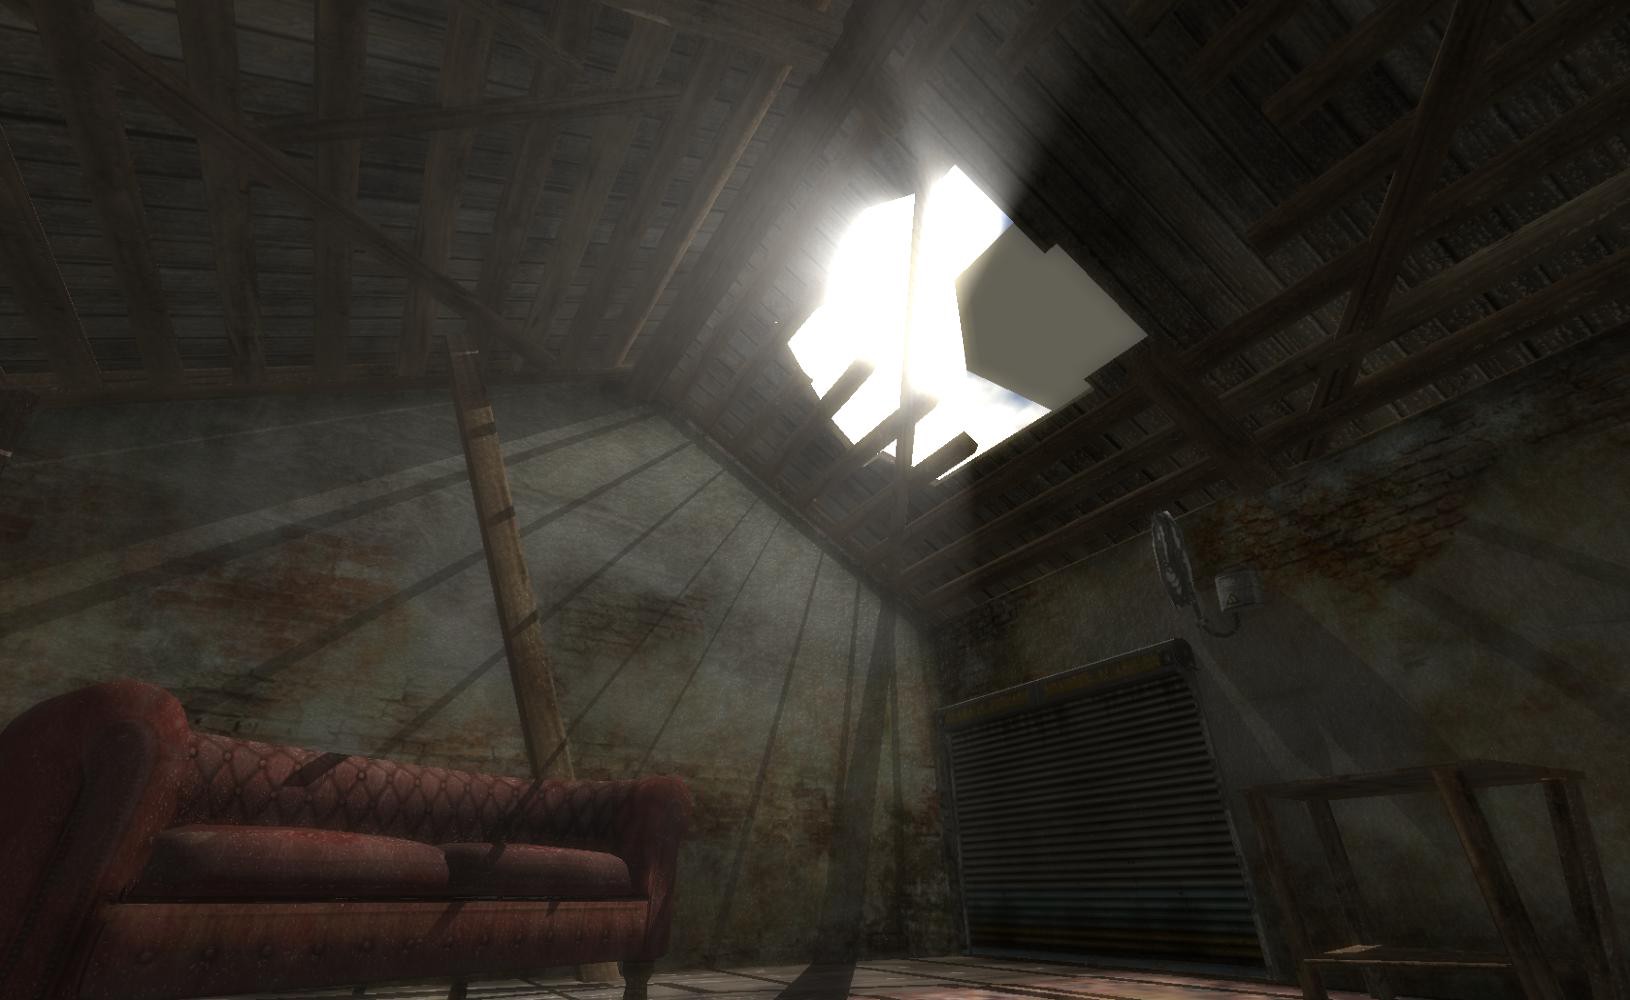
Oh, finally we got a cool render:
 Final using the base render?s color
Now, to smooth the rays take this ultimate line:
/// This will “smooth” the rays and render more realisticgl_FragColor = ((vec4((vec3(color.r, color.g, color.b) * exposure), 1)) + (realColor*(1.1)));
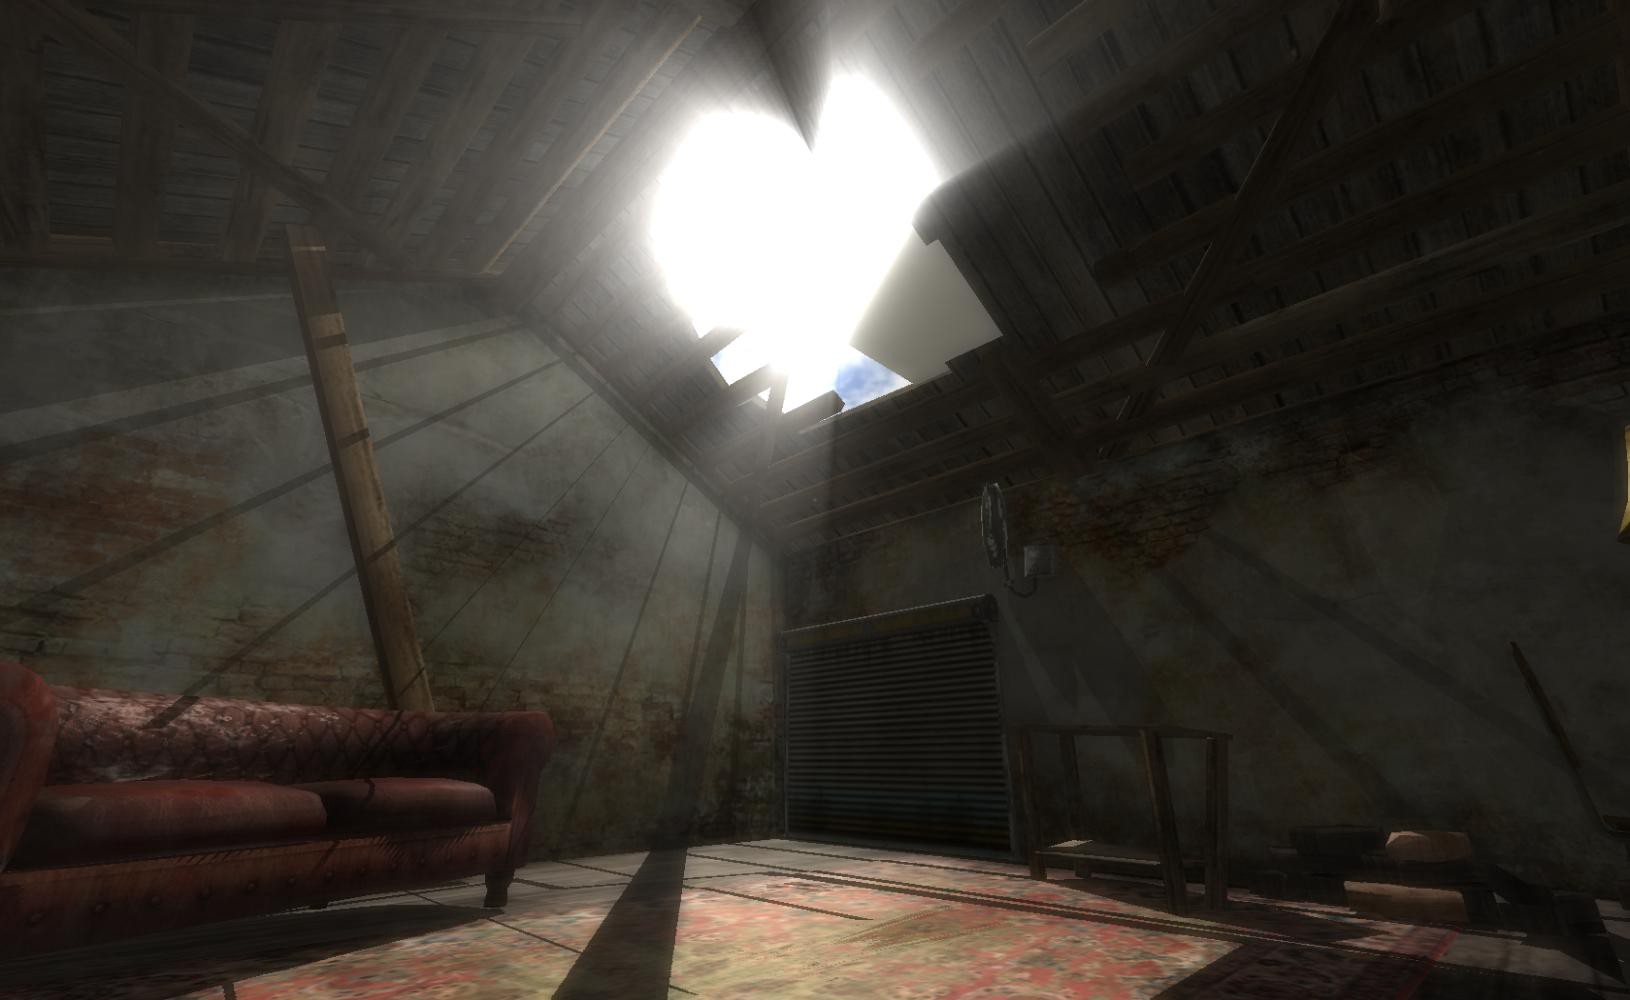
The render looks more realistic now:
 Output with the ultimate line
Concerning the shader?s callback
The shader uses a 2D vector (uniform vec2 lightPositionOnScreen) to locate the light position on the 2D Space. To calculate it, just call a function present in all 3D engines that will ?translate? a 3D position to a 2D position.
In Irrlicht, the function is:
core::vector2di lightPositionOnScreen = yourSceneManager->getSceneCollisionManager()->getScreenCoordinatesFrom3DPosition(vector3df(x, y, z));
Once you have the vector2di, send it to the shader:
materialRendererServices->setPixelShaderConstant(“lightPositionOnScreen”, reinterpret_cast<f32*>(&lightPositionOnScreen.X), 2);
Using CP3D
Community Play 3D provides a scripting method. Once you added the shader pass into the filters, edit the LUA script callback to send the proper values to the shader:
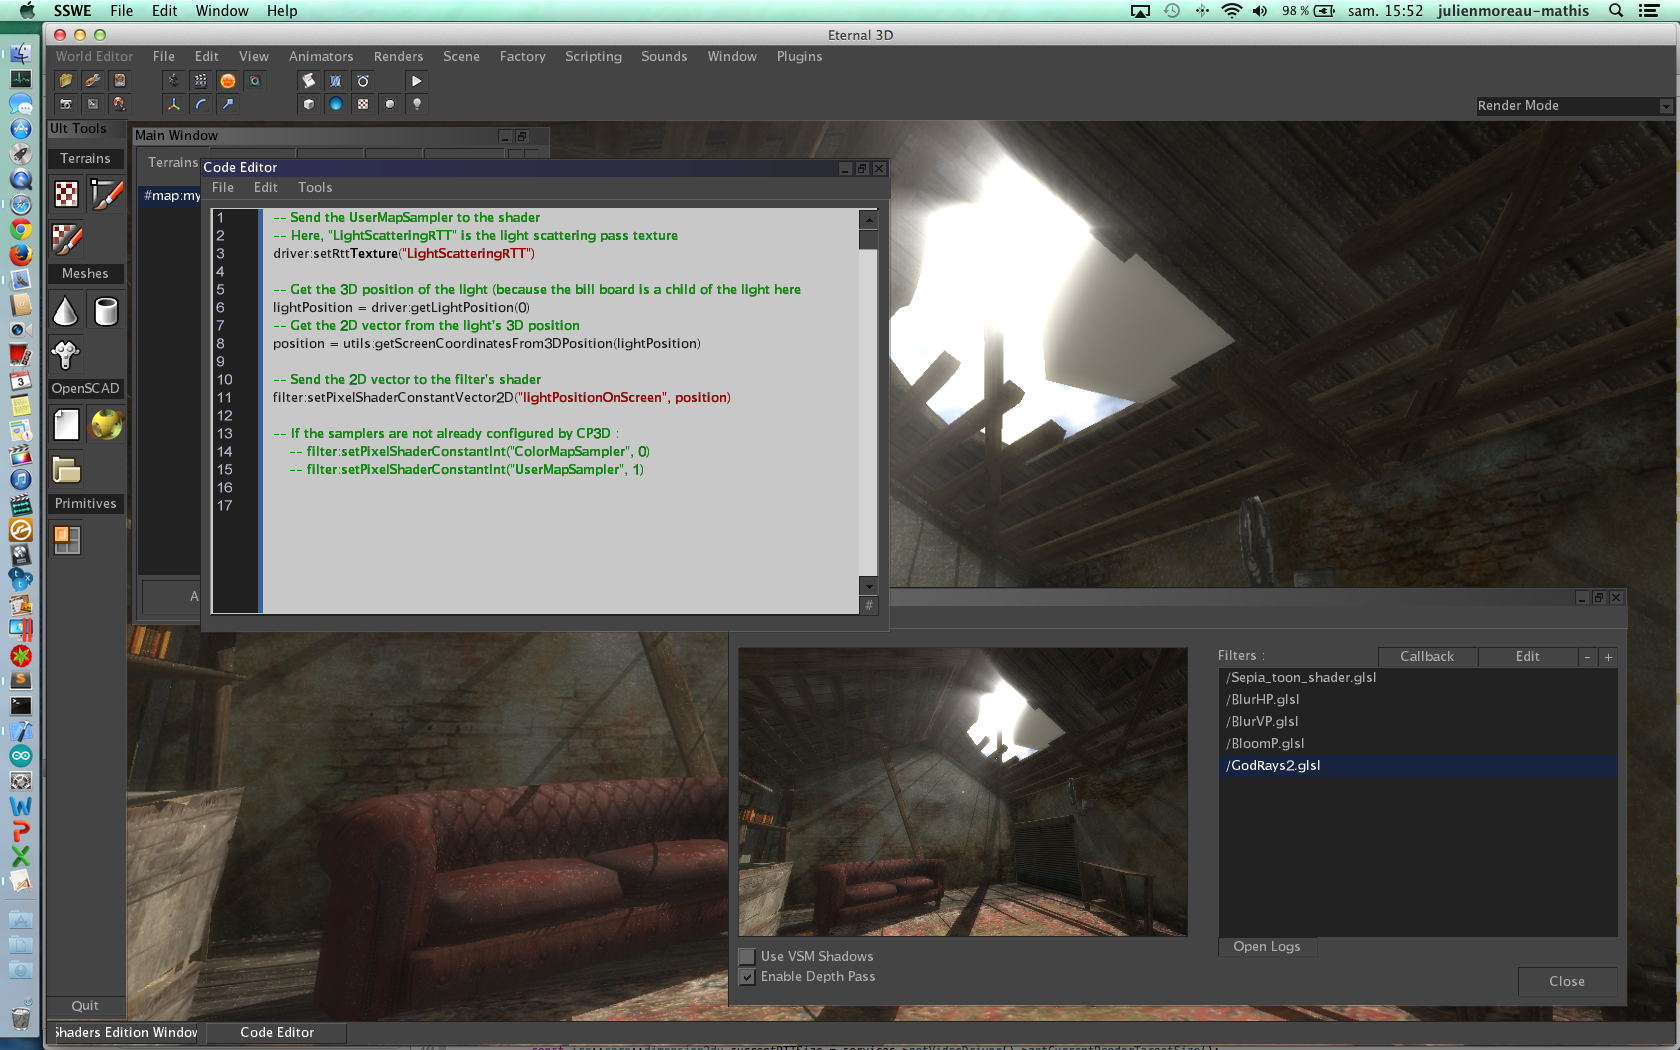 Filter?s callback using CP3D
Concerning the HLSL code
The HLSL code is the following, which uses exactly the same method:
sampler2D ColorMapSampler : register(s0);sampler2D UserMapSampler : register(s3);float2 lightPositionOnScreen;float4 pixelMain(float2 texCoord : TEXCOORD0) : COLOR0{ float decay=0.97815; float exposure=0.92; float density=0.966; float weight=0.58767; int NUM_SAMPLES = 100; float2 tc = texCoord; float2 deltaTexCoord = (tc – lightPositionOnScreen.xy); deltaTexCoord *= 1.0f / NUM_SAMPLES * density; float illuminationDecay = 1.0; float4 color =tex2D(UserMapSampler, tc)*0.4; for(int i=0; i < NUM_SAMPLES ; i++) { tc -= deltaTexCoord; float4 sample = tex2D(UserMapSampler, tc)*0.4; sample *= illuminationDecay * weight; color += sample; illuminationDecay *= decay; } float4 realColor = tex2D(ColorMapSampler, texCoord.xy); return ((float4((float3(color.r,color.g,color.b) * exposure),1))+(realColor*(1.1)));}
What if I have multiple light sources?
If you want to provide ?God Rays? with multiple sources, then, declare the lightPositionOnScreen 2D vector as an array.
uniform vec2 lightPositionOnScreen[n];
deltaTexCoord changes because it?ll take the current light position on screen, so it becomes:
/// clpos is the current 2D vector you are computing vec2 deltaTexCoord = (tc???lightPositionOnScreen[clpos].xy);
Basically, the shader?s code with multiple light sources:
/// This shader hasn’t been tested yet./// Our light scattering pass textureuniform sampler2D UserMapSampler;/// Indicate where are the light sources on the screen (2D position)/// n is the number of light sources you want to computeuniform vec2 lightPositionOnScreen[n];void main(){ float decay=0.96815; float exposure=0.2; float density=0.926; float weight=0.58767; /// NUM_SAMPLES will describe the rays quality, you can play with int NUM_SAMPLES = 100; for (int clpos=0; clpos < n; clpos++) { vec2 tc = gl_TexCoord[0].xy; vec2 deltaTexCoord = (tc???lightPositionOnScreen[clpos].xy); deltaTexCoord *= 1.0 / float(NUM_SAMPLES) * density; float illuminationDecay = 1.0; vec4 color =texture2D(UserMapSampler, tc.xy)*0.4; for(int i=0; i < NUM_SAMPLES ; i++) { tc -= deltaTexCoord; vec4 sample = texture2D(UserMapSampler, tc)*0.4; sample *= illuminationDecay * weight; color += sample; illuminationDecay *= decay; } } gl_FragColor = color;}
Decay, exposure, density and weight?
In the shader?s code there is:
float decay=0.96815;float exposure=0.2;float density=0.926;float weight=0.58767;
For more details on these values you can take a look on the NVidia?s article I quoted above. It gives the equations that use these values for better understanding. If you don?t want to break your mind on it, just play with and find your best result.
Conclusion
The method for the light scattering pass isn?t an optimized way. Considering the 3D engine you use, you?ll be able to find a better method. Here, it?s just a way to set up ?God Rays? quickly and easily.
Once you find a better method thanks to your 3D engine (like using an other shader for the pass instead of computing light sources on scene nodes? =]), your FPS will say ?Thank You? and it?ll be a real real-time ?God Rays? computation.
Rendering quality using the non-optimized method in Community Play 3D (using the GLSL code):
https://www.youtube.com/watch?v=nhg9HTR6oew
The light scattering pass here is exactly the same, stored in a CP3D plugin and ran by Community Play 3D. You can see how it can create disturbances in your FPS.
Running on a MacBook Pro 13″, i7 bi-core with IntelHD 4000.Render target size : 1650 * 1080Current shader passes : Sepia, Horizontal Blur, Vertical Blur, Bloom, God RaysMaterials : Normal Mapping, 1 light
